Deleted
Member since: January 1970
Posts: 0
Nov 25, 2024 14:56:18 GMT -5
Nov 25, 2024 14:56:18 GMT -5
|
Post by Deleted on Mar 8, 2016 6:38:41 GMT -5
|
|
adt70hk
Forum Moderator      November '24 Showcased Model Awarded
Member since: November 2015
Currently attempting to build something decent!!! ;)
Posts: 2,834 
MSC Staff
|
Post by adt70hk on Mar 8, 2016 7:28:10 GMT -5
Jamie
Truly excellent work there!
Andrew
|
|
Rick
Full Member
  
Member since: March 2013
what to build, what to build . . . Ok THAT one!
Posts: 854 
|
Post by Rick on Mar 12, 2016 21:03:19 GMT -5
Great update Jamie. Nice to see a refresher on the chipping. Know there's plenty more to come.
Rick
|
|
|
|
Post by deafpanzer on Mar 13, 2016 21:58:44 GMT -5
DAMN! Freakin cool!!!
|
|
|
|
Post by panzerjager2 on Mar 15, 2016 0:31:28 GMT -5
Great progress.....keep it coming
|
|
Haggis
Junior Member
  March 2016 MoM Winner
Member since: March 2012
Posts: 65
Mar 8, 2012 3:18:06 GMT -5
Mar 8, 2012 3:18:06 GMT -5
|
Post by Haggis on Mar 25, 2016 19:06:42 GMT -5
Hi chaps, here's the next update. Painting, the best bit! The whole thing was under coated with Alclad Duralumin before a sealing coat of matt varnish then a few coats of Ammo of Mig Scratch Effects chipping fluid. I decided to do the tail plane in SEA camo so this was sprayed free hand using GSI Creos. Note, no pre shading (a hateful bloody procedure) and only a little post shading. I always try to keep things as realistic as possible! 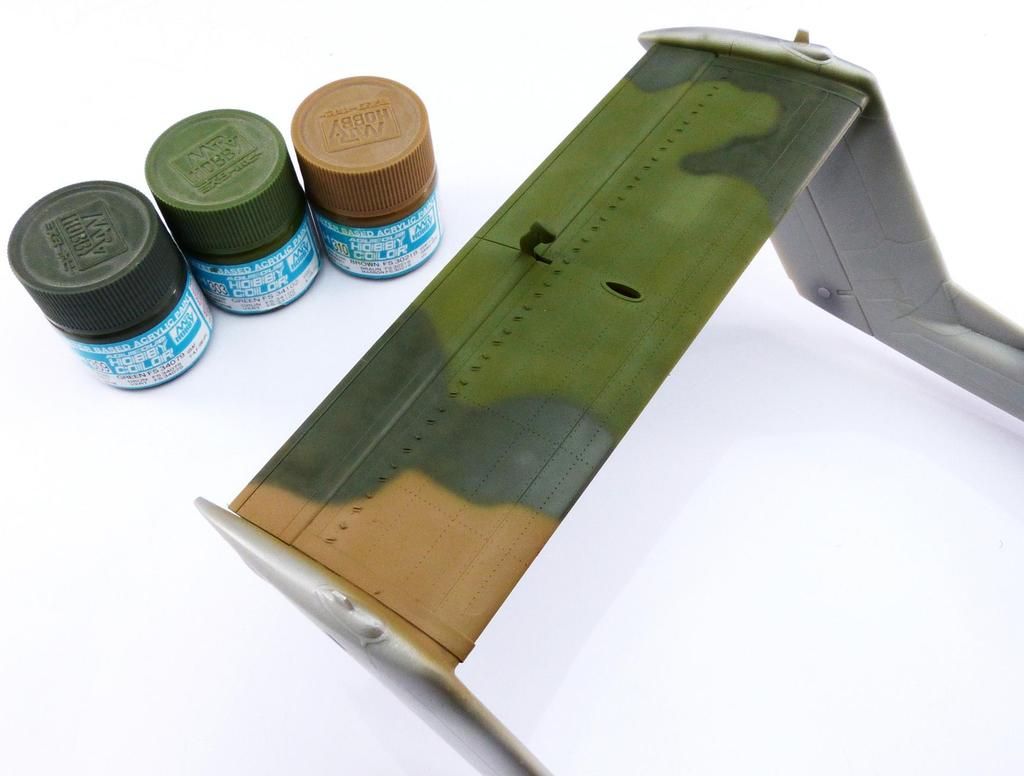 Using a load of tap water and a soft (ish) brush, the area was chipped to buggery! 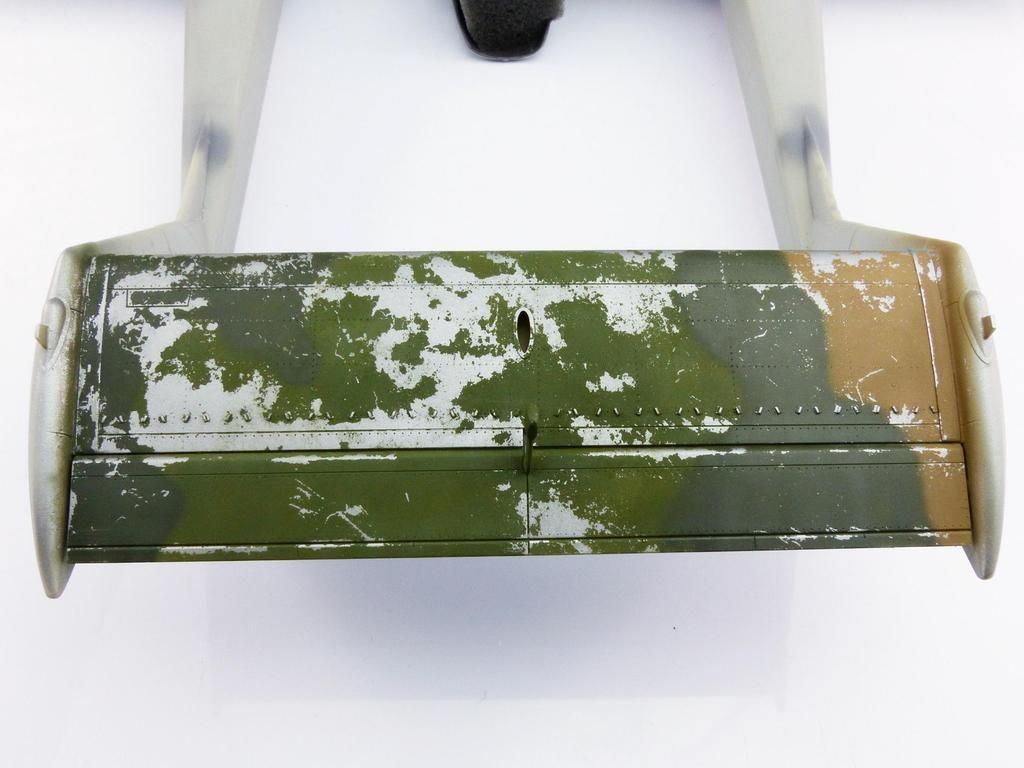 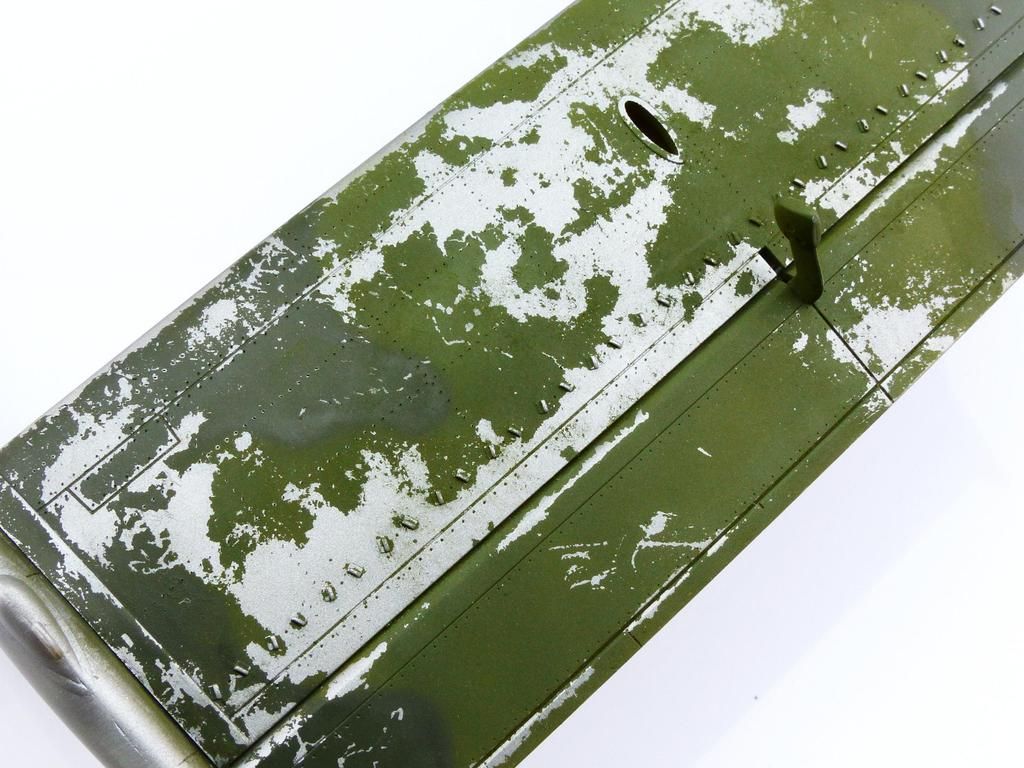 The drop tank had the same treatment. 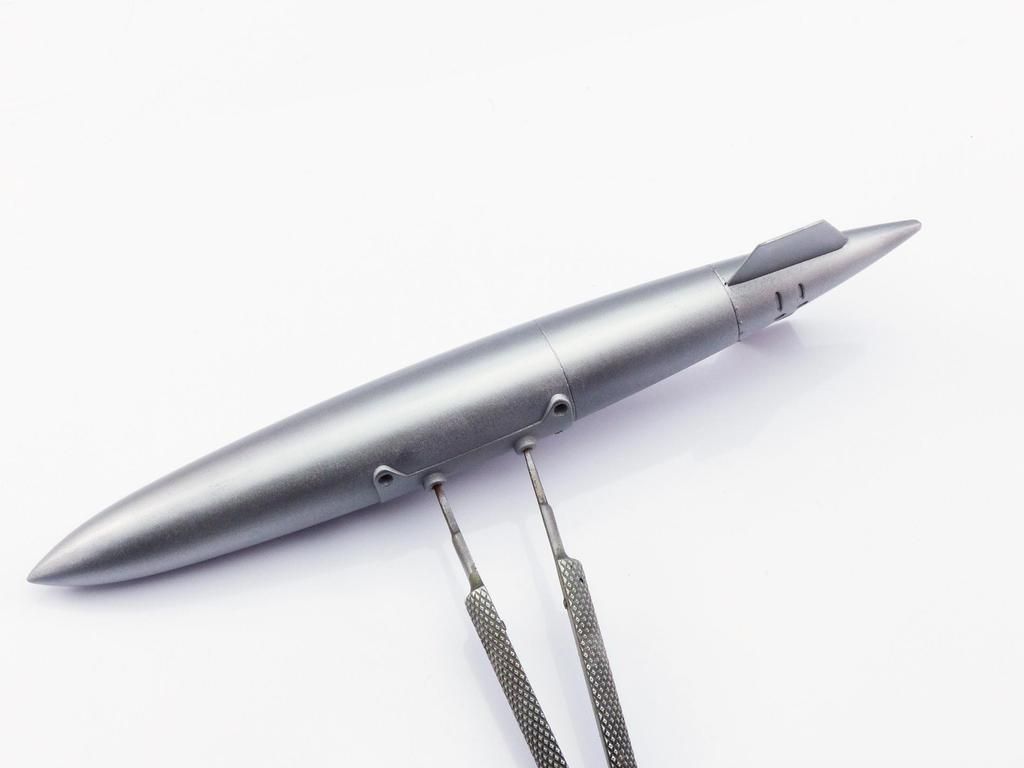 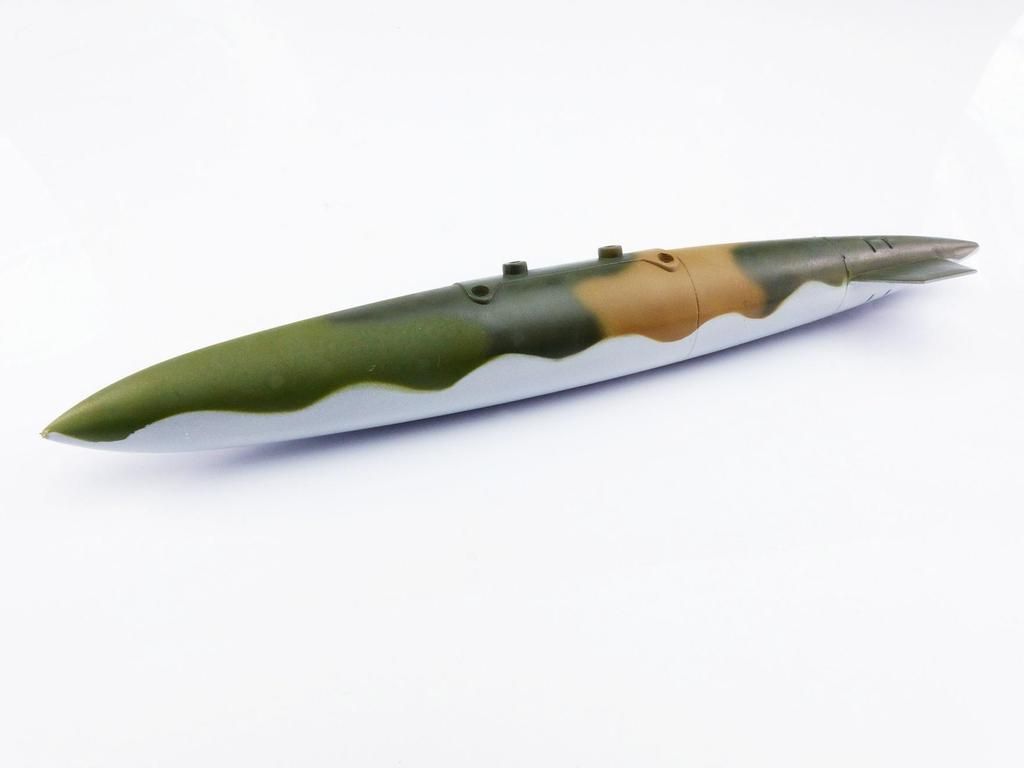 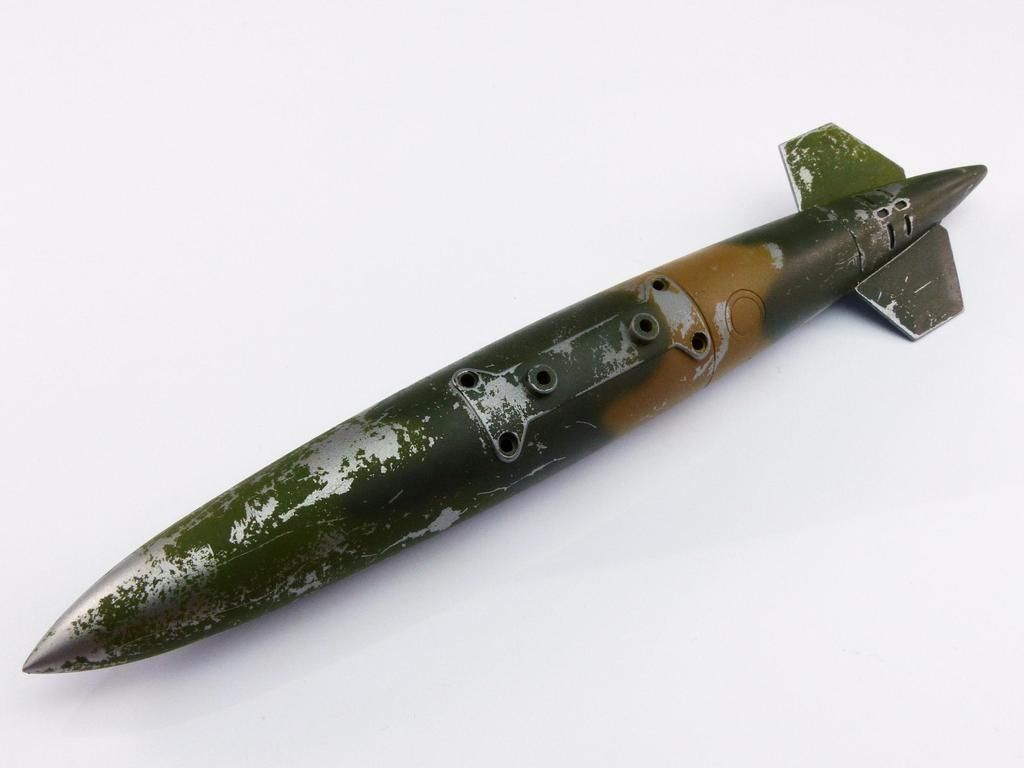 Now for the tail. I had previously undercoated the relevant areas white and the "male" portion of the tail marking was applied in place followed by a coat o that Duralumin. Varnish and Scratch Effects fluid were applied before the top coat of red (GSI Creos and Tamiya). The nerve wracking bit was the freehand black border, this was to increase the contrast of the marking against the background! 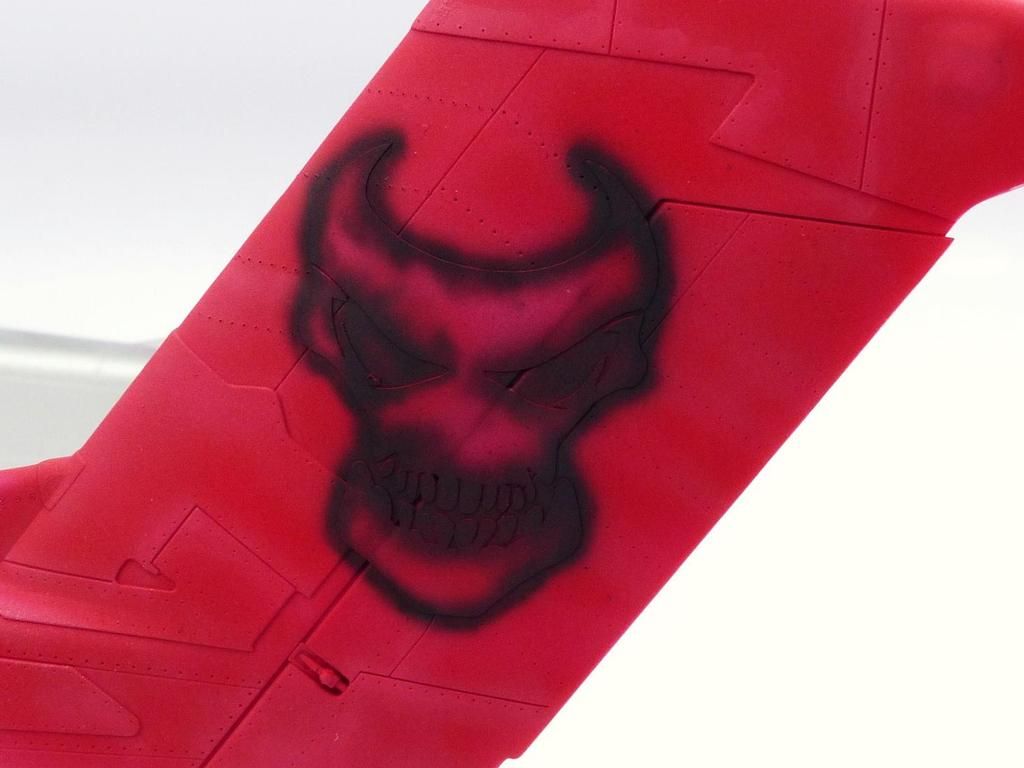 The red was chipped as before. 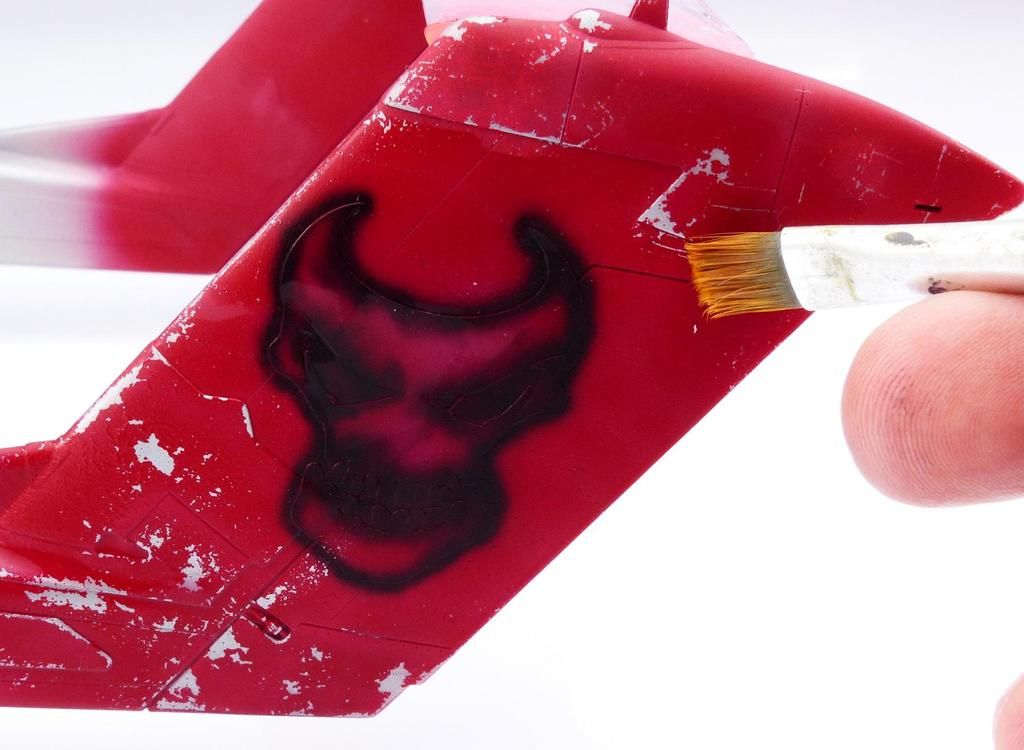 Its always satisfying removing masks. Here's the finished result, badass or what! 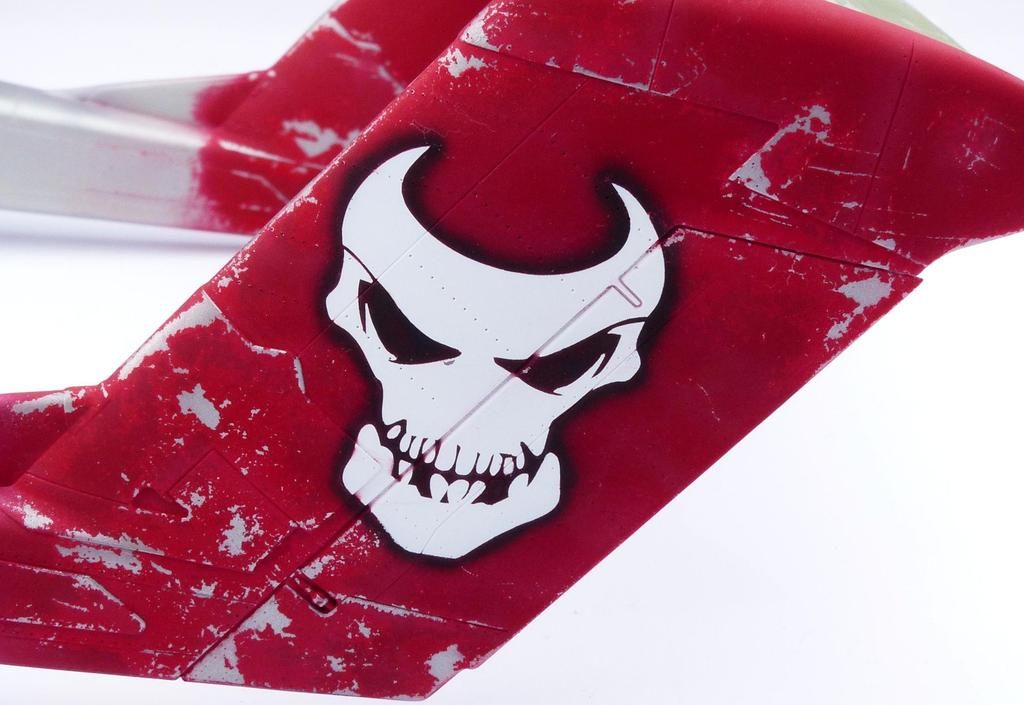 |
|
Haggis
Junior Member
  March 2016 MoM Winner
Member since: March 2012
Posts: 65
Mar 8, 2012 3:18:06 GMT -5
Mar 8, 2012 3:18:06 GMT -5
|
Post by Haggis on Mar 25, 2016 19:07:55 GMT -5
With a large aeroplane, I find it easier to work in sections so with this job I started on the fuselage. The black wasn't really black, it was a mix of black, blue and deck tan. 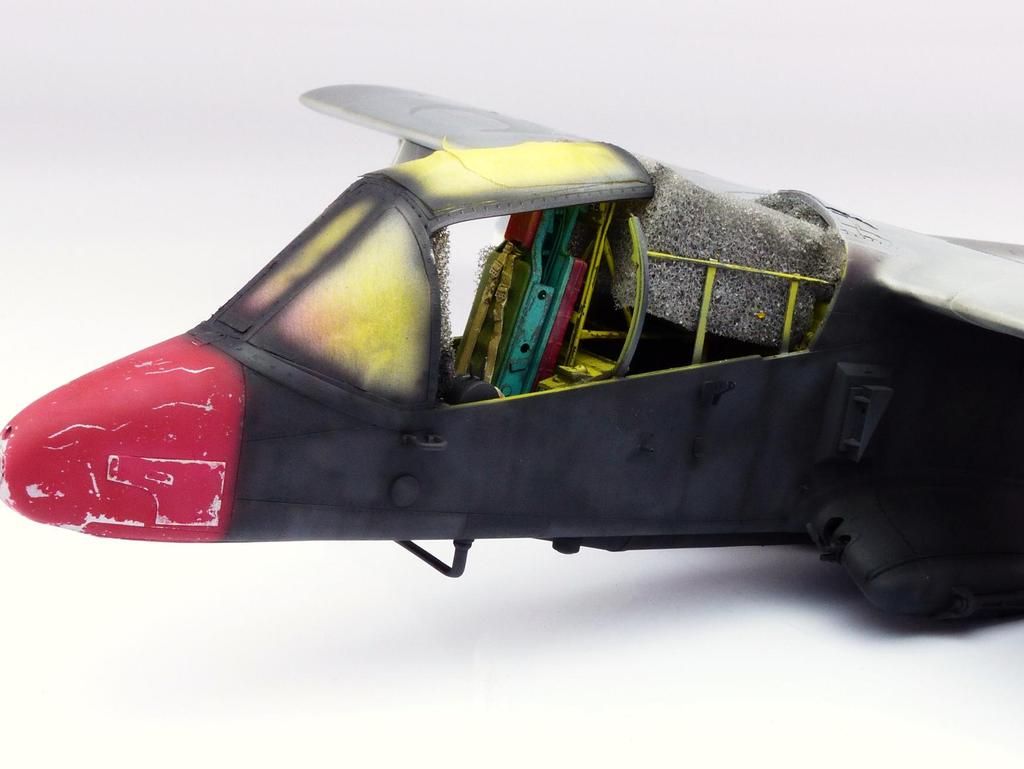 This Ammo of Mig Scratch Effects is ace. 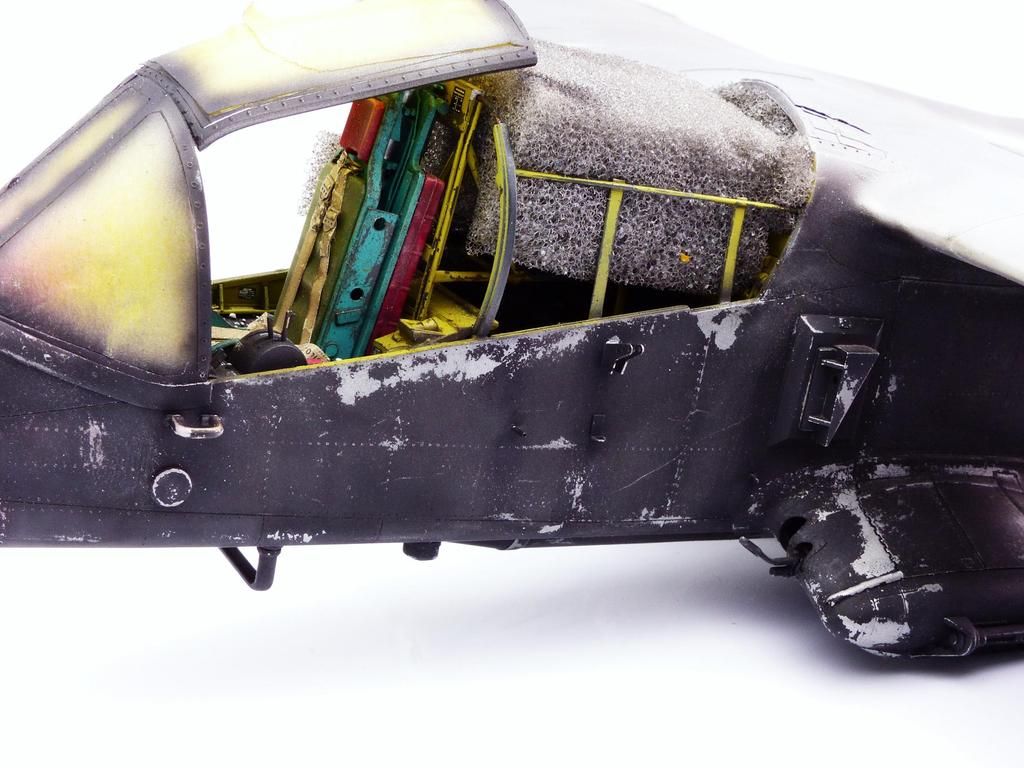 Wings were next and had the same treatment. Note the masks for the skulls were already in place. I had to cut the one covered with the plastic card panel. The black was tinted with different levels of tan and blue, some areas had neat black. I tried to keep it patchy and worn rather than a random squiggle or other effect. 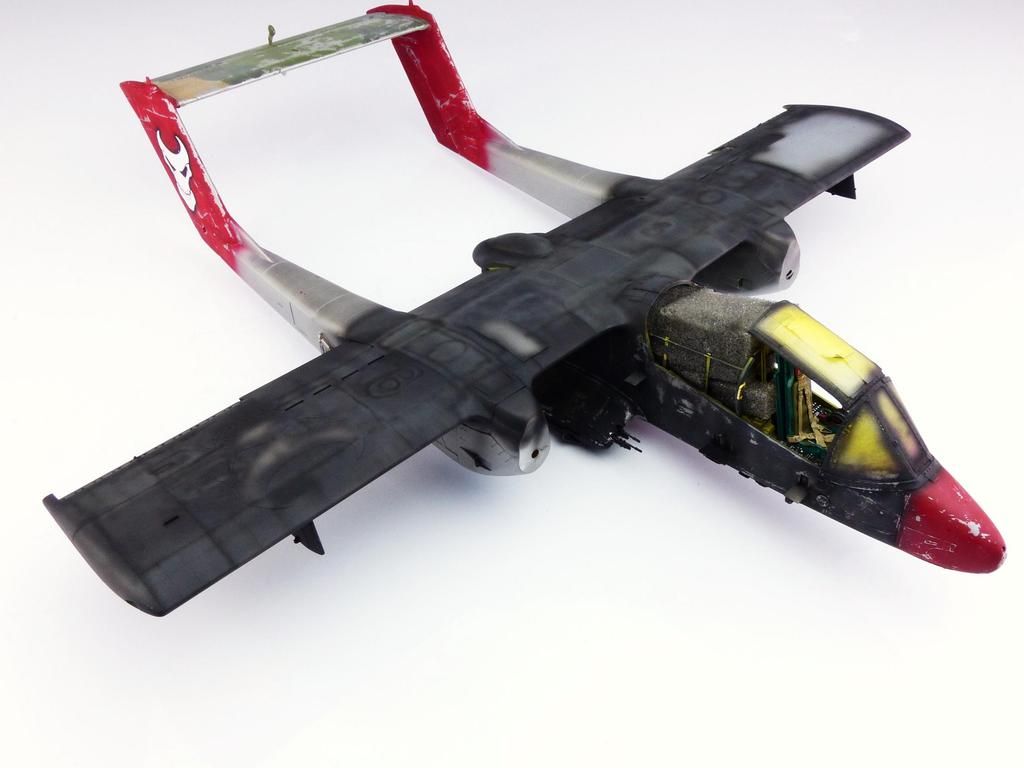 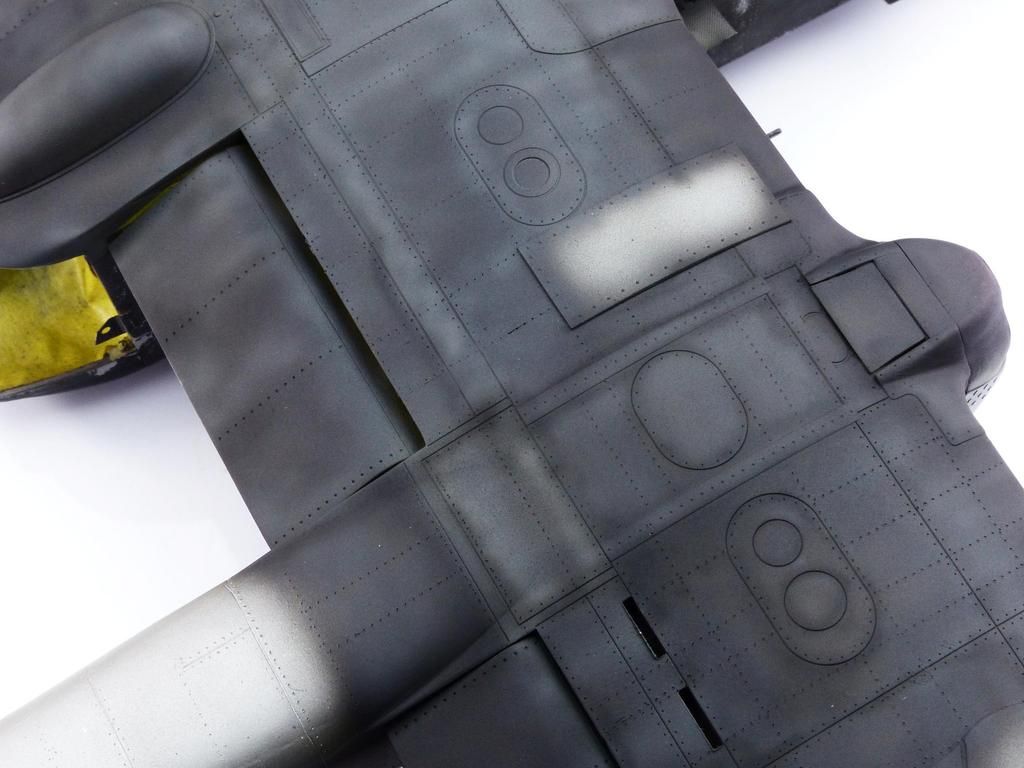 Yet more chipping. Note how the raised bits of my home made rivets get caught thus accentuating them. 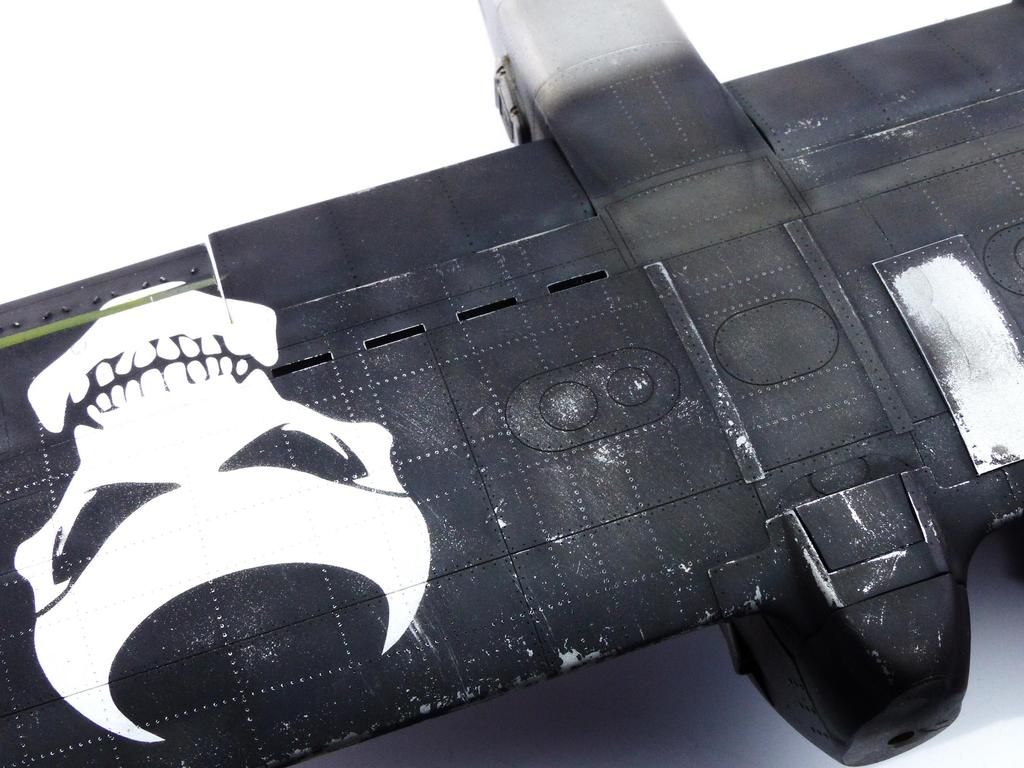 Badass! 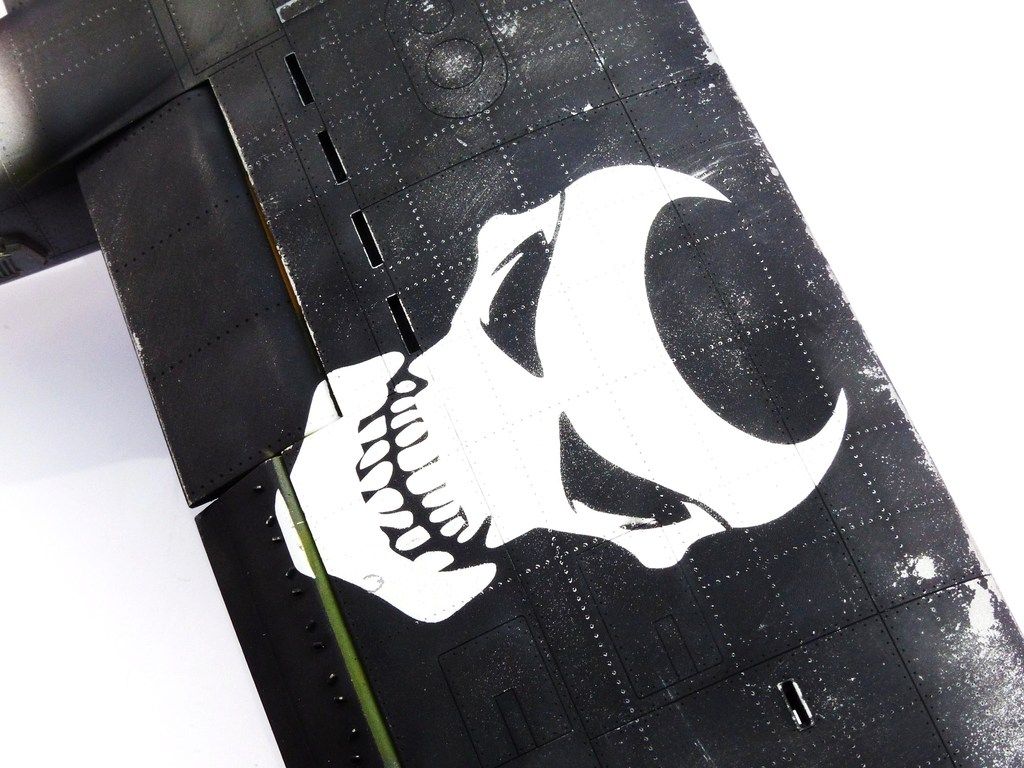 That's just the tail booms to go. 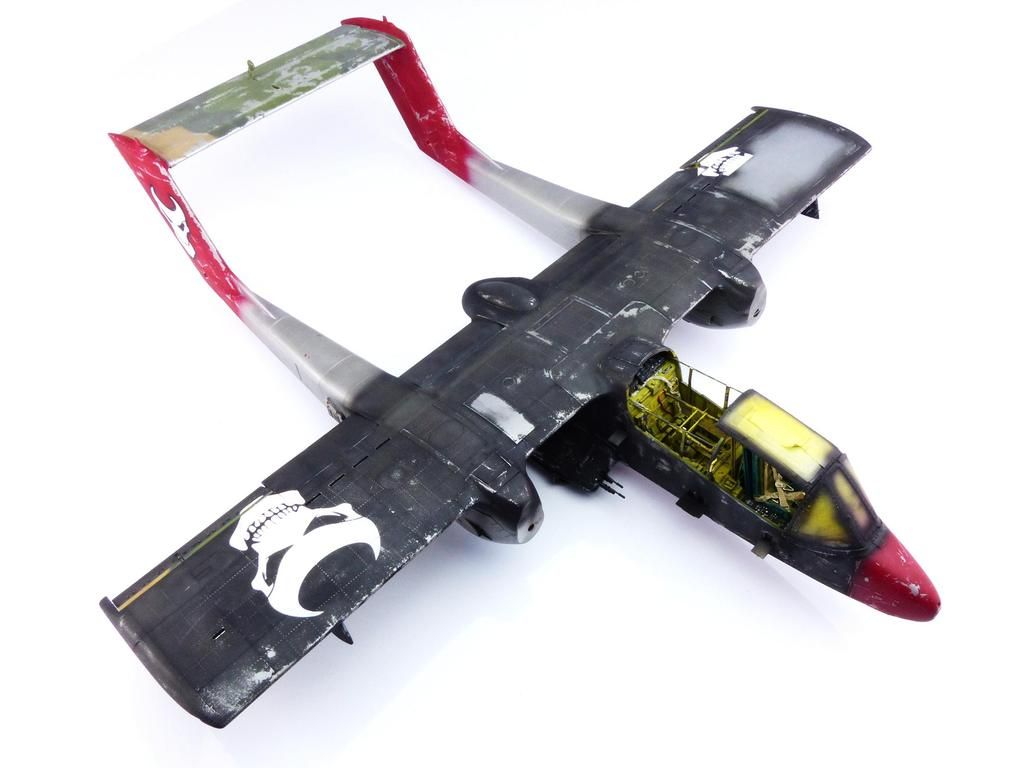 Base coat complete. Very cool, its all coming together. 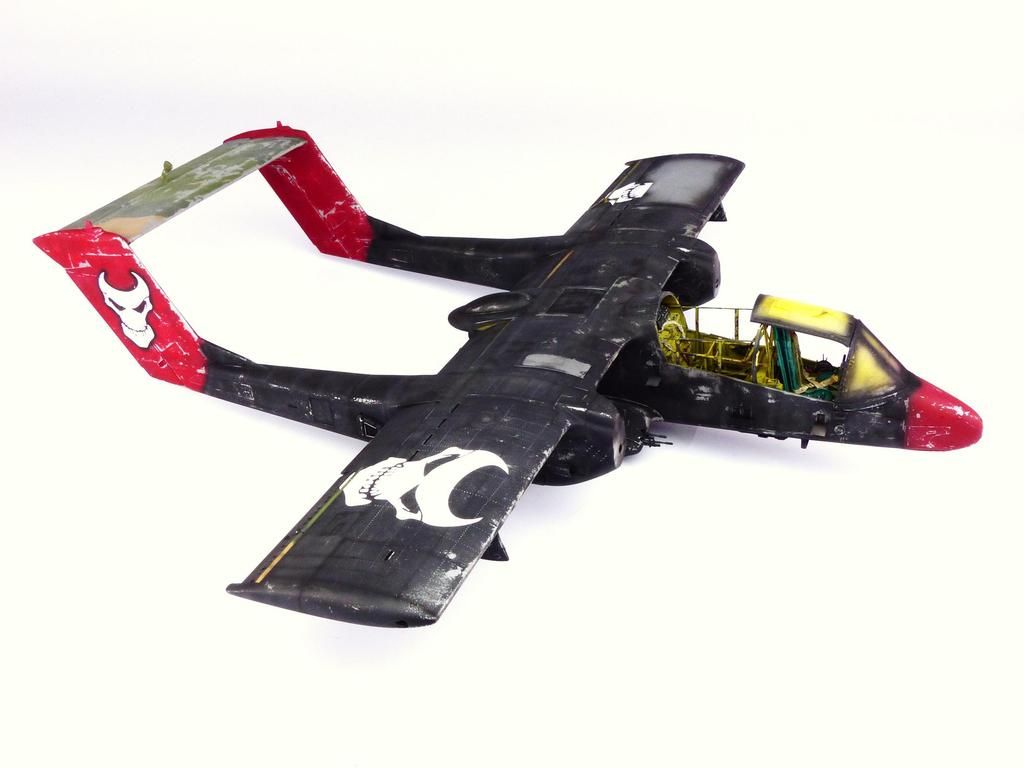 |
|
Haggis
Junior Member
  March 2016 MoM Winner
Member since: March 2012
Posts: 65
Mar 8, 2012 3:18:06 GMT -5
Mar 8, 2012 3:18:06 GMT -5
|
Post by Haggis on Mar 25, 2016 19:09:16 GMT -5
Now for that Pepsi logo. The plastic card was masked off then a base coat of Mr. Paint Basic White was applied. This is very tough satin coat which will be an ideal base for what comes next. 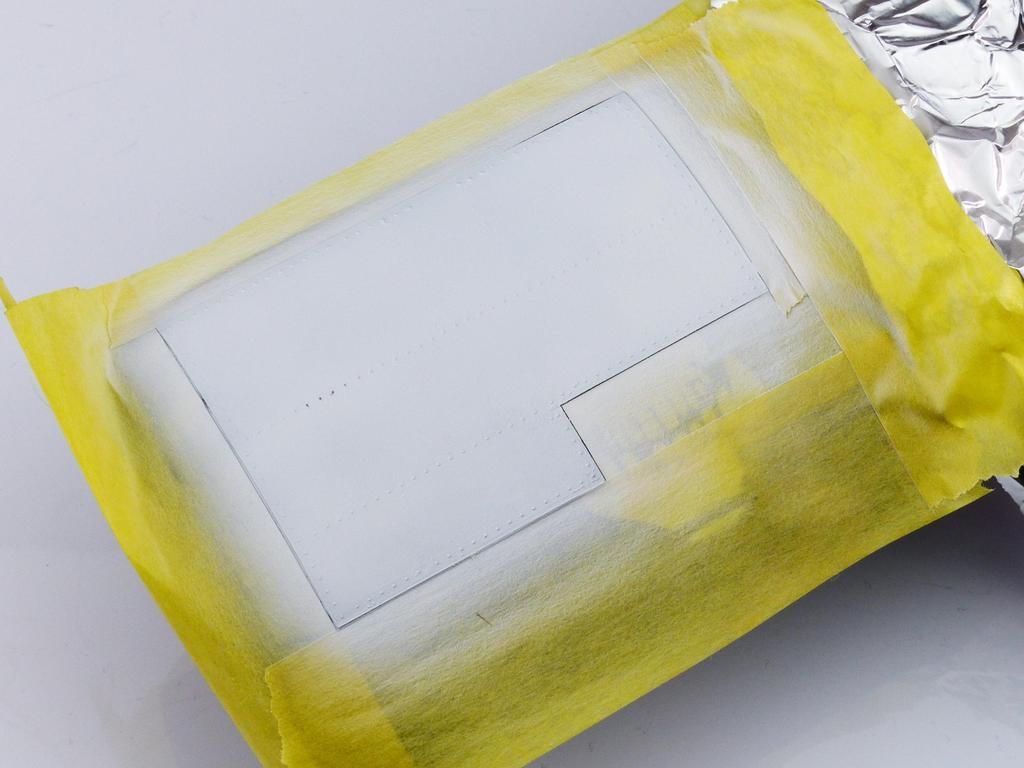 The awesome Miracle masks was carefully placed on and the red portion removed. Using Mr. Paint again the red was built up but I was careful to leave it faded and random. 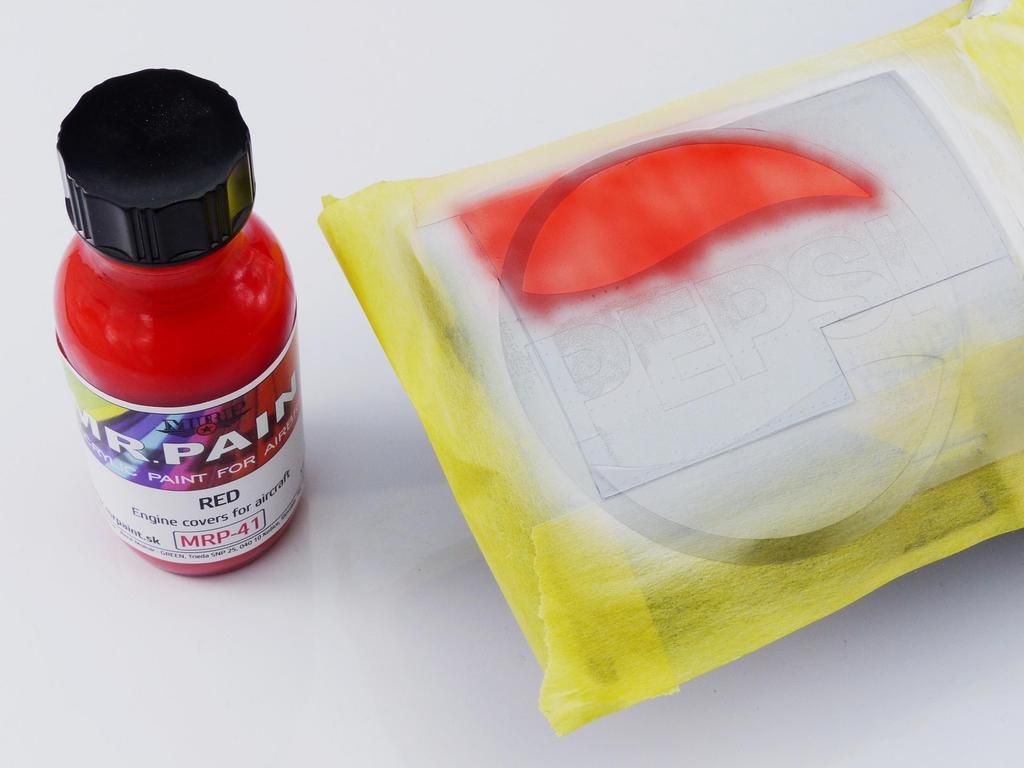 Next the red was masked being careful top cover any joins (otherwise there is a risk of hair line over spray). The blue was sprayed on, again with mr paint but mixed using Gloss Sea Blue and White until it looked right by eye. 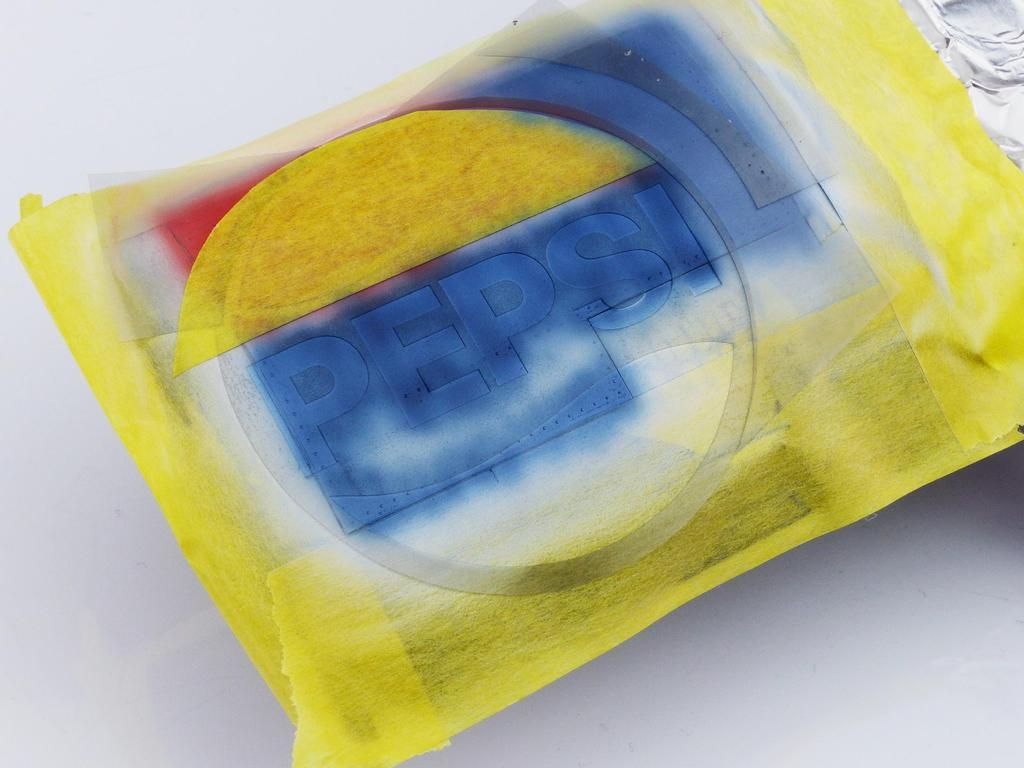 And here is that finished logo. 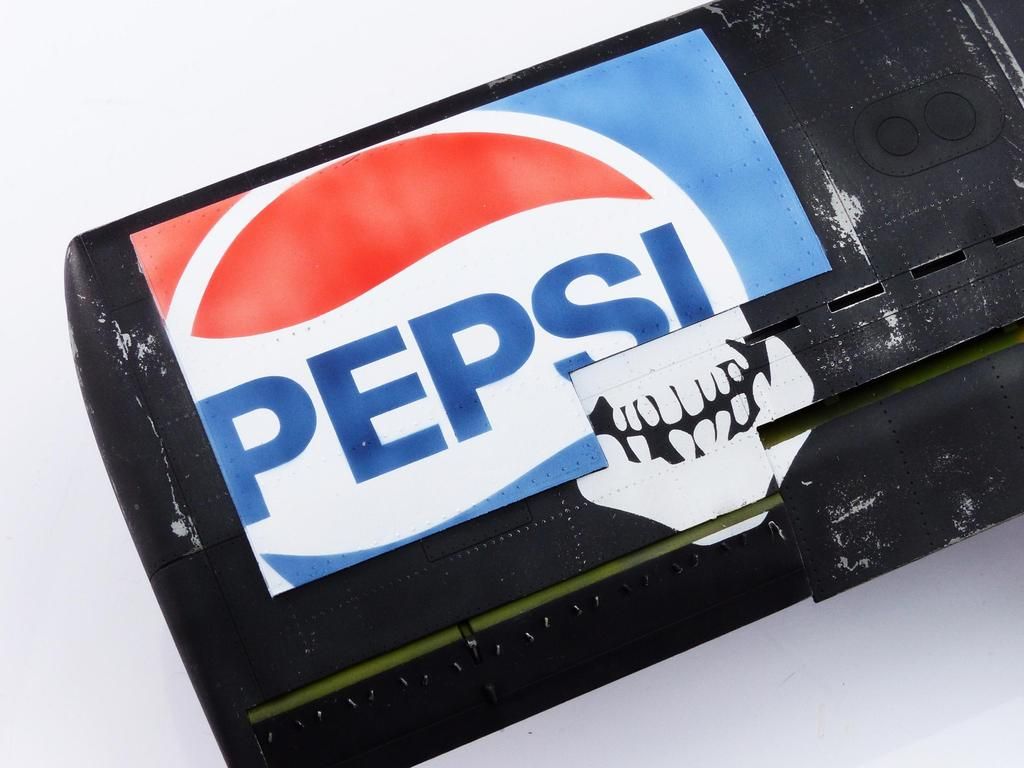 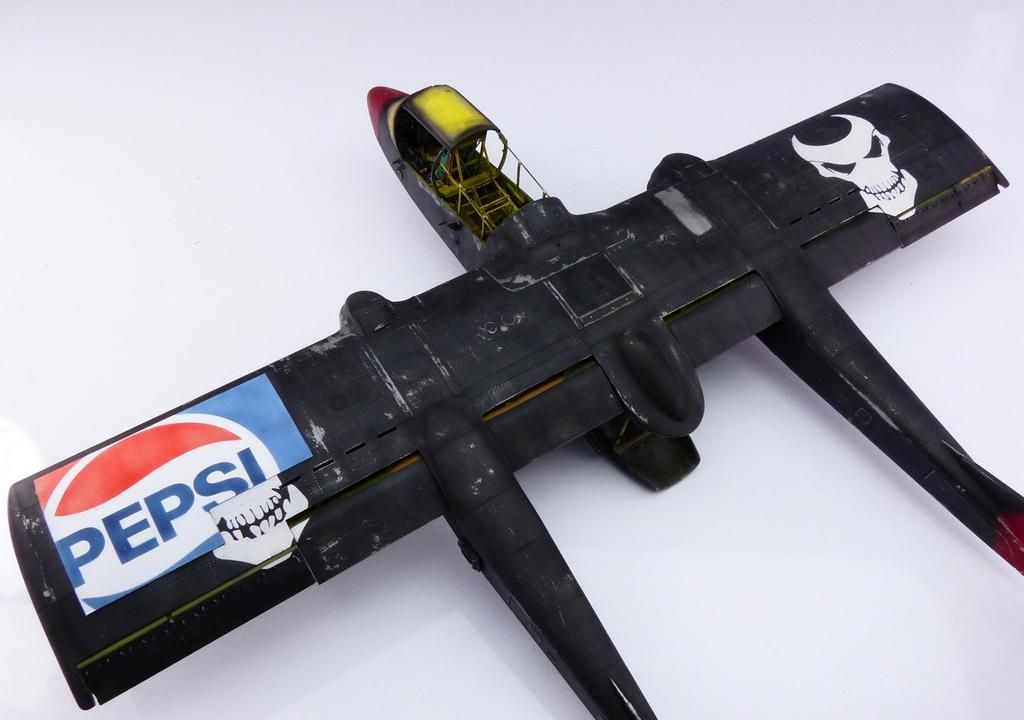 Now for the weathering. Chipping was done using various sponges and Ammo of Mig Chipping Colour acrylic. 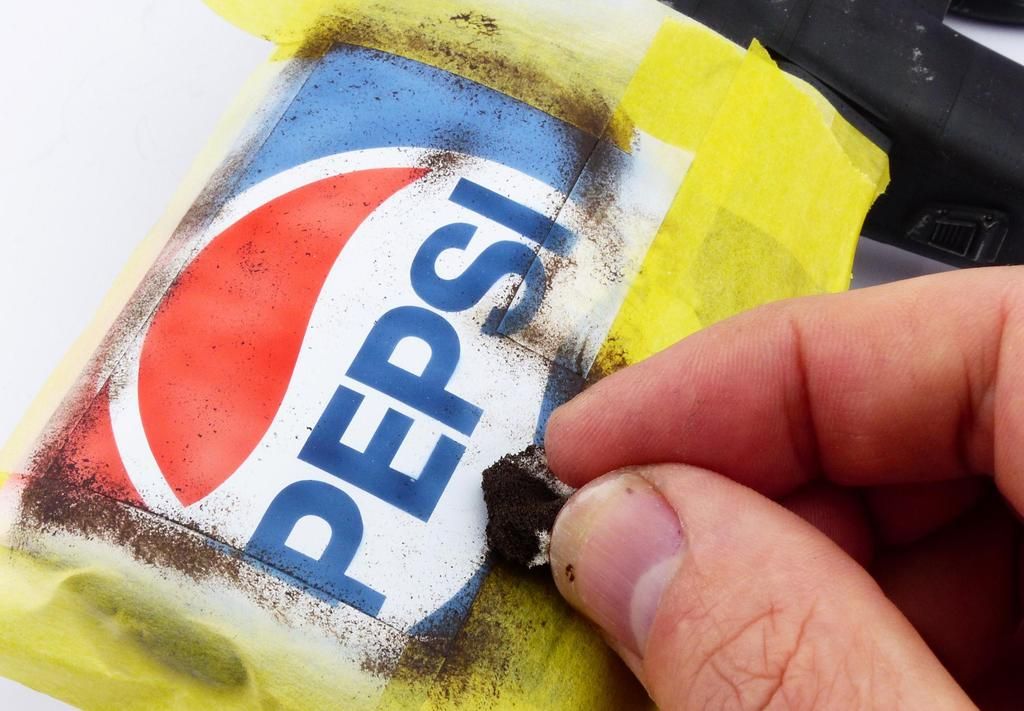 Once again turning to Ammo of Mig, I used Track Wask to accentuate the riveting and simulate some old rust staining, concentrating on the heaviest chipping. 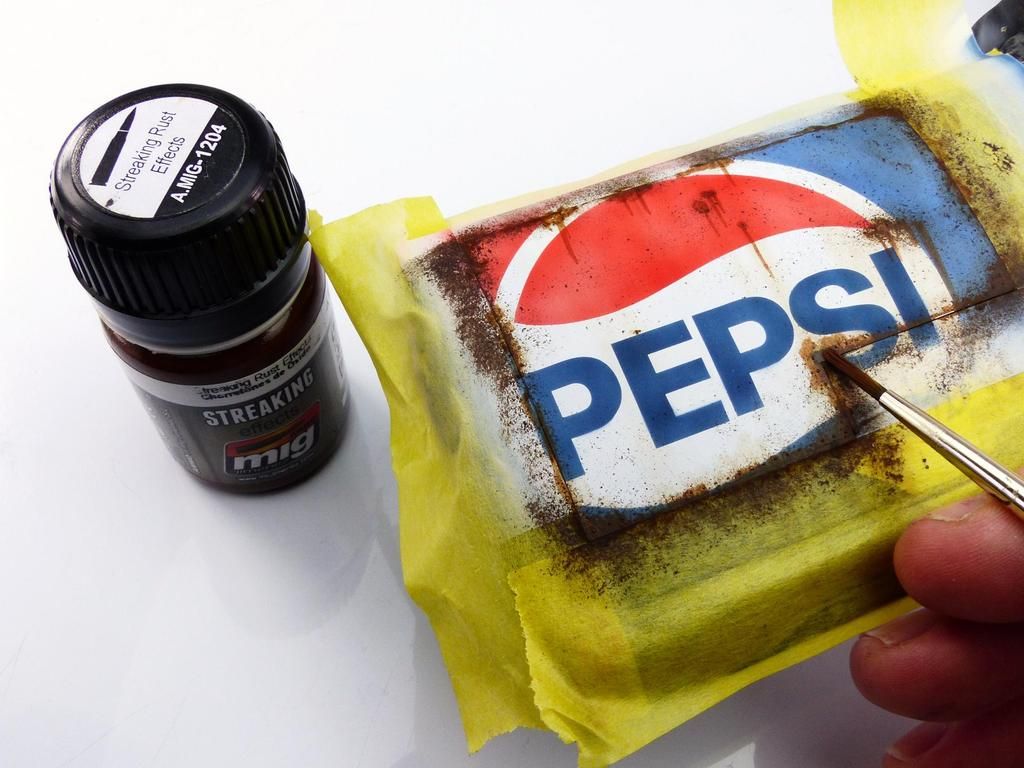 In some areas the track wash was streaked back using a flat brush. 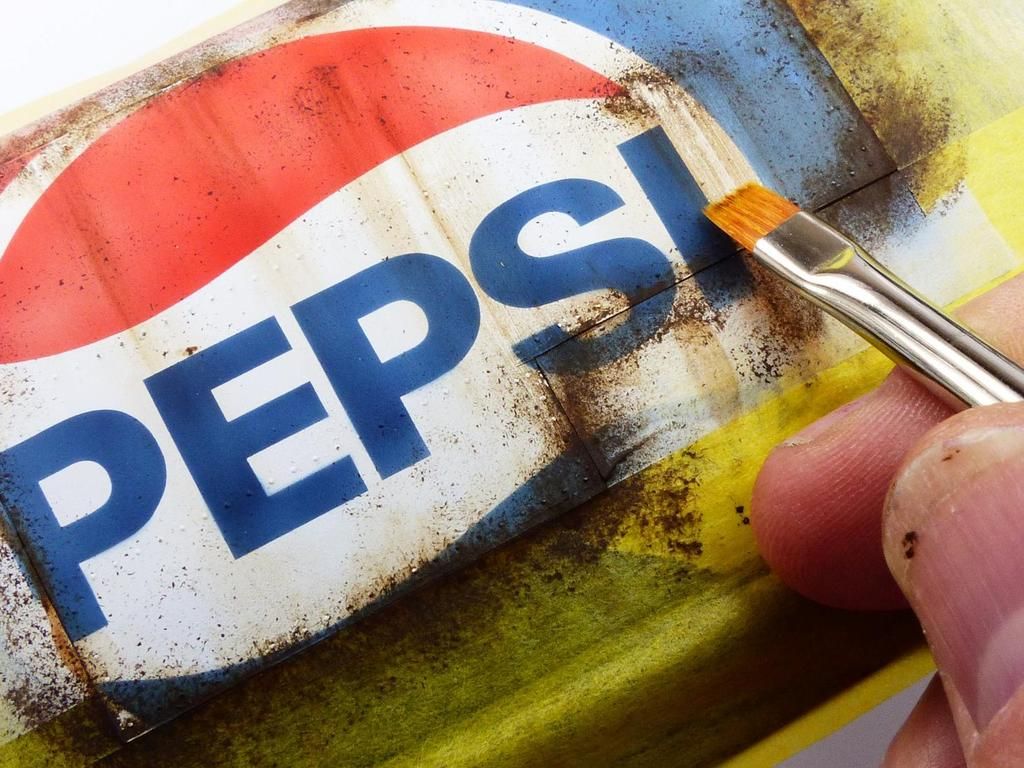 Tiny amounts of Rust coloured oils (Abteilung) were blended into the heaviest chipping. 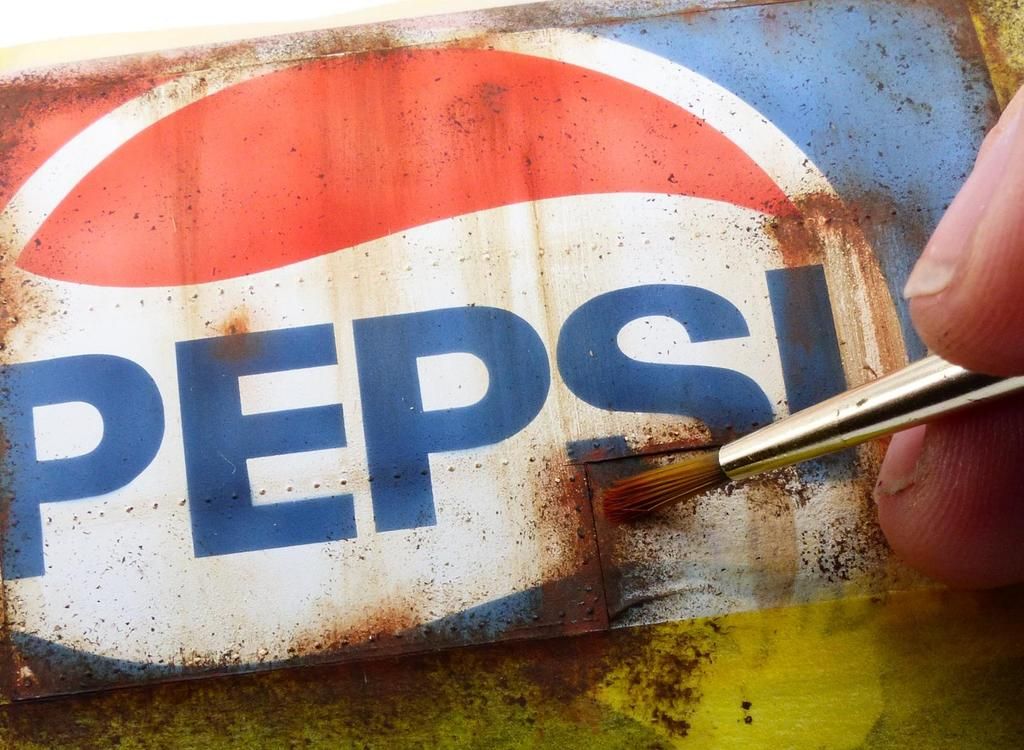 And here it is all finished after a coat of matt varnish to seal it all in. 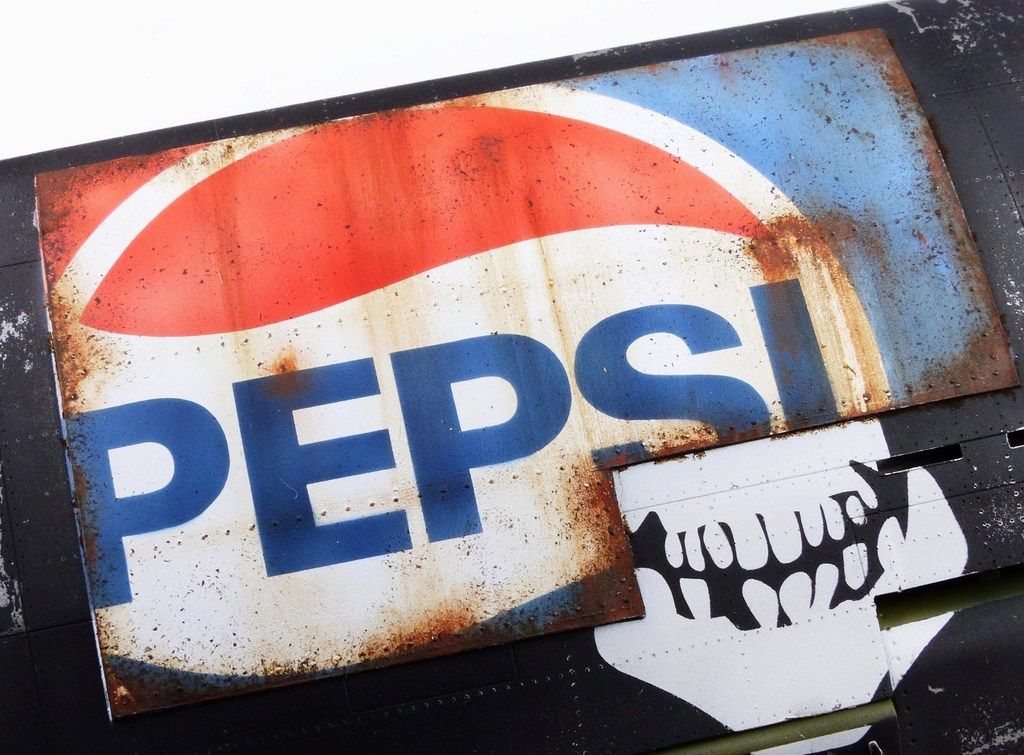 |
|
|
|
Post by Leon on Mar 25, 2016 19:25:55 GMT -5
Jamie that is totally awesome work and really looking BADASS indeed!  Faded paint,rust and chipping look to notch.  |
|
|
|
Post by panzerjager2 on Mar 25, 2016 21:03:23 GMT -5
I know you think I may be just "blowing smoke" BUT.......... This is some of the finest work I HAVE EVER SEEN
|
|
chris0423
Full Member
   Aug 2014 MoM Winner
Member since: February 2012
Posts: 528
Feb 23, 2012 17:08:25 GMT -5
Feb 23, 2012 17:08:25 GMT -5
|
Post by chris0423 on Mar 26, 2016 1:32:21 GMT -5
Jamie, what a superb build and finish. Nit really any words in mu my vocabulary to describe this work of art.
Well done.
|
|
|
|
Post by dierk on Mar 26, 2016 4:45:27 GMT -5
That really does look the canine's danglies! I think we're looking at a potential MoM winner here - you'll certainly get my vote!
|
|
Deleted
Member since: January 1970
Posts: 0
Nov 25, 2024 14:56:18 GMT -5
Nov 25, 2024 14:56:18 GMT -5
|
Post by Deleted on Mar 26, 2016 6:19:30 GMT -5
I hope you don't mind if I BOOK MARK this.

|
|
k1w1
Full Member
  
Member since: February 2015
Posts: 873
Feb 18, 2015 8:07:41 GMT -5
Feb 18, 2015 8:07:41 GMT -5
|
Post by k1w1 on Mar 26, 2016 6:32:21 GMT -5
Wow ... Excellent work !
|
|
captfue
Full Member
  
Member since: October 2012
Posts: 311
Oct 1, 2012 22:25:19 GMT -5
Oct 1, 2012 22:25:19 GMT -5
|
Post by captfue on Mar 26, 2016 13:38:33 GMT -5
Looks great can't wait to see it finished
|
|
Haggis
Junior Member
  March 2016 MoM Winner
Member since: March 2012
Posts: 65
Mar 8, 2012 3:18:06 GMT -5
Mar 8, 2012 3:18:06 GMT -5
|
Post by Haggis on Mar 26, 2016 15:12:39 GMT -5
Blimey chaps, thanks for the comments. You know how to make a guy blush! Next up was the steel plates, there are a number on the aircraft blanking off the undercarriage and here, on the wing as another patch. First off a coat of Alclad Steel. 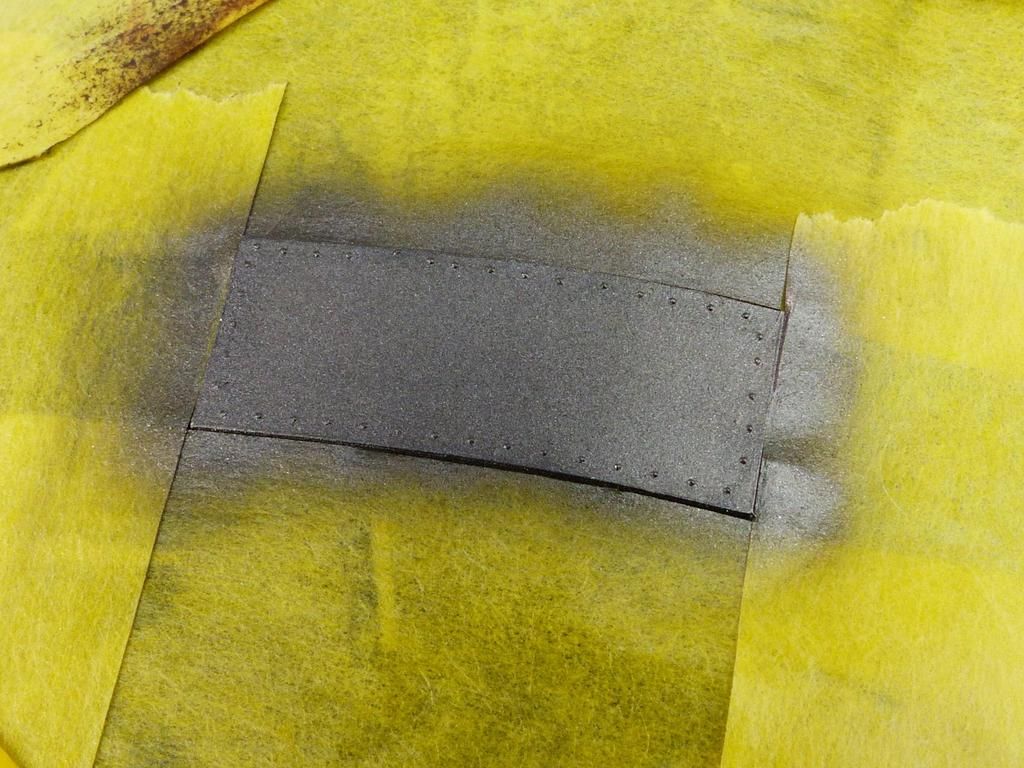 Matt varnish helps to seal it in but also helps to create finer chipping. So after a coat of chipping fluid Tamiya red Brown was sprayed on in a fairly opaque coat. 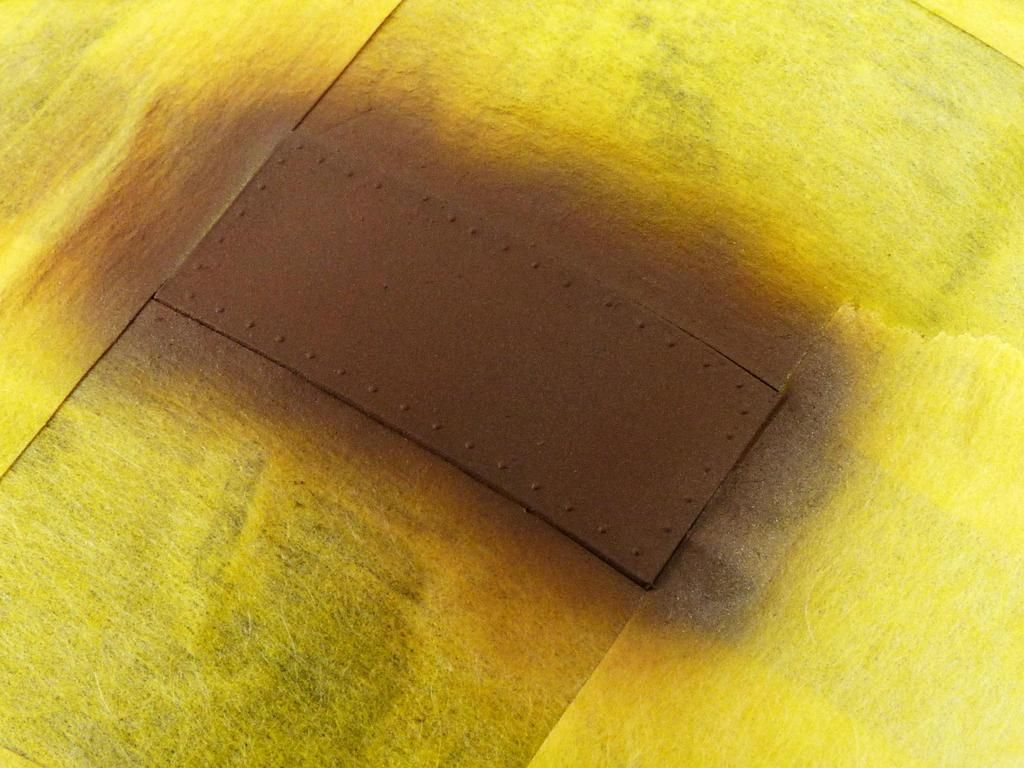 This was chipped as before. 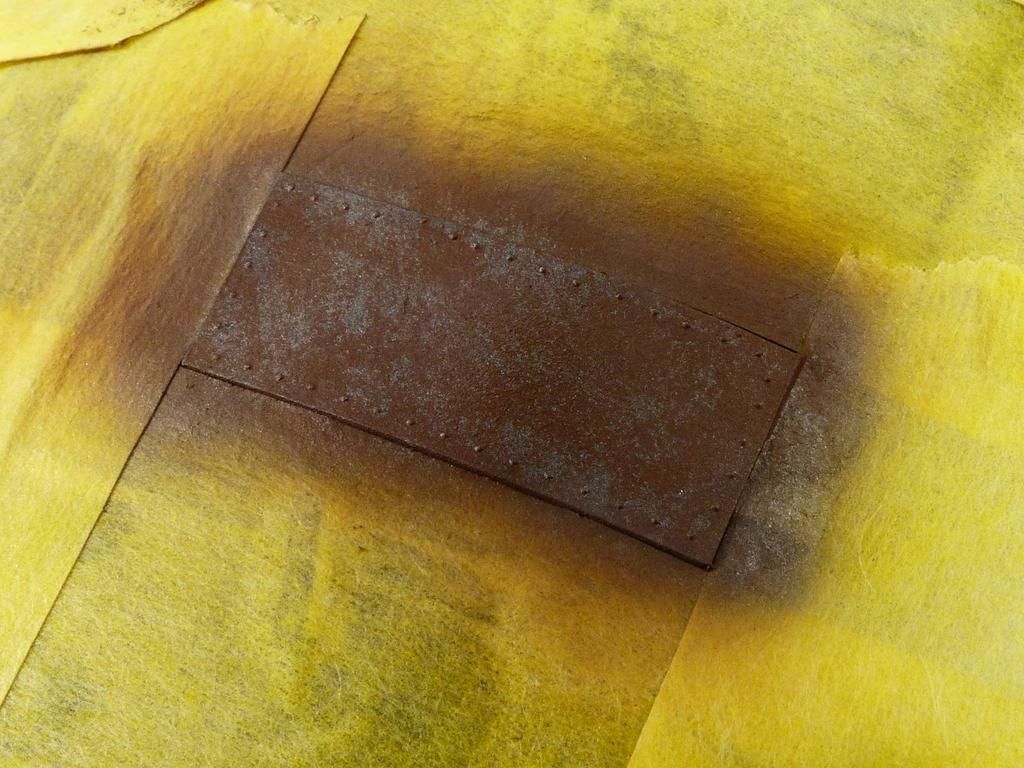 After sealing with Matt Varnish, an orange tone (Tamiya) was applied. This was less opaque, note the straight edge created using a piece of paper as a mask. This simulates rust and where the plates were stacked up in the yard! 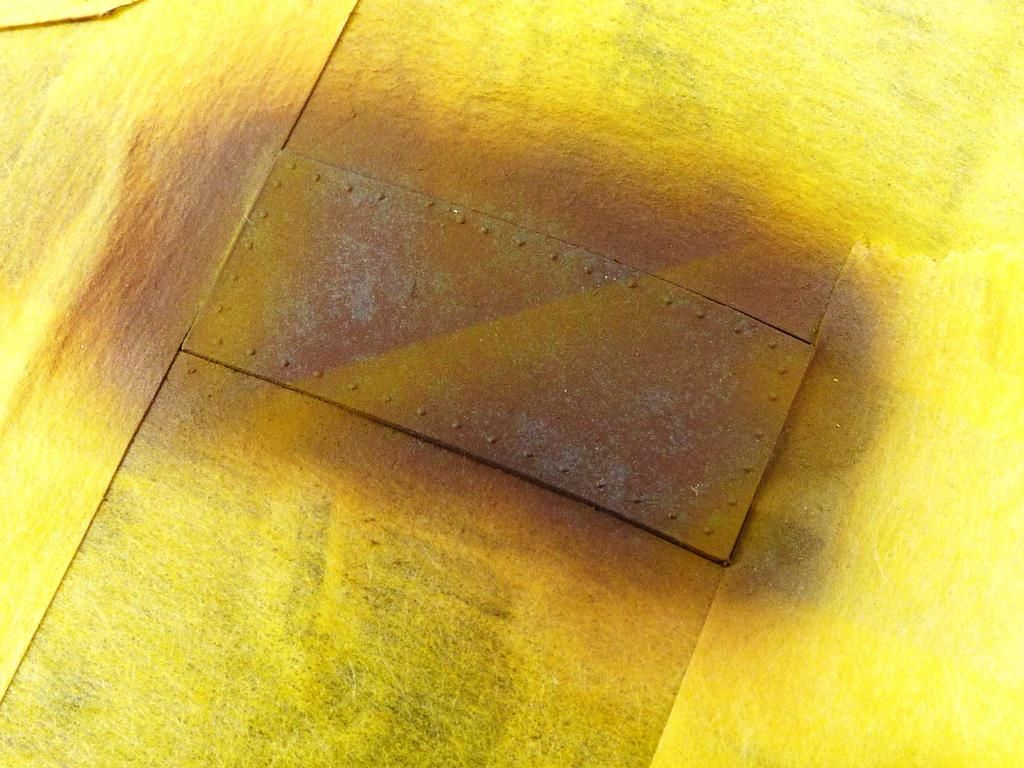 As the Pepsi logo, a wash using Ammo of Mig Track Wash was blended. 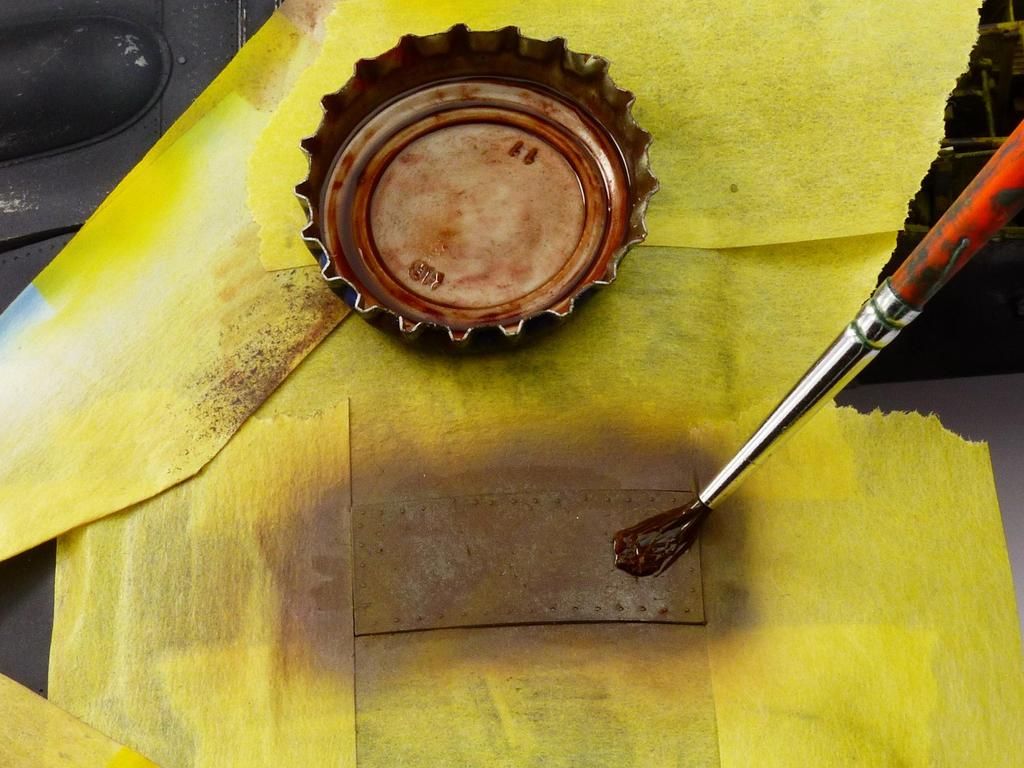 Lastly a mix of the Track Wash, various rust pigments and oil paints was speckled" onto the model. 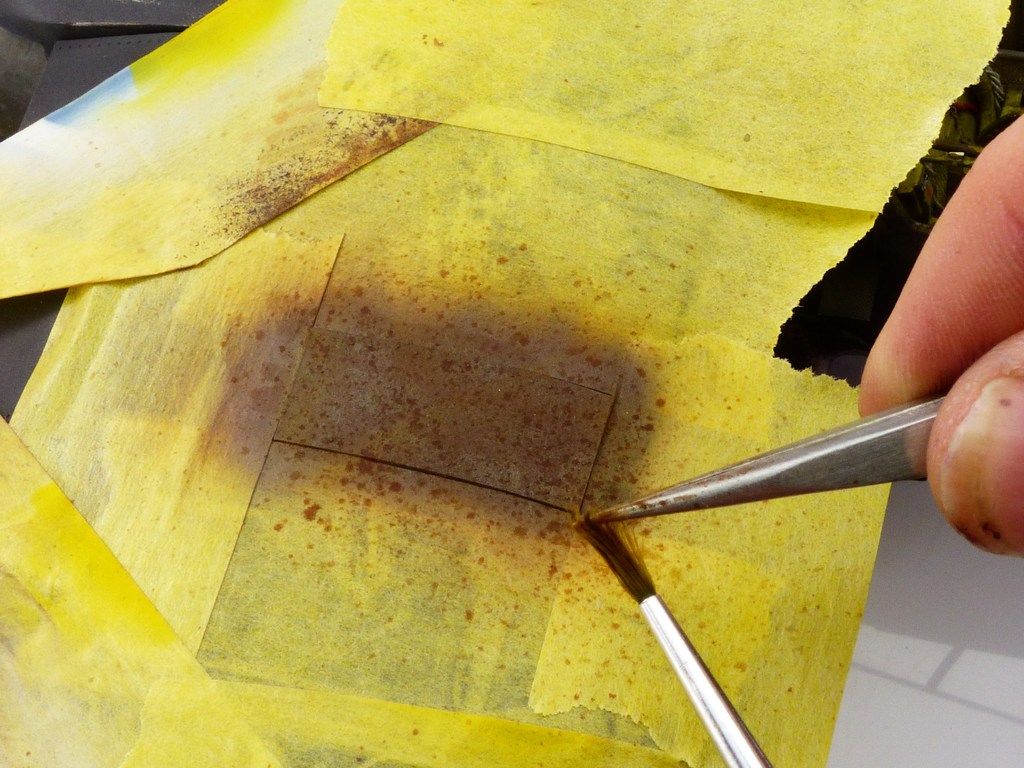 As subtle panel line was was next. I used mixed tones from the Ammo of Mig PLW range. 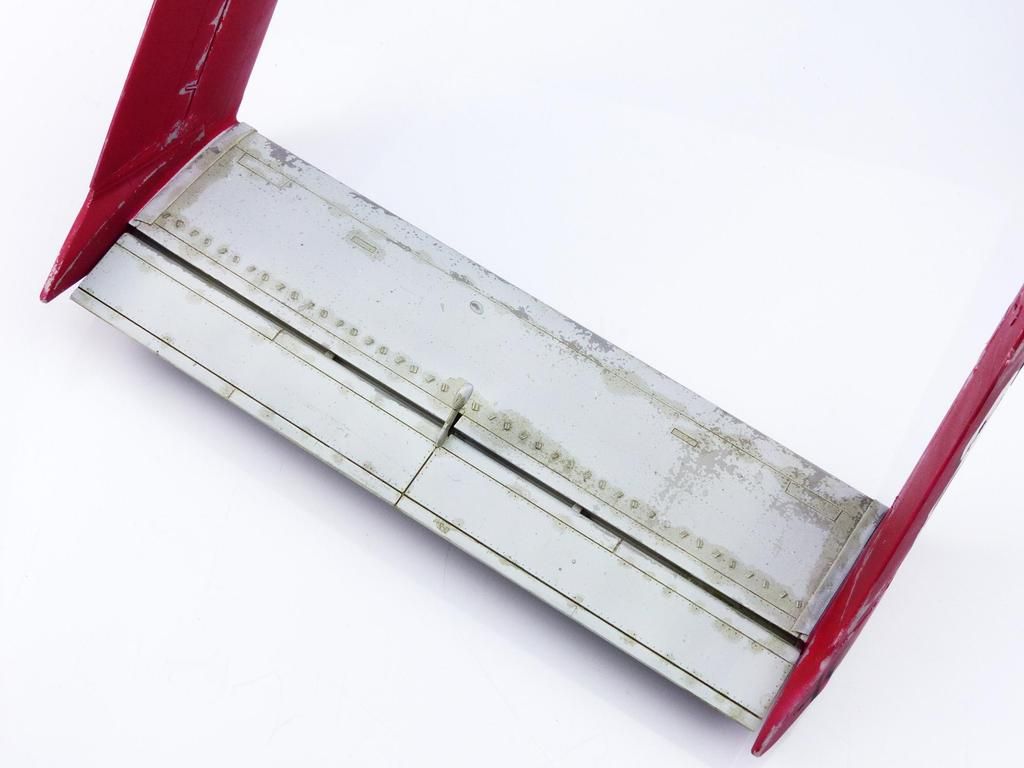 I find that if you wipe away the excess then you can wipe it right out of the detail, even when fully dry but especially if the detail is relatively faint. For that reason I prefer to clean the excess with a brush moistened in thinner. 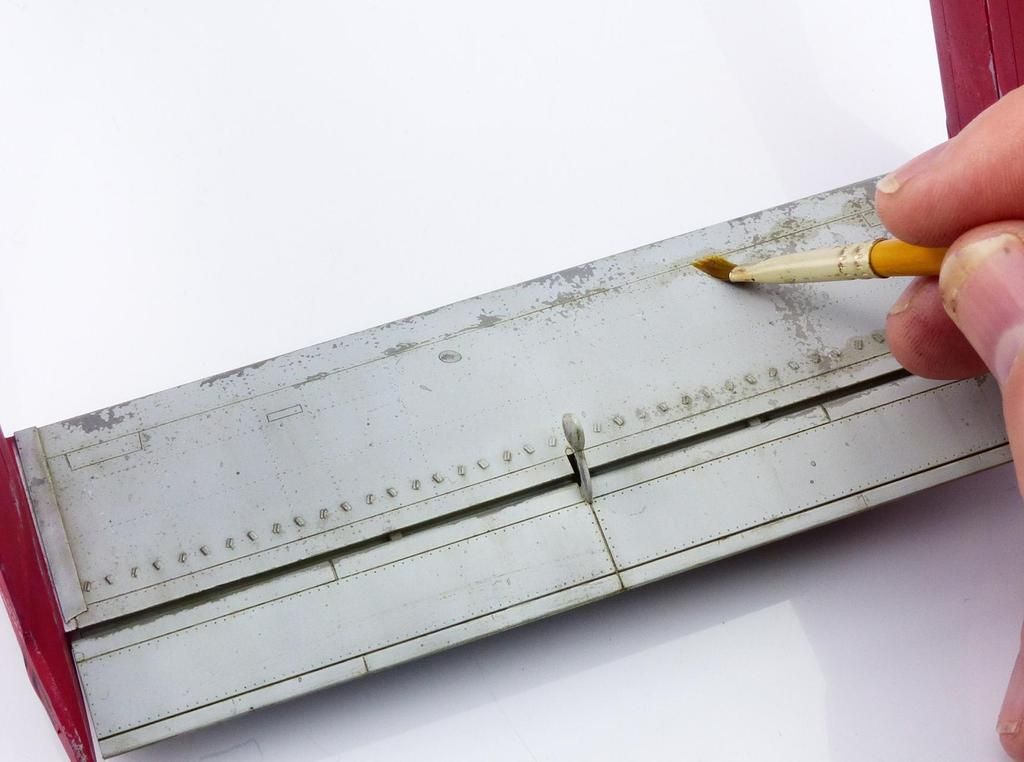 |
|
Haggis
Junior Member
  March 2016 MoM Winner
Member since: March 2012
Posts: 65
Mar 8, 2012 3:18:06 GMT -5
Mar 8, 2012 3:18:06 GMT -5
|
Post by Haggis on Mar 26, 2016 15:14:30 GMT -5
Next on the list was the dust effects. I went for a layered approach here and built up the effect using different techniques. First up was a base coat using tamiya acrylics but over a coat of the ever useful Scratch Effects chipping fluid. 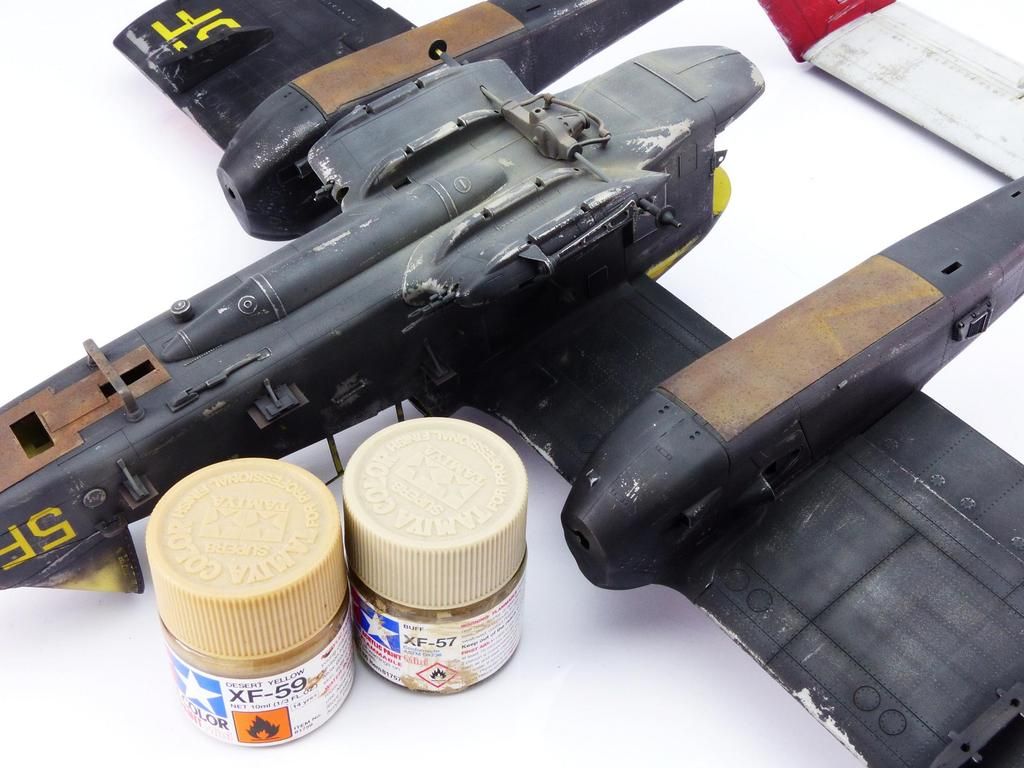 This was chipped in the usual way but be careful as the paint is only a misty thin coat. 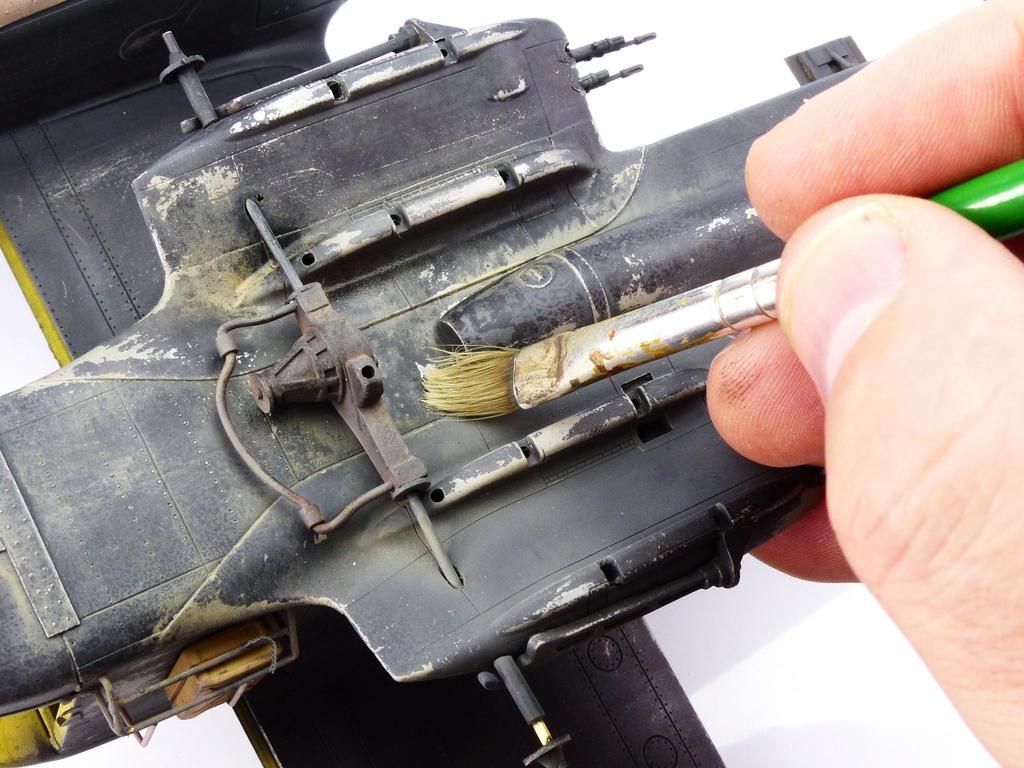 The next layer was a thin coat of Ammo of Mig Kursk Soil Nature Effects, this is like a thick wash and its sprayed with the airbrush. 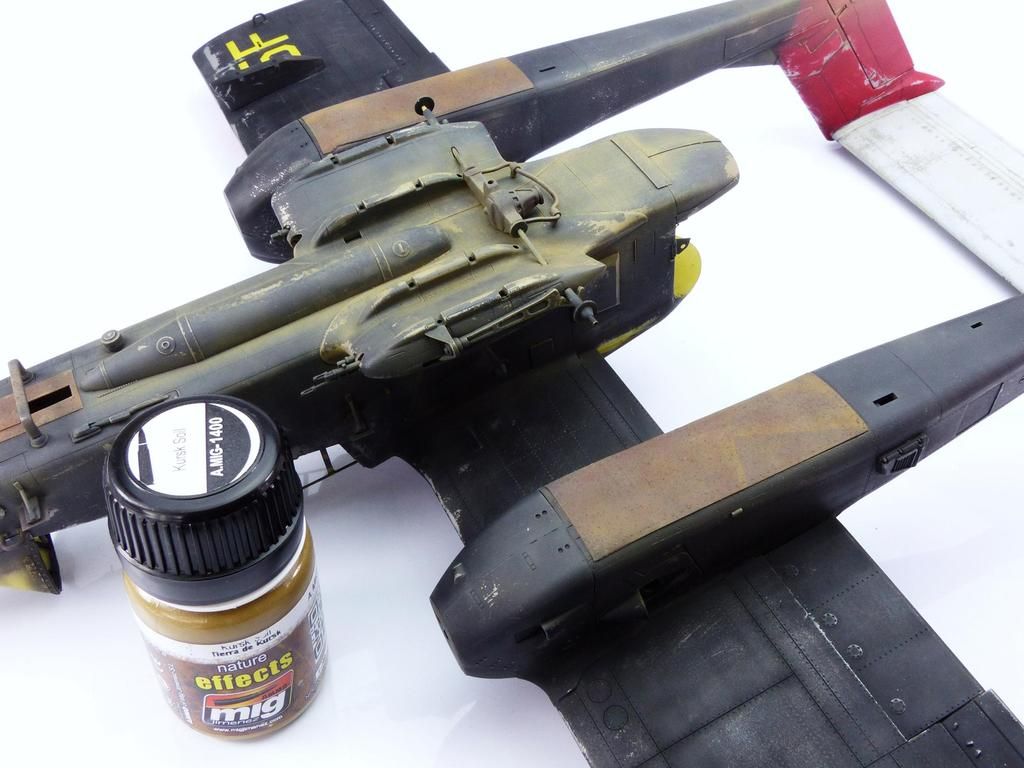 Being enamel it can be blended and streaked, here on the fuselage simulated rain effects. 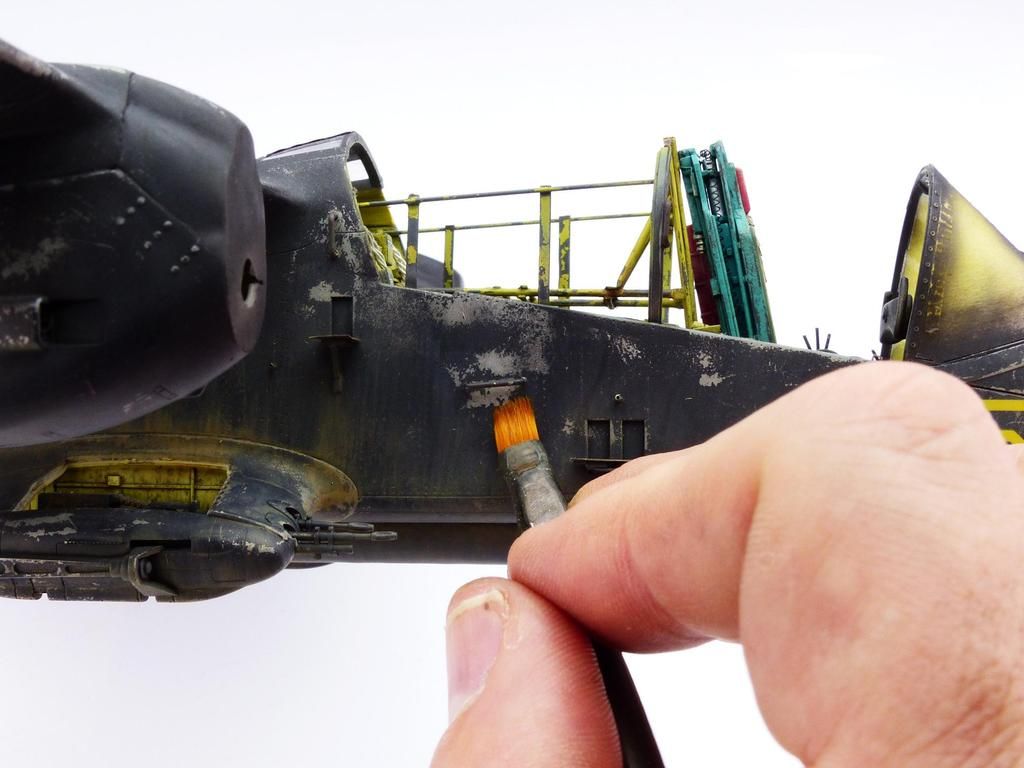 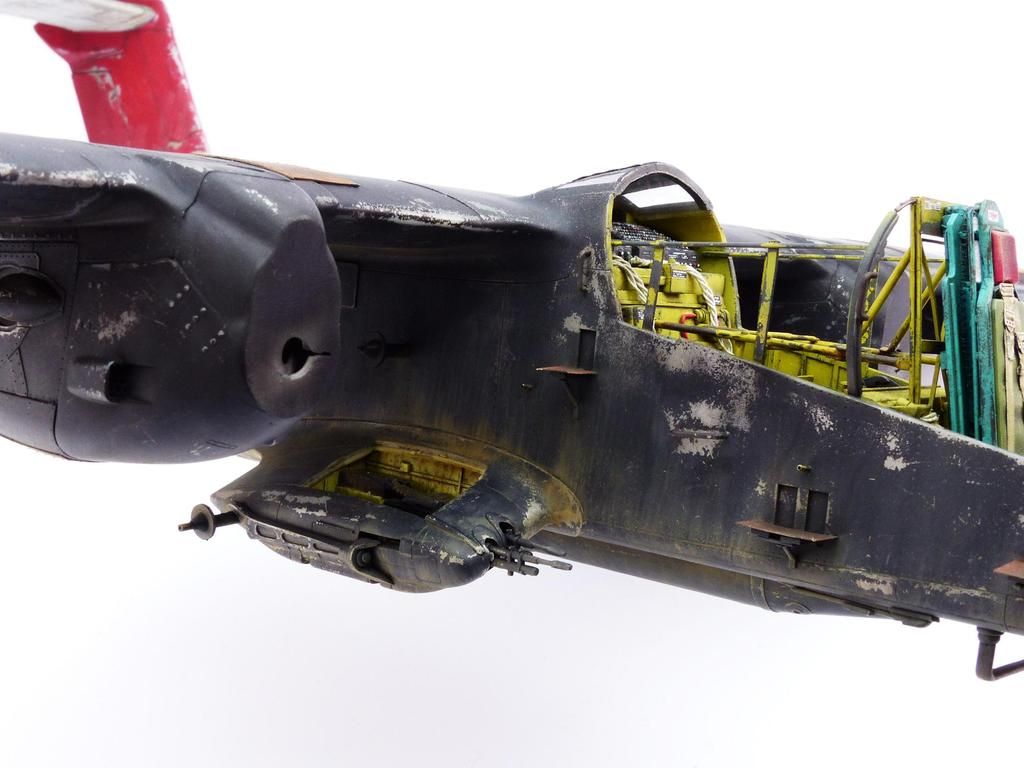 Now for the big guns, pigments! Various tones were applied using a soft brush.Now for the big guns, pigments! Various tones were applied using a soft brush. 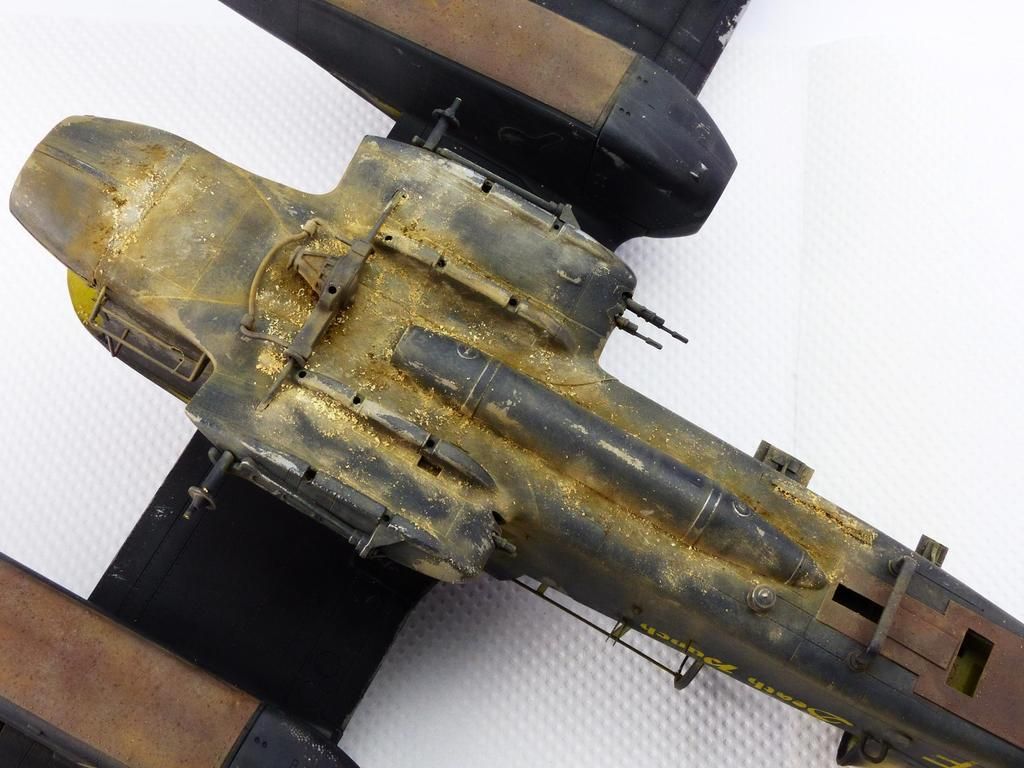 These are then fixed in place with white spirit. The beauty of this is that you can still manipulate them wheras Pigment Fixer is a lot stronger. Here I'm doing a bit of blending with a soft brush. 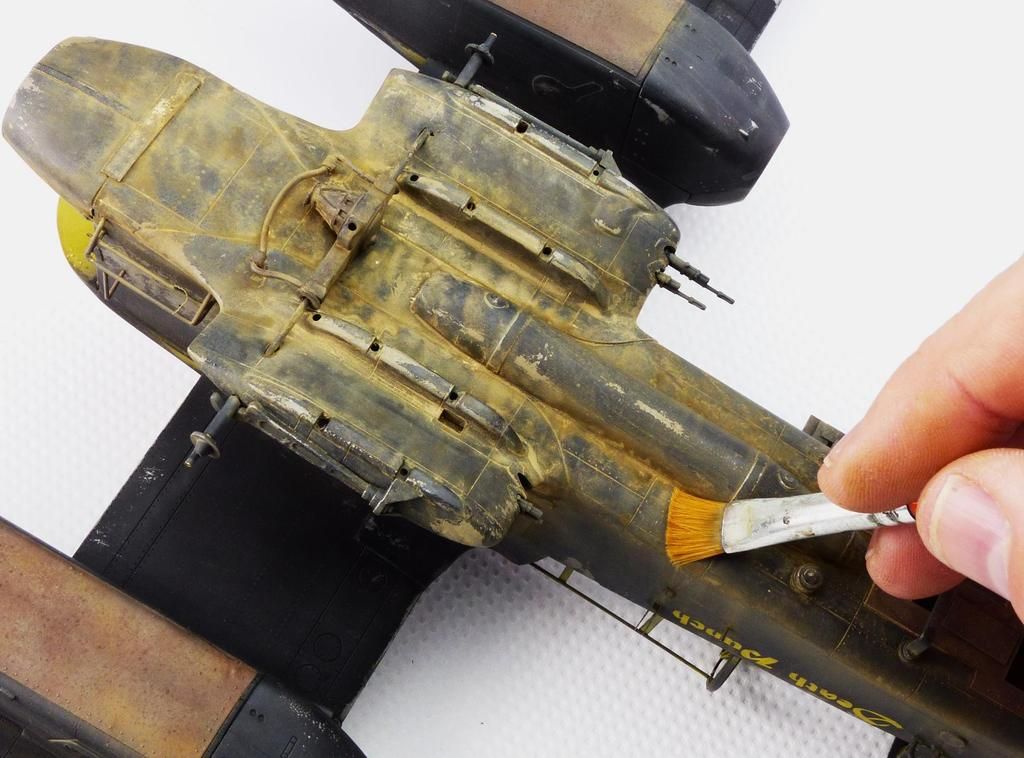 The tail gets similar treatment as with the modified undercarriage it sits nose high and the back end gets quite close to the deck, plus its in the prop wash! (Note the 5F marking on the top of the tail, this was sprayed on again using the masking set). 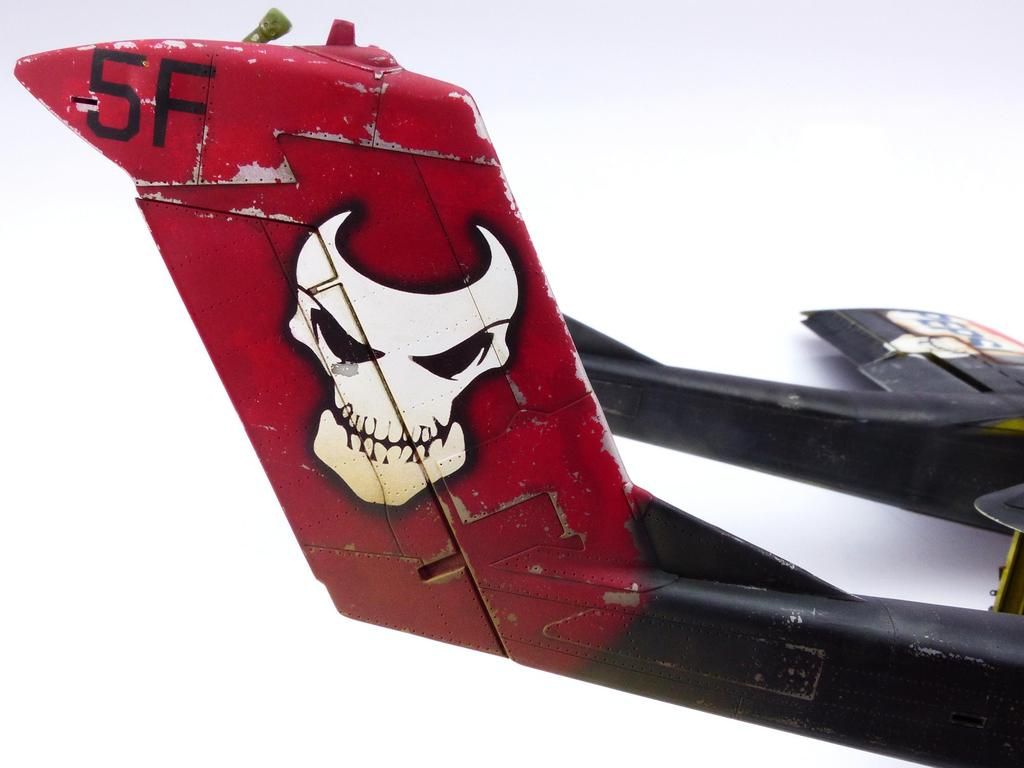 The wheels come from a resin set by Live Resin for the Humvee. The tread is beautifully cast which is ideal for what I have planned! First off after priming they got a coat of Ammo of Mig Rubber Tyres acrylic. 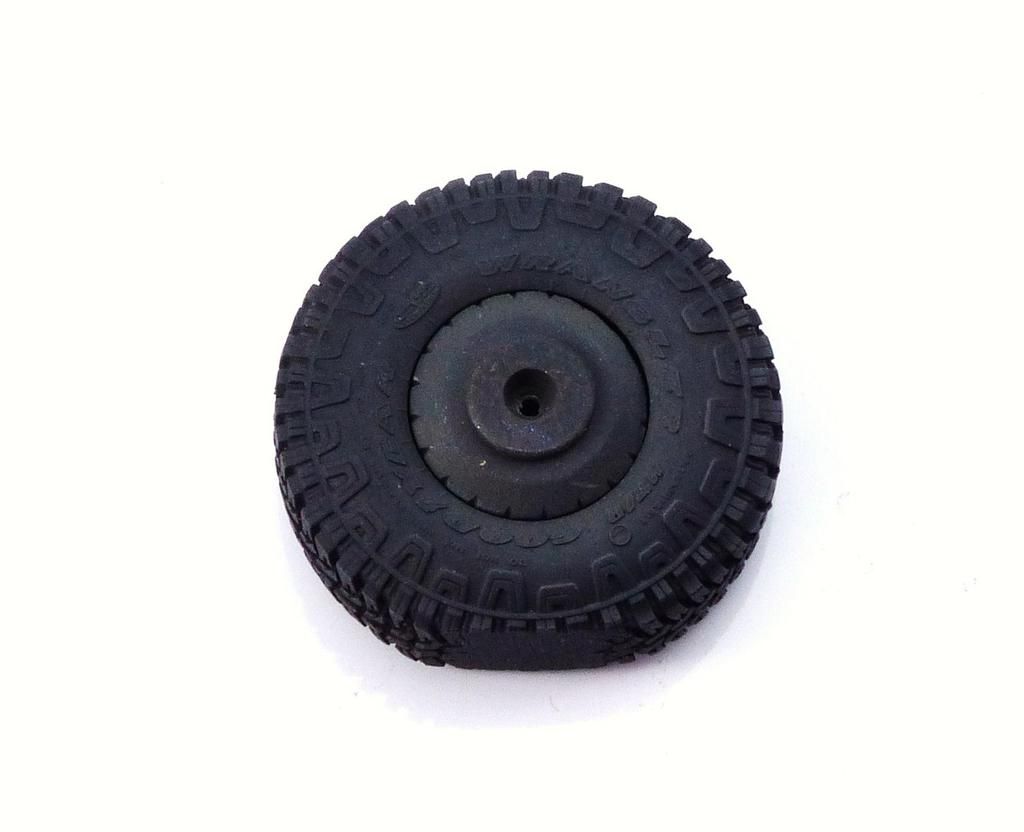 A wash was made up using pigments and white spirit, this was then liberally applied making sure I got into all the recesses, especially the tread. 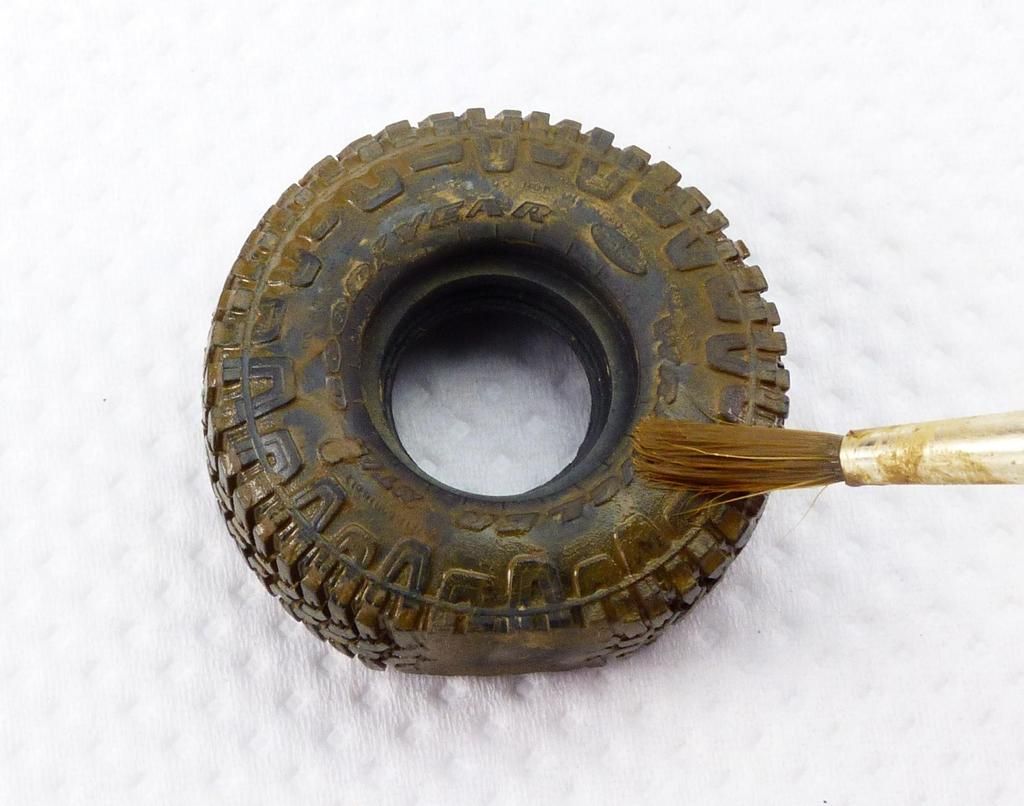 When dry it looks a right mess! 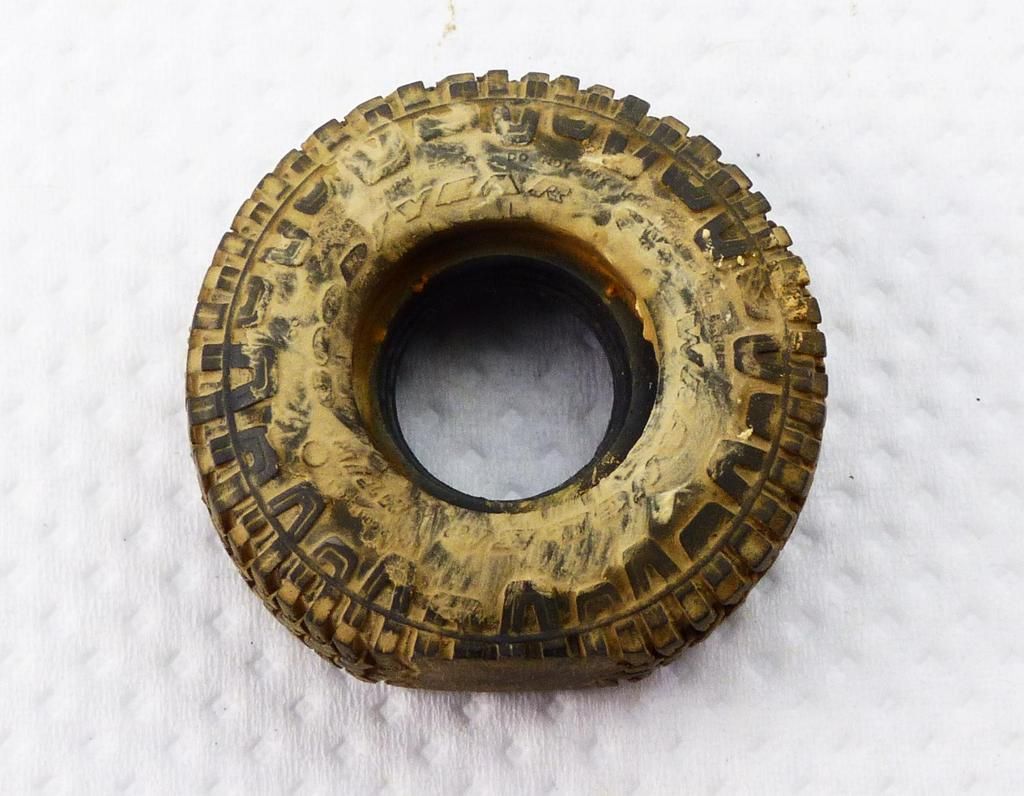 However, one of the best blending tools is the Mk 1 digit! 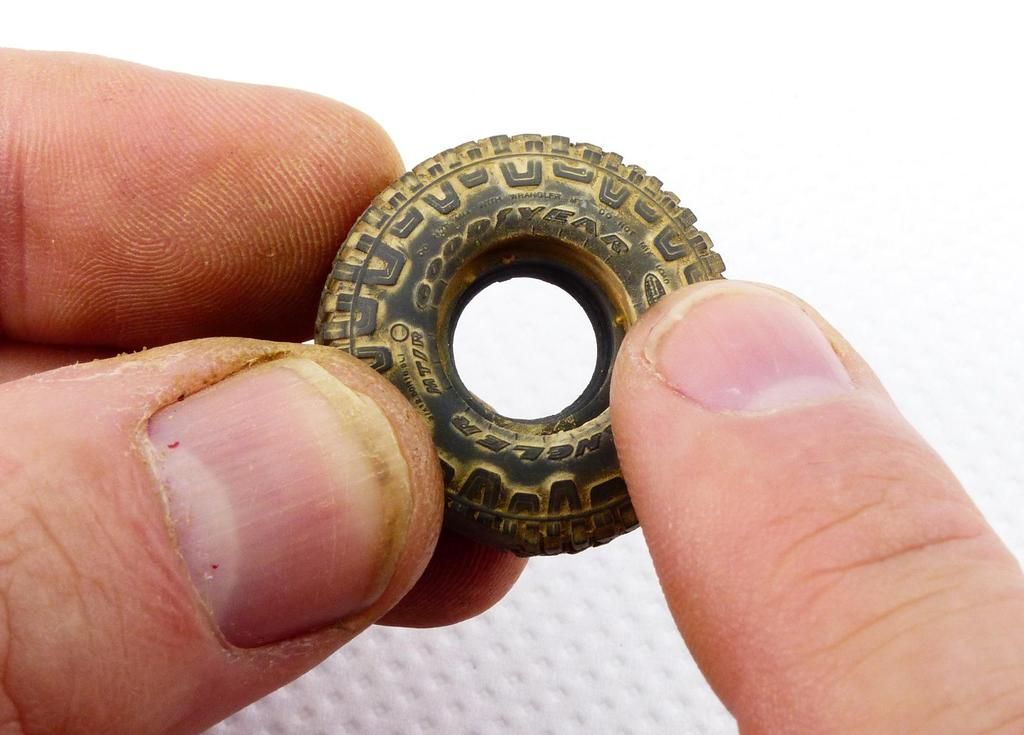 Next up, engines. |
|
Deleted
Member since: January 1970
Posts: 0
Nov 25, 2024 14:56:18 GMT -5
Nov 25, 2024 14:56:18 GMT -5
|
Post by Deleted on Mar 26, 2016 15:44:22 GMT -5
I have one of those MK-1s! Awesome Tutorial!! What a find and what a build! 
|
|
Rick
Full Member
  
Member since: March 2013
what to build, what to build . . . Ok THAT one!
Posts: 854 
|
Post by Rick on Mar 26, 2016 17:09:51 GMT -5
Write a book Jamie! Your weathering on this piece covers a lot of territory. New to some, reinforcement and inspiration to others. Beautiful work!
Rick
|
|
Haggis
Junior Member
  March 2016 MoM Winner
Member since: March 2012
Posts: 65
Mar 8, 2012 3:18:06 GMT -5
Mar 8, 2012 3:18:06 GMT -5
|
Post by Haggis on Mar 26, 2016 17:35:55 GMT -5
Write a book Jamie! Your weathering on this piece covers a lot of territory. New to some, reinforcement and inspiration to others. Beautiful work! Rick Funny you should say that mate, I've got one more model to do then it's writing time! :-D |
|
|
|
Post by dupes on Mar 26, 2016 17:42:54 GMT -5
Wow, man...I haven't checked in a while. WOW! Can't wait to see the finished product.
|
|
bbrowniii
Full Member
  
Member since: March 2012
If you are not part of the solution, you are part of the precipitate.
Posts: 1,239
Mar 25, 2012 22:08:04 GMT -5
Mar 25, 2012 22:08:04 GMT -5
|
Post by bbrowniii on Mar 26, 2016 18:22:48 GMT -5
I am speechless.
Just AMAZING work. I love it!
|
|
|
|
Post by Leon on Mar 26, 2016 18:23:21 GMT -5
Excellent work on the additional weathering Jamie!  |
|
|
|
Post by deafpanzer on Mar 27, 2016 13:11:49 GMT -5
Wow! I think I am in love. Way too cool with the metal sheet from Pepsi truck box or something like that.
|
|
Haggis
Junior Member
  March 2016 MoM Winner
Member since: March 2012
Posts: 65
Mar 8, 2012 3:18:06 GMT -5
Mar 8, 2012 3:18:06 GMT -5
|
Post by Haggis on Mar 28, 2016 9:36:01 GMT -5
Thanks guys, I really appreciate the comments. I found the PW 2800s really tedious, I tried counting how many parts there were but I gave up! After a bath in the sonic cleaner the big bits were removed from the casting blocks and all had a coat with Aclad Black Primer. The cylinders were then dry brushed with Mr Metal Steel. 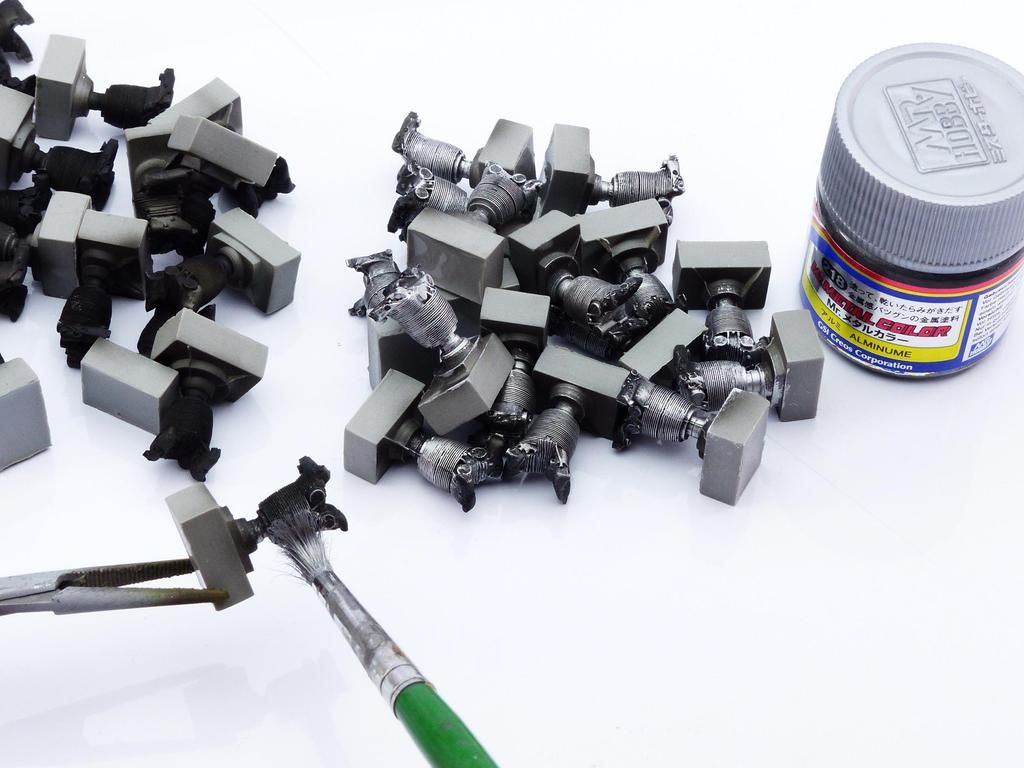 The rocker covers were touched in with Ammo of Mig Black acrylic. 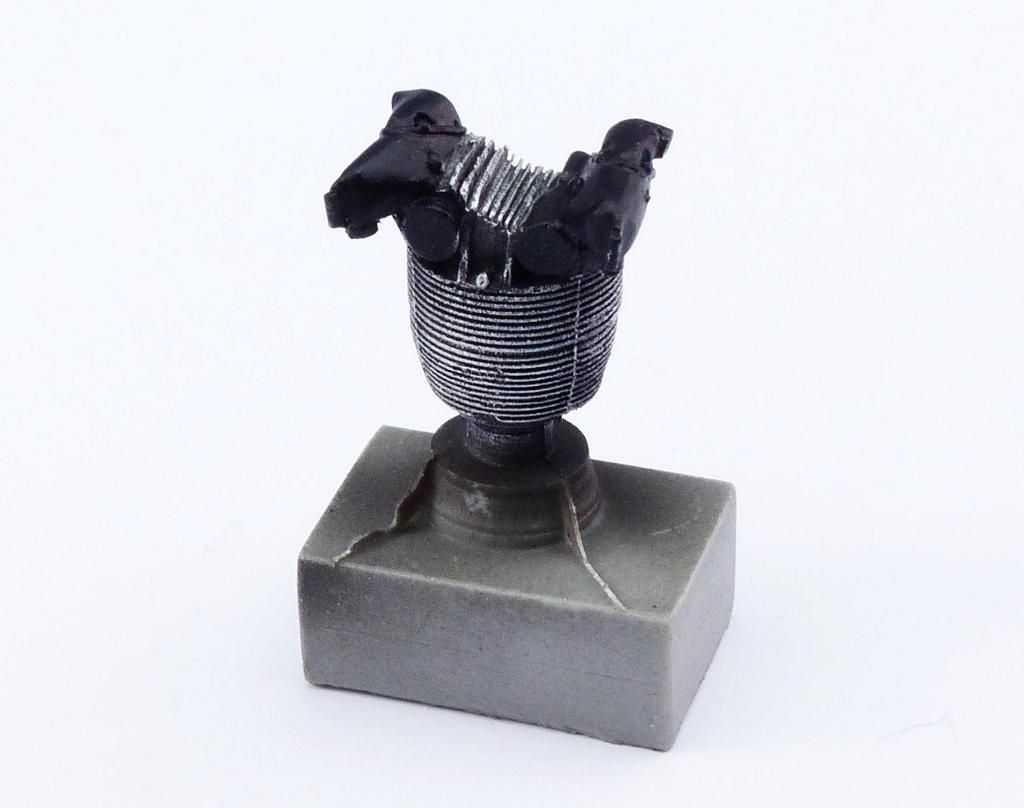 The casing had a coat of grey (I forget which) from GSI Creos. 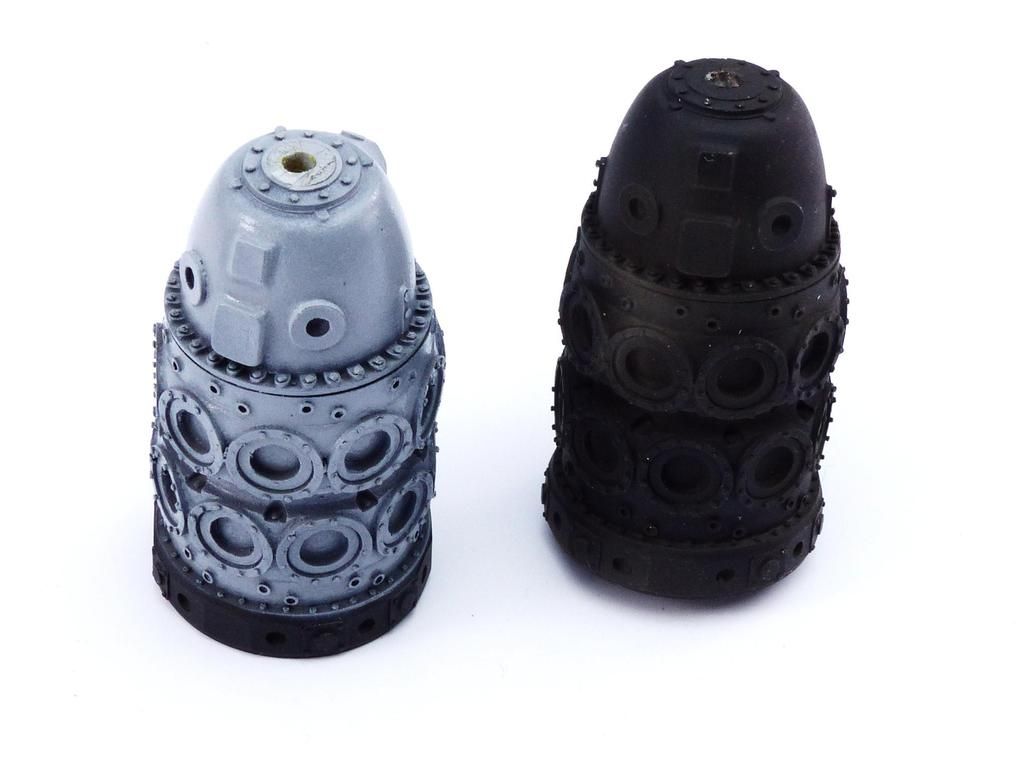 When built up a grimy wash using Ammo of Mig Engine Grime and Fresh Engine and Fuel effects was applied. Here I've done one so you can see the difference. 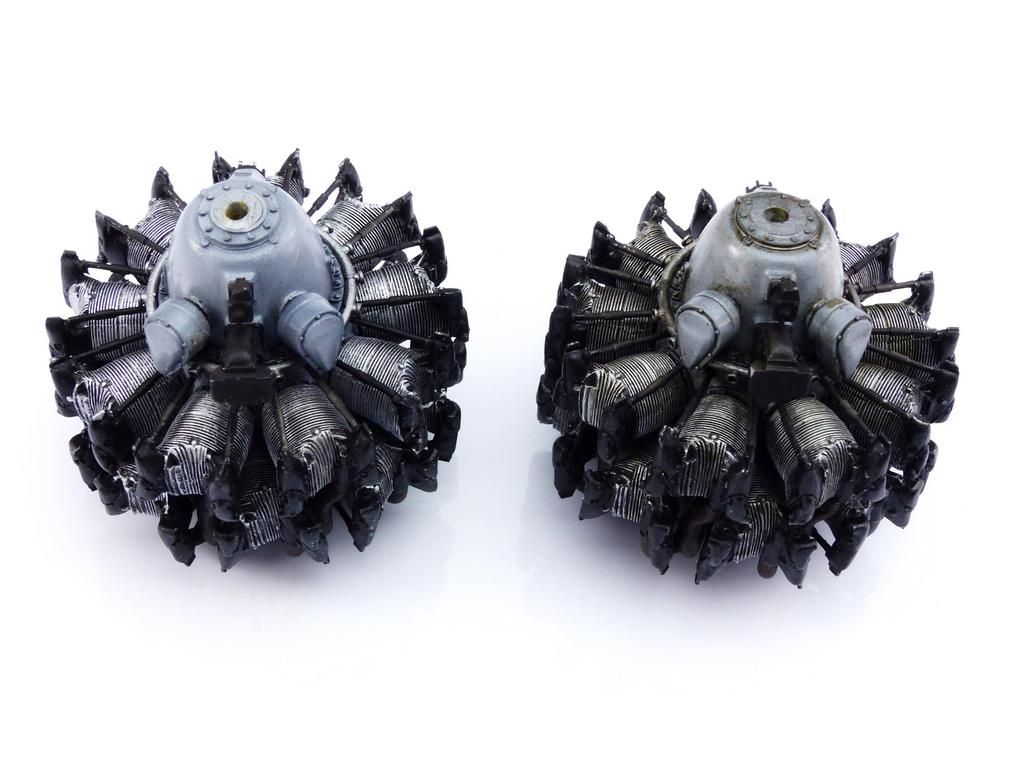 The holes were drilled out so some cotton covered wire (from little cars) was glued in place. Cotton covered wire is great as it captures the texture of the ignition leads whilst being really easy to paint, in this case with Vallejo Hull Red. 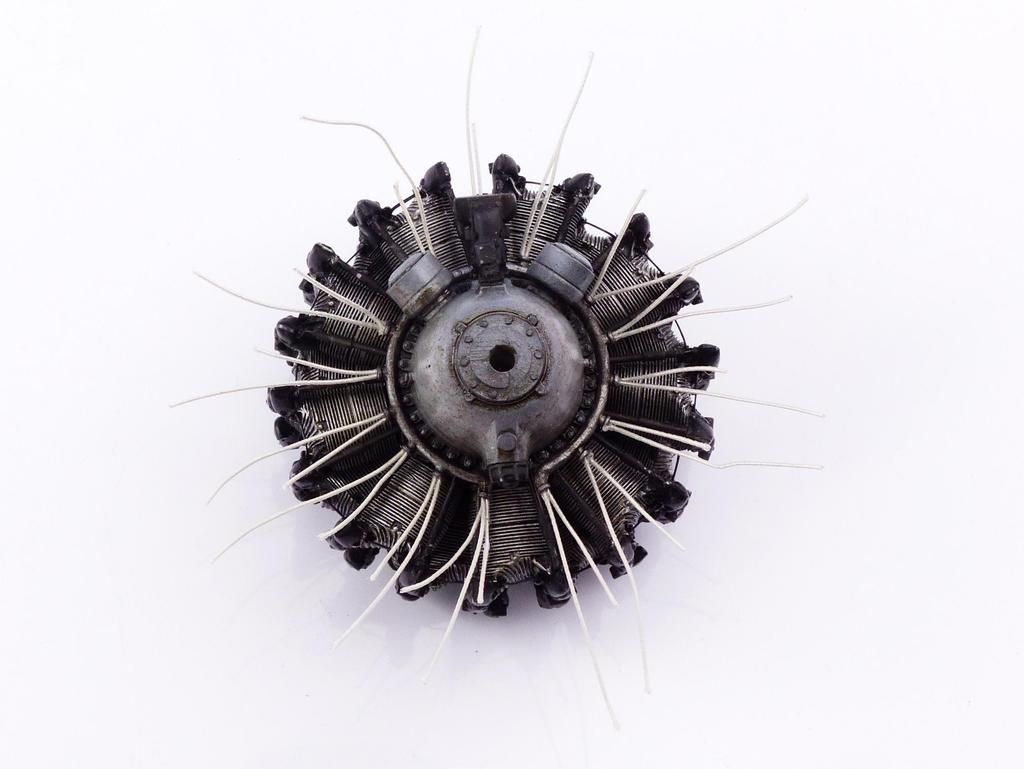 And here is the finished result. A right pain but well worth it in the end. 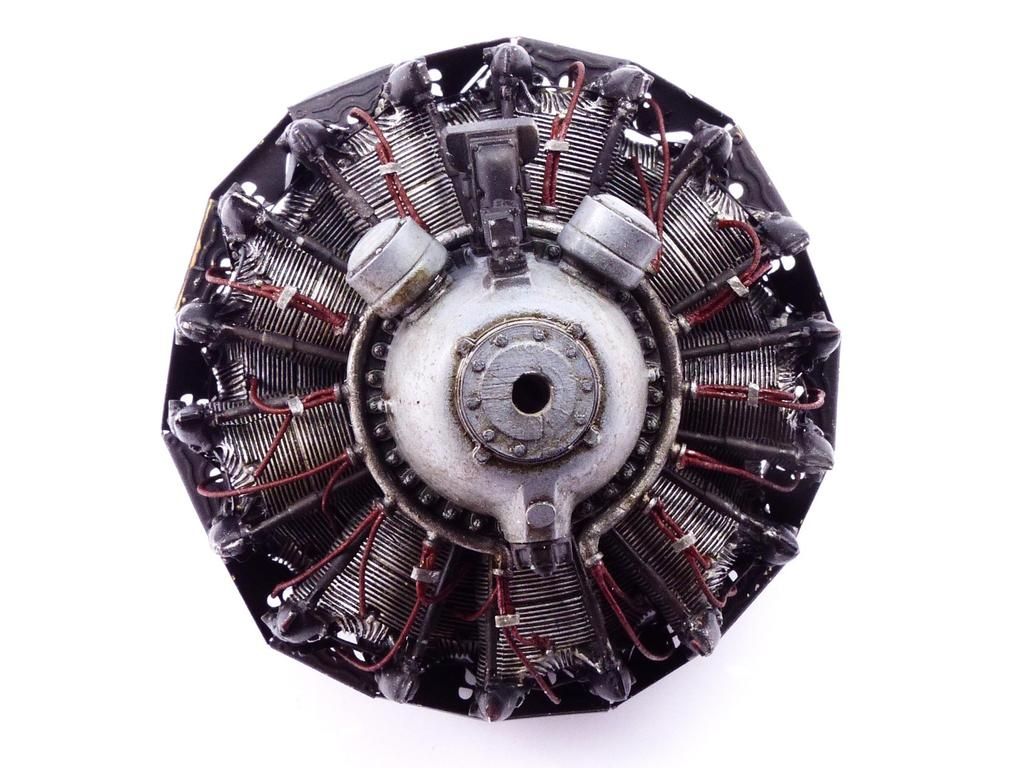 |
|
Haggis
Junior Member
  March 2016 MoM Winner
Member since: March 2012
Posts: 65
Mar 8, 2012 3:18:06 GMT -5
Mar 8, 2012 3:18:06 GMT -5
|
Post by Haggis on Mar 28, 2016 9:36:38 GMT -5
The Live Resin mini gun was made up, painted with Matt Black then dry brushed with Gun metal pigment. 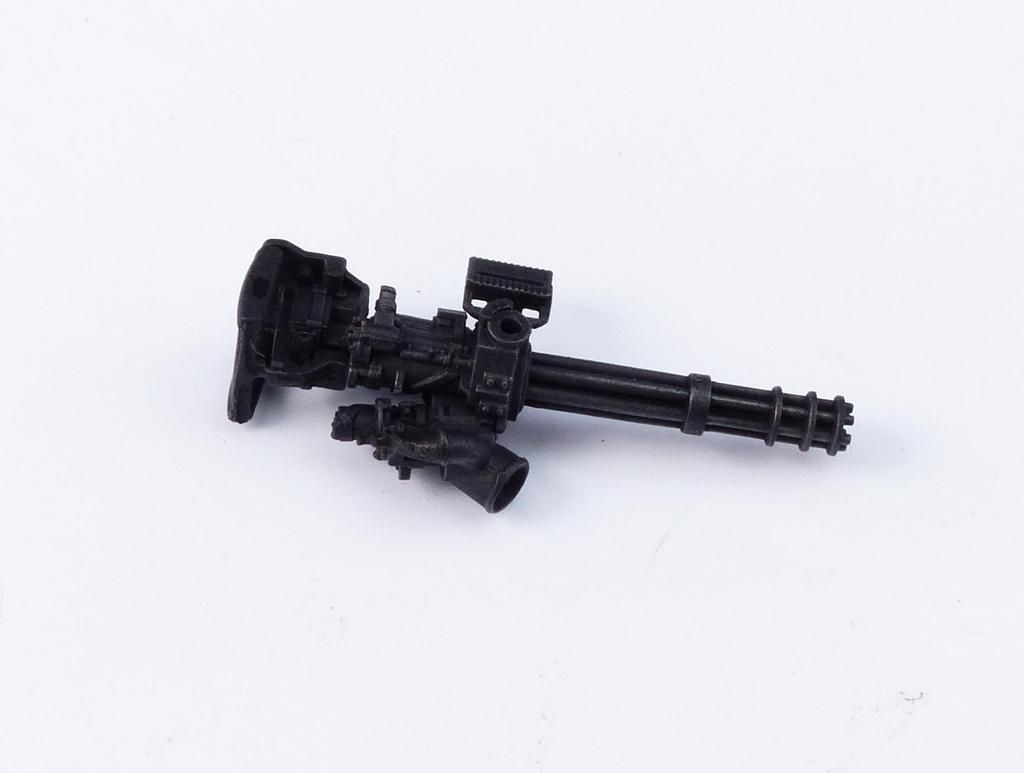 As well as a spare wheel (weathered similarly to the undercarriage but authentically for a spare) I made up one of the WMIK spare rims. 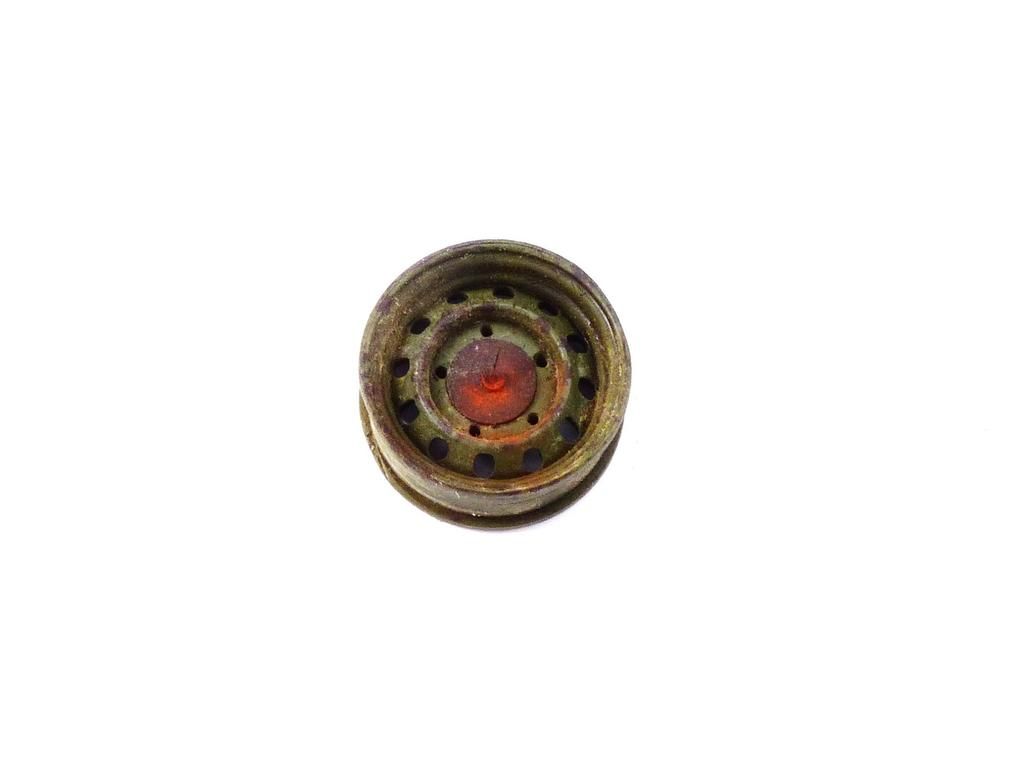 And here's the gun in it's mounting. In this photo you can see the jerry can set up, the shovel is further forward! The spare wheels are on the other side. 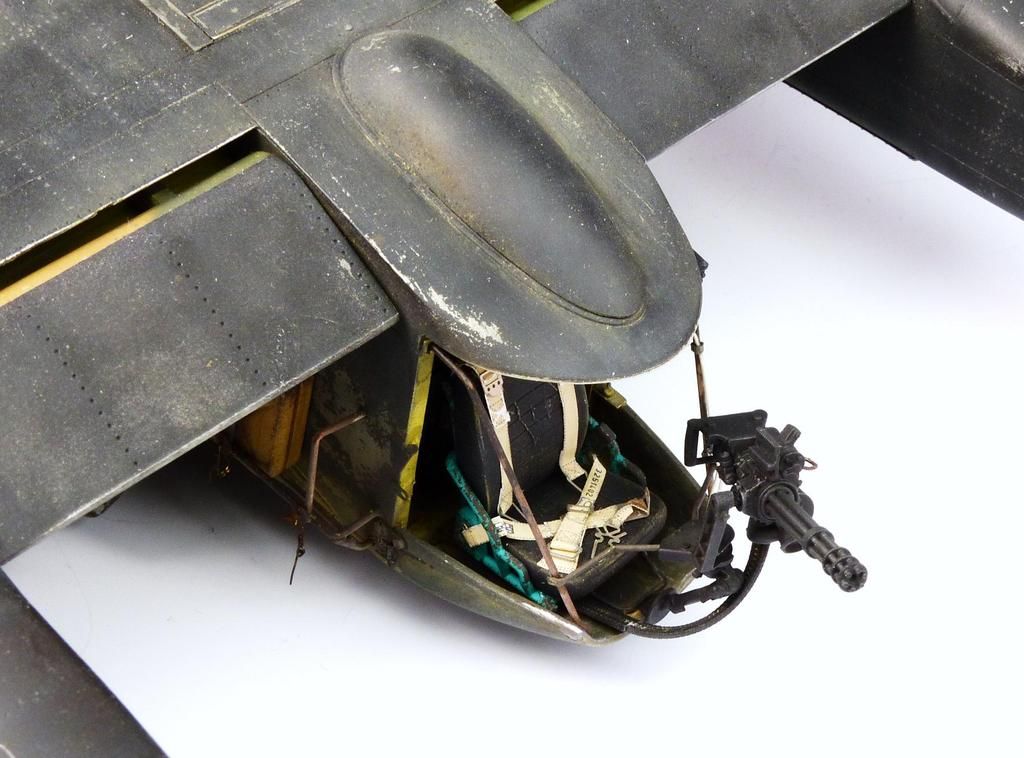 This little bloke was rather fun. It required a bit of clean up and I drilled out the eye sockets to make it look more realistic, It was primed in black then Mr Hobby Basic White misted on creating shadows. The horns ere painted with Vallejo and Ammo of Mig acrylics and it was finished off with a wash using the excellent new hogwash from Alclad. The finishing touch was the rivet and plate from plastic card and a bit of rust from the steel pin. 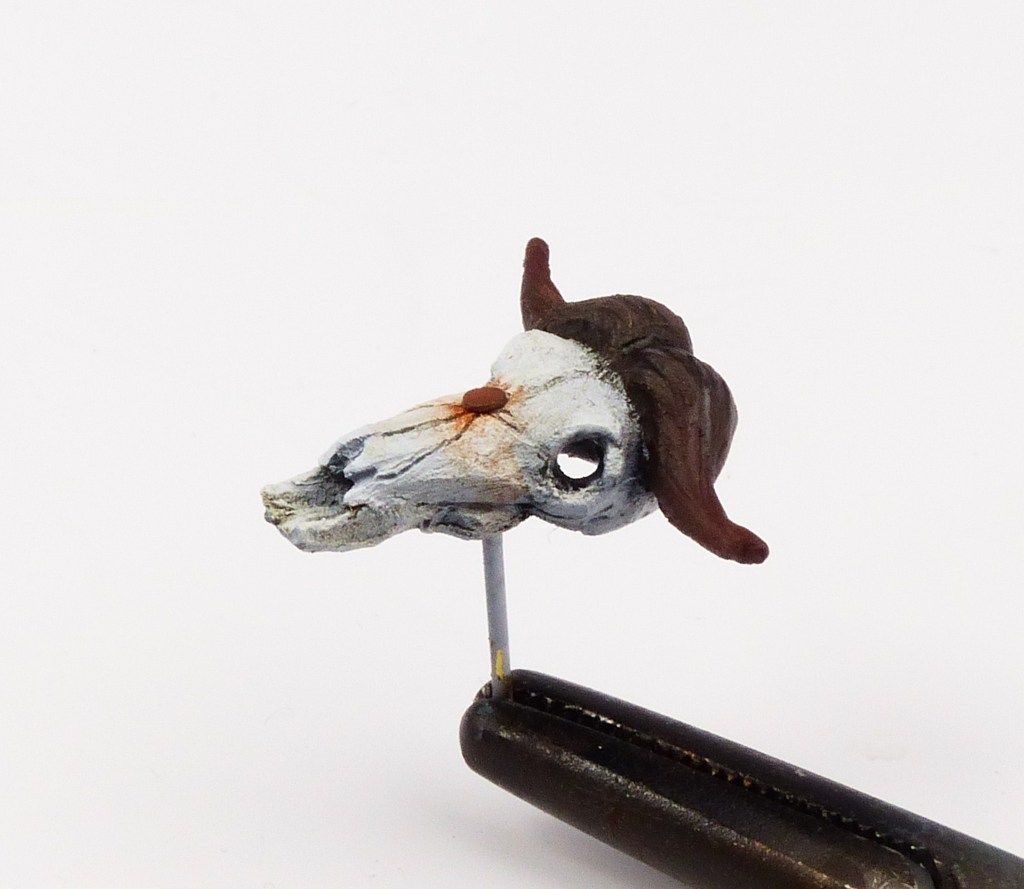 |
|
Haggis
Junior Member
  March 2016 MoM Winner
Member since: March 2012
Posts: 65
Mar 8, 2012 3:18:06 GMT -5
Mar 8, 2012 3:18:06 GMT -5
|
Post by Haggis on Mar 28, 2016 9:37:54 GMT -5
The oil drums were next up (Voyager resin jobs). Again I relied heavily on the Scratch Effects and Matt Varnish between each layer. Base coat was Alclad Steel (after a black primer coat). 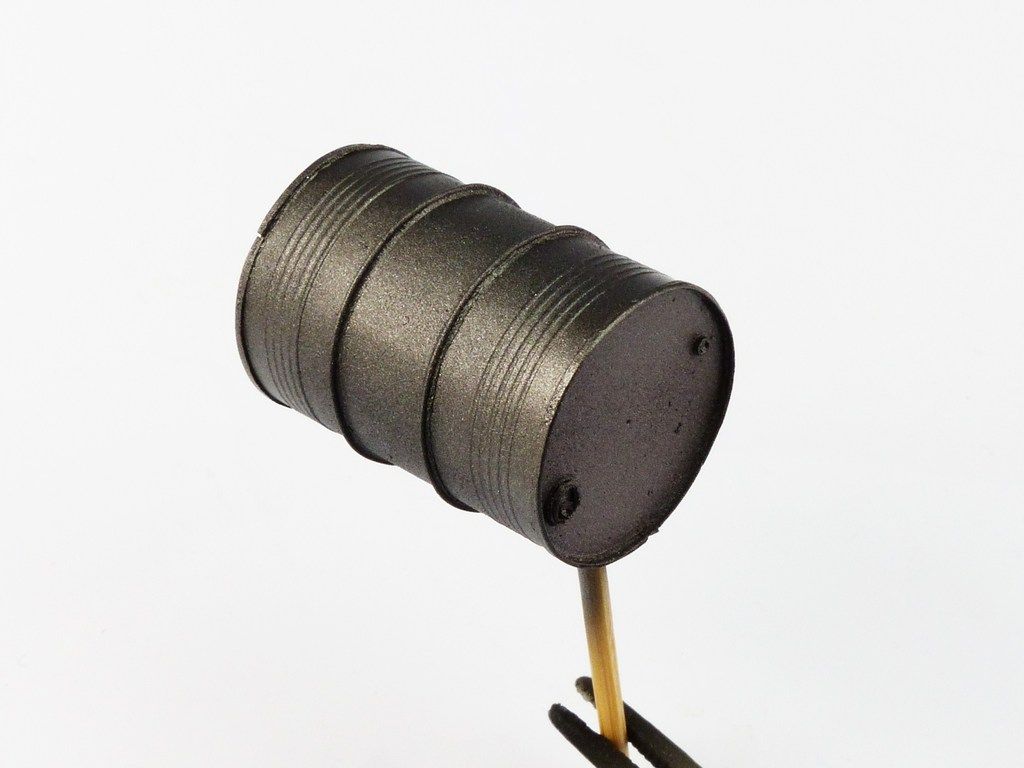 Next layer, Red Brown from Tamiya in an opaque coat. 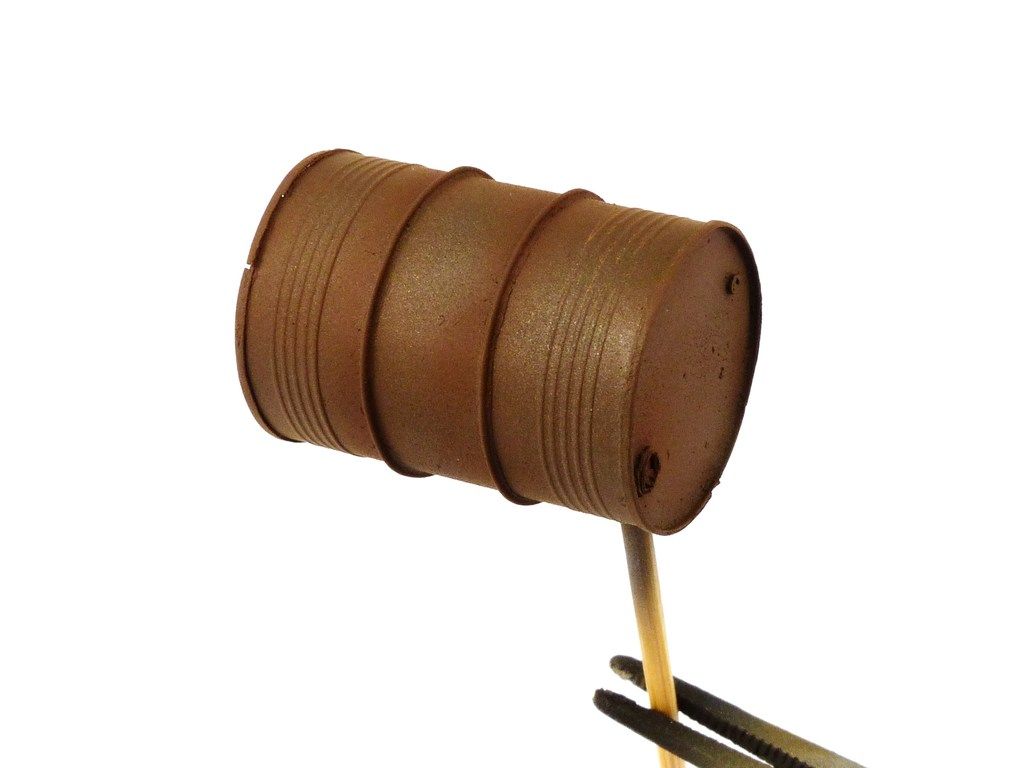 Chipping is very therapeutic... 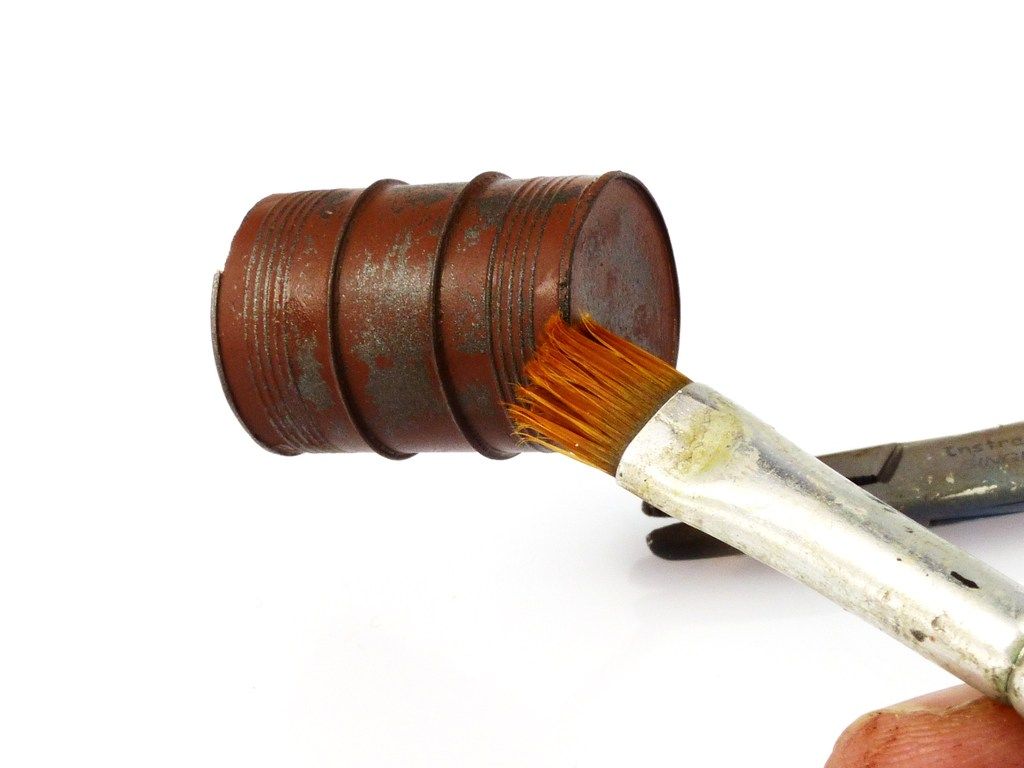 Next up a blue grey layer, this was chipped as well obviously. 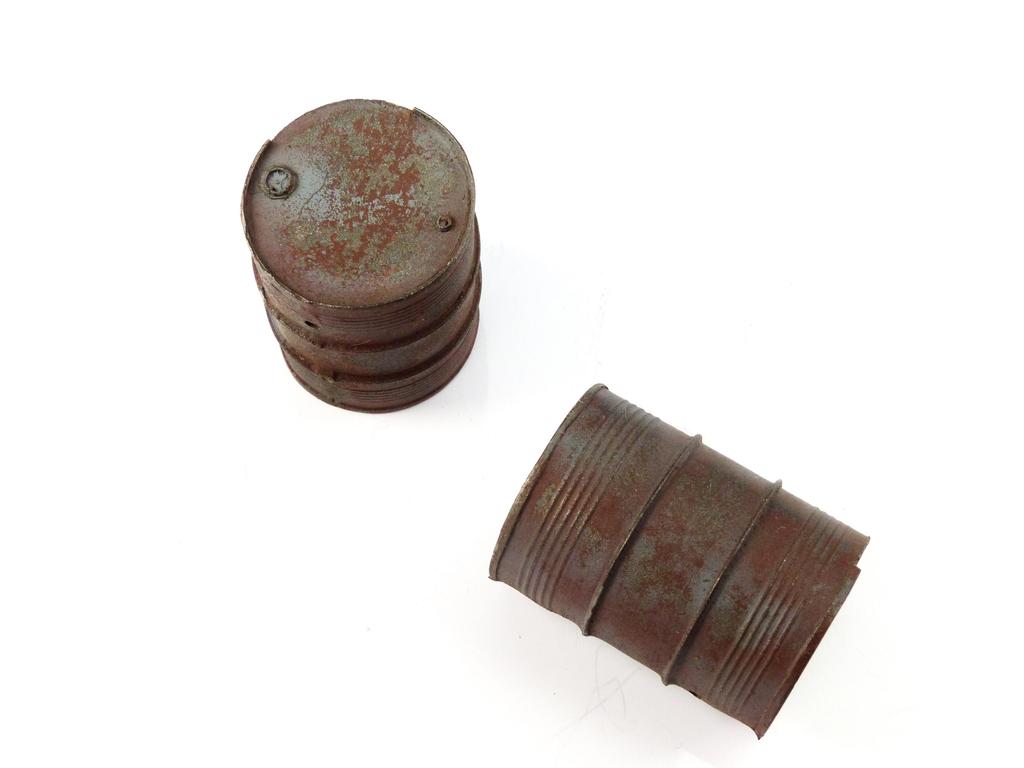 Now rust, Tamiya mixed to an orange tone was next. 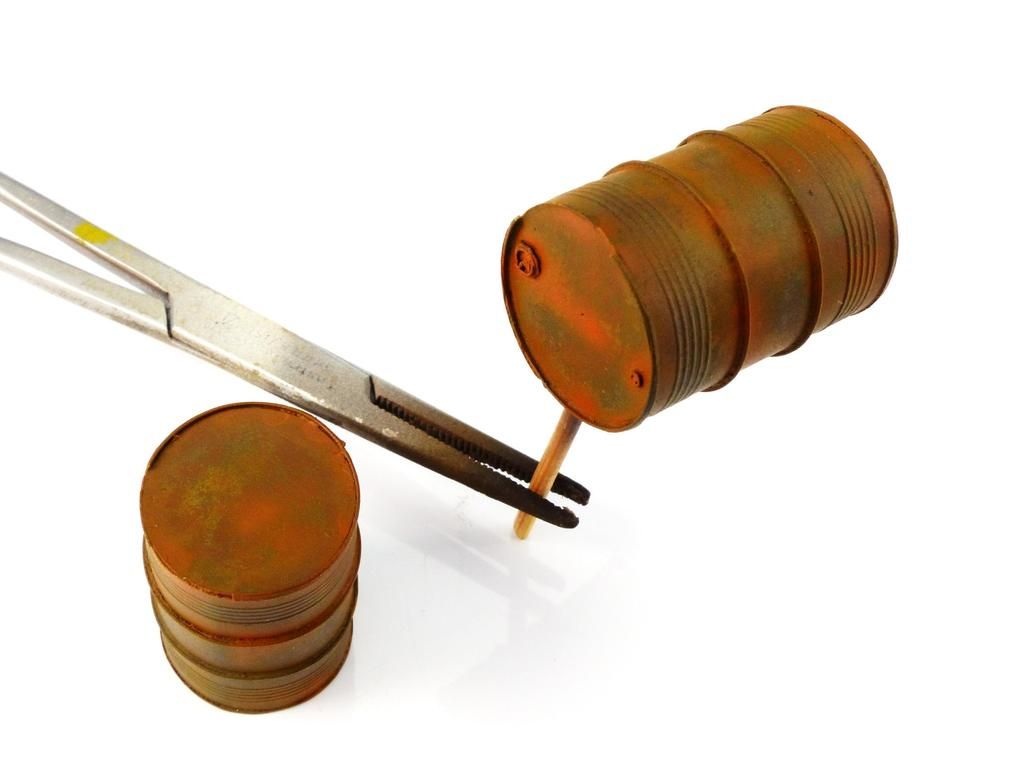 Then a wash using Ammo of Mig Track Wash helps lift the detail. 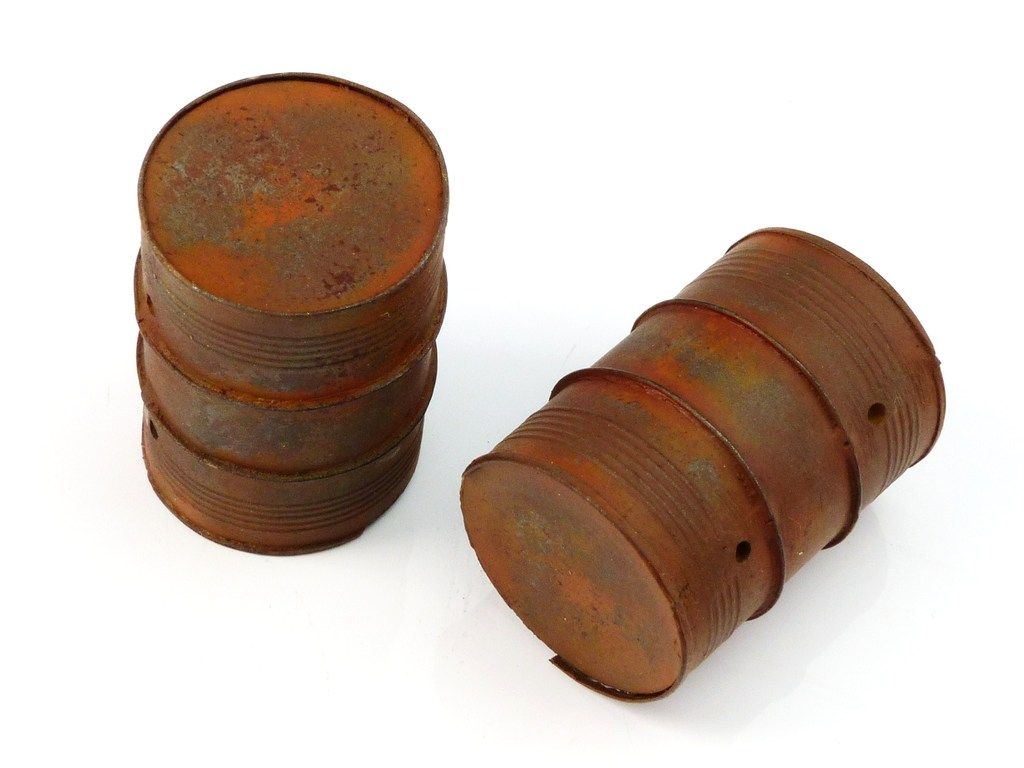 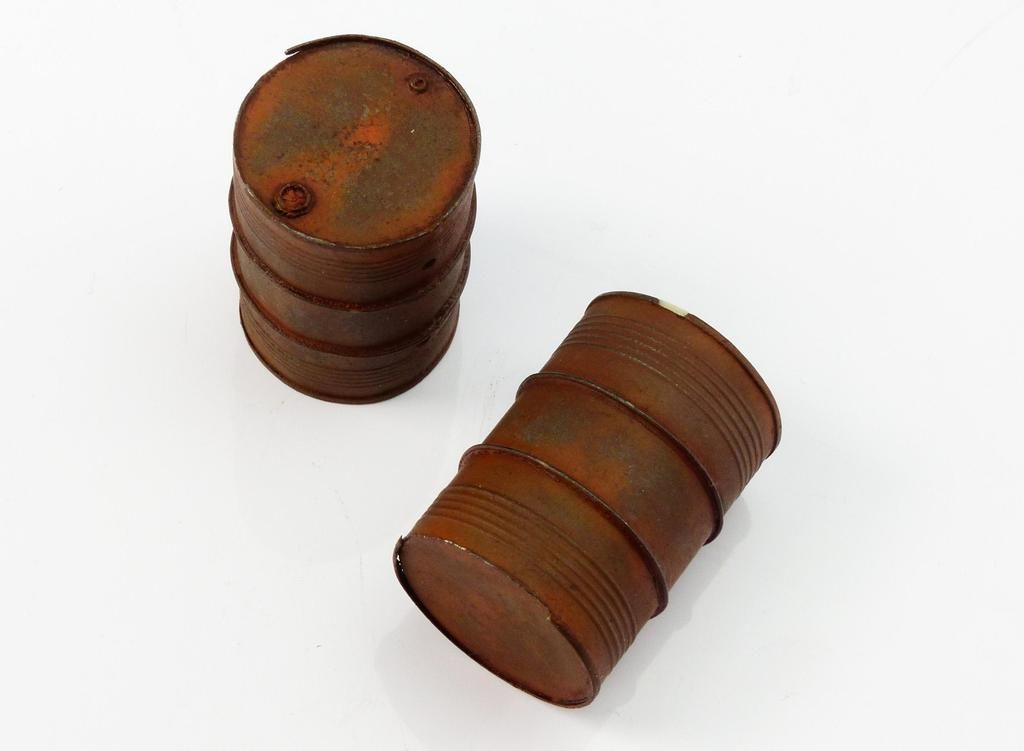 Last up small amounts of rust pigments were applied dry and worked into the surface. 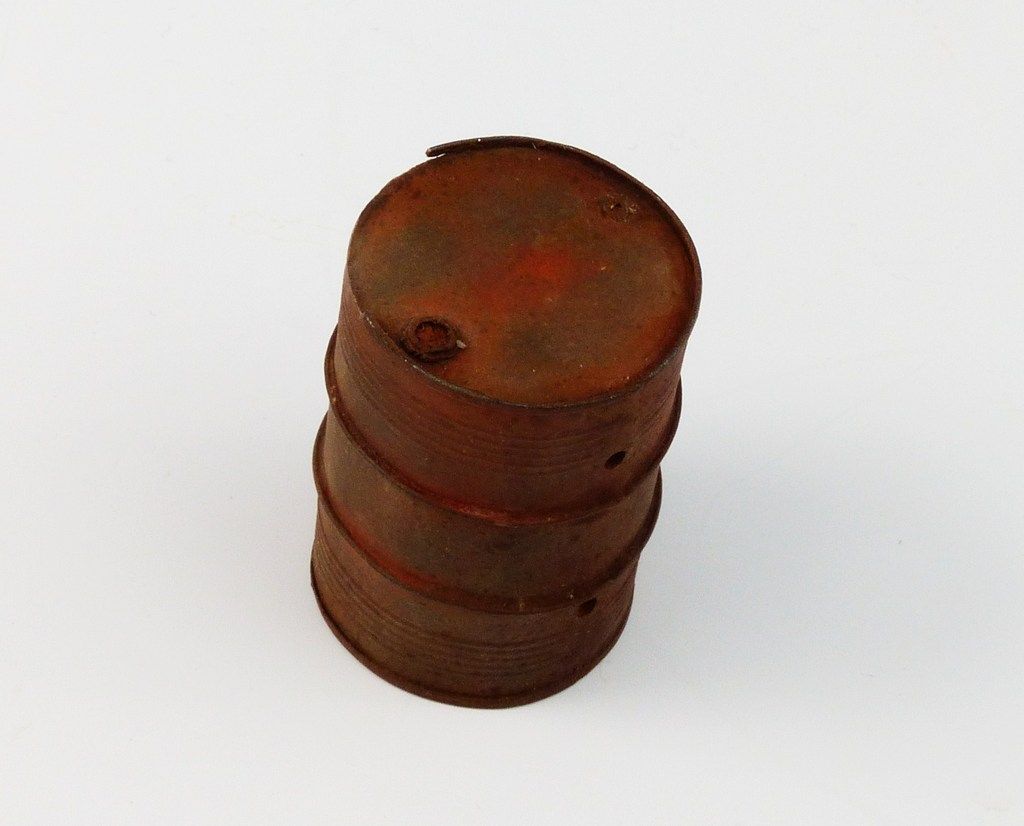 Now for the yellow one! Yep, you guessed it, matt varnish, Scratch Effects the Tamiya paint. 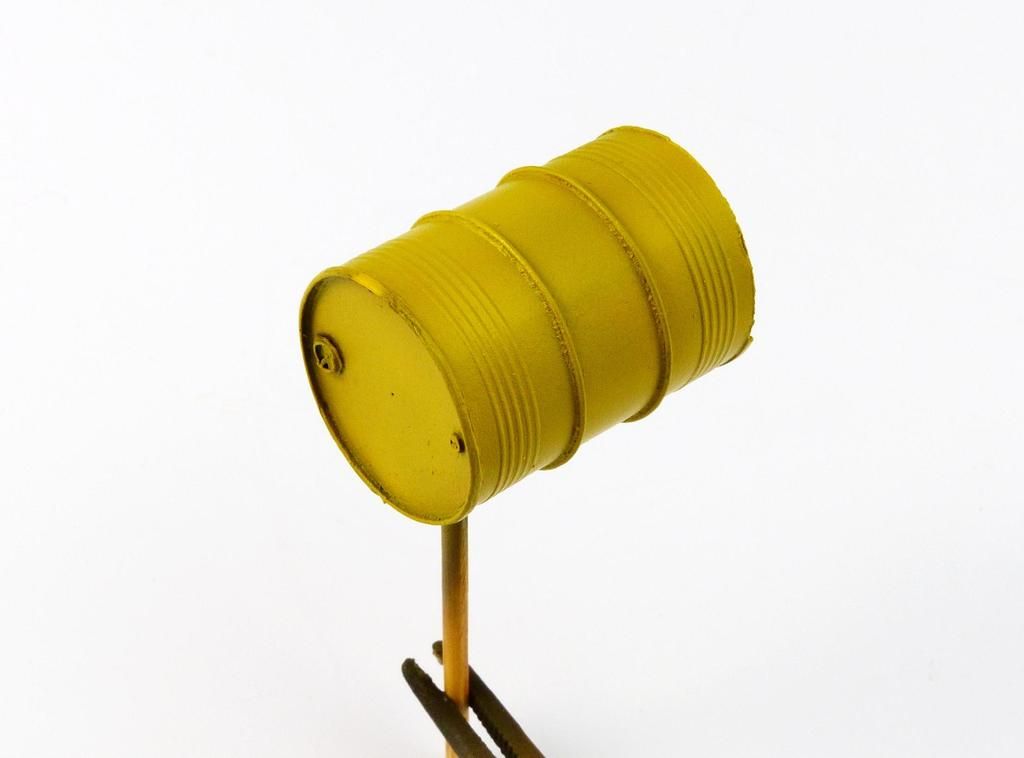 Followed by water and a brush, after 5 minutes you get this! 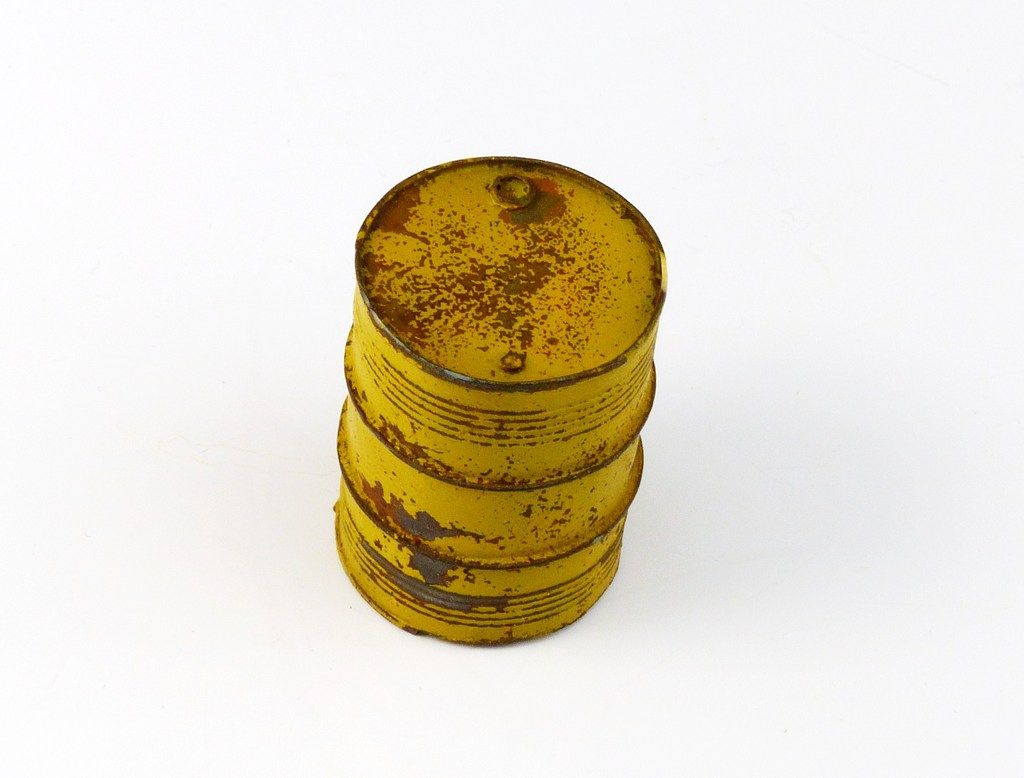 A wash with Ammo of Mig Streaking Grime came next. 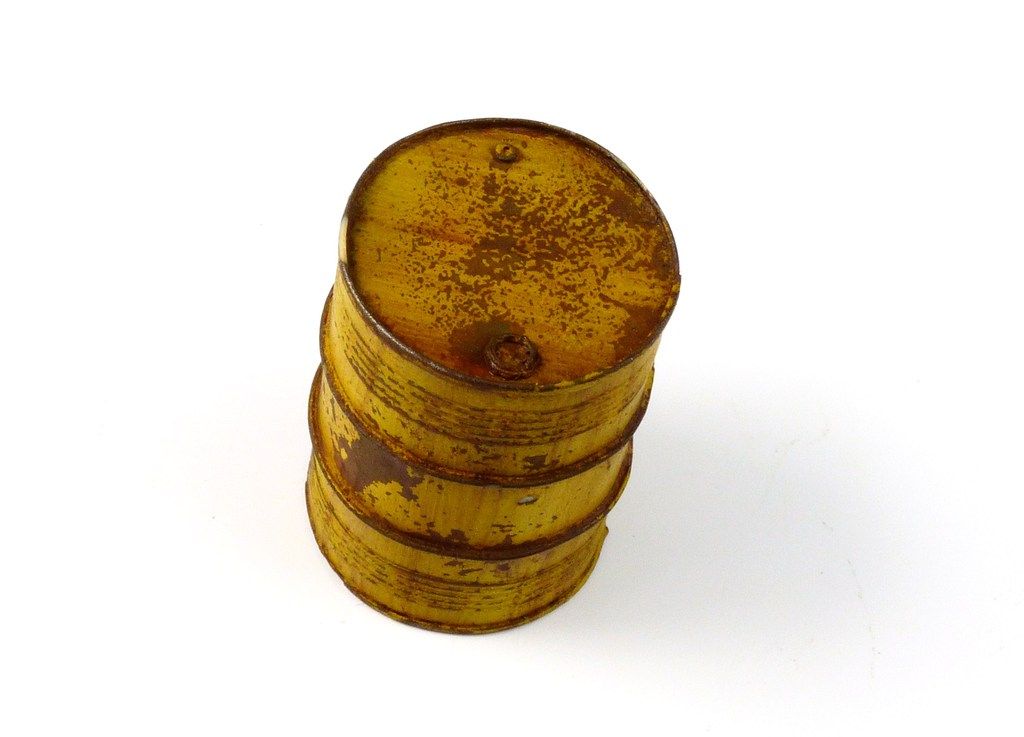 And then lastly to finish off, Ammo of Mig Fresh Oil and Fuel Effects was streaked on. 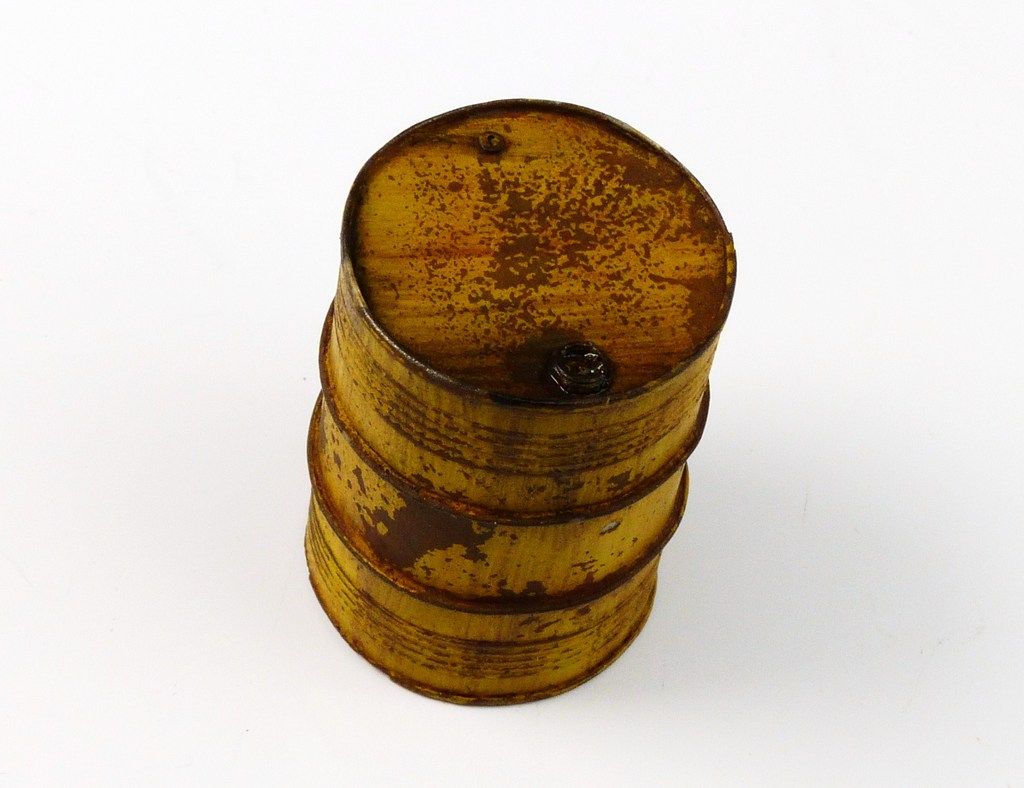 |
|
|
|
Post by dierk on Mar 28, 2016 9:56:25 GMT -5
I've probably said it before: stunning work Haggis! Very inspirational!
|
|
Rick
Full Member
  
Member since: March 2013
what to build, what to build . . . Ok THAT one!
Posts: 854 
|
Post by Rick on Mar 28, 2016 10:39:13 GMT -5
Looking forward to the book Jamie. In the mean time, this gets better and better!
Rick
|
|
Haggis
Junior Member
  March 2016 MoM Winner
Member since: March 2012
Posts: 65
Mar 8, 2012 3:18:06 GMT -5
Mar 8, 2012 3:18:06 GMT -5
|
Post by Haggis on Mar 29, 2016 7:48:15 GMT -5
Right, last bit was the base. It started with a cheap frame from Hobbycraft, some thin foam board and Celluclay. 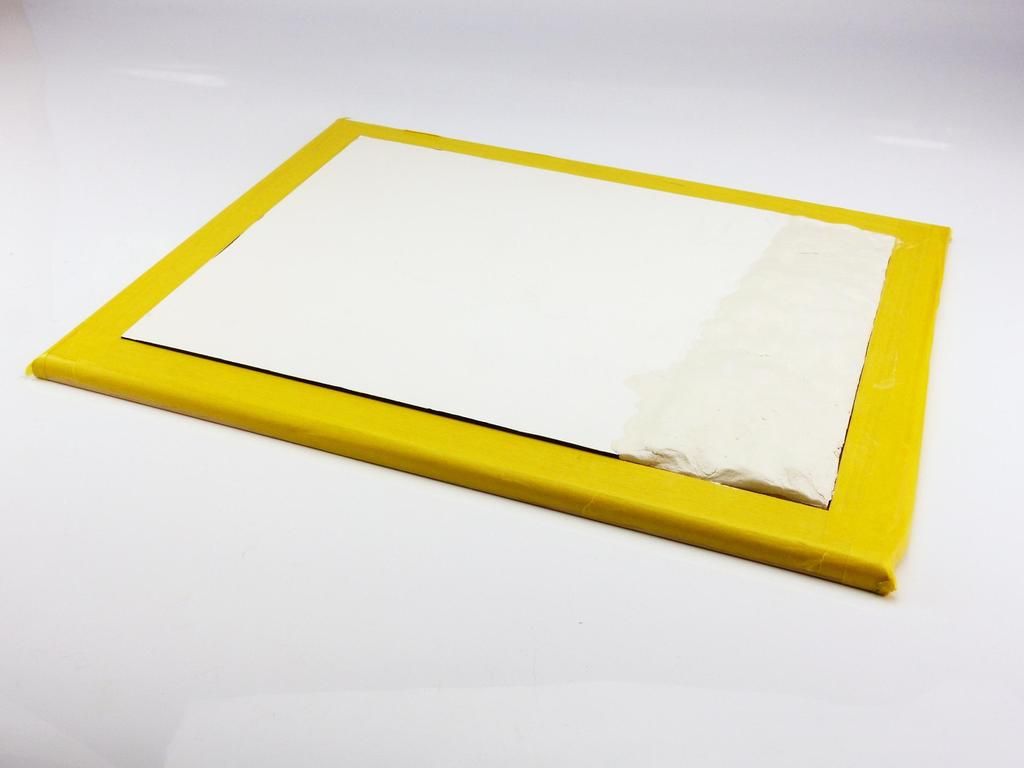 Some fine grit Wet and dry was glued in place and a thin coat of plaster was applied over the clay; then the whole lot given a coat of Stynylrez Black. 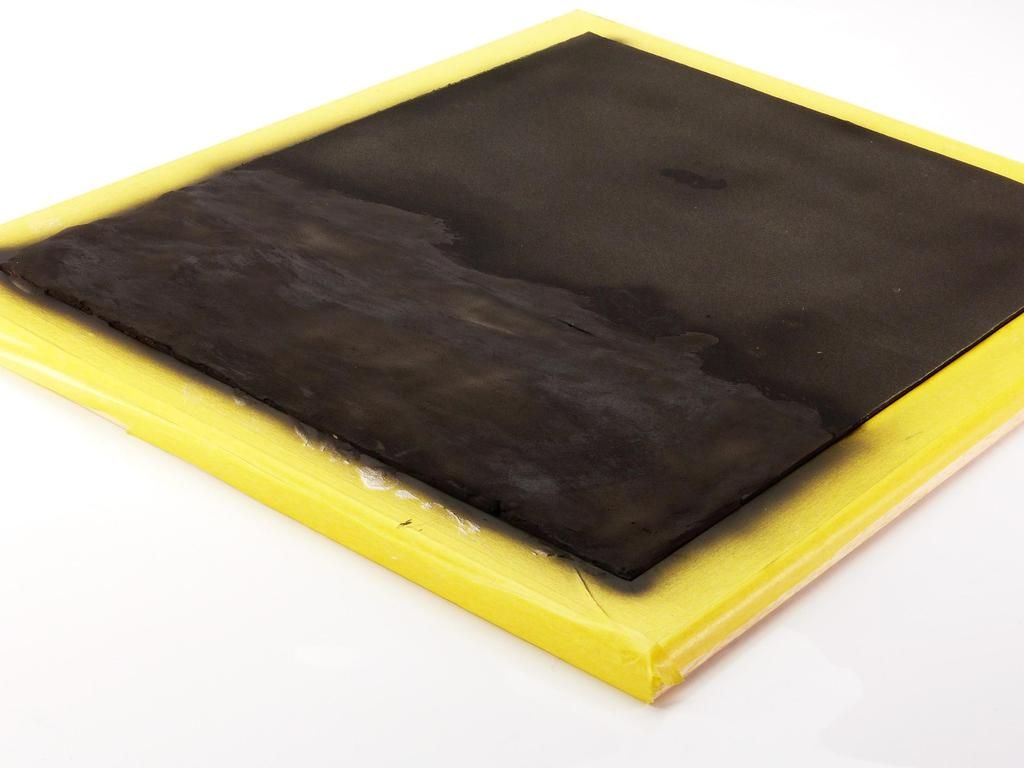 Thinned PVA was brushed on, this was the base for the dirt which was fine sand, grit and real dirt from the garden. 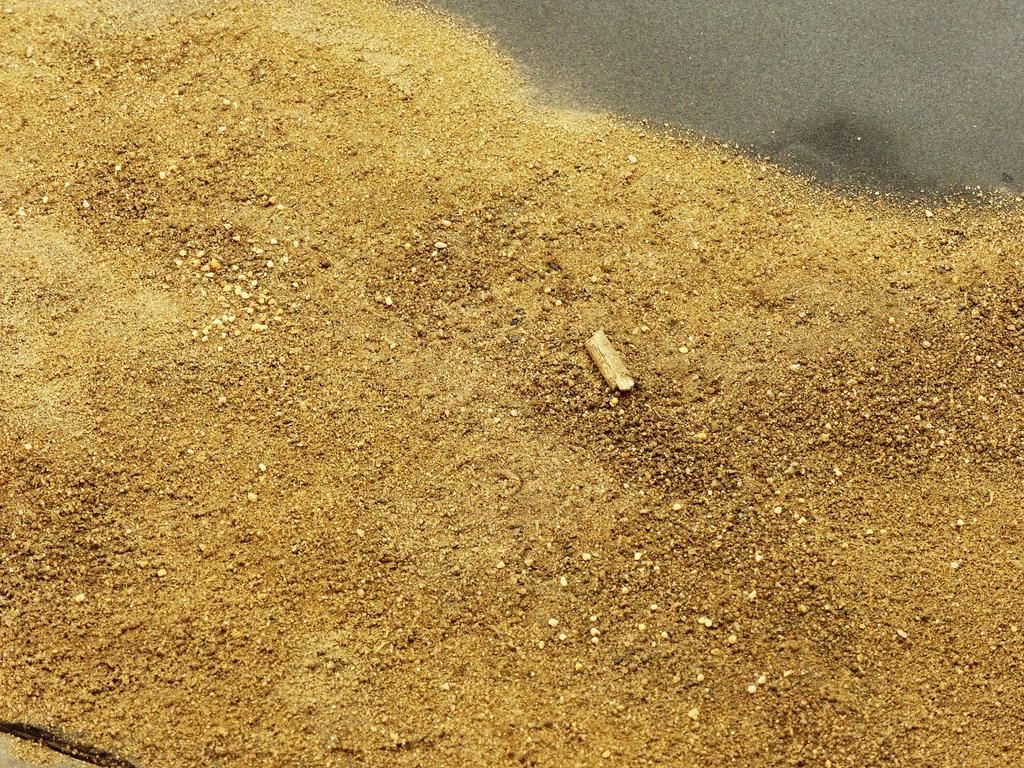 When dry the dirt was sprayed with various tones of buff and sand. I used multiple tones to break up the colour and create false shadows enhancing the depth. Note how it was sprayed over the edge of the tarmac, this will help to blend it all together. 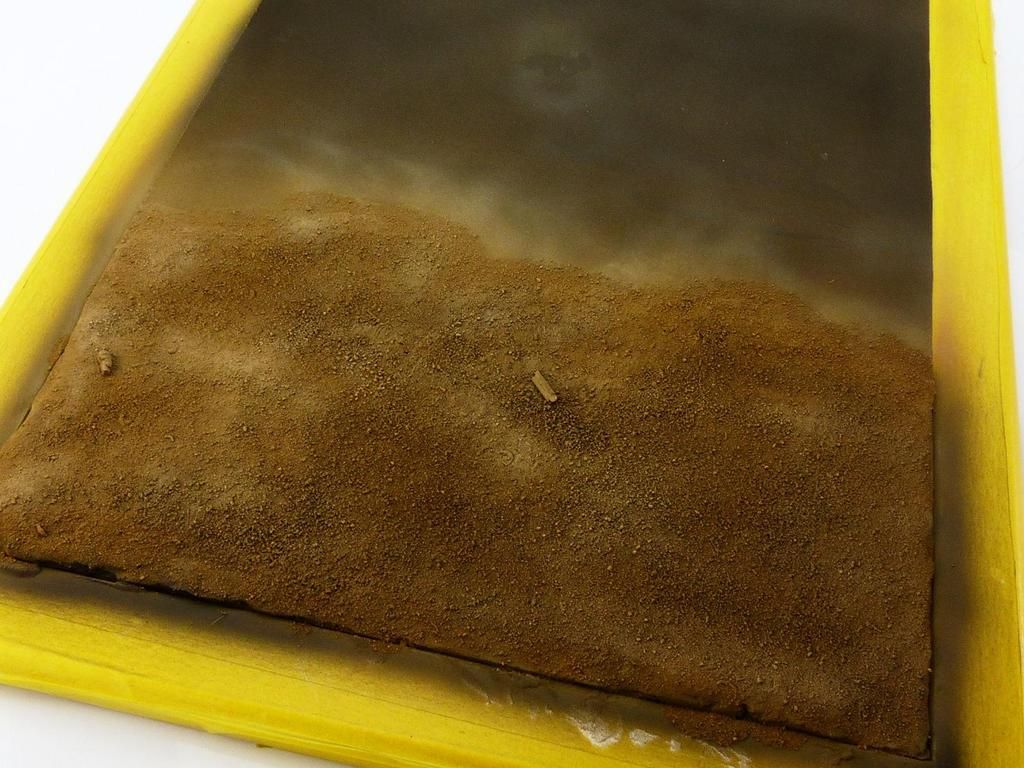 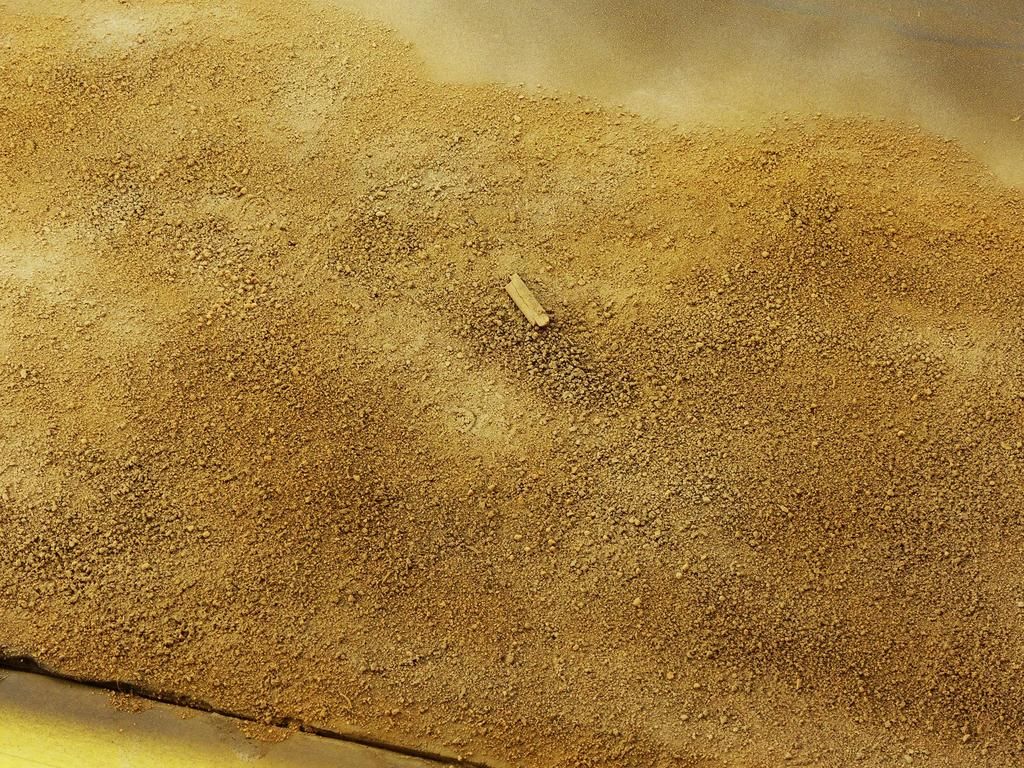 Now for a wash, Ammo of Mig Streaking Grime was thinned still further then allowed to soak into the ground work. It needed blending over the tarmac as otherwise tide marks would appear. 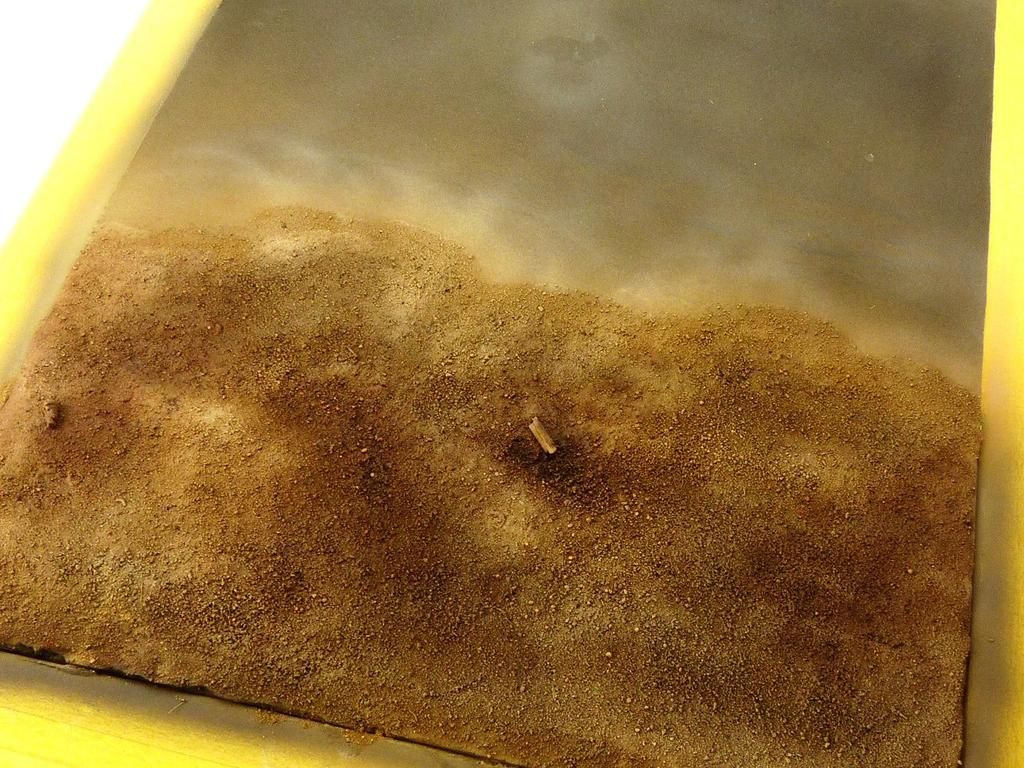 Darker brown tones were used in areas to give a more 3D and realistic effect. Dry brushing and pigments were also used after the wash was dry. 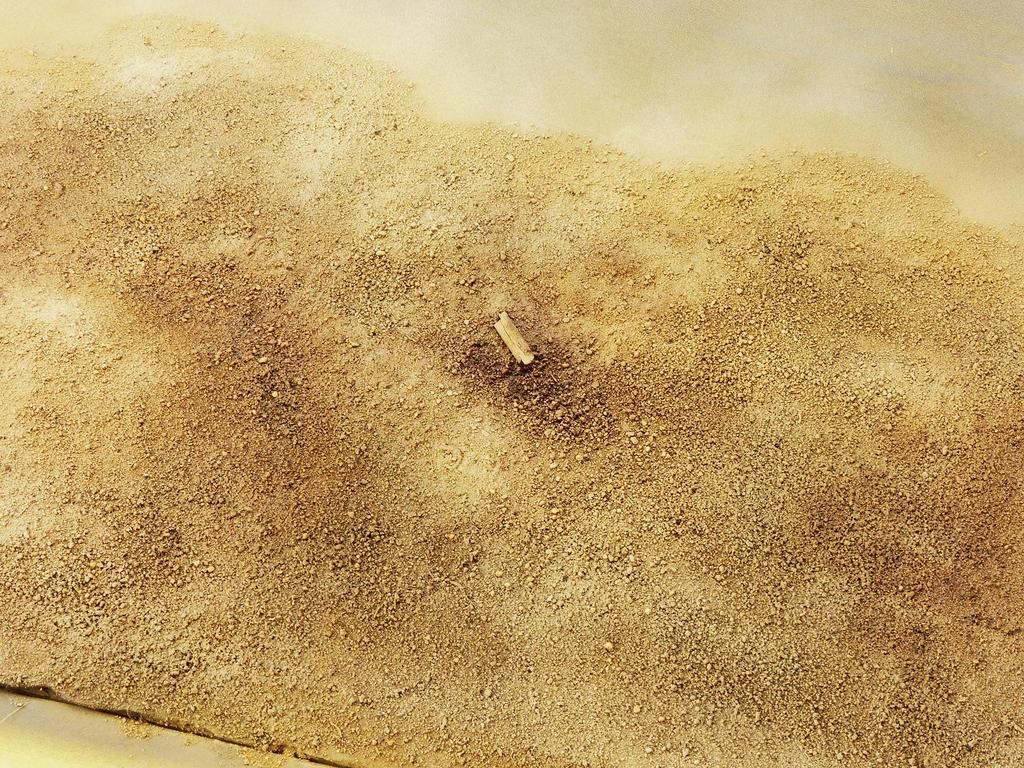 Various plants from Joefix were used too. 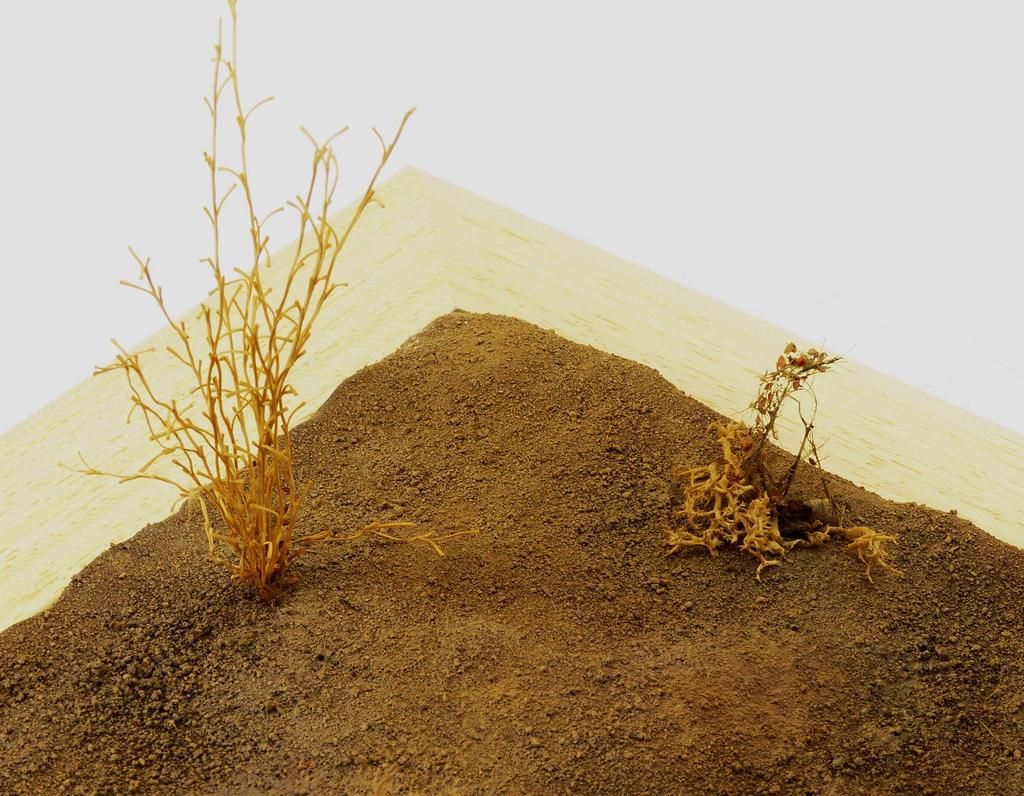 Here is the finished base. It's quite simple but I wanted the aeroplane to be the focus. 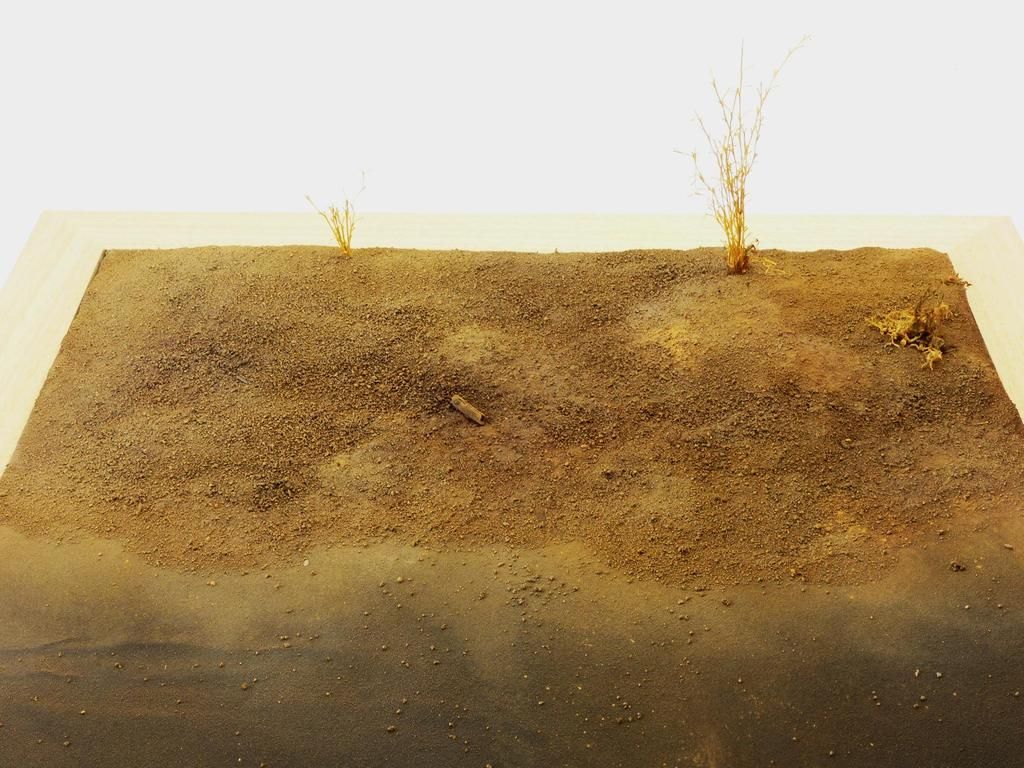 And that's it, project complete! I hope you've enjoyed the thread, I must say this is my favourite project I've done to date and is now my "the house is on fire and I've only got time to save one model" model! |
|