|
|
Post by dierk on Oct 4, 2016 3:50:00 GMT -5
Looking forward to it already!
|
|
|
|
Post by Leon on Oct 4, 2016 4:35:56 GMT -5
Waiting patiently to see you start this!
|
|
|
|
Post by Steve Zuleski on Oct 4, 2016 23:55:18 GMT -5
Wow AG, great subject matter for this finale, Bravo! There's tons of detail to be had in there, should be a doozy by all standards, Ruck On!
Cheers, Ski.
|
|
|
|
Post by armorguy on Oct 5, 2016 3:34:34 GMT -5
Thank you for your kind reactions my friends, it's very motivating ! Yesterday however I had two temporary setbacks. I dryfitted the Platformwagen and put the WR360 next to it...believe it or not, the buffers didn't line up. You can imagine I had kind of a psychic meltdown BUT then I checked things on the internet and it seems normal, check out this photo : ONLY FOR REFERENCE PURPOSES ! 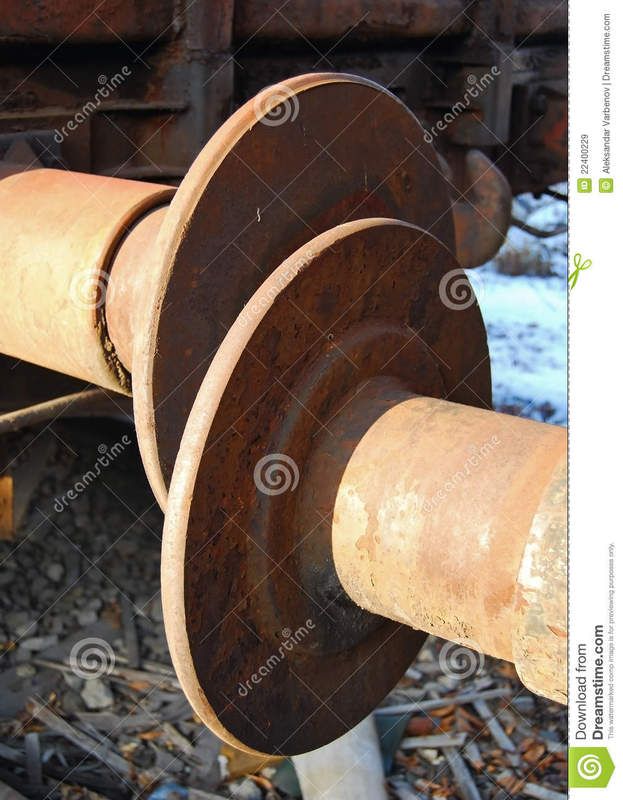 I will do some more research on this matter but I'm optimistic. The second setback was an e-mail of a good friend of mine who's specialized in railway modeling hobby. I sent him some photos of my locomotive and dryfitted railcar and he spotted a flaw. The buffers were glued on in a wrong way. Probably you already know that railcars have a flat ond a rounded buffer surface on each side ? When you turn your back to them, the round one is at the right side, the flat one should be at the left side. Trumpeter and Sabre instruction manuals kept this matter vague. Meanwhile I've made the correction without damaging parts but I really hate to do these things. Update, we have paint ! Gloss black, Tamiya. 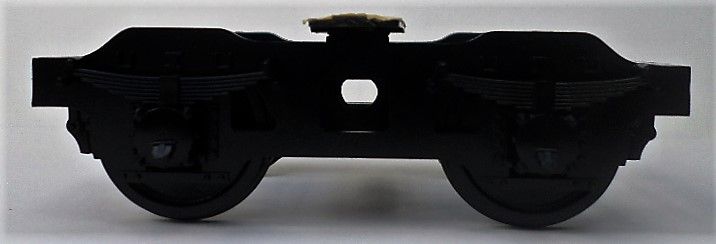 Mixture of Tamiya Flat Red Brown + Gloss Black for a basic dirty look. 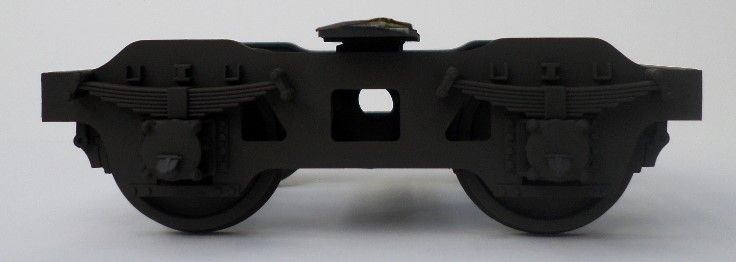 The woodbed basic fiddling. 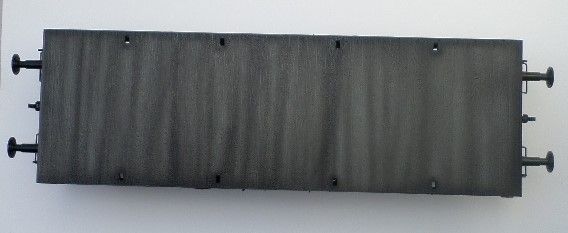 The chassis treated the same way. 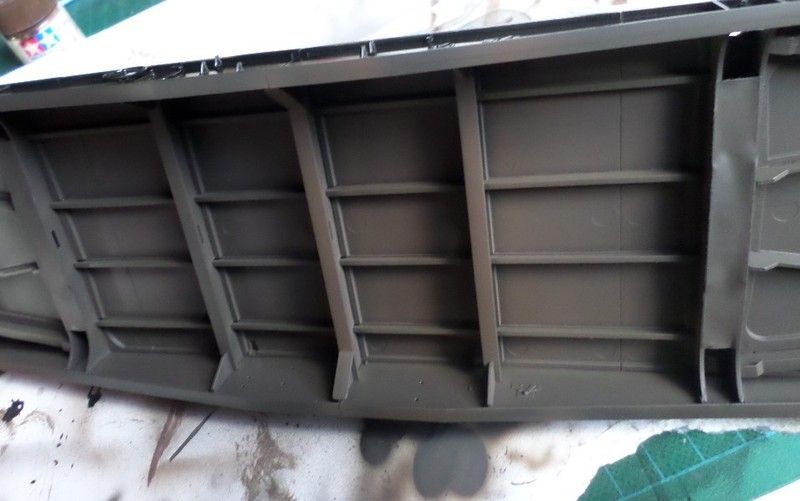 A mist of lighter shade of brown sprayed on from above. 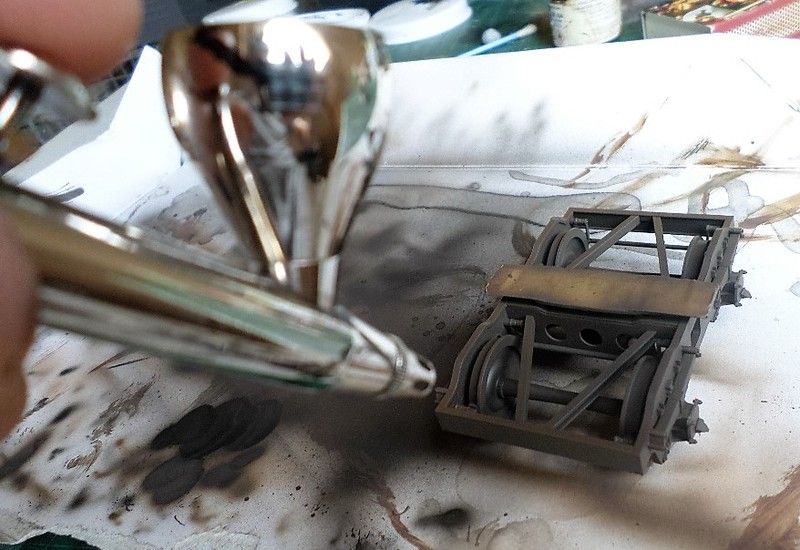 I sprayed on thin paint for a subtle effect. 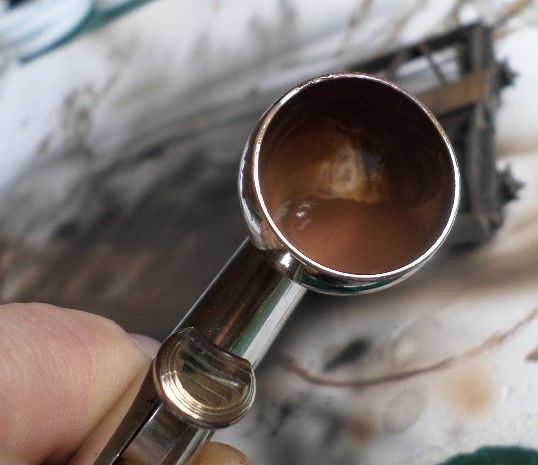 Before and after adding the lighter shade. 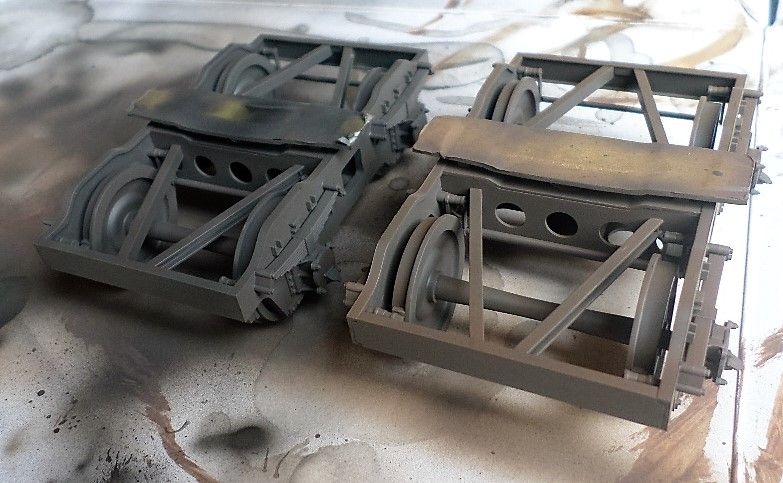 After masking I sprayed on two layers of grey, the first dark, the second lighter and sprayed on from above.  I then airbrushed on another mist of thin paint, I added more white. 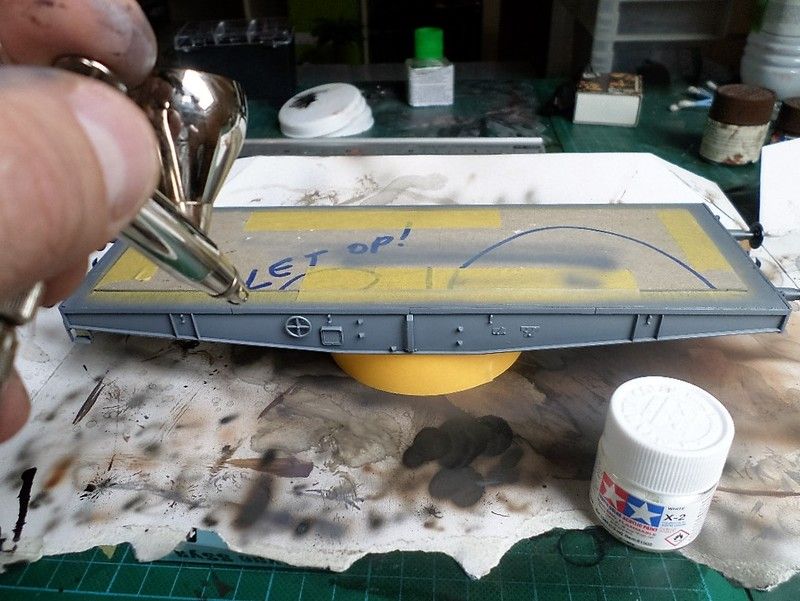 The sides were finally done with the dirt/dust mixture to match with the bogies. 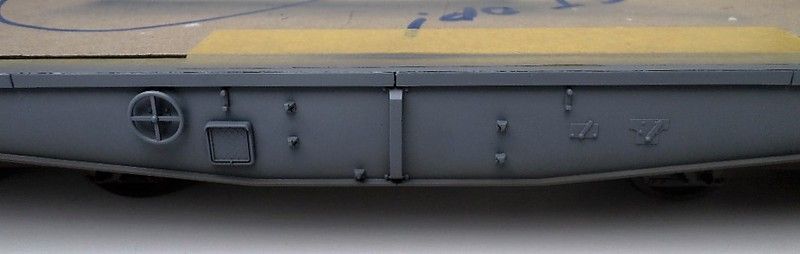 This is the result so far. 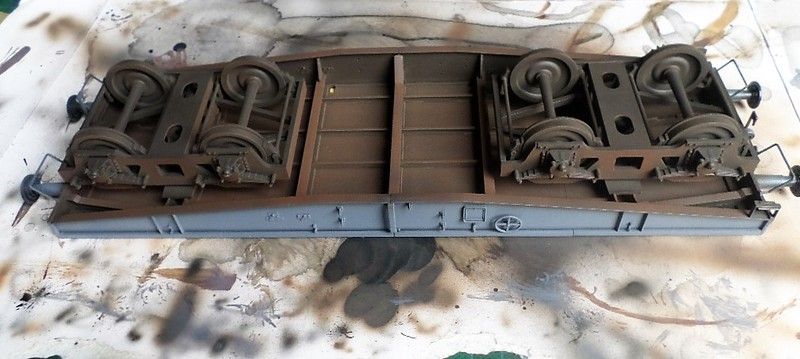 Big update, sorry folks ! |
|
|
|
Post by dierk on Oct 5, 2016 4:20:51 GMT -5
Looks great Guy! So what do you have to 'let op' (watch out) about?  Glad to hear you got the buffers sorted! |
|
|
|
Post by armorguy on Oct 5, 2016 4:36:32 GMT -5
Looks great Guy! So what do you have to 'let op' (watch out) about? Glad to hear you got the buffers sorted! Hi Dierk, thanks fella ! I put small parts on that piece of cardboard and to remind myself they were there I wrote this...I know I'm getting old !  I will build another Platformwagen and that one will be lowered as it will carry the Panther tank, it will be connected to the locomotive so the buffers will nicely line up. The Platformwagen I've build will carry lighter stuff zo it makes sense it's slightly higher on its 'feet'. It's all a matter of thinking and thinking again...  |
|
|
|
Post by Leon on Oct 5, 2016 4:39:39 GMT -5
Great results on the railcar Guy!  |
|
|
|
Post by armorguy on Oct 6, 2016 6:15:31 GMT -5
Thank you Leon ! Today I've done the next step with a couple of washes (a thin and a semi thin one) and pigments. 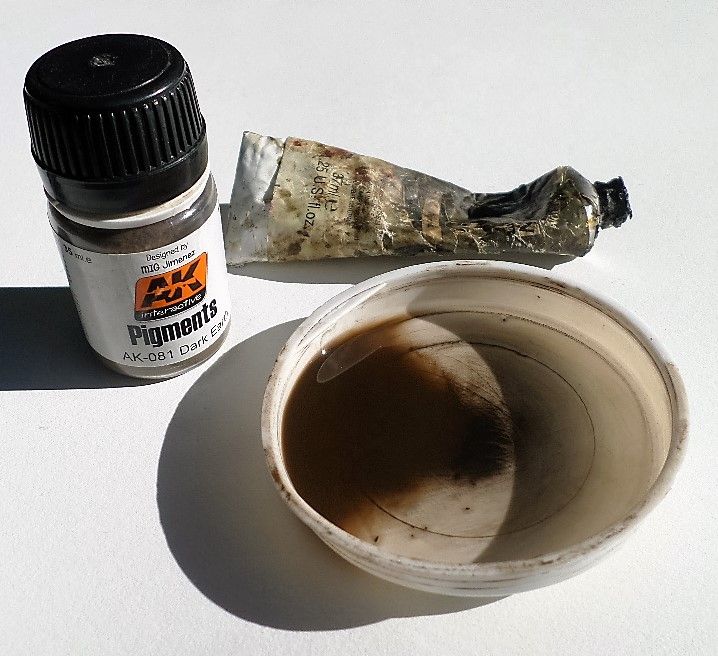 The bogies were first airbrushed with a thin wash (Raw umber oil paint + white spirit 5/95). Next I brushed pigments AK Dark Earth onto them, I removed the exess. I then airbrushed on the same wash but I added a bit more Raw Umber. 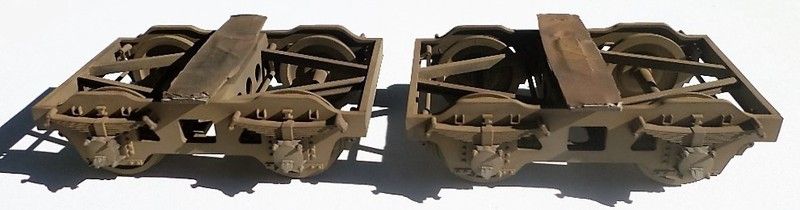 Stay tuned for more. |
|
adt70hk
Forum Moderator 
Member since: November 2015
Currently attempting to build something decent!!! ;)
Posts: 2,496 
MSC Staff
|
Post by adt70hk on Oct 7, 2016 7:39:27 GMT -5
Guy
Yet again more stunning work!! An don't feel so hard about the buffers - I had no idea that there was a difference!!
I'm loving the idea of doing a 1/35 version of that signal box, it should look stunning!
Keep it up!
Andrew
|
|
|
|
Post by armorguy on Oct 7, 2016 13:46:11 GMT -5
Thank you Andrew, meanwhile I've added some rust effects with pigments. Tomorrow I'll see if I can spice things up a bit more. 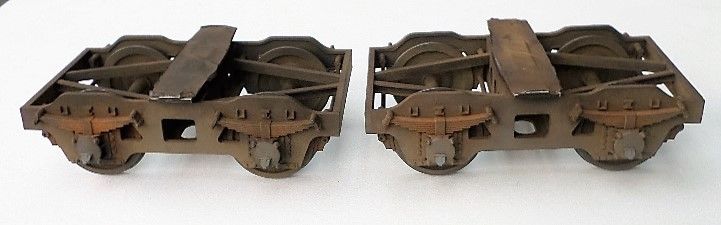 Best regards ! |
|
|
|
Post by Leon on Oct 7, 2016 15:47:35 GMT -5
Just keeps getting better and better Guy! Really has that worn look.  |
|
|
|
Post by armorguy on Oct 8, 2016 7:56:52 GMT -5
Thanks Leon, I added more rust pigments, grease... 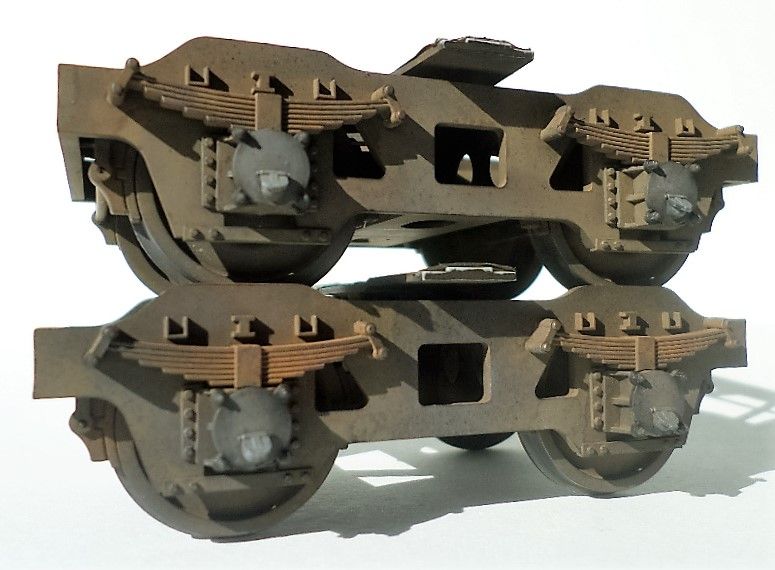 I think it's time to move on with the flatbed for now. Best regards ! AG. |
|
|
|
Post by armorguy on Oct 9, 2016 5:00:05 GMT -5
This one will be next on the menu : 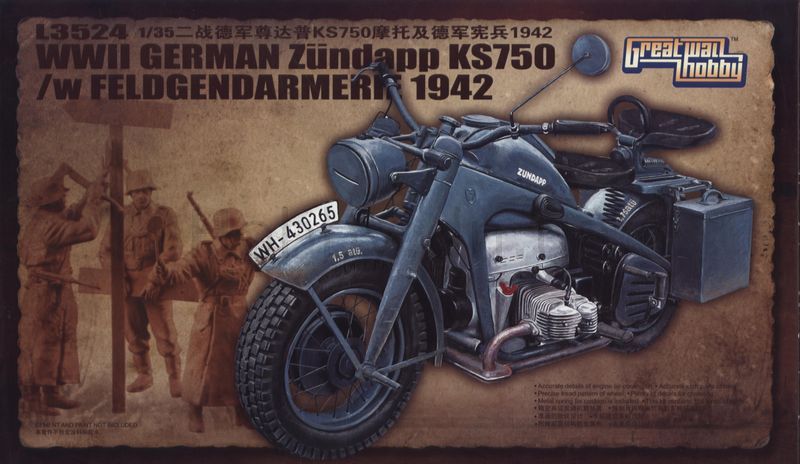 Best regards ! AG. |
|
|
|
Post by dierk on Oct 9, 2016 5:27:43 GMT -5
Great work Guy! Love the KS-750! I wonder if GWH got the engine right? It's not actually a true flat twin, but a very shallow angle V-twin (not many people know that  ) |
|
|
|
Post by armorguy on Oct 9, 2016 7:20:33 GMT -5
Great work Guy! Love the KS-750! I wonder if GWH got the engine right? It's not actually a true flat twin, but a very shallow angle V-twin (not many people know that ) Let's keep it that way then Dierk ! |
|
|
|
Post by Leon on Oct 9, 2016 7:36:23 GMT -5
Looks like your going to have a great smorgasbord there Guy! |
|
|
|
Post by armorguy on Oct 10, 2016 11:47:18 GMT -5
The base of the flatbed was weathered with washes and pigments, tomorrow I think I can finish this part so the bogies will be attached. 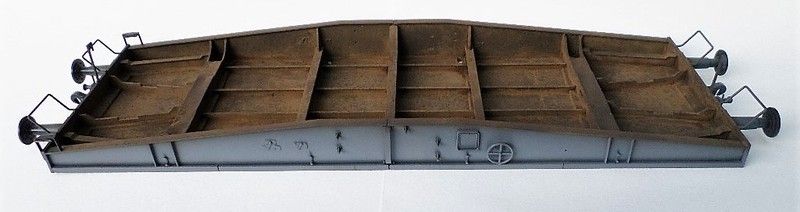 Best regards ! AG. |
|
|
|
Post by Leon on Oct 10, 2016 15:54:47 GMT -5
Chassis looks great Guy! Could pass for the real thing. |
|
adt70hk
Forum Moderator
Member since: November 2015
Currently attempting to build something decent!!! ;)
Posts: 2,496
MSC Staff
|
Post by adt70hk on Oct 11, 2016 7:29:50 GMT -5
Stunning!! Simply stunning!
Any news on the your amphibian warrior??
|
|
|
|
Post by armorguy on Oct 11, 2016 10:53:08 GMT -5
Stunning!! Simply stunning! Any news on the your amphibian warrior?? Thanks bud ! The Warrior Toad is in the shelf queen department but he won't be forgotten and will be finished 100% guarantee ! The bogies were attached to the basic structure after I gave it a last treatment with AK Shafts and Bearings, this is a superb product imho.  The sides were given a very light shade of grey to make details pop some more, Clear (Tamiya) was used and the railcar is ready for decals. Tomorrow however I'll make a start with the woodbed. AG. |
|
|
|
Post by armorguy on Oct 12, 2016 12:51:18 GMT -5
Paints used : 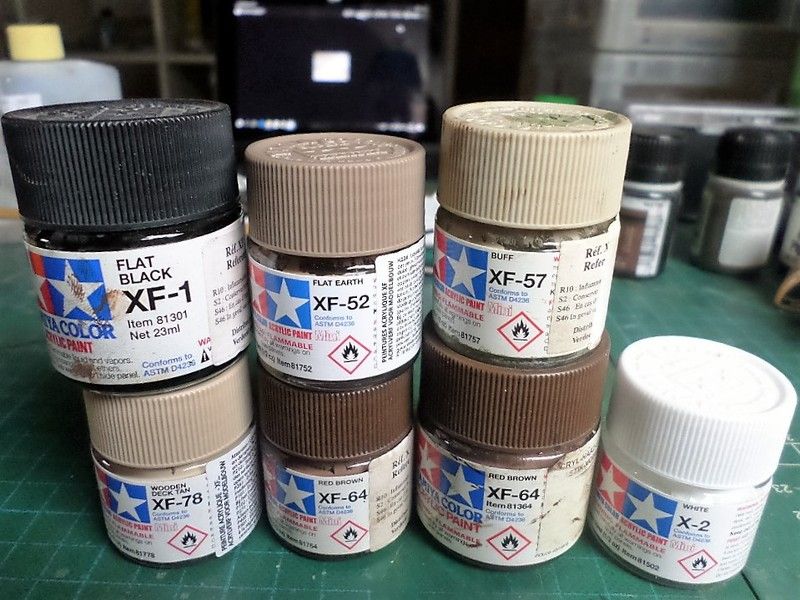 Each plank masked and colored. 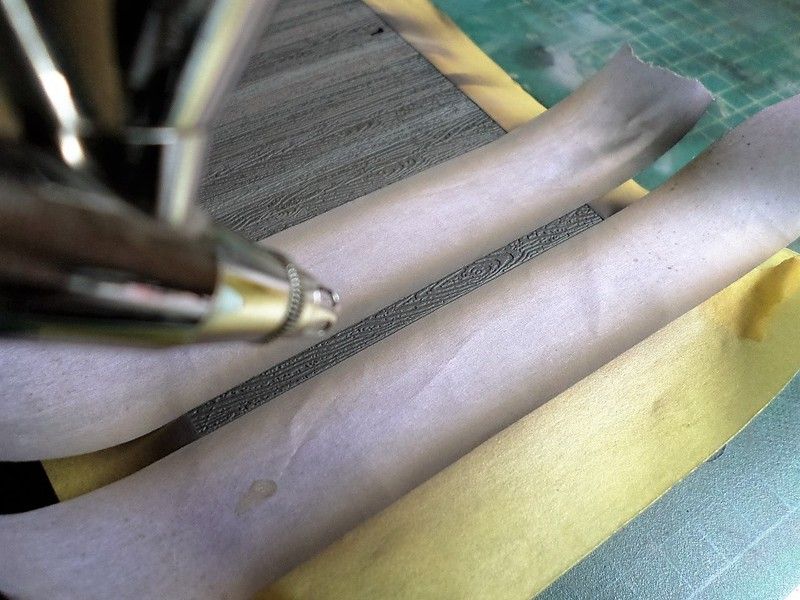 Done coloring.  Clear. 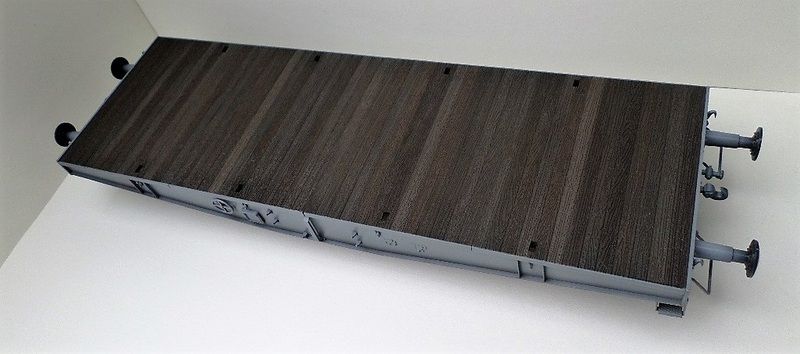 Ready for oils. 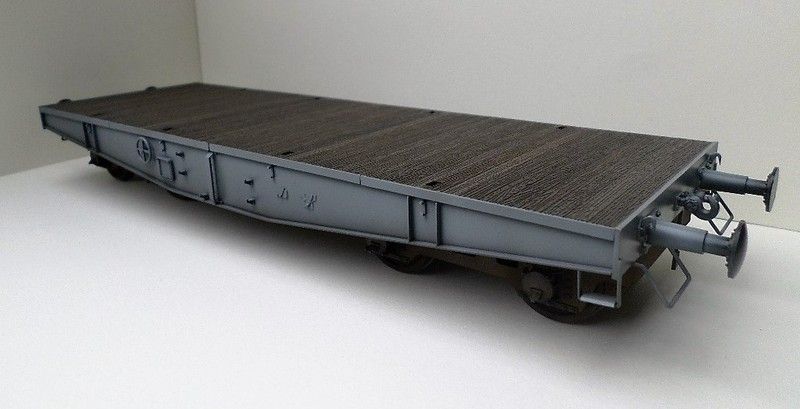 Best regards ! AG. |
|
|
|
Post by Leon on Oct 12, 2016 15:13:53 GMT -5
Planks look good guy! |
|
|
|
Post by dierk on Oct 13, 2016 5:38:31 GMT -5
Looking great Guy!
|
|
|
|
Post by armorguy on Oct 13, 2016 11:58:31 GMT -5
It's decal time guys, they were added with Microscale Set&Sol, it took me three hours for only one side, they sit very well and they're good quality, thin and strong. 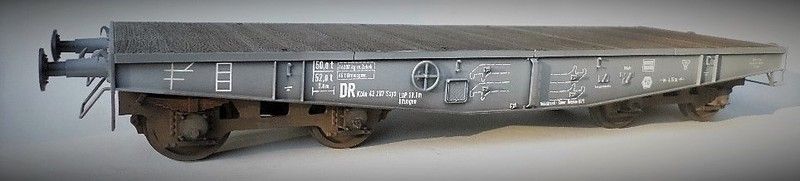 The corner decals will be sprayed on, that's less complicated. |
|
|
|
Post by dierk on Oct 13, 2016 12:54:00 GMT -5
You spend three hours doing decals, and all we get is just one - cropped - picture? Whereas I posted three pics of the Opel after all your nagging and you can't even be ar$ed to leave a comment! I think I'll have to re-write my x-mas card list...  |
|
|
|
Post by armorguy on Oct 13, 2016 13:09:51 GMT -5
You spend three hours doing decals, and all we get is just one - cropped - picture? Whereas I posted three pics of the Opel after all your nagging and you can't even be ar$ed to leave a comment! I think I'll have to re-write my x-mas card list... LMAO ! IT's too big Dierk, it's almost 30 cm long from buffer to buffer, I just have to crop the photos ! |
|
|
|
Post by Leon on Oct 13, 2016 14:36:55 GMT -5
Cropped or not Guy! I really like what i'm seeing. |
|
|
|
Post by dierk on Oct 13, 2016 16:36:25 GMT -5
it's almost 30 cm long from buffer to buffer, I just have to crop the photos ! I bet you say that to all the girls |
|
|
|
Post by armorguy on Oct 14, 2016 7:59:37 GMT -5
it's almost 30 cm long from buffer to buffer, I just have to crop the photos ! I bet you say that to all the girls I just knew this one was coming ! |
|
|
|
Post by dierk on Oct 14, 2016 9:42:39 GMT -5
I bet you say that to all the girls I just knew this one was coming ! I knew you knew this one was coming - the law of causality in inescapable |
|


 )
)


