|
|
Post by Leon on Mar 19, 2016 17:45:57 GMT -5
Nice start on the interior bits Bill!  That really is a tight space even without the gun.  |
|
adt70hk
Forum Moderator      November '24 Showcased Model Awarded
Member since: November 2015
Currently attempting to build something decent!!! ;)
Posts: 2,834 
MSC Staff
|
Post by adt70hk on Mar 19, 2016 17:46:50 GMT -5
Bill
Thanks as always for yet another informative update!
Andrew
|
|
Deleted
Member since: January 1970
Posts: 0
Nov 24, 2024 21:41:08 GMT -5
Nov 24, 2024 21:41:08 GMT -5
|
Post by Deleted on Mar 19, 2016 18:10:10 GMT -5
Wholie Guacamolie!! 
|
|
|
|
Post by wbill76 on Mar 19, 2016 18:11:31 GMT -5
Thanks Leon! No kidding, the gun still has to go in and, in theory, 3 crew men!  Andrew Andrew, my pleasure sir!  Bruce Bruce, I told you so!  |
|
|
|
Post by Tojo72 on Mar 19, 2016 18:43:00 GMT -5
How are the kits figures,decent enough?
|
|
afvfan
Senior Member
   
Member since: December 2012
Bob
Posts: 1,772
Dec 10, 2012 17:32:38 GMT -5
Dec 10, 2012 17:32:38 GMT -5
|
Post by afvfan on Mar 19, 2016 18:51:17 GMT -5
Good progress, Bill.
|
|
|
|
Post by wbill76 on Mar 19, 2016 19:14:38 GMT -5
Thanks Bob! Trucking along. How are the kits figures,decent enough? They look good for styrene figures Anthony, nice fold detail in the one guy with a trench coat, and all three have different/distinct faces and features. Nice detail on the padded tanker-helmets for two of the crew and the Putin look-alike commander has a fur-flap hat molded directly on his head. HTH! |
|
|
|
Post by dierk on Mar 20, 2016 5:21:28 GMT -5
Three questions: how did I miss the start of this? Why didn't anybody tell me I missed it? And who's been messing with the space/time continuum - I've got German armour on the bench and Bill's gone soviet?  Be careful Bill - once the 4BO bug bites, you're infected for life!  Having caught up, I'll be watching with interest from now on. |
|
|
|
Post by wbill76 on Mar 20, 2016 10:20:02 GMT -5
Three questions: how did I miss the start of this? Why didn't anybody tell me I missed it? And who's been messing with the space/time continuum - I've got German armour on the bench and Bill's gone soviet?  Be careful Bill - once the 4BO bug bites, you're infected for life!  Having caught up, I'll be watching with interest from now on. Wondered when you would find it Dierk!  Have to maintain balance in the universe since you're doing a Panther.  Glad to have you along of course. |
|
|
|
Post by wbill76 on Mar 20, 2016 17:37:25 GMT -5
Continuing on with the fighting compartment stuff, I assembled the three sub-machine ammo racks and the radio equipment as called for in Step 7. These will get installed separately after I've had a chance to paint them, two of the racks go on the right side along with the radio and the third one goes on the left side. 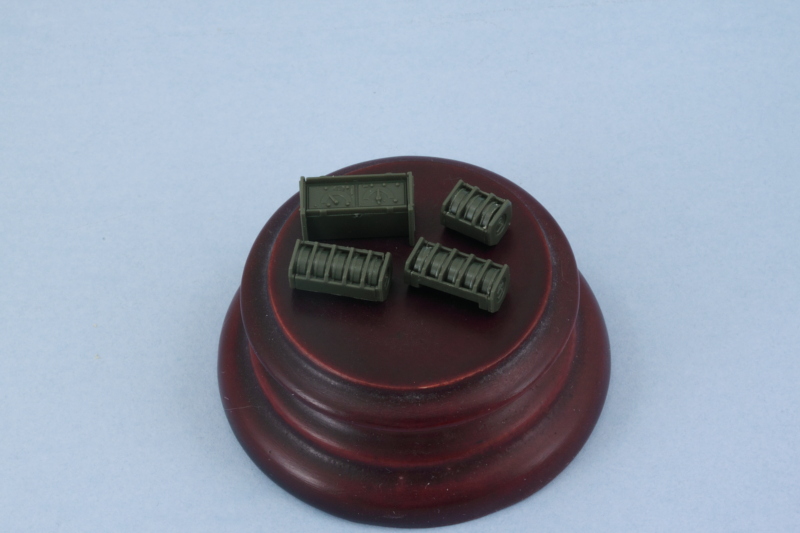 Step 8 addresses the right side of the compartment and I removed the ejector marks that would be visible and left the others alone. All of the little details that would be the same hull color were installed to get it squared away. 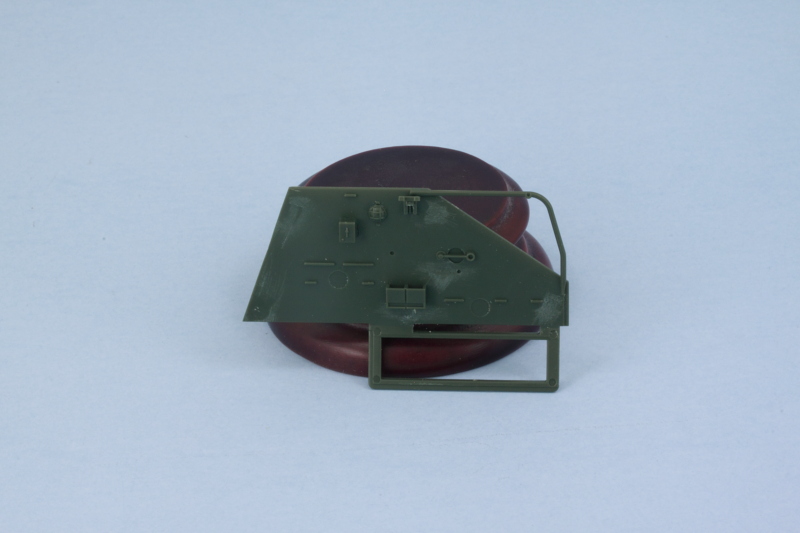 Step 9 installs the radio and ammo racks, so this was temporarily skipped. Step 10 gives the detail treatment to the left side. Same drill regarding ejector marks here too!  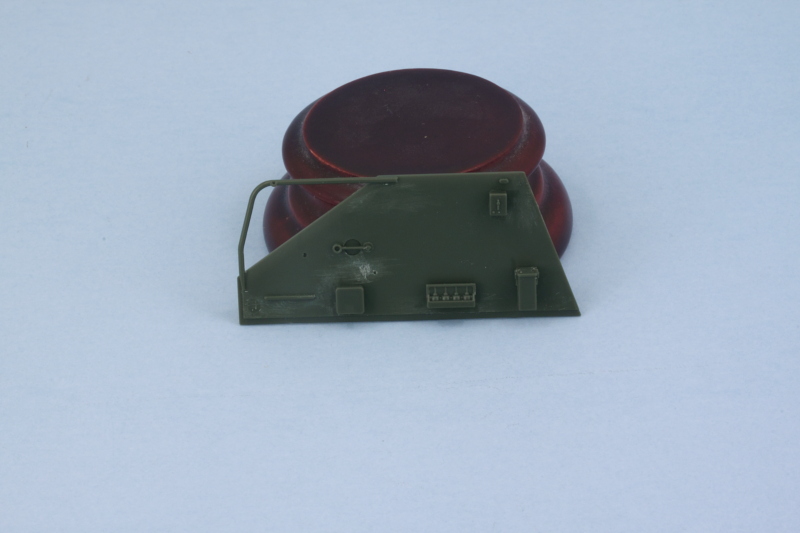 The back plate received some more attention as I decided to go ahead and install its door in the closed position. This isn't called out until the very final step 37 that also addresses the figures...I'm not sure if you need to have the door open in order for one of the crewmen to fit correctly, it's hard to be sure. The instruction diagram's top-down view of how they sit doesn't seem to indicate this would be a problem, but I'm not planning on placing the figures myself so it's not a big deal for me but could be for others. I also added the tow hook components from Step 16 as I wanted to see how much of the opening there would be filled by the hook. Turns out it doesn't completely fill up the space, so I puttied over it to make it seamless with the rest of the interior plate. For good measure, I also got the triangular plates that attach to the tops of the fighting compartment ready for paint. These are covered in Step 34. I drilled out the eyepiece face and also drilled an actual hole in the top portion of the pipe periscope. The part has a molded dimple here, I used a #78 micro drill bit to up the detail a touch. 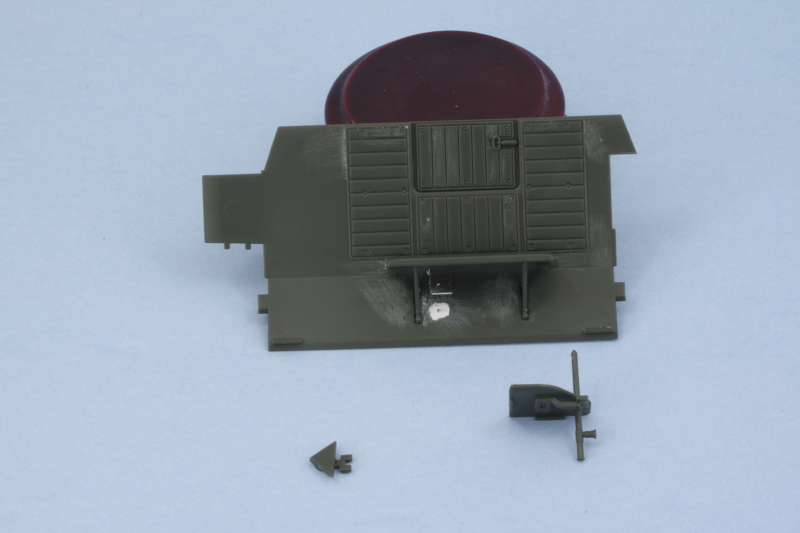 So here's where all the interior parts of the fighting compartment are at before I start in on getting them painted and detailed. 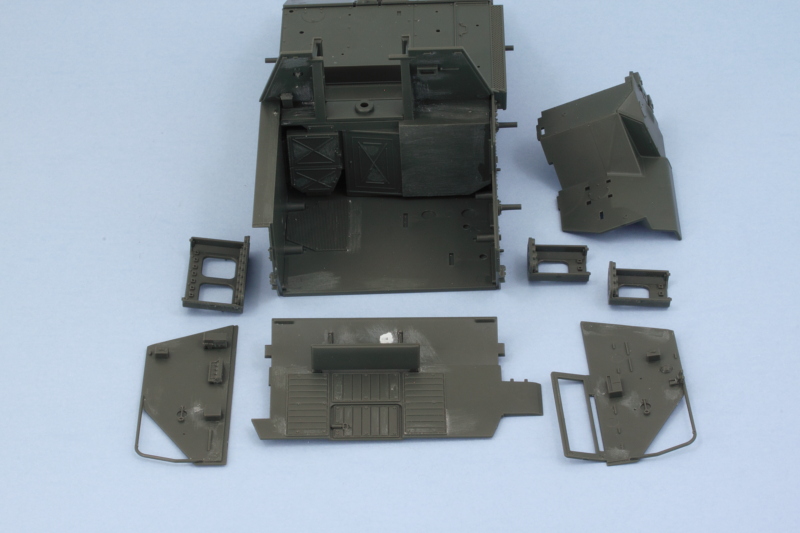 |
|
|
|
Post by Leon on Mar 20, 2016 18:22:58 GMT -5
Bring on the primer and paint Bill!  Your sure making quick work of this one.  |
|
|
|
Post by wbill76 on Mar 20, 2016 19:08:49 GMT -5
Thanks Leon! It's a little deceptive, there's still a lot to do in terms of detailing that fighting compartment, getting the gun together, etc. not to mention the rest of the exterior.  Open-top vehicles involve more built-paint-build-paint vs. a good old tank for sure!  I will say that it's a bit annoying working with the dark green plastic...it's a Tamiya thing to always mold the plastic in colors that are a close match to the actual finish but I'd be much happier with gray to be honest.  |
|
|
|
Post by dierk on Mar 21, 2016 2:55:41 GMT -5
Quick progress Bill!
Thanks for maintaining the equilibrium of the universe - my thoughless act of building a Panther might have brought the whole thing crashing down otherwise!
I'm in two minds about what colour styrene I prefer: green is easier to spot on our carpet, but I like working with grey styrene, then again, I usually use light grey primer - more difficult to spot which bits are covered when the model is grey too.
|
|
jsteinman
Full Member
  
Member since: March 2013
Posts: 735
Mar 24, 2013 9:29:10 GMT -5
Mar 24, 2013 9:29:10 GMT -5
|
Post by jsteinman on Mar 21, 2016 7:42:45 GMT -5
Off to a good start. I have to get this kit to see how it compares to the Miniart kit. That thing was one tuff build, specially painting the interior and gun mid build.
|
|
adt70hk
Forum Moderator      November '24 Showcased Model Awarded
Member since: November 2015
Currently attempting to build something decent!!! ;)
Posts: 2,834 
MSC Staff
|
Post by adt70hk on Mar 21, 2016 7:51:52 GMT -5
Bill Looking good so far!!  Although my experience is very limited as you know, I've found open top stuff to be a bit of a double edged sword - it's great that you get to see a lot of interior detail but it does mean a more complicated process in terms of assembly and painting.....  Keep up the good work!! Andrew |
|
|
|
Post by armorguy on Mar 21, 2016 8:54:06 GMT -5
I enjoy this Bill, let 'm come my friend !
|
|
|
|
Post by wbill76 on Mar 21, 2016 10:13:36 GMT -5
Dierk, it's true about finding parts, it's not without its benefits!  John John, I've heard similar things from others as well about the Miniart kit. I've not built it myself but the Tamiya kit has been smooth sailing so far in all respects. The gun installs using a post and polycap arrangement for example. Andrew, thanks as always! I enjoy working on open top vehicles every now and then as a good change of pace and a fun challenge. You have to think inside the box!  AG AG, thanks as well! 
|
|
|
|
Post by armorguy on Mar 21, 2016 10:17:36 GMT -5
I still have an overdetailed Marder III (Tristar's) in my stash, a very difficult one to build and only do-able with tons of patience...maybe when I'm retired lol !
|
|
|
|
Post by wbill76 on Mar 21, 2016 11:50:03 GMT -5
I still have an overdetailed Marder III (Tristar's) in my stash, a very difficult one to build and only do-able with tons of patience...maybe when I'm retired lol ! That's often the case! I'm sure you're not alone in having that kind of project sitting quietly in the stash closet AG!  |
|
|
|
Post by wbill76 on Mar 21, 2016 16:24:14 GMT -5
Managed to get some airbrush work in on the interior. I started with a base coat of Testors Model Master enamel Russian Armor Green. This did double-duty as a primer coat and let me check all my sanding to see if everything was going in the right direction. 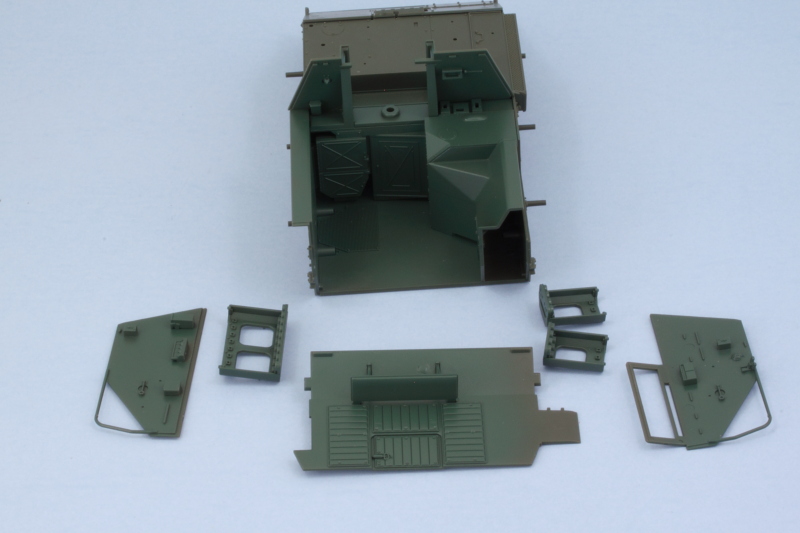 I've never been quite happy with this particular color right out of the bottle, it's got a kind of 'minty' green hint to it, so I tried something a little different. I mixed up a custom color using a 50/50 ratio of the MM enamel Russian Armor Green and Olive Drab FS34087. This was sprayed at low pressure over the previous coat to build up the finish. As an unintended side effect, I think I might have come up with a pretty close match to the kit's original plastic color.  It's also hard to photograph it accurately, but in hand it came out along the lines I was after. 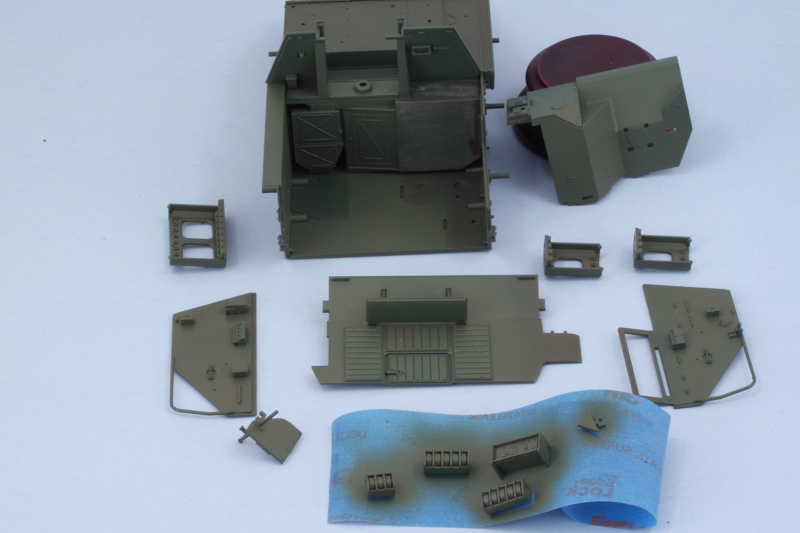 Now to let that cure a little bit and then start in on the actual detailing and weathering of the interior so I can get it all together. |
|
vlpbruce
Full Member
  
Member since: March 2013
Posts: 1,463 
|
Post by vlpbruce on Mar 21, 2016 18:38:14 GMT -5
Looks really good from here Bill.
|
|
|
|
Post by Leon on Mar 21, 2016 19:01:30 GMT -5
Nice work on the custom color Bill! Looks darn good.  |
|
|
|
Post by wbill76 on Mar 21, 2016 20:11:13 GMT -5
Thanks Bruce and Leon! Now the fun begins on that interior.  |
|
reserve
Senior Member
   
Member since: July 2012
Si vis pacem para bellum
Posts: 2,372
Jul 11, 2012 9:11:45 GMT -5
Jul 11, 2012 9:11:45 GMT -5
|
Post by reserve on Mar 21, 2016 20:35:06 GMT -5
Looks as it should be suitably busy. Nice work as always
Regards,
Mark
|
|
S e r z h--Rest In Peace
Full Member
  
Member since: November 2014
RIP- December 2023
Posts: 650 
|
Post by S e r z h--Rest In Peace on Mar 21, 2016 23:56:52 GMT -5
Bill - thanks for the report! I been waiting for the beginning of construction Su-76 of the Tamiya kit. GOOD LUCK! 
|
|
|
|
Post by wbill76 on Mar 22, 2016 0:49:15 GMT -5
Thanks Mark! Lots of stuff to pack into that fighting compartment.
Serzh, glad to have you along as well.
|
|
martslay
Full Member
  
Member since: February 2016
Posts: 1,113 
|
Post by martslay on Mar 22, 2016 1:22:28 GMT -5
Thanks Bruce and Leon! Now the fun begins on that interior.  Interesting work! I look forward to an interior  |
|
|
|
Post by wbill76 on Mar 22, 2016 17:33:06 GMT -5
First important detail for the interior is the ammo racks, so today's efforts were split between Steps 4 and 12 in the instructions. The kit provides 10 AP rounds and 10 HE rounds that are designed to go in the racks proper and an additional 4 AP and 4 HE 'whole' rounds that don't have the clips molded on them and have the full casing base. At first, I thought this was kind of strange as the racks have 11 empty spaces leaving one space totally unaccounted for. Why so many empty spaces? After studying the layout of the crew figures in the Step 37 diagram, I think I know why. If the racks were fully loaded up, the loader figure doesn't have enough room for sure and there might also be a conflict with the commander figure on the other side. It's a cramped space and figures aren't flexible, so I suppose it was a necessary compromise on Tamiya's part. It also explains the missing clips as the figures would fill up that space. If you don't use the figures, that's a different story! Anyhow, I cleaned up all 20 of the rounds I needed to go into the racks and then hand painted them. I used MM Non-buffing metalizer Brass for the casings, non-buffing metalizer Gunmetal for the AP rounds, enamel Italian Olive Green for the HE rounds, and non-buffing metalizer Steel for the HE fuse caps. 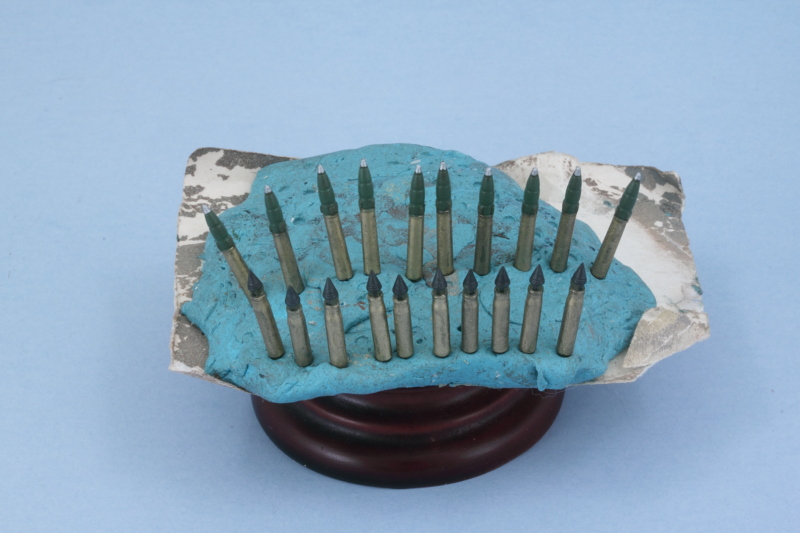 The back row of rounds went into the racks first, then the support rack for the front row added and painted to match the rest of the rack. Last but not least, the partial front row loads were added to get the racks together. 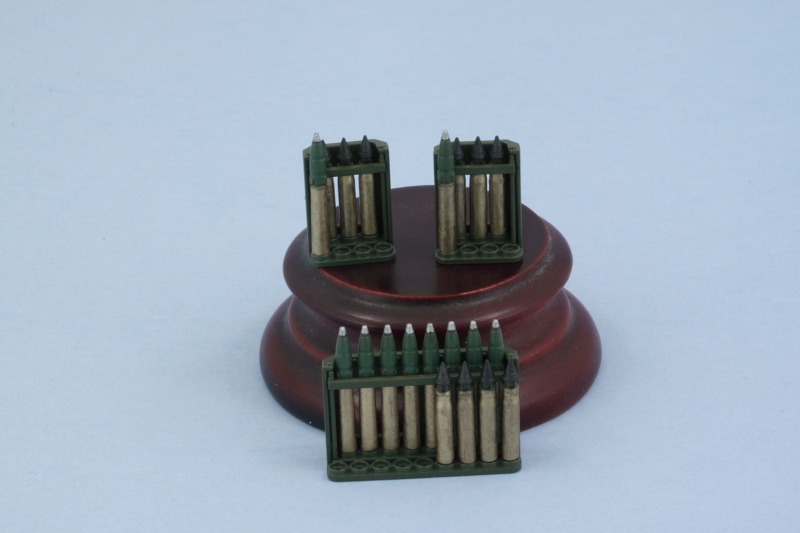 Still plenty left to do with the interior! |
|
|
|
Post by Leon on Mar 22, 2016 17:50:12 GMT -5
Ammo rounds look good Bill!  |
|
|
|
Post by wbill76 on Mar 22, 2016 17:51:44 GMT -5
Thanks Leon! Gun needs something to shoot after all!  |
|