|
|
Post by wbill76 on Mar 25, 2016 15:30:03 GMT -5
Great job so far Bill, you nailed the wood tones there bud, that's the secret for realistic worn wood, different grey tones ! Wood is so much fun to paint and weather. The rest of the interior looks killer, the rifles are the cherry IN the cacke. The oily greens look stunning. Kickass ! Who needs a magazine here ? Thanks Bill ! Thanks AG! Just to clarify what I think people are interpreting as 'wood' is really something else, at least as I understand it. They are padded cloth cushions that the instructions say should be Khaki (as in the pants color!) so that's what I was aiming for. Very close color to natural wood, so it's a win-win either way.  You are right about wood being a lot of fun to work with, can't argue with you there. Glad you like how the submachine guns came out, I spent a good bit of time on them since they occupy such a prominent space.  |
|
vlpbruce
Full Member
  
Member since: March 2013
Posts: 1,463 
|
Post by vlpbruce on Mar 25, 2016 17:30:55 GMT -5
Nice work on the paint Bill.
it's a pleasure to watch this little one going together.
|
|
|
|
Post by wbill76 on Mar 25, 2016 19:36:14 GMT -5
Thanks Bruce!  Achieved a major milestone in the build today in terms of getting the fighting compartment all together. First order of business, I decided it would be easier to paint the exterior of the compartment plates before installation. This meant adding some of the exterior details like the crew step called out in Step 18 and the radio antenna and pot called out in Step 21. Both of those parts have recessed mount points and a little bit of putty help was needed in some spots to fill those in completely before painting. 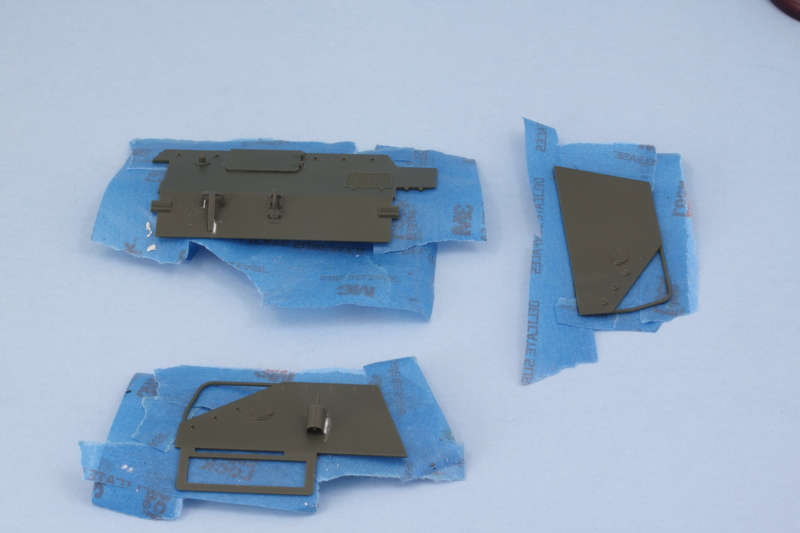 The plates and the front of the compartment were airbrushed first with Russian Armor Green and followed up with the 50/50 OD/Russian Armor Green treatment that I used on the interior. 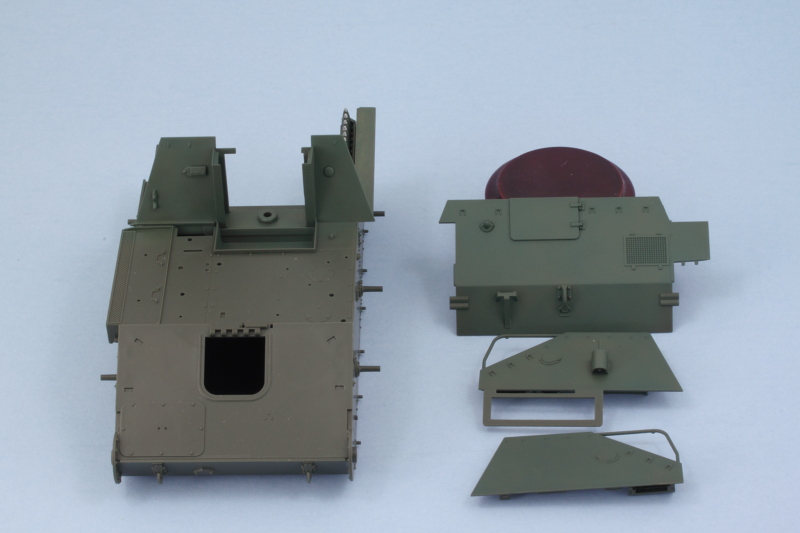 I installed the rest of the communications equipment on the right side and added the large wall component into the compartment proper. While I still had the compartment open, I added some pigment weathering in the form of Mig Rubble Dust applied to the floor. 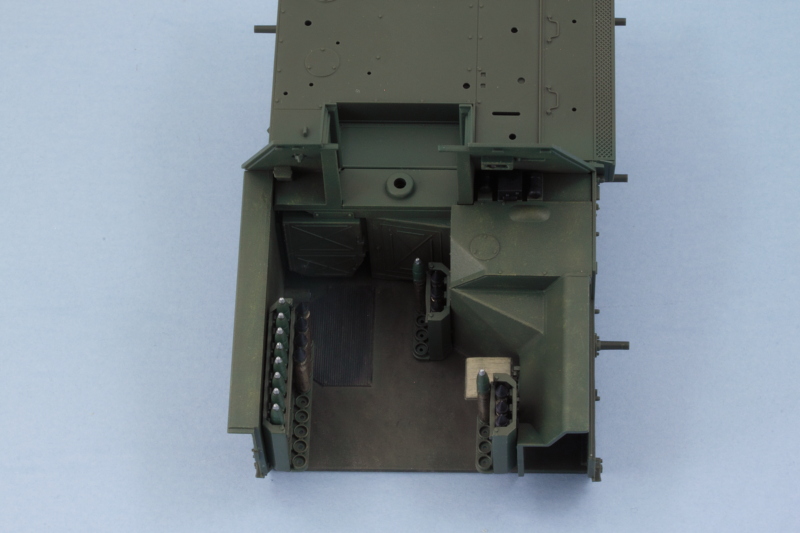 Right side upper plate was added next along with the large top plate that includes the commander's periscopes. It has the added advantage of a larger attachment area due to the radiator box that attaches to the outside, so it was the easiest to get lined up with the front of the compartment. 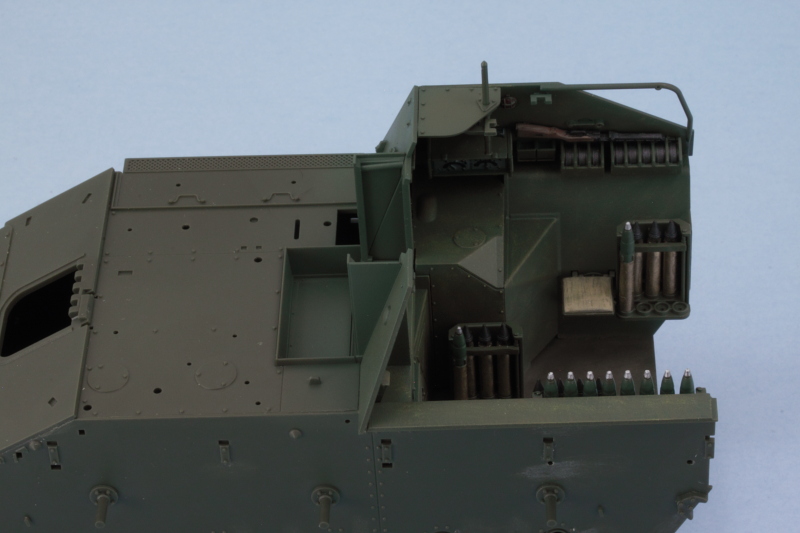 For the left side, I used regular glue along the base edge since it has the most contact surface and liquid glue at the front once it had grabbed a bit. As you can see in the photos, the greens don't all match up perfectly just yet, that will change once it's all set and I have the opportunity to go back over the join areas with the airbrush. My main concern at this point was avoiding having to do a lot of work with the full compartment masked off. 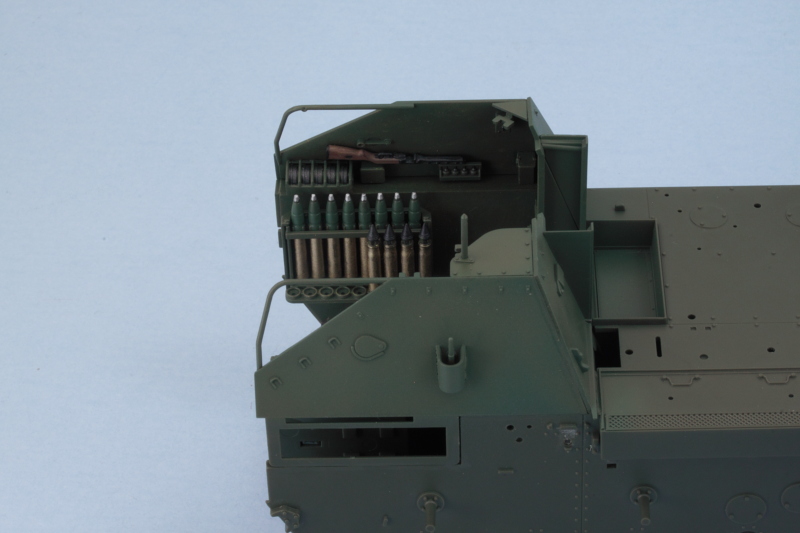 Last but not least, the rear plate was added to complete the full compartment. Overall the fit was excellent. One small minor area on the left rear plate join needed just a touch of putty and sanding, otherwise it all went together perfectly. 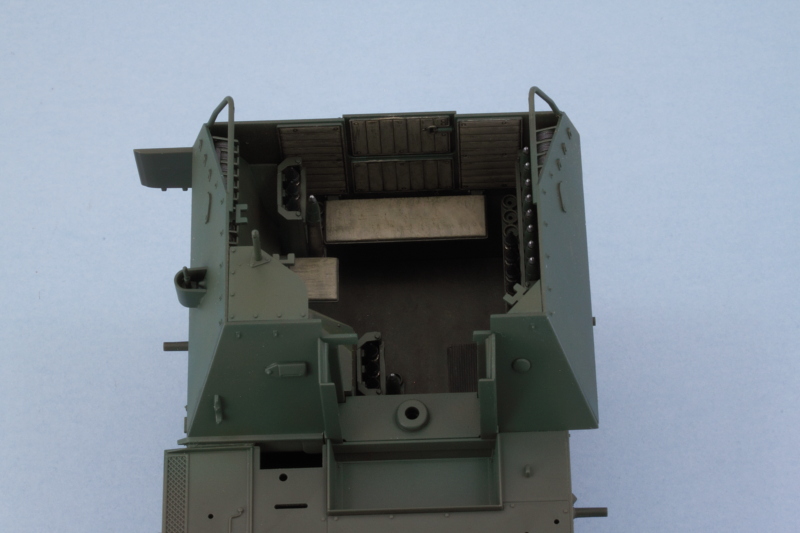 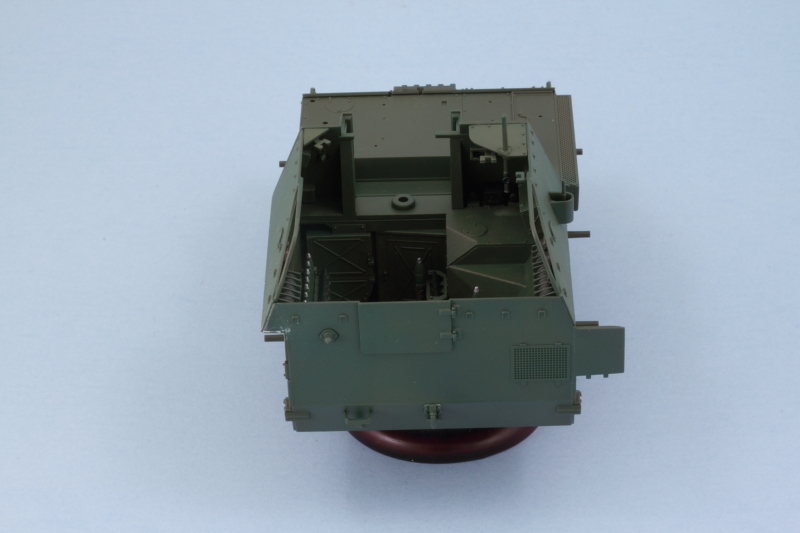 Next up will be spending some time on the suspension components and various other external details. |
|
martslay
Full Member
  
Member since: February 2016
Posts: 1,113 
|
Post by martslay on Mar 26, 2016 1:44:11 GMT -5
Looks good Bill! Very much it is pleasant to me.  |
|
Tojo72
Forum Moderator      Sept '24 Showcased Model Awarded
Member since: November 2012
Posts: 5,325
Member is Online
MSC Staff
|
Post by Tojo72 on Mar 26, 2016 1:52:26 GMT -5
Moving along nicely Bill,thanks for doing the planning for us  seems to need some forthought. |
|
|
|
Post by Leon on Mar 26, 2016 3:16:18 GMT -5
Nice progress getting the fighting compartment buttoned up Bill!  |
|
|
|
Post by dierk on Mar 26, 2016 4:20:24 GMT -5
Coming together nicely Bill!
|
|
Deleted
Member since: January 1970
Posts: 0
Nov 24, 2024 22:05:45 GMT -5
Nov 24, 2024 22:05:45 GMT -5
|
Post by Deleted on Mar 26, 2016 6:01:54 GMT -5
Great detail work! 
|
|
vlpbruce
Full Member
  
Member since: March 2013
Posts: 1,463 
|
Post by vlpbruce on Mar 26, 2016 11:09:15 GMT -5
looking real good Bill.
|
|
|
|
Post by wbill76 on Mar 26, 2016 11:17:37 GMT -5
Thanks Martin, Leon, Dierk, Bruce, and Bruce! Appreciate the comments!  Moving along nicely Bill,thanks for doing the planning for us  seems to need some forthought. Most of it is done by the instruction step order but, like any open top vehicle, you can make your life a little easier depending on preferences. I hate to scrape paint if it can be avoided so I usually plan to minimize that wherever possible!  |
|
|
|
Post by wbill76 on Mar 26, 2016 17:26:25 GMT -5
As promised, today's efforts focused on getting the suspension components installed and ready for painting. To do this, I had to go back to Step 3 and add the final drive housings along with their polycaps. I also cleaned up the 6 return rollers since they are called out in the same step, more on them later. Continuing on, Steps 13 and 15 have the 4 bump stops, two per side. That brings us to the main attraction, Step 16, which installs all swing arms and the idler mounts. Tamiya designed the swing arms to be fixed and level with each other using a small mount pin that the arms attach to. This, of course, is also designed to support their link-and-length track arrangement covered in Steps 19-20. While I was poking around in the steps, I went ahead and added in the driver's hatch and periscope in the closed position. The kit parts have detail on the lower part of the periscope but nothing on the inside face of the hatch or the driver's area. 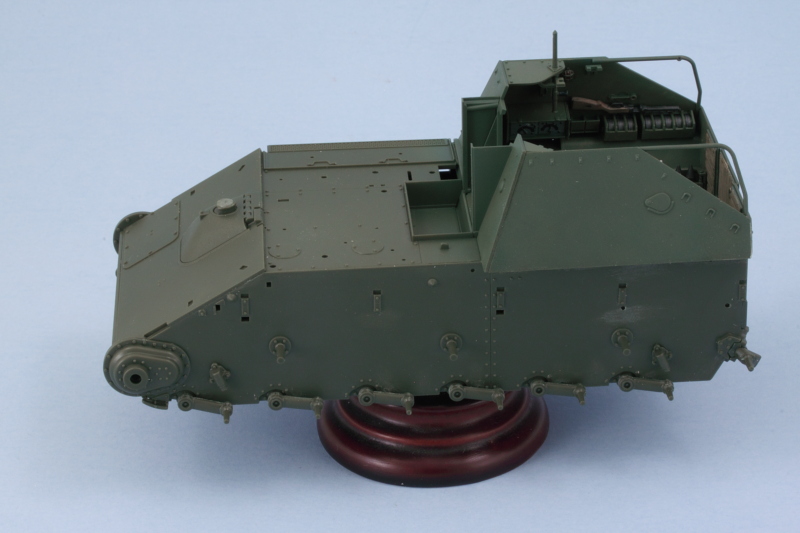 Road wheels were next under Step 17. There are 14 wheels (6 road, 1 idler per side) that have to be removed from the sprue along with a matching 14 rear hub inserts to make the full wheels. I used a sanding stick to remove the mold seam on the rubber portion of the wheels. Each of the hub inserts has 2 sprue attachment points that have to be carefully removed to keep their round shape intact, easily done with a sharp #11 blade and a little patience. 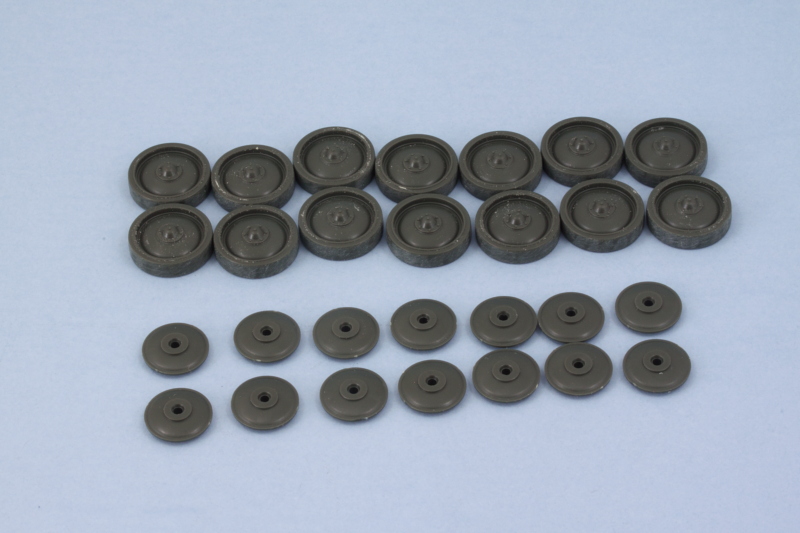 A touch of liquid glue around the rim edges got the wheels together and I also assembled the sprockets as called for in the same step. The steel return rollers from Step 3 also had a small mold seam that was sanded down to get them cleaned up. 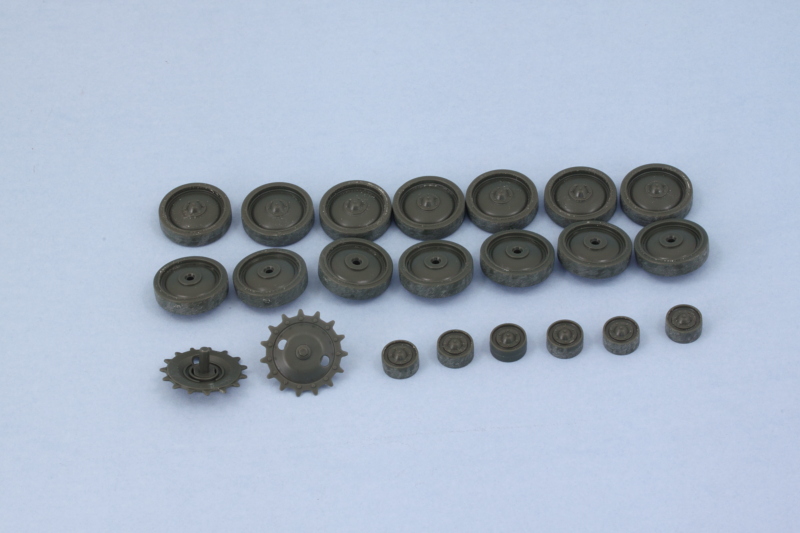 After the glue had dried on the sprockets and wheels, I did a quick test fit to make sure everything sits level and plays nice with each other. As you can see, the road wheels cover almost the whole lower hull area below the fenders. These will be painted separately to allow for easier detailing and weathering before the tracks and fenders have to go on. 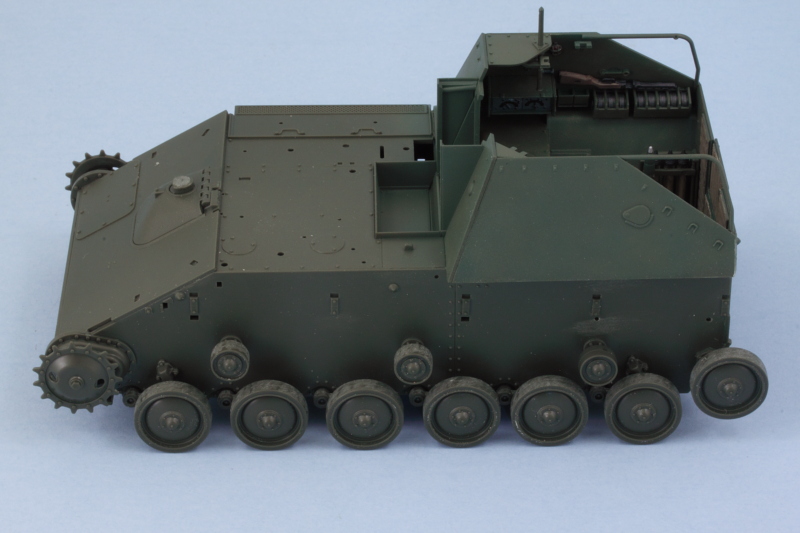 Next up will be dealing with some more of the hull details and getting the fenders together so I can maximize the airbrush time for the next round of painting. |
|
afvfan
Senior Member
   
Member since: December 2012
Bob
Posts: 1,772
Dec 10, 2012 17:32:38 GMT -5
Dec 10, 2012 17:32:38 GMT -5
|
Post by afvfan on Mar 26, 2016 19:40:16 GMT -5
While not on par with some of the other guys, this one is a lot more detailed than their kits of yore. Good to see Tamiya upping their game.
|
|
c3p0.
Full Member
  
Member since: January 2016
The harder you sweat in here the less you gonna bleed on the special project this is a must have.
Posts: 157 
|
Post by c3p0. on Mar 26, 2016 19:54:00 GMT -5
Looking good sir and I am enjoying watching this come together. Cannot go wrong with Tamiya Soviet armor.
|
|
|
|
Post by wbill76 on Mar 26, 2016 20:43:15 GMT -5
Bob, it's definitely been an enjoyable build so far with zero major issues...and no errors in the instructions!  There's something to be said for that all by itself I think.  The tracks aren't something that I'm particularly thrilled about but then I prefer workables as a rule due to the flexibility they offer when it comes to painting/weathering. I'm still thinking about just how best to go about tackling the fact that you can't easily install the tracks with the fenders in place if you go with their supplied sag-jig arrangement for example. That definitely complicates the order of things as the fenders and the stuff that goes on them occupy a significant chunk of the finished vehicle. C3P0, glad you're enjoying the ride with me!
|
|
martslay
Full Member
  
Member since: February 2016
Posts: 1,113 
|
Post by martslay on Mar 27, 2016 2:27:40 GMT -5
Good progress Bill! I wait for painting works.  |
|
|
|
Post by dierk on Mar 27, 2016 3:41:52 GMT -5
Looking good Bill!
Like you I prefer workables, but on the few times where I used non-workable kit tracks what I did to get around the fender/mudguard problem was that I attached them with a tiny drop of CA, just enough to keep them in place for painting. Once the hull is painted, and the lower hull weathered, remove the mudguards and fit the wheels and tracks, reattach the fenders with cement. Bit of a PITA, but works.
|
|
|
|
Post by wouter on Mar 27, 2016 7:43:04 GMT -5
Nice couple of updates chap. And who said only Germans loved lots of roadwheels ey  Cheers |
|
|
|
Post by wbill76 on Mar 27, 2016 11:40:37 GMT -5
thanks Martin! Dierk, that pretty much represents how I was leaning in terms of temporary attachment. Tamiya chose a kind of odd route with the fender supports too which complicates things a bit. Wouts, that's true! The Russians had to stretch the chassis to fit the 76mm gun, so it upped the wheels in the bargain!  |
|
|
|
Post by deafpanzer on Mar 27, 2016 13:37:24 GMT -5
Looking great!!! I trust that you have learned how to drink vodka without making a funny face, do the Russian dance and sing loudly like a Russian soldier by now.
|
|
|
|
Post by wbill76 on Mar 27, 2016 13:58:59 GMT -5
Looking great!!! I trust that you have learned how to drink vodka without making a funny face, do the Russian dance and sing loudly like a Russian soldier by now. Don't forget random outbursts that include 'Za Rodina'!  |
|
martslay
Full Member
  
Member since: February 2016
Posts: 1,113 
|
Post by martslay on Mar 27, 2016 14:55:21 GMT -5
Looking great!!! I trust that you have learned how to drink vodka without making a funny face, do the Russian dance and sing loudly like a Russian soldier by now. However...  |
|
|
|
Post by wbill76 on Mar 27, 2016 17:13:04 GMT -5
Looking great!!! I trust that you have learned how to drink vodka without making a funny face, do the Russian dance and sing loudly like a Russian soldier by now. However...  Don't worry Martin, that's just Andy's unusual sense of humor.  Flammable spirits and plastic models don't go well together in my experience.  |
|
|
|
Post by wbill76 on Mar 27, 2016 17:34:34 GMT -5
Hope everyone had a Happy Easter (for those that it applies...otherwise, Happy Sunday!)  With the focus on getting the hull ready for painting, I bounced around in the instructions quite a bit hunting for stuff that I could install now vs. later. In Step 20, I added the base parts for the gun travel lock while the lock itself is added in Step 24. The lock remains movable, so that's a plus. I also added the small rectangular hood for the exhausts after a test fit showed it's possible to still add the exhaust pipe after it's in place. Step 25 had the 5 retaining hooks for the tow cable, so those were added as well. 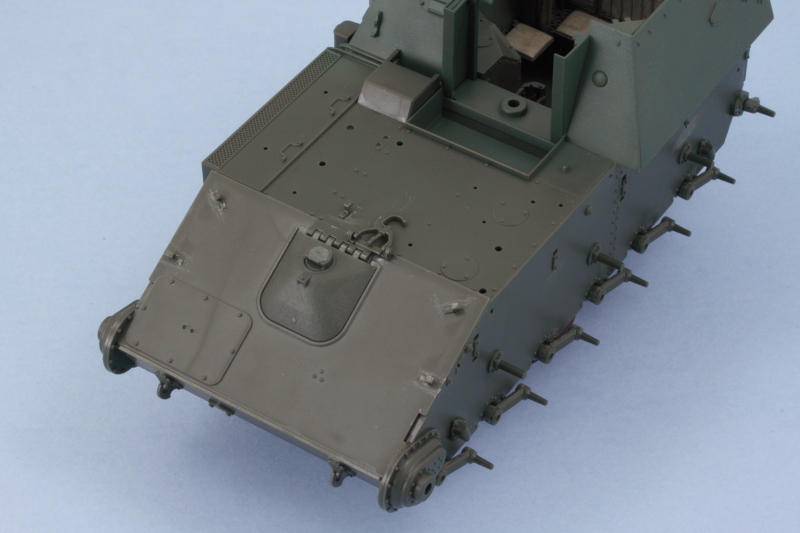 Over on the hull's right side, I added the large radiator/air exhaust box that's called for in Step 21. I found it easier to add the top part, B11, to the hull first since it has a large mount tab to support and align it and then add the rest of the box around it vs. assembling the box off the vehicle and installing it as a single part as the instructions call for. The top doesn't have any solid alignment guides for the 'finned' side portion and getting it lined up right is critical, hence my 'alternative' method to ensure that happened.  I added the small canister from Step 23 and the second exhaust cover from Step 24 after again testing the exhaust pipe fit to be sure I could still install it with the cover in place. 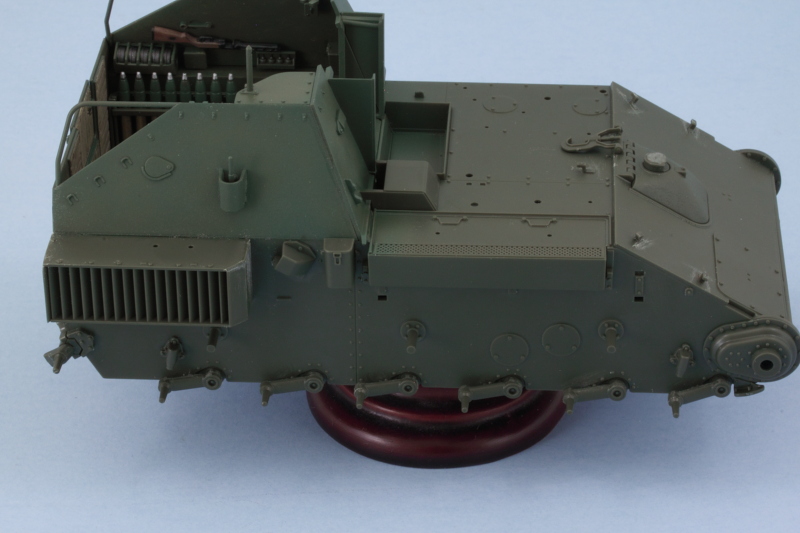 Now came the fenders. In order to fit the tracks onto the suspension, the fenders need to remain loose. In theory, since all of the top links are individual links, you could add them after the fenders are in place but that's an iffy proposition at best IMHO. Step 22 assembles the two fenders along with the front portions of the mud guards. 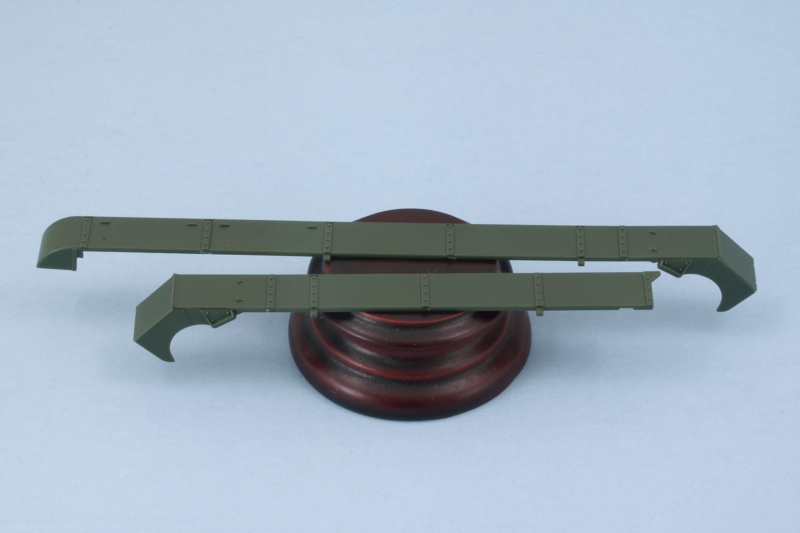 The next trick with the fenders is getting the braces added. Instead of providing the triangular brackets as single pieces, Tamiya molded parts of the bracket on the fenders, part on the hull, and has the angled top part as a single piece that's added to complete the whole bracket. These are added in Steps 24 and 25 and this arrangement actually works out ok if you're careful. I used tape to hold the fenders in place and added the brace tops one at a time and only glued their bottom ends to the fenders themselves. the tops were adjusted so they would fit into the openings in the hull but still allow me to remove the fenders for painting and the track install. 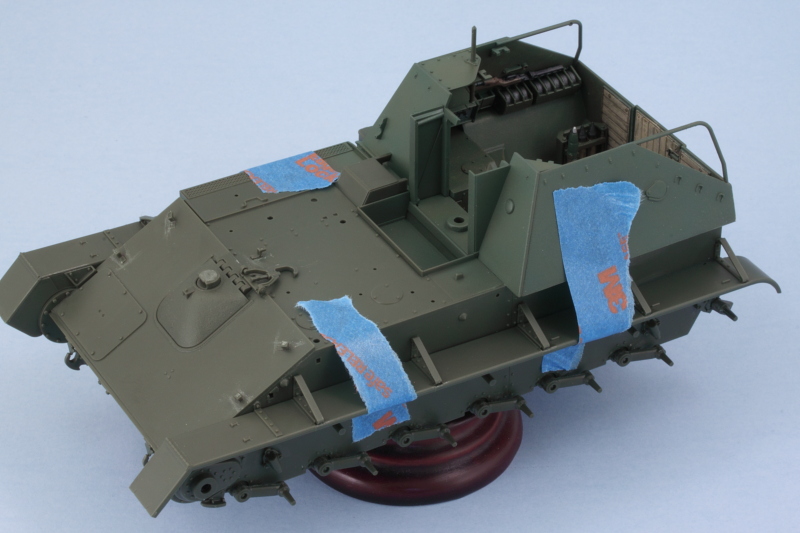 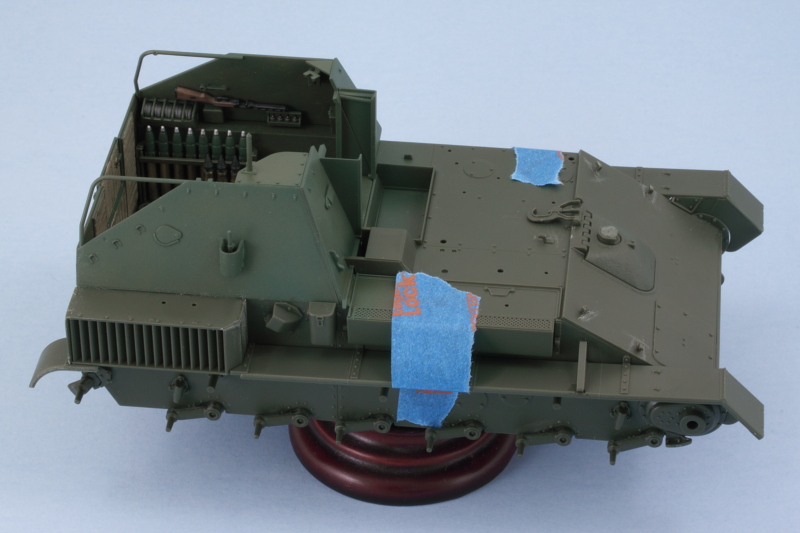 Once I was sure the braces would behave, I added the two storage boxes to the left fender as called out in Step 36. These boxes don't attach to the hull side and the instructions show a nice little sub-diagram that emphasizes this to avoid any mistake. I also cleaned up the headlight and siren horn as mentioned in Step 35 and installed them as directed in Step 36. 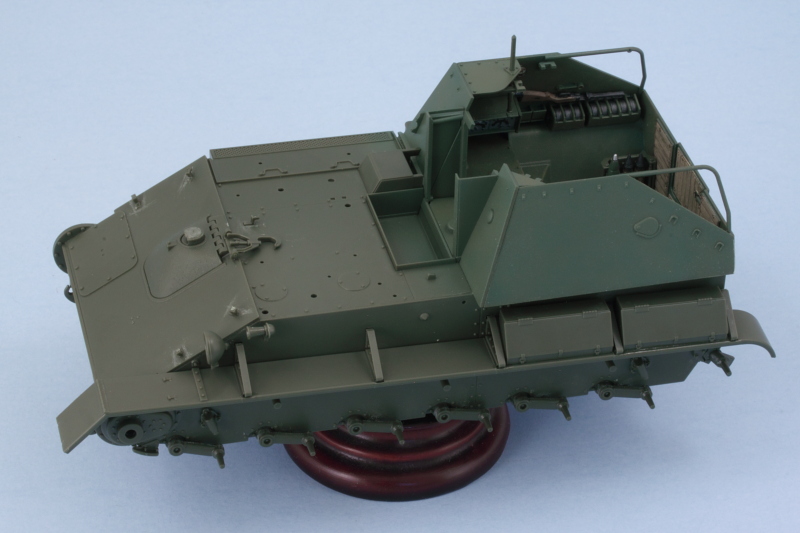 That should put me in good shape to get the hull painted before I move on to the gun. |
|
|
|
Post by Leon on Mar 27, 2016 18:30:43 GMT -5
A nice days progress Bill!  Paint should be coming soon.  |
|
|
|
Post by wbill76 on Mar 27, 2016 19:32:35 GMT -5
Thanks Leon! Not far off for sure.  |
|
|
|
Post by dierk on Mar 28, 2016 2:40:32 GMT -5
Nice work Bill - looking forward to more.
|
|
|
|
Post by armorguy on Mar 28, 2016 2:53:28 GMT -5
I know where to look when I build this Russian beauty Bill. Thanks for sharing your good thinking while cruising the steps !
|
|
jsteinman
Full Member
  
Member since: March 2013
Posts: 735
Mar 24, 2013 9:29:10 GMT -5
Mar 24, 2013 9:29:10 GMT -5
|
Post by jsteinman on Mar 28, 2016 7:58:32 GMT -5
Looking great so far. I did not choose to paint in the order you did, but this is what the masking looked like, so maybe your's is the better way?  |
|
|
|
Post by wbill76 on Mar 28, 2016 10:23:52 GMT -5
Thanks Leon! AG, let's hope all this skipping around pays off!  John John, I imagine Tamiya's design allows for some flexibility in the approach. Their use of polycap for the gun install should make it a drop in arrangement for example. We'll see if my fender approach works or not!  |
|
sturmbird
Full Member
  
Member since: June 2012
Posts: 1,406
Jun 21, 2012 13:51:45 GMT -5
Jun 21, 2012 13:51:45 GMT -5
|
Post by sturmbird on Mar 28, 2016 15:11:11 GMT -5
It is good that there are no unclear inscriptions. Eternally Soviet/Russian inscriptions print with mistakes.  Your the guy I want ask this question to. Is the basic hull the T-70 light tank fielded by the USSR in WWII? If so lets hope and pray that Tamiya follows suite with a T-70 tank!! gary |
|