|
|
Post by wbill76 on Apr 3, 2016 18:40:34 GMT -5
Getting closer Bob! The moment of destiny arrived today with the rest of the tracks getting assembled and installed. It also reminded me why I prefer workable tracks vs. statics...but since this is an OOB build, I had to stick with the kit-supplied links. They aren't difficult to work with necessarily, they are just tiny, have to be shaped in a specific way, and then need to hold that shape permanently for painting and detailing. That's a tall order and there was more than one occasion where I had to reattach links together at different moments. First up, the remaining connecting runs were assembled as directed in Step 20. 16 links for the front run around the sprocket, 13 links for the rear around the idler. The fact that the sprocket is able to move in the polycap mount was something that I found made life a little harder...the join spots with the upper and lower runs are in places that the weight and position of the links results in the sprocket wanting to turn...not a good thing. I resorted to small narrow strips of tape to hold it all in place while the glue set. I also made the mistake of trying to 'multi-task' and assembled the runs for both sides at the same time before I realized just how delicate the whole thing is when trying to line up all the different runs. I was forced into taping and shaping both sides at the same time before the glue set as a result. Now that's a guaranteed exercise in frustration as I quickly discovered, so I'd strongly recommend to anyone else that you work only one side at a time to avoid that. 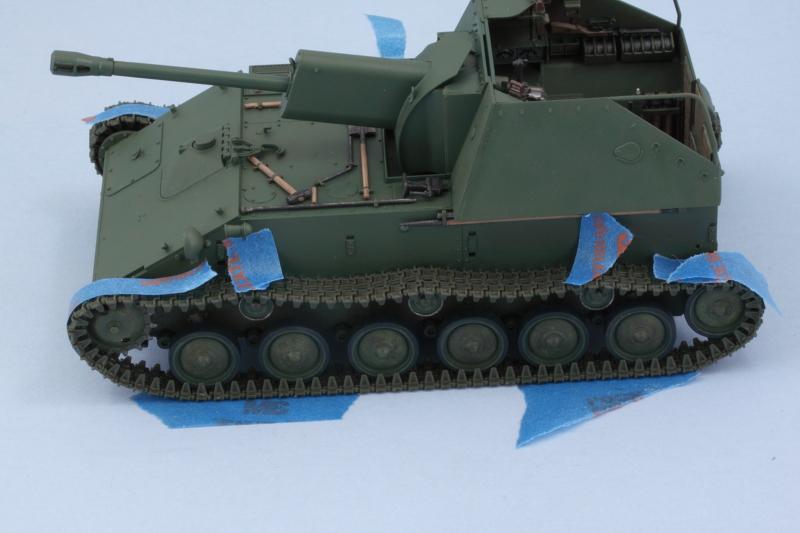 After the glue had set, the tape came off, and I had the tracks in 4 pieces per side. I made sure to keep the pieces for each side together from here on out as there's no guarantee that one side would fit the other or vice versa. The return rollers were also finished with their bare metal contact surfaces detailed and all 6 were installed. I found in the fitting process that it's just possible to feed the pre-sagged run over the 3rd roller on the right side but definitely necessary to keep the idler separate since I had added the little mudflap extension under the cooling vent. 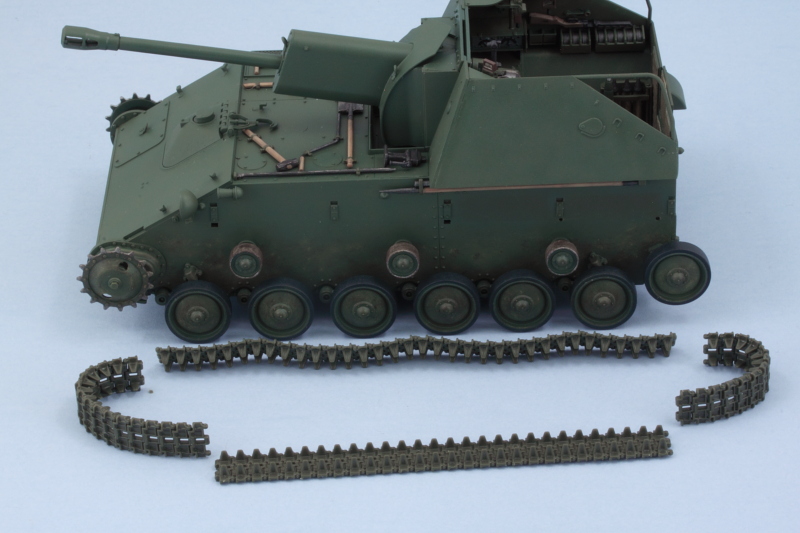 The tracks were hand painted with a base coat of MM Metalizer Non-Buffing Gunmetal then dry brushed with enamel Steel. The last step was an overall wash of MM enamel Raw Umber. Then the tracks were puzzle-pieced together one more time and glued in place. 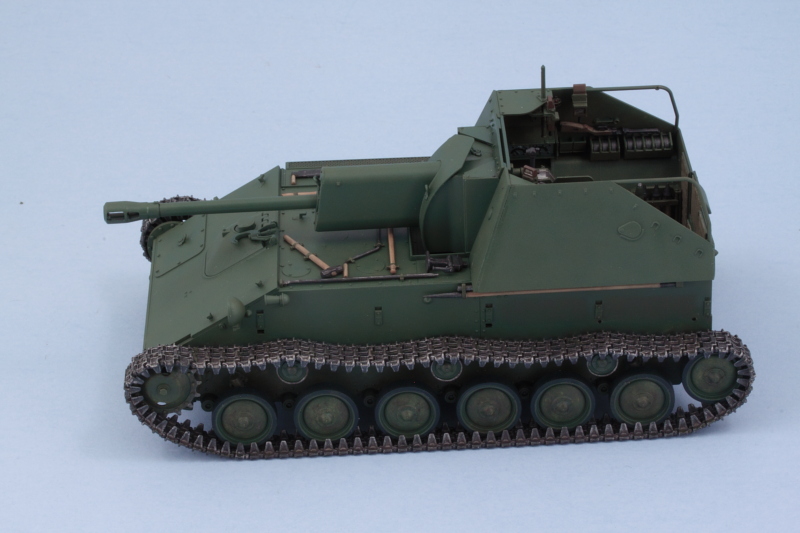 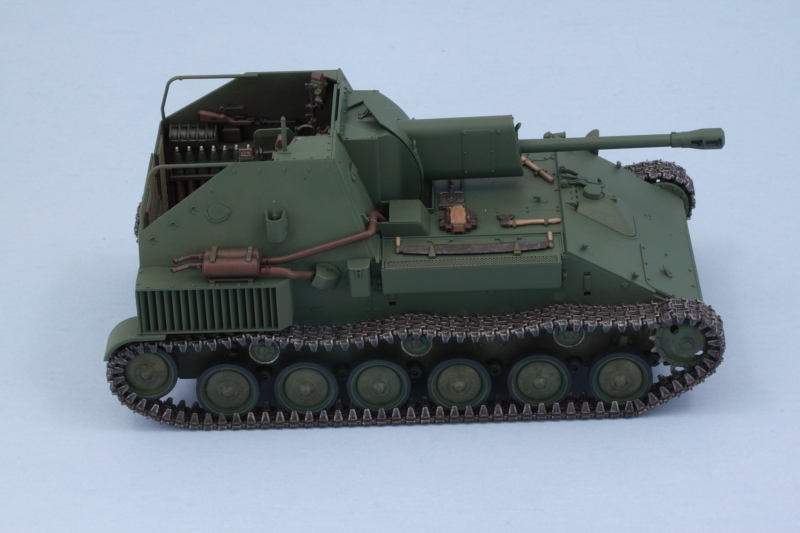 Once that's all set, I'll add the fenders to top it all off. |
|
|
|
Post by Leon on Apr 3, 2016 19:11:30 GMT -5
WOW....Nice work on getting the tracks on Bill!  I hear you on the turning sprocket,had the same issue with the SPG.  |
|
|
|
Post by wbill76 on Apr 3, 2016 20:10:38 GMT -5
WOW....Nice work on getting the tracks on Bill!  I hear you on the turning sprocket,had the same issue with the SPG.  For a while there I felt like one of those lab mice that has to keep pushing the button for food...and I kept getting zapped until I figured out the tape solution.  |
|
|
|
Post by tonylee-Rest In Peace on Apr 3, 2016 20:24:59 GMT -5
|
|
|
|
Post by wbill76 on Apr 3, 2016 22:52:06 GMT -5
Cool shades!  |
|
|
|
Post by wouter on Apr 4, 2016 0:36:40 GMT -5
It got it's shoes on, now it finally can walk!
Cheers
|
|
|
|
Post by dierk on Apr 4, 2016 2:49:19 GMT -5
I hear you on the workable tracks - mind you, assembling a set of Masterclub T-70 tracks wasn't a bundle of fun either.
The end is nigh!
|
|
Deleted
Member since: January 1970
Posts: 0
Nov 28, 2024 15:57:29 GMT -5
Nov 28, 2024 15:57:29 GMT -5
|
Post by Deleted on Apr 4, 2016 9:08:20 GMT -5
Sweet!
|
|
|
|
Post by armorguy on Apr 4, 2016 10:41:22 GMT -5
They look perfect those tracks Bill ! As good looking as Friuls !
|
|
jsteinman
Full Member
  
Member since: March 2013
Posts: 735
Mar 24, 2013 9:29:10 GMT -5
Mar 24, 2013 9:29:10 GMT -5
|
Post by jsteinman on Apr 4, 2016 13:15:05 GMT -5
I hate to do this to you - but the 4BO experts called and the chroma of your shade has an incorrect value, resulting in a lower than expected intensity...
j/k Looks smart!
|
|
|
|
Post by wbill76 on Apr 4, 2016 13:49:27 GMT -5
Wouts, or at least roll along convincingly!  Dierk Dierk, small tracks no matter the type are always an exercise in patience. It could be worse...they could be Pz I links!  These are roughly the same size as 38t links so not quite as trying.  Bruce Bruce, thanks as well!  AG AG, high praise indeed! Tamiya did a good job on molding their detail to a high standard. Probably some of the best looking indy links I've seen in a while. I hate to do this to you - but the 4BO experts called and the chroma of your shade has an incorrect value, resulting in a lower than expected intensity... j/k Looks smart! I hear you John...the 4BO nazis can be almost as intense on this subject as the OD nazis! Kind of ironic when you think about it. Funny that you should mention chroma and intensity...I'm going to add one more slight color shift after finding this color chip on the net. Even though I believe it's from 1938 (I'm no expert at all on this subject!), I like the tone and I 'think' I've been able to mix up a shade that's pretty darn close once added to the existing paintwork. We'll see if it actually produces the intended result...more to come! 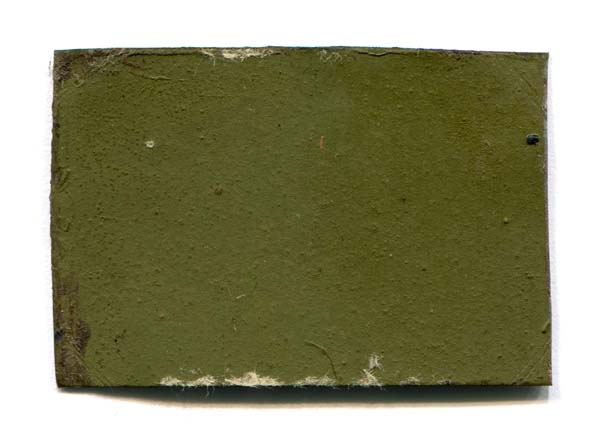
|
|
jsteinman
Full Member
  
Member since: March 2013
Posts: 735
Mar 24, 2013 9:29:10 GMT -5
Mar 24, 2013 9:29:10 GMT -5
|
Post by jsteinman on Apr 4, 2016 14:02:43 GMT -5
Considering that some tanks left the factory without paint - and I darn tootin bet many that were painted were painted with a mop that had been dipped in who knows what as long as your green isn't pink or purple you are okay in my book.
|
|
|
|
Post by deafpanzer on Apr 4, 2016 14:14:52 GMT -5
That's pretty good looking shoes!!! And I like them!
|
|
|
|
Post by wbill76 on Apr 4, 2016 14:53:40 GMT -5
Thanks Andy! Considering that some tanks left the factory without paint - and I darn tootin bet many that were painted were painted with a mop that had been dipped in who knows what as long as your green isn't pink or purple you are okay in my book. That reminds me of the 'pink' T-34 that some anti-war protesters did a while back, can't recall exactly where (London maybe?), but this is the vehicle:  Would make for a 'little something different' scheme!  |
|
|
|
Post by wbill76 on Apr 4, 2016 17:31:08 GMT -5
After the tracks had set up, I installed the fenders permanently into place. This went relatively smoothly, I just needed to add a little bit of putty to the left rearmost mount since it attaches right up against the hull side edge. As you can see, there's not a whole lot of clearance tolerance between the fenders and the tracks. Trying to work the indy links with the fenders already in place would probably have been possible since the sprocket can move but it would be a very tight space for sure. I also decided to do a little more tonal work on the hull color, so the masking tape around the fighting compartment was a prep for that. 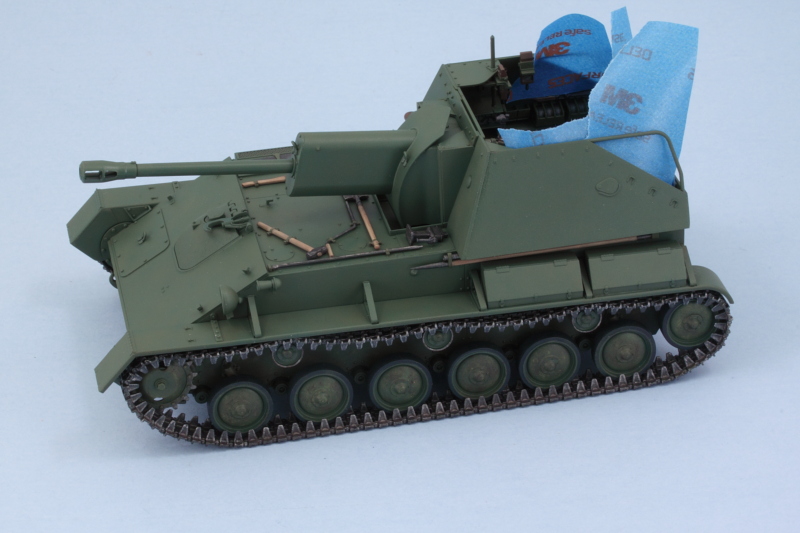 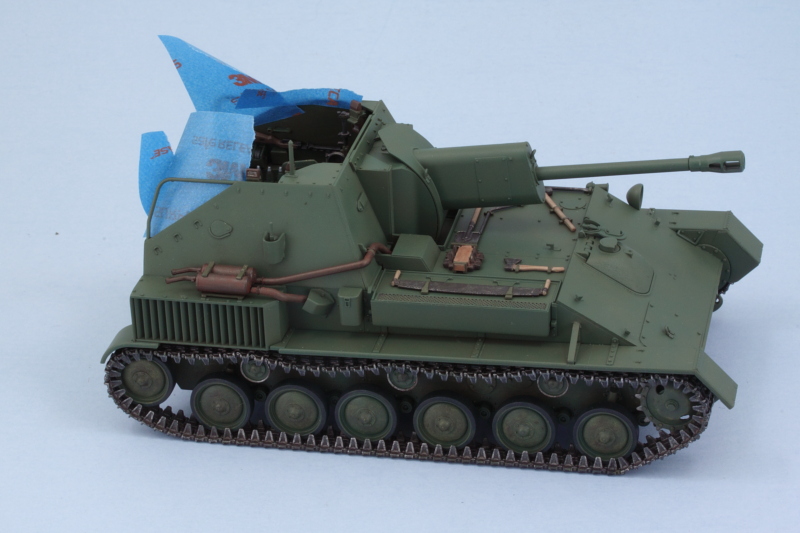 I have to issue a small disclaimer here for the next little bit as it involves the whole 4BO 'correct shade' debate...which I'm not an expert on and have no interest in trying to litigate. In searching around the 'net, I did find a handy 4BO color chip and this was the 'green' that I've been using as a mental guide in relation to the finish.  Easier said than done, but I've been waiting until I had the fenders on to add the last little touch. I took the 50/50 OD/Russian Armor Green mix mentioned previously and combined it with another 50% MM enamel Medium Field Green. Here's how it looks in the bottle: 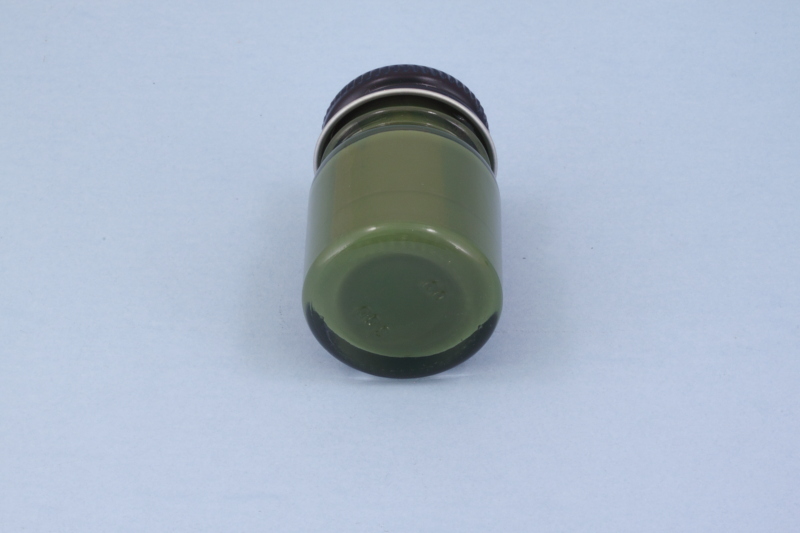 I loaded up the airbrush and worked with a very fine detail nozzle (I use an Aztek airbrush, so this is the 'tan' tip) to add this shade over the previous work. I switched to a white background as the blue was playing some tricks and it's hard to capture it effectively, with the white, the photos are closer to what it looks like 'in hand'. Monitor settings of course may cause a variance, but I'm happy with the approximation and subtle changes it introduced to the overall green finish. 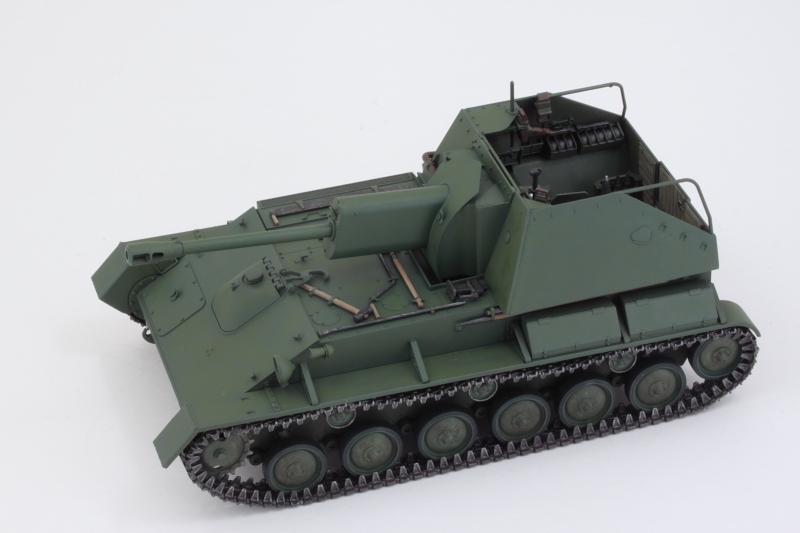 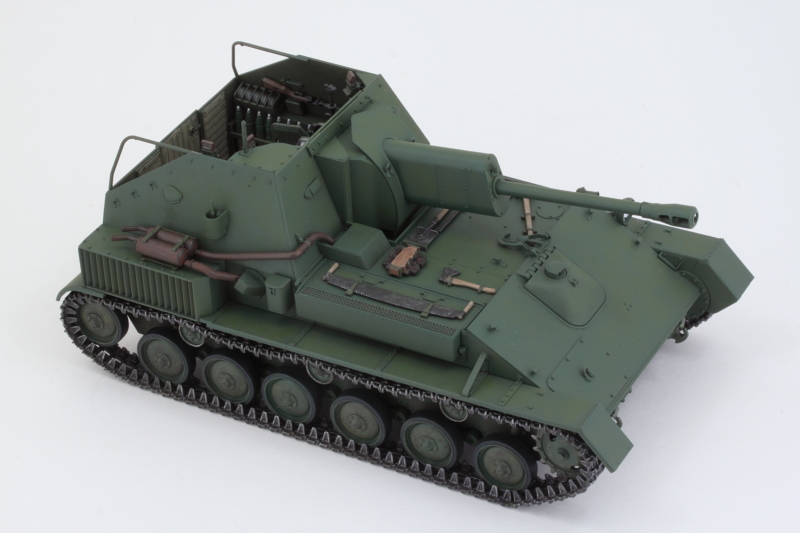 While that's all curing (and before I tackle the last remaining hull detail, the tow cable), I decided to give the kit-supplied crew figures a shot. These are covered in Step 37 and are multi-part assemblies depending on the figure in question. They go together easily without the need of much clean-up and are, of course, designed to occupy specific positions/poses in the vehicle with no real room to modify/adapt them. Pictured left to right are the commander, gunner, and loader. The commander's arms had molded solid sleeves on his coat, so I opened them up for a little better detail using a combination of micro drills and needle files. 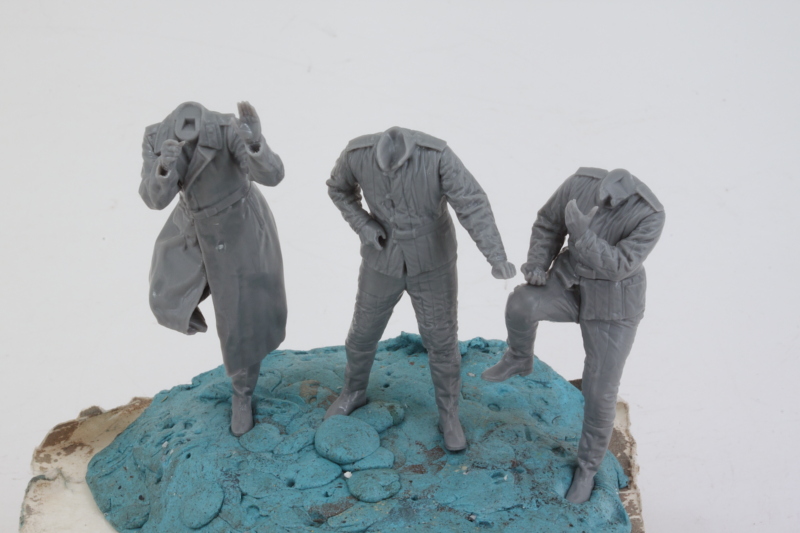 The commander (aka Comrade Putin) had his hat molded in place along with the head while the other two crew have the padded tanker's helmets as three-piece assemblies that build up around the head. The details on Putin's hat are a little soft as a result when compared to the other two crewmen but each one has their own features/character instead of being cookie-cutter heads. All three have shaped tabs on their bases that are designed to fit their respective torsos, so no swapping around without a lot of work if you wanted to go that route. 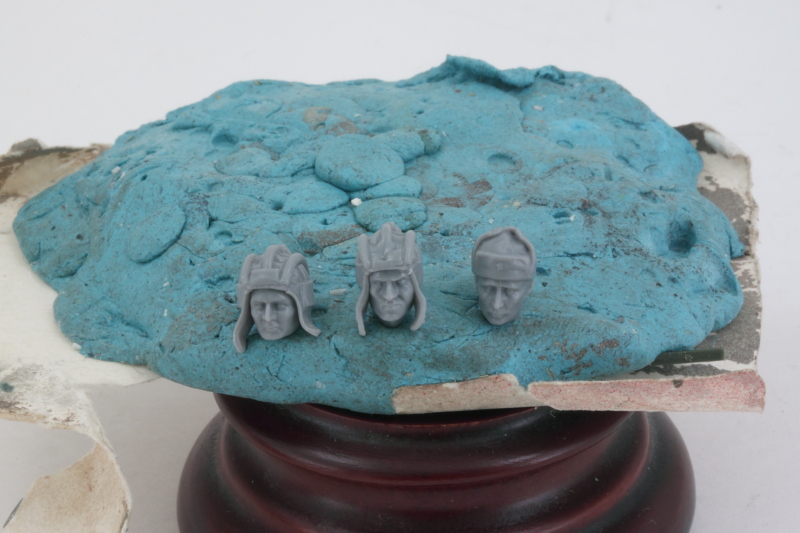 I did a test fit with the gang to see how they would all go into the compartment. As I suspected, the gunner is the hardest to position correctly and I found it necessary to remove the C77 gun-control wheel that was installed back in Step 29 in order to be able to move him in and out of position. Once he's painted and positioned, the wheel will go back on so it can match up to his hand to boot. 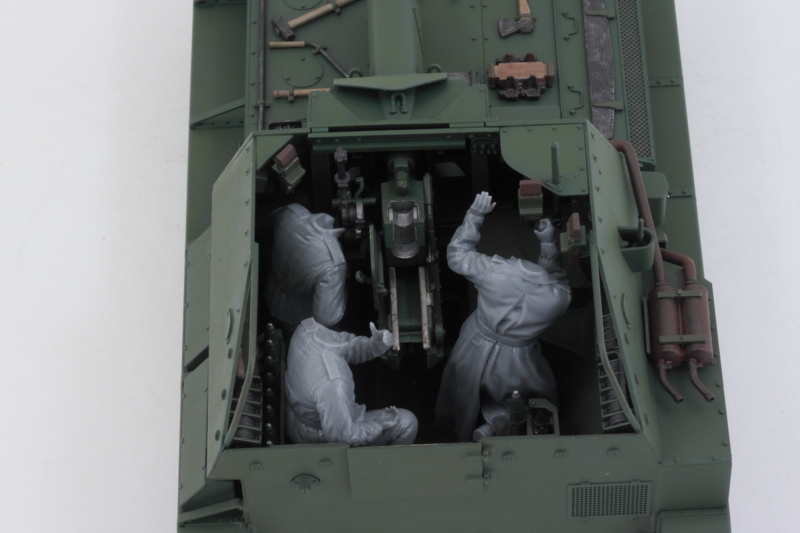 The loader is going to be holding a round, the instructions want you to fit an HE round but I did a test fit and one of the AP rounds fits just as well, so you can really take your pick since the sprues have 'clean' rounds of both type available for use. As you can see, the crew had to be on good terms with each other, not a lot of room to spread out! |
|
|
|
Post by Leon on Apr 4, 2016 17:51:43 GMT -5
WOW...Nice work on the shading Bill!  I like the subtle change in color and nice start on the crew.  |
|
afvfan
Senior Member
   
Member since: December 2012
Bob
Posts: 1,772
Dec 10, 2012 17:32:38 GMT -5
Dec 10, 2012 17:32:38 GMT -5
|
Post by afvfan on Apr 4, 2016 18:02:51 GMT -5
Would make for a 'little something different' scheme!  Not quite pink, but I did put this one out many years ago.  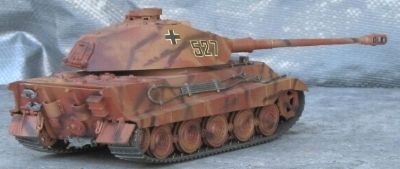 Sometimes this was more fun when I didn't know any better.  The SU looks great.... even if it is the "wrong" green.  |
|
Deleted
Member since: January 1970
Posts: 0
Nov 28, 2024 15:57:29 GMT -5
Nov 28, 2024 15:57:29 GMT -5
|
Post by Deleted on Apr 4, 2016 18:26:01 GMT -5
GREENAGE! 
|
|
|
|
Post by wbill76 on Apr 4, 2016 18:32:36 GMT -5
Thanks Leon! I've been having to think 'long' on this one to try to get it all together. So far it seems to be paying off!  Bob Bob, it's always good to keep around some of the older stuff as a reminder of the progression...I still have some of my very first (as an adult) builds still hanging around and there are some 'interesting' results there for sure.  GREENAGE!  Thanks Bruce!  |
|
|
|
Post by dierk on Apr 5, 2016 4:20:55 GMT -5
"the 4BO nazis" shouldn't that be 4BO bolshevics?  For a bit of fun and because I like to play devil's avocado, I'll temporarily let my inner 4BO bolshevic off the leash: I'm afraid you'll have to repaint the SU Bill - if the chip is from 1938 it isn't 4BO but 3B AU, a pre-war paint that had a fatal flaw: it reflected a different colour-spectrum from chlorophyll and with a special filter vehicles painted in 3B AU stood out like a sore thumb from the surrouding flora - leading to the introduction of 4BO using a linsed oil base, 4BN on a nitro-cellulose base and 4BG which was water based   Before the little freak makes me list the respective mixing-ratios I'll put him back in his box, lock it and throw away the key. Ok, now that order is restored, time to read Tobias' great article ' Colour Madness' again. If it looks good it is good - and Bill: your SU looks good enough to eat! |
|
martslay
Full Member
  
Member since: February 2016
Posts: 1,113 
|
Post by martslay on Apr 5, 2016 6:17:08 GMT -5
Everywhere same talk on paint shades. This talk always reminded me the statement: "You have the WRONG winter camouflage of 1941-1945". Weather conditions, operation and other always very strongly influence color of paint. It is senseless to argue "on the correct and wrong 4BO" or any other color. If the model looks good - everything means correctly.  The main thing that instead of green wasn't pink.  |
|
Deleted
Member since: January 1970
Posts: 0
Nov 28, 2024 15:57:29 GMT -5
Nov 28, 2024 15:57:29 GMT -5
|
Post by Deleted on Apr 5, 2016 7:51:29 GMT -5
To be 4BO or to Not be 4BO.......... that is the question? 
|
|
|
|
Post by wbill76 on Apr 5, 2016 10:19:50 GMT -5
Dierk, no worries about your inner 4Bolshevik! It's always neat to know that history behind the machine! I thought of you when I found that chip and compared it to color photos via Google.The ultimate goal was to land somewhere in the range given the enamel colors available to me. You and Martin are right about trying to get the one true tone for any color...once you add in dust/dirt, age/fading, variable paint production and application, etc a whole spectrum of possibility opens up! 
|
|
|
|
Post by armorguy on Apr 5, 2016 11:17:04 GMT -5
I like the color and it looks pretty well 4BO green to me. The figures look sharp, Russian cherries on the cake.
|
|
jsteinman
Full Member
  
Member since: March 2013
Posts: 735
Mar 24, 2013 9:29:10 GMT -5
Mar 24, 2013 9:29:10 GMT -5
|
Post by jsteinman on Apr 5, 2016 11:33:16 GMT -5
Thanks Andy! Considering that some tanks left the factory without paint - and I darn tootin bet many that were painted were painted with a mop that had been dipped in who knows what as long as your green isn't pink or purple you are okay in my book. That reminds me of the 'pink' T-34 that some anti-war protesters did a while back, can't recall exactly where (London maybe?), but this is the vehicle:  Would make for a 'little something different' scheme!  It is funny you post this up. I have been doing some research on this tank and have a bunch more photos showing it in many different schemes and colors - I am planning to do this as a side project as I wait on some 3D prints for my BA-6 Dio... |
|
|
|
Post by wbill76 on Apr 5, 2016 11:35:31 GMT -5
Thanks AG! John, now that would be fun to see!  |
|
sturmbird
Full Member
  
Member since: June 2012
Posts: 1,406
Jun 21, 2012 13:51:45 GMT -5
Jun 21, 2012 13:51:45 GMT -5
|
Post by sturmbird on Apr 5, 2016 12:17:23 GMT -5
Considering that some tanks left the factory without paint - and I darn tootin bet many that were painted were painted with a mop that had been dipped in who knows what as long as your green isn't pink or purple you are okay in my book. I made a similar statement several years ago on another board. They basically told me I was nuts! Still I knew I was right. Guess now there's two of us that are flat nuts! The Russians also shipped some T34's without any sighting device for the main gun due to shortages (bet those guys went strait to the Gulag!!) Paint colors change by the manufacturer, as well as the lot number. A fine example of this is in the USA. TACOM has an O.D. spec, and actually hold it pretty tight. Yet if your doing a repaint, the paint contract goes thru the GAO. They seem to change things monthly. You really spot this when you paint over chips. Germans (and probably the USA)used a deep red primer, but it was not red primer that we know. It was known as red lead, and you can still buy it to this day. Why? Most of all it has the best ability to attach itself to bare metal than any other form of paint. Plus it's not porous like the normal grades of primer we often think of (also not known to be a bleeder like other reds are). Still it's a dark red, and really closer to a brown. Several years back my brother and I paid a visit to Wright Patterson AFB in Ohio. Dead center of the runways sat one or two T54 Russian tanks. I knew they were Russian by the shade of green; let alone the texture. We stepped back to the truck and got out his field glasses. Have yet to see anybody come close to that green color. Myself, I don't get too wrapped up about paint colors. Do your best, and be done with it. gary |
|
sturmbird
Full Member
  
Member since: June 2012
Posts: 1,406
Jun 21, 2012 13:51:45 GMT -5
Jun 21, 2012 13:51:45 GMT -5
|
Post by sturmbird on Apr 5, 2016 12:21:32 GMT -5
Dierk, no worries about your inner 4Bolshevik! It's always neat to know that history behind the machine! I thought of you when I found that chip and compared it to color photos via Google.The ultimate goal was to land somewhere in the range given the enamel colors available to me. You and Martin are right about trying to get the one true tone for any color...once you add in dust/dirt, age/fading, variable paint production and application, etc a whole spectrum of possibility opens up!  Bill, Looks to me like you ended up with a near perfect match for those two T54's I saw in Ohio. They might have been just ever so slightly lighter in color (paint fading?). I like what I see. gary |
|
|
|
Post by wbill76 on Apr 5, 2016 12:31:07 GMT -5
Thanks Gary!  |
|
reserve
Senior Member
   
Member since: July 2012
Si vis pacem para bellum
Posts: 2,372
Jul 11, 2012 9:11:45 GMT -5
Jul 11, 2012 9:11:45 GMT -5
|
Post by reserve on Apr 5, 2016 19:28:10 GMT -5
Well it looks like Soviet green to me
A fine job on what seems to be a nice little kit
Regards,
Mark
|
|


 I hear you on the turning sprocket,had the same issue with the SPG.


