|
|
Post by Leon on Apr 1, 2016 4:47:23 GMT -5
Nice start on the detail painting Bill!  |
|
|
|
Post by wbill76 on Apr 1, 2016 10:13:32 GMT -5
Thanks Leon! Looking good Bill - really like your style of blogging (almost as much as I like my own  ) You know what they say about shared insanity!  |
|
|
|
Post by dierk on Apr 1, 2016 10:19:24 GMT -5
|
|
|
|
Post by Leon on Apr 1, 2016 11:05:41 GMT -5
ROFLMAO! !!!
|
|
|
|
Post by wbill76 on Apr 1, 2016 18:19:43 GMT -5
The details were the featured item on the menu today with the bulk of the focus on getting the tools detailed and ready for installation. Most of these install on the flat deck in front of the fighting compartment while the gun cleaning rods go under the left side overhang and behind the fender storage boxes. That's why those rods are called out in Step 15 before the fender installation, there's no real easy way to get them in place unless you leave the fenders removable like I've done. The rest of the tools are scattered around in the instructions in Steps 23-25. They were removed from the sprue, cleaned up, and detailed by hand. The only minor annoyance was Tamiya's decision to integrate the two spare links and the jack block into a single piece. It definitely made detailing those two very different elements an exercise in patience! I used MM Non-Buffing Metalizer Gunmetal as the base for all the metal parts, lightly dry brushed some enamel Steel, then dusted them with some black artist pastels to blend it all together. For the wood areas, I applied a base coat of 50/50 Afrika Grunbraun/Light Gray since it has a nice 'wood' tone, then applied a light wash of enamel Leather followed by some burnt umber artist pastels to get the look I wanted. With all that done, the tools were installed in place. 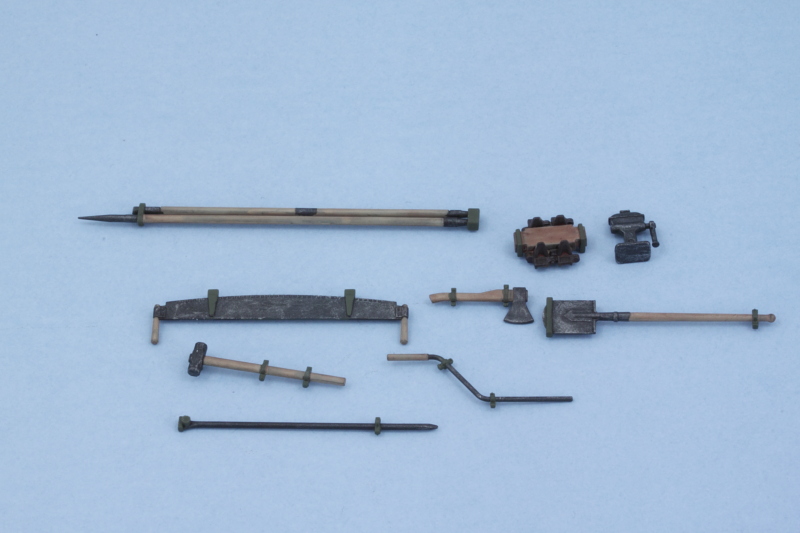 I did make some minor modifications to the shovel by sanding down its edges to get them more in-scale and also drilled out the exposed end of the gun cleaning rod for a little more detail. 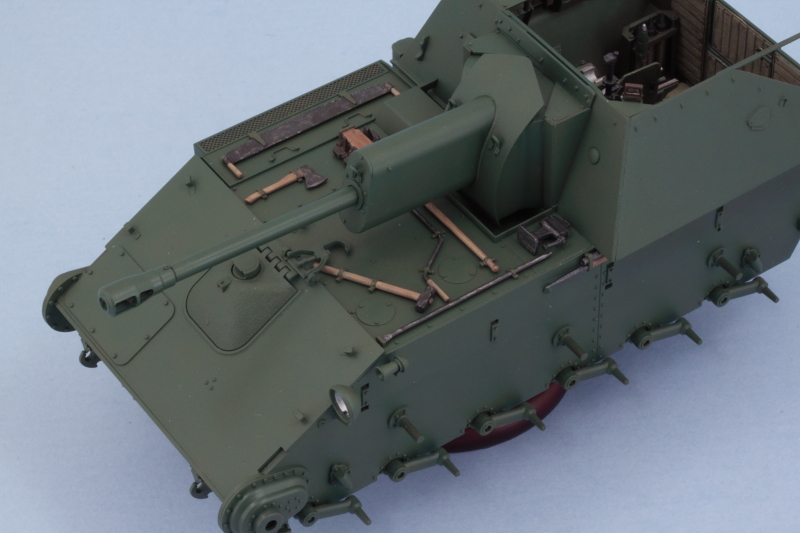 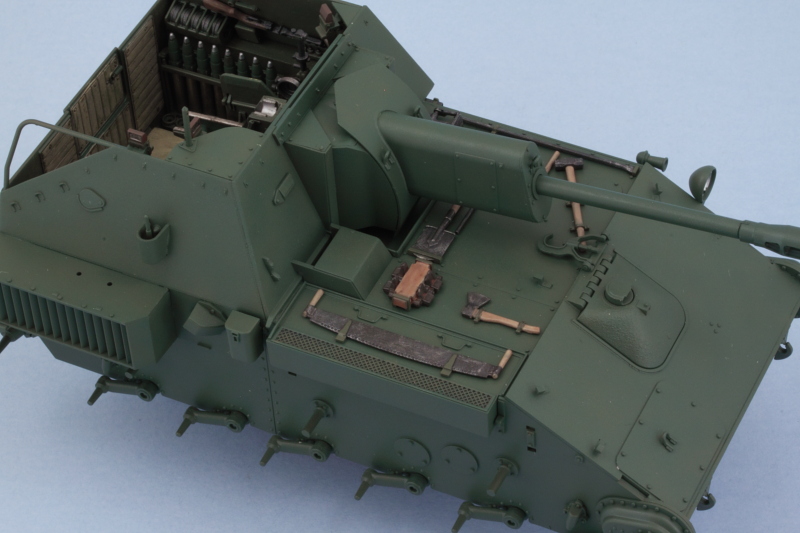 Next up were the exhausts. The two halves were assembled as directed in Step 21 and their join seam sanded down after the glue had set. I applied a base coat of MM non-buffing Metalizer Gunmetal to the bare plastic and then followed that up with multiple applications of a thinned Leather wash to build up some tonal variations. Some burnt orange artist pastels helped here as well and black artist pastels were added to the exhaust tips for some soot accumulation. The exhaust tips themselves were molded solid, so some quick work with a micro drill opened them up. I had to sacrifice one of the t-shaped retaining clamps for the exhausts to the carpet monster, but a quick bit of scratch building using strip styrene and rod gave me an adequate replacement. I had kept the two different exhaust pipes separate throughout the painting process and only joined them up once I was ready to install them in place. The key is to place the pipes in position first, then feed their long d-shaped tabs into the exhaust cylinders so that everything lines up correctly. Only then did I apply some liquid glue inside the small armored housing on the side of the hull, the connection points to the cylinders, and the small cutout support on the front of the fighting compartment. It sounds complicated but the Tamiya engineering allows you to pull it off with just a little patience. 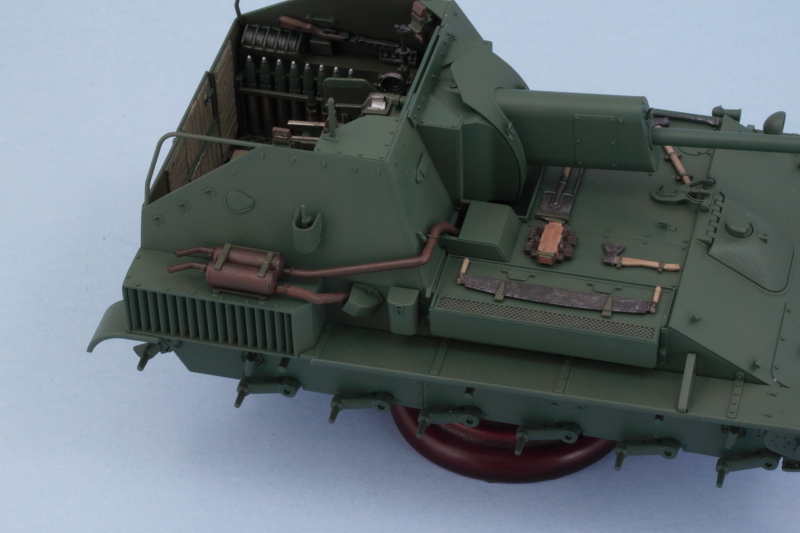 Always a fun step to get out of the way! |
|
vlpbruce
Full Member
  
Member since: March 2013
Posts: 1,463 
|
Post by vlpbruce on Apr 1, 2016 18:24:52 GMT -5
Another great update.
She's really looking good now Bill.
|
|
|
|
Post by wbill76 on Apr 1, 2016 18:28:31 GMT -5
Thanks Bruce! Starting to get some character to go with all that green.  |
|
|
|
Post by Leon on Apr 1, 2016 19:01:57 GMT -5
Tools look and exhaust great Bill!  |
|
|
|
Post by wbill76 on Apr 2, 2016 13:55:41 GMT -5
Thanks Leon! I've been putting off the tracks to the end...I think it's now time to tackle them next.  |
|
|
|
Post by wouter on Apr 2, 2016 14:30:11 GMT -5
Nice paintwork on the tools, Bill. And I must say, I like the effects on the exhaust as well!
Cheers
|
|
martslay
Full Member
  
Member since: February 2016
Posts: 1,113 
|
Post by martslay on Apr 2, 2016 14:33:28 GMT -5
Looks very good! Continue so Bill!  |
|
|
|
Post by wbill76 on Apr 2, 2016 15:17:33 GMT -5
Thanks Martin! Nice paintwork on the tools, Bill. And I must say, I like the effects on the exhaust as well! Cheers Thanks Wouts! I'm pleased with the exhaust as well, it took several passes to slowly build it up to the desired look but was worth it. Especially considering where they sit, they provide a nice bit of visual interest.  |
|
|
|
Post by armorguy on Apr 2, 2016 15:43:54 GMT -5
Awesome paintwork on the tools Bill ! What a difference once these are attached to the spgun.
|
|
|
|
Post by tonylee-Rest In Peace on Apr 2, 2016 16:48:19 GMT -5
It's a geeetin there Tex Tony lee  |
|
|
|
Post by wbill76 on Apr 2, 2016 16:53:29 GMT -5
Thanks AG! Have to agree, it really goes well with the green. Tony, slowly but surely sir!  |
|
|
|
Post by wbill76 on Apr 2, 2016 17:20:36 GMT -5
The latest effort was aimed at the lower hull and getting ready for the track installation. First order of business was beating up the lower hull a little bit. I added some wear by stippling and dry brushing a combination of Deep Yellow, Burnt Umber, and some of the OD/Russian Armor Green mix. I also weathered up the sprockets and added some bare metal wear to the drive teeth. 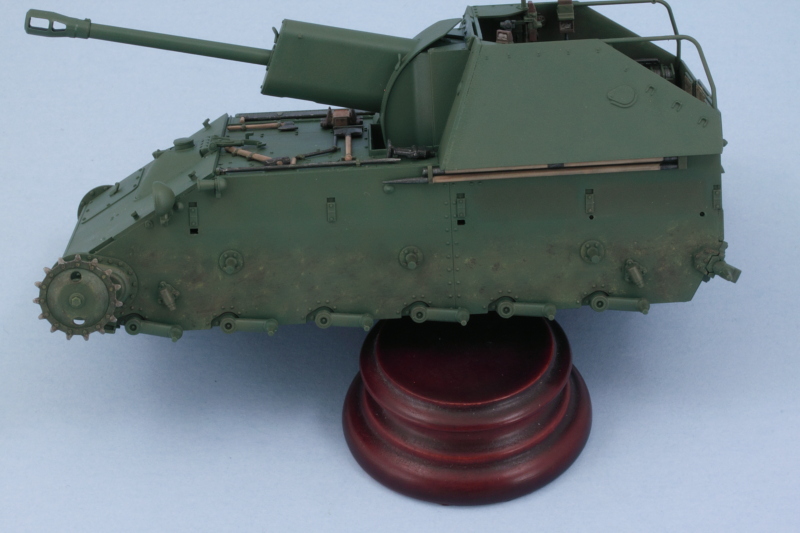 Road wheels also got some wear and attention. 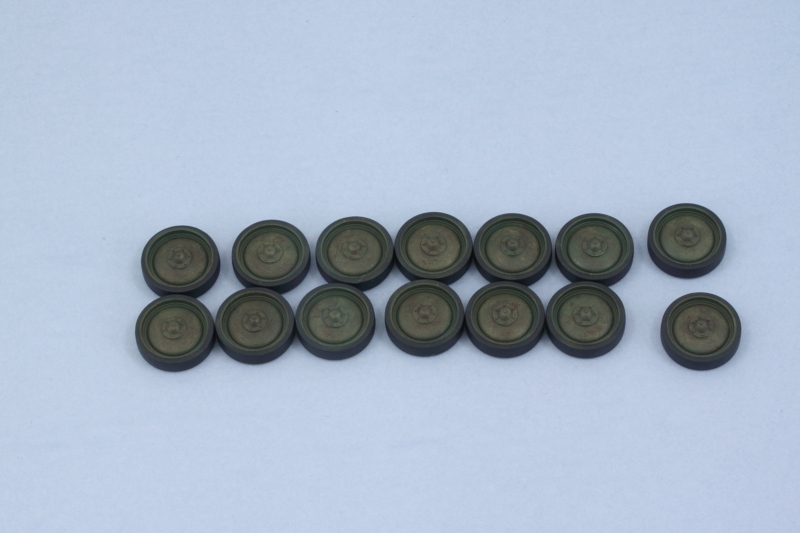 I installed the 6 road wheels per side but left off the idlers for now. I used liquid glue on the arms and cleaned up the long bottom run of the tracks so it could help serve as a guide to ensure all the wheels lined up together while the glue set. 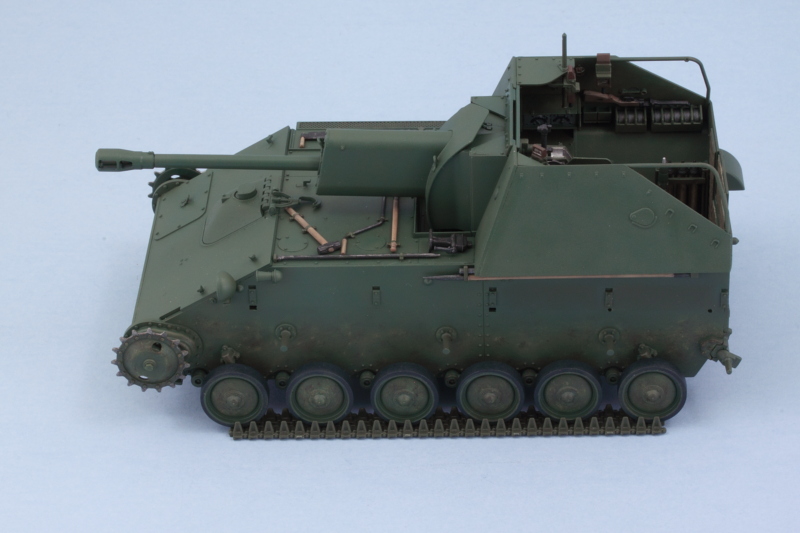 While the road wheels were setting up, I turned my attention to the individual track links. At the start of the instructions they indicate that 6 of the A33 links are 'not for use', so I removed all but 6 links from the sprue and cleaned them up. They have 2 small attachment points that have to be cleaned up but that's not a big deal. I used a small ziplock baggie to hold the links until needed. The links aren't very big and I used the Optivisor during the clean-up as they don't have a large contact surface with each other and I wanted to be sure I kept as much of that intact as possible. 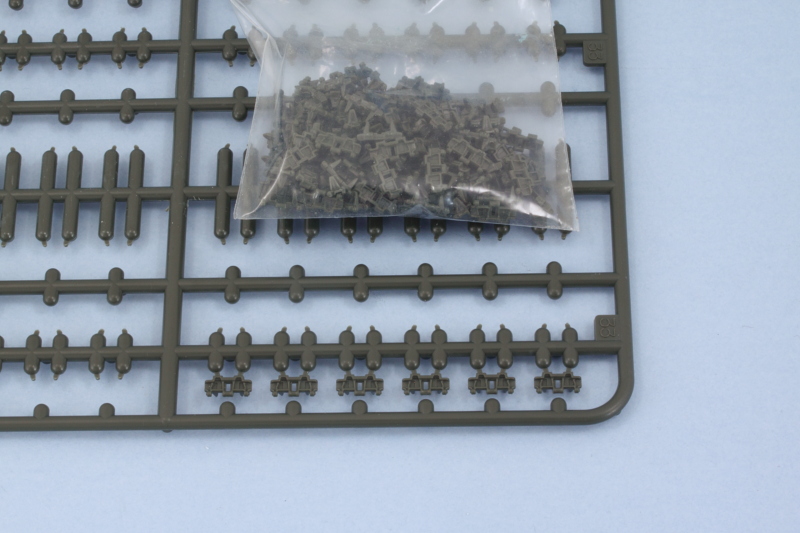 I counted out 34 links as directed in Step 19 and glued them together one at a time into a single straight run using regular glue and tweezers to fit them together. Once the run was together, I used the kit-supplied sag jig to shape the run into the necessary shape. The jig is also plastic, so care is needed in the gluing process so that the run can be safely removed after the glue has set. The jigs also have an 'F' mark that is supposed to be the front of the run. I noticed after I took the pic that I had the run ends reversed relative to the F, so I swapped it around before the glue had set. I'm not sure that it really matters all that much but better to be safe than sorry! I also double checked the 'hump' in the sag with three of the return rollers on the left side and everything lined up perfectly there too. 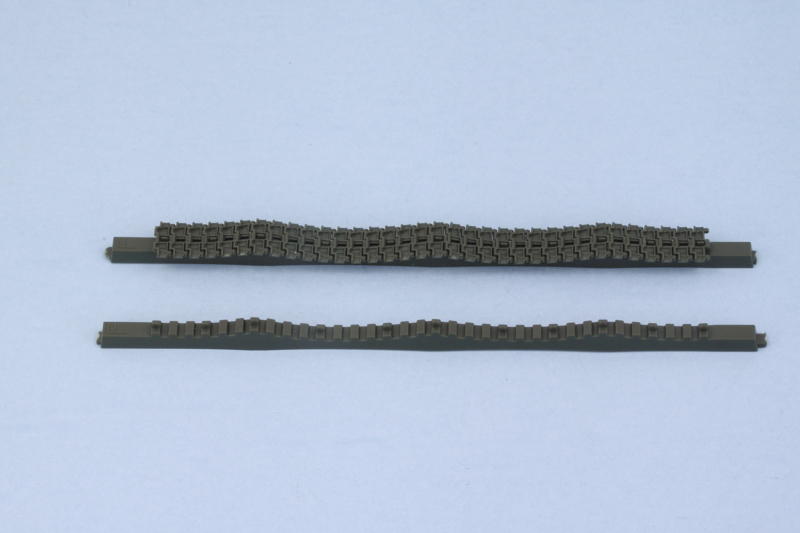 I'll let the two sagged top runs set up overnight before addressing the curved runs that connect the top and bottom runs together. All told, the instructions call for a combined 63 individual links to create the tracks runs so that's a total of 126 links between the two sides not including the straight length run already provided. |
|
Deleted
Member since: January 1970
Posts: 0
Nov 24, 2024 23:57:46 GMT -5
Nov 24, 2024 23:57:46 GMT -5
|
Post by Deleted on Apr 2, 2016 17:37:44 GMT -5
Wow! Excellent progress! 
|
|
|
|
Post by wbill76 on Apr 2, 2016 18:50:30 GMT -5
Thanks Bruce!  |
|
|
|
Post by Leon on Apr 2, 2016 19:06:19 GMT -5
Nice start on the tracks and getting the wheels on Bill! I like the idea of the sag jig they included.  |
|
|
|
Post by wbill76 on Apr 2, 2016 19:35:43 GMT -5
Thanks Leon! The jig certainly makes life easier to form the sag consistently. Since there's not a whole lot of contact surface with the small links, it also increases the overall 'strength' of the assembly. We'll see how it all goes together with the rest of the runs!  |
|
|
|
Post by armorguy on Apr 3, 2016 3:40:54 GMT -5
This is gonna be so cool with the tracks on !
|
|
|
|
Post by dierk on Apr 3, 2016 8:35:36 GMT -5
Like the detail work a lot Bill! Looking forward to seeing it with tracks on.
|
|
|
|
Post by wbill76 on Apr 3, 2016 10:12:47 GMT -5
Thanks AG and Dierk! Tracks definitely change the look of this little guy.  |
|
martslay
Full Member
  
Member since: February 2016
Posts: 1,113 
|
Post by martslay on Apr 3, 2016 10:43:06 GMT -5
Interestingly looks
Bill!
The convenient conductor for tracks.
|
|
|
|
Post by wbill76 on Apr 3, 2016 11:49:48 GMT -5
Thanks Martin! Fingers crossed that the Tamiya engineering will pull it all together.  |
|
|
|
Post by wouter on Apr 3, 2016 12:38:20 GMT -5
Whoop whoop, always good to see dust appear on the lower hull!
Cheers
|
|
|
|
Post by wbill76 on Apr 3, 2016 14:21:41 GMT -5
Whoop whoop, always good to see dust appear on the lower hull! Cheers First sign of the apocalypse!  |
|
sturmbird
Full Member
  
Member since: June 2012
Posts: 1,406
Jun 21, 2012 13:51:45 GMT -5
Jun 21, 2012 13:51:45 GMT -5
|
Post by sturmbird on Apr 3, 2016 14:26:51 GMT -5
Really no other way that I could see to do it Gary given all the detail that has to go in that compartment.  Glad to have you along!  I liked what I saw, that I bought the same kit yesterday afternoon. Forgot just how small that hull is! gary |
|
|
|
Post by wbill76 on Apr 3, 2016 15:13:54 GMT -5
Really no other way that I could see to do it Gary given all the detail that has to go in that compartment.  Glad to have you along!  I liked what I saw, that I bought the same kit yesterday afternoon. Forgot just how small that hull is! gary It's a tiny little guy for sure...even with the small stretch and extra road wheel they put in to accommodate the ZiS-3.  |
|
afvfan
Senior Member
   
Member since: December 2012
Bob
Posts: 1,772
Dec 10, 2012 17:32:38 GMT -5
Dec 10, 2012 17:32:38 GMT -5
|
Post by afvfan on Apr 3, 2016 18:29:24 GMT -5
Making some good headway on this, Bill. You can almost see the finish line now.
|
|