flmlm
Full Member

Member since: March 2016
Crack open that kit and smell the build ????
Posts: 170 
|
Post by flmlm on May 6, 2016 18:56:50 GMT -5
Thanks Leon....its growing on me as well.
Regards
Mike
|
|
flmlm
Full Member
Member since: March 2016
Crack open that kit and smell the build ????
Posts: 170
|
Post by flmlm on May 6, 2016 20:52:08 GMT -5
This beast has been a labor of joy for the most part. Looking back I should have spent a little more time on research on the M60 in this configuration.the motorization kinda messed me up I should have spent a little more time in closing up those holes intended for the motorization.
Regards
Mike
|
|
|
|
Post by deafpanzer on May 7, 2016 20:07:54 GMT -5
I am with Leon... it is starting to look sexy now!
|
|
flmlm
Full Member
Member since: March 2016
Crack open that kit and smell the build ????
Posts: 170
|
Post by flmlm on May 9, 2016 12:51:08 GMT -5
Thanks fella's I'm almost ready to start some shading followed by washes....having a good time with this kit.
Regards
Mike
|
|
flmlm
Full Member
Member since: March 2016
Crack open that kit and smell the build ????
Posts: 170
|
Post by flmlm on May 31, 2016 17:28:37 GMT -5
Good Evening Hope all had a good holiday. I've been moving a long with the build just been slow. I'm a modular builder and the major components have been completed. Set to finish the tracks next ......I've almost completed the included stowage. Washes up next and weathering on the tracks. Regards Mike 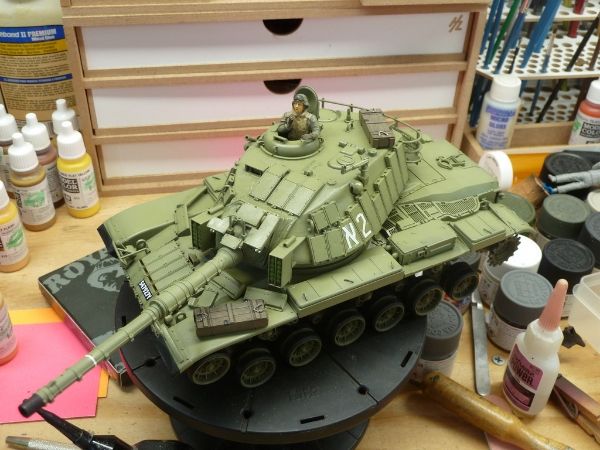 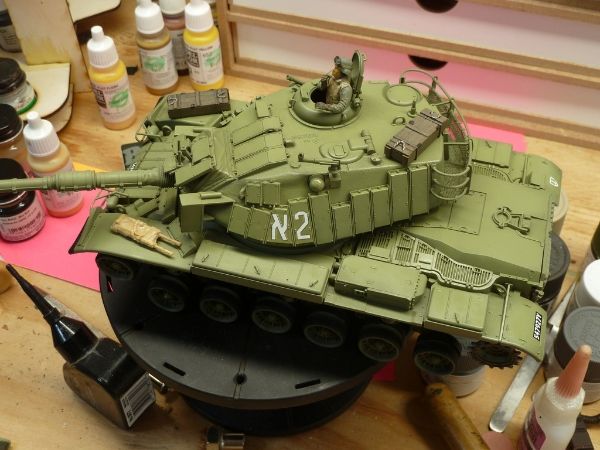 |
|
|
|
Post by TRM on May 31, 2016 17:49:20 GMT -5
Looking great Mike! Bring on the weathering!!  |
|
|
|
Post by Leon on Jun 1, 2016 6:55:12 GMT -5
Looking really good Mike!
|
|
|
|
Post by wbill76 on Jun 1, 2016 10:25:24 GMT -5
Looking good Mike!
|
|
flmlm
Full Member
Member since: March 2016
Crack open that kit and smell the build ????
Posts: 170
|
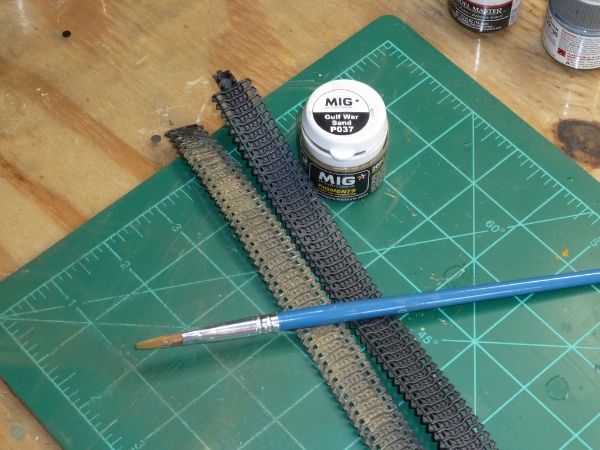
Post by flmlm on Jun 19, 2016 6:31:50 GMT -5
Good Morning All and Happy Father's Day!
Started the weathering on the kit supplied tracks. I've decided to give MIG Pigments a try. So far so good impressed with the product and the results. Additionally doing an oil wash on the turret and hull. Hope to get a bit more done today.
Regards
Mike
|
|
|
|
Post by wbill76 on Jun 19, 2016 23:56:43 GMT -5
Off to a great start on the tracks!
|
|
|
|
Post by Leon on Jun 20, 2016 4:15:34 GMT -5
Nice start on tracks and the oil wash looks good Mike!
|
|
|
|
Post by deafpanzer on Jun 22, 2016 21:35:47 GMT -5
Huge fan of MiG pigments... Amazing how they can transform models into something. Looking good my friend!
|
|
flmlm
Full Member
Member since: March 2016
Crack open that kit and smell the build ????
Posts: 170
|
Post by flmlm on Jun 23, 2016 7:28:53 GMT -5
Thanks Guys!
Andy I normally utilize good ole fashion northern dirt ground into powder but the MIG product is pretty good stuff. Still experimenting with oils for the washes....not totally satisfied with the outcome but... with practice I'm sure my use of oil washes will improve.
Regards
Mike
|
|
thug626
Senior Member

Member since: January 2013
Posts: 1,782
Jan 15, 2013 13:05:28 GMT -5
Jan 15, 2013 13:05:28 GMT -5
|
Post by thug626 on Jun 25, 2016 10:58:39 GMT -5
Good morning Mike. This beastie is rolling along nicely. Your oil wash really is staring to bring it to life. Following is one of the tricks I've done with MIG pigments and tracks, especially delicate indy plastic ones. You could certainly apply it to "rubber band" tracks.
I'll make a wash with distilled water and some pigment:
- Brush on liberally over the entire track
- Set aside to dry. You could use a blow dryer for this. Just make sure not to get it too close to the tracks...rubber band or otherwise
-Using a stiff brush (e.g. deer hoof brush) to remove the excess. Make sure you wear a mask and have good ventilation as a lot of this will get airborne and hang there for a bit.
- Use a graphite stick, bar, pencil...whatever works for you....basically color the contact surfaces to give a metallic finish. On the inside runs of track, where the road wheels contact the inside of the track, I'll use a smudging stick with graphite to burnish those areas. I'll hit the edges of the guide horns with a sharp #2 pencil to give some contrast.
Sorry, I don't mean to hijack your post.
I certainly will be staying tuned for this build. Now book marked!
Dave
|
|
flmlm
Full Member
Member since: March 2016
Crack open that kit and smell the build ????
Posts: 170
|
Post by flmlm on Jun 25, 2016 20:06:55 GMT -5
Thanks for sharing Dave....I appreciate your input.......I'll give that technique a try.
Regards
Mike
|
|
thug626
Senior Member
Member since: January 2013
Posts: 1,782
Jan 15, 2013 13:05:28 GMT -5
Jan 15, 2013 13:05:28 GMT -5
|
Post by thug626 on Jun 26, 2016 2:29:52 GMT -5
No problem. Just have fun with your build....whatever it may be.
Cheers
Dave
|
|
flmlm
Full Member
Member since: March 2016
Crack open that kit and smell the build ????
Posts: 170
|
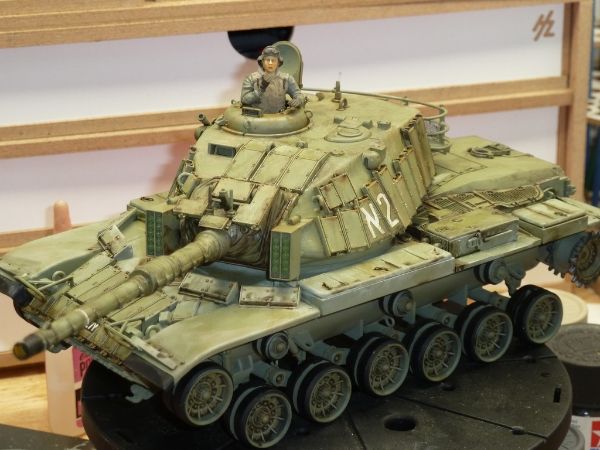
Post by flmlm on Jul 3, 2016 19:05:35 GMT -5
Good Evening All, I had the opportunity to get a bit more done on the M60 today. As mentioned earlier in the thread I'm a component builder and saving final assembly for the end. Well its getting close to the end. Tomorrow I hope to join the drive assembly to the upper hull after which I'll be just about done. Today I used my old technique of using sifted dirt for the drive assembly and under the upper hull. I live in Florida so not much dirt around here just sand. As a result whenever I visit my home state of West Virginia I always collect a bag of dirt to bring home with me which is what I used on the underside of the upper hull. To try and bring it all together I also used Tamiya Buff diluted 20/80 for a dried mud effect. Very pleased to this point. Time for an adult beverage...have a good evening my friends. Regards Mike 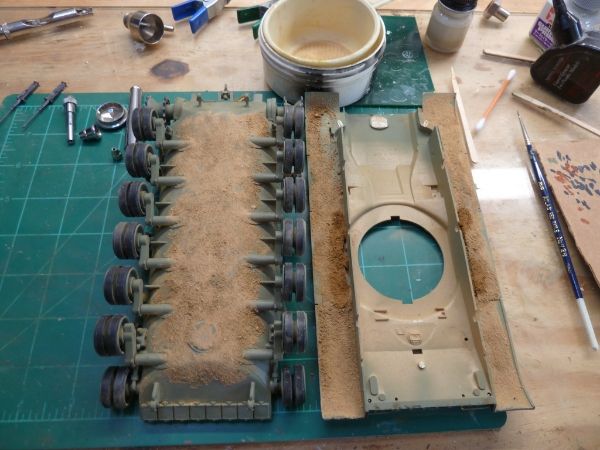 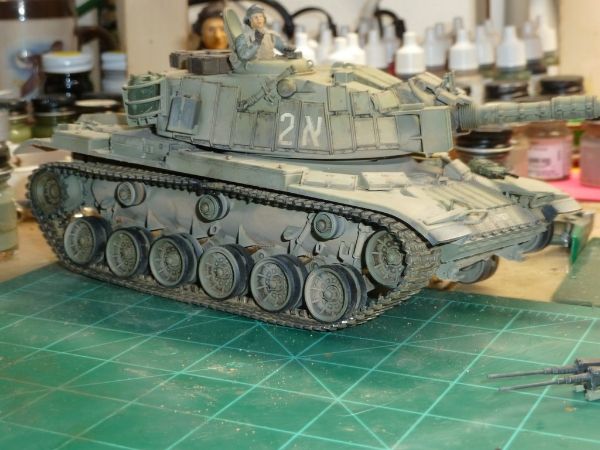 |
|
|
|
Post by Leon on Jul 3, 2016 21:16:51 GMT -5
That looks great Mike! How did you fix the dirt to the hull? I want to try that on a few projects.  |
|
flmlm
Full Member
Member since: March 2016
Crack open that kit and smell the build ????
Posts: 170
|
Post by flmlm on Jul 4, 2016 6:13:37 GMT -5
That looks great Mike! How did you fix the dirt to the hull? I want to try that on a few projects. Leon I use Titebond II glue (water based) thinned ...brushed on with a cheap brush. I then start sprinkling on the dirt. Works well for me. Regards Mike |
|
|
|
Post by Leon on Jul 4, 2016 8:02:20 GMT -5
Thank you Mike,much appreciated! |
|
13bravo
Junior Member

Member since: April 2016
Posts: 47
|
Post by 13bravo on Jul 4, 2016 14:04:39 GMT -5
Mike; that M60 looks great. Great idea with the dirt. I'll have to try that technique on my next build.
Kindest Regards;
Harold aka 13Bravo
|
|
|
|
Post by deafpanzer on Jul 5, 2016 10:56:21 GMT -5
I really like what I am seeing... keep up with the great work!
|
|
|
|
Post by wbill76 on Jul 5, 2016 13:52:20 GMT -5
Can't beat real dirt for making something look dirty! Nice progress Mike.
|
|
flmlm
Full Member
Member since: March 2016
Crack open that kit and smell the build ????
Posts: 170
|
Post by flmlm on Jul 5, 2016 14:30:22 GMT -5
Thanks for the comments fella's. This build is working out. I'm pleased with it to this point.
Regards
Mike
|
|
|
|
Post by TRM on Jul 5, 2016 20:24:31 GMT -5
Well done so far mike! Undercarriage is looking the part now! |
|
flmlm
Full Member
Member since: March 2016
Crack open that kit and smell the build ????
Posts: 170
|
Post by flmlm on Jul 31, 2016 19:13:02 GMT -5
Good Afternoon Got back to the bench on this one. When I was installing the rubber band tracks that came with the kit the rear drive sprocket busted off, good grief! Lucky for me I had not glued them so I was able to remove the broken axle from the hub so that repair should be half way simple....I will prevail with this beast. Regards Mike I went ahead and removed the other drive sprocket as well it was only a matter of time before that one broke as well 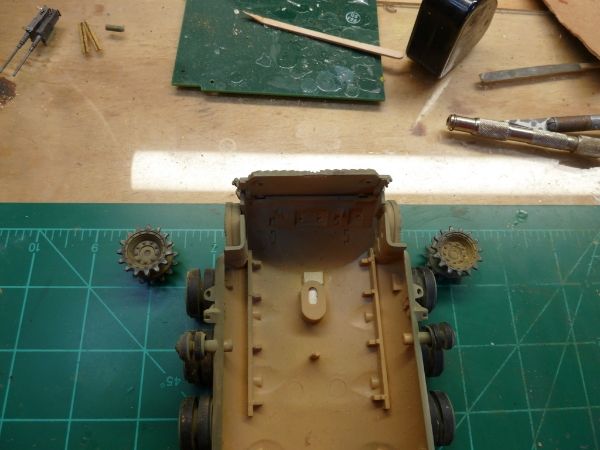 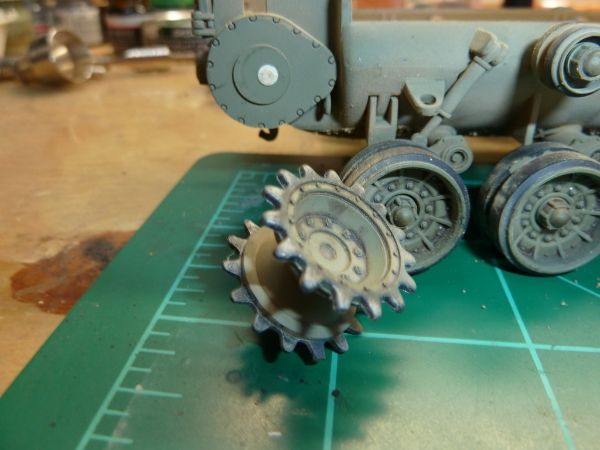 Drilling out the broken pieces 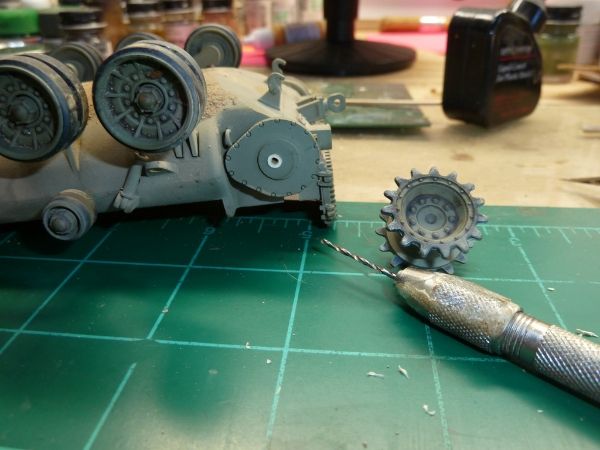 |
|
|
|
Post by Leon on Jul 31, 2016 19:44:39 GMT -5
Been there,done that Mike! Should be an easy fix. |
|
|
|
Post by wbill76 on Aug 1, 2016 10:06:58 GMT -5
Better to experience it now vs. later when you had it all together! Those bandy tracks can produce a lot of tension for sure.
|
|
flmlm
Full Member
Member since: March 2016
Crack open that kit and smell the build ????
Posts: 170
|
Post by flmlm on Aug 1, 2016 14:47:41 GMT -5
Better to experience it now vs. later when you had it all together! Those bandy tracks can produce a lot of tension for sure. That's exactly what I thought as well! I decided not to take a chance with the other one for that very reason. It was wobbling too so I just went ahead and broke that one off so I wouldn't have to worry about it after the lower and upper hull glued together.
Regards Mike
|
|
flmlm
Full Member
Member since: March 2016
Crack open that kit and smell the build ????
Posts: 170
|
Post by flmlm on Aug 1, 2016 14:48:40 GMT -5
Been there,done that Mike! Should be an easy fix. Thanks! I've just about got it all back together again and it's not to bad.
Regards Mike
|
|


