|
|
Post by dierk on Dec 7, 2016 10:46:01 GMT -5
Hans and Franz? hehe - google what Heidi Klum calls her, erm... lady-bumps  |
|
|
|
Post by TRM on Dec 7, 2016 15:02:38 GMT -5
Fine work in the office and its inhabitants Joe!!  |
|
|
|
Post by fightnjoe on Dec 8, 2016 18:50:54 GMT -5
Many many thanks.
Joe
|
|
|
|
Post by deafpanzer on Dec 8, 2016 21:59:55 GMT -5
I can't remember if you have ever done figures before and you did great!!!
|
|
|
|
Post by panzerjager2 on Dec 9, 2016 3:47:03 GMT -5
Being a 1/25 scale guy, ( yes I know it's 1/24th) all I can say is..........

|
|
adt70hk
Forum Moderator      November '24 Showcased Model Awarded
Member since: November 2015
Currently attempting to build something decent!!! ;)
Posts: 2,836 
MSC Staff
|
Post by adt70hk on Dec 9, 2016 16:52:50 GMT -5
Looking very nice there indeed!!
|
|
|
|
Post by fightnjoe on Dec 11, 2016 0:10:38 GMT -5
Many many thanks. Not very often Andy.
Joe
|
|
|
|
Post by fightnjoe on Dec 11, 2016 0:11:18 GMT -5
Today was a productive day. The day began with the skeleton of two pieces of wing and one tail feather. It ends with ribs and details. The ribs are a mixture of .010 x .040, .020 x .020, and .010 x .030 strip. I began to fabricate the two fuel cells and the inner bulkheads and such. In the outer wing the shinny round pieces are BB's and the larger blue pieces are craft beads. Let the ribbing commence. 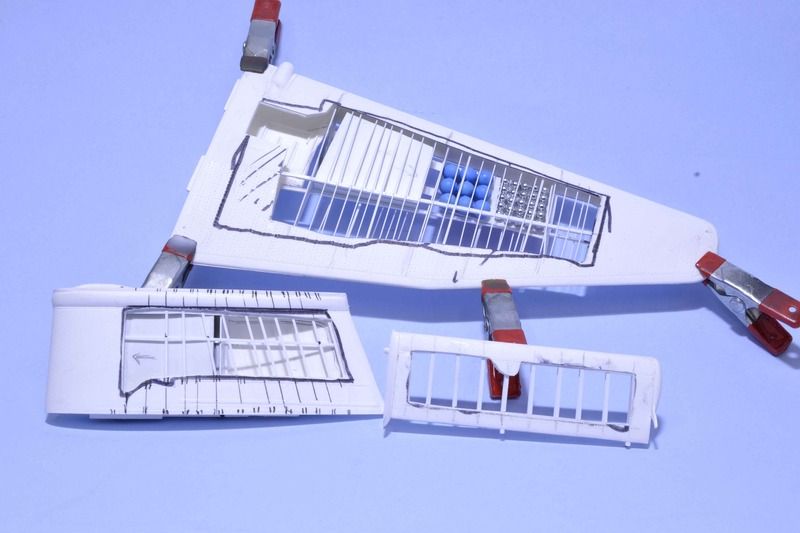 There they are in all their glory. I do need to finish up a bit of the detail work but then I can go forward with the firewall and the engine compartment. All comments, critiques, and criticism are encouraged. Joe |
|
adt70hk
Forum Moderator      November '24 Showcased Model Awarded
Member since: November 2015
Currently attempting to build something decent!!! ;)
Posts: 2,836 
MSC Staff
|
Post by adt70hk on Dec 11, 2016 3:47:29 GMT -5
Now that must have taken some patience!! Hats off to you that is very nicely done indeed.
Andrew
|
|
|
|
Post by Leon on Dec 11, 2016 7:08:16 GMT -5
Nice work on the ribbing Joe!  |
|
|
|
Post by fightnjoe on Dec 22, 2016 16:24:19 GMT -5
Very kind. Thank you.
Joe
|
|
Rick
Full Member
  
Member since: March 2013
what to build, what to build . . . Ok THAT one!
Posts: 854 
|
Post by Rick on Dec 22, 2016 19:09:21 GMT -5
Looking good Joe!
|
|
|
|
Post by wbill76 on Dec 24, 2016 12:48:54 GMT -5
Keep at it Joe, looking good.
|
|
|
|
Post by fightnjoe on Jan 3, 2017 23:33:52 GMT -5
You are all very kind. Thank you.
Joe
|
|
|
|
Post by fightnjoe on Jan 3, 2017 23:34:27 GMT -5
After nearly two weeks of being sick I am able to show a bit of progress. I began the process of preparing to get some color on the build. I did this just a bit different than previous builds. I began with a Gloss Black base. I then shot Alclad Polished Aluminium. Mind you this was not done to be a high gloss, mirror finish. Just a base for the color to come. 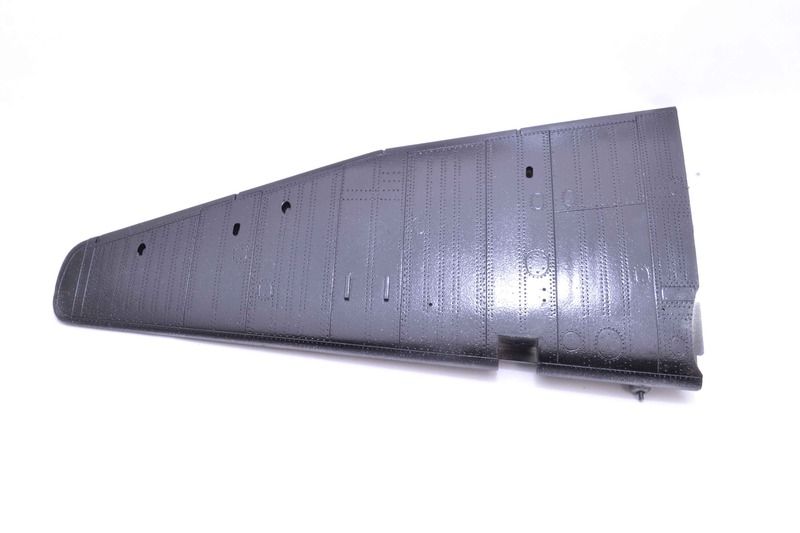 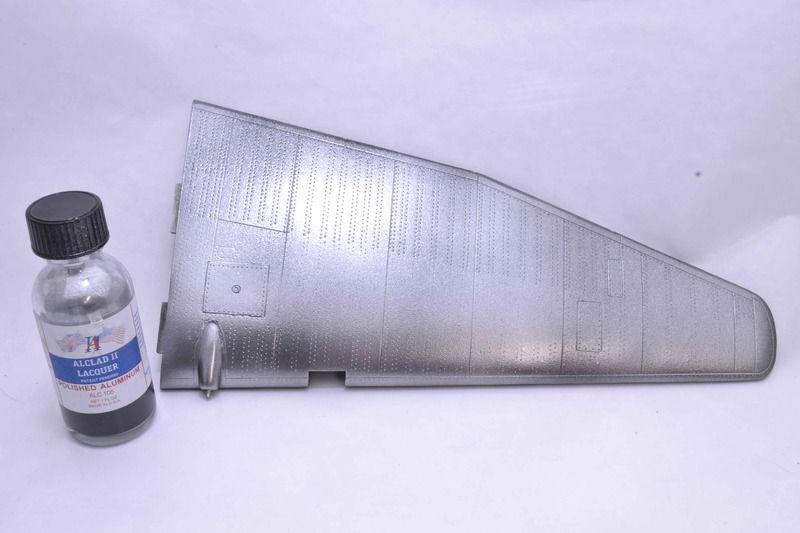 Once dry the real colors make their appearance. RLM 70 and 71 for the upper and RLM 65 for the lower. I began by taping off the shapes and then shot a lightened version of each of the top colors to get a first color. I then went back through with thinned coats of the colors to darken up the cammo. For the lower I shot several layers of thinned color. 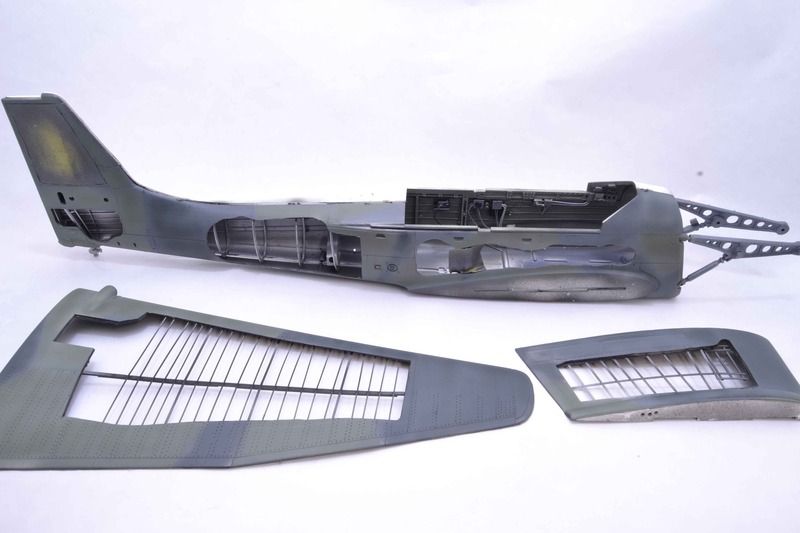 This was done over the cut away sections. I did this to try to minimize any overspray to the interior. I did have a bit of a mishap. Prior to getting sick I scanned the decal sheet. My son touched up the image to give the best possible color. I then printed off the decals on two sheets, my only two sheets, of decal paper. Once I thought it was dry I sprayed decal bonder. Once I felt up to doing anything again I checked on the decals and found that they had a reddish tint. Not sure if the ink had not dried or what happened. I do need to redo these. This is good progress and hopefully the momentum can continue for a while. All comments, critiques, and criticism are encouraged. Joe |
|
|
|
Post by panzerjager2 on Jan 3, 2017 23:49:38 GMT -5
Making FINE progress
|
|
|
|
Post by wbill76 on Jan 4, 2017 12:17:19 GMT -5
Glad to see you're back at work on this one Joe. Tough break on the decals but better to know that now than later I guess.  |
|
|
|
Post by deafpanzer on Jan 4, 2017 14:50:28 GMT -5
Looking real good... happy to see your updates too unless another publisher tells you not to share. LOL
|
|
|
|
Post by fightnjoe on Jan 4, 2017 23:53:04 GMT -5
Many thanks all. I hope to redo the decals soon.
Joe
|
|
|
|
Post by Leon on Jan 5, 2017 5:20:08 GMT -5
Nice progress on the paint Joe!
|
|
|
|
Post by fightnjoe on Jan 5, 2017 15:58:49 GMT -5
Many many thanks my friend.
Joe
|
|
adt70hk
Forum Moderator      November '24 Showcased Model Awarded
Member since: November 2015
Currently attempting to build something decent!!! ;)
Posts: 2,836 
MSC Staff
|
Post by adt70hk on Jan 5, 2017 18:04:21 GMT -5
Good to see some paint on Joe!!
Looking forward to seeing a lot more soon!!! 😁
|
|
thug626
Senior Member
   
Member since: January 2013
Posts: 2,035
Jan 15, 2013 13:05:28 GMT -5
Jan 15, 2013 13:05:28 GMT -5
|
Post by thug626 on Jan 8, 2017 15:00:47 GMT -5
All caught up now. Solid work going on here.
|
|
|
|
Post by fightnjoe on Jan 8, 2017 19:10:42 GMT -5
Many many thanks.
Joe
|
|
|
|
Post by fightnjoe on Jan 8, 2017 19:11:25 GMT -5
Time for just a very brief update. Big news as the fuselage is now closed and the inner wing sections are attached. Not so happy news is the gaps for the fuselage halves and the wing roots were at the very least and eighth of an inch in width. This thing needed about a third of a container of putty to actually fill them. That was even after using some styrene to try to fill the gap. In the end though the inner wings are on and the fuselage is closed. I did add the detail to the interior of the cut wing section. More on that later. Pictures of the gap and putty show. 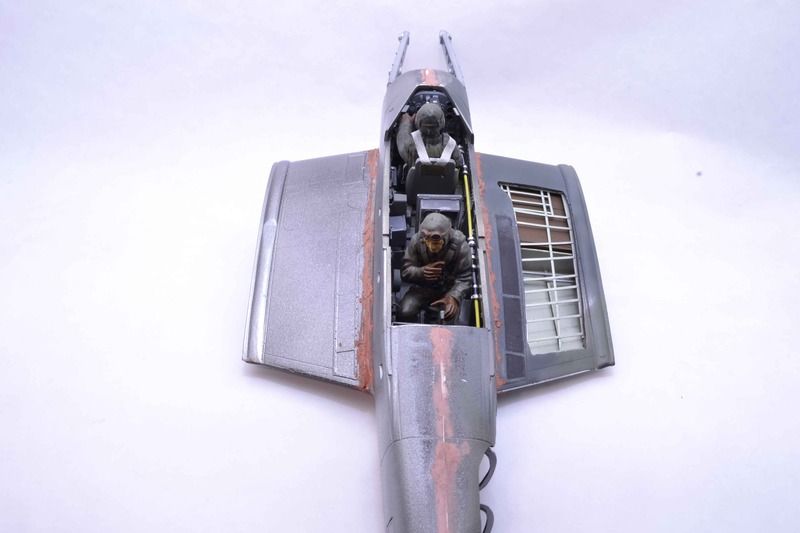 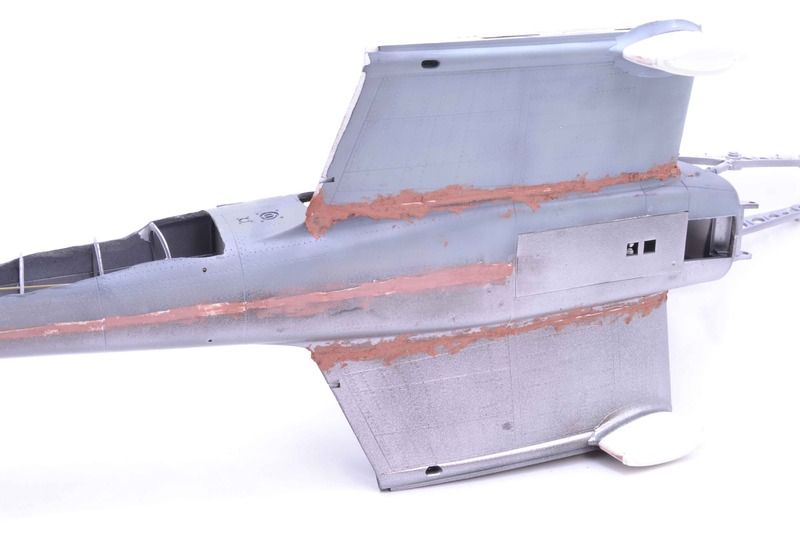 I did spend a little time on the engine. Nothing worthy of pictures yet but soon I hope. All comments, critiques, and criticism are encouraged. Joe |
|
|
|
Post by TRM on Jan 8, 2017 19:52:54 GMT -5
No Comments or critiques...maybe words of praise after filling the gaps!  Looks like your making some good process Joe!! Keep the fires lit on the bench! |
|
|
|
Post by deafpanzer on Jan 8, 2017 22:21:34 GMT -5
Bet you had so much fun filling the gap with putty... NOT! You will win at the end eventually...
|
|
|
|
Post by dupes on Jan 9, 2017 6:43:11 GMT -5
Dang... eighth of an inch, eh? You've done so much scratch work, wouldn't it be easier to fabricate new pieces to avoid the bucket 'o putty?
Would love to have one of these in the collection. What a beast of a kit!
|
|
M1Carbine
Senior Member
    November '23 Showcased Model Awarded
Member since: November 2012
Posts: 1,730
Nov 16, 2012 2:49:11 GMT -5
Nov 16, 2012 2:49:11 GMT -5
|
Post by M1Carbine on Jan 9, 2017 7:32:32 GMT -5
Wow! Looks awesome so far Joe.
Bob
|
|
plasticjunkie
Full Member
   Sept '24 Showcased Model Awarded
Member since: December 2016
Posts: 132
Dec 25, 2016 1:04:48 GMT -5
Dec 25, 2016 1:04:48 GMT -5
|
Post by plasticjunkie on Jan 11, 2017 7:59:52 GMT -5
Wow that Stuka is looking stunning. Amazing attention to detail. I've had a couple of issues come up when printing my own decals too. Isn't decal printing fun?  |
|