|
|
Post by wbill76 on Jun 21, 2017 23:44:35 GMT -5
Thanks PJ! With Ships the hull is almost like a sub-build all to itself.
|
|
|
|
Post by dierk on Jun 22, 2017 4:55:28 GMT -5
People wearing glasses are often called four-eyes. So, does that make crutch users 'four-legs'?   |
|
|
|
Post by wbill76 on Jun 22, 2017 8:17:10 GMT -5
People wearing glasses are often called four-eyes. So, does that make crutch users 'four-legs'?   One of those deep and abiding mysteries Dierk! All I know is that I dread moving around with them as every little effort swinging the leg around is sheer agony.  |
|
|
|
Post by dierk on Jun 23, 2017 4:53:06 GMT -5
Hope you're mended soon - can't be fun. Looking on the bright side, you've got a good excuse to spend time modelling I suppose.
|
|
|
|
Post by wbill76 on Jun 23, 2017 9:05:37 GMT -5
Hope you're mended soon - can't be fun. Looking on the bright side, you've got a good excuse to spend time modelling I suppose. They put me in an orthopedic boot to help with isolation of the lower leg and that has helped a lot. PT will start next Friday, that's when it will get really interesting.  |
|
joelsmith
Full Member
  
Member since: July 2012
There no winners in war, only survivors.
Posts: 1,404
Jul 5, 2012 22:33:58 GMT -5
Jul 5, 2012 22:33:58 GMT -5
|
Post by joelsmith on Jun 23, 2017 13:50:29 GMT -5
Bill, a hint that my PT told me was to take your pain meds an hour before pt, it makes it a bit less painful, HTH, Joel.
|
|
|
|
Post by wbill76 on Jun 23, 2017 14:21:27 GMT -5
Bill, a hint that my PT told me was to take your pain meds an hour before pt, it makes it a bit less painful, HTH, Joel. Oh yes, I know all about that having done PT a couple of years ago on my knee.  It's a good torture process but sometimes feels worse than the injury! |
|
afvfan
Senior Member
   
Member since: December 2012
Bob
Posts: 1,772
Dec 10, 2012 17:32:38 GMT -5
Dec 10, 2012 17:32:38 GMT -5
|
Post by afvfan on Jun 23, 2017 15:27:52 GMT -5
You must be growing grapes out there, Bill, cause it sure sounds like the whinery is open.  ....  Hope you recover as quickly and painlessly as possible.  |
|
|
|
Post by wbill76 on Jun 23, 2017 15:46:30 GMT -5
You must be growing grapes out there, Bill, cause it sure sounds like the whinery is open.  ....  Hope you recover as quickly and painlessly as possible.  Summer vintage is always the sweetest!  |
|
bbrowniii
Full Member
  
Member since: March 2012
If you are not part of the solution, you are part of the precipitate.
Posts: 1,238
Mar 25, 2012 22:08:04 GMT -5
Mar 25, 2012 22:08:04 GMT -5
|
Post by bbrowniii on Jun 23, 2017 16:13:30 GMT -5
Bill
Sorry to hear about your injury. I hope the crutch time isn't too agonizing.
The Graf Spee is coming together nicely. I'm looking forward to that hull work!
|
|
|
|
Post by wbill76 on Jun 24, 2017 12:19:33 GMT -5
Thanks Boyd! Should be able to get some airbrush work done today on the hull now that the roofers have finished. The last area they were working on was directly over my spray booth, so didn't want to risk any kind of dust/contamination issues. It's a busy summer in many ways!  |
|
|
|
Post by panzerjager2 on Jun 24, 2017 12:31:28 GMT -5
Bill, good to hear your "up and at em" again..........
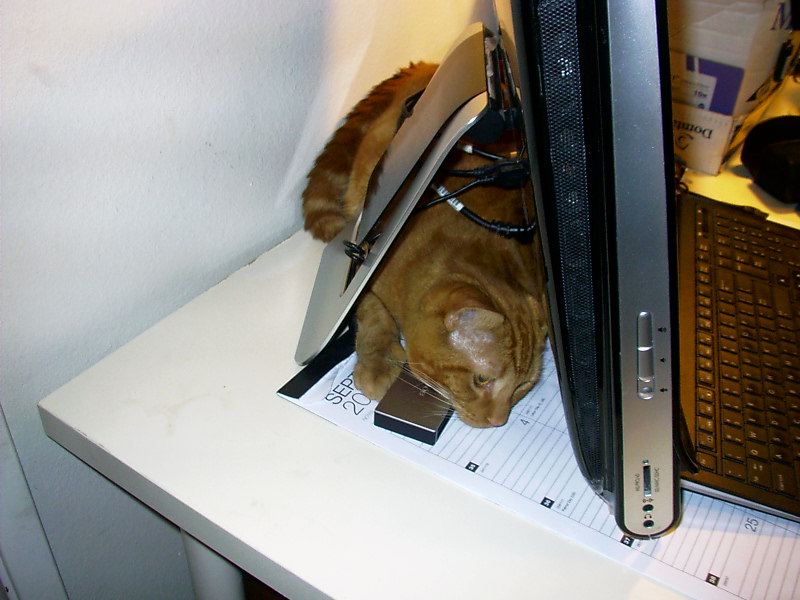
On a sidebar/side note, MAYBE one day you can post some info abooot how you created your paint booth. I am in the "market" as it were... I am tired of the worlds fatest cats fur turning up in my paint....
Thanks 
PJ2
|
|
|
|
Post by wbill76 on Jun 24, 2017 12:41:30 GMT -5
Bill, good to hear your "up and at em" again..........
On a sidebar/side note, MAYBE one day you can post some info abooot how you created your paint booth. I am in the "market" as it were... I am tired of the worlds fatest cats fur turning up in my paint....
Thanks 
PJ2
Several years back I decided to go with a commercial product from Micro Mark for their large-size spray booth and fume extractor system. It works pretty well, just have to replace the filter pads occasionally. It has twin exhaust fans that pull the air through the filters and then pushes it to the outside through 2 standard dryer vent connections. Definitely keeps the domestic tranquility intact!  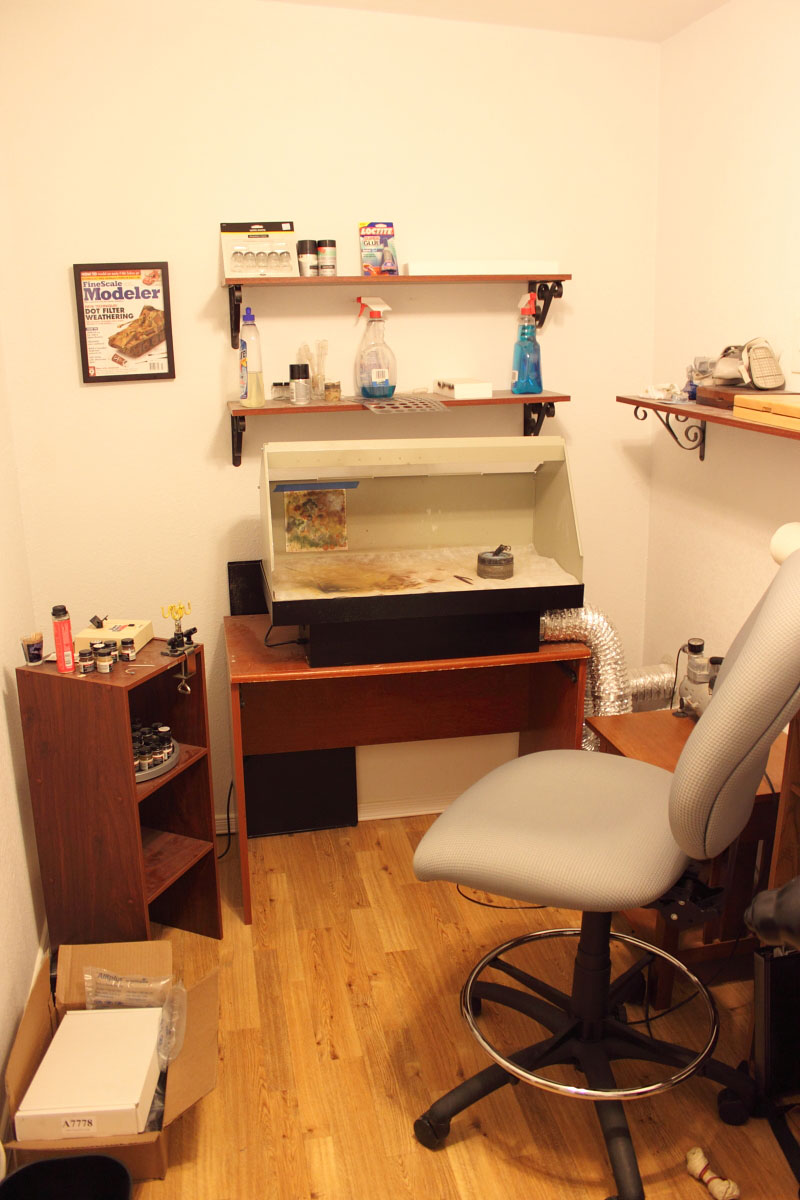 |
|
|
|
Post by panzerjager2 on Jun 24, 2017 13:15:14 GMT -5
Dear Santa..................
Thanks Bill  PJ2 PJ2
|
|
|
|
Post by wbill76 on Jun 24, 2017 16:15:59 GMT -5
Ships are always a little different when it comes to the major paint work steps, it's always a case of building a little, paint, build, paint, etc. until it all gets done. This is the first round of that back and forth as the hull represents the largest piece to deal with. I started by airbrushing a primer coat of Model Master enamel Flat Black over the entire hull. This does triple duty as a primer, a pre-shade, and also to help create the boot stripe. Masking tape along the hull top edge prevented any overspray on the deck plate join areas. 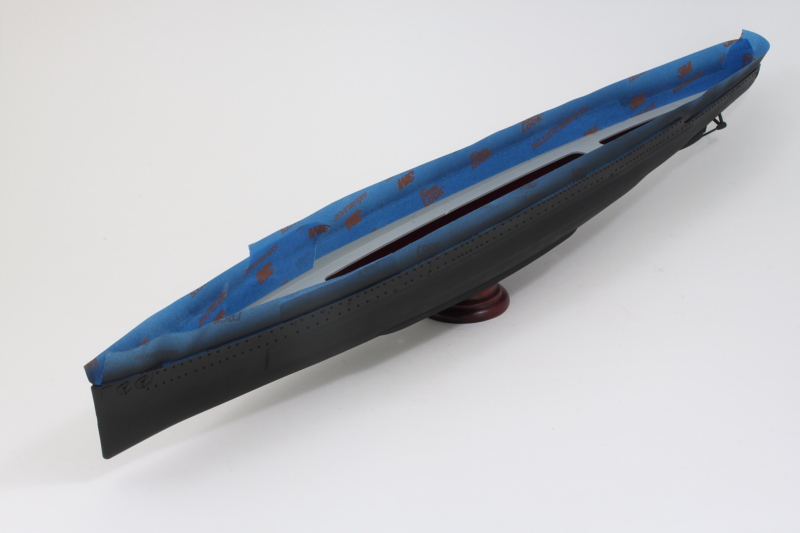 For the hull red, I airbrushed MM enamel Insignia Red over the Flat Black. This is built up using several thin passes and creates some nice tonal variation in the process. 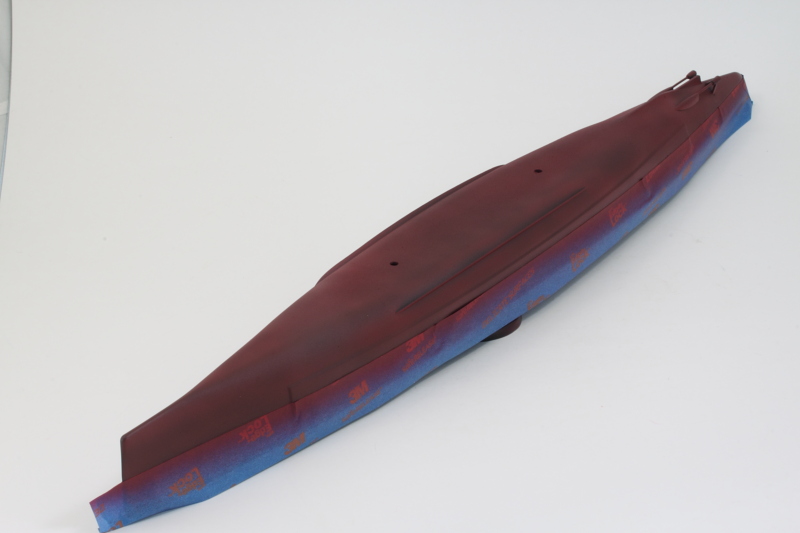  I'll let that set up and then mask the top of the boot stripe so I can spray the gray for the upper hull portion next. |
|
|
|
Post by Leon on Jun 24, 2017 16:45:07 GMT -5
Nice color variation on the lower hull Bill!
|
|
|
|
Post by panzerjager2 on Jun 24, 2017 19:51:23 GMT -5
Looking good 
PJ2
|
|
|
|
Post by dierk on Jun 25, 2017 5:21:25 GMT -5
Nice progress!
|
|
|
|
Post by wbill76 on Jun 25, 2017 9:51:50 GMT -5
Thanks Leon, PJ, and Dierk! June has turned out to be a pretty busy month...we still have one major project left to do on the home-improvement front and that gets the kitchen floor re-tiled. Plus I have to go to another round of professional development (this time related to teaching Pre-AP classes) that lasts 4 days this week, so I'm getting done what I can when I can on this project!  |
|
|
|
Post by wbill76 on Jun 25, 2017 13:26:36 GMT -5
Creating the boot stripe is always a bit of a challenge with ships especially since the hulls curve. To help with that, I used a cutting mat and cut some 2-3mm wide strips of blue painter's tape and used that to mask off the top edge of the stripe. The width was aimed at giving me flexibility around the compound curves, particularly at the stern area, and not the desired width of the stripe per se. The bottom edge had been created earlier with the hull red work, so I was already half way there with the bottom edge. Larger strips masked off the rest of the lower hull to prevent any wayward overspray and I airbrushed some Model Master enamel Medium Gray to create the Dunkelgrau 51 (KM02) that Graf Spee wore in late 1939. Just as with the hull red, the Medium Gray was applied in multiple thin passes to build it up over the Flat Black primer coat. 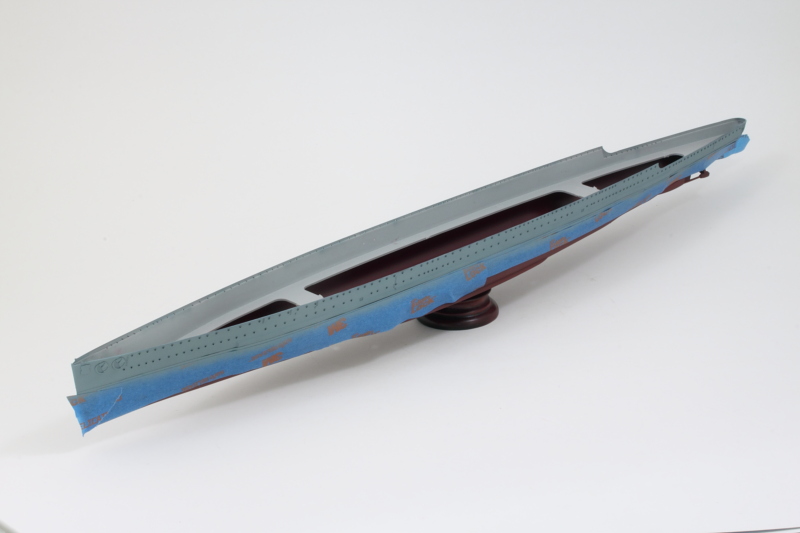 The moment of truth is always when the tape comes off! There was only one section that I needed to redo on the starboard side near the stern, so that was re-masked and some Flat Black airbrushed to solve the issue. 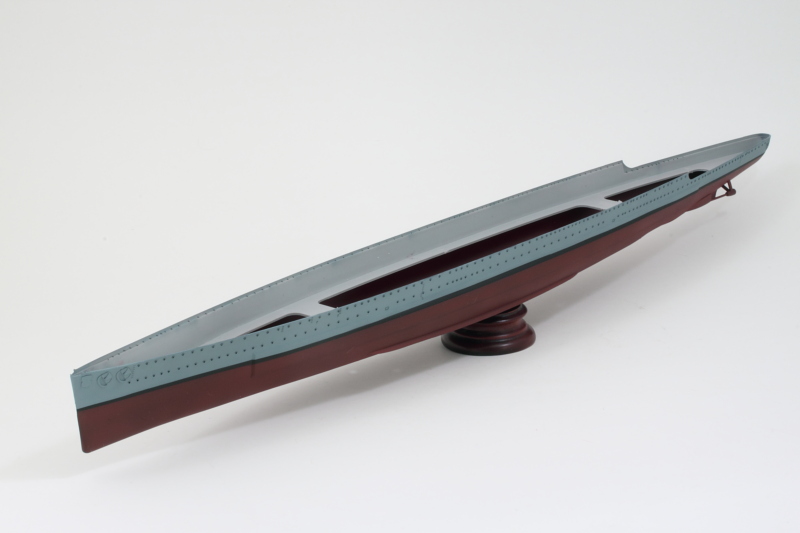 I'll let that cure a bit before adding the last bit in the form of a false bow-wave that was part of Graf Spee's camouflage. That's going to require some careful thought and additional masking so no hurry to get there just yet. |
|
joelsmith
Full Member
  
Member since: July 2012
There no winners in war, only survivors.
Posts: 1,404
Jul 5, 2012 22:33:58 GMT -5
Jul 5, 2012 22:33:58 GMT -5
|
Post by joelsmith on Jun 25, 2017 14:24:28 GMT -5
Looking really good Bill! Looking forward to the deck and upper works.
|
|
|
|
Post by Leon on Jun 25, 2017 15:13:17 GMT -5
Nice work on the masking and gray Bill!  |
|
|
|
Post by wbill76 on Jun 25, 2017 17:49:41 GMT -5
Thanks Joel! Deck and upper works are always where the fun's at!  Thanks as well Leon! |
|
|
|
Post by TRM on Jun 26, 2017 19:01:27 GMT -5
Your fingers healed up from drilling yet? Great seeing the color on the hull already...she's going to be a real beauty Bill! Enjoy the bench time while you have it!
|
|
|
|
Post by wbill76 on Jun 26, 2017 20:04:48 GMT -5
Seems to be going well so far T!  |
|
|
|
Post by wbill76 on Jul 1, 2017 14:11:12 GMT -5
The first couple of steps in the kit's instructions involves working on various details as well as all the ship's AA, secondary, and main gun armament. I decided to tackle the big guns first since I knew they were going to involve the most work to swap out the kit barrels for the brass replacements. The triple mounts have each barrel separate with a single rod that passes through eyes connecting them all together to create the assembly that goes into the turret. The mount pins on the brass barrels would sit inside those 'eyes', so it was necessary to mount the plastic barrels to the rod first. The rod is designed to trap between the turret halves and allow the guns to elevate in unison, so I used the turret parts to help ensure that all 3 guns sat level with its neighbor. The rear portion and rod fit together with some wiggle room, so I had to be very careful with the liquid glue to make sure I didn't glue the rod accidentally to the turret traps in the process. 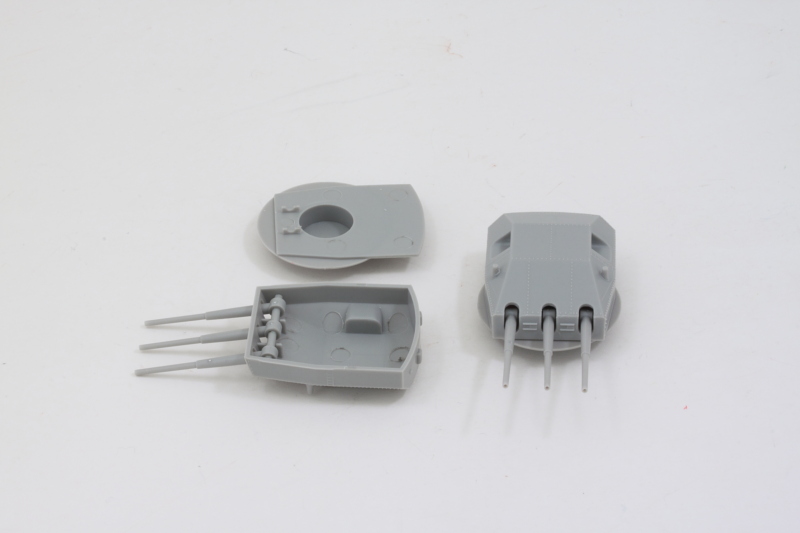 I let the plastic barrels set up overnight before working on replacing them with the brass barrels. I used a pair of sprue cutters to cut away the plastic barrel and lightly sanded the remaining nub that the brass barrel would need to attach to. I used a pin vise and drill bit to open up the 1mm diameter mount hole needed. The brass barrel was dry fit and tested for alignment with the fixed 2 remaining plastic barrels to ensure everything was lined up. 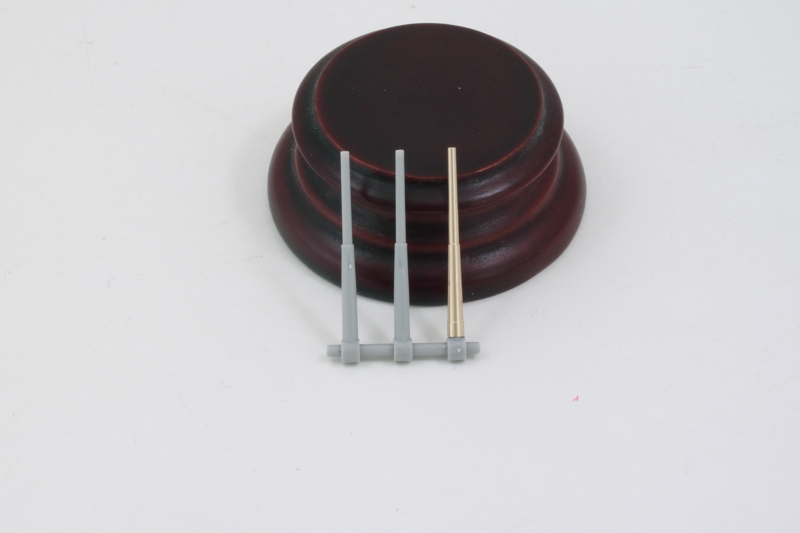 I removed the brass barrel, then repeated the process with the 2nd and 3rd barrels until all three mounts were ready to take their replacements. I used CA gel to give a little work-time and installed one barrel at a time, checking with the turret halves to make sure each one sat level. 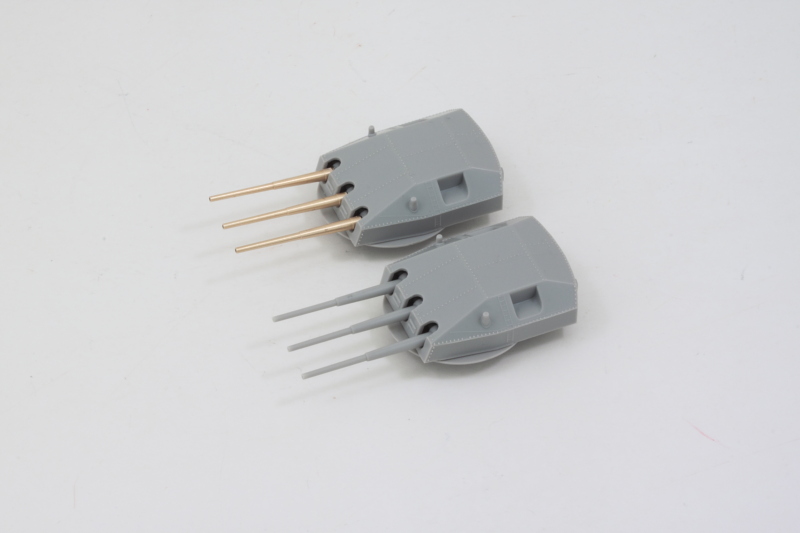 After I had both triple mounts done, I checked them with the decks they would install into to make sure they would sit properly and play nice with their surroundings. 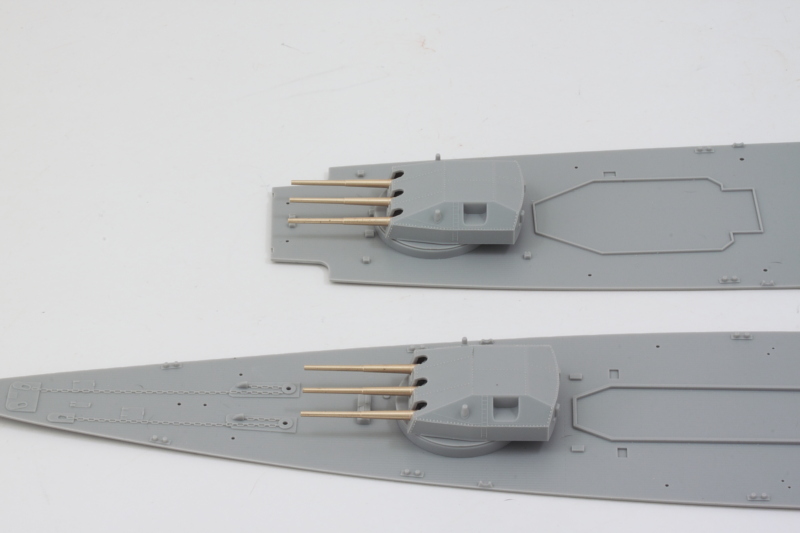 With the barrels done and ready, next I'll work on removing some of the molded-on detail on the turrets themselves that will be replaced with PE parts from the Eduard set and then assembling the turrets all into single units for painting. |
|
|
|
Post by Leon on Jul 1, 2017 14:33:21 GMT -5
Nice work on the brass barrels Bill! They look really good.  |
|
joelsmith
Full Member
  
Member since: July 2012
There no winners in war, only survivors.
Posts: 1,404
Jul 5, 2012 22:33:58 GMT -5
Jul 5, 2012 22:33:58 GMT -5
|
Post by joelsmith on Jul 1, 2017 15:32:18 GMT -5
Good looking main armament! Still looking forward to the upper works!
|
|
|
|
Post by wbill76 on Jul 1, 2017 19:20:18 GMT -5
Thanks Leon, it's always fun working with triple gun mounts in terms of getting the barrels to all play nice with each other.  Joel Joel, thanks as well! The upper works/superstructure will take some time to pull together as I'll have to tackle those in a modular fashion but it will all happen eventually!  |
|
|
|
Post by TRM on Jul 1, 2017 20:05:03 GMT -5
Bonus round...adding the barrels!  Fine work as usual Bill! Hows your mobility coming along? Slow and Steady? |
|