|
|
Post by wbill76 on Jun 8, 2017 20:28:38 GMT -5
I'm free at last for the summer! Well, almost...I still have to attend several different professional development sessions between now and the end of June so I won't fully be on vacation until July, but I'll take it as I'll still get some bench time in between before it opens up full bore. This summer's designated project is the 1/350 Trumpeter kit #05316 German Pocket Battleship (Panzer Schiff) Admiral Graf Spee using Eduard PE, Master turned brass barrels and a Pontos wood deck set. That should be enough to keep me busy between now and mid-August when the next school year starts up again. 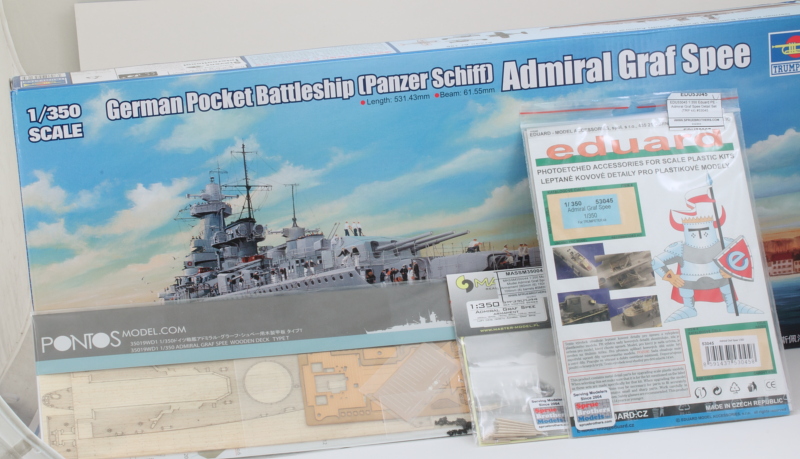 |
|
joelsmith
Full Member
  
Member since: July 2012
There no winners in war, only survivors.
Posts: 1,404
Jul 5, 2012 22:33:58 GMT -5
Jul 5, 2012 22:33:58 GMT -5
|
Post by joelsmith on Jun 8, 2017 21:02:50 GMT -5
Good to see you back at the bench! Can't wait to see how this ship comes out!
|
|
|
|
Post by panzerjager2 on Jun 8, 2017 21:33:52 GMT -5
WOW Bill, talk about a summer project!!!!!!!!!!!!! I know that you see me as a "died in the wool" Armour geek, BUT I love ships, just never could master the buggers. I will be stopping back by on this one.. 
PJ2
|
|
|
|
Post by TRM on Jun 8, 2017 22:19:33 GMT -5
Great knowing you made it through the school year!  Fine choice of summertime plasticizing! Looking forward to folling along! |
|
|
|
Post by panzerjager2 on Jun 8, 2017 22:59:24 GMT -5
Well Bill, I now blame you, LOL LOL.... I just spent 20 minutes researching Germany's LARGEST Projected Battleship the H-44. Holy cow was that thing gonna be big, It would have dwarfed the Yamato class by a lot, and the cannon were to be 30 inch, man that something like 650mm  
PJ2
|
|
afvfan
Senior Member
   
Member since: December 2012
Bob
Posts: 1,772
Dec 10, 2012 17:32:38 GMT -5
Dec 10, 2012 17:32:38 GMT -5
|
Post by afvfan on Jun 9, 2017 0:16:01 GMT -5
Ah, my favorite German ship.
|
|
|
|
Post by Leon on Jun 9, 2017 4:36:15 GMT -5
Count me in Bill! Looks like a great project.  |
|
|
|
Post by Tojo72 on Jun 9, 2017 7:21:35 GMT -5
Nice Bill,will follow with interest,I will build this next year,i have the Artwox wood deck and brass barrels.I look forward to yours.
|
|
|
|
Post by wbill76 on Jun 9, 2017 20:44:56 GMT -5
Thanks Joel! It will be good to sniff some glue again for a change.  PJ PJ, it's always good to have you around! Like many things under Hitler, the battleship plans ballooned to ginormous proportions before realities set in on what was actually practical/achievable!  Todd Todd, it was an interesting year for sure. Next year they are upping the ante on me, I've been assigned to teach all 8th grade US and Pre-AP US history. In Texas, those are the years that are state-tested in Social Studies for the first time, so the pressure will be intense to go with it.  Will definitely have to make the most of the Summer to relax and gear up for the battles ahead.  Bob Bob, I always had a soft spot for Graf Spee myself even though her war-time career wasn't very long, it was definitely memorable! Leon, grab a deck chair my friend!  Anthony Anthony, sounds like a plan, will do my best to ID any pitfalls along the way to smooth your own voyage.  |
|
|
|
Post by wbill76 on Jun 15, 2017 17:05:08 GMT -5
Work has begun on getting the hull ready to go and the first order of business is a little tedious but worth it for the result it provides. The portholes along the hull sides aren't molded very deep, so I decided to drill them out with a #70 finger drill to improve their look. The top row was drilled out completely since the plastic is thin there to accommodate the deck plating that will install later. That plate will provide a backing for the opened holes, so no issue there. The bottom row has thicker backing so they were only deepened to avoid creating any see-through problems with the holes on the opposite side. 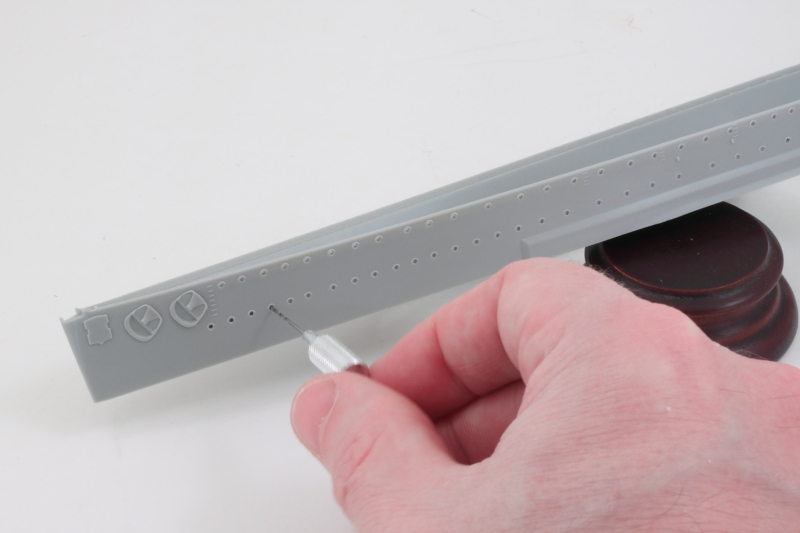 Trumpeter provides the hull separate from the bottom to give the option of either full-hull or waterline construction and that also helps with manipulating the hull and holding it while doing the drill-out work. There are 185 portholes per side, so it's a bit time-consuming to get them all done. The payoff will come in the end with the painting and finishing process though as a test-fit with the deck plate shows that the effort does increase the look of the detail significantly. 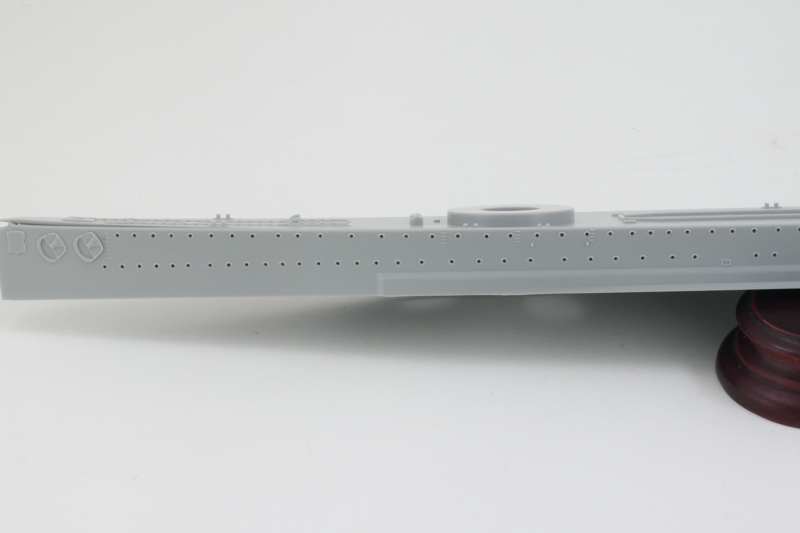 One side down, one to go!  |
|
bbrowniii
Full Member
  
Member since: March 2012
If you are not part of the solution, you are part of the precipitate.
Posts: 1,239
Mar 25, 2012 22:08:04 GMT -5
Mar 25, 2012 22:08:04 GMT -5
|
Post by bbrowniii on Jun 15, 2017 17:27:08 GMT -5
185 holes???!!! PER SIDE!!!! DANG Bill, you must have REALLY missed your bench time!!  Seriously though, I'll follow this with great interest. Love the look of that ship. Can't wait to see how you pull it all together! |
|
|
|
Post by wing_nut on Jun 15, 2017 18:12:37 GMT -5
Who do you think you are? Shia Lebeouf?
|
|
|
|
Post by Leon on Jun 15, 2017 18:39:44 GMT -5
Nice work on the port holes Bill!  |
|
joelsmith
Full Member
  
Member since: July 2012
There no winners in war, only survivors.
Posts: 1,404
Jul 5, 2012 22:33:58 GMT -5
Jul 5, 2012 22:33:58 GMT -5
|
Post by joelsmith on Jun 15, 2017 18:42:16 GMT -5
Are your fingers/hands cramping?
|
|
|
|
Post by dierk on Jun 16, 2017 8:11:31 GMT -5
It's official: you're utterly bonkers Bill! I thoroughly approve!  |
|
|
|
Post by wbill76 on Jun 16, 2017 9:02:56 GMT -5
Boyd, yep, 370 holes in total before it's all said and done...just have to take it one at a time and break it up into little sessions to avoid going further insane!  Marc Marc, only if I also get his bank account!  Leon Leon, thanks my friend, the hull is always the most work when it comes to these types of projects. Joel, I imagine they would be if I tried to do it all in a single sitting! Breaking it up does help, the hardest part is checking all the holes with a light to make sure they are consistently deep enough without going all the way through. Dierk, I had a feeling this would appeal to your particular brand of insanity for sure!  Some people have grumbled online about some of the portholes not being quite lined up as they should be between the two hull sides (the old mirroring dilemma) but I'm not so committed that I would fill in and try to recreate/shift their alignment. That's a whole different level! 
|
|
|
|
Post by dierk on Jun 16, 2017 10:01:11 GMT -5
Some people have grumbled online about some of the portholes not being quite lined up as they should be between the two hull sides (the old mirroring dilemma) but I'm not so committed that I would fill in and try to recreate/shift their alignment. That's a whole different level!  Now you disappoint me...  |
|
|
|
Post by wbill76 on Jun 18, 2017 19:45:45 GMT -5
Father's Day provides the perfect excuse to make some more progress on the Graf Spee! I got the other side's portholes drilled out making a grand total of 370 in total and I can honestly say I'm glad to have that over and done with. That meant I could move on to the rest of the lower hull. The kit provides either a waterline or full-hull option and I'm going with the full hull. The kit's included stand leaves something to be desired, so I used a set of bronze drawer knobs from Lowe's instead. Holes were drilled out using a Dremel and similar-sized bit and the holes carefully enlarged with a #11 blade to take the threaded bolts. The bolts and knobs are removable for now to make it easier to paint the hull and will get permanently installed later. 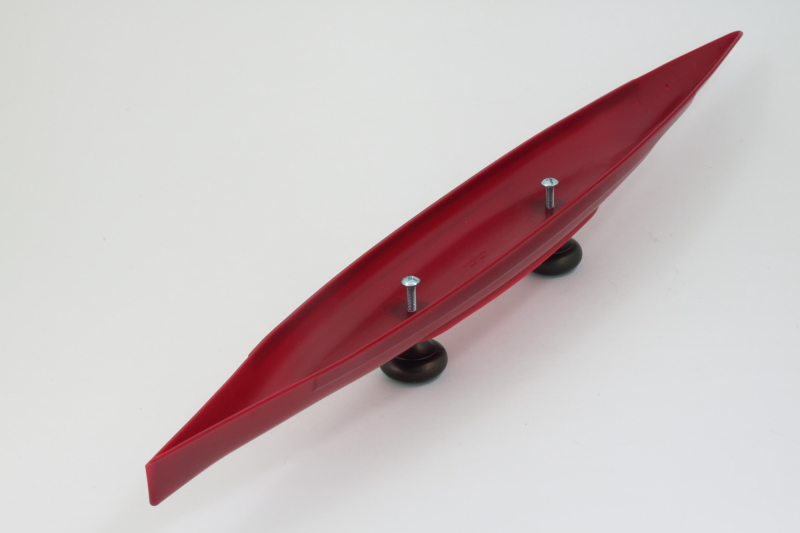 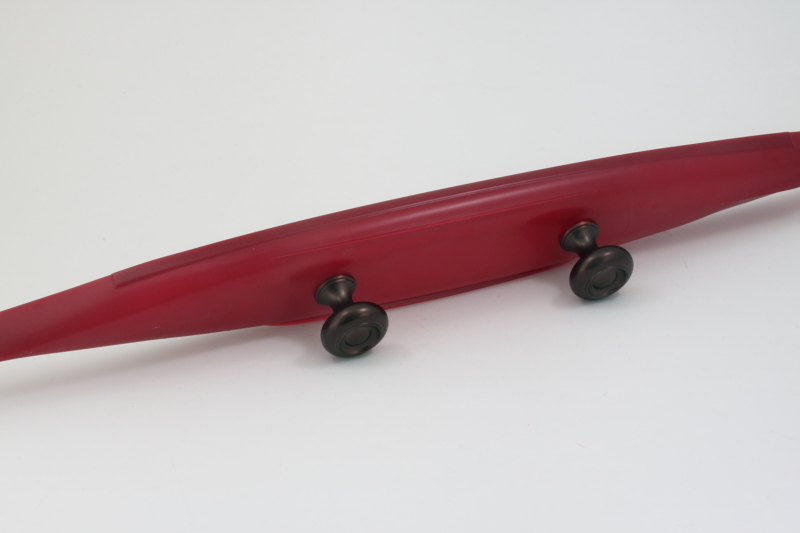 I'm not sure why the Trumpeter instructions wait to the very last step of the build to attach the hull halves together. Even if you were doing the waterline version, it would make sense to have that solid before working with the deck plates and all the other details, but then kit instructions don't always have to be logical! Regardless, I went ahead and attached the hull to the upper portion and dry fit the deck plates so that the rubber bands would have something solid to hold onto and avoid causing any buckling of the top edge while the glue set. The fit of the hull halves is pretty solid, the only areas to watch out for are the bow and stern where there's a little bit of play that can cause things to slide out of sync if you're not careful. 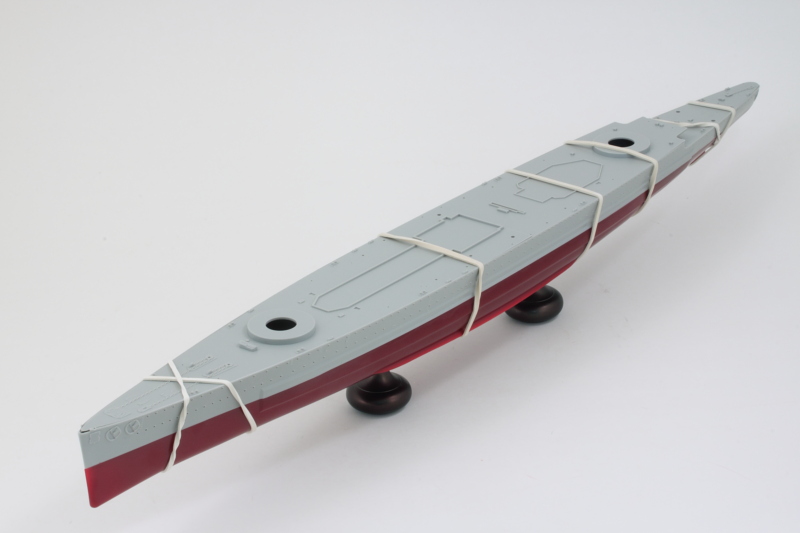 Once the glue has set up, I'll remove the bands and lightly sand the join line to make sure everything is lined up nice and smooth. |
|
|
|
Post by panzerjager2 on Jun 18, 2017 20:40:04 GMT -5
Pretty dang cool...... Plus I guess i never noticed she has the twin anchors on one side........ Silly question, "does she have twins on the other side"  ? ? 
PJ2
|
|
|
|
Post by Leon on Jun 19, 2017 4:39:46 GMT -5
Nice progress on the hull Bill!  |
|
|
|
Post by Leon on Jun 19, 2017 4:55:10 GMT -5
Pj,she has only one anchor on the other side!  |
|
|
|
Post by wbill76 on Jun 19, 2017 7:07:14 GMT -5
Thanks Leon! As Leon points out, only one on the other side but has an unusual additional stern anchor for a total of 4! |
|
afvfan
Senior Member
   
Member since: December 2012
Bob
Posts: 1,772
Dec 10, 2012 17:32:38 GMT -5
Dec 10, 2012 17:32:38 GMT -5
|
Post by afvfan on Jun 19, 2017 11:09:51 GMT -5
.... it would make sense to have that solid before working with the deck plates and all the other details, but then kit instructions don't always have to be logical! If instructions had to be logical Dragon would have gone out of business a long time ago. |
|
|
|
Post by wbill76 on Jun 19, 2017 19:42:58 GMT -5
.... it would make sense to have that solid before working with the deck plates and all the other details, but then kit instructions don't always have to be logical! If instructions had to be logical Dragon would have gone out of business a long time ago. Truer words were never spoken!  Dragon definitely is the undisputed king of 'challenging' instructions.  |
|
|
|
Post by panzerjager2 on Jun 20, 2017 9:07:16 GMT -5
Again Pretty Dang Cool........... Not being a real "ship guy",(real being defined as: one who actually completes a ship model...LOL), that base/stand system is cool.......
Thanks to all for the anchor info.... I never noticed the two "port" anchors let alone one in the stern...... 
PJ2
|
|
|
|
Post by wbill76 on Jun 20, 2017 9:13:22 GMT -5
Again Pretty Dang Cool........... Not being a real "ship guy",(real being defined as: one who actually completes a ship model...LOL), that base/stand system is cool.......
Thanks to all for the anchor info.... I never noticed the two "port" anchors let alone one in the stern...... 
PJ2 Two best places to find stuff are the hardware aisles at Lowe's and the crafts section at Hobby lobby!  |
|
|
|
Post by wbill76 on Jun 21, 2017 19:13:51 GMT -5
It's been an eventful week in a couple of unexpected ways...I had to attend 2 days of professional development training (the district has a perverse sense of humor, they call them 'holiday exchange' days! They are part of the contracted # of annual service days and if you don't go, then you lose 2 days over Christmas break instead). Monday's training had an engagement exercise that involved tossing a ball to different people and the person who caught it had to answer a question. Yours truly was 2nd to last and the guy that threw it to me did it a little high, so instinctively I jumped about 3 inches to get it. That little jump was just enough to cause me to strain/tear my left calf muscle where it meets the Achilles tendon...fortunately I didn't rupture the tendon but it caused enough damage that I'm going to be on crutches for 2 weeks, have to wear an orthopedic boot, and then will have to do evil PT so probably a month or more before it's all fully recovered. At least it gets me out of the 'honey-do' list for a while!  I did manage to get some more bench time in on the Graf Spee today so it's not all bad. After letting the hull set up nice and solid, I removed the rubber bands and the temporary deck plates. Overall the fit and join line of the upper and lower hull are pretty good, it just needed some light sanding to smooth things out along the length. 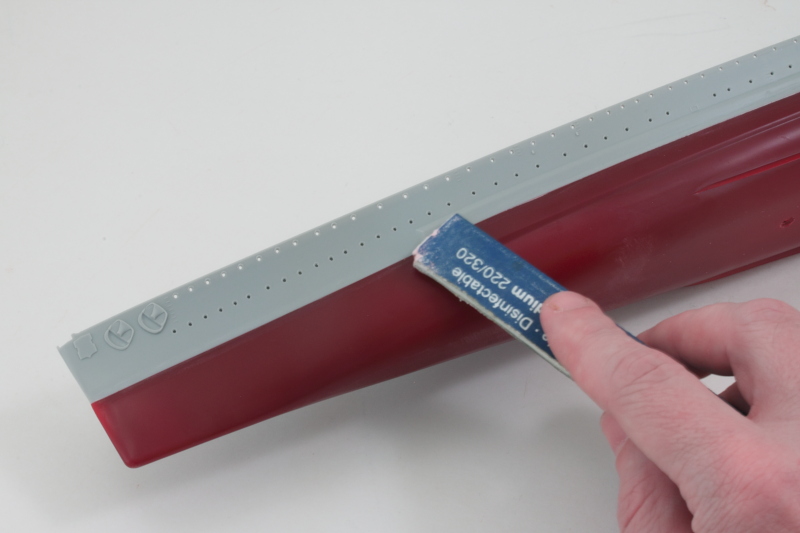 The mold lines on the bottom hull also needed some attention. These were removed using a combination of a #11 blade in the delicate/small areas and sanding. 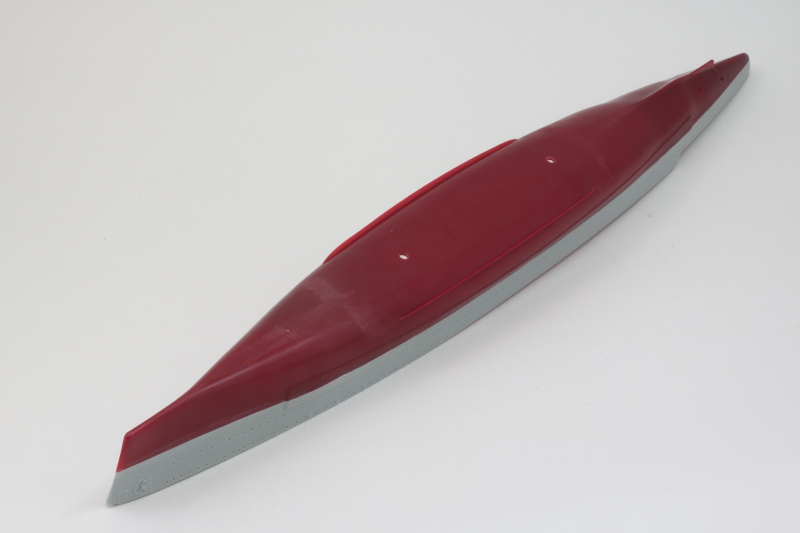 That cleared the way for the installation of the propeller shafts and mounts at the stern. The support posts are smaller than the cut-outs in the hull for the top mount points so those required a little bit of putty-and-sanding work to fill in but otherwise was uneventful. The rudder was cleaned up and test fit but will not be permanently installed until much later. Experience is a wonderful teacher and rudders invariably get knocked loose during the painting and handling process so it's better to just paint it now and then set it off to the side for safe keeping! The propellers themselves will also be dealt with at later date for similar reasons. 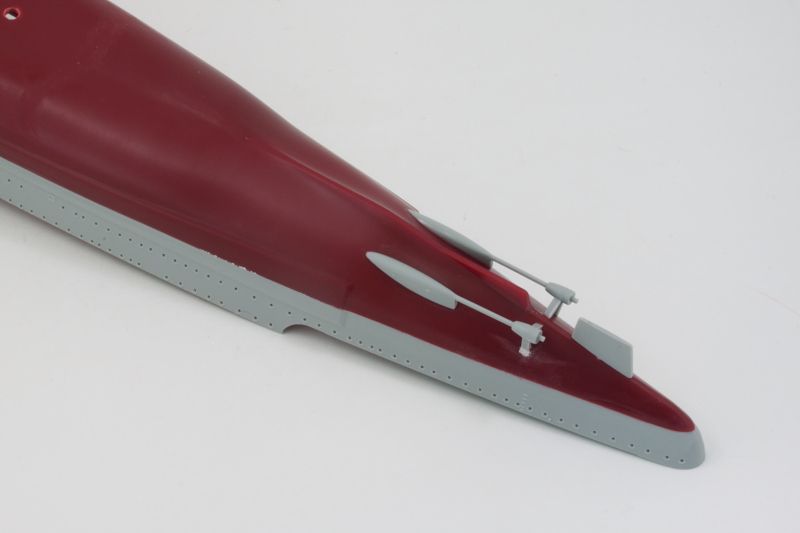 The hull is now ready for the major paint work to begin! |
|
|
|
Post by Leon on Jun 21, 2017 20:17:21 GMT -5
Hull looks good Bill!  Take it easy on those crutches! Sounds like you'll be getting plenty of bench time.  |
|
|
|
Post by wbill76 on Jun 21, 2017 20:36:46 GMT -5
Thanks Leon. 2 weeks on the sticks will certainly limit things but fortunately the bench qualifies as non-weight bearing activity!  |
|
|
|
Post by panzerjager2 on Jun 21, 2017 22:31:58 GMT -5
I think it looks great...... moving along nicely.... 
PJ2
|
|