|
|
Post by Leon on Jul 19, 2017 4:48:28 GMT -5
Nice start on the masking and painting Bill!  |
|
|
|
Post by wbill76 on Jul 19, 2017 8:52:02 GMT -5
Thanks Leon! I am going back and forth with the different reference photos out there and trying to replicate it as close as possible. Sometimes I wish those Germans were more considerate of future modelers in their choices!  |
|
afvfan
Senior Member
   
Member since: December 2012
Bob
Posts: 1,772
Dec 10, 2012 17:32:38 GMT -5
Dec 10, 2012 17:32:38 GMT -5
|
Post by afvfan on Jul 19, 2017 8:58:20 GMT -5
Coming right along there, Bill. Nice work on all those itty-bitty pe parts.
|
|
|
|
Post by dierk on Jul 19, 2017 9:06:33 GMT -5
With few exceptions that prove the rule, being considerate of anyone is not part of the German modus operandi  Boat's starting to look floatilicious! |
|
|
|
Post by wbill76 on Jul 19, 2017 10:55:54 GMT -5
Thanks Bob! Itty bitty is the name of the game in this scale!  Dierk Dierk, I know but one can always hope for that exception!  |
|
|
|
Post by dierk on Jul 19, 2017 11:08:49 GMT -5
Dierk, I know but one can always hope for that exception!  That'll be me, then  |
|
|
|
Post by wbill76 on Jul 19, 2017 20:54:53 GMT -5
Getting the disruptive camo pattern on requires a good bit of thinking, checking reference photos, and then decide the right order to tackle it all. What makes it complicated is that there are two different shades of gray used over the standard light gray and the crew of Graf Spee changed her look more than once, so she doesn't always look exactly the same from one set of photos to another. I decided to go mostly with what is shown on the Trumpeter finishing guide but also altering it somewhat based on what I can see in the actual photos taken while Graf Spee was in Montevideo. For example, those photos show the turrets had the darkest gray applied to most of their surfaces so I ran with that instead of the middle gray that the Trumpeter guide calls for. I also decided to tackle the scheme in terms of deck levels vs. trying to do it all in one shot. The pyramid structure in particular benefits from this approach I think as the support decks that attach to it all get different colors in varying amounts depending on where they attach and also on which side. Lots of masking was called for so I started that on the smokestack, pyramid, and two main deck levels of the superstructure modules. The 11-inch turrets were large enough that I decided to do them freehand instead of trying to mask their complex surfaces. The same was true for the tops of the 6-inch turrets as well. MM enamel Gunship Gray did the trick and was airbrushed at relatively low pressure (approximately 15 psi) and at very close distance to give maximum control. 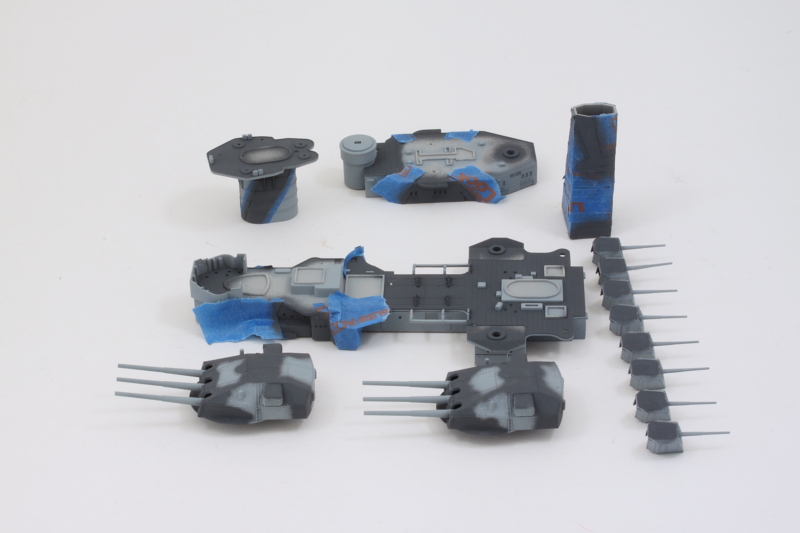 I tightened up the turret work and corrected some small overspray areas on the smokestack by dry-brushing the Light Ghost Gray with a square tip blender brush. A quick test fit of all the elements show the scheme is starting to come together. 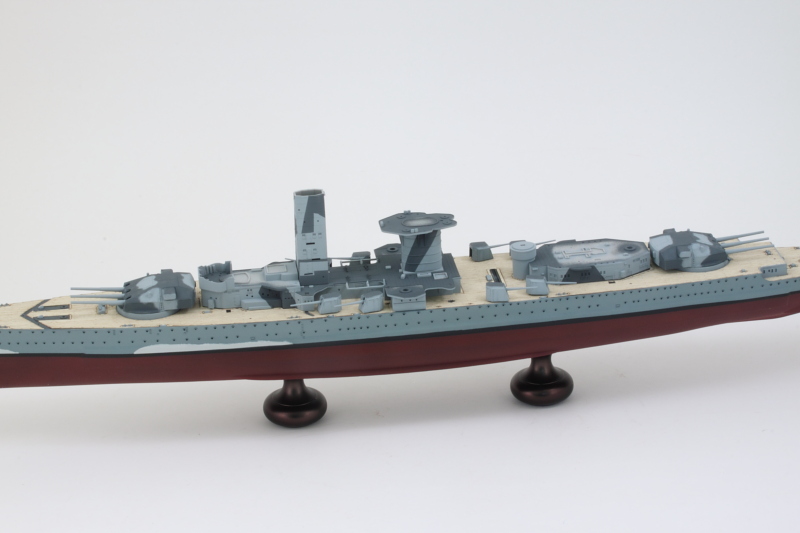 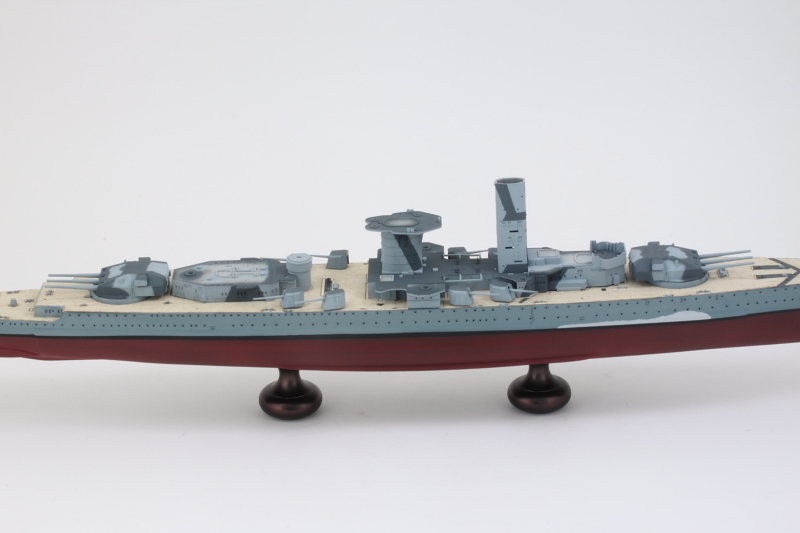 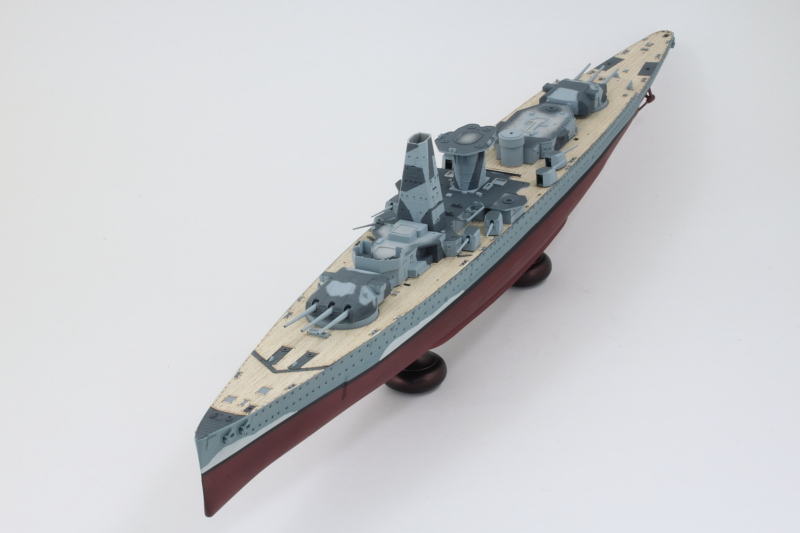 More work to come with the upper levels. The 2nd medium gray color needs to get added as well but some of that will inevitably have to be done by hand due to the small size of the different areas and the more curvy patterns involved. |
|
|
|
Post by panzerjager2 on Jul 20, 2017 0:49:50 GMT -5
VERY BERRY COOL update 
PJ2
|
|
|
|
Post by dierk on Jul 20, 2017 1:52:28 GMT -5
That looks the canine's danglies Bill!
|
|
|
|
Post by wbill76 on Jul 20, 2017 8:33:54 GMT -5
Thanks PJ and Dierk, we're moving along at full speed now!  |
|
|
|
Post by Leon on Jul 20, 2017 11:19:13 GMT -5
That pattern looks great Bill!
|
|
|
|
Post by wbill76 on Jul 20, 2017 20:09:09 GMT -5
Thanks Leon! More progress to report in just a bit!  |
|
|
|
Post by wbill76 on Jul 20, 2017 20:24:36 GMT -5
Continuing on from yesterday's initial efforts, I worked on getting the camo pattern added to the rest of the superstructure components and secondary battery turrets. This required more masking and more reference checking and I also caught a couple of places fore and aft on the first superstructure levels that I missed so those were addressed as well. Once I had all of the Gunship Gray airbrushed, I cracked open the Medium Gray that was used for the hull and hand painted the smaller patterns on the upper works and in various places as needed to complete the full pattern look. The Medium Gray isn't nearly as high contrast as the Gunship Gray so it appears a little more muted as a result but still in line with what the reference photos support. Those photos clearly show that a third gray was used on Graf Spee in various places although not as heavily as the darker gray. 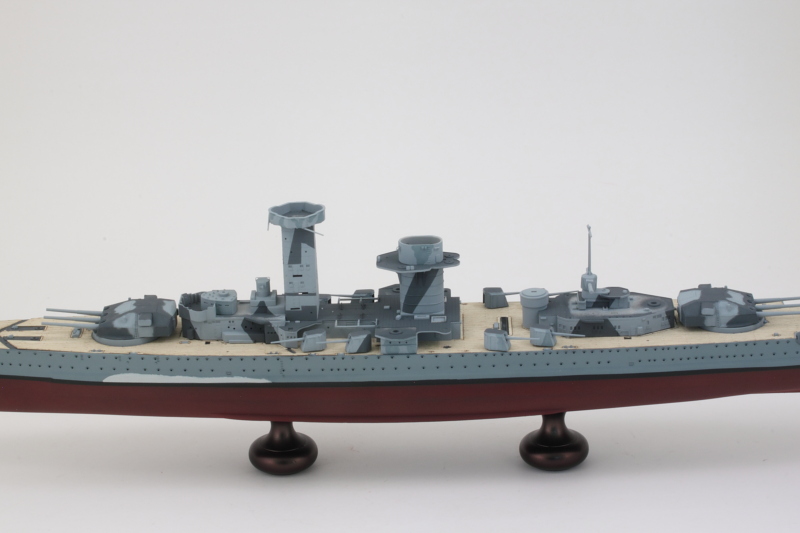 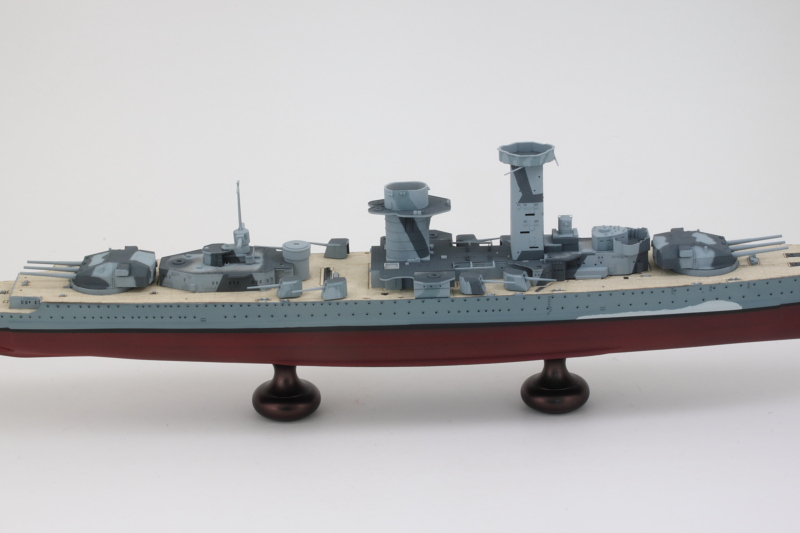 Getting the scheme done cleared the way for me to add the remaining wood deck portions to both the superstructure modules. I added the conning tower to the main module and the aft fire control station to the secondary module. Both modules need a lot of little details installed but I'm going to wait to do that until I've shaped their railings to give me plenty of room to work since the railing sections are large single pieces for those areas. 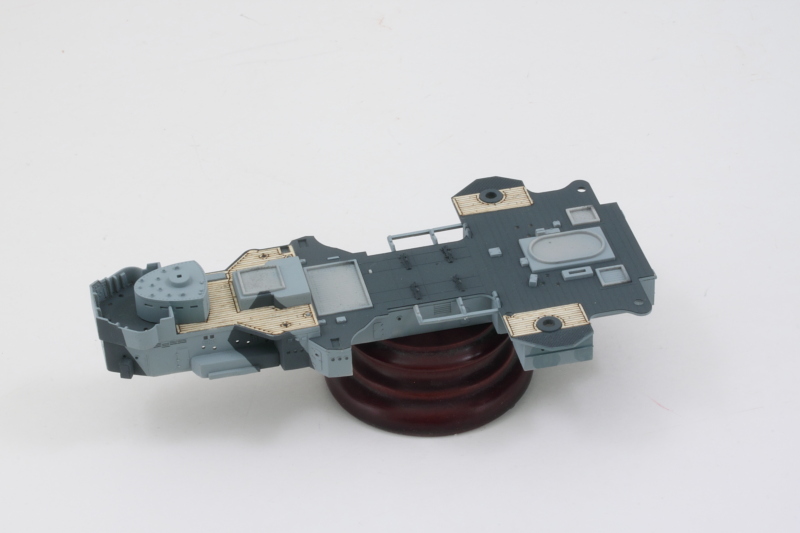 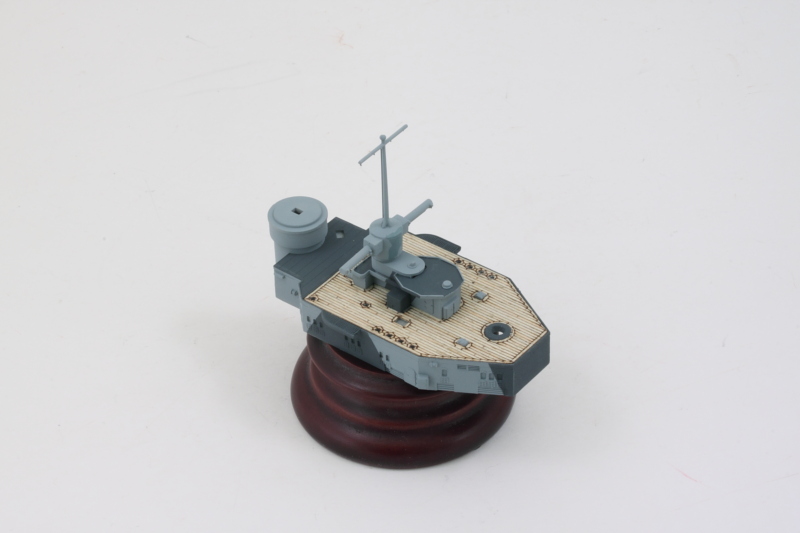 I also made a lot of progress in getting the support decks added to the pyramid structure. PE railings were added to the small wing stands and for the searchlight platform. I still need to add some access ladders to the rear structure but that will have to wait just a bit. 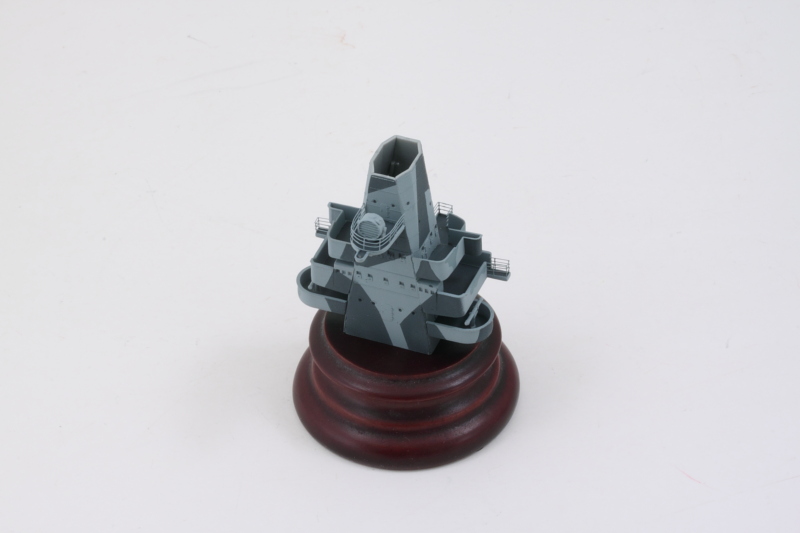 I'm going to see Dunkirk tomorrow so probably won't get that much done but will start in on the railings for the main superstructure levels in the constant quest to move onward and upward!  |
|
|
|
Post by TRM on Jul 20, 2017 20:48:59 GMT -5
Wow...this is shaping up quickly!! Very crisp on the camo!  (expected that though) |
|
|
|
Post by wbill76 on Jul 20, 2017 21:40:57 GMT -5
Thanks Todd! Got to get it done before the end of the month so there's extra motivation.  |
|
|
|
Post by TRM on Jul 20, 2017 22:02:29 GMT -5
Oooohhh...that time of year already? LOL  |
|
|
|
Post by dierk on Jul 21, 2017 4:36:09 GMT -5
Very impressive Bill!
|
|
|
|
Post by wbill76 on Jul 21, 2017 21:01:38 GMT -5
Thanks Dierk! Despite a well-earned detour to see 'Dunkirk' in the theater (thoroughly enjoyed it too!), more progress was made today. This stage of the build is all about the details and you have to be careful in choosing what to install when because of the tight spaces. I got the bridge deck portion's details done including the railings and this one single photo represents about 4 hours of work total. I shaped the railings first before adding any of the details so I had the maximum space to work with then switched around between painting and detailing various pieces and installing them into place. The railings were painted to match the camo pattern after they were attached with CA so that everything lined up like it should. 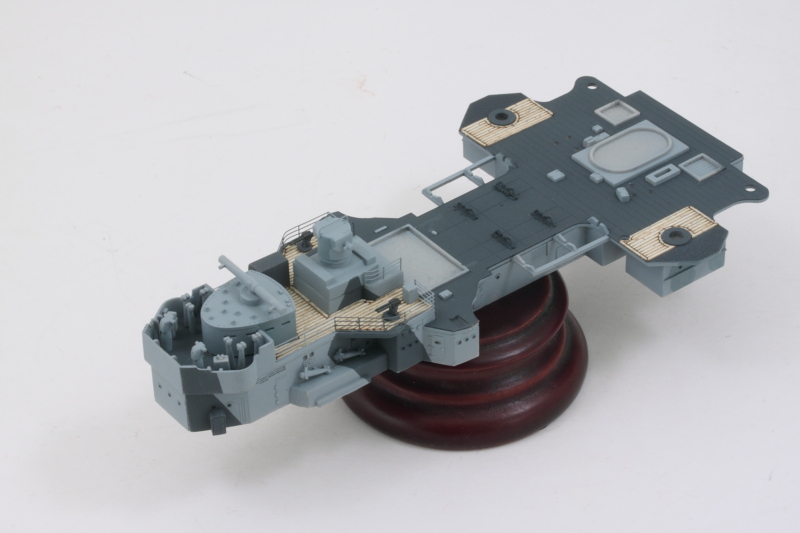 Next will be doing the same for the boat deck area. These railings are all long single piece lengths with complex shapes and curves so that's going to be the next challenge. |
|
|
|
Post by panzerjager2 on Jul 21, 2017 21:06:06 GMT -5
Really impressive workmanship 
PJ2
|
|
|
|
Post by TRM on Jul 21, 2017 21:32:01 GMT -5
Very sharp!! Good luck on those bends!
|
|
|
|
Post by wbill76 on Jul 22, 2017 10:24:53 GMT -5
Thanks PJ! Todd, lots of hunchback time with tweezers and the Optivisor in store for me this weekend!  |
|
|
|
Post by TRM on Jul 22, 2017 10:30:46 GMT -5
LOL...Ice packs and Advil!  What does not kill you only makes you stronger! |
|
|
|
Post by Leon on Jul 22, 2017 11:24:43 GMT -5
Great job on the railings Bill!  |
|
|
|
Post by wbill76 on Jul 22, 2017 20:59:00 GMT -5
Thanks Leon! More progress in the details and railings department. The forward area of the boat deck received its railings, hose reels, and small structures that go around the base of the pyramid superstructure.  Speaking of the pyramid, I added all of the access ladders and support railings needed there and also installed the main mast structures. I left the top off of the structure for now as I found it easier to manipulate the pyramid without it in place. That top will get added once the pyramid is installed in place permanently. 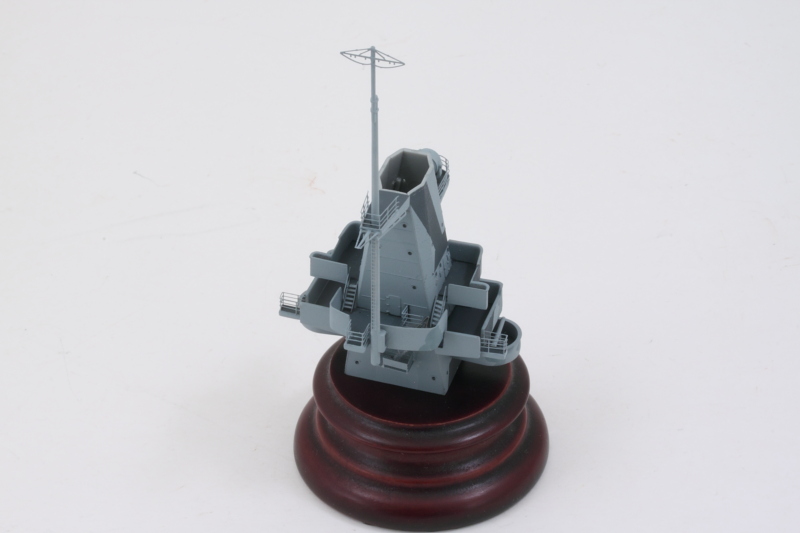 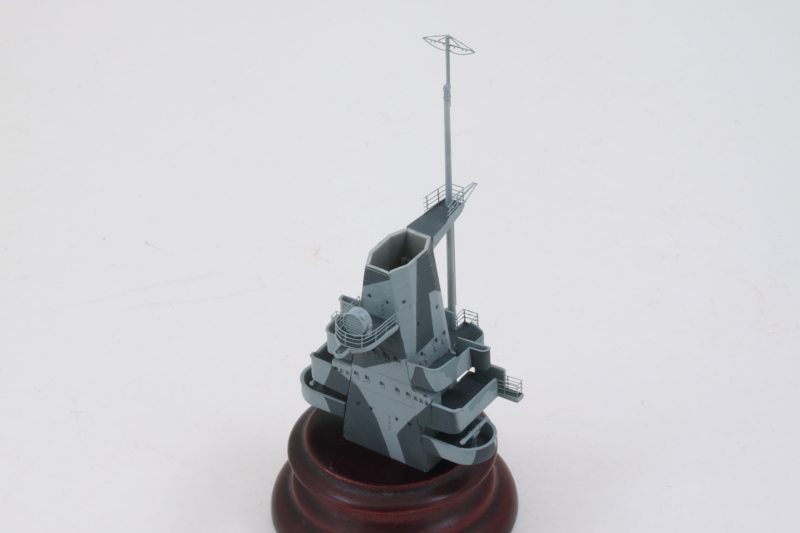 I'm debating when to add the pyramid to the main module but will most likely do it after I put in the last set of railings around the AA mounts and smokestack. More detailing fun to come! |
|
|
|
Post by wbill76 on Jul 23, 2017 20:08:00 GMT -5
Another day, more details! The latest round got the rest of the remaining railings added to the main superstructure module along with the ventilation funnels, ammo lockers for the AA guns, the AA guns themselves, and the pair of fire control stations for the secondary batteries. Left off for now is the base of the smokestack as it still needs its own railing work added and I also need that spot as a handling point due to all the others rapidly disappearing as other items get added.  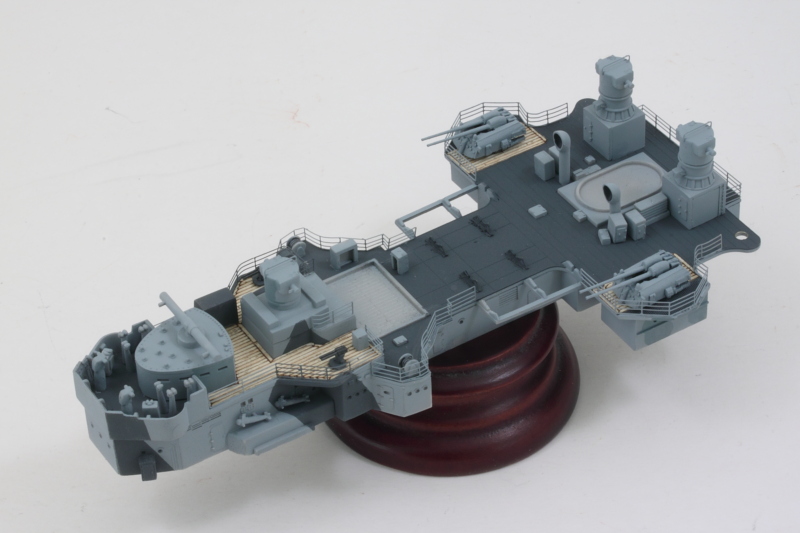 Speaking of, one of those disappeared with the addition of the pyramid superstructure. I added the fighting top along with a pair of small AA guns and the PE rigging elements for the mast spars underneath it. The angled PE rigging had to be cut down to fit properly, Eduard designed them to fit the full length of the kit part but neglected to take into account that a good chunk gets blocked underneath the fighting top, so a quick snip with the angle cutters did the trick before installing them in place. 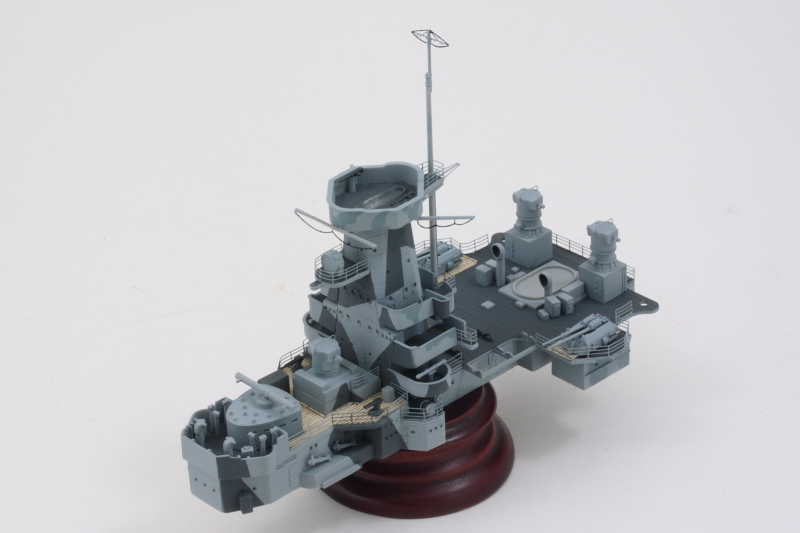 Last, but not least, I assembled the two-part PE radar antenna and this was a time-consuming exercise mostly because I had to paint the inside and outside of both parts before bending them together completely or there would've been no way to get them fully painted otherwise. It looks 100% better than the solid plastic part the kit provides though, so very worth it. I used Gator Grip Thin Blend to attach the base of the antenna to the direction finder first and let that set up solid before using more thin blend to add the antenna itself onto the base. 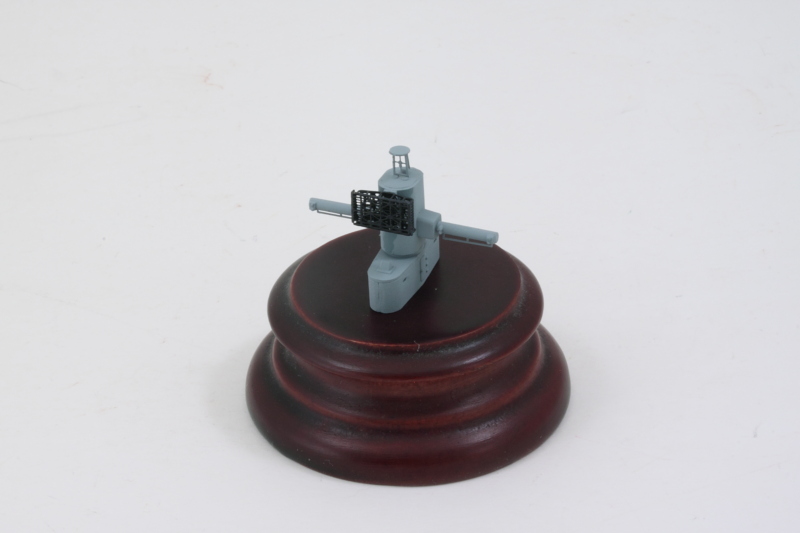 On to the smokestack next! Its searchlight deck has a railing that is a single solid PE piece so that's going to be the biggest bending challenge of all I think.  |
|
|
|
Post by TRM on Jul 23, 2017 20:35:39 GMT -5
WOW...sweet details a-poppin'!! Love watching this all come together!
|
|
|
|
Post by wbill76 on Jul 23, 2017 20:39:49 GMT -5
WOW...sweet details a-poppin'!! Love watching this all come together! Thanks Todd! Too bad I have to spend all day tomorrow at a data analysis session for the next school year, I'd rather be bending PE for sure!  |
|
|
|
Post by Leon on Jul 23, 2017 20:48:24 GMT -5
Great days progress Bill! This is coming along nicely.  |
|
|
|
Post by TRM on Jul 23, 2017 21:09:34 GMT -5
Mmmm...data analysis!  All part of the job! |
|
afvfan
Senior Member
   
Member since: December 2012
Bob
Posts: 1,772
Dec 10, 2012 17:32:38 GMT -5
Dec 10, 2012 17:32:38 GMT -5
|
Post by afvfan on Jul 23, 2017 22:32:02 GMT -5
Fantastic progress, Bill.
|
|