reserve
Senior Member
   
Member since: July 2012
Si vis pacem para bellum
Posts: 2,372
Jul 11, 2012 9:11:45 GMT -5
Jul 11, 2012 9:11:45 GMT -5
|
Post by reserve on Mar 1, 2018 10:13:18 GMT -5
FIVE parts a link?? There's an echo here
You are a more tolerant man than I sir the moment I saw something like that I'd be searching the parts box for some bandies
Looks great brother
Regards,
Mark
|
|
|
|
Post by deafpanzer on Mar 2, 2018 11:34:12 GMT -5
CRAP! It looks like I must get this kit... looking great already!
|
|
sturmbird
Full Member
  
Member since: June 2012
Posts: 1,406
Jun 21, 2012 13:51:45 GMT -5
Jun 21, 2012 13:51:45 GMT -5
|
Post by sturmbird on Mar 2, 2018 14:45:04 GMT -5
CRAP! It looks like I must get this kit... looking great already! when the kit first hit the market, I bought one figuring I at least had the parts to build one off a Dragon kit (tells you about my Tiger knowledge). Get home an have a look thru the kit. Hours later I couldn't stand it and ran out an bought a second one. I now have a half dozen RFM Tigers, and want them to do a "late" Tiger I. Great kits! Interestingly, my kits don't have the resin parts like the kit here does. Guess it was somekind of a revision. gary |
|
|
|
Post by deafpanzer on Mar 2, 2018 14:49:50 GMT -5
I now have a half dozen RFM Tigers, and want them to do a "late" Tiger I. Great kits! gary Holy cow! Guess you can always sell me a kit for a good price? LOL Will you be going to Roscoe Turner IPMS show next weekend? If so, be sure to find me! |
|
|
|
Post by TRM on Mar 3, 2018 9:57:58 GMT -5
Looking great Dave! Good find from the parts bin with the 3D stuff!
|
|
thug626
Senior Member
   
Member since: January 2013
Posts: 2,030
Jan 15, 2013 13:05:28 GMT -5
Jan 15, 2013 13:05:28 GMT -5
|
Post by thug626 on Mar 4, 2018 23:38:05 GMT -5
PJ2 I've wanted to build a Tiger with these filters for a very long time. I think they just look cool.
Dierk There are things that make all of us sweary at one time or another in this hobby. These are still better than than the Modelkasten tracks I used for a Dragon Firefly years ago. For the guide horns on this beastie, I just put on some good music and went to town.
Leon Thank you kindly my good man. The tracks went much quicker than I had thought they would..
|
|
thug626
Senior Member
   
Member since: January 2013
Posts: 2,030
Jan 15, 2013 13:05:28 GMT -5
Jan 15, 2013 13:05:28 GMT -5
|
Post by thug626 on Mar 4, 2018 23:55:47 GMT -5
Mark Thank you kindly brother for the compliment. After I saw what some bandies did on my brother's Israeli Sherman, I will never use them. He was getting ready for a show back east, grabbed the Sherman out of the case, and they had started to liquify. Andy You'll love the kit my friend. There, I've corrupted yet another! Only a few more to go and I get a toaster oven! So much for paring your stash down. Bwahahahahah. Gary I know what you mean. I've got a few more in the stash. T I've used Aber tool clasps in the past. These look much like them. Well done, and functional when assembled carefully. At a cost to ones sanity. Shapeways to my rescue. Bench time is a premium for the next few weeks. I've got a bunch of continuing education to get done for a certification that runs up at the end of the month. That being said, I was able to steal away some time today. A break, really, from the CE's. All of the tools, cables, and fenders are mounted. With the exception of the jack block. That will go on much later. The resin side fenders are far more correct than the styrene ones. The front two sections are shorter than the rear two. Unfortunately what that means, is that the front half mounting lugs needs to be removed. Resin parts to the rescue. Again! 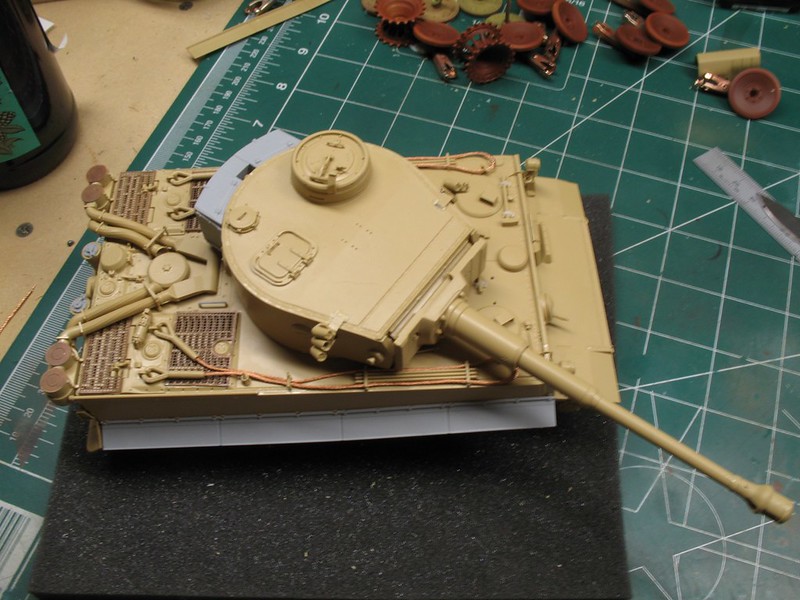 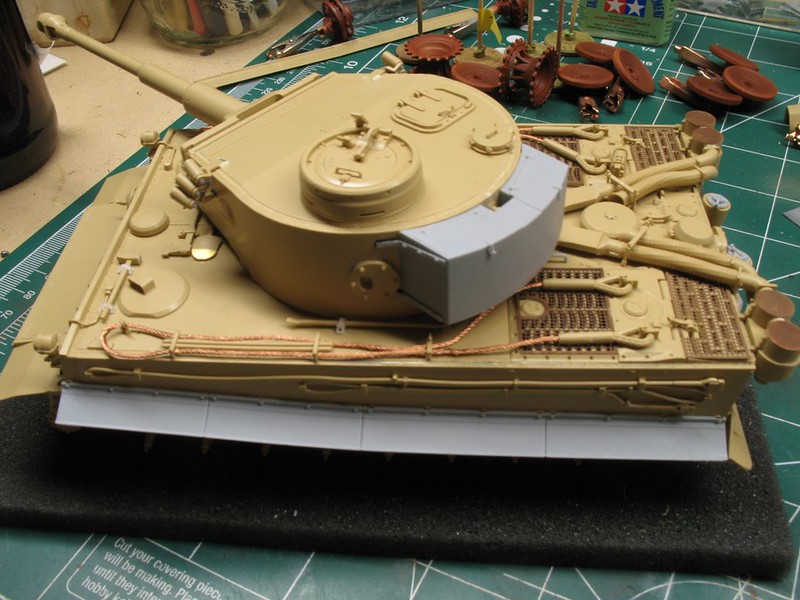 You can see the white triangular piece here. These reinforcement parts were not included on the resin or styrene parts. Styrene stock to the rescue. Also, the instructions call for part D39 for the headlight mount. What's not mentioned is part D40. This is the base for when the headlight is not mounted. 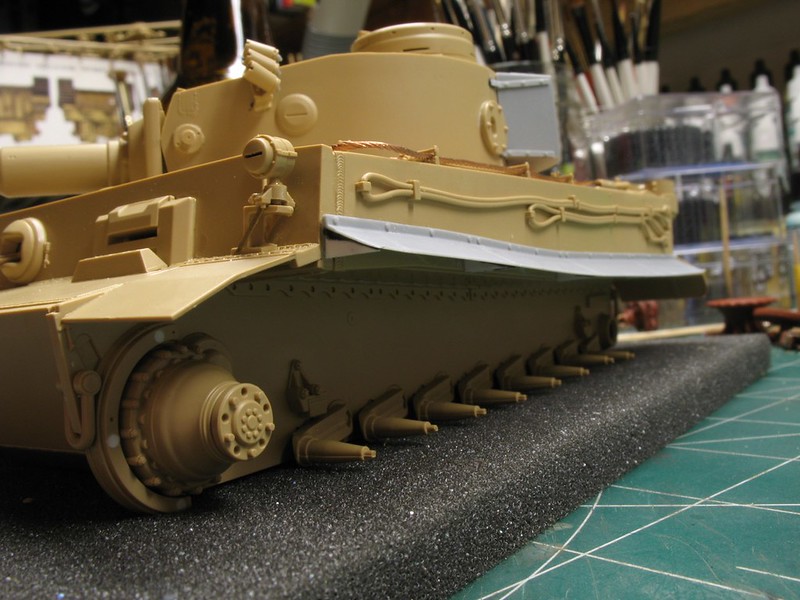 This is a bit blurry, but the black stuff you see is rubberized CA glue. When it's painted it replicates weld lines rather well. 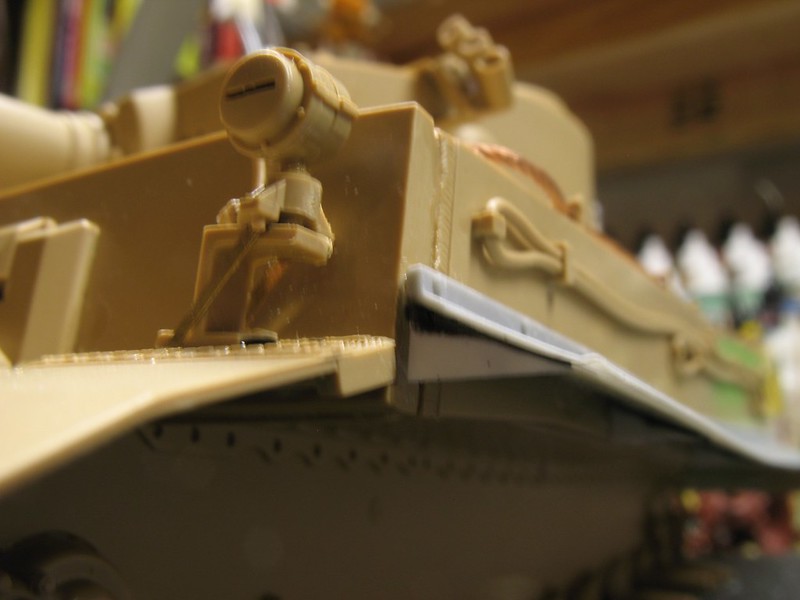 There is a bit of slop with the CA on mounting the fenders. This will be weathered over. I wanted to make absolutely sure they were not going to go anywhere, as there is a bit more handling to be done of the Tiger. 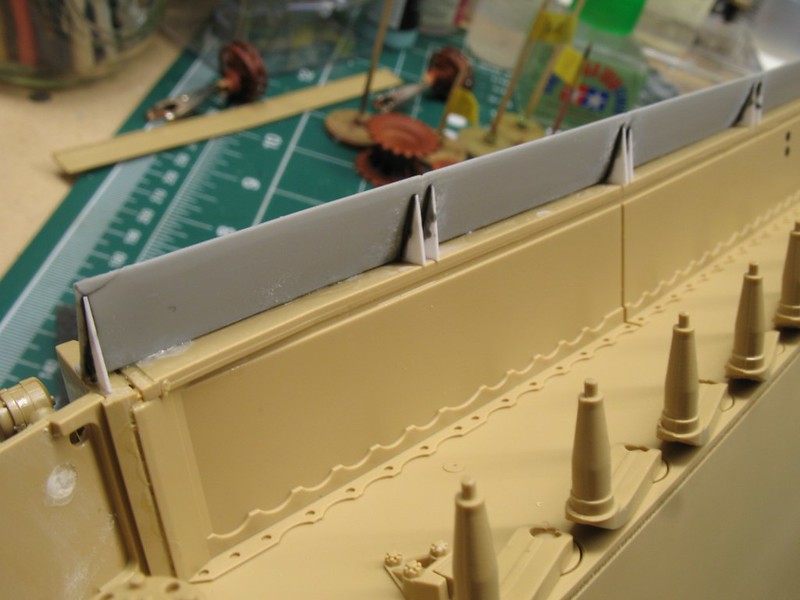
|
|
|
|
Post by panzerjager2 on Mar 5, 2018 0:26:50 GMT -5
Dave, I really am inspired by the work you're doing on this lil kitten. But that's "par for the course" when it comes to your builds.
Going back to the filters and hoses for a quick minute. I think a lot of us out there forgot how detailed these pieces really were. We got numbed, or is that dumbed by Tamiyas early Tigers both in 1/35 and 1/25. Both well let's be kind, BLEW CHUNKS.... that's kind right. Anyway I have always fancied another go at the 1/25th scale Tiger, BUT as the Model Master Shep Paine once said... "that kits a bitch too fix".......
Anyhow GREAT WORK, you and Todd, TRM's Tigers are awesome, can't wait to see more 
PJ2
|
|
|
|
Post by Leon on Mar 5, 2018 4:46:17 GMT -5
Nice progress getting everything mounted Dave!  |
|
sturmbird
Full Member
  
Member since: June 2012
Posts: 1,406
Jun 21, 2012 13:51:45 GMT -5
Jun 21, 2012 13:51:45 GMT -5
|
Post by sturmbird on Mar 5, 2018 13:22:03 GMT -5
Holy cow! Guess you can always sell me a kit for a good price? LOL Will you be going to Roscoe Turner IPMS show next weekend? If so, be sure to find me! I have not made up my mind yet, to be honest. Last two years all the vendors were gone (or going) home when I got there. Plus there's not a lot of kits I'm chasing right now. About the only really serious thing I'm after is a Verlinden Sherman Calliope kit (2 kits), and maybe a couple Sherman M4a2 Asuka kits. Is Bob Pace going to be there this year? I looked for him last year, and he wasn't there. I would be all over a good deal on a Hasegawa A6m7 Zero in 1/32 scale. The Hobby Town on Southport Road has a mid Tiger, but that's it. Plus they might have a couple Tiger II's from Takom. No Dragon kits at all. gary |
|
thug626
Senior Member
   
Member since: January 2013
Posts: 2,030
Jan 15, 2013 13:05:28 GMT -5
Jan 15, 2013 13:05:28 GMT -5
|
Post by thug626 on Mar 6, 2018 0:48:36 GMT -5
PJ2, Thank you for the high praise my good man. Likewise, I am pretty dang inspired by your builds. As far as Tamiya's offerings......for the time they were possibly the best to be had. But, with advances in technology and expectations, the bar got raised....and fast. I remember looking at the Tamiya offering for the Feifel filters and thinking, "those don't quite look right, but how the heck can I scratch something better?".....crickets. Anywho....I am prattling on. Thank you again for taking the time to have a gander at the Kitty.
Sincerely
Dave
|
|
thug626
Senior Member
   
Member since: January 2013
Posts: 2,030
Jan 15, 2013 13:05:28 GMT -5
Jan 15, 2013 13:05:28 GMT -5
|
Post by thug626 on Mar 9, 2018 2:41:21 GMT -5
I picked out a couple of road wheels in which to practice some techniques on. The ones I choose would not be terribly visible if something got messed up. I used a graphite stick and burnisher to give some shine to the rim of the wheel where it rubs the guide horn. Since none of my stencils matchup up on either side of the road wheels, I painted the tires by hand. Two down.....forty six to go. 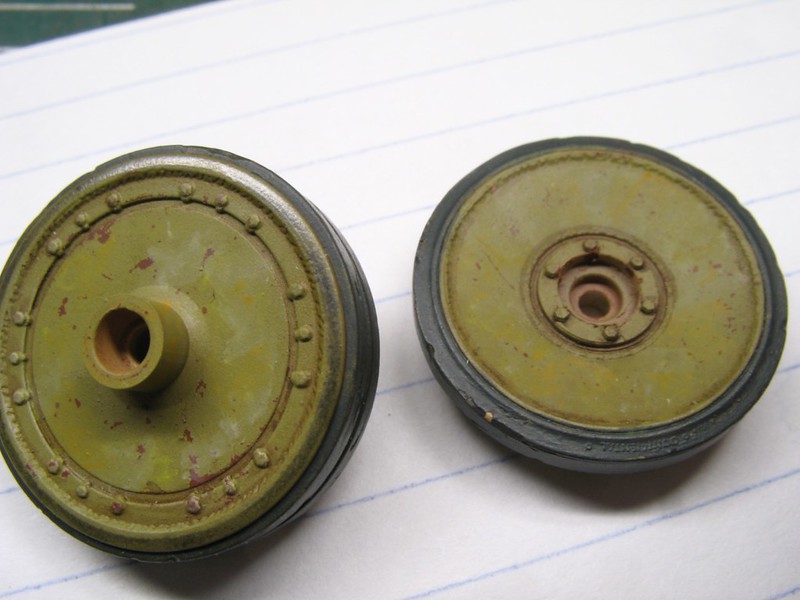  A mini aerial shot of the wheel painting session. This is not all of the wheels. 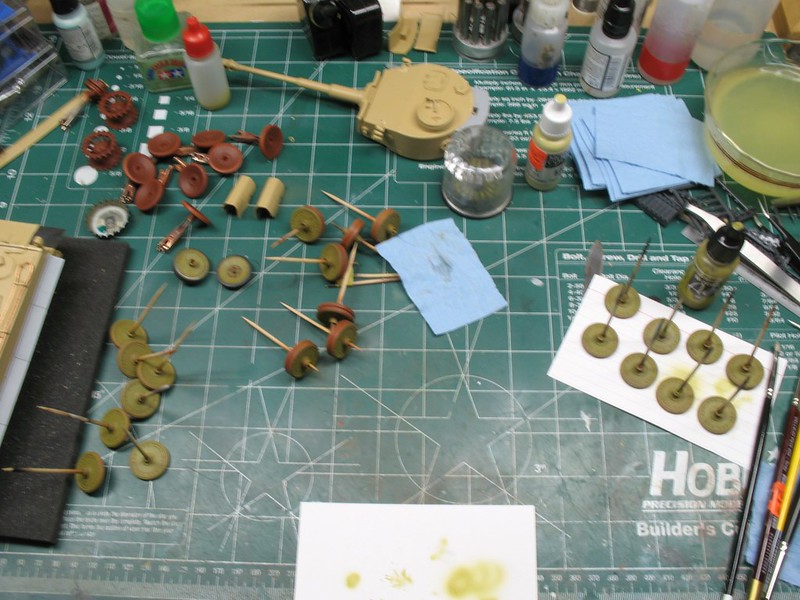 Here's a sample of chipping using the hairspray technique. 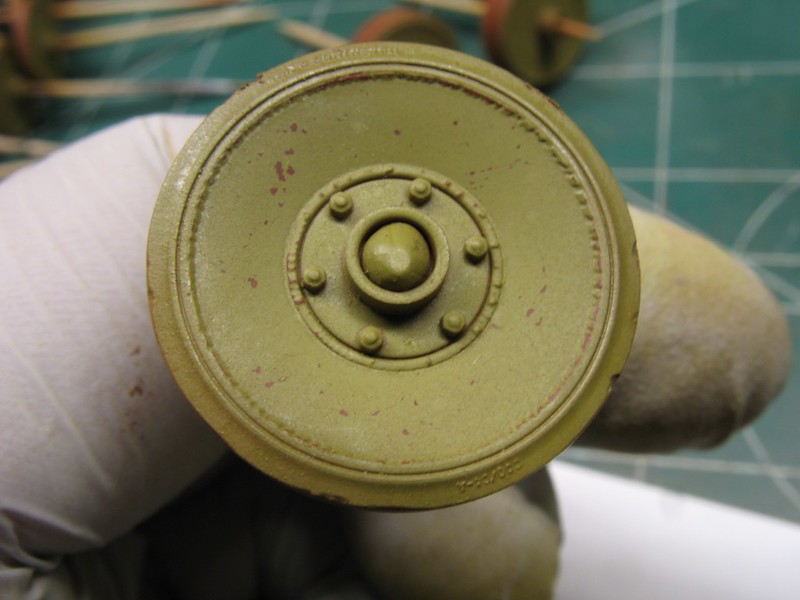 |
|
|
|
Post by dierk on Mar 9, 2018 3:20:29 GMT -5
Chipping looks great! Maybe add some with a sponge using lightened DG? But 48 wheels is too many - that's why I do soviet armour  |
|
|
|
Post by Leon on Mar 9, 2018 4:46:59 GMT -5
Nice start on the wheels Dave!  That has to be the most tedious part of model painting.  |
|
|
|
Post by TRM on Mar 9, 2018 21:41:10 GMT -5
Looking awesome Dave!! LOL...I think you ran right past me on the assembly line my friend!  Lovely work on the wheels...tedious, unforgiving job, but someone needs to do it!  Looks like you're cooking with gas now though!!  |
|
|
|
Post by deafpanzer on Mar 12, 2018 10:43:00 GMT -5
Dig the work on the wheels... I think its spot on for somewhat weary wheels!
|
|
thug626
Senior Member
   
Member since: January 2013
Posts: 2,030
Jan 15, 2013 13:05:28 GMT -5
Jan 15, 2013 13:05:28 GMT -5
|
Post by thug626 on Mar 14, 2018 23:52:24 GMT -5
Dierk Thank you kindly for the compliment. I'll be using some lightened DG, but not with a sponge...stay tuned.  Leon Leon Thank you very much buddy. It certainly started that way. Then my 5x lens came in for my Optic-Loupe. I could cut in the tire color without a hitch. T Thank you kindly good sir. As tedious as it is, it is one of the defining features of the Tiger I that will make or break the final presentation. Andy Thank you my friend. That is what I was going for. Some day soon, I need to do a late war, war weary beast. Today I got all of my education out of the way for my recertification. I am now good for the next three years. As my reward, I played at the bench. Unfortunately, my primary AB went down, so I had to order parts for it. I brought up the back up on line and laid down some RAL primer. 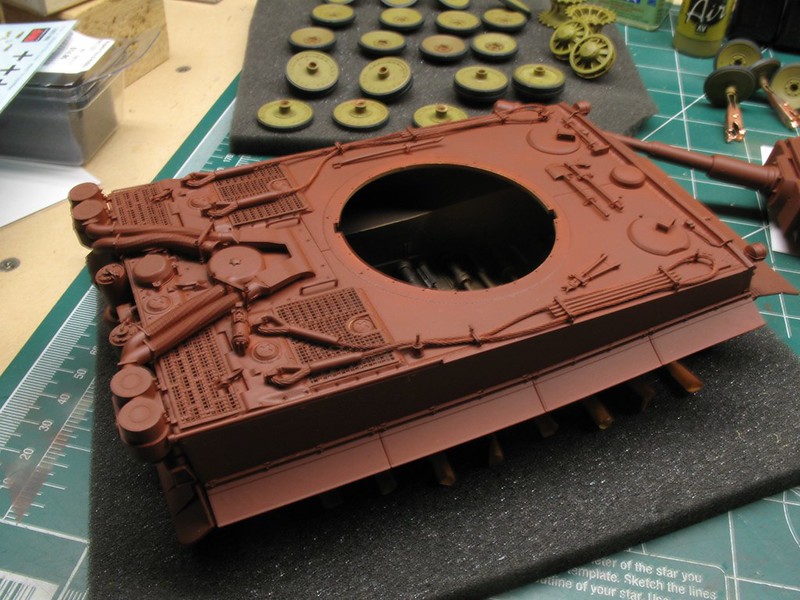 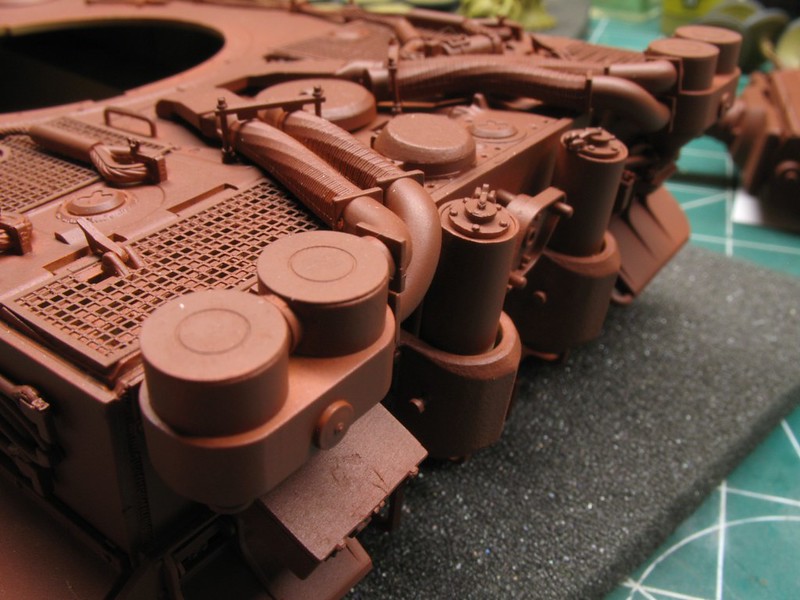 This is the resin tool box and mounting brackets. 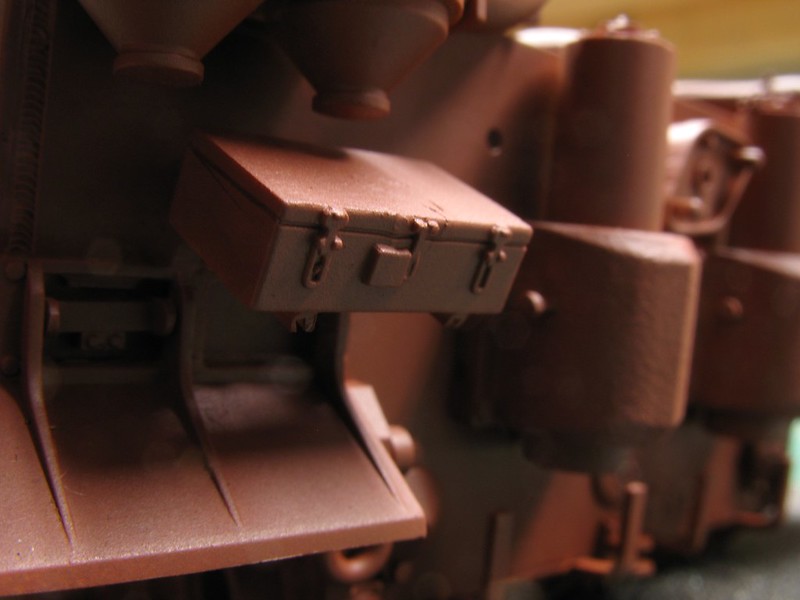 The primer, properly thinned goes on like silk. 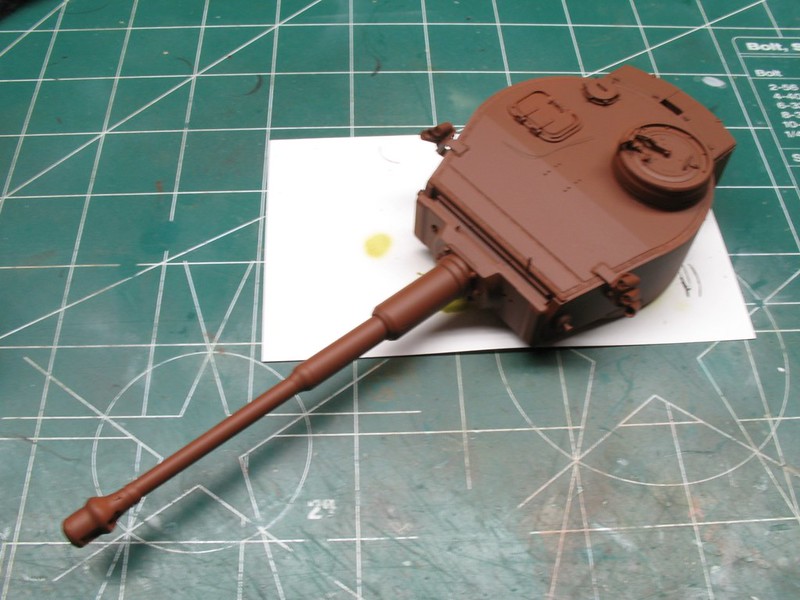
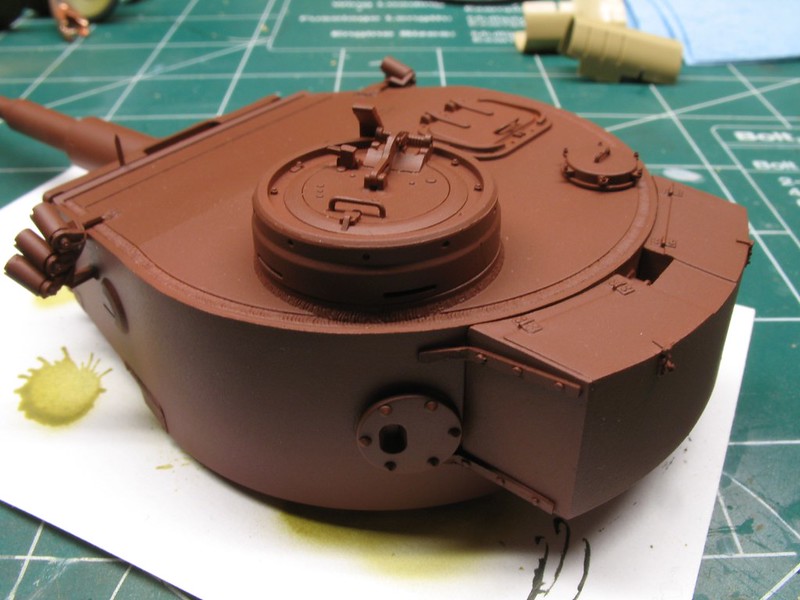
|
|
|
|
Post by panzerjager2 on Mar 15, 2018 0:23:09 GMT -5
Looking pretty "prime"  
PJ2
|
|
|
|
Post by Leon on Mar 15, 2018 8:31:41 GMT -5
Great work on the primer Dave! Looks as smooth as a babys butt.LOL😀
|
|
406 Silverado
Global Administrator     
Member since: November 2011
Posts: 10,201
Member is Online
MSC Staff
|
Post by 406 Silverado on Mar 15, 2018 9:52:27 GMT -5
Good to see the primer on her, next the base paint and the fun part
|
|
|
|
Post by tonylee-Rest In Peace on Mar 15, 2018 10:40:02 GMT -5
The molding on this kit is PRIME,really crisp.  Tony lee  |
|
|
|
Post by deafpanzer on Mar 16, 2018 11:36:44 GMT -5
Looking yummy!!!
|
|
|
|
Post by wing_nut on Mar 16, 2018 14:49:19 GMT -5
Nice. SCHWING on the road wheels.
|
|
thug626
Senior Member
   
Member since: January 2013
Posts: 2,030
Jan 15, 2013 13:05:28 GMT -5
Jan 15, 2013 13:05:28 GMT -5
|
Post by thug626 on Mar 18, 2018 18:12:31 GMT -5
PJ2 You were just looking for an excuse to use that? Weren't you?  Leon Leon Smooth as, and the best part? No POOP! Rob Primer. Done! Base coats? Finished today. Had some fun with the base costs as well. Tony The detail is certainly crisp. The decals? One my want to seek decals elsewhere. They tore very easily. Andy Thank you my friend. Marc Thank you for having a gander my good man. A good bit of progress the last couple of days at the bench. The base coats are all done. There are some pics and documentation that seems to support a two tone camo scheme. I went with a RAL 8000 and RAL 7008. A pic of Tiger 112 shows it with several patches of a light color. This is thought to be RAL 8020 which superseded RAL 8000 for the tropical camo scheme. This color is thought to used in the repair of battle damage. The pic also showed 112 with a grey barrel. Possibly a replacement? The lighter color is on the barrel sleeve. All of the contrast made me decide on this particular tank. By no means am I an expert on Tigers...let alone the frist seven that went to N. Africa. 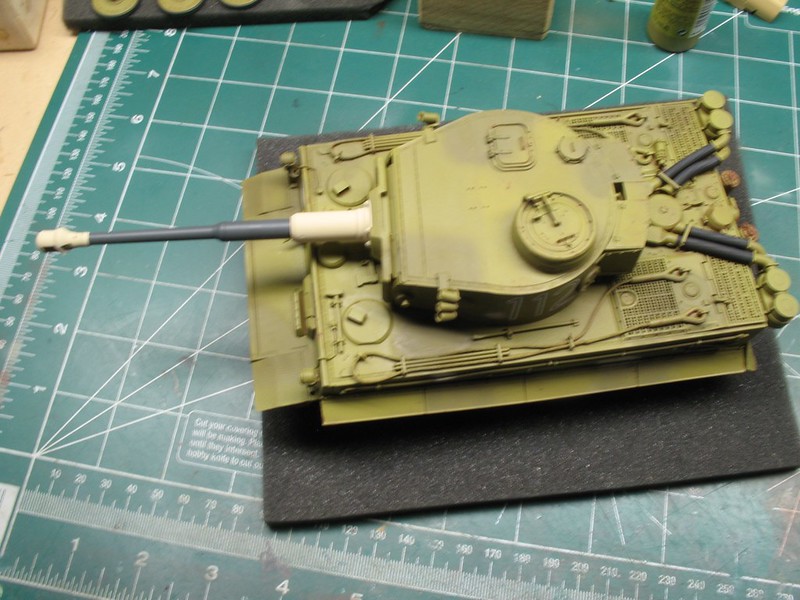 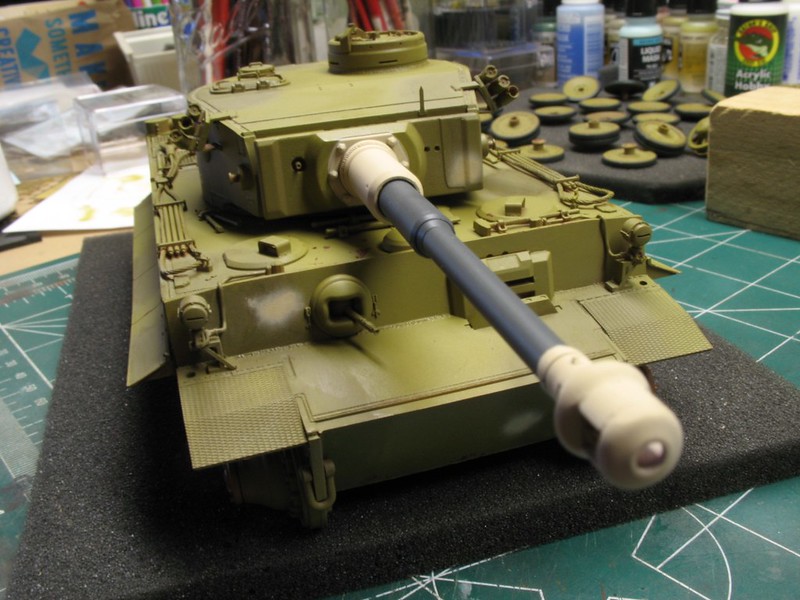 A couple of the numbers tore upon application. The balkenkreuz also tore. I may just end up painting the one on the left side under the track cable. 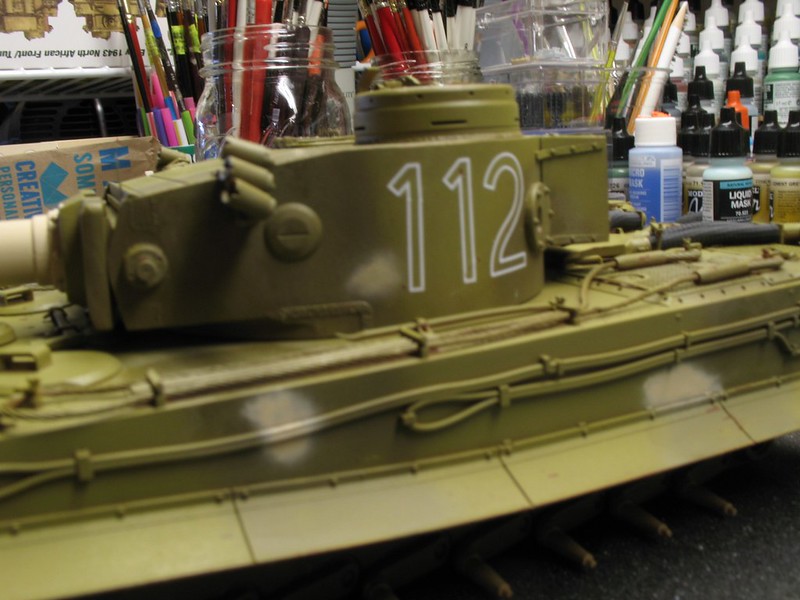 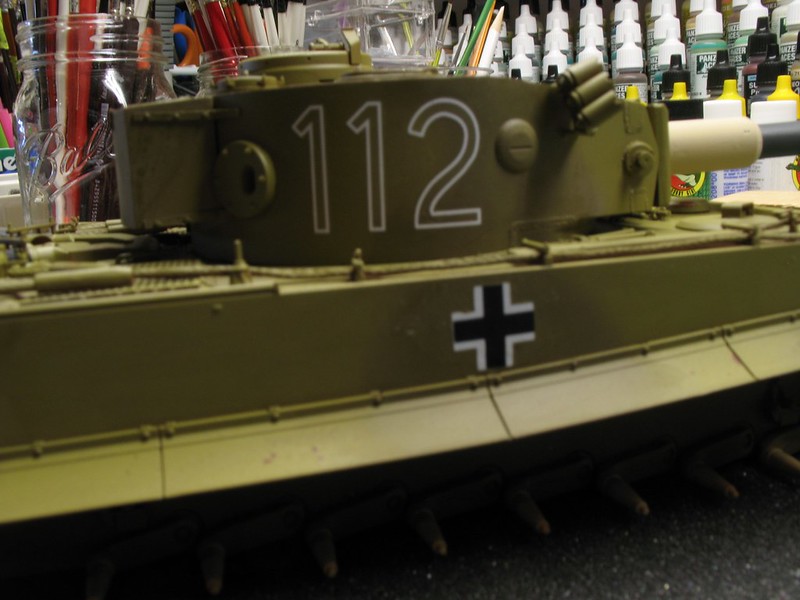 Very little of the exhausts be seen once the shrouds are mounted. 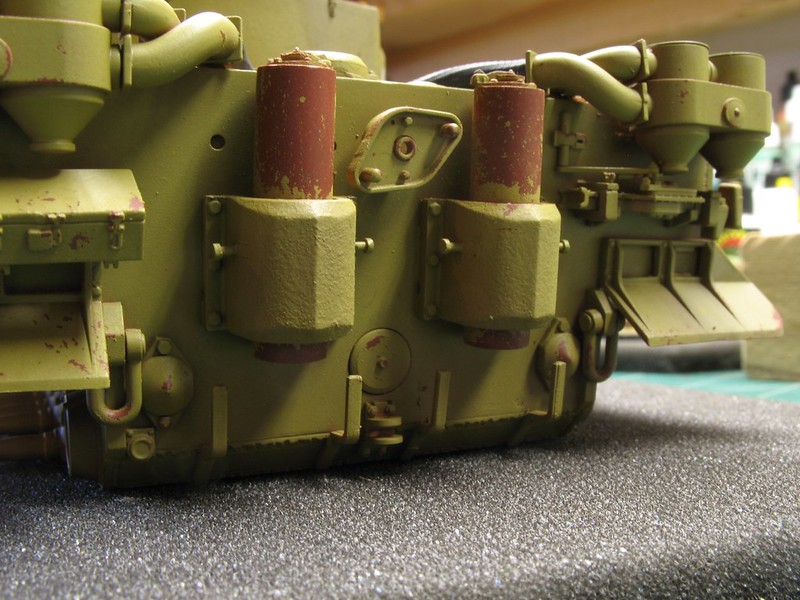 The commanders cupola. There is still some work to do with the paint chips. 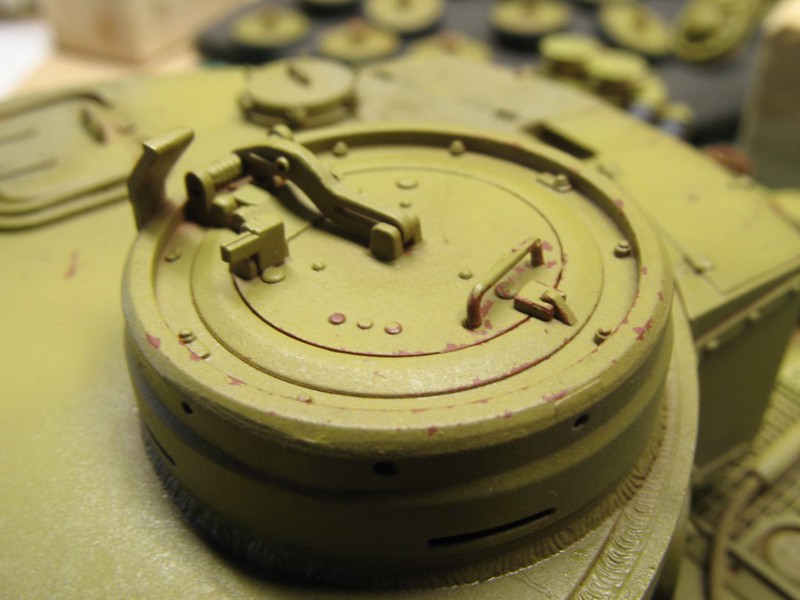 This pic is a good shot of the low contrast between the colors. It's even more difficult to see in B&W pics. The RAL 7008 is by Lifecolor. This "chips" very differently than the Vallejo paints. 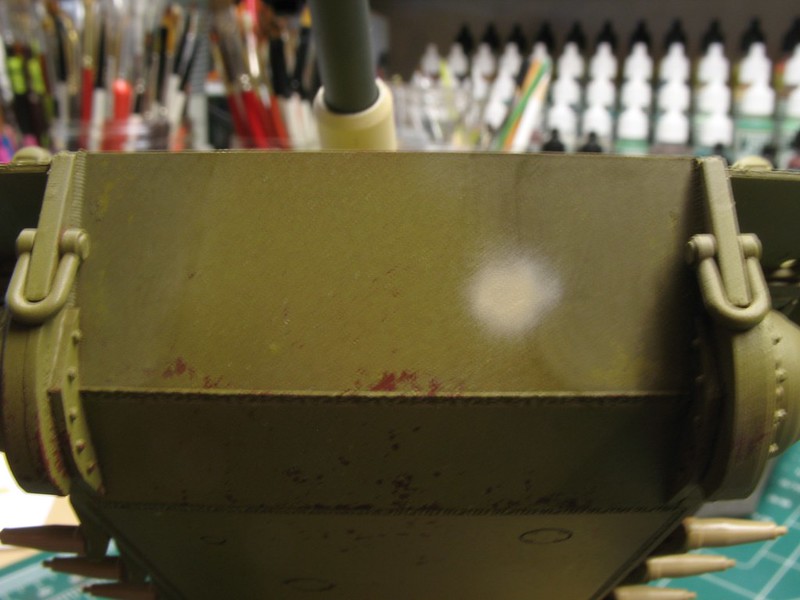
|
|
adt70hk
Forum Moderator     
Member since: November 2015
Currently attempting to build something decent!!! ;)
Posts: 2,831 
MSC Staff
|
Post by adt70hk on Mar 18, 2018 18:33:30 GMT -5
That really is looking very good indeed. Keep up the good work.
Andrew
|
|
thug626
Senior Member
   
Member since: January 2013
Posts: 2,030
Jan 15, 2013 13:05:28 GMT -5
Jan 15, 2013 13:05:28 GMT -5
|
Post by thug626 on Mar 18, 2018 19:48:03 GMT -5
Thank you kindly Andrew.
|
|
|
|
Post by panzerjager2 on Mar 18, 2018 20:08:44 GMT -5
Dave, you got me on that one.... I had that "prime" line in the vault for sometime...LOL LOL LOL.
Your paint job is looking awesome.... 
PJ2
|
|
|
|
Post by Leon on Mar 19, 2018 5:26:28 GMT -5
Base coat and marking look good Dave!
|
|
thug626
Senior Member
   
Member since: January 2013
Posts: 2,030
Jan 15, 2013 13:05:28 GMT -5
Jan 15, 2013 13:05:28 GMT -5
|
Post by thug626 on Mar 22, 2018 2:11:31 GMT -5
PJ2 We've all got that "one" we are looking to use.  Thank you kindly my good man. The weathering of the road wheels is mostly done. That is, I still need to take care of the grime and gunk on them. 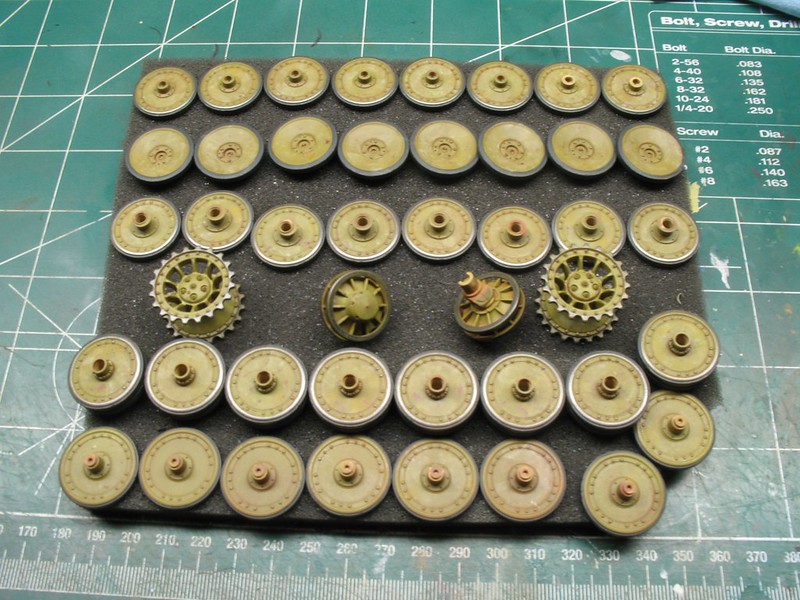 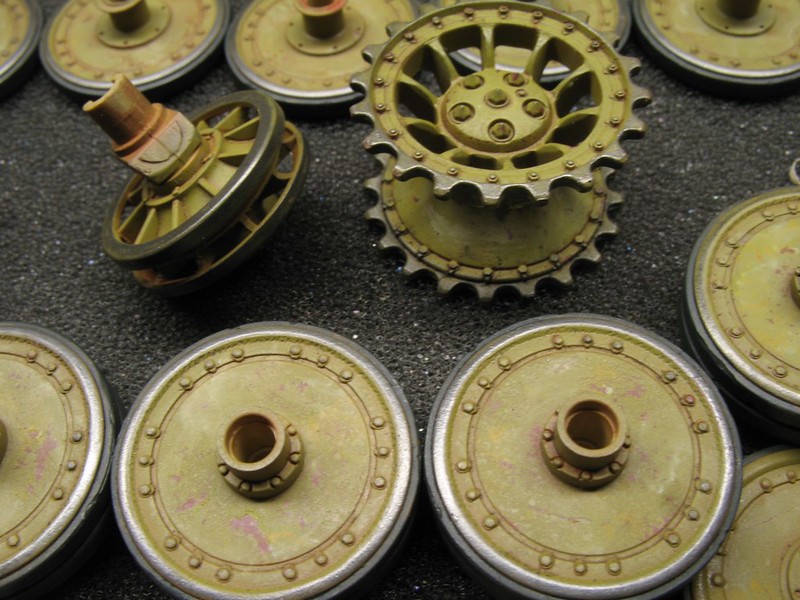 I finally got the tow cables taken care of. 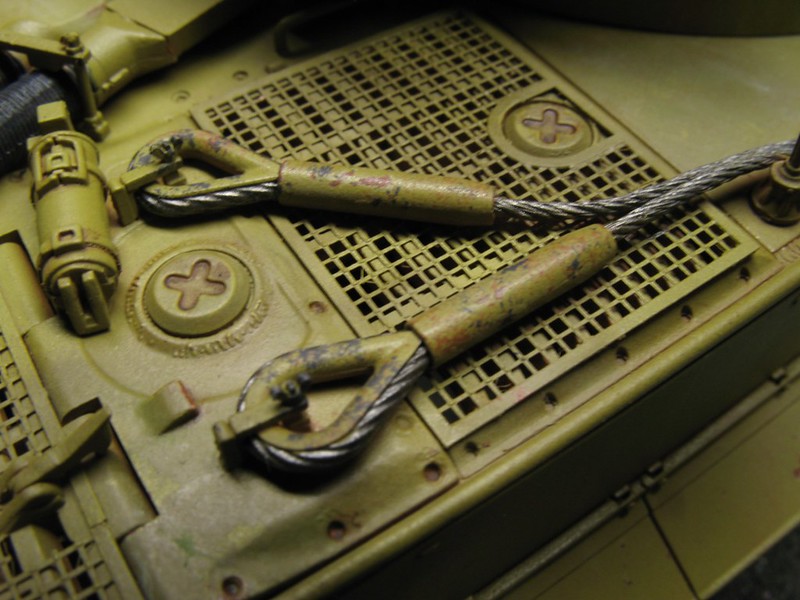 It's difficult to see, but I added a slight touch of lightened base coat around the paint chips. This is to lend to newer chips. 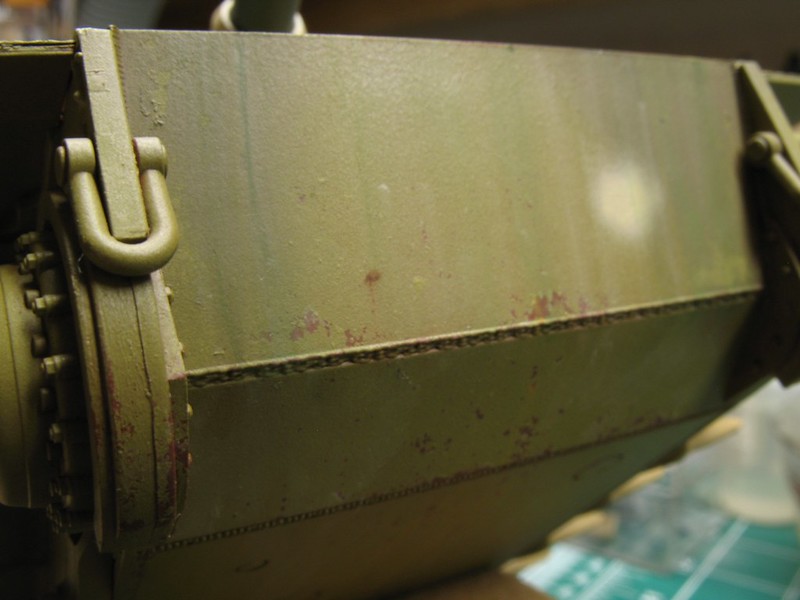 The exhaust shields are mounted. 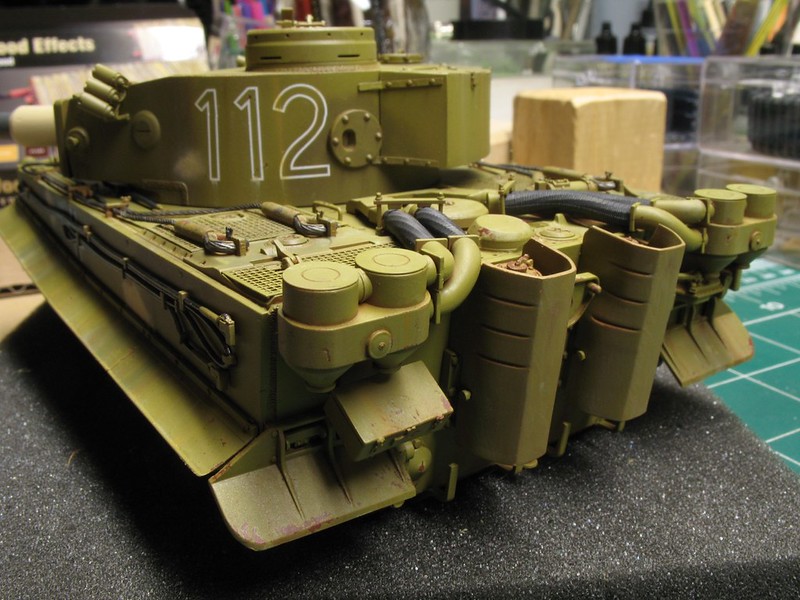
|
|
|
|
Post by dierk on Mar 22, 2018 4:11:04 GMT -5
Excellent detail painting!
|
|