thug626
Senior Member
   
Member since: January 2013
Posts: 2,030
Jan 15, 2013 13:05:28 GMT -5
Jan 15, 2013 13:05:28 GMT -5
|
Post by thug626 on Feb 14, 2018 21:01:07 GMT -5
With the Abrams complete, and wanting to stick with the desert theme, I pulled the RFM Tunisian Tiger from the stash. I was wanting to build one up with and interior, but this kit is sans interior. It's been a few years since I built a Tiger, i figured it was time to build another big cat. 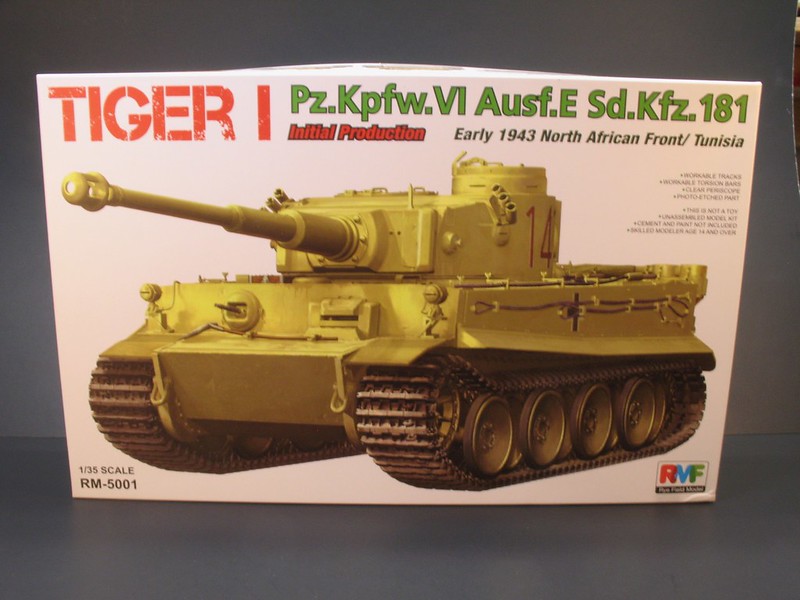 |
|
|
|
Post by TRM on Feb 14, 2018 22:32:20 GMT -5
Looking forward to the carnage Dave! I am suspecting you will love this kit over the last Tiggy!  |
|
thug626
Senior Member
   
Member since: January 2013
Posts: 2,030
Jan 15, 2013 13:05:28 GMT -5
Jan 15, 2013 13:05:28 GMT -5
|
Post by thug626 on Feb 14, 2018 23:51:46 GMT -5
T, good evening. The last Tiggy I built was Tamiya’s mid production. This one doesn’t have an interior, but one can see the groundwork for an interior.
|
|
|
|
Post by panzerjager2 on Feb 15, 2018 0:48:54 GMT -5
Dave, way to step up to the "armour plate".... A TIGER. I can't wait to see what you do with this monster 
PJ2
|
|
thug626
Senior Member
   
Member since: January 2013
Posts: 2,030
Jan 15, 2013 13:05:28 GMT -5
Jan 15, 2013 13:05:28 GMT -5
|
Post by thug626 on Feb 15, 2018 0:57:00 GMT -5
Good to see you PJ2. Stay tuned. I got some work done on the turret. I’ll get some pics up later.
|
|
|
|
Post by Leon on Feb 15, 2018 4:03:49 GMT -5
I'll be following along Dave! I love a good Tiger build.  |
|
|
|
Post by 406 Silverado on Feb 15, 2018 8:02:27 GMT -5
Looking forward to seeing how this one comes together. They have some nice kits, tons of parts.
|
|
thug626
Senior Member
   
Member since: January 2013
Posts: 2,030
Jan 15, 2013 13:05:28 GMT -5
Jan 15, 2013 13:05:28 GMT -5
|
Post by thug626 on Feb 18, 2018 16:35:03 GMT -5
Leon, It's good to have you along on the build. Rob, It is also good to have you along. I've been taking some notes from your book. Thank you. The start of the build! The barrel and brake is a six piece assembly. 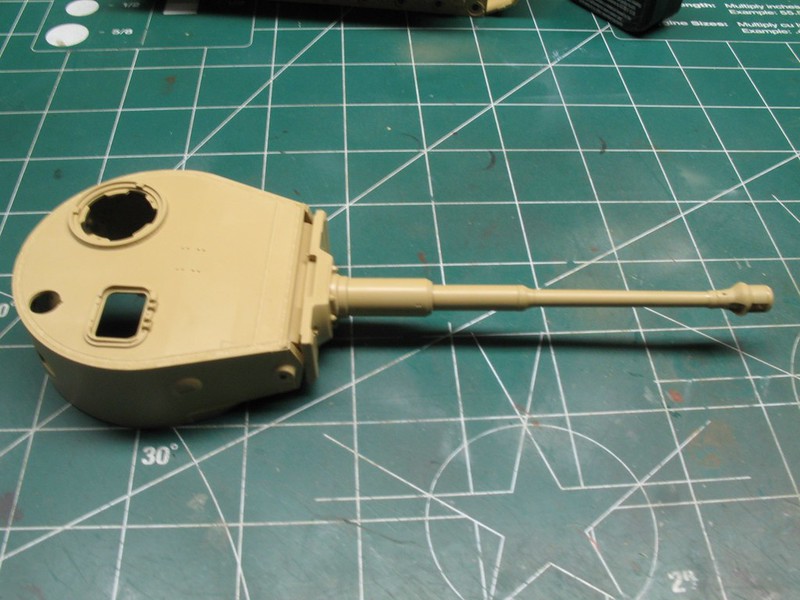 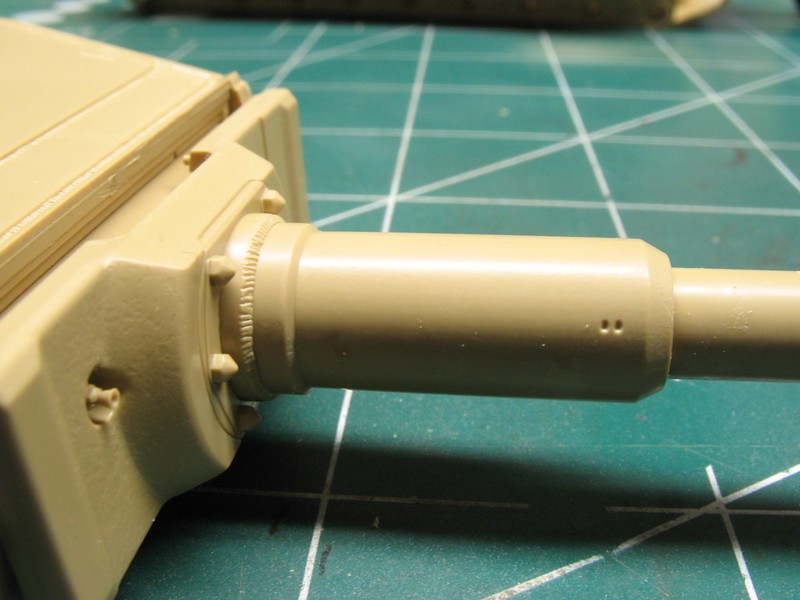 This was RFM first kit offering, and the interior of the cupola has detail that suggests a future offering for an interior. Which they did. After the glue sets up, the grab handle will be cleaned up, and weld detail added. 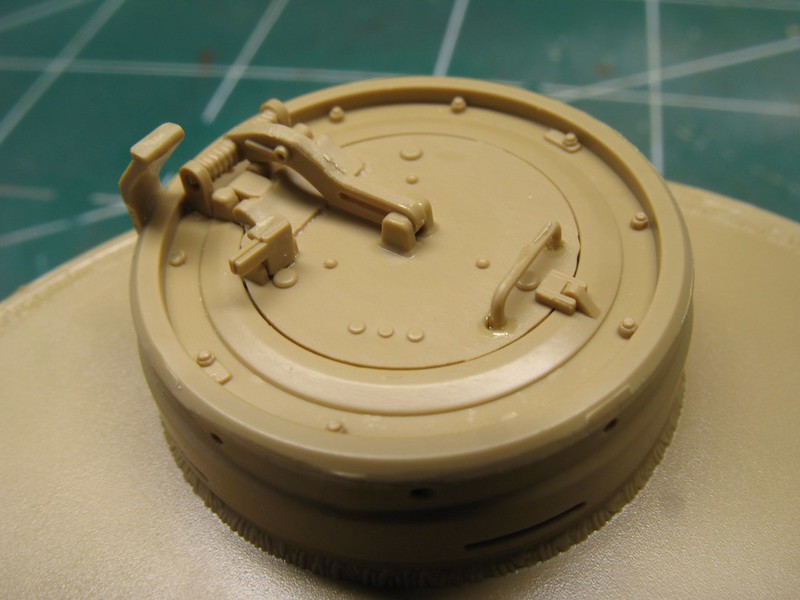 Now this was a nice, and unexpected addition. A resin bin. There are also some other resin goodies included that there is no indication on the box or instructions. 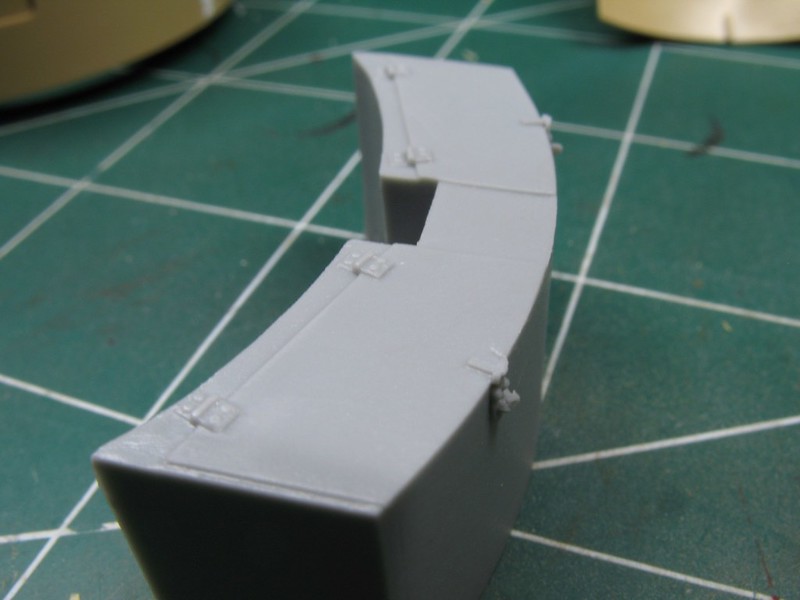 Todays detailing. I added Bronco castle nuts and lead wire. The lead wire is a bit over scale, but the next size down of anything I had that was easy to work with would have been lost visually. 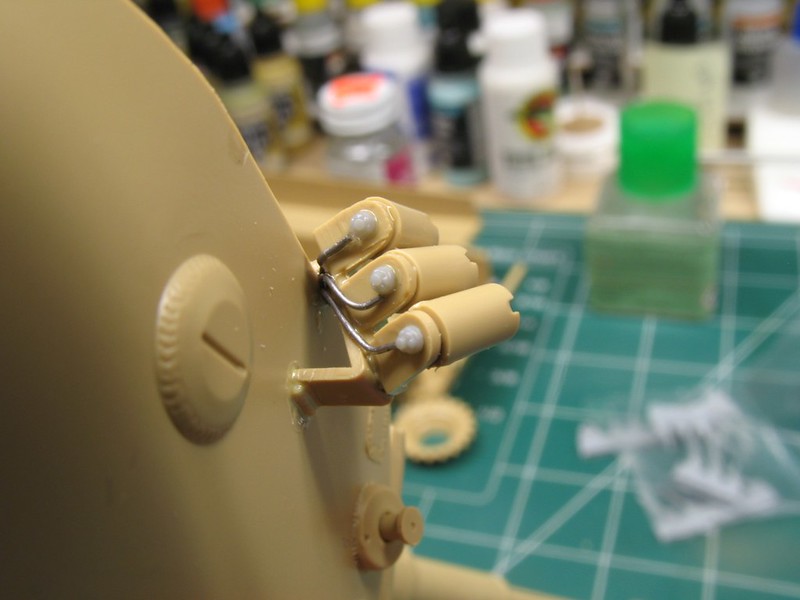
|
|
|
|
Post by Leon on Feb 18, 2018 18:53:30 GMT -5
Off to a good start Dave! A lot of nice detail there.  |
|
Deleted
Member since: January 1970
Posts: 0
Nov 22, 2024 23:28:26 GMT -5
Nov 22, 2024 23:28:26 GMT -5
|
Post by Deleted on Feb 18, 2018 21:27:23 GMT -5
This is looking good!
I really enjoyed building this kit. I want to do another one soon.
G
|
|
|
|
Post by TRM on Feb 18, 2018 21:45:37 GMT -5
Looking great already Dave! I am working on the Mid RFM...with the interior. They did a pretty good job I thought. Tons of extra parts for different variants both in and out.
|
|
thug626
Senior Member
   
Member since: January 2013
Posts: 2,030
Jan 15, 2013 13:05:28 GMT -5
Jan 15, 2013 13:05:28 GMT -5
|
Post by thug626 on Feb 18, 2018 22:06:08 GMT -5
Leon Thank you kindly. There is detail in this kit, that carries over to their Tigers with a full interior, that just begs to be built up into a maintenance dio.
G Thank you kindly my good man. It's good to see you are still about. I decided to build this kit, instead of the Initial Production one with the full interior. Getting used to a manufactures quirks.
Rob Thank you very much good sir. I'll be taking notes on your Mid Production.
|
|
thug626
Senior Member
   
Member since: January 2013
Posts: 2,030
Jan 15, 2013 13:05:28 GMT -5
Jan 15, 2013 13:05:28 GMT -5
|
Post by thug626 on Feb 18, 2018 23:10:47 GMT -5
A bit more progress today. I had to take a break from working on continuing education to maintain one of my certifications. The detail on this kit is amazing. I am glad that I started with the non-interior Tiger first, as all manufacturers have their quirks....more on that in a bit. The final drive and sprocket mounting plate. As you can see, there a some EPM that needed dealing with. These were easily remedied, so, not a deal breaker for me. The detail in the kit more than makes up for it. 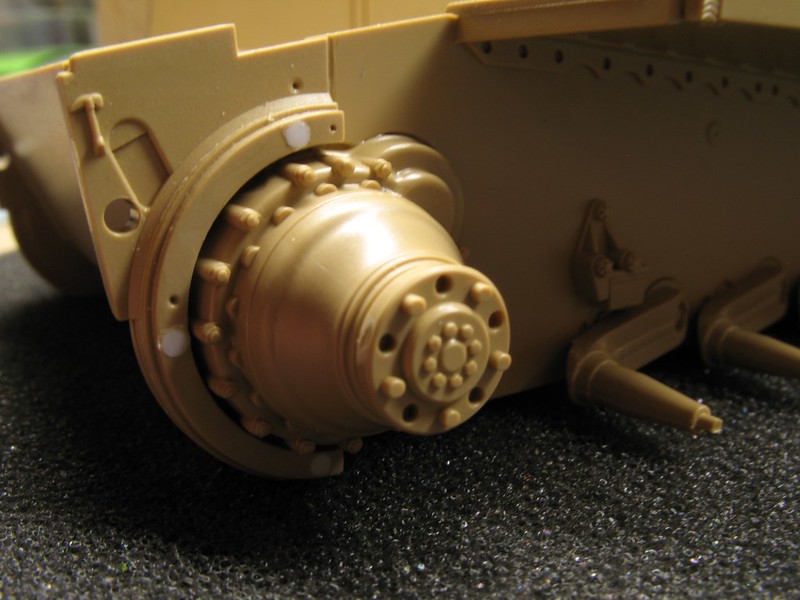 Outer and inner detail on the sprockets. 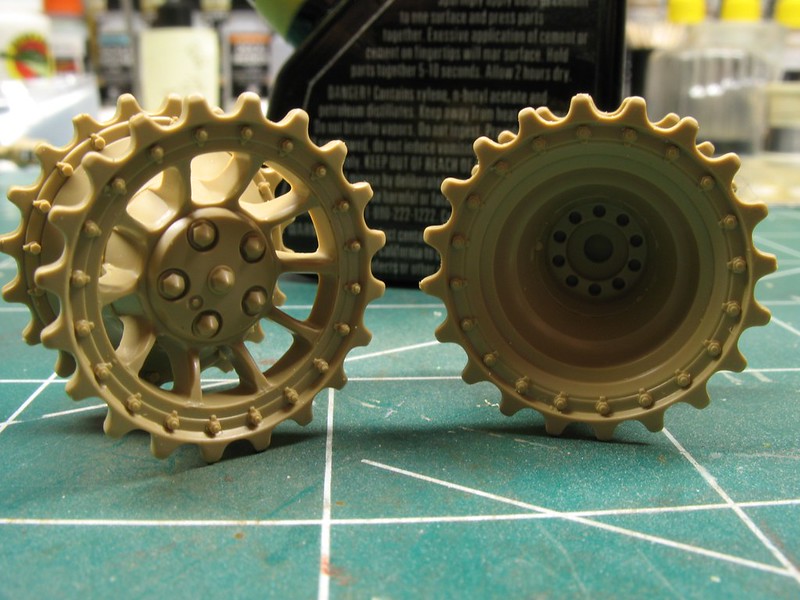 The hull is taking shape. 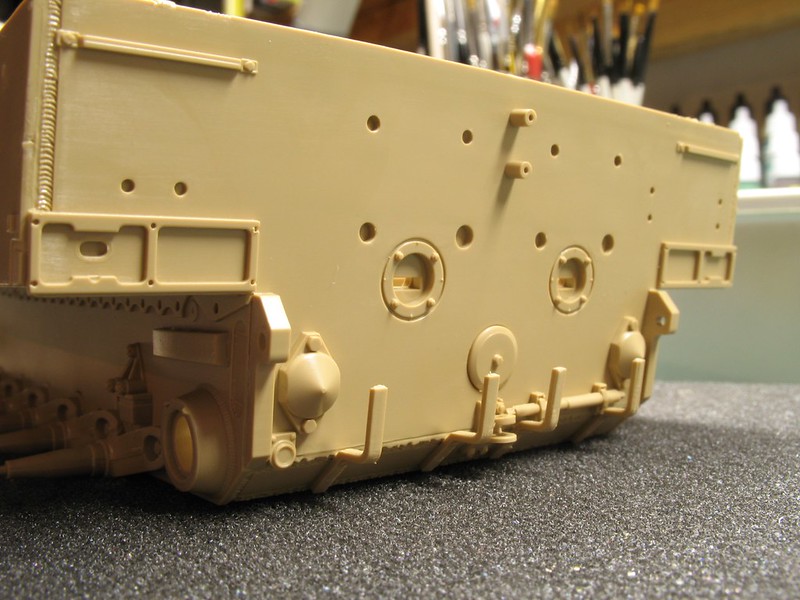 This is why I am glad I started with the non-interior kit first. I cut the tabs on the swing arms to allow them to travel, and in theory, allow the suspension to "self level". What I failed to realized is that there is not a lot of surface area for the torsion spring to glue to. Fearing these would break after the hull top is glued on, I cobbled up some styrene to allow a larger surface area to glue to. It is not pretty, but it isn't going to show either. The suspension will still have some travel. 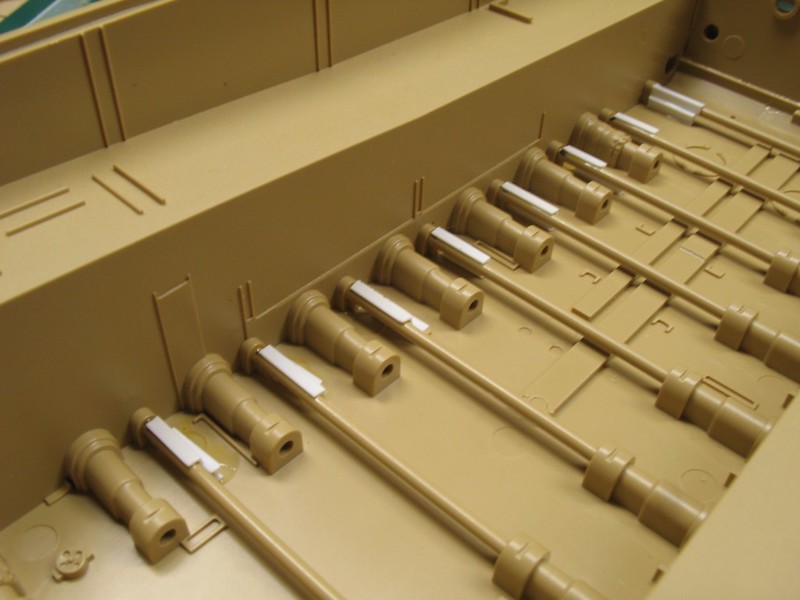 |
|
thug626
Senior Member
   
Member since: January 2013
Posts: 2,030
Jan 15, 2013 13:05:28 GMT -5
Jan 15, 2013 13:05:28 GMT -5
|
Post by thug626 on Feb 22, 2018 13:06:31 GMT -5
Here are some of the resin correction parts included in my kit. The exhaust tops without the top cover. As you can see by the styrene part where the rods glue in at. One could fill them in, but it would be a pain. 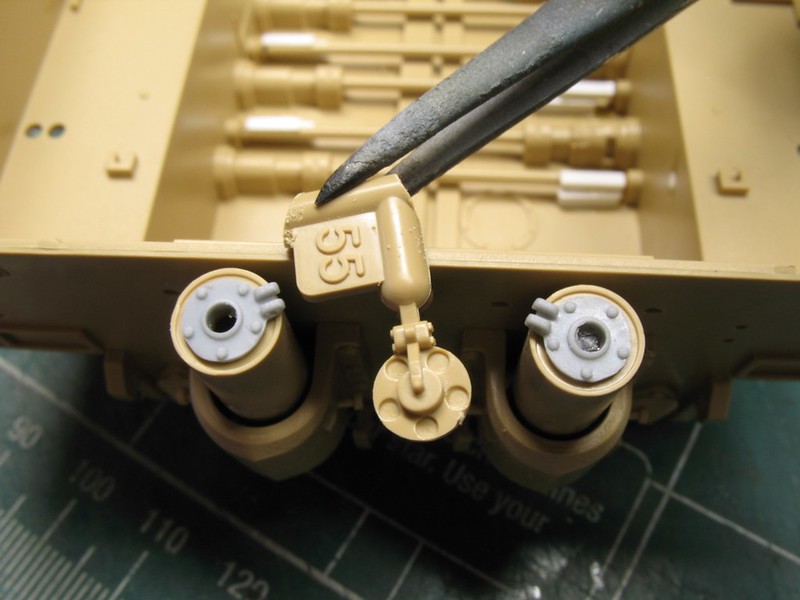 Dimensionally the resin bin is larger than the styrene part. The bin should go from pistol port to pistol port, which this on does. 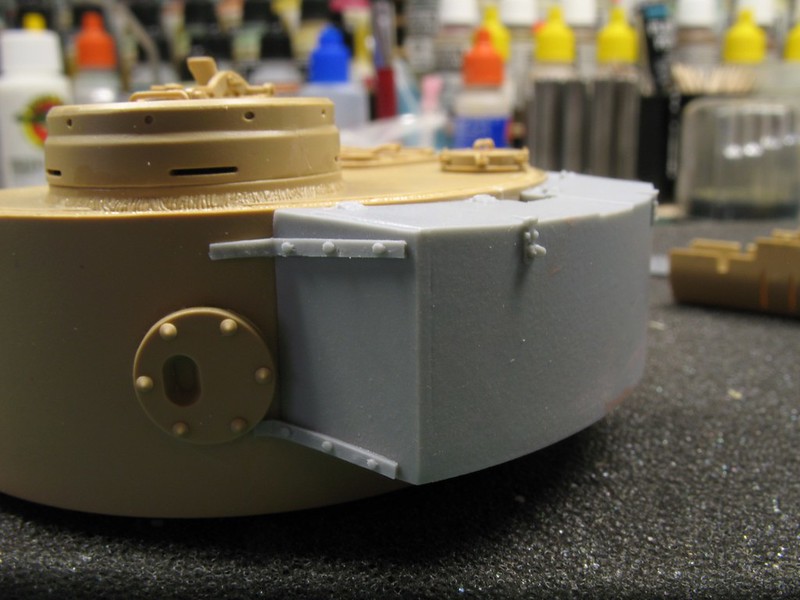 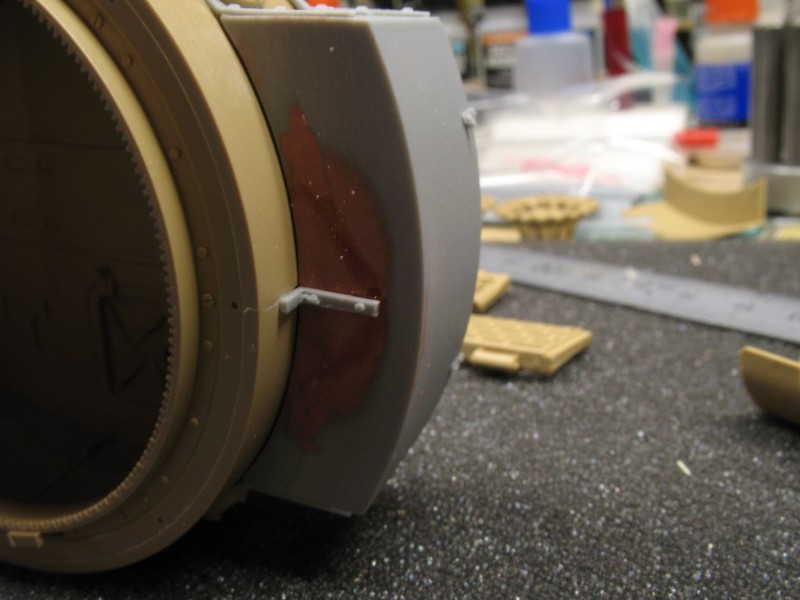 There's a lot of mass on the rear hull plate. The lifting lugs for the exhaust armor will get filled in, and retextured with some stippling. 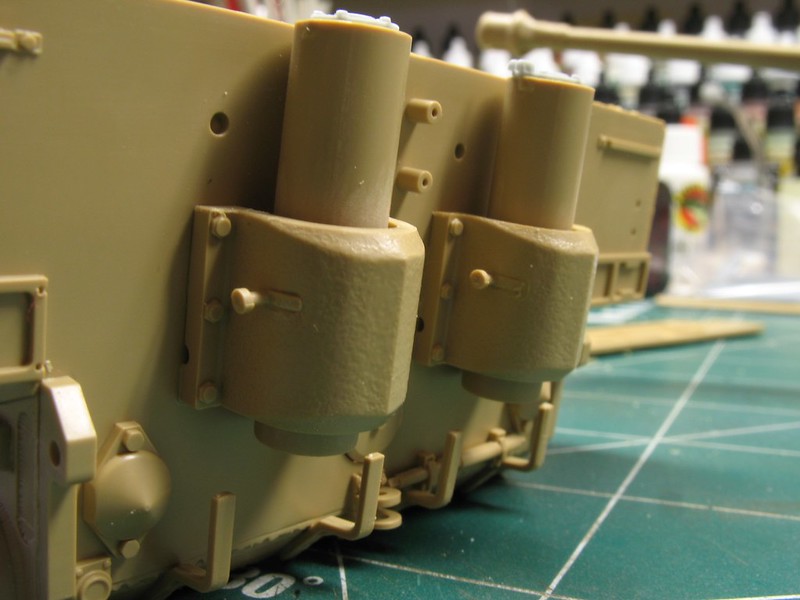 Now this detail will never be seen on this kit, but I thought I'd share it anyway. The hatches articulate like the real thing. I left of the locking latches as, this will not be visible when it is buttoned up. I am looking forward to building the kit with the interior. 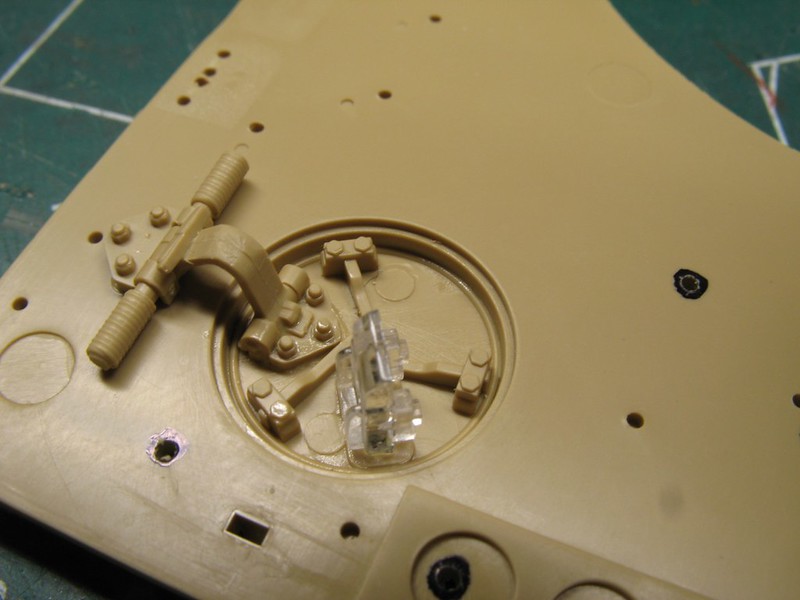 The final drive backing plates parts were never called out in the instructions. They are shown, just not called out. They are parts B54 and B55. Here is a link that was shared with me for corrections to the RMF kit. tiger1.info/models/products-page/RM5001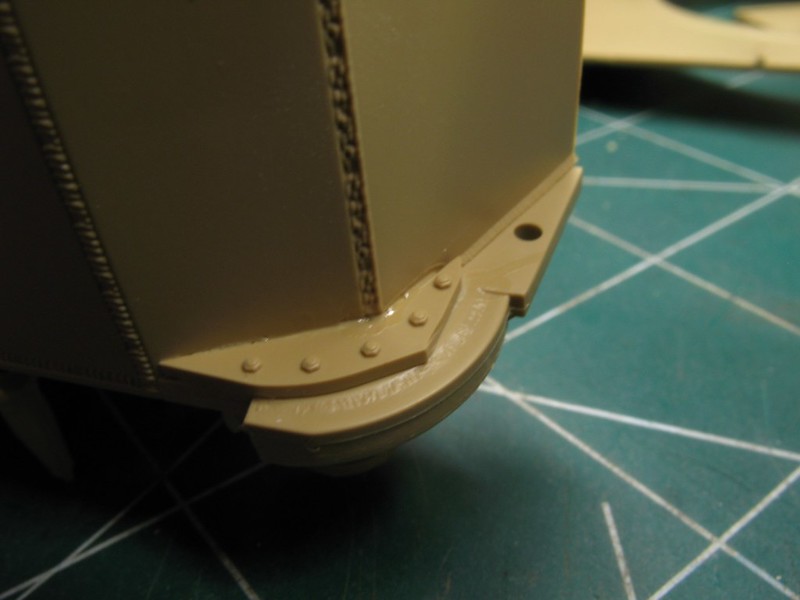 |
|
|
|
Post by Tojo72 on Feb 22, 2018 16:35:03 GMT -5
Your details are outstanding as usual.I enjoyed the Dragon Tunisian Tiger.Have you ever used David Bryden's Tiger site,lots of good info,he's quite the Tiger guru.
|
|
|
|
Post by Leon on Feb 22, 2018 16:56:39 GMT -5
That's a lot of nice detail there Dave!
|
|
|
|
Post by TRM on Feb 22, 2018 19:23:31 GMT -5
Been living at Bryden's site for a while I think...LOL These kits are pretty nice and worth the time, money and any effort if you ask me! I seen the epm's on the final drive plates too, looked like the sprockets were going to cover...and after the tracks, well, you do the same as a bunch of us and fill them anyway...LOL She's looking hot brotha'! In much better shape then the wreck I'm working on!!  |
|
|
|
Post by panzerjager2 on Feb 22, 2018 20:55:32 GMT -5
Dave, Tiger is looking real good. Great details on this kit. I have never done a Rye Field kit....looks great. Also, GREAT catch on the details for the S-mine/Smoke Launchers and the Turret Stowage Bin...most people forget the support arm underneath..... 
PJ2
|
|
thug626
Senior Member
   
Member since: January 2013
Posts: 2,030
Jan 15, 2013 13:05:28 GMT -5
Jan 15, 2013 13:05:28 GMT -5
|
Post by thug626 on Feb 23, 2018 2:27:20 GMT -5
Tojo72. Thank you my good man. I have his site bookmarked from some time ago. I've got some Tiger references here, but one of my books seems to be missing. Leon There certainly is with this kit. I can't wait to build the kit with the interior. Well.....I say that now.  T T I've had Byrdens site within quick reach for a bit with this build. One certainly gets a lot of "bang for the buck" with these kits. Unless I am 100% certain the epm will not be seen, I'll fill them. Just like I did for the front fenders. Thank you for the compliment my good man. Yours has reached the terminal end of it's usefulness. This is just going to have some mileage on it. I am planning on using the hairspray technique on this one. PJ2 Thank you for having a gander my good man. This is my first Rye Field kit. The instructions are not quite 100%, but far better than Dragons instructions. The mounting brackets for the bin were included with the resin goodies. I figured where that bracket was supposed to go. Even then, I might have added one if one was not included. That seems like an awfully big span not to be supported in some fashion Detail abounds on this kit. The sidewalls on the road wheels are no exception. I roughed up the road wheels with a Dremel 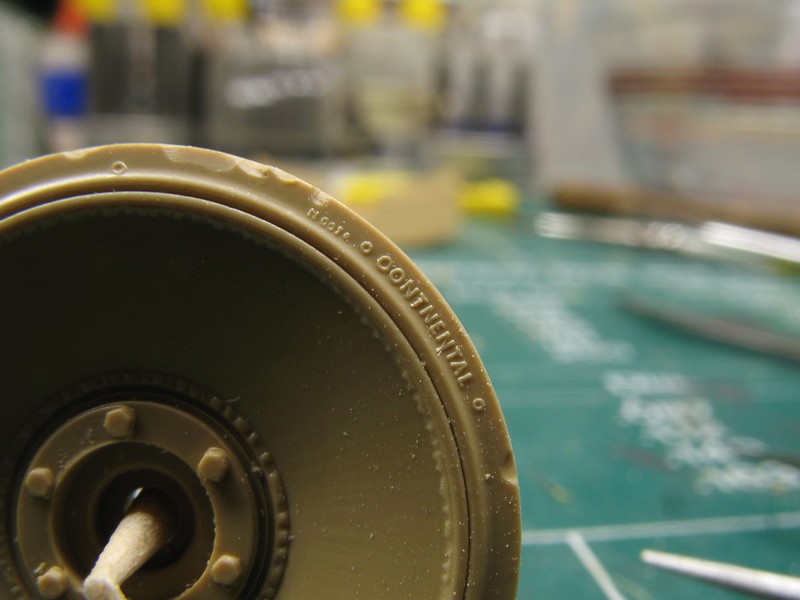 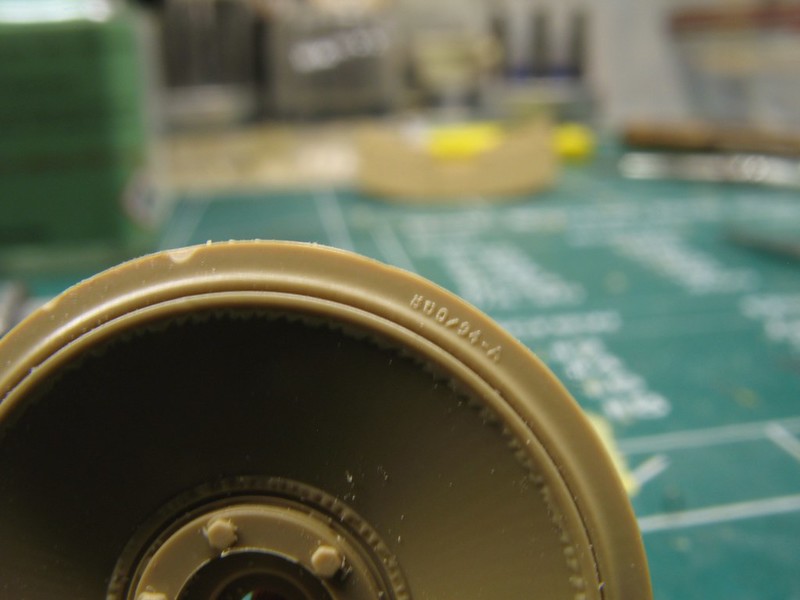 Here is a mock up of the drive sprocket, road wheels, and idler. 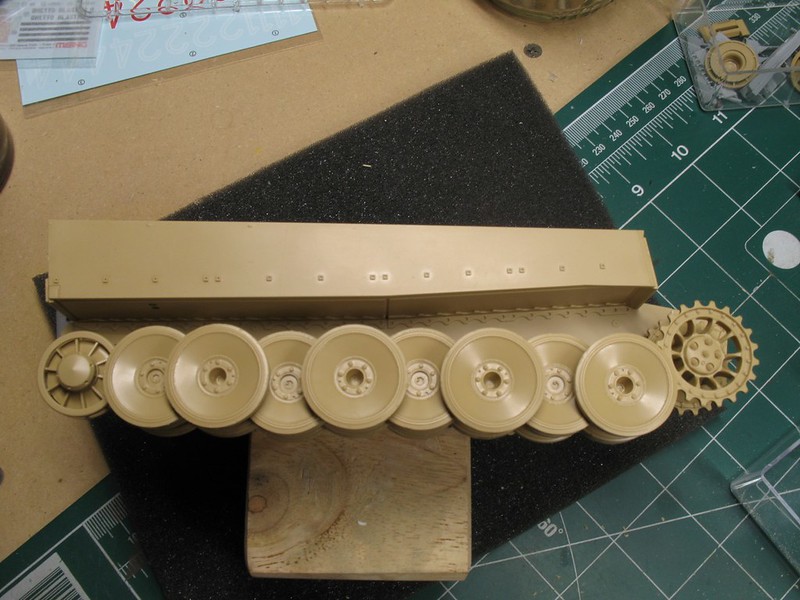 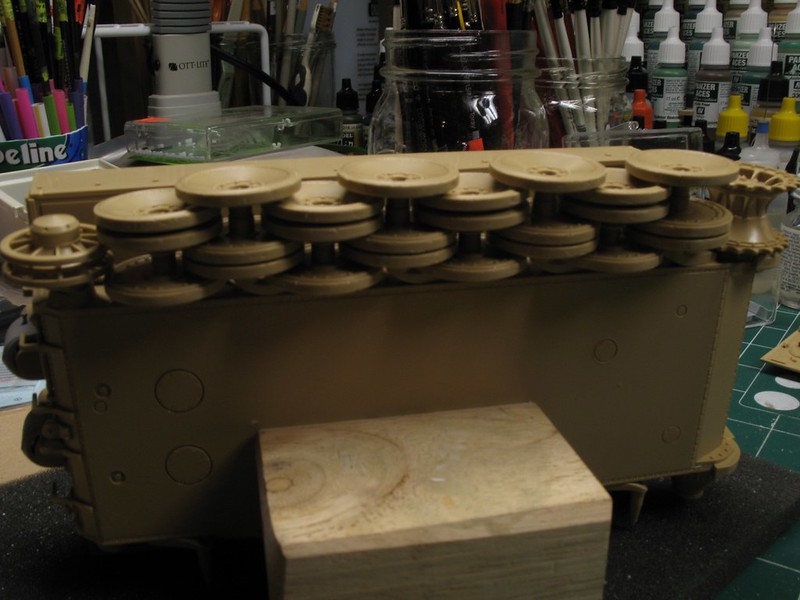 It is easy to see why the interleaved setup would easily get clogged by mud. 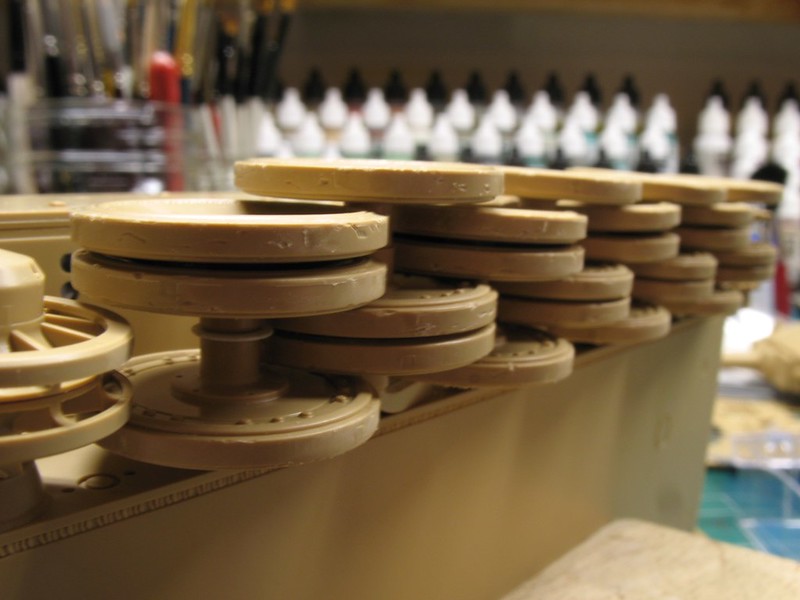 it is all ready for primer.... 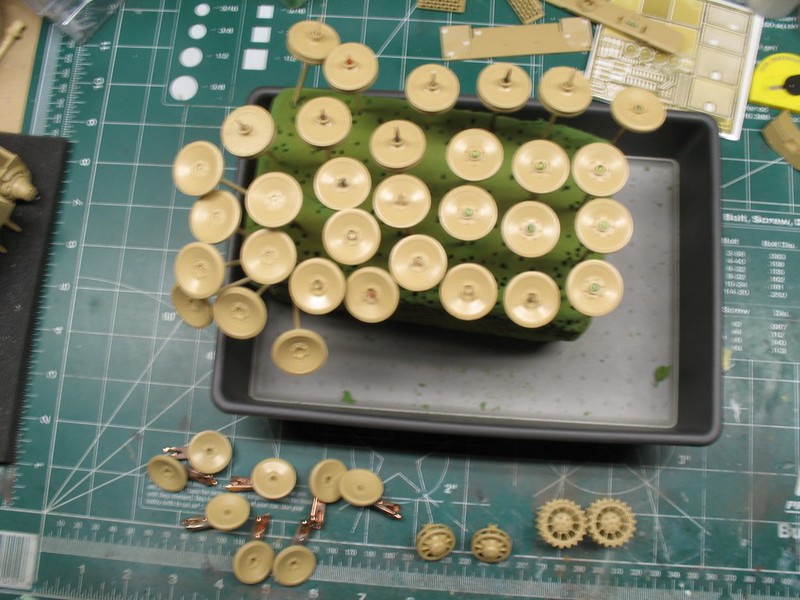 .....the primer is laid down on the wheels, and sprockets. 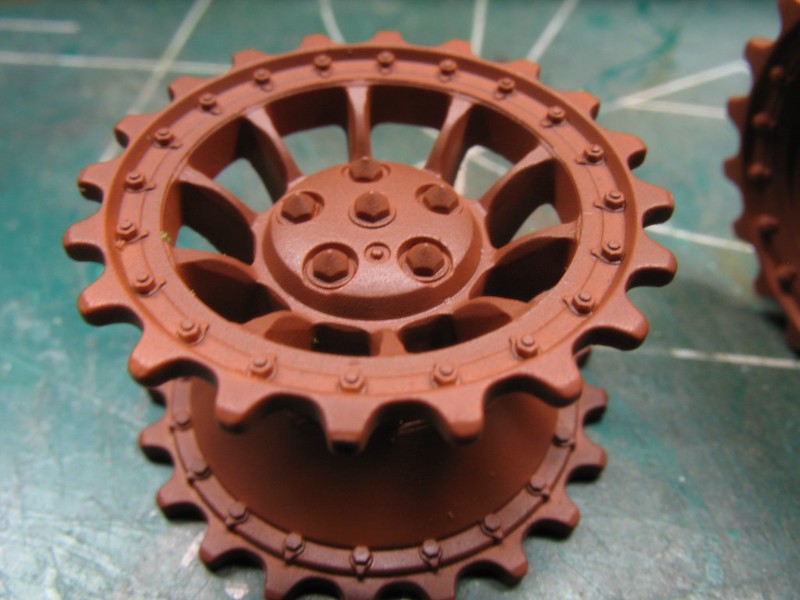 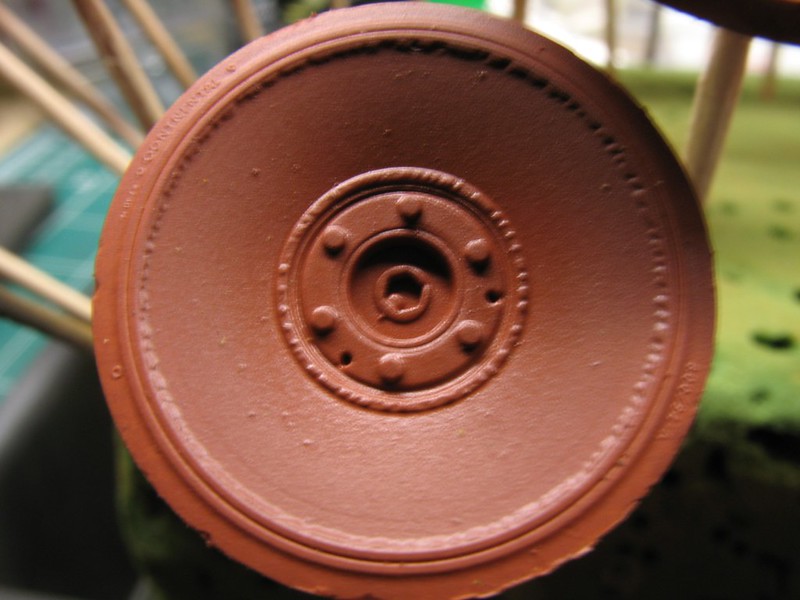
|
|
|
|
Post by dierk on Feb 23, 2018 3:27:33 GMT -5
Looking good!
I suppose there were some licensing issues that caused RFM to leave out the 'i' in Continental?
|
|
thug626
Senior Member
   
Member since: January 2013
Posts: 2,030
Jan 15, 2013 13:05:28 GMT -5
Jan 15, 2013 13:05:28 GMT -5
|
Post by thug626 on Feb 23, 2018 8:28:16 GMT -5
Thank you. I’m sure there would have had to be a royalty check involved, had they spelled “continental” properly. Wasn’t it Dragon that spelled it “continentau”?
|
|
|
|
Post by dierk on Feb 23, 2018 12:06:29 GMT -5
Thank you. I’m sure there would have had to be a royalty check involved, had they spelled “continental” properly. Wasn’t it Dragon that spelled it “continentau”? Yes, it was Dragon - easier to turn a 'U' into an 'L' than to insert an 'I'  Conti could've really done with the royalty cheque: they've just been hammered with a multi-million euro fine for breaking anti-cartel regulations  |
|
|
|
Post by 406 Silverado on Feb 23, 2018 16:51:22 GMT -5
Some very nice detail in this kit, really like the welds. But man who thought of doing the lifting lugs on the exhausts like that! A simple pin that goes in a hole works best.
Overall she's looking good.
|
|
|
|
Post by TRM on Feb 23, 2018 21:41:16 GMT -5
Moving forward with the wheels!!  Looking great! A little wear-n-tear goes a long way! I ended up trading in the rubber for the steel as mine convert out to a late...I thought the kit tires, sprockets and idelers looked pretty nice though! Seeing primer is an awesome thing!! |
|
thug626
Senior Member
   
Member since: January 2013
Posts: 2,030
Jan 15, 2013 13:05:28 GMT -5
Jan 15, 2013 13:05:28 GMT -5
|
Post by thug626 on Feb 23, 2018 23:26:38 GMT -5
Thank you. I’m sure there would have had to be a royalty check involved, had they spelled “continental” properly. Wasn’t it Dragon that spelled it “continentau”? Yes, it was Dragon - easier to turn a 'U' into an 'L' than to insert an 'I'  Conti could've really done with the royalty cheque: they've just been hammered with a multi-million euro fine for breaking anti-cartel regulations  Sound like someone got the royal corporate spanking. Rob The weld lines are nicely done. I can see your point about the pins. With lugs, there is one less thing that the maintenance battalion has to remember to bring along. T Thank you kindly good sir. I usually go with the lived in to lived in for a while look. One of these days, I need try my hand at a used up hulk....or a burnt out hulk. The later is what I'll use my Tamiya T-55 for one of these days. |
|
|
|
Post by TRM on Feb 24, 2018 4:01:55 GMT -5
That is a great thought!  It's just a different type of building is all...like switching from armor to ships or whatever for the break. Some of the best kit for this are the smack-down deals at shows! Always easier to justify cracking a 10 or 15 dollar kit over a $70 monster...LOL |
|
thug626
Senior Member
   
Member since: January 2013
Posts: 2,030
Jan 15, 2013 13:05:28 GMT -5
Jan 15, 2013 13:05:28 GMT -5
|
Post by thug626 on Feb 28, 2018 22:37:58 GMT -5
T I am looking forward to building up a burnt out hulk. That'll be a first for me. I agree with you, I really don't want to experiment on a $70 kit..... Last nights bout of insomnia wasn't wasted after all. I got the remainder of track run built up. The first run, at least half of it, ended up rather "stiff". I refined my process, and the second run is just right. 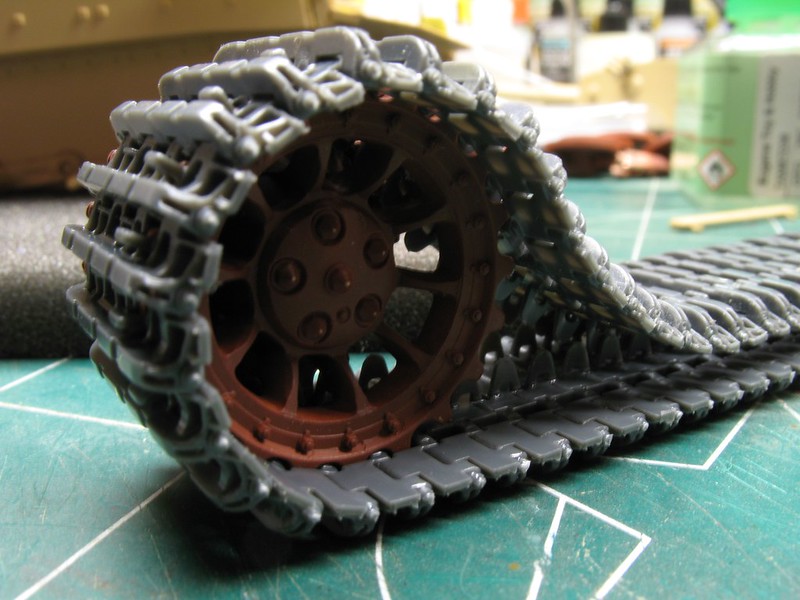 Each link has five parts. Ninety six links per run....times two.... 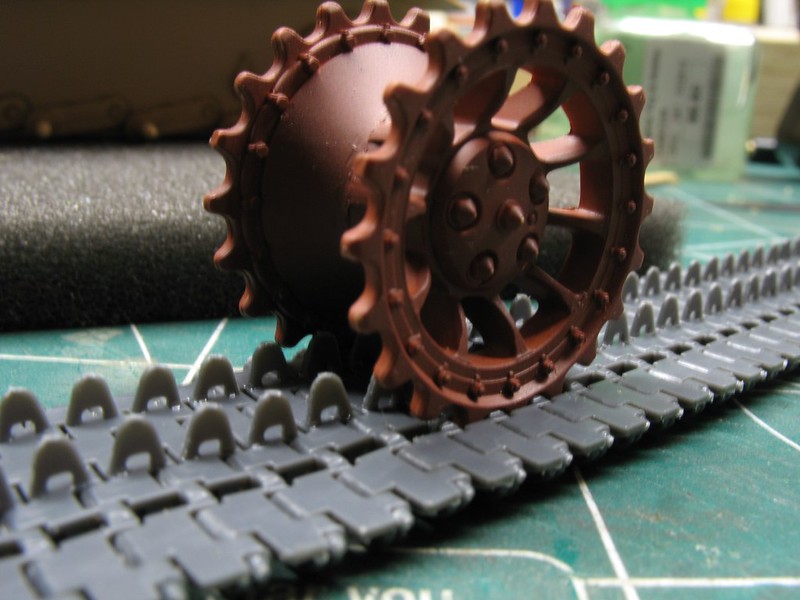 Todays progress. The Feil air filters. 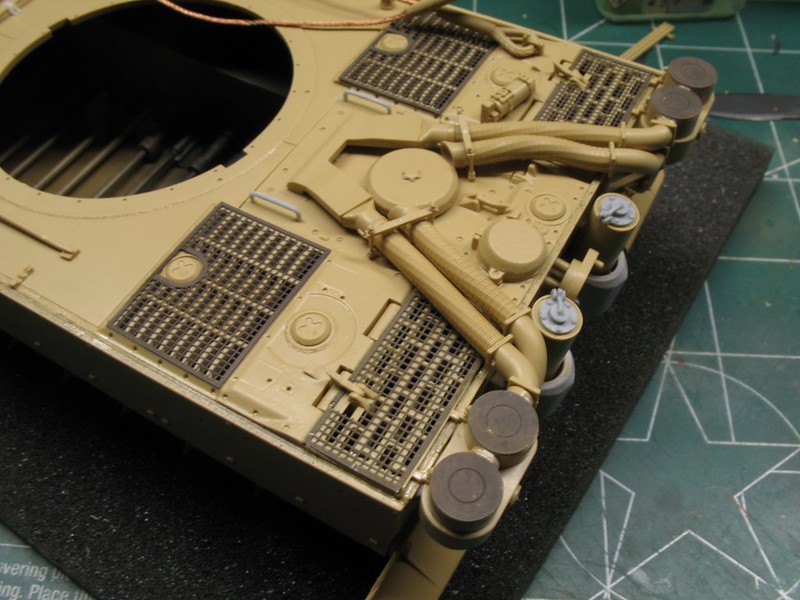 Most everything on the rear hull is done. I am holding off on the tool box, as the mounting brackets are a bit delicate. They are the resin correction parts. 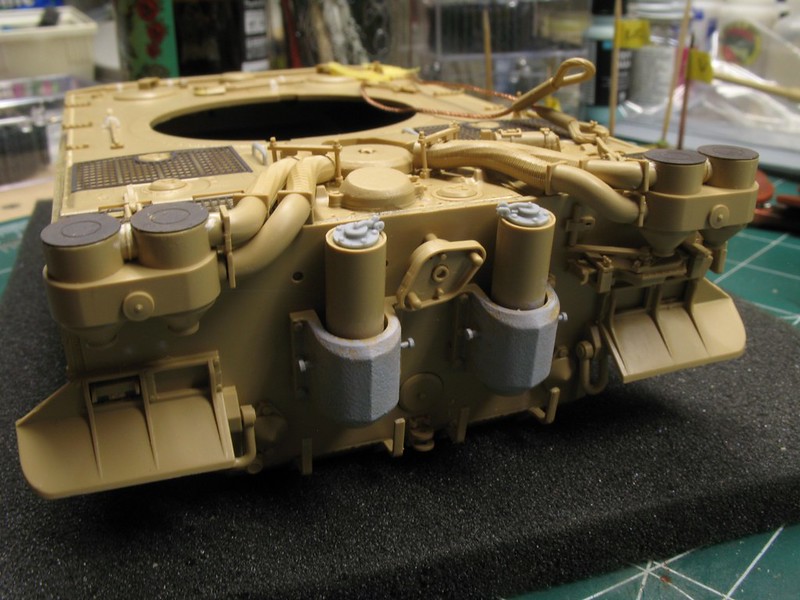 You can see the drilled out intake for the left side. 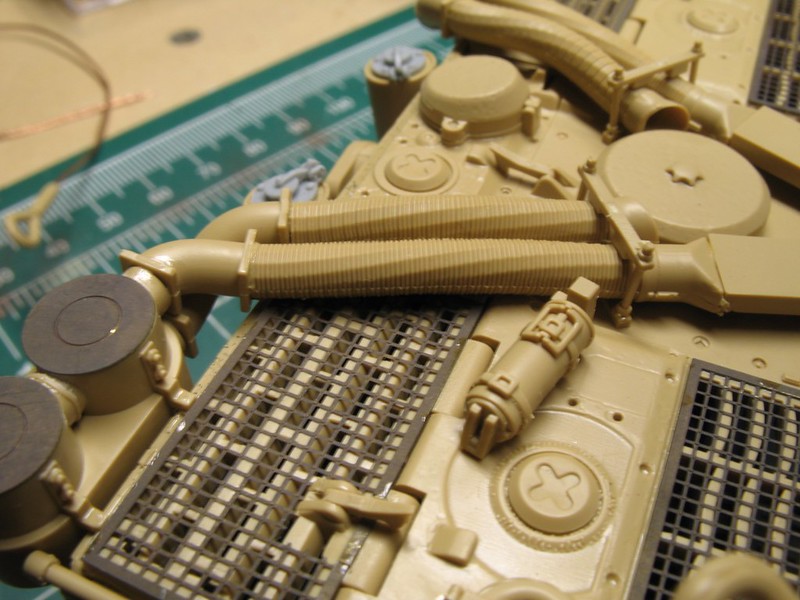 I remember that I had some 3D printed tool clasps from Shapeways in the parts bins. Far easier than the multi parts PE offerings in the kit. Not that those are bad, but I only have so much sanity to go around. 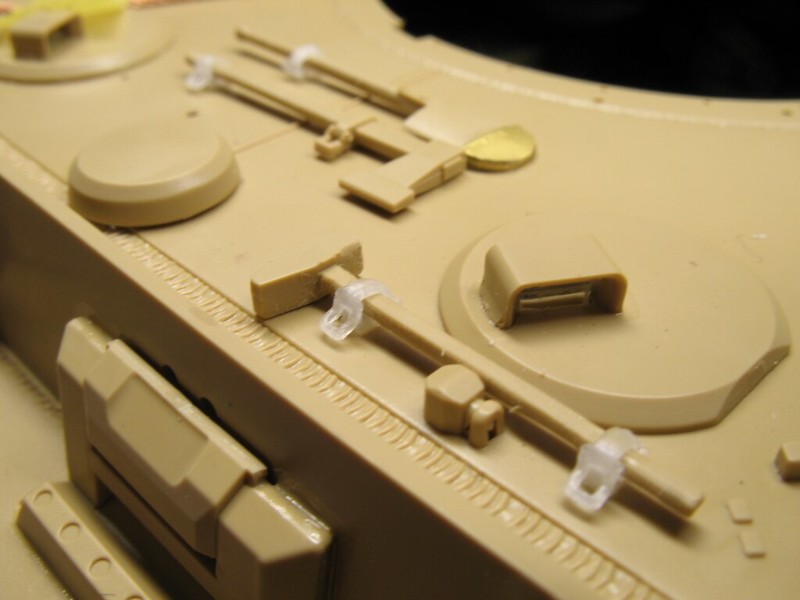
|
|
|
|
Post by panzerjager2 on Feb 28, 2018 22:46:44 GMT -5
Dave the "lil" kitty is coming along very nicely..... I really like the details on the Feifel air cleaners 
PJ2
|
|
|
|
Post by dierk on Mar 1, 2018 2:38:01 GMT -5
That's some great looking parts in that kit! But, five parts per link?  I get all sweary when all I've got to do is glue guide horns to links...  |
|
|
|
Post by Leon on Mar 1, 2018 4:48:34 GMT -5
Nice progress on the tracks and air filters Dave!  |
|