|
|
Post by tcoat on May 10, 2023 9:13:59 GMT -5
1/32 A6M2 from years ago. I only put minimal weathering on it, I wanted a fresh, pre-December 7th look to it.  Definitely not a fan of Flickr anymore. Or atleast what they were for a while there. Hard to find a picture of a heavily weathered carrier based, early, Zero anyway. The grey/tan paint was far better than the later green, they actually used primer early on and they took far better care of the aircraft at that point in the war. Of course it didn't take long for them to not last long enough to get weathered anyway! |
|
|
|
Post by robbo on May 10, 2023 9:26:16 GMT -5
That is a nice looking build too
|
|
mz3
Full Member
   March '24 Showcased Build Awarded
Member since: October 2012
Posts: 651
Oct 14, 2012 21:09:43 GMT -5
Oct 14, 2012 21:09:43 GMT -5
|
Post by mz3 on May 15, 2023 13:10:41 GMT -5
|
|
moparmadness
Full Member
  
Member since: May 2023
Posts: 930
Member is Online
May 11, 2023 20:39:35 GMT -5
May 11, 2023 20:39:35 GMT -5
|
Post by moparmadness on May 15, 2023 21:35:01 GMT -5
Oh wow, the detail is plentiful on this one! 🍻Nicely done thus far.
|
|
stikpusher
Forum Moderator      May '23 Showcased Model Awarded
Member since: April 2023
Living The Dream
Posts: 4,135 
MSC Staff
|
Post by stikpusher on May 16, 2023 12:33:57 GMT -5
Sweet additional detailing!!! Wiring, control levers, linkages… 👍🏼👍🏼
|
|
mz3
Full Member
   March '24 Showcased Build Awarded
Member since: October 2012
Posts: 651
Oct 14, 2012 21:09:43 GMT -5
Oct 14, 2012 21:09:43 GMT -5
|
Post by mz3 on May 16, 2023 15:42:47 GMT -5
Thanks guys! I LUUUUUUUV PE!!!  Was just test fitting and noticed there's a wire just missing. Looks like it was never there. I was debating on replacing this part with wire, decision made. |
|
mz3
Full Member
   March '24 Showcased Build Awarded
Member since: October 2012
Posts: 651
Oct 14, 2012 21:09:43 GMT -5
Oct 14, 2012 21:09:43 GMT -5
|
Post by mz3 on May 21, 2023 14:51:19 GMT -5
Update... I ended up cutting the brass "wires" out and glueing wires in place... 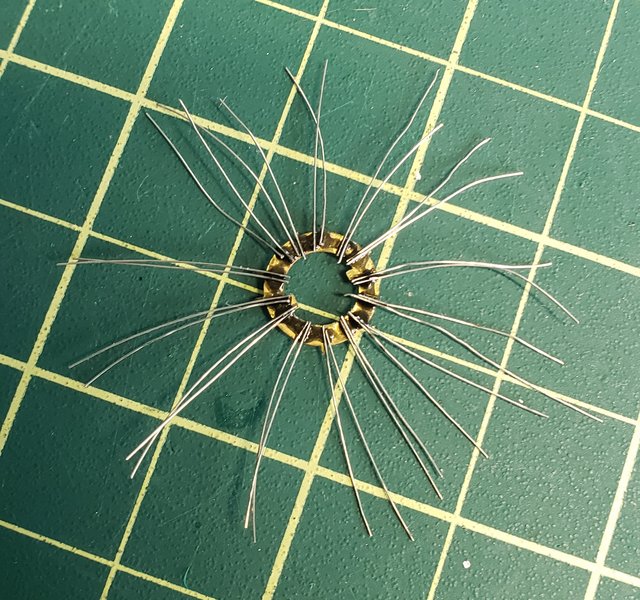 Kind of messy but it's completely hidden.  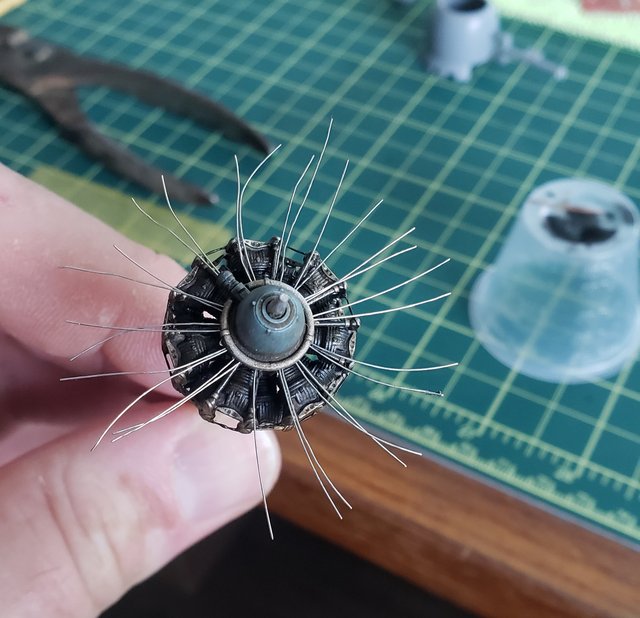 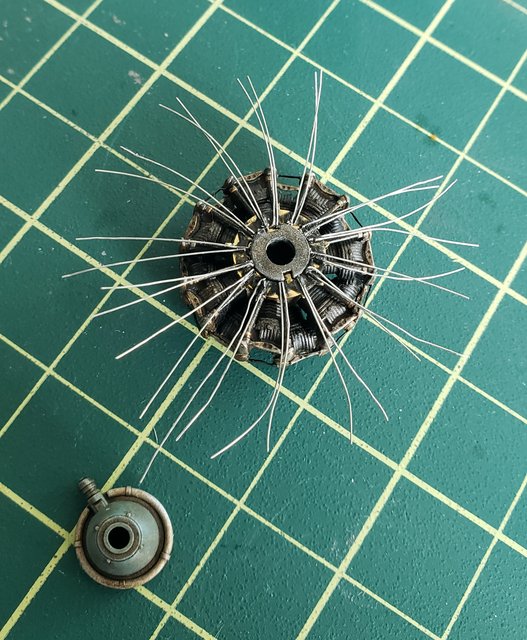 Cutting and ran the wires. Don't study the picture to much. I'm only concerned with the way it looks from the front. After the cowling is in place most of the wiring becomes hard to see...  Put on the finishing touches on the cockpit. Oils for dirt and grime. Seatbelts are a weird almost construction paper type of material. I found them on ebay and they work good enough. They can be positioned by soaking the in water. Instructions don't say that. I kinda just figured it out on my own.  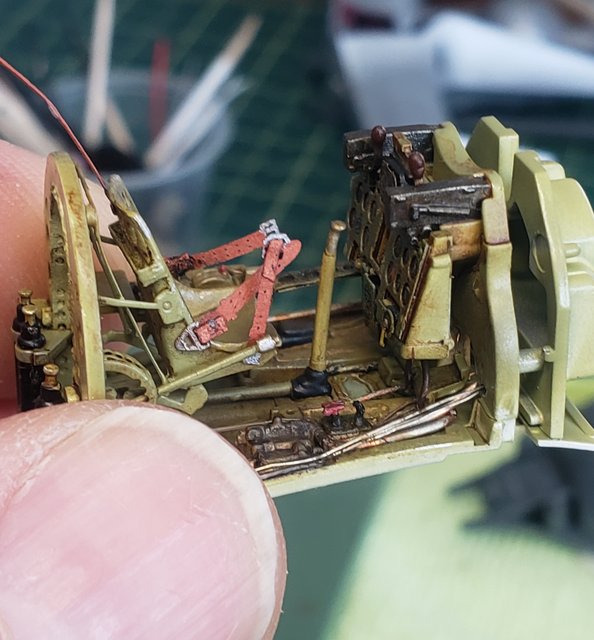 I sprayed the cockpit with a very thinned flat black trying to blend the colors of the paint and the prepainted pe parts. Thinned like 100 to 1. I was actually cleaning my airbrush after repainting a couple of parts for the gundam. I got it to change the base color just enough to keep it from popping out. Then gave it oil washes of burnt umber, van dyke brown and just on the floor and seat tub raw sienna to look a little dirtierish(is that even a wird?). The engine was painted with some Vallejo aluminum then the black parts were brush painted with xf-1. Then washed with burnt umber and brown. The wires are from an old power cord. I'm not painting them or putting any oils on them. I like the way they look raw. I'll get the fuselage haves together later today if the oils are dry enough. Then the main cockpit slides in. |
|
TJ
Senior Member
    June '23 Showcased Model Awarded
Member since: May 2023
Posts: 2,172
May 14, 2023 18:18:36 GMT -5
May 14, 2023 18:18:36 GMT -5
|
Post by TJ on May 23, 2023 5:48:05 GMT -5
|
|
handiabled
Administrator      Apr '23 Showcased Build Awarded
Member since: February 2023
Posts: 4,427 
MSC Staff
|
Post by handiabled on May 26, 2023 8:07:10 GMT -5
The office and engine look perfect! Love the detail!
|
|
|
|
Post by Steve Zuleski on May 27, 2023 7:16:59 GMT -5
That's lookin real good!
|
|
|
|
Post by 406 Silverado on May 27, 2023 7:40:34 GMT -5
Sorry I missed the last update to this beauty but this is just crazy good with all of the detailing that's going on with this build. GREAT idea on wiring up the engine and it looks better IMO than the PE parts did. The pit......man.....the PIT!!! What you've done here is all very convincing. WOW!!
|
|
moparmadness
Full Member
  
Member since: May 2023
Posts: 930
Member is Online
May 11, 2023 20:39:35 GMT -5
May 11, 2023 20:39:35 GMT -5
|
Post by moparmadness on May 27, 2023 8:33:04 GMT -5
Oh the wires are MUCH better! Photoetch is great, but it does have it limitations from time to time.
|
|
moparmadness
Full Member
  
Member since: May 2023
Posts: 930
Member is Online
May 11, 2023 20:39:35 GMT -5
May 11, 2023 20:39:35 GMT -5
|
Post by moparmadness on May 27, 2023 8:34:06 GMT -5
And that cockpit! I mean it’s nicely weathered, colors look great, it’s all around a job well done.
|
|
mz3
Full Member
   March '24 Showcased Build Awarded
Member since: October 2012
Posts: 651
Oct 14, 2012 21:09:43 GMT -5
Oct 14, 2012 21:09:43 GMT -5
|
Post by mz3 on May 29, 2023 10:27:07 GMT -5
Thank you everyone for the kind words. I do appreciate them. It's nice being in a space where someone will actually take the time to respond. Update time... Seatbelts are in and set in place.  I can't seem to get a good picture. Cellphone cameras are garbage and I can't use my dslr right now (laptop is dead). The pictues always end up looking bad to me. Anyway, I'm calling the cockpit, it's done. Excuse the unfinished wash areas, none of that will be seen. With that out of the way I moved on to the fuselage. There is a weird fit issue that kind of throw me for a loop. I think it's the first time I've ever actually had a fit issue with a tamiya kit.  I test fiited the part that holds the cowling and engine to the kit and the seam separated. Not a huge issue, just a "what the hell" kind moment. That piece I test fitted also holds the cowling flaps. I prepared it for the pe flaps. The instructions for the pe are incredibly vague for this step. Big shock. I used a 0.1mm scriber to carefull remove the flaps from the piece. That leaves nothing. The part would not set in the cowling at all and there's nothing to attach the pe flaps to. So i added a strip of evergreen to it and cut it down to fit.    I cut the flaps off both the parts, closed flaps/opened flaps, and got the exact same result. It's an easy fix. Lastly, I was going to do rivets on the exterior. I have an old trumpeter rivet wheel. I was mentally preparing for this. Then I came across a sheet of rivet decals. It spiked my interest/curiosity so I bought a set. They should arrive mid week. Should be fun, I'm always down to try new things in this hobby. |
|
|
|
Post by robbo on May 29, 2023 11:06:31 GMT -5
This is some very good modelling
|
|
|
|
Post by Medicman71 on Jun 5, 2023 13:53:14 GMT -5
Wow! The engine and cockpit look great!!
|
|
|
|
Post by deafpanzer on Jun 5, 2023 17:21:20 GMT -5
Agree with the guys... looking great!
|
|
mz3
Full Member
   March '24 Showcased Build Awarded
Member since: October 2012
Posts: 651
Oct 14, 2012 21:09:43 GMT -5
Oct 14, 2012 21:09:43 GMT -5
|
Post by mz3 on Jun 11, 2023 19:18:50 GMT -5
Thanks guys. I've been a little slow with this kit. The gundam is taking more of my time then I thought it would. But I did get the landing gear bay done-  I added a line on each side, I believe the brake line. There are other smaller wires that I'm going to ignore because they are REALLY hard to get in there and won't be seen almost at all. The brake line is just stretched styrene cut into little pieces to make it look like it's under the frame parts. Fun! The engine is mounted and I've been working the parts on slowly. There are some very small fit issues. Nothing really bad, just a little annoying. I'll post that later. |
|
mz3
Full Member
   March '24 Showcased Build Awarded
Member since: October 2012
Posts: 651
Oct 14, 2012 21:09:43 GMT -5
Oct 14, 2012 21:09:43 GMT -5
|
Post by mz3 on Jun 11, 2023 19:23:34 GMT -5
Forgot this one-  |
|
|
|
Post by keavdog on Jun 11, 2023 20:34:48 GMT -5
Looking great. I've got this kit in the stash so following along. Not sure I will go down the PE road, but it does look good. Fantastic pit.
|
|
stikpusher
Forum Moderator      May '23 Showcased Model Awarded
Member since: April 2023
Living The Dream
Posts: 4,135 
MSC Staff
|
Post by stikpusher on Jun 11, 2023 22:16:47 GMT -5
Oh my! Now we have crazy tine details in the wheel wells too?!
|
|
handiabled
Administrator      Apr '23 Showcased Build Awarded
Member since: February 2023
Posts: 4,427 
MSC Staff
|
Post by handiabled on Jun 12, 2023 8:15:50 GMT -5
The amount of detail you are adding for a 1/48 build is outstanding! I stumble around with 1/32
|
|
|
|
Post by 406 Silverado on Jun 13, 2023 5:28:46 GMT -5
The work that you've done in that cockpit & landing gear bay as well as overcoming the cowl flap issues are nothing short of amazing bud. And I hear you on trying new things in this hobby as it's easy to get stuck in a "rut" with doing the same things/ procedures. Looking good all the way and looking forward to the next update.
|
|
TJ
Senior Member
    June '23 Showcased Model Awarded
Member since: May 2023
Posts: 2,172
May 14, 2023 18:18:36 GMT -5
May 14, 2023 18:18:36 GMT -5
|
Post by TJ on Jun 14, 2023 3:56:14 GMT -5
I can't add anything to what has been already said. Awesome
|
|
mz3
Full Member
   March '24 Showcased Build Awarded
Member since: October 2012
Posts: 651
Oct 14, 2012 21:09:43 GMT -5
Oct 14, 2012 21:09:43 GMT -5
|
Post by mz3 on Jun 19, 2023 10:15:45 GMT -5
Thanks for the comments. I really do appreciate them. So I'm having more fit issues up front. In some of the pictures you can see that early on I broke the front of the fuselage off. I didn't say anything about it because things break, not a difficult fix. Now I'm thinking I didn't fix it properly. It's off ever so slightly and causing the 3 panels at the nose to fit badly. But, it's plastic so it's always fixable.    Added evergreen to the bottom of the 2 side panels, sanded and filed all 3 and used a needle to apply putty to fill the small gaps(which I didn't take a pic of yet, letting it dry) Once paint and weathering goes on hopefully it won't be noticeable. I hardly ever build models the exact same way. Even in the depths of my armor days I would finish each kit differently some how. Even if it was just a different brand paint or real dirt instead of pigments. These rivet decals definitely sparked my interest. And now I'm getting to that point where I need to start thinking about them. |
|
mz3
Full Member
   March '24 Showcased Build Awarded
Member since: October 2012
Posts: 651
Oct 14, 2012 21:09:43 GMT -5
Oct 14, 2012 21:09:43 GMT -5
|
Post by mz3 on Jun 19, 2023 10:36:50 GMT -5
Also, I've been looking for a different way to finish this kit. I don't want to use the kit decals because it's Tamiya and I know they are a quarter inch thick. I also can't find any decal sets I like. So looking around the interwebs I found this... 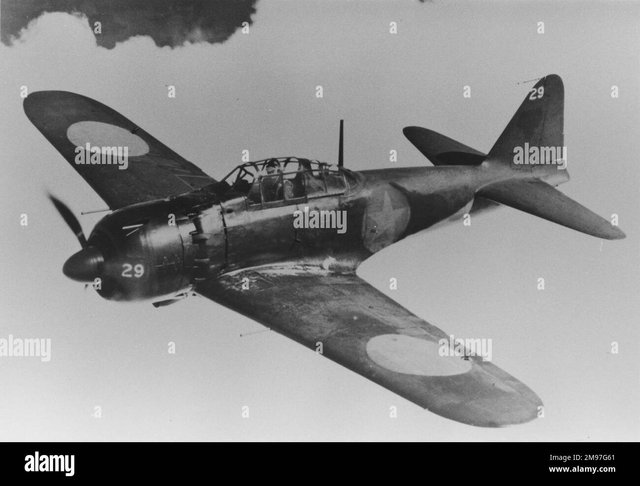 There are several pictures from different angles. Only problem, I can't tell if the paint on top is a camo pattern or just worn out. I'm going to dig a bit more and see if I can find anything more. But this is what I'm aiming for. |
|
|
|
Post by deafpanzer on Jun 19, 2023 11:12:09 GMT -5
Great work on the engine! I look forward to more updates...
|
|
stikpusher
Forum Moderator      May '23 Showcased Model Awarded
Member since: April 2023
Living The Dream
Posts: 4,135 
MSC Staff
|
Post by stikpusher on Jun 19, 2023 13:38:38 GMT -5
That is probably one of the Zeros captured on Saipan. There was debate about it being a two tone came scheme or not, but then someone found a series of photos showing that certain areas of the aircraft around the insignia and such were washed up during transport back to the US.
|
|
mz3
Full Member
   March '24 Showcased Build Awarded
Member since: October 2012
Posts: 651
Oct 14, 2012 21:09:43 GMT -5
Oct 14, 2012 21:09:43 GMT -5
|
Post by mz3 on Jun 20, 2023 17:28:19 GMT -5
I was kinda hoping for camo. Things should start moving faster in here now. The gundam is just about wrapped up. Wings attached. Some small gaps in the usual spots to fill. I had black ca out, so I just used that. They're not too big. None at the wing roots though, kind of weird to have that not happen.   Decal rivets are coming up fast. 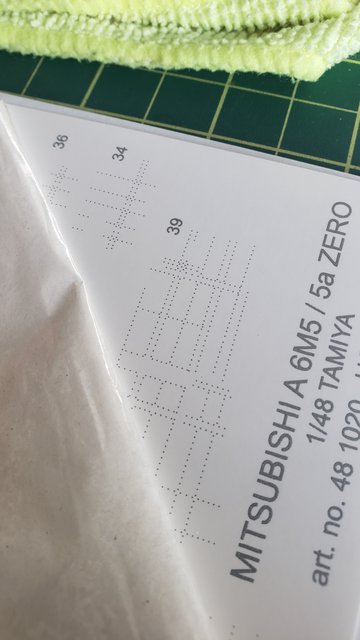 Not sure how to go about doing them. Luckily there are decals for alternate parts, so I'll probably do those first and get a hang of things. The instructions say to lay them down right on the primer. Guess we'll all find out quickly. |
|
stikpusher
Forum Moderator      May '23 Showcased Model Awarded
Member since: April 2023
Living The Dream
Posts: 4,135 
MSC Staff
|
Post by stikpusher on Jun 20, 2023 21:55:58 GMT -5
|
|