ogrejohn
Full Member
   Oct '23 Showcased Model Awarded
Member since: June 2012
Go away or I shall taunt you a second time!
Posts: 1,302
Jun 1, 2012 17:33:59 GMT -5
Jun 1, 2012 17:33:59 GMT -5
|
Post by ogrejohn on Apr 3, 2023 16:48:44 GMT -5
Very nice indeed!
|
|
|
|
Post by hasenpfeffer on Apr 29, 2023 9:20:48 GMT -5
Nothing really major to report. I managed to get the primer on all the parts and then the German primer color. I'm gonna try to do the hairspray thing, but I don't have a lot of experience doing it. Meaning I don't have a set process for paint on paint. I tried a little yesterday on the side schurzen and am not totally happy with the results. I used Tamiya paints for both layers thinned with Mr. Leveling Thinner. I am thinking maybe I should use a lacquer based paint for the base (primer color in this case) and then whatever for more durability of the base layer, but there are just so many factors that affect the results.
Anyway, that aside, I did manage to get the wheels painted the base color. I was having trouble (and always have) holding the wheel mask template in a position where I could easily spray them. I have an Alliance Model Works mask that I bought some years ago. So I was basically using my index finger to push the wheel lightly from the bottom while using my thumb and middle finger to hold the mask. This was quite tedious and tricky - even if it does still beat hand painting. So I set out to build a type of jig that would allow me to insert the wheel from the bottom and locate the mask in a way that I could just put the wheel in and paint.
My very low budget solution was to drill holes in some pretty thick evergreen stock for this purpose. I made it 2 layers (glued together with Extra Thin) only because I didn't have anything thicker and I wanted the wheels to be positively located for the painting. They are rough, but only need to hold the wheels in place. The holes are just big enough for the wheels to fit in - there is very little wiggle room. (I drilled the holes slightly smaller than the wheels and then fine tuned it with sandpaper wrapped around a Sharpie.) I then stacked random stuff underneath so that the wheel was flush to the mask and I could properly position/center it. A few pieces of tape and Presto! Now all I have to do is insert the wheel and go! The main benefit being that I don't have to perform circus acts to hold the wheel and mask together while painting. The mask itself is for the Dragon kits, but it is close enough to work well on this one.


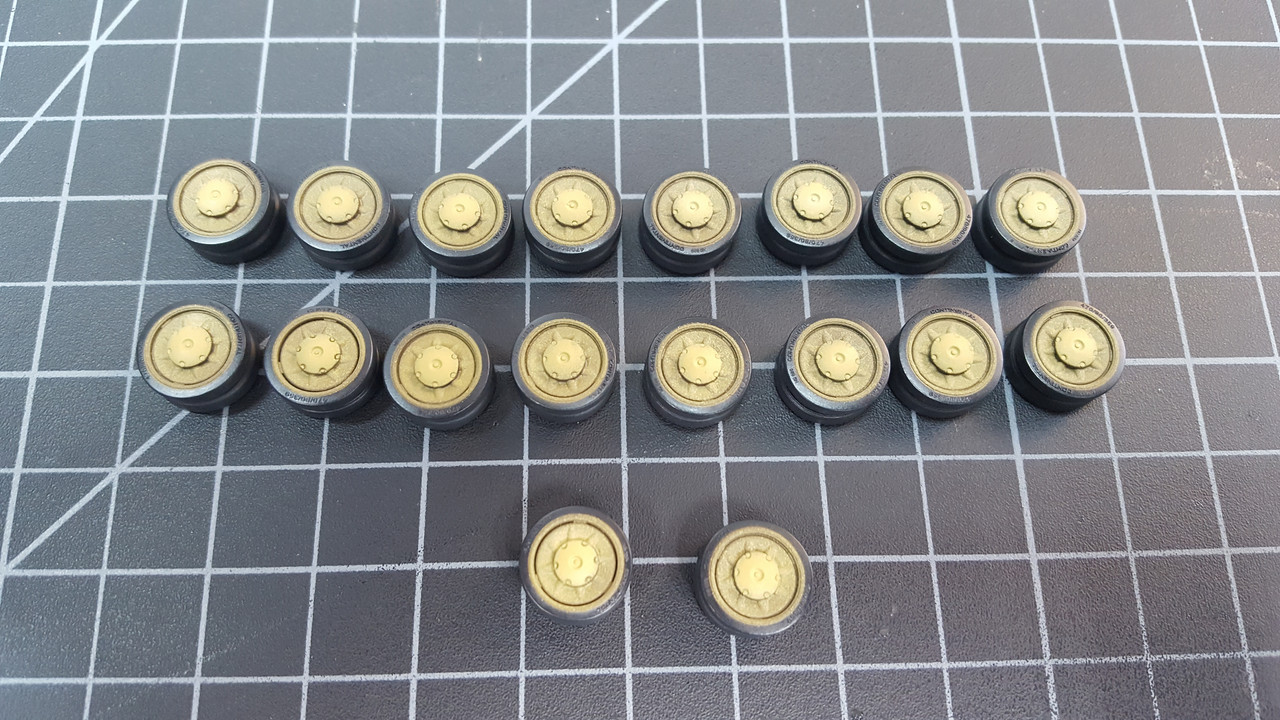
What do you guys do for your wheels? Do you have a better way to share? I plan to keep this thing as is for any Panzer IV that I may build. Hoping, of course, that there isn't a lot of variation between kit manufacturers in rim/tire size.
And a shot with all that "bling" disappeared...

Now I really have to settle on a paint scheme. Dark Yellow is next.
|
|
|
|
Post by tcoat on Apr 29, 2023 9:30:47 GMT -5
My very low budget solution was to drill holes in some pretty thick evergreen stock for this purpose. I made it 2 layers (glued together with Extra Thin) only because I didn't have anything thicker and I wanted the wheels to be positively located for the painting. They are rough, but only need to hold the wheels in place. The holes are just big enough for the wheels to fit in - there is very little wiggle room. (I drilled the holes slightly smaller than the wheels and then fine tuned it with sandpaper wrapped around a Sharpie.) I then stacked random stuff underneath so that the wheel was flush to the mask and I could properly position/center it. A few pieces of tape and Presto! Now all I have to do is insert the wheel and go! The main benefit being that I don't have to perform circus acts to hold the wheel and mask together while painting. The mask itself is for the Dragon kits, but it is close enough to work well on this one.
 |
|
406 Silverado
Global Administrator     
Member since: November 2011
Posts: 10,229
Member is Online
MSC Staff
|
Post by 406 Silverado on Apr 29, 2023 9:32:40 GMT -5
Thats an VERY good method for painting those road wheels Dave. Sometimes we have to get pretty inventive to the the results we're looking for and you've done just that. I'm looking forward to see what you do with a scheme on this bad boy.
|
|
garydavis-Rest In Peace
Full Member
  
Member since: March 2023
RIP- September 2023
Posts: 440 
|
Post by garydavis-Rest In Peace on Apr 29, 2023 11:14:23 GMT -5
Hey Dave...very good "HOW TO" and technique on painting road wheels. Thank you for a great idea. I'm going to keep that jig idea for sure.
|
|
|
|
Post by hasenpfeffer on Apr 29, 2023 12:30:41 GMT -5
Managed to get some color on the main hull and turret. So far so good.
Tamiya Dark Yellow thinned with Mr. Leveling Thinner. Modulated with the addition of Deck Tan and Flat White. I didn't get too extreme with it. I also went mostly by what I was seeing and not some formulation. So if you ask, I don't know. LOL

|
|
|
|
Post by hasenpfeffer on Apr 29, 2023 12:31:43 GMT -5
Hey Dave...very good "HOW TO" and technique on painting road wheels. Thank you for a great idea. I'm going to keep that jig idea for sure. Glad I could be of help to someone! Ha! If you have any specific questions on it, just let me know. |
|
|
|
Post by `Boots` on Apr 29, 2023 14:32:39 GMT -5
Thats very nice....glad it ain`t just me that don`t work with paint formulas  |
|
|
|
Post by hasenpfeffer on May 8, 2023 20:17:02 GMT -5
A little preview of the scheme I'll be doing for this one.
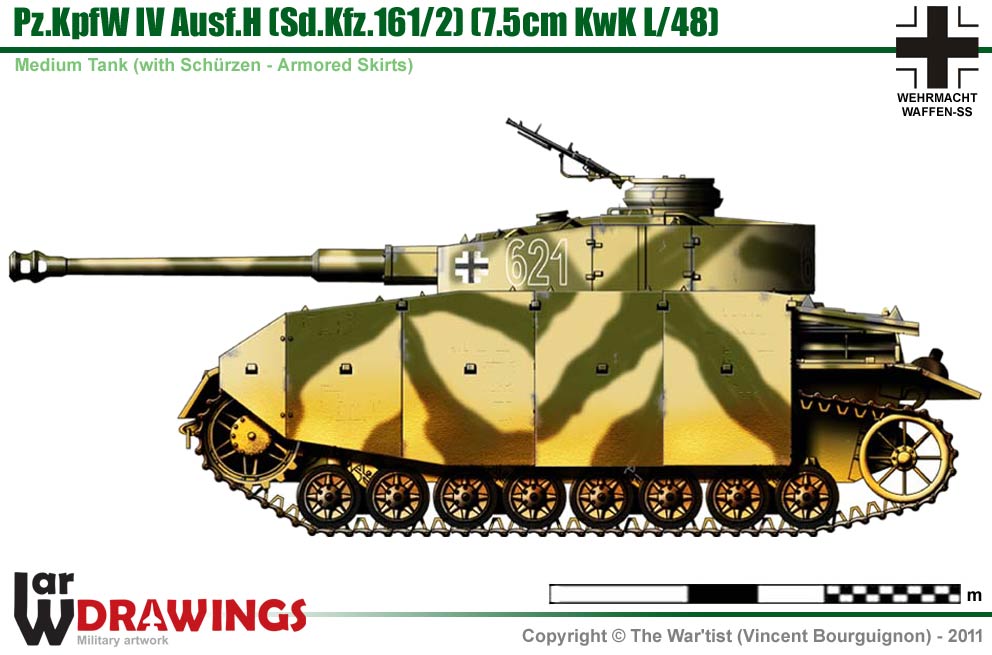
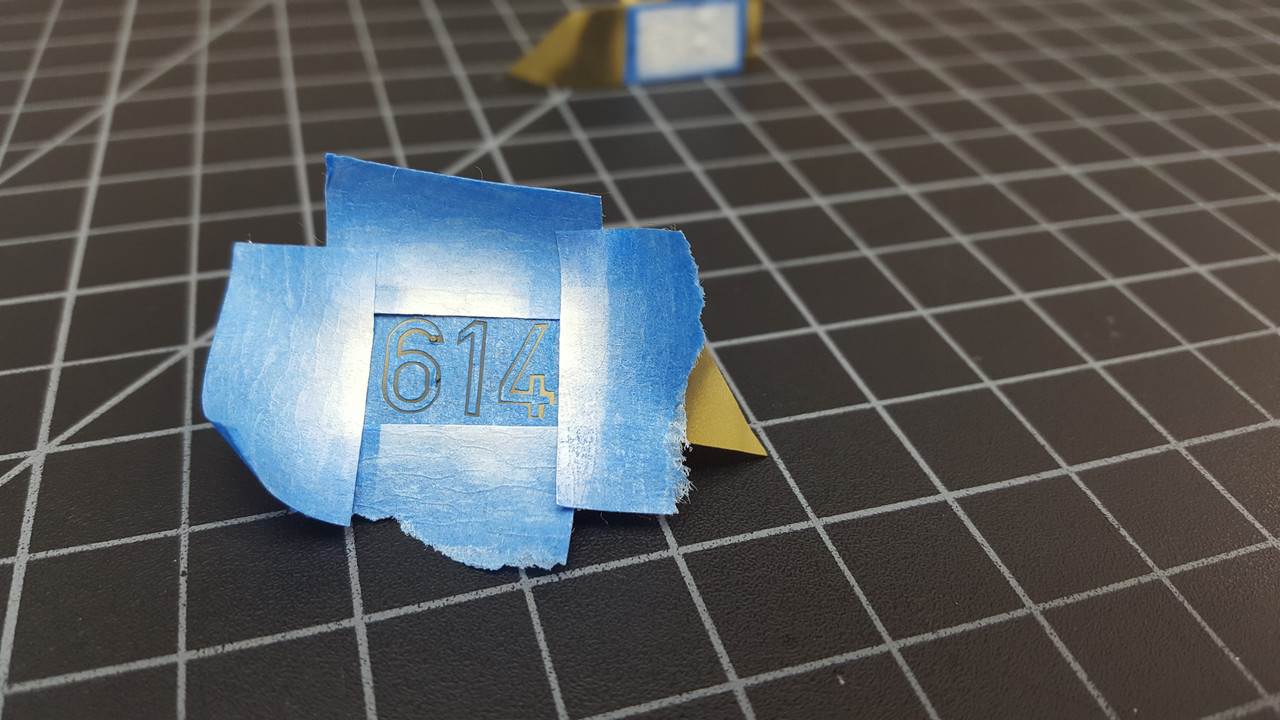

Sorry that these are the only shots I have so far...
|
|
406 Silverado
Global Administrator     
Member since: November 2011
Posts: 10,229
Member is Online
MSC Staff
|
Post by 406 Silverado on May 8, 2023 21:39:44 GMT -5
Man.....that turned out good!! You make this look too easy Dave. Really.  |
|
|
|
Post by chromdome35 on May 9, 2023 14:24:30 GMT -5
This is looking really nice, that camo is going to be SWEET!
Did you use a cutter to produce the masks?
|
|
|
|
Post by hasenpfeffer on May 10, 2023 20:36:36 GMT -5
This is looking really nice, that camo is going to be SWEET! Did you use a cutter to produce the masks? Thanks, Brian. Yes, I have a Cricut. It's good enough for most everything that I do, however I would be a little more pleased if it made cuts a little more square and was able to cut smaller things without jacking up what your cutting onto. (1:48 tail numbers, or 1:35 chassis numbers would be nice...) For things larger than say, 3-4 mm it's pretty good. I have the vinyl stuff but have been cutting masking tape recently to see the difference. The vinyl can come de-bonded (temporarily while cutting) and cause distortion. If you look closely at balken kreuzen the Pz Rgt 15 Panzer III in the duel thread I have you'll see what I mean. Pros and cons to everything, my friend. The mismatch in lengths is my fault black/white, but you can definitely make out curves where things should be straight and square. |
|
|
|
Post by chromdome35 on May 10, 2023 21:56:26 GMT -5
This is looking really nice, that camo is going to be SWEET! Did you use a cutter to produce the masks? Thanks, Brian. Yes, I have a Cricut. It's good enough for most everything that I do, however, I would be a little more pleased if it made cuts a little more square and was able to cut smaller things without jacking up what your cutting onto. (1:48 tail numbers, or 1:35 chassis numbers would be nice...) For things larger than say, 3-4 mm it's pretty good. I have the vinyl stuff but have been cutting masking tape recently to see the difference. The vinyl can come de-bonded (temporarily while cutting) and cause distortion. If you look closely at balken kreuzen the Pz Rgt 15 Panzer III in the duel thread I have you'll see what I mean. Pros and cons to everything, my friend. The mismatch in lengths is my fault black/white, but you can definitely make out curves where things should be straight and square. Thanks for the great response!!! Karma to you my friend. My wife has a Silhouette that I cut some masks with on my last build. It's really handy and I like the painted markings vs decals. Finding good SVG files is a challenge, I'm not a very good at making my own. |
|
|
|
Post by hasenpfeffer on May 14, 2023 19:47:53 GMT -5
And... Done!
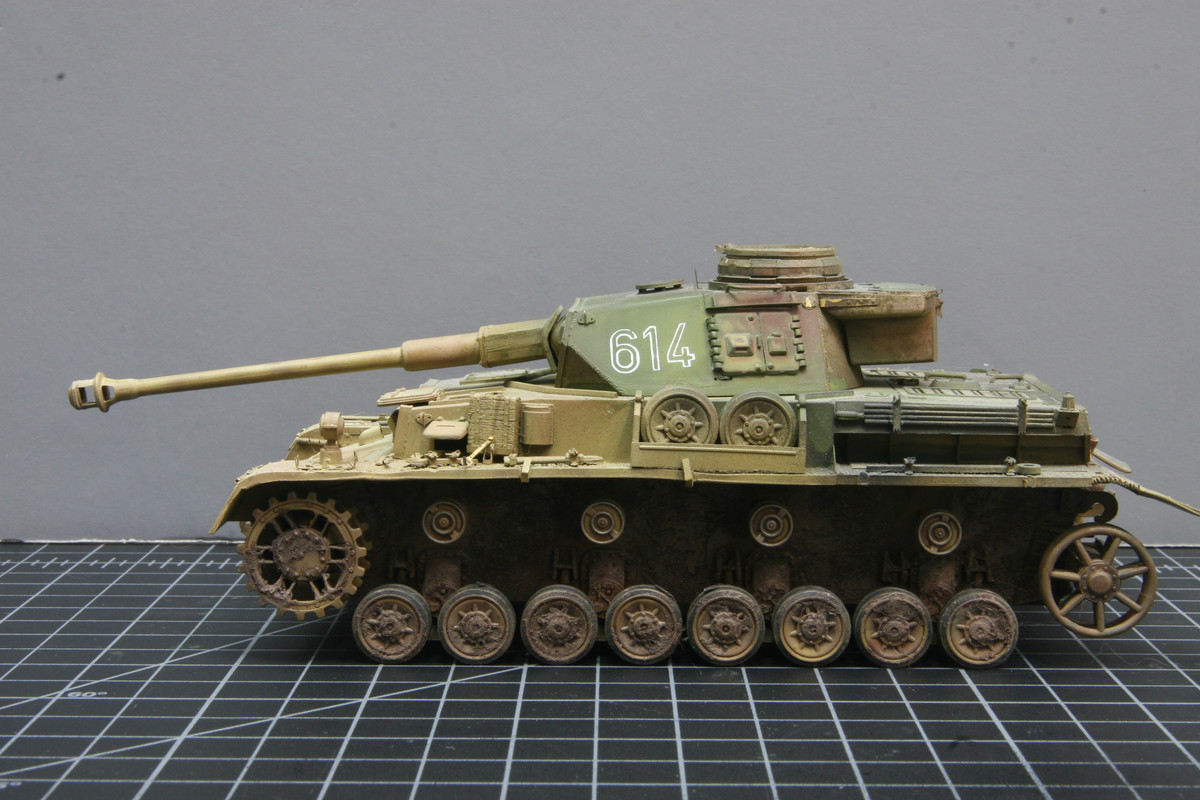
LOL - Nah, just kidding. This is a tired old Tamiya kit that I built back in the late '80s that now serves as a test mule.
Onto the actual update, I managed to get the main paint job done with the chipping and scratching. It's at that stage where I'm not quite sure how it will turn out in the end. I'm always afraid that I've over done it. Anyway, there seems to be quite a learning curve with hairspray chipping. How long you wait until doing it, what paints you used, how much spray, etc., etc. I feel like I have a lot more to learn in this respect. I'll let you be the judge, but I had to do a lot more aggresive stuff like light sanding than I would have liked, but we'll see how it turns out in the end. I'm trying to get over my anti-experimenting self.
Only one schurzen attached - some of the detail painting is started, although far from finished. Hoping to get this far enough along before the Panther GB.
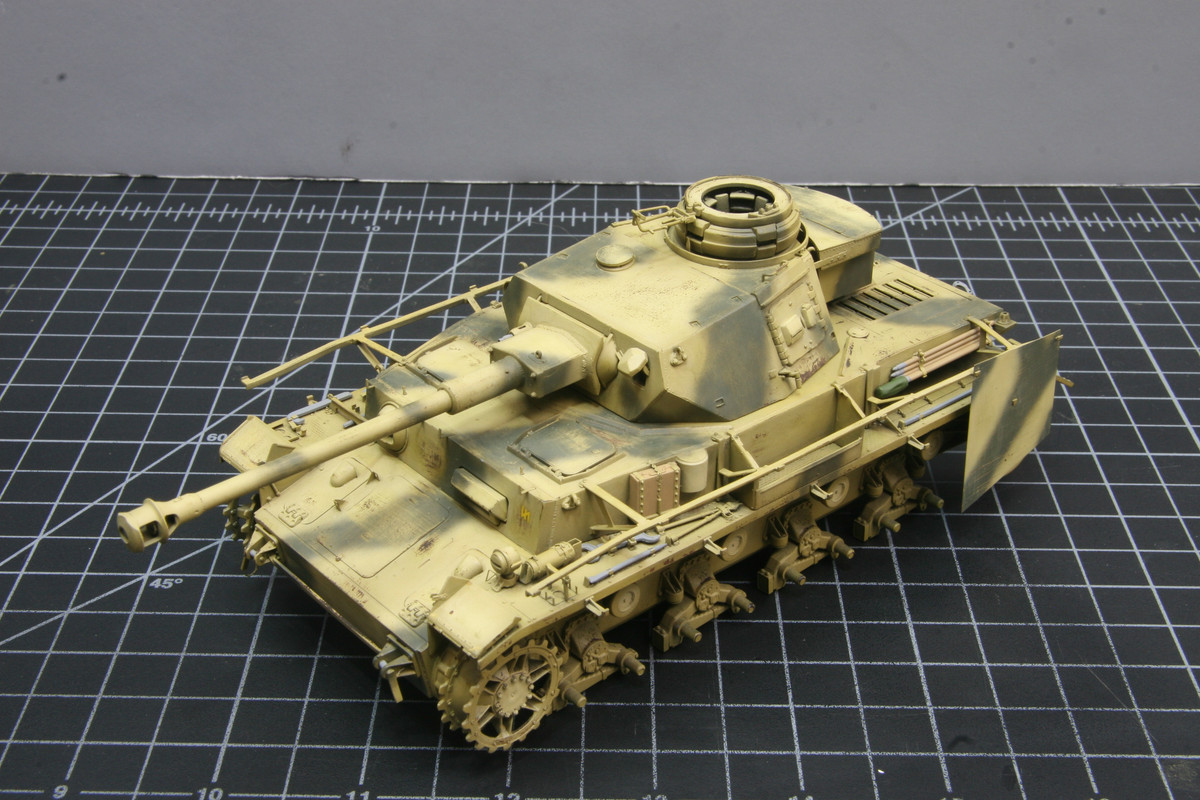


What do you think?
|
|
moparmadness
Full Member
  
Member since: May 2023
Posts: 928
May 11, 2023 20:39:35 GMT -5
May 11, 2023 20:39:35 GMT -5
|
Post by moparmadness on May 14, 2023 20:06:27 GMT -5
Looks like you’re close to the finish line! You really got the barrel issue ironed out. That first Mk IV is a classic for sure!
|
|
|
|
Post by hasenpfeffer on May 14, 2023 20:25:07 GMT -5
Looks like you’re close to the finish line! You really got the barrel issue ironed out. That first Mk IV is a classic for sure! LOL - yeah, that's what I always think as it takes me 3 more months to finish up all the details! Also the stage where I am the most discombobulated. I can never remember what the hell I did the last time, or what order I should be doing stuff. I always think I do, so I never write it down. EVERY TIME! |
|
stikpusher
Forum Moderator      May '23 Showcased Model Awarded
Member since: April 2023
Living The Dream
Posts: 4,125 
MSC Staff
|
Post by stikpusher on May 14, 2023 23:21:28 GMT -5
Not too far from the finish line now. So far everything is looking great.
|
|
Joe Rix
Forum Moderator     
Member since: January 2023
Posts: 1,524 
MSC Staff
|
Post by Joe Rix on May 15, 2023 13:12:02 GMT -5
That is some really sharp work has. Superb paint work so far.
|
|
moparmadness
Full Member
  
Member since: May 2023
Posts: 928
May 11, 2023 20:39:35 GMT -5
May 11, 2023 20:39:35 GMT -5
|
Post by moparmadness on May 15, 2023 15:30:39 GMT -5
Looks like you’re close to the finish line! You really got the barrel issue ironed out. That first Mk IV is a classic for sure! LOL - yeah, that's what I always think as it takes me 3 more months to finish up all the details! Also the stage where I am the most discombobulated. I can never remember what the hell I did the last time, or what order I should be doing stuff. I always think I do, so I never write it down. EVERY TIME! Same here! 😄 |
|
ogrejohn
Full Member
   Oct '23 Showcased Model Awarded
Member since: June 2012
Go away or I shall taunt you a second time!
Posts: 1,302
Jun 1, 2012 17:33:59 GMT -5
Jun 1, 2012 17:33:59 GMT -5
|
Post by ogrejohn on May 15, 2023 17:44:05 GMT -5
Looks pretty dang good!
|
|
|
|
Post by hasenpfeffer on May 21, 2023 12:38:41 GMT -5
I've been slowly plugging away at this. I finally attached the turret armor. I feel like I still have a million tiny things to do, but it's starting to take it's final shape.


|
|
406 Silverado
Global Administrator     
Member since: November 2011
Posts: 10,229
Member is Online
MSC Staff
|
Post by 406 Silverado on May 21, 2023 13:59:33 GMT -5
Man.....this all looks so dang REAL Dave. You sure put on a good show and it's such an educational ordeal you've got going on here. Keep 'er comin' buddy.
|
|
|
|
Post by chromdome35 on May 22, 2023 12:42:25 GMT -5
This is really coming along nicely, the scratches on the side plates look great!
|
|
|
|
Post by Tojo72 on May 22, 2023 16:06:00 GMT -5
Looking good taking notes.
|
|
buddho
Forum Moderator     
Member since: February 2019
Posts: 1,287 
MSC Staff
|
Post by buddho on May 22, 2023 21:14:38 GMT -5
This is one fine looking model, clean, crisp and with a ton of detail. I love how you handled the track siiation...it is gonna be a doozy of a build. And one fun to watch as you build it.
Ohhh...love the camou!
|
|
stikpusher
Forum Moderator      May '23 Showcased Model Awarded
Member since: April 2023
Living The Dream
Posts: 4,125 
MSC Staff
|
Post by stikpusher on May 22, 2023 22:17:39 GMT -5
Sooooo close to the finish line! Looking great!
|
|
ogrejohn
Full Member
   Oct '23 Showcased Model Awarded
Member since: June 2012
Go away or I shall taunt you a second time!
Posts: 1,302
Jun 1, 2012 17:33:59 GMT -5
Jun 1, 2012 17:33:59 GMT -5
|
Post by ogrejohn on May 23, 2023 4:26:34 GMT -5
That is very nice indeed!
|
|
brandonk
Full Member
   Jan '24 Showcased Model Awarded
Member since: May 2023
Posts: 1,269
May 14, 2023 13:45:45 GMT -5
May 14, 2023 13:45:45 GMT -5
|
Post by brandonk on May 23, 2023 13:22:58 GMT -5
Purdy indeed. That is one sexy battle beasty. Nice work.
|
|
|
|
Post by hasenpfeffer on May 29, 2023 18:44:37 GMT -5
Thanks for all of the kind comments everyone! I feel like I over scratched the schurzen... I think mostly because of my lack of hairspray chipping combos knowledge. Still looking for that perfect recipe for paint layering, thickness and dry time. As well as any protective layers in between... So many factors to consider. Anyway, another somewhat small update, but th eend is getting nearer. Even if I will be working to finish this up during the start of the Panther GB. Tracks are on and the lower hull weathered for the most part. I still have a lot of little things here and there and the turret to weather. It's getting there though.
Quickies with the phone:

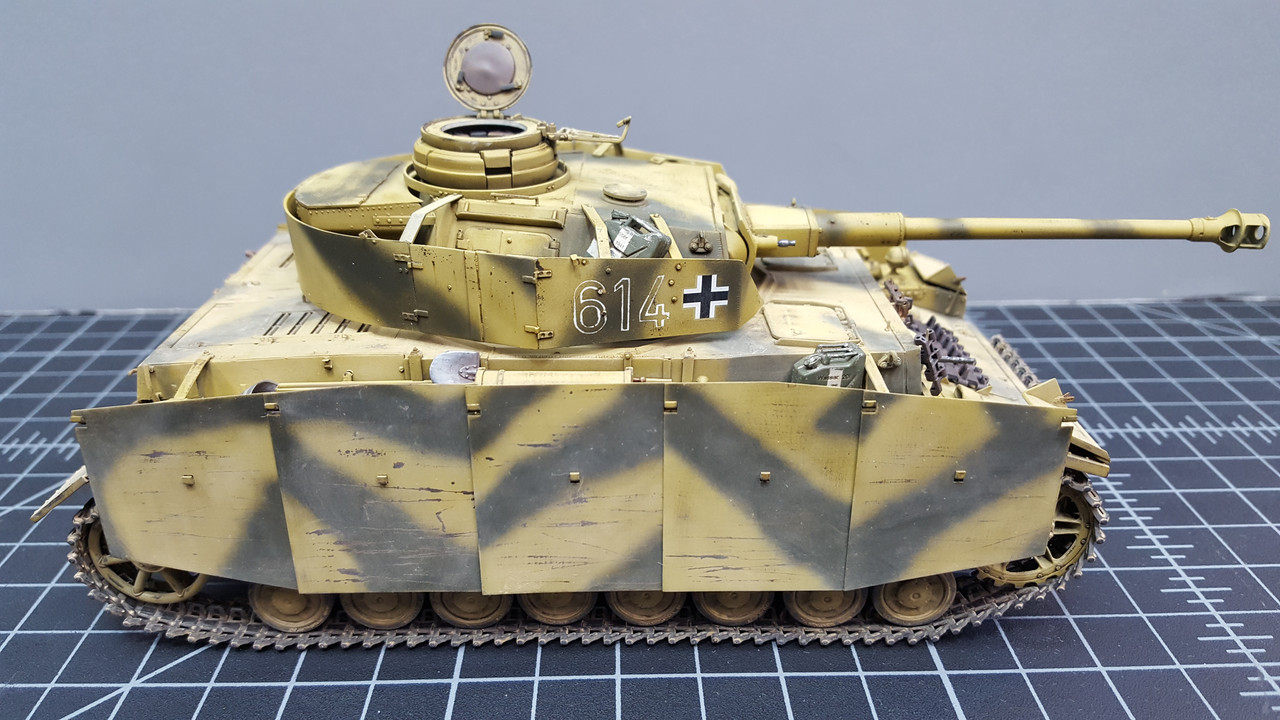
Love this perspective. With the right background...
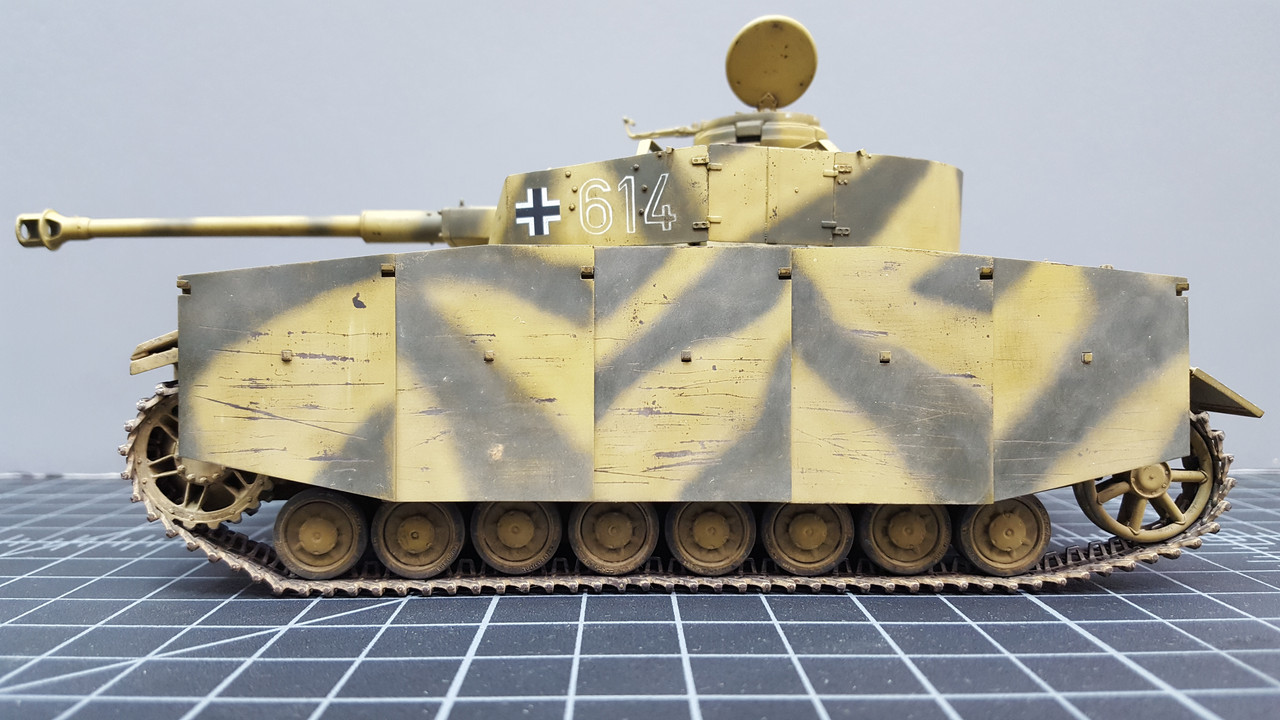
Thanks for looking. 
|
|
|
|
Post by tcoat on May 29, 2023 18:55:37 GMT -5
Thanks for all of the kind comments everyone! I feel like I over scratched the schurzen... I think mostly because of my lack of hairspray chipping combos. Still looking for that perfect recipe for paint layering, thickness and dry time. As well as any protective layers in between... So many factors to consider. Anyway, another somewhat small update, but th eend is getting nearer. Even if I will be working to finish this up during the start of the Panther GB. Tracks are on and the lower hull weathered for the most part. I still have a lot of little things here and there and the turret to weather. It's getting there though.
Quickies with the phone:
Love this perspective. With the right background...
Thanks for looking. 
Not over scratched at all. All picture show those that remained attached at all took a beating. Your flaking paint at the edges of the scratches and the layering works very well. Having them at all the different angles, levels and depths makes then look like they all happened at different times and places which is very convincing.  |
|