Deleted
Member since: January 1970
Posts: 0
May 18, 2024 3:34:25 GMT -5
May 18, 2024 3:34:25 GMT -5
|
Post by Deleted on Apr 14, 2013 13:21:03 GMT -5
Give the Gagster a break, he's given us enough building tips to last twenty years,  Get the paint out, paint it then start another. I'm hooked. |
|
macmcconnell
Full Member

Member since: December 2011
Posts: 1,238
Dec 11, 2011 12:07:33 GMT -5
Dec 11, 2011 12:07:33 GMT -5
|
Post by macmcconnell on Apr 14, 2013 13:27:44 GMT -5
Dicky gave me the heads up on this at sword and lance glad i dropped in amazing stuff
Mac
|
|
|
|
Post by Leon on Apr 15, 2013 19:44:13 GMT -5
Waiting patiently for paint.Maybe i can use my magic. |
|
thenylongag
Full Member
Sept2013 MoM Winner
Member since: June 2012
Yes, we have 'NO' bananas
Posts: 304
Jun 7, 2012 11:20:57 GMT -5
Jun 7, 2012 11:20:57 GMT -5
|
Post by thenylongag on Apr 18, 2013 18:39:18 GMT -5
Evenin All, You guy's crack me up, Thank you so much, to have such high praise from such a talented group of builders and that you take the time to comment on my thread, means alot to me. I might need that Migic at a later stage so keep it handy would you. Sooooooooooooooo, paint. I've said before, i don't like to paint much because it never turns out how i expect it to, but, so far i am very happy at how it's looking, I think i'm a little more confident than the last time i made a model, which was about 12 years ago. I am, in fact enjoying it so far.... ;D But enough of my waffle PIX First i had to finish up the tail section. 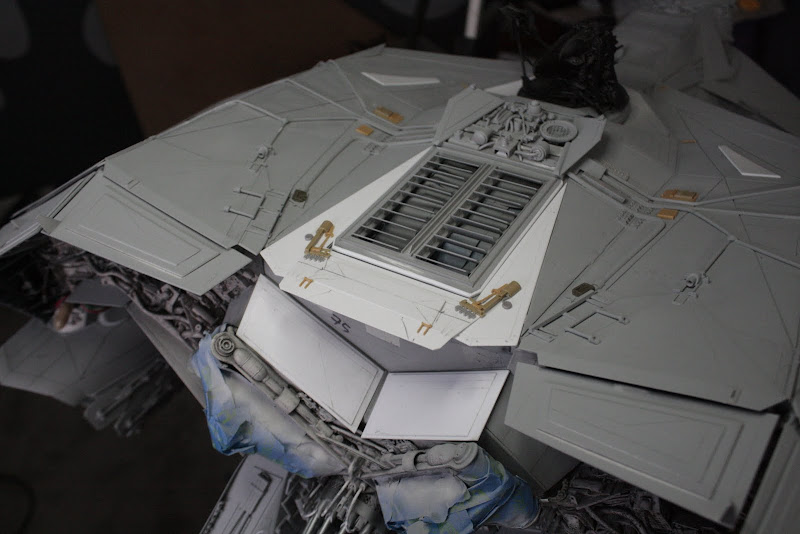 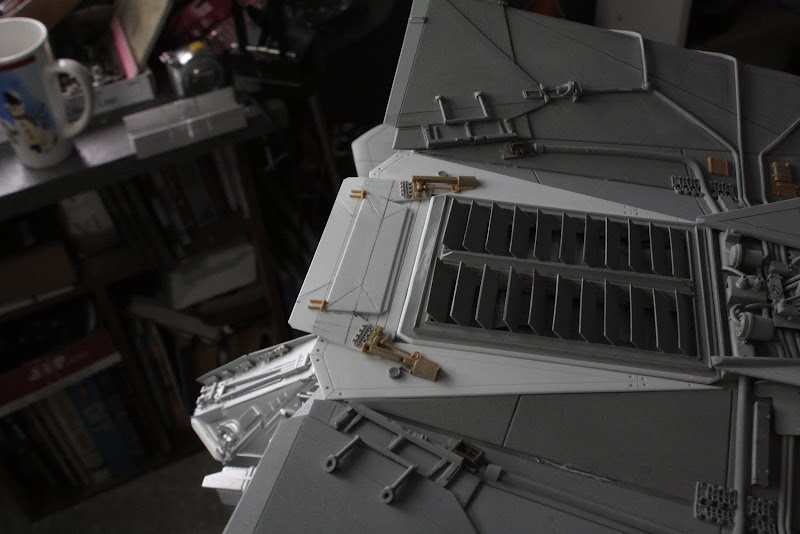 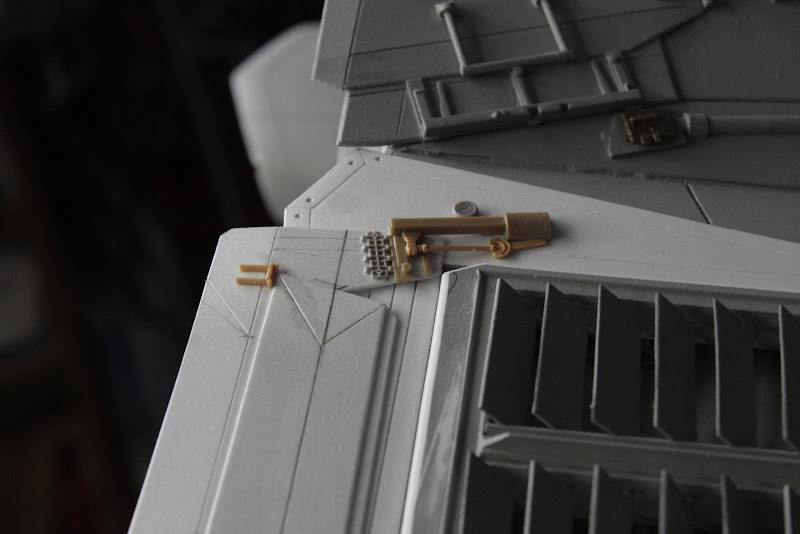 Added some detail do-dads on the front of the main wings  Finished, i think, building wise, apart from the cockpit interior and exterior. There are some assemblies to add but that's it for the main stuff.  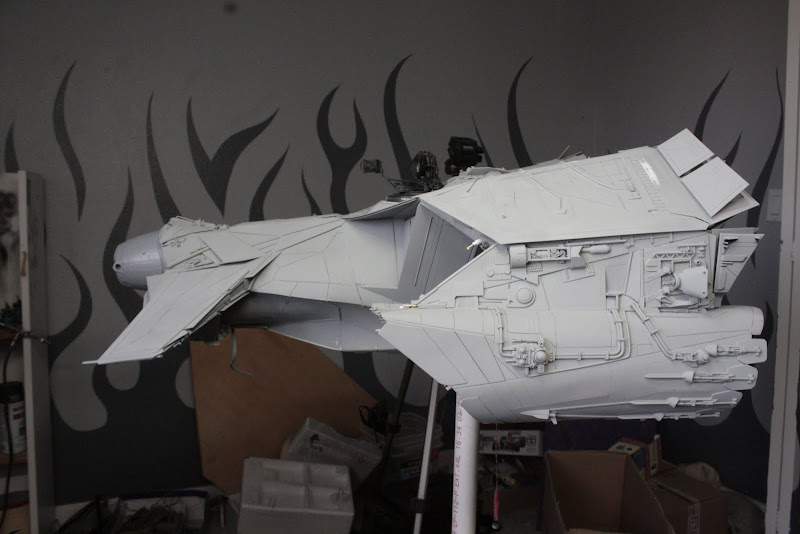 I removed the masking from the hitch assembly drivers and put them in position to see how they were lookin.  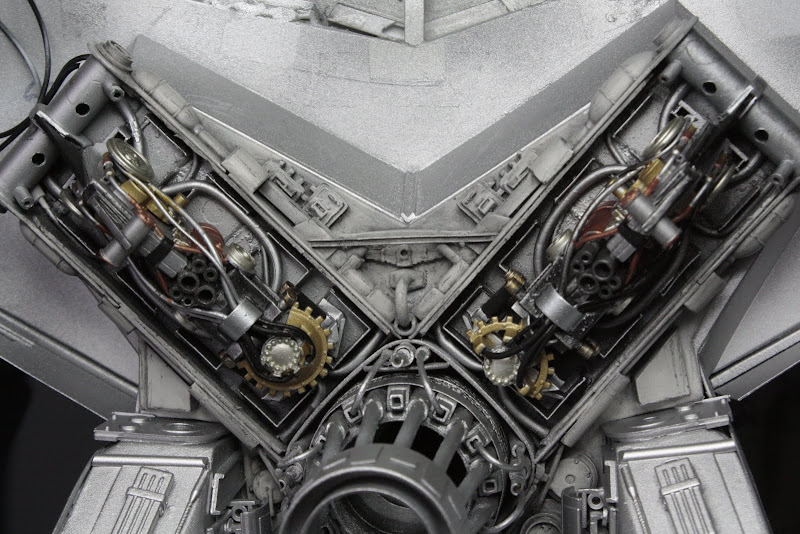 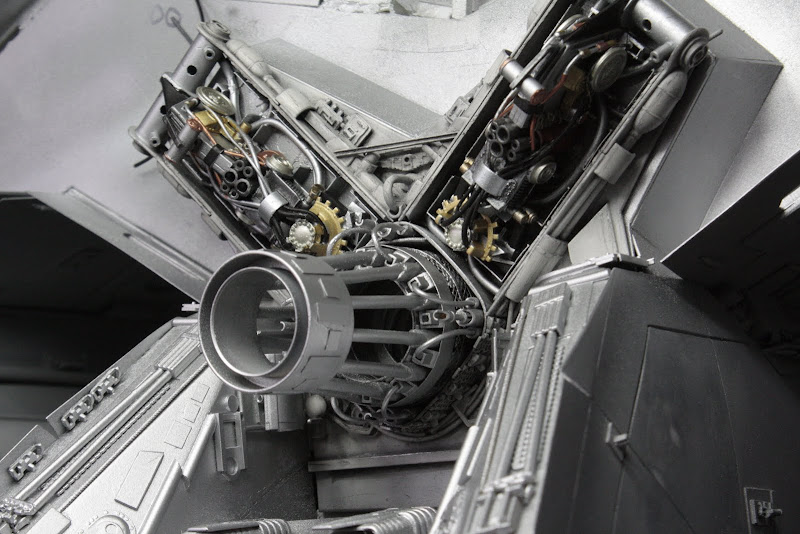 The back section is going to be the same white mix as the wing backs, but first i lay down X-11 Crome silver, Vallejo Gun then XF-1 Flat Black Pre-shade, 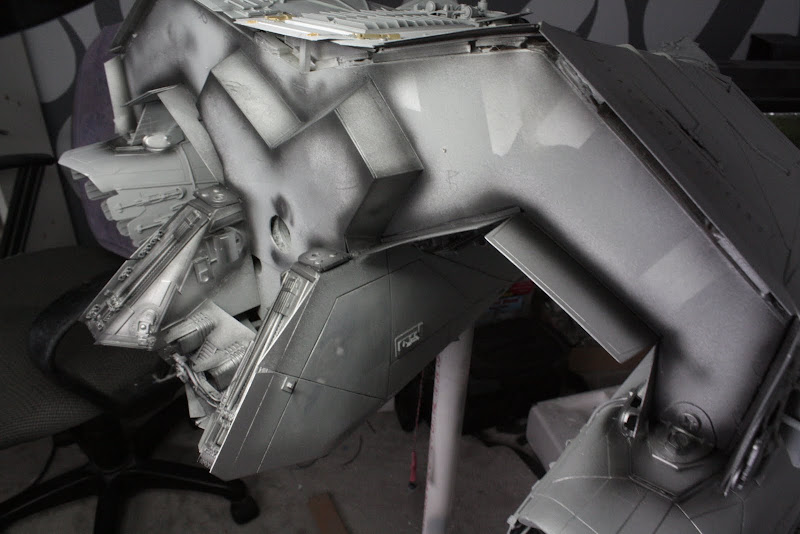 I did the same thing to all the little assemblies    Added some burn marks with the Flat Black on the back wing panels  Gave the hitch assembly drivers a very lite Black & then brown pastel wash.   Future, hairspray and salt, then the White, silver light grey, buff mix. But thats next time Stay tuned Gaggster McPicasso |
|
|
|
Post by Leon on Apr 18, 2013 19:03:40 GMT -5
WOW,the paint really brought that to life.Looks sweet McPicasso |
|
multicam
Senior Member

Member since: January 2012
Nate
Posts: 2,039
Jan 10, 2012 14:35:41 GMT -5
Jan 10, 2012 14:35:41 GMT -5
|
Post by multicam on Apr 18, 2013 19:07:57 GMT -5
McPicasso indeed! Awesome Gag! Beautiful work:)
|
|
|
|
Post by deafpanzer on Apr 18, 2013 19:54:13 GMT -5
WOW! If I see this one more time I am going to quit... I am not that good now. Great painting job!
|
|
thenylongag
Full Member
Sept2013 MoM Winner
Member since: June 2012
Yes, we have 'NO' bananas
Posts: 304
Jun 7, 2012 11:20:57 GMT -5
Jun 7, 2012 11:20:57 GMT -5
|
Post by thenylongag on Apr 18, 2013 21:07:25 GMT -5
Future, hair spray, salt, white mix ... ... ...   Hitch Assembly Drivers, Dry brush, pigment, AK products, drybrush, Finished.    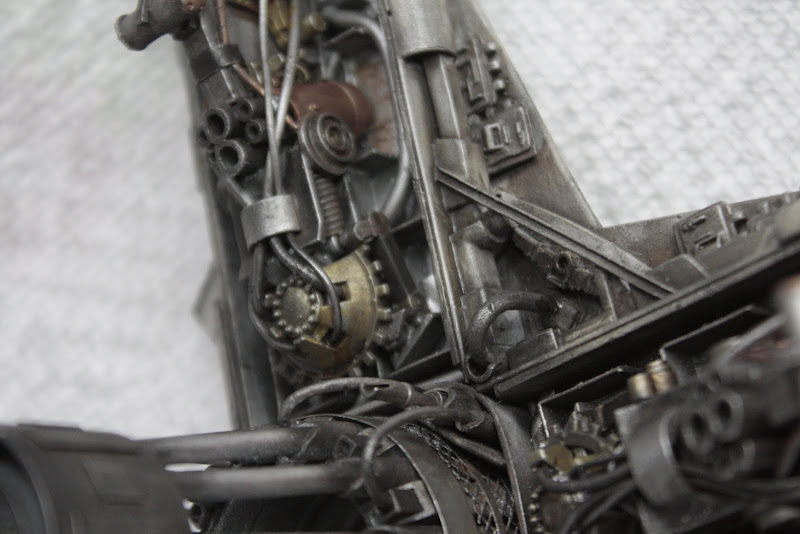 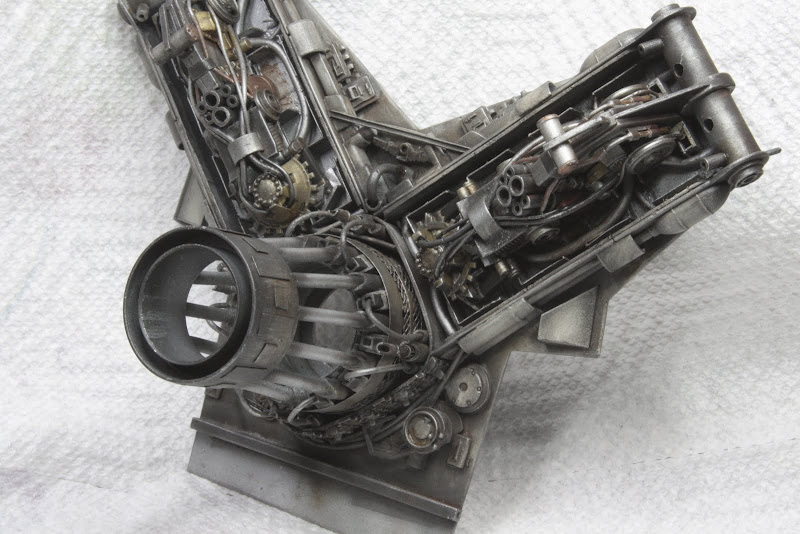 Time for bed, Said Florence boing. Said Zebbedee, Goodnight Children. Gag |
|
|
|
Post by fightnjoe on Apr 18, 2013 23:47:30 GMT -5
i read this update in stunned silence.
fantastic stuff.
joe
|
|
Deleted
Member since: January 1970
Posts: 0
May 18, 2024 3:34:25 GMT -5
May 18, 2024 3:34:25 GMT -5
|
Post by Deleted on Apr 19, 2013 1:43:59 GMT -5
Just when I think we're there you add more detail and effects ... And they're all superb |
|
Deleted
Member since: January 1970
Posts: 0
May 18, 2024 3:34:25 GMT -5
May 18, 2024 3:34:25 GMT -5
|
Post by Deleted on Apr 19, 2013 12:21:36 GMT -5
Amazing work sir!!!!!!!!!!!!!!
I...Yeah...I got nothing else. I am impressed!!! |
|
|
|
Post by dupes on Apr 19, 2013 16:50:55 GMT -5
!!!!!!!!!!!!!!!!!!  Holy paint, batman. Egads this is hot. |
|
|
|
Post by Leon on Apr 20, 2013 5:50:56 GMT -5
Simply put.Amazing work Gag.Your talent and attention to detail is top notch.  |
|
stevereid
Full Member
Member since: November 2011
Posts: 556
Nov 16, 2011 16:17:33 GMT -5
Nov 16, 2011 16:17:33 GMT -5
|
Post by stevereid on Apr 20, 2013 6:26:43 GMT -5
I need to start calling you Mr. Gag- or would you prefer Mr. Nylon!
This is a brilliant piece of work! :-)
Steve
|
|
thenylongag
Full Member
Sept2013 MoM Winner
Member since: June 2012
Yes, we have 'NO' bananas
Posts: 304
Jun 7, 2012 11:20:57 GMT -5
Jun 7, 2012 11:20:57 GMT -5
|
Post by thenylongag on Apr 24, 2013 7:58:25 GMT -5
Morning Folks, Thanks everyone, appreciate you stopping by. Still weathering and painting the back detail assemblies. I removed the salt and further chipped the paint with a sharpened chop stick Then i applied several black and brown pastel washes on all the rear assemblies slowly building up the effect. 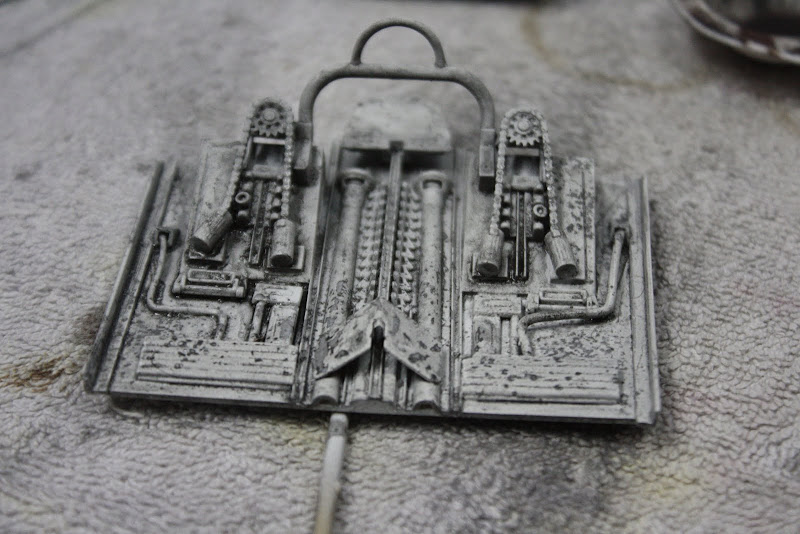   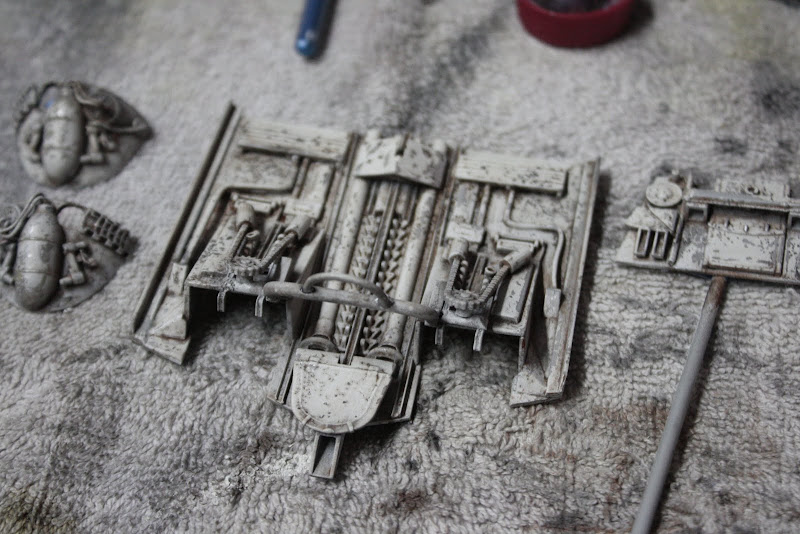 These panels are still a bit lighter than the wing back sections, so i will finish them with my AK products when they are in position. I wanted to see how much the actuators would affect the overall colour balance of the back section so i did some assembly work. 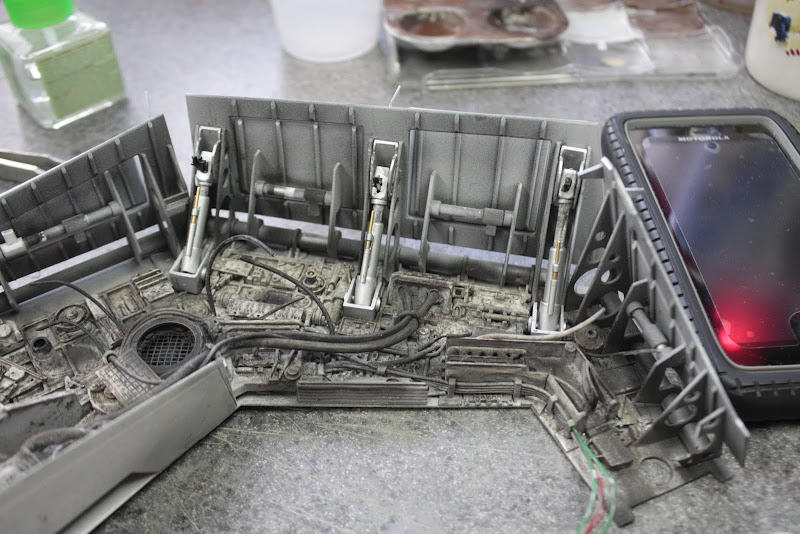 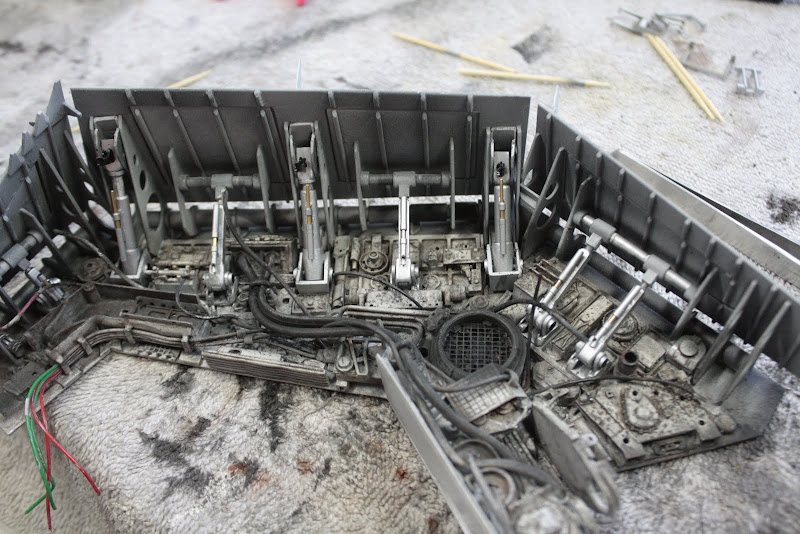 I also added the fuel delivery tube. 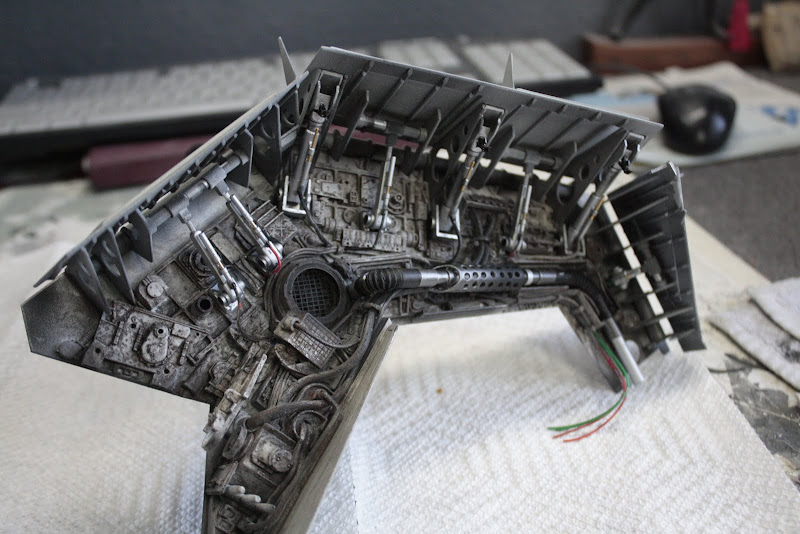 I then attached all the wires for the actuators, these will be painted and weathered later. 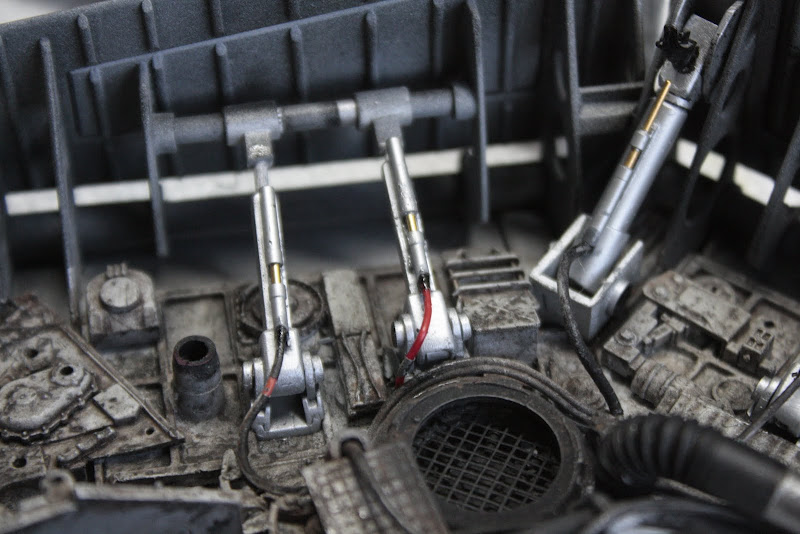  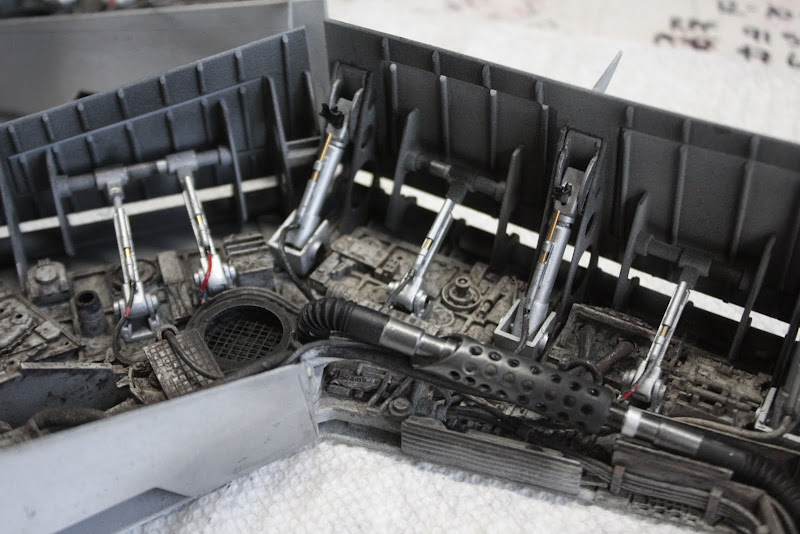 I decided to do some more assembly on the hitch mechanism. I put on the generator covers 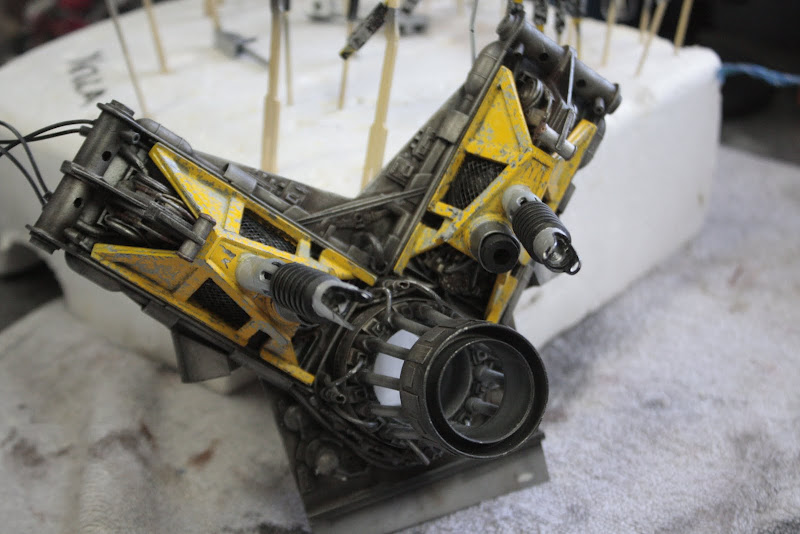 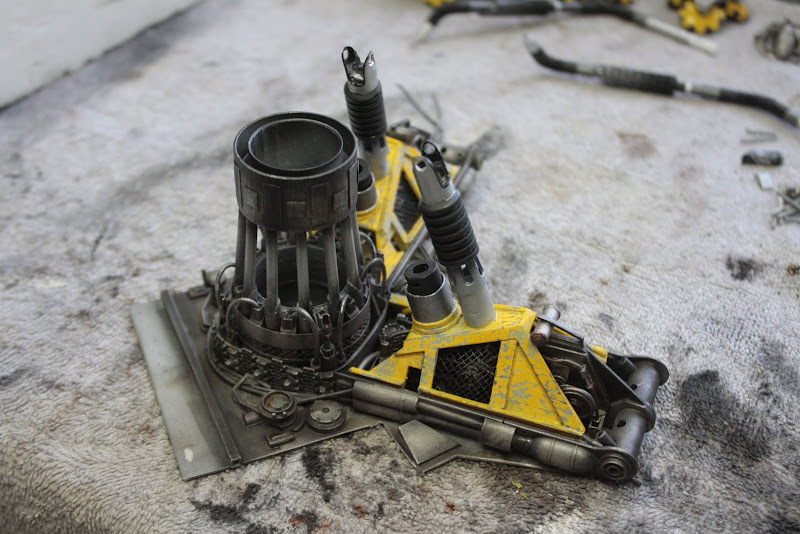 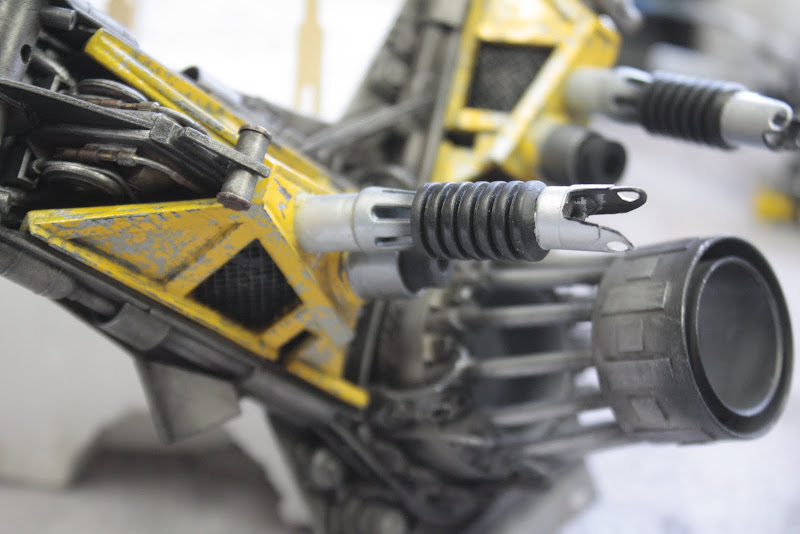 Put it in position to see how it looks    Added the hitch ball and the support arms and most of the assembly for a quick dry fit 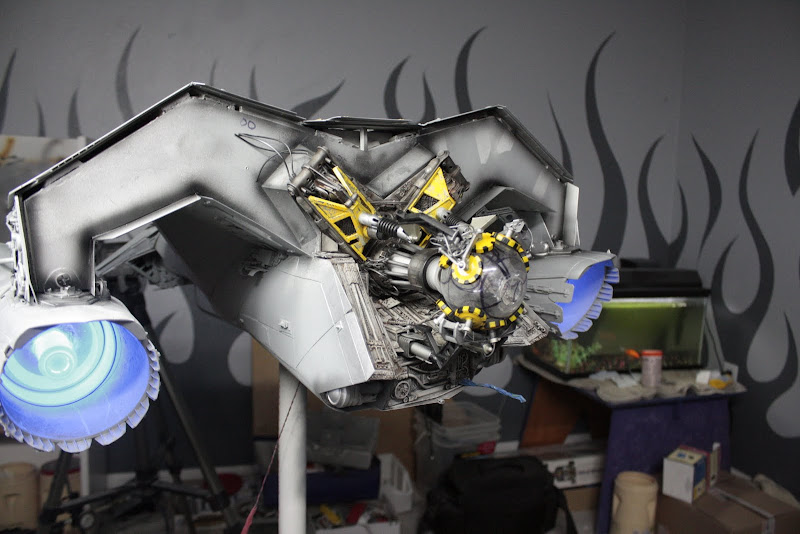 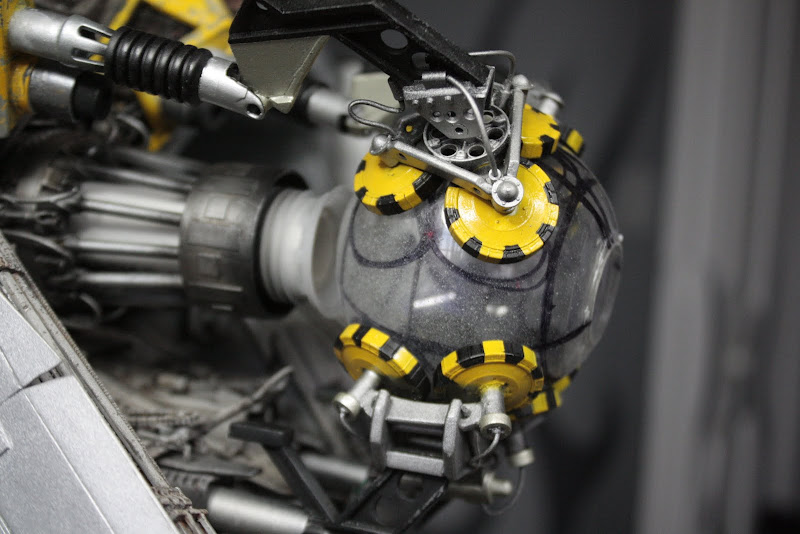  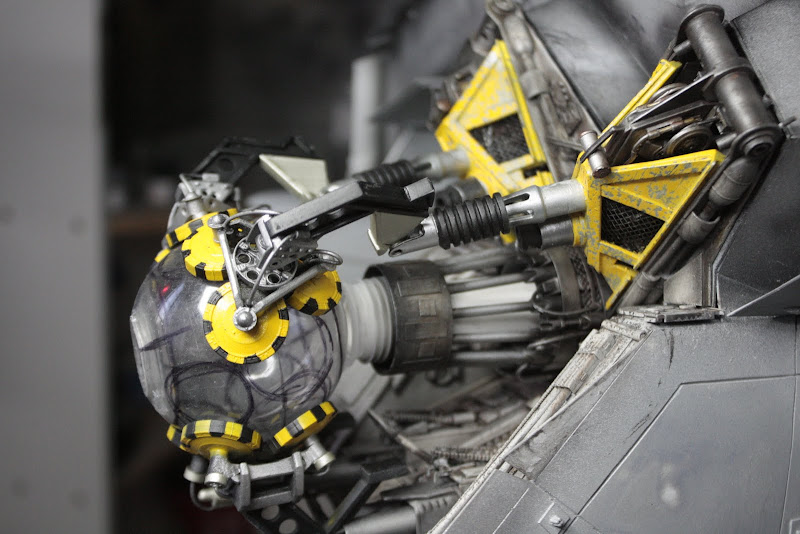 I couldn't resist so i dry fit all of the wing back details to see how we were looking 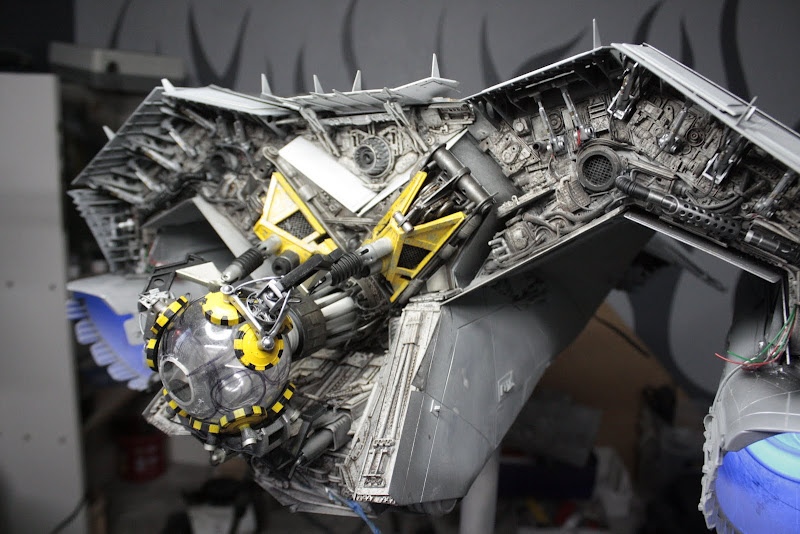 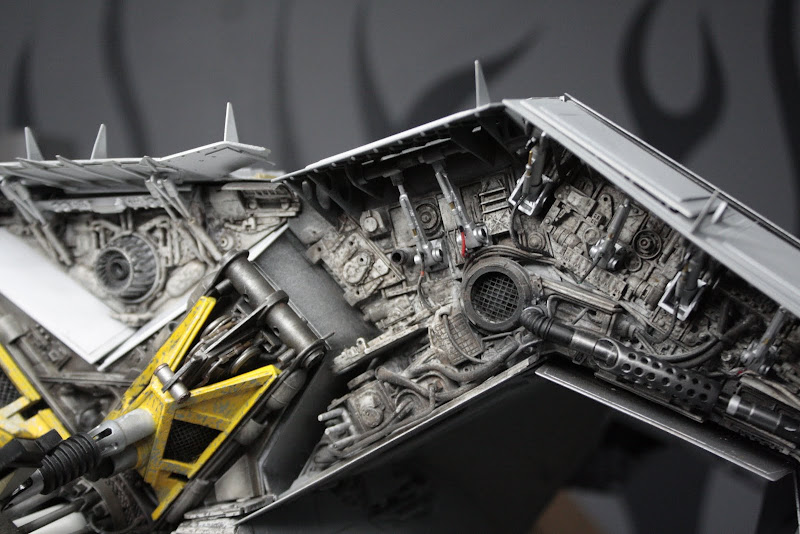   I cannot tell you how pleased i am with the overall look of the back section. You have a picture in your head of how you want it to look but nothing compares to seeing it all painted and assembled. A quick video. www.youtube.com/watch?v=BO5JNN4Oj4wYes, that is me giggling, it's the vodka again ;D No, i do not live in a public toilet that background noise is from my fish tank. I am very very happy with it. Next is final weathering with AK products and some dry brushing and maybe another wash or two. What do you think friends? Gag |
|
|
|
Post by fightnjoe on Apr 24, 2013 8:20:10 GMT -5
stunning. absolutely stunning. not sure i could get the right words.
this is a truely epic demonstration of creative building.
joe
|
|
Deleted
Member since: January 1970
Posts: 0
May 18, 2024 3:34:25 GMT -5
May 18, 2024 3:34:25 GMT -5
|
Post by Deleted on Apr 25, 2013 9:34:57 GMT -5
Oh My God
Marvelous
G
|
|
Deleted
Member since: January 1970
Posts: 0
May 18, 2024 3:34:25 GMT -5
May 18, 2024 3:34:25 GMT -5
|
Post by Deleted on Apr 25, 2013 12:42:50 GMT -5
More superb progress Gag  great video BTW, not sure it's all the vodka ! Cheerio old boy! |
|
Deleted
Member since: January 1970
Posts: 0
May 18, 2024 3:34:25 GMT -5
May 18, 2024 3:34:25 GMT -5
|
Post by Deleted on Apr 26, 2013 12:05:56 GMT -5
You, sir, should be proud!!! This is stunning!!! Excellent work.
|
|
macmcconnell
Full Member
Member since: December 2011
Posts: 1,238
Dec 11, 2011 12:07:33 GMT -5
Dec 11, 2011 12:07:33 GMT -5
|
Post by macmcconnell on Apr 26, 2013 12:17:44 GMT -5
I just love it outstanding
Mac
|
|
thenylongag
Full Member
Sept2013 MoM Winner
Member since: June 2012
Yes, we have 'NO' bananas
Posts: 304
Jun 7, 2012 11:20:57 GMT -5
Jun 7, 2012 11:20:57 GMT -5
|
Post by thenylongag on Apr 28, 2013 11:11:47 GMT -5
Evenin all, Thanks for the kind words, here's the score this week.....PIX Heavy washes to all the actuators on the wing backs  Did some post shading, flat black, its wet in this picture. 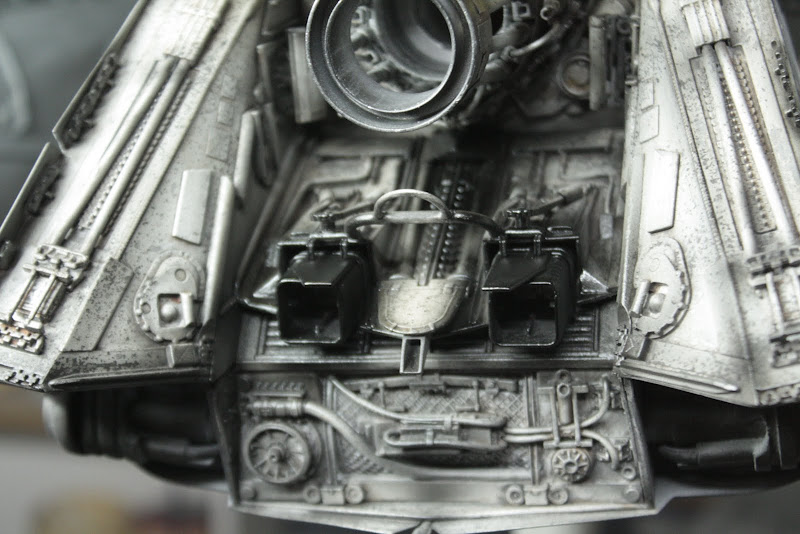 More heavy pastel washes on the hitch and the undertray area.  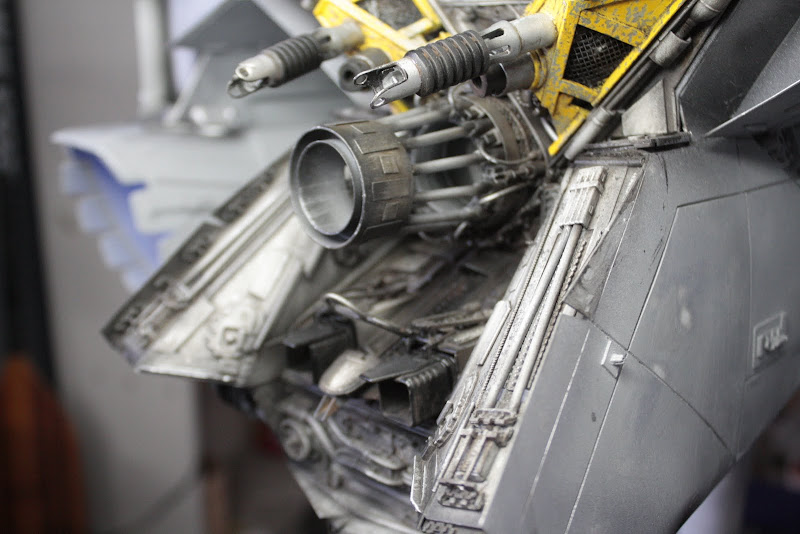 Also did the emergency cable assembly 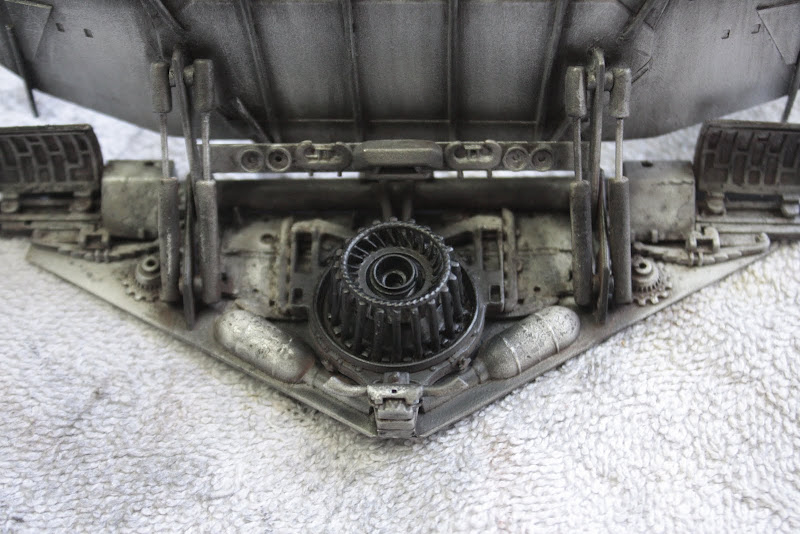 Then i had some toys arrive today 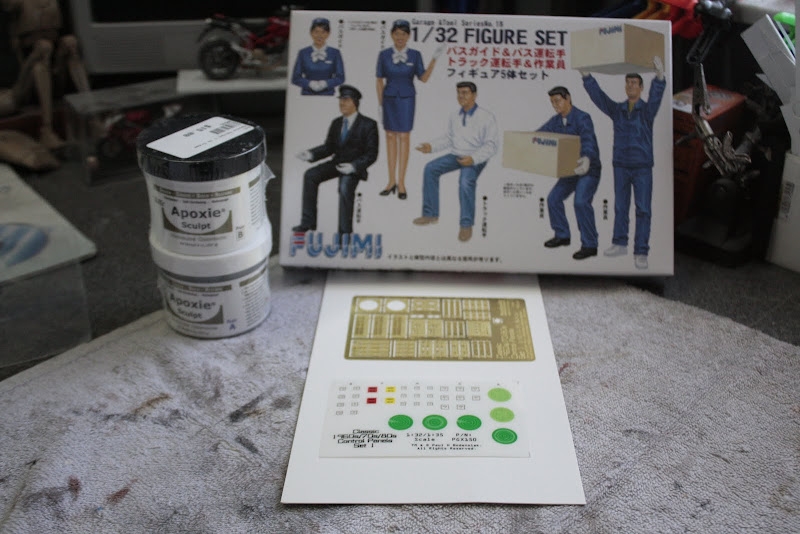 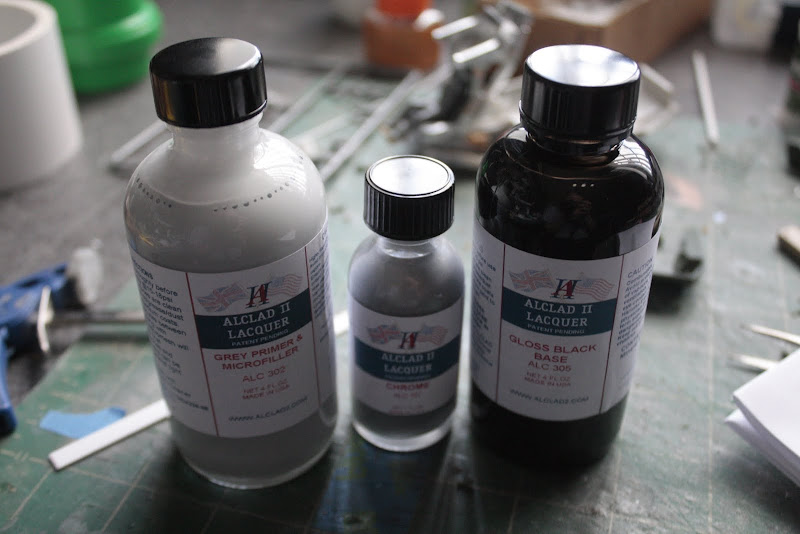 Started to assemble the pilot 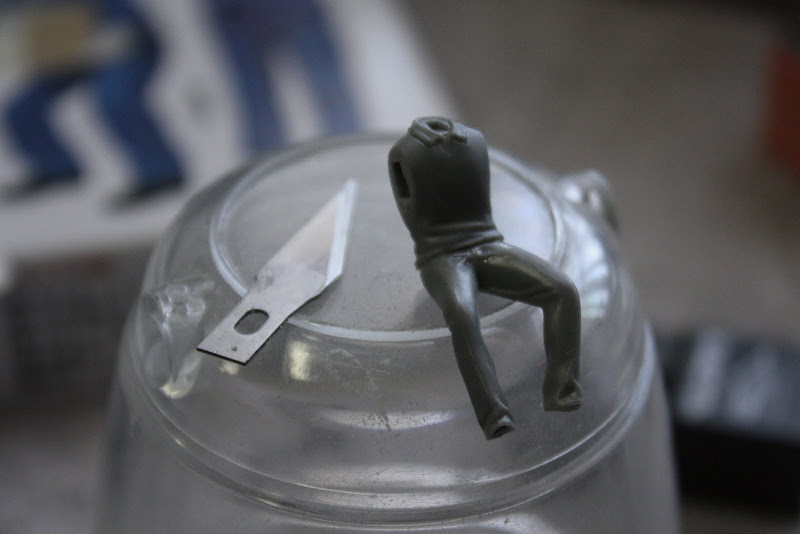 Used an old buffing stick to make the padded seat 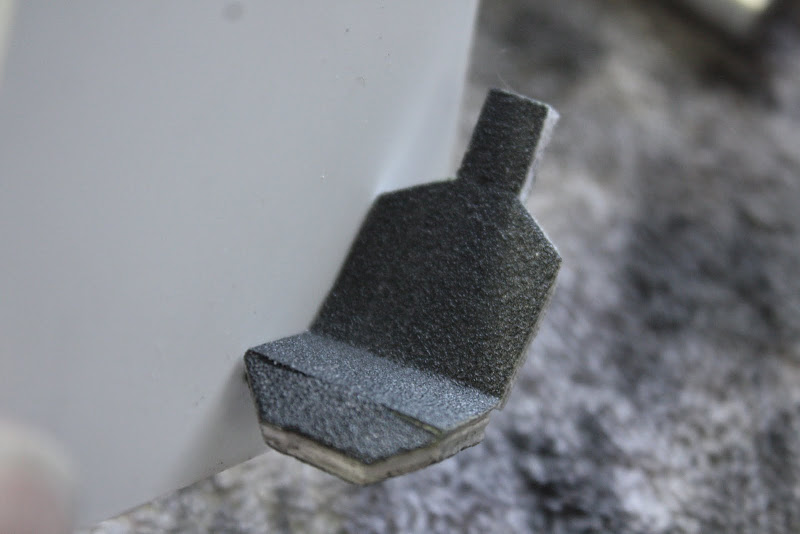 Added some sides and a bit of back support  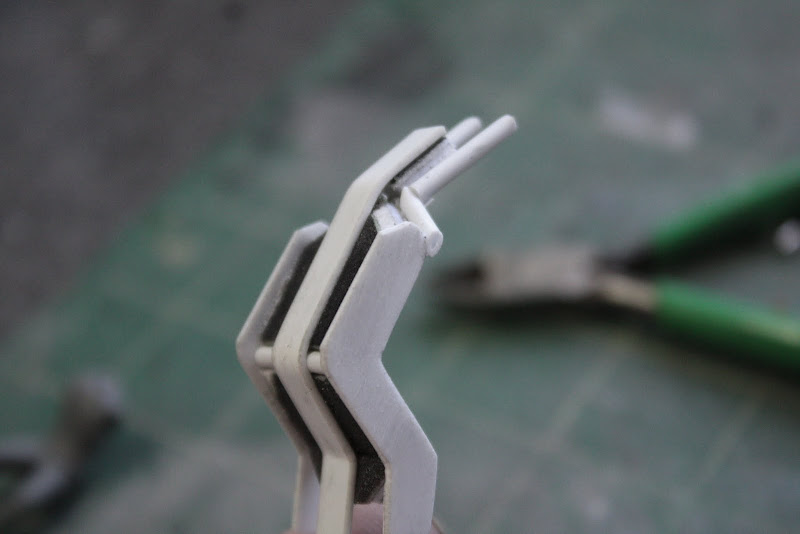 Used a MotoGP bike frame to support the seat module 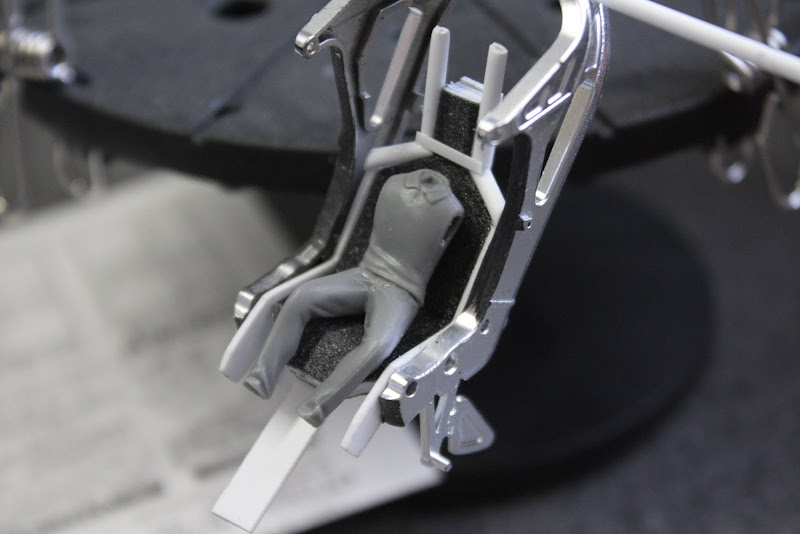 Some details 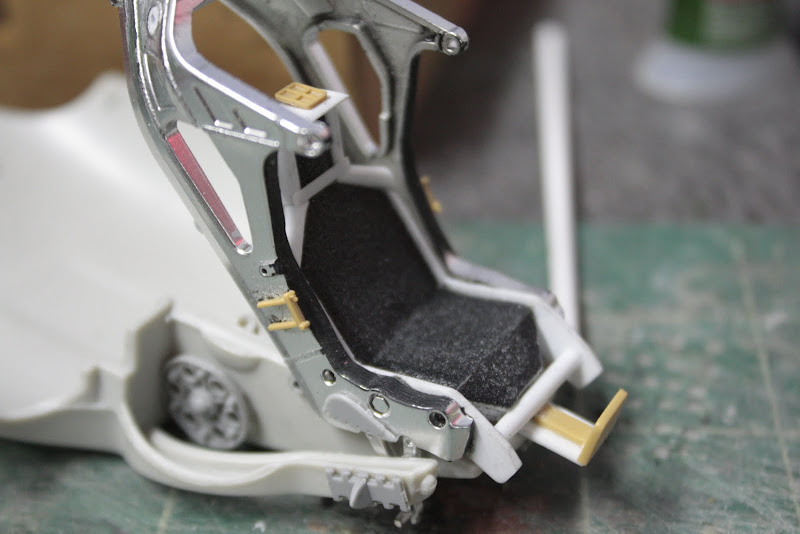 G-force anti grav generator added behind the seat 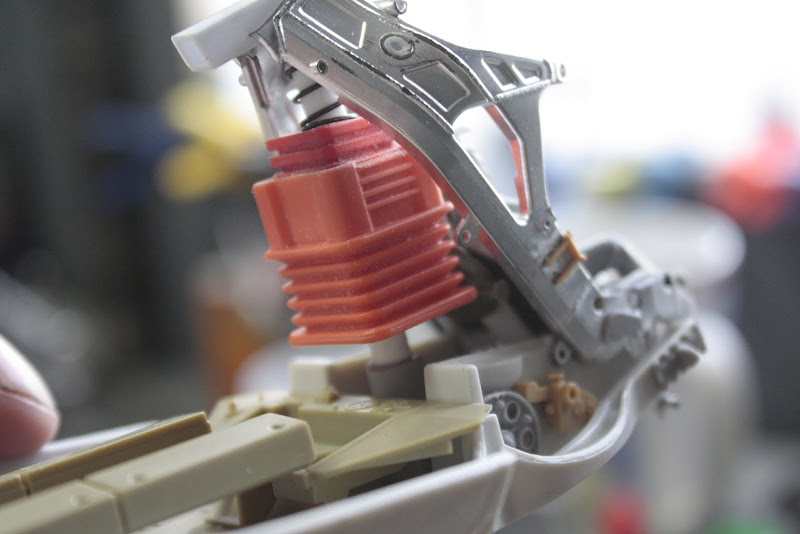 Put everything on a SAP base  Trailer box for the rear door, armour plates for the walls 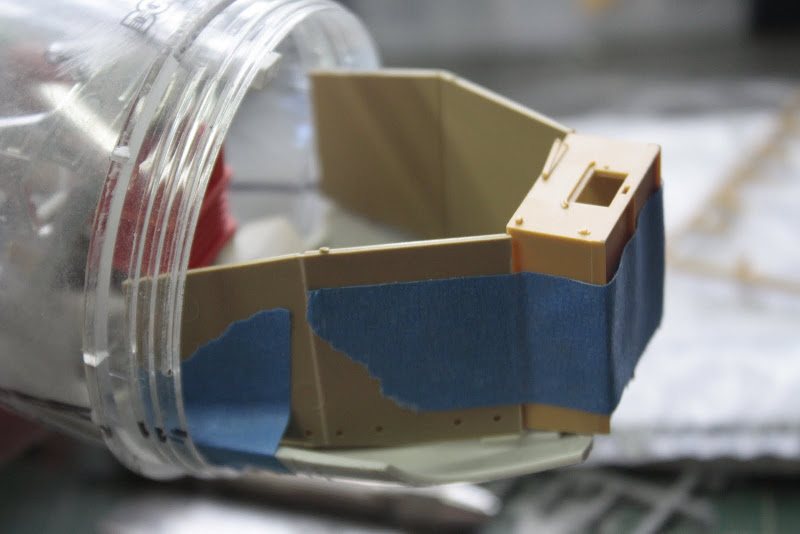 Rear cockpit area 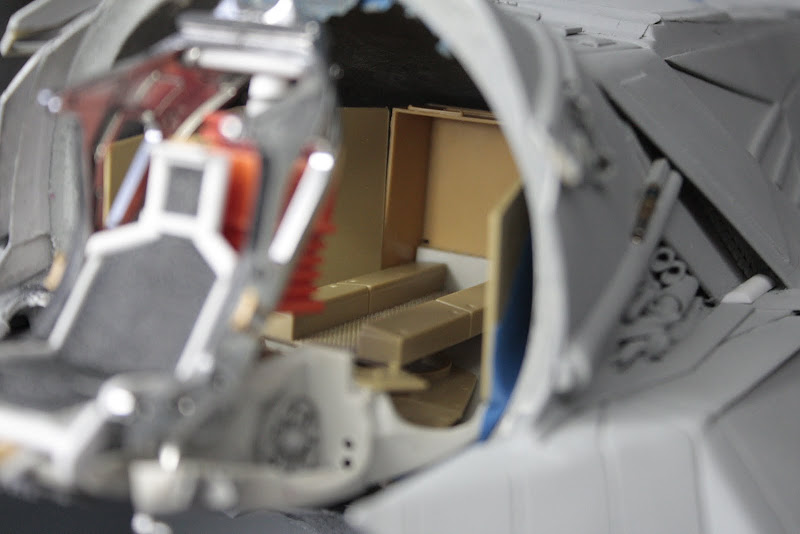 seat module 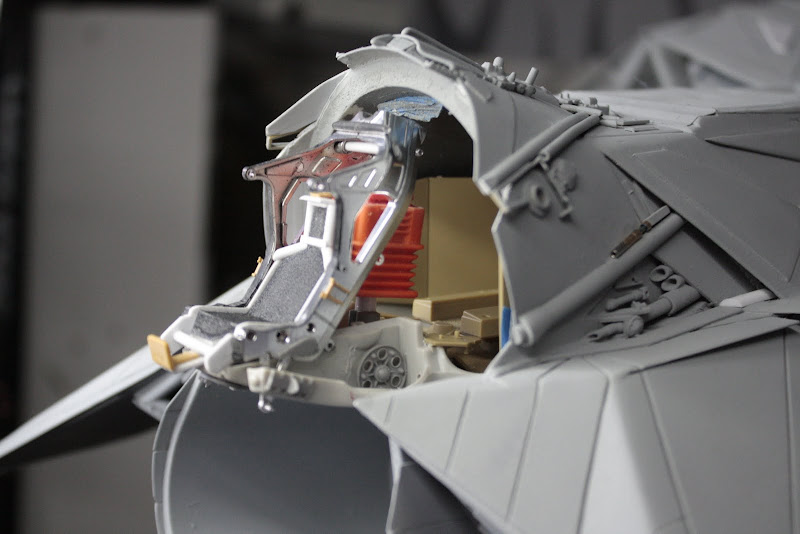 Seat module with over head accessories rail and posible instrument tubs  Dry fit in the cockpit dome 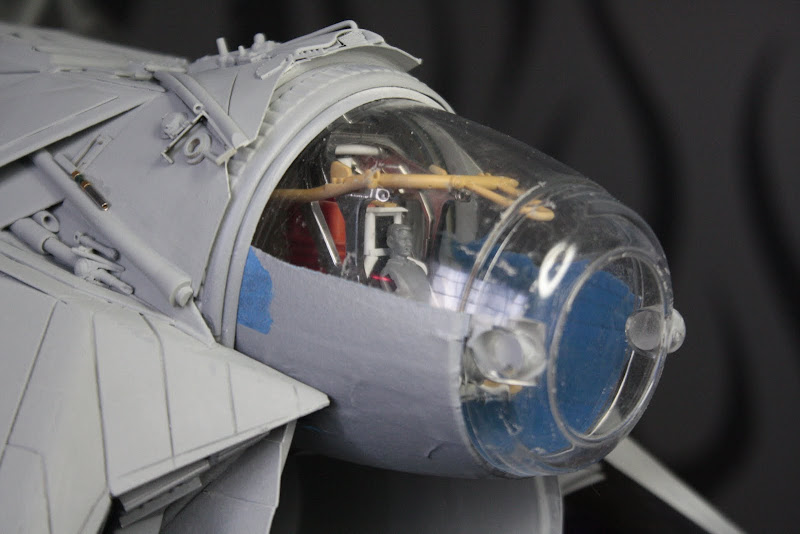 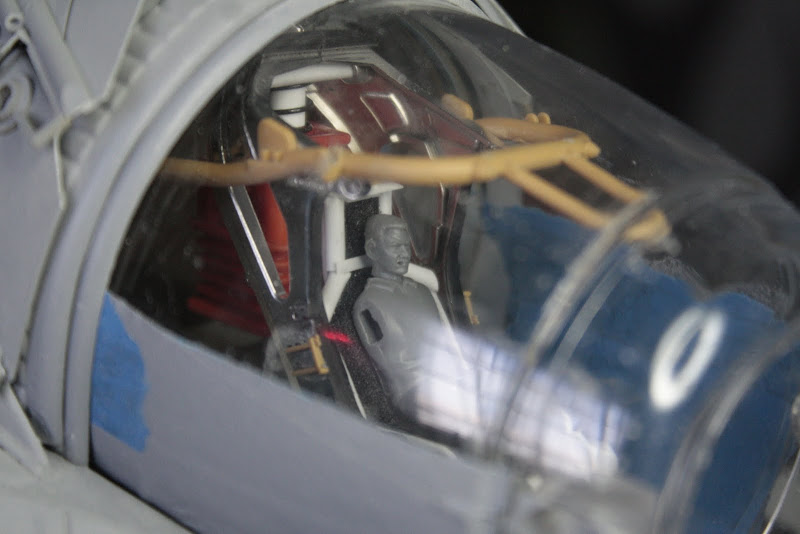 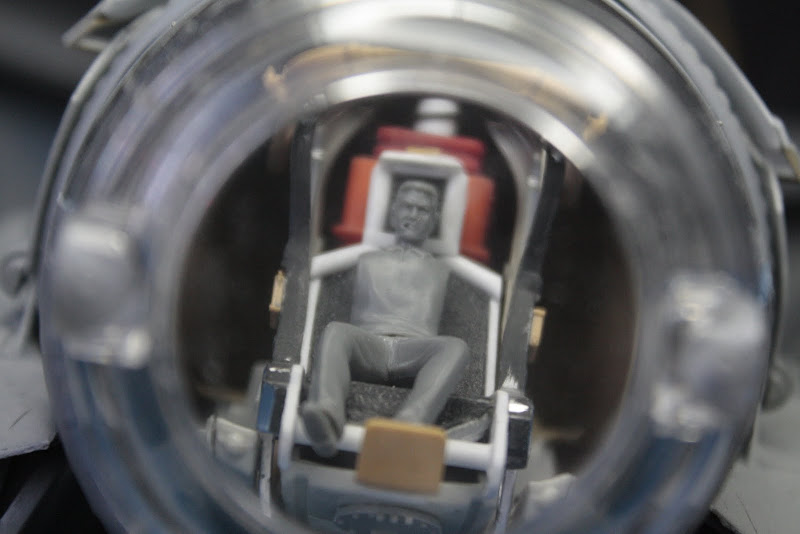 Thanks for stopping by Gag |
|
Deleted
Member since: January 1970
Posts: 0
May 18, 2024 3:34:25 GMT -5
May 18, 2024 3:34:25 GMT -5
|
Post by Deleted on Apr 28, 2013 11:49:28 GMT -5
Ace just ace!
|
|
|
|
Post by Leon on Apr 28, 2013 19:30:05 GMT -5
Another jaw dropping update.Love the pit. |
|
|
|
Post by deafpanzer on Apr 28, 2013 19:30:58 GMT -5
D-A-M-N ! ! ! ! ! ! ! ! ! This is so sick...
|
|
Deleted
Member since: January 1970
Posts: 0
May 18, 2024 3:34:25 GMT -5
May 18, 2024 3:34:25 GMT -5
|
Post by Deleted on Apr 29, 2013 12:27:57 GMT -5
Wow!!! This is coming along beautifully. I love the cockpit!! The displays will be interesting to see also.
As usual...you are knocking it out of the park!!! Excellent work.
|
|
thenylongag
Full Member
Sept2013 MoM Winner
Member since: June 2012
Yes, we have 'NO' bananas
Posts: 304
Jun 7, 2012 11:20:57 GMT -5
Jun 7, 2012 11:20:57 GMT -5
|
Post by thenylongag on May 22, 2013 10:42:10 GMT -5
Hi everybody, Thanks guy's. I've been away from the bench for a couple of weeks due to illness so i haven't even been online that much either, but on Saturday i got a few hours in and last night i got another few hours at the bench, so whats been up, lets have a look...... Added some tubing and some under walkway lighting and a bit of beam work. 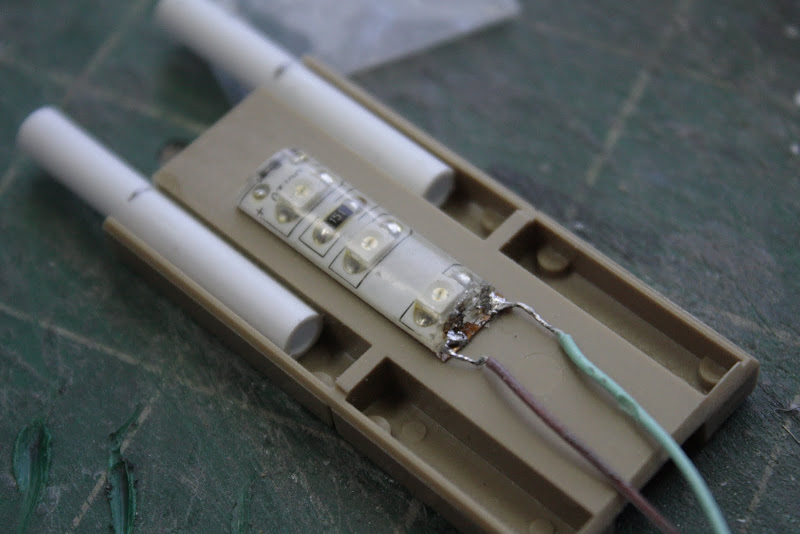 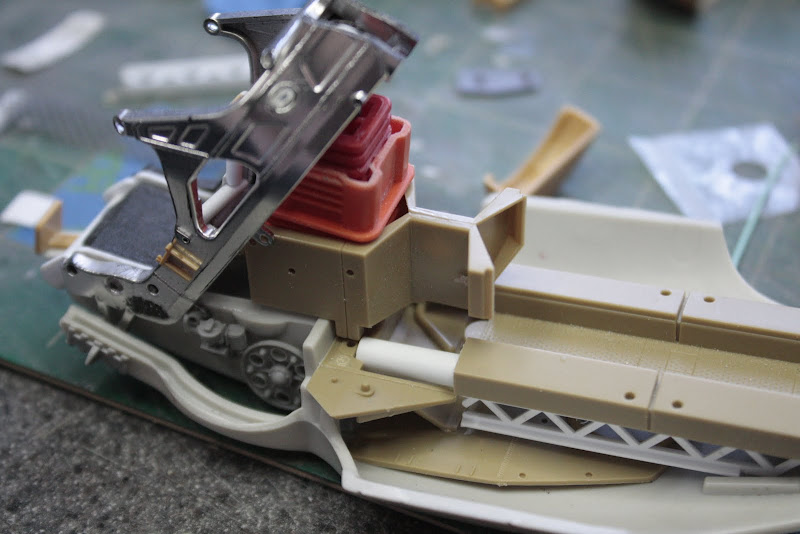 Then i started working on the side pod (mud guard) instument panels. 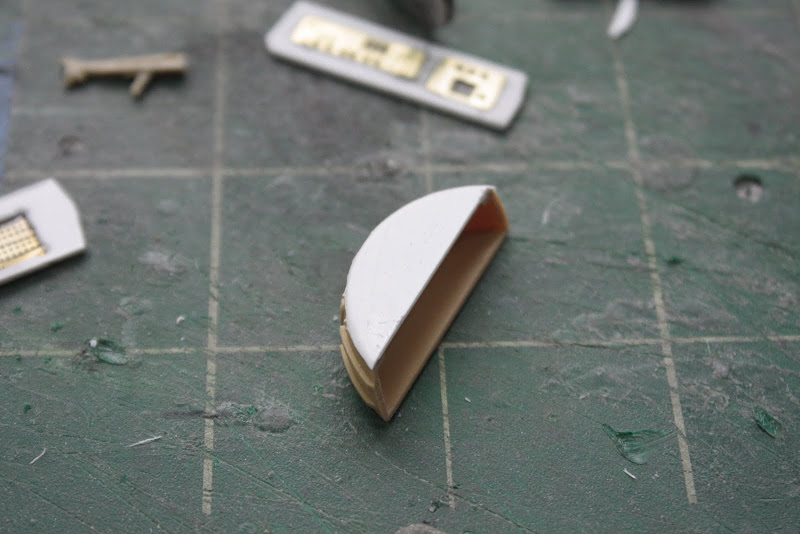 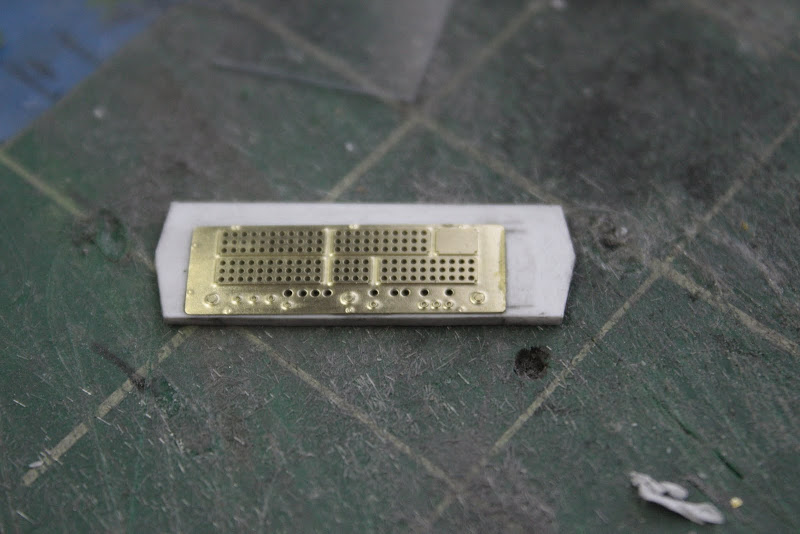 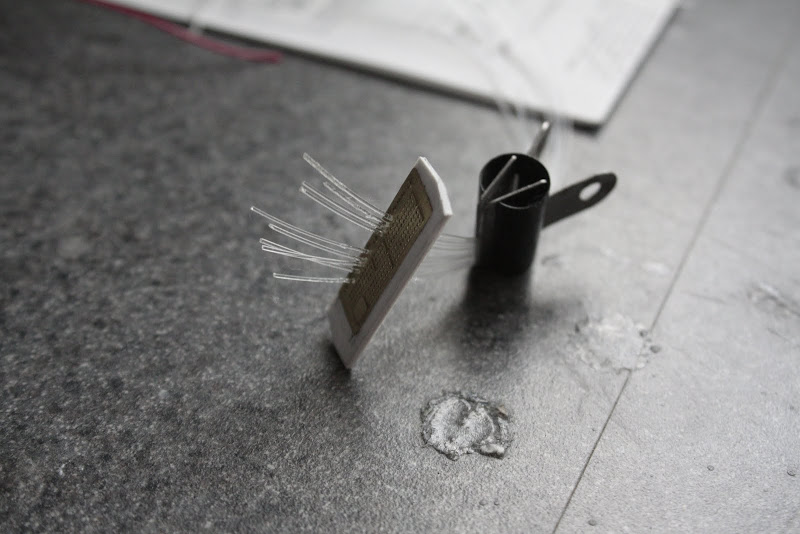 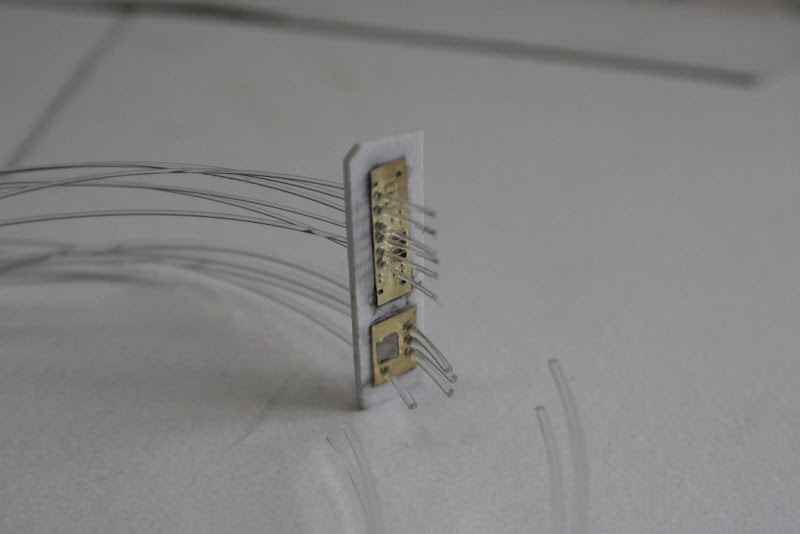 Aluminium foil for the insides 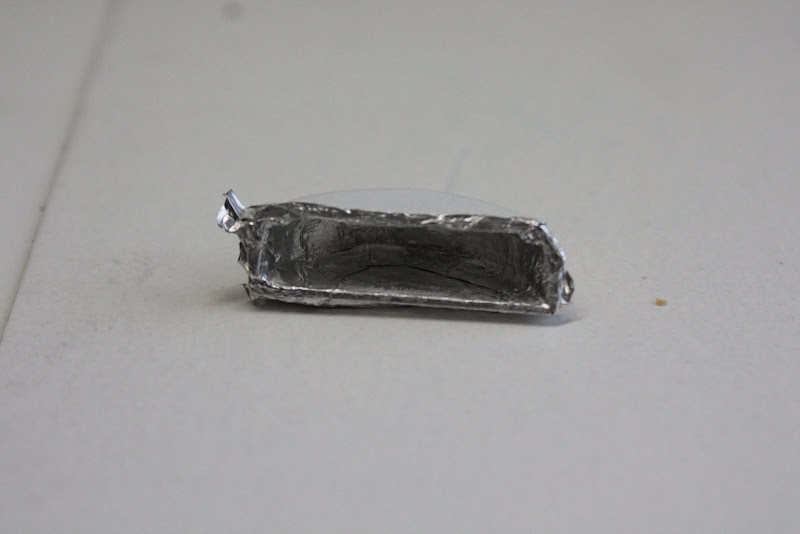 Each side has a white LED inside Threaded all the fiber optics and the led cable through a hole i drilled in the bottom of the tub 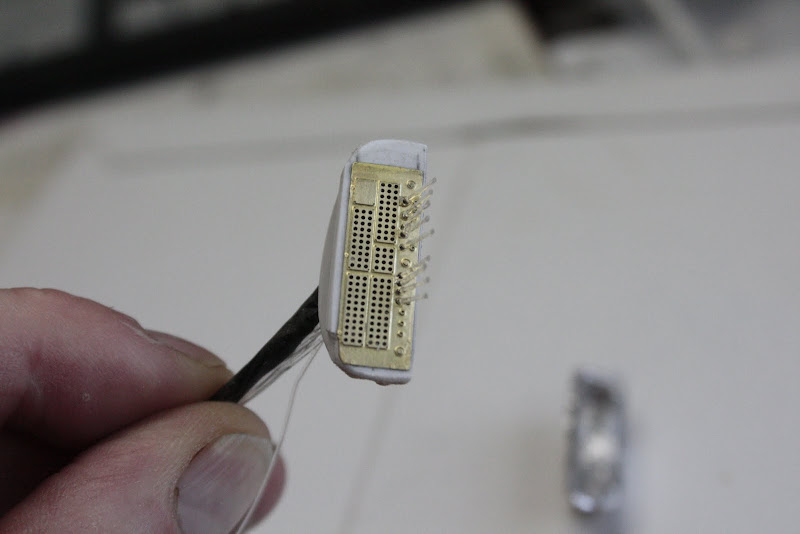 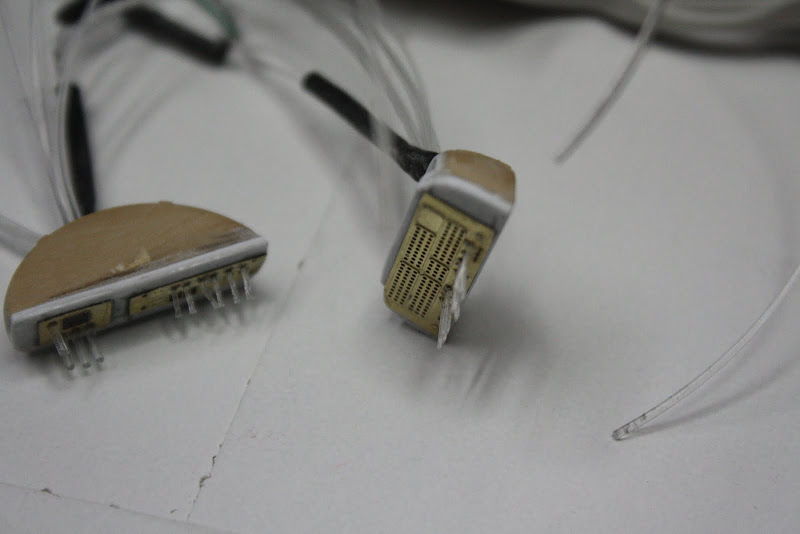 Covered the wires and FO with heat shrink and threaded it through to the back of the cockpit pod and then i glued on the side pods 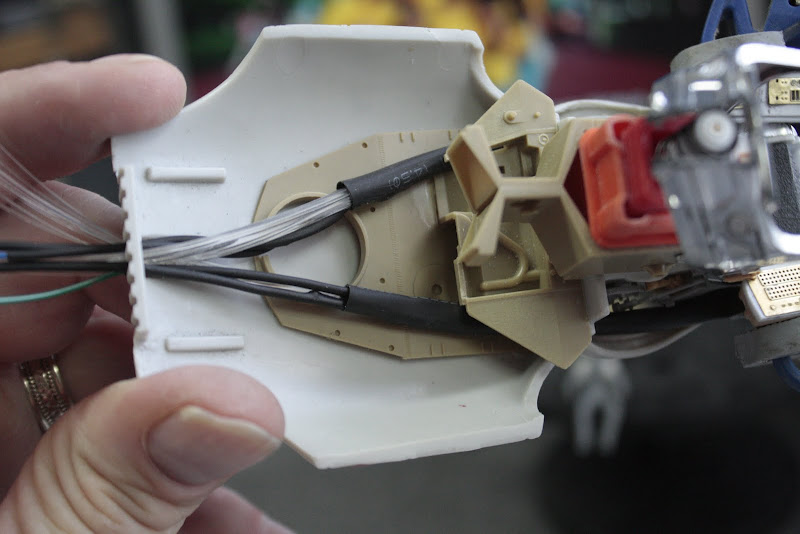  Next i added some smaller details on the top instrument panels  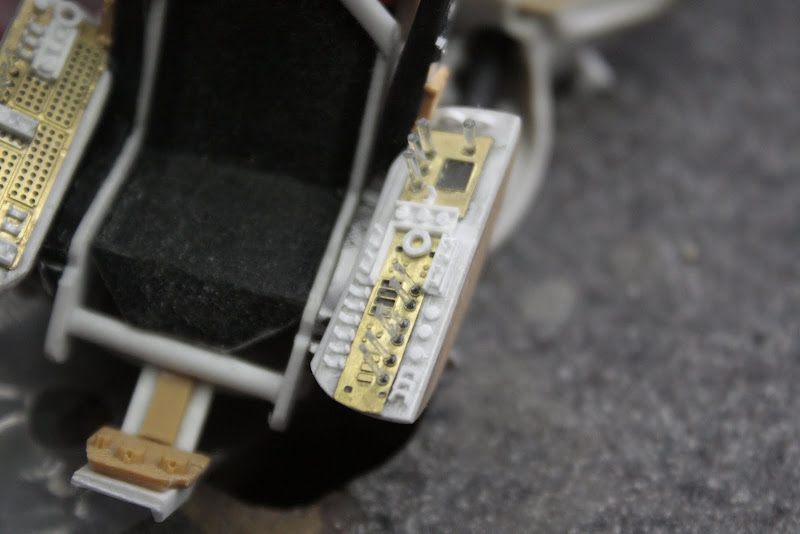 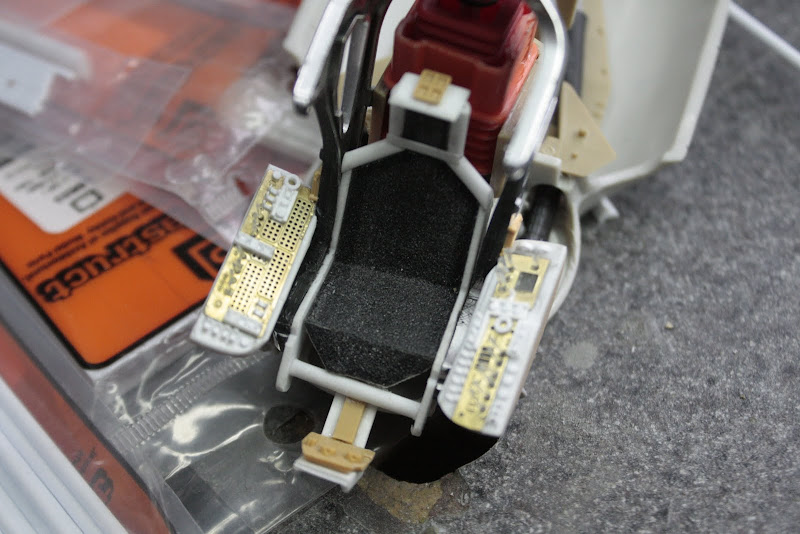 Started the joysticks 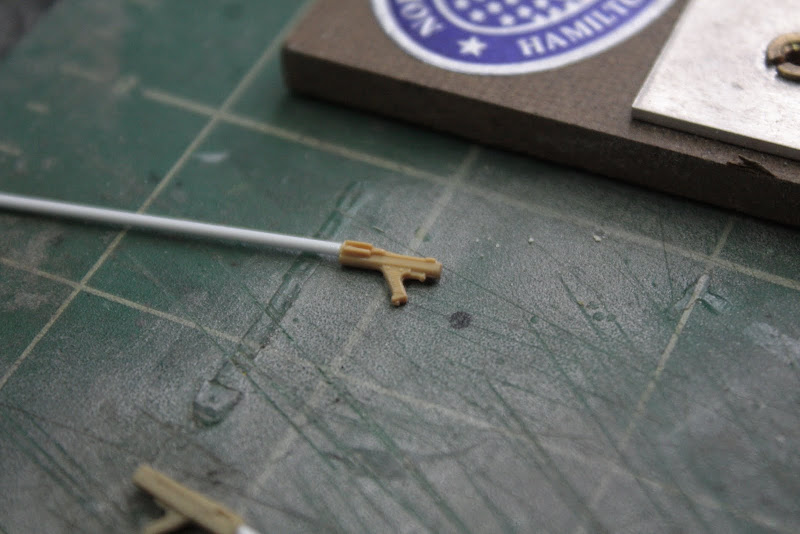 Gave the pilot arms and a coat of primer 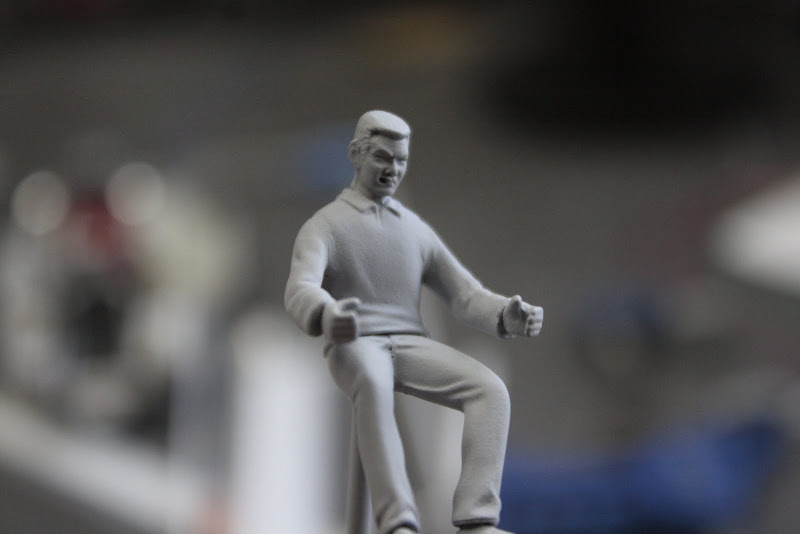 Fitted the overhead accessories rail 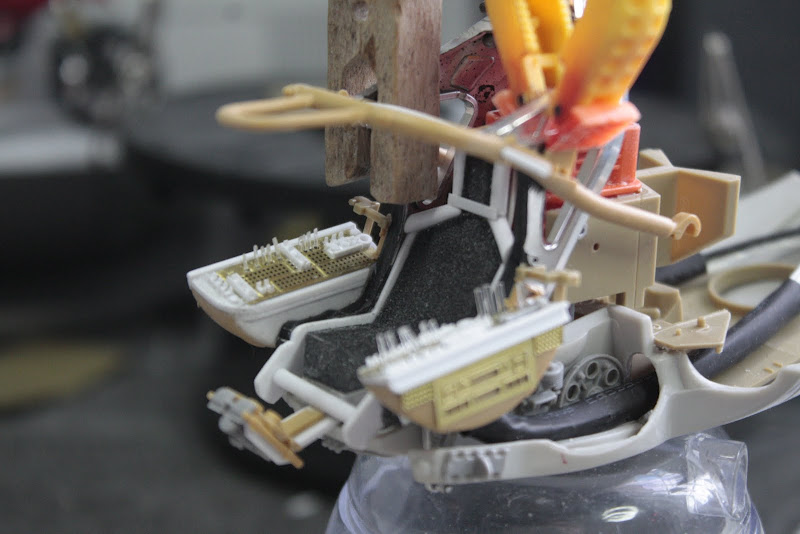 This is the Heads Up Display screen 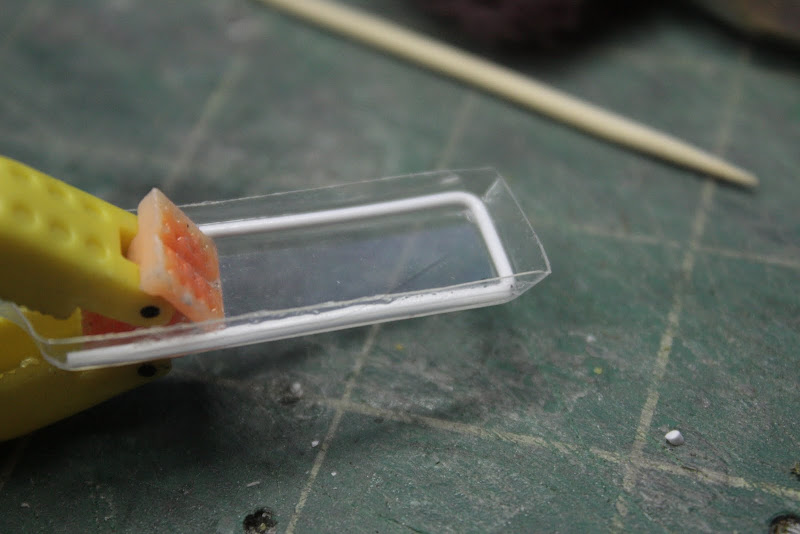 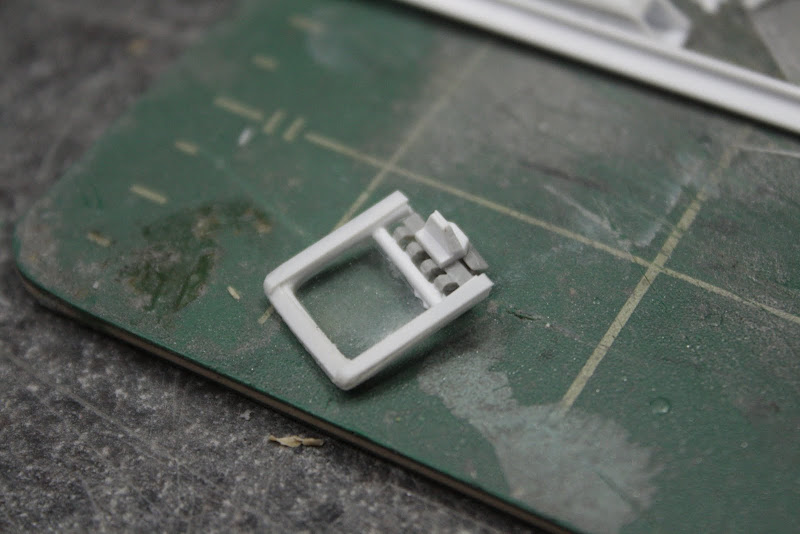 Thats it so far, more soon Take care Gag |
|
|
|
Post by Leon on May 22, 2013 15:42:06 GMT -5
Greg that is some awesome work on the cockpit .Like the lights and small detail.Good to see you back even if it's just for a few hours. |
|
thenylongag
Full Member
Sept2013 MoM Winner
Member since: June 2012
Yes, we have 'NO' bananas
Posts: 304
Jun 7, 2012 11:20:57 GMT -5
Jun 7, 2012 11:20:57 GMT -5
|
Post by thenylongag on May 24, 2013 18:04:15 GMT -5
Evenin all, Thank you so much for your kind words chap, I realy appreciate you stopping by and commenting it means alot to me so, Thanks. Well, on with the cockpittery, thanks Dicky my new favourite word, eyewatering cockpittery sounds a very rude indeed, but it isn't, but if you think about it to much, then it does again . It was all about the details, wiring and displays. The main challenge was the HUD, i wasn't sure if my idea would work.....? Lets have a look. PIX Did a quick light test of the underwalkway lighting before gluing it in place. I had to open up two new holes either side of the walk way to accomodate the wires. In their original position the walkway wouldin't sit down correctly  Tested the lights in the side pod instrument panels, i will fill the holes with various colours later, the fiber optics will be all flashing, i hope.  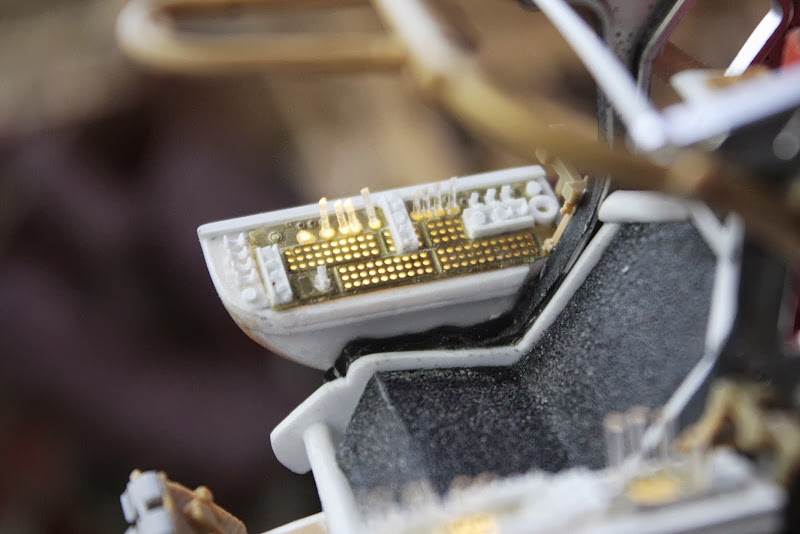 Added side details behind the seating area on both sides 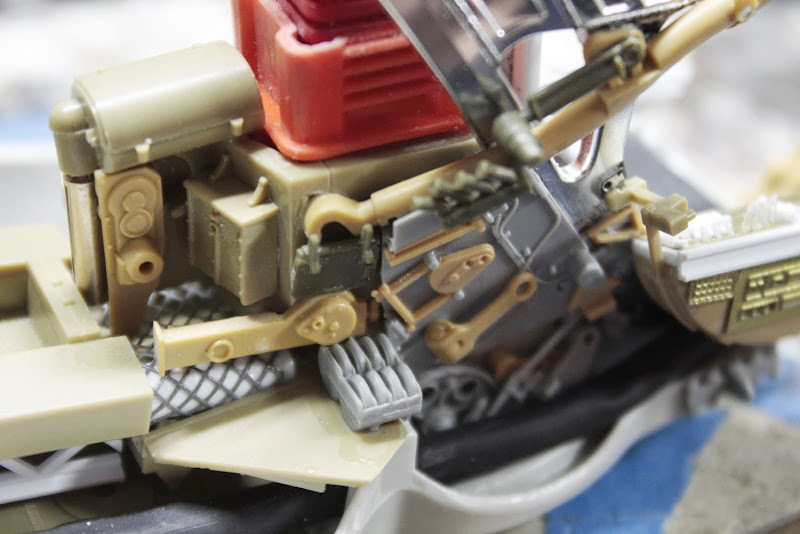 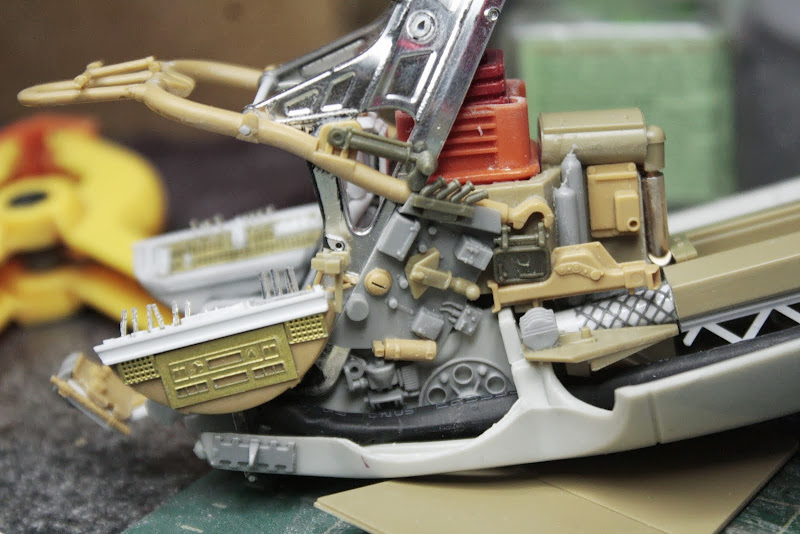 Quick test fit 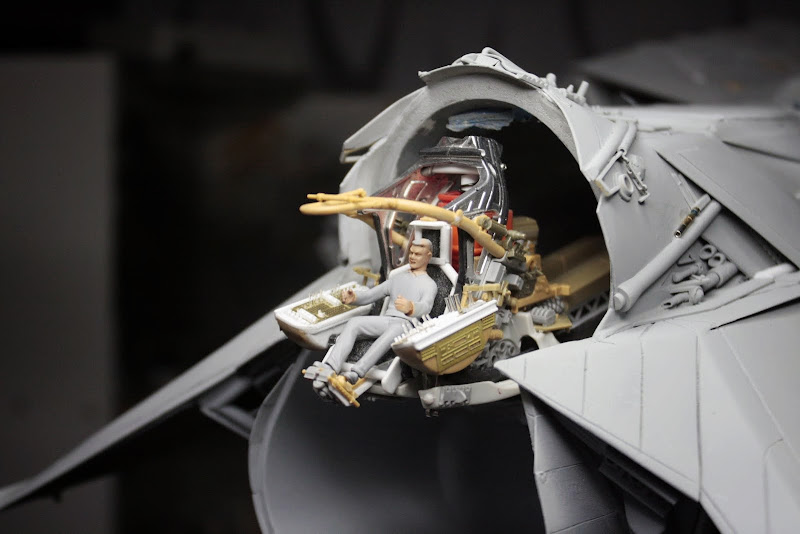 Then i started on the heads up display projector unit. Added heatshrink as a light block 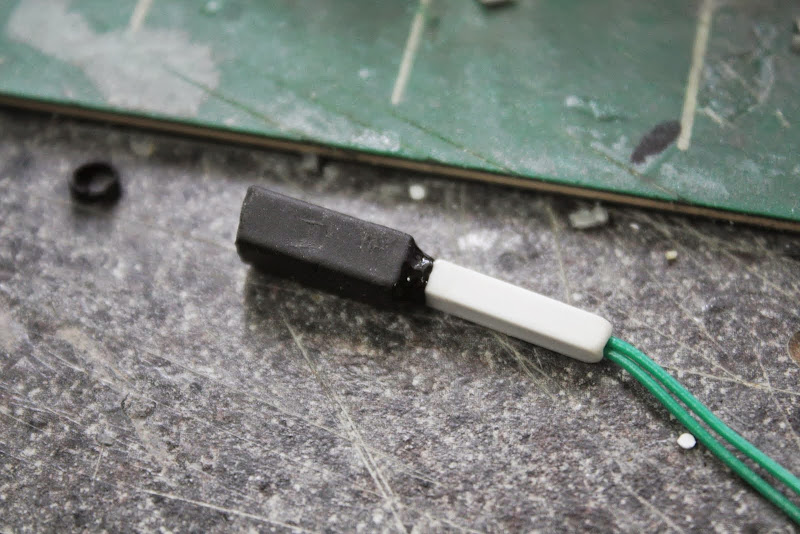 Glued the screen in position on the accessories rail, i covered it in masking tape to protect its surface, it will eventually have a translucent decal applied later, this took me alot of time to get the positioning correct. The LED had to be the correct depth inside the square tube to 'project' a correct size square to fit the screen size. 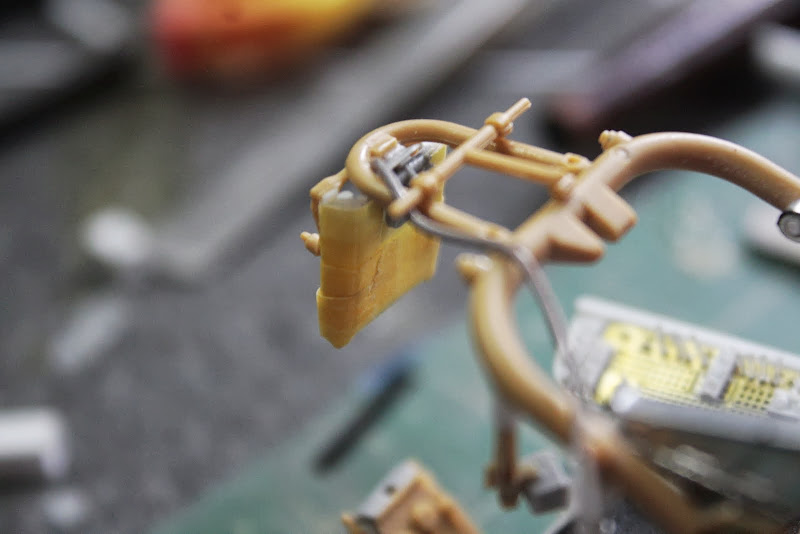 Fitted two smaller drop down displays/control boxes. 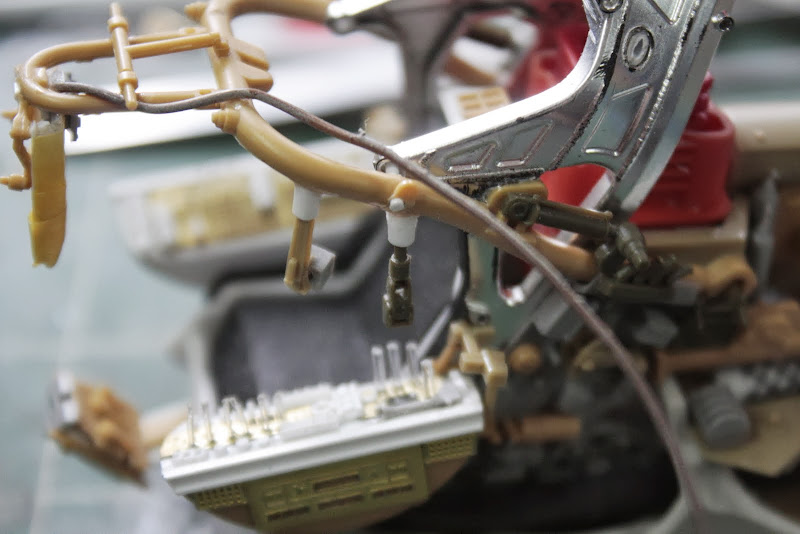 HUD light test. 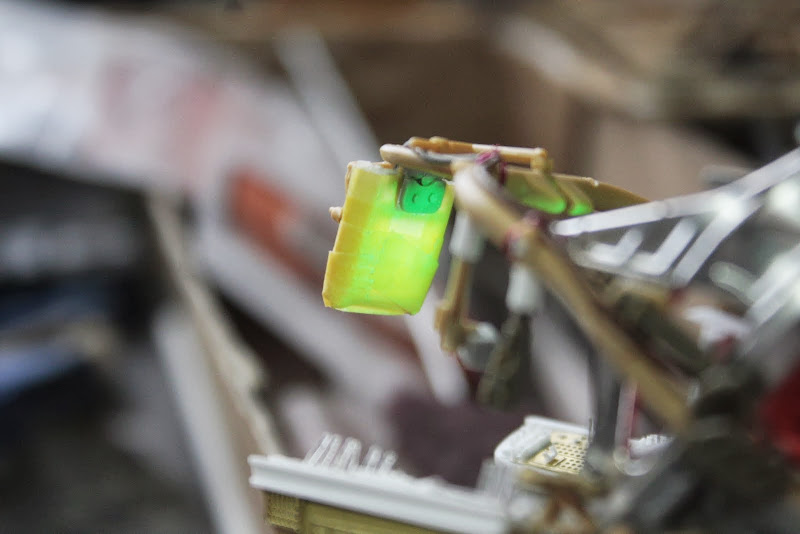 Projector in position, it works perfectly. I'm so chuffed right now. ;D 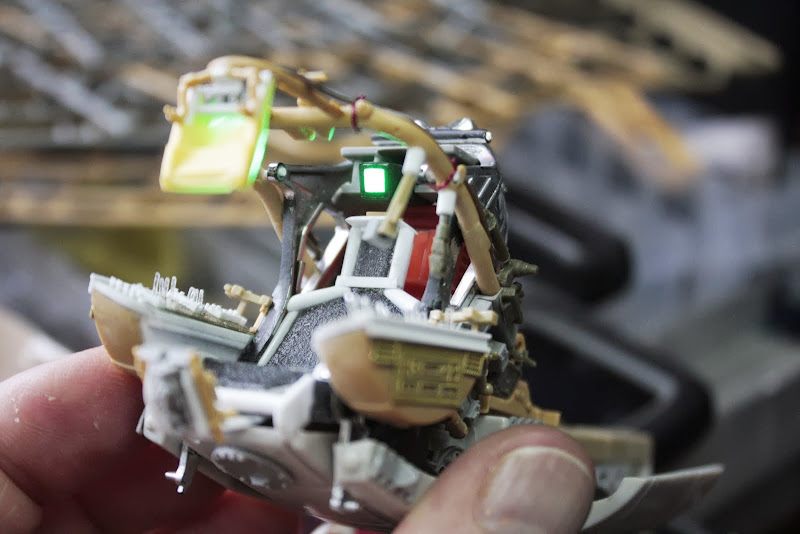 Another control box with floppy disc material behind the PE 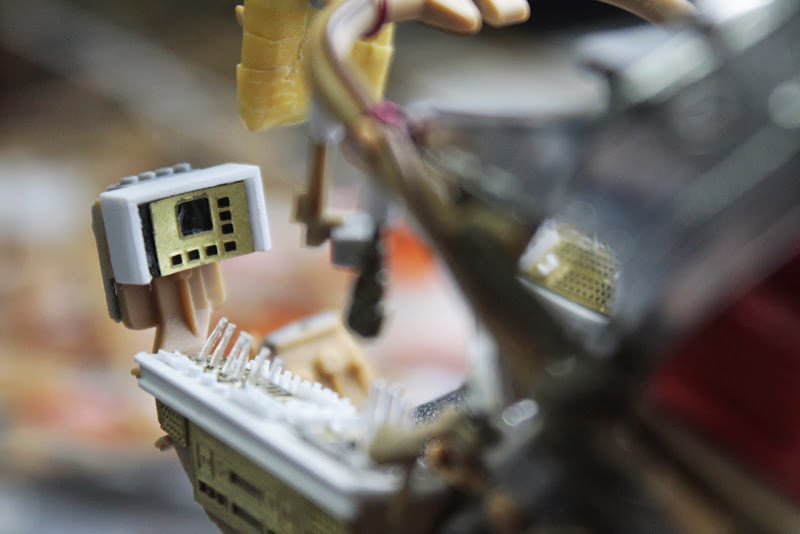 Ready for masking then on to..........primer. 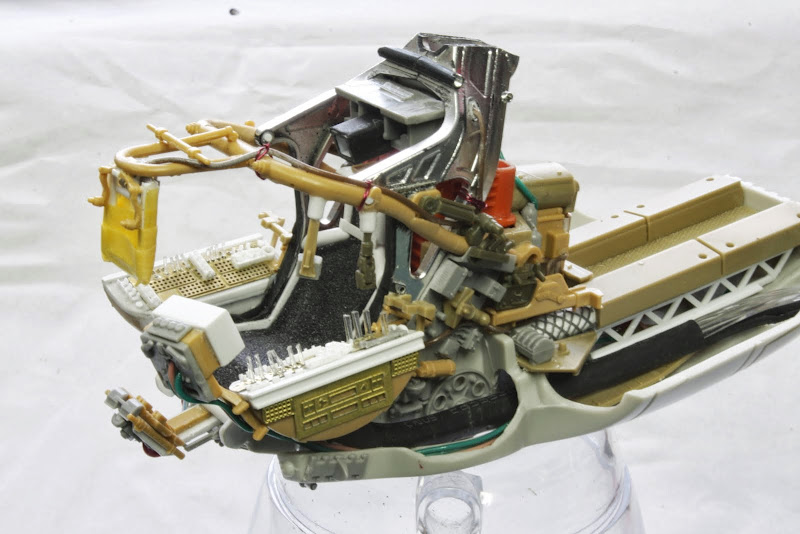 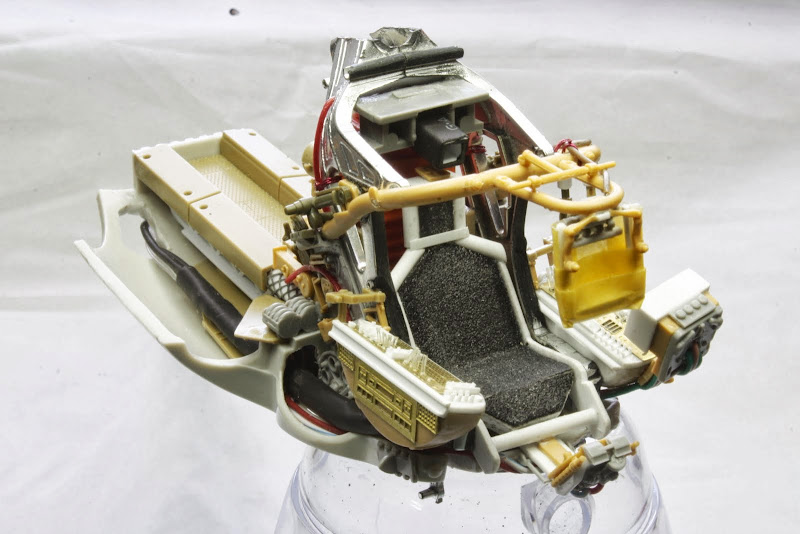 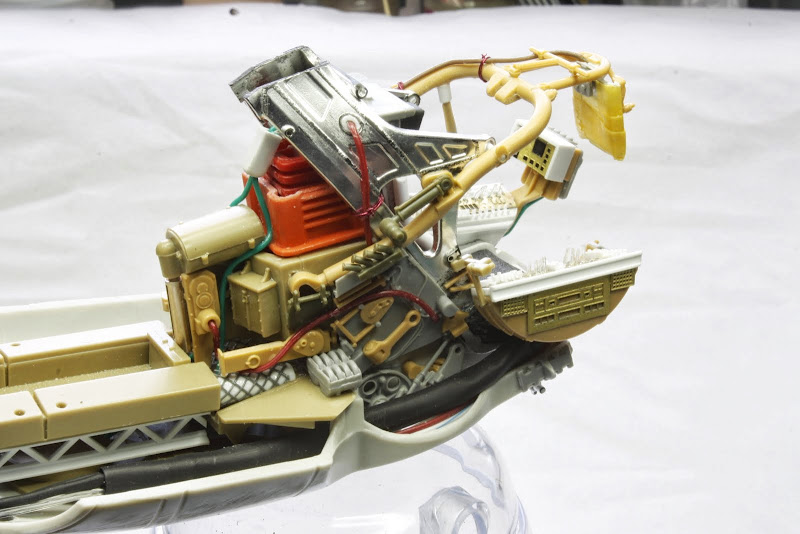 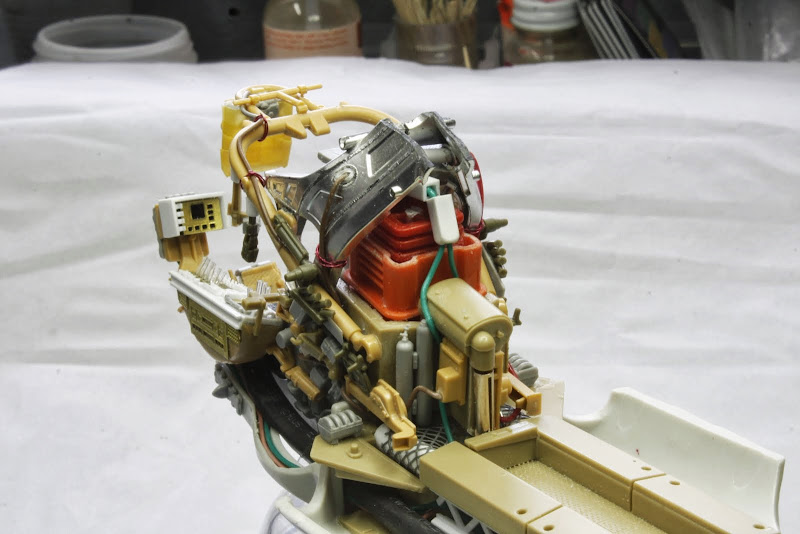 Test fit with Kiko, my pilot (my father-in-law calls me Kiko, don't ask me why cuz i don't know) 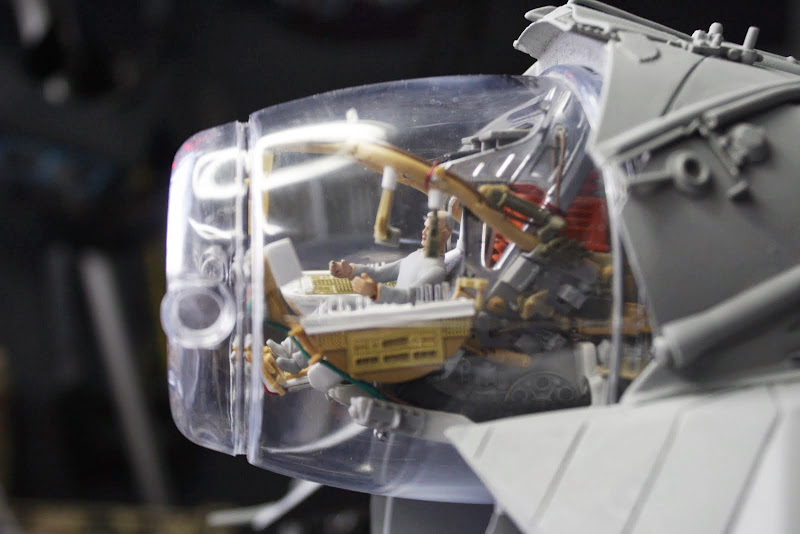 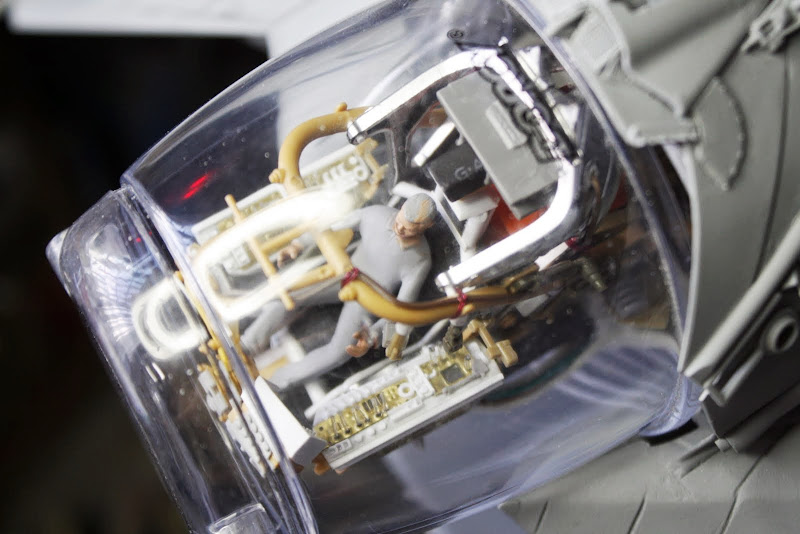 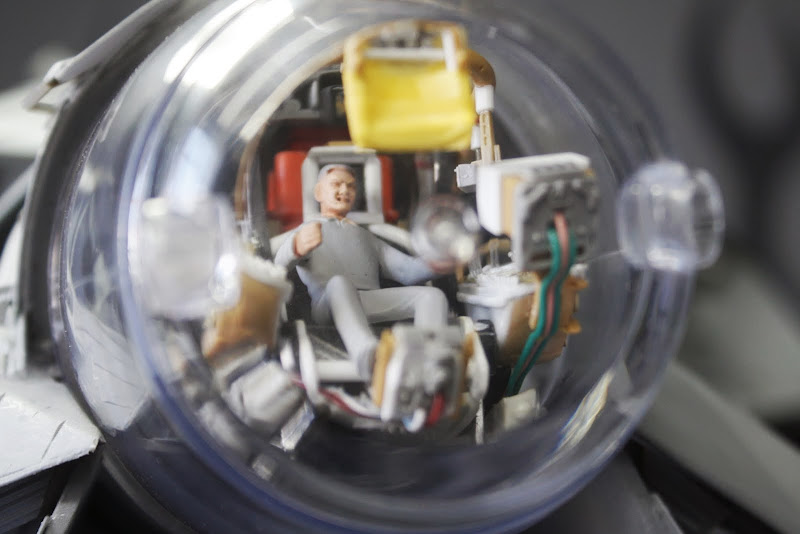 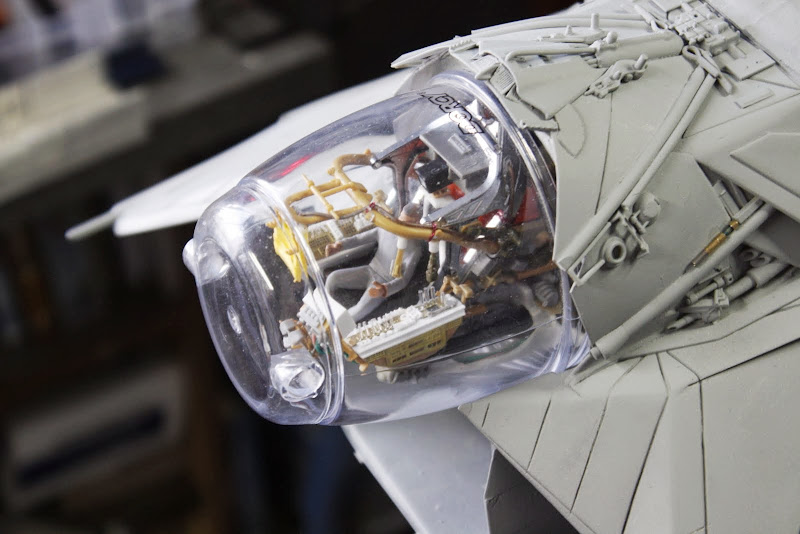 Masked everything up and now, you guessed it, Primer, Mmmmmmmmmmmmmmmmmm Primer 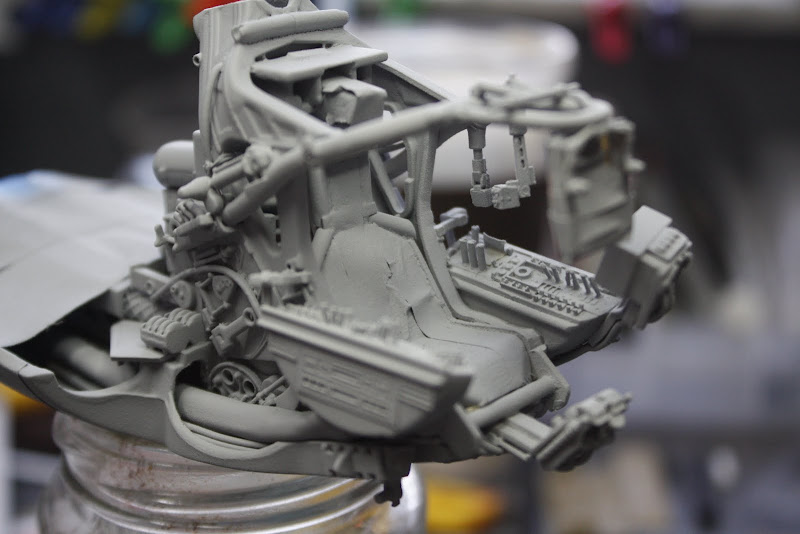 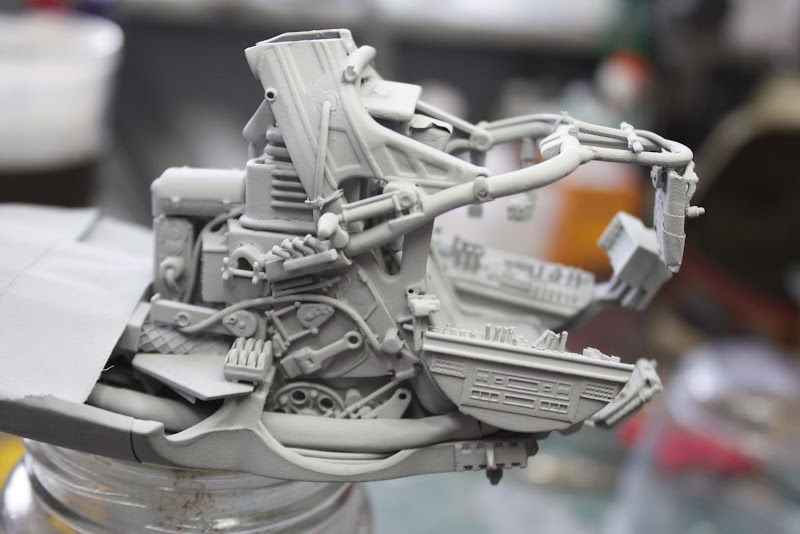 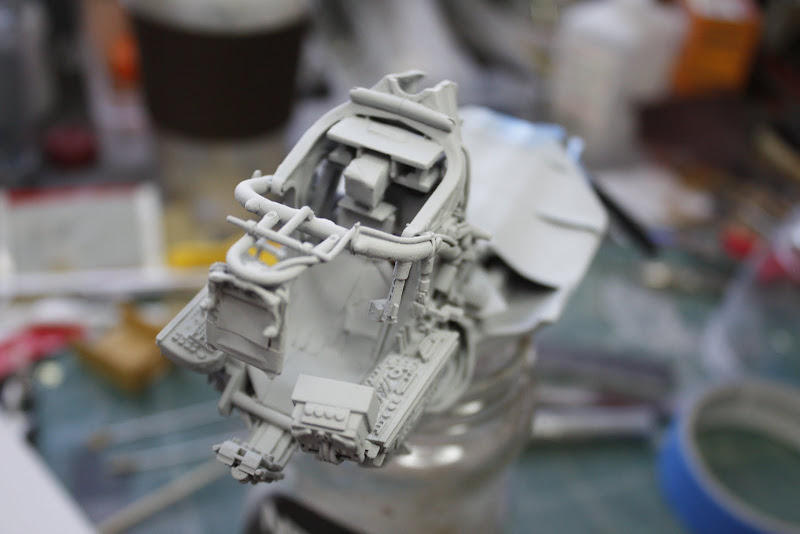 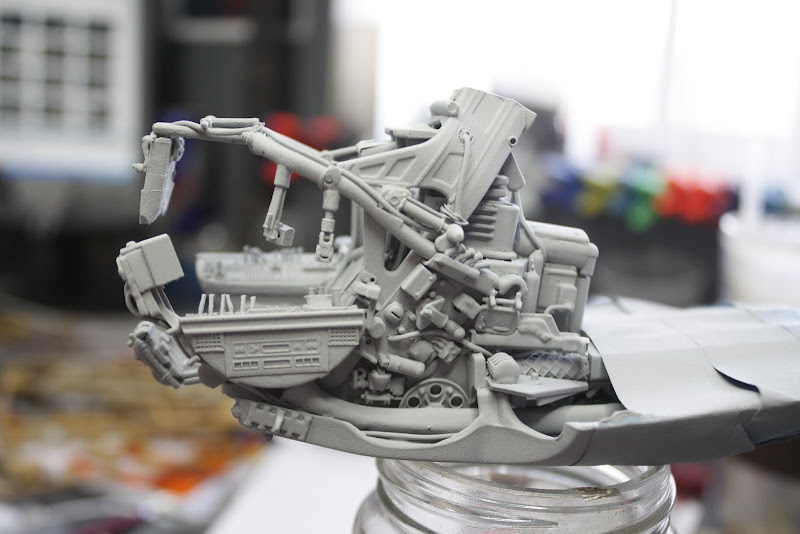 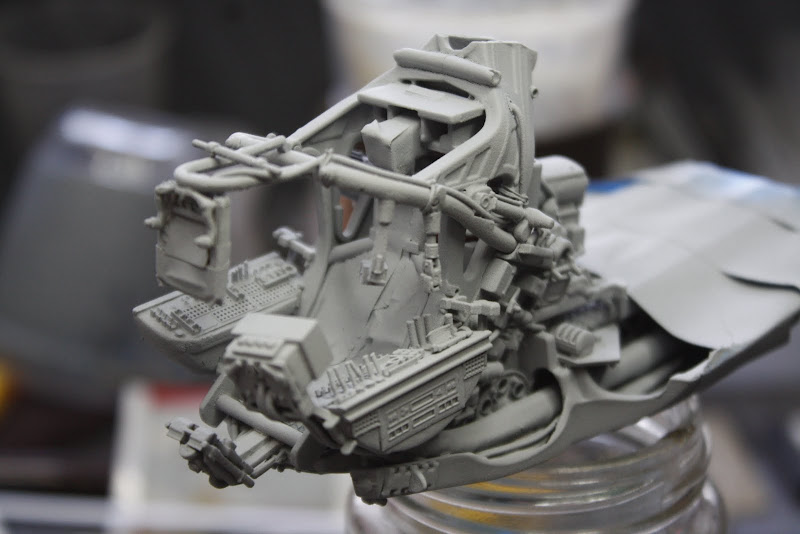 Thats all so far, hopefully i will get some more up later in the weekend. Next is the corridor section of the cockpit. Take care Gag |
|
|
|
Post by dupes on May 24, 2013 18:18:50 GMT -5
Good god! It gets better with every update!!!
Question - can you prime LEDs? How's that work out? Prime it, and then cut to length revealing the tube inside?
|
|
thenylongag
Full Member
Sept2013 MoM Winner
Member since: June 2012
Yes, we have 'NO' bananas
Posts: 304
Jun 7, 2012 11:20:57 GMT -5
Jun 7, 2012 11:20:57 GMT -5
|
Post by thenylongag on May 25, 2013 13:45:14 GMT -5
Good god! It gets better with every update!!! Question - can you prime LEDs? How's that work out? Prime it, and then cut to length revealing the tube inside? Not sure what you mean by 'prime' the LED's, do you mean primer as in paint them? Gag |
|
 Get the paint out, paint it then start another. I'm hooked.