thenylongag
Full Member
   Sept2013 MoM Winner
Member since: June 2012
Yes, we have 'NO' bananas
Posts: 304
Jun 7, 2012 11:20:57 GMT -5
Jun 7, 2012 11:20:57 GMT -5
|
Post by thenylongag on Jun 14, 2012 11:42:47 GMT -5
Hello folks, Let me bring my new friends at the Modelers Social Club up to speed, are we all sitting comfortable, then I shall begin..........Along time ago in a galaxy far, far........ Hold on a minute, wrong story. Our story begins in October 2011 & my life had gotten into a bit of a rut, always sitting round watching to much TV, smoking to much, drinking to much, generally letting my brain go to waste & with no real interests. After surfing the web one night, I came across young Mr. Scott Girvan’s videos on the U-Tube; I hadn't seen anything so cool in a long time and was tremendously motivated by what I was seeing. I hadn't modeled for quite some time and I had my dad’s old stuff just sitting in a spare bedroom collecting dust. It was time to start modeling again I decided, but I didn't want to do one of the models in my megre stash (7) I wanted to do something no one had seen before, plus I wanted a different challenge to an OOB kit. I wanted to go free style baby. So, I decided to scratch build an original Spaceship/craft/sum-it-or-other. I was determined not to copy a style or genre. Very difficult with me being a big Star Wars fan since 1977. I was nine at the time the movie came out so most of the designs were burned into my brain pretty good. I decided I didn't want it to be from a galaxy far far away, I thought it would be more interesting to go towards a more feasible design with a not to distant future kind a look. I thought about the year 3011ish should do. I wanted it also to be little bit relevant in today’s world, so, during this thinking process I just happened to be watching my sport of choice, Formula 1. Red Bull Racing had just won the F1 World championship (2011) with Sebastian Vettel driving. What about Red Bull deliveries in the 3011 I thought, (as you would) how would Red Bull get its product to where ever in 3011. Bingo? You see the Red Bull logo everywhere, plus I thought it would make a very cool paint scheme. So, I decided to build a Red Bull delivery-thingy-what-sit from the year 3011. I made a few pre-liminary sketches incorporating design elements I liked. I felt the key was the cockpit shape. I always liked the shot in Alien, when Ash (the synthetic) climbs into the pilot seat of the Nostromo, and its an underbelly canopy, with the whole planet layed out under him. So after much searching I found my canopy material and established the design from there back. I made a small model just to see if my vision of the wing profile would have ‘flow’, look ‘feasible’ & be ‘cool’, my 3 main criteria for this build. So after that ‘short’ intro, here are some ‘story so far’ pix. Basic parts layout. 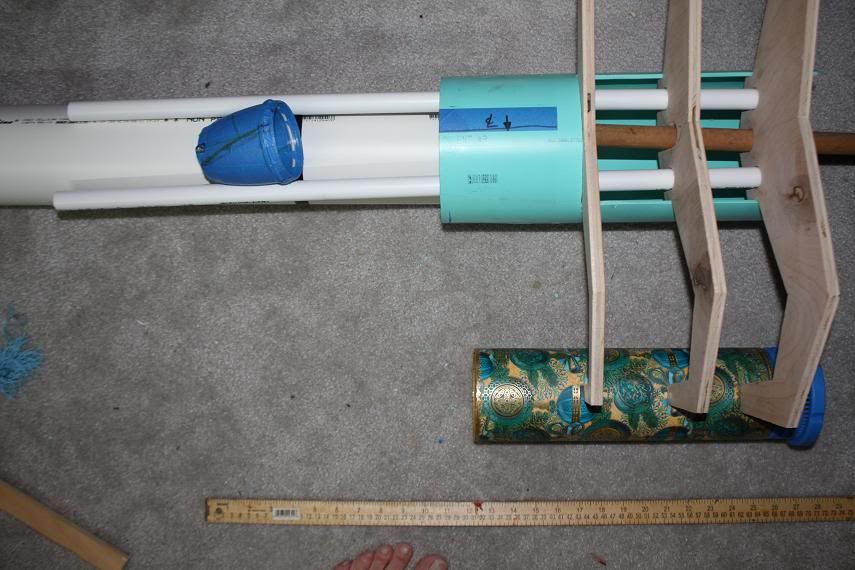 With everything taped in place and on the stand 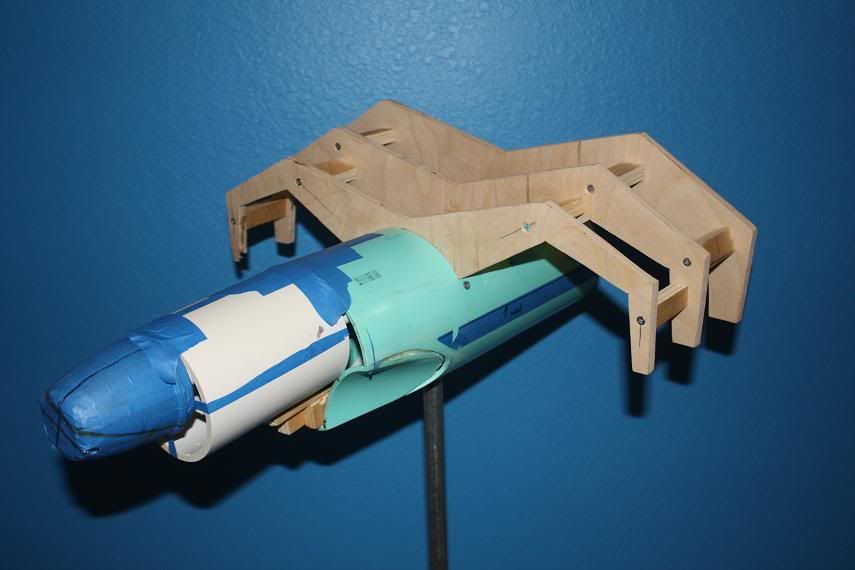 Test skins made from regular cardboard. 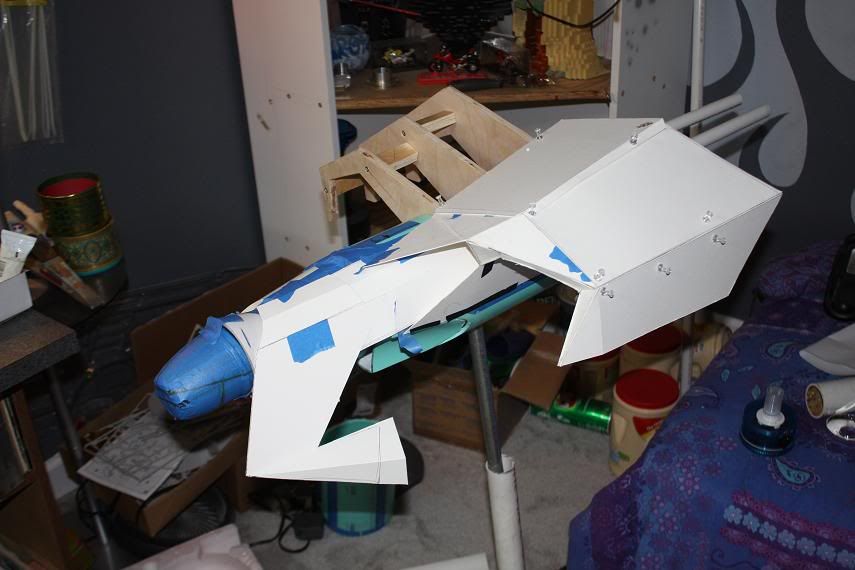 The rear main body basic shape established and fabricated 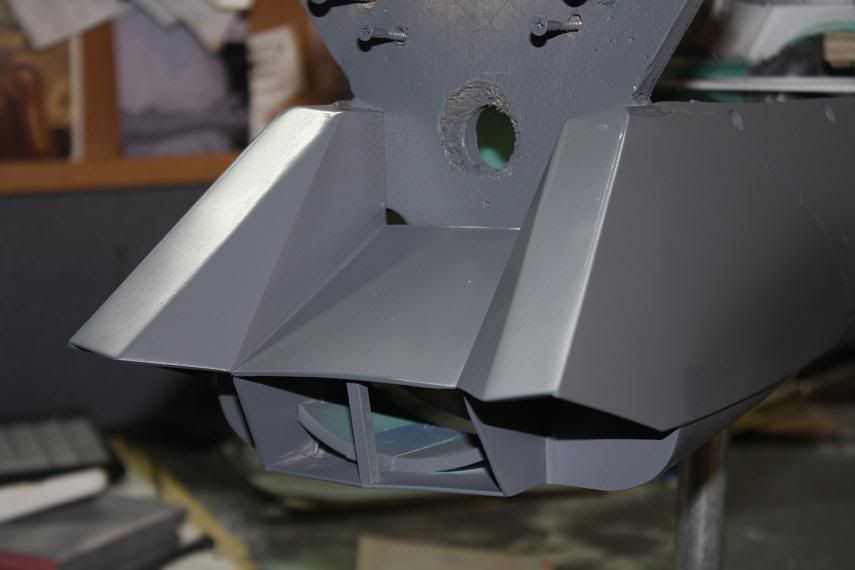 With more top wing elements mocked up in cardboard. 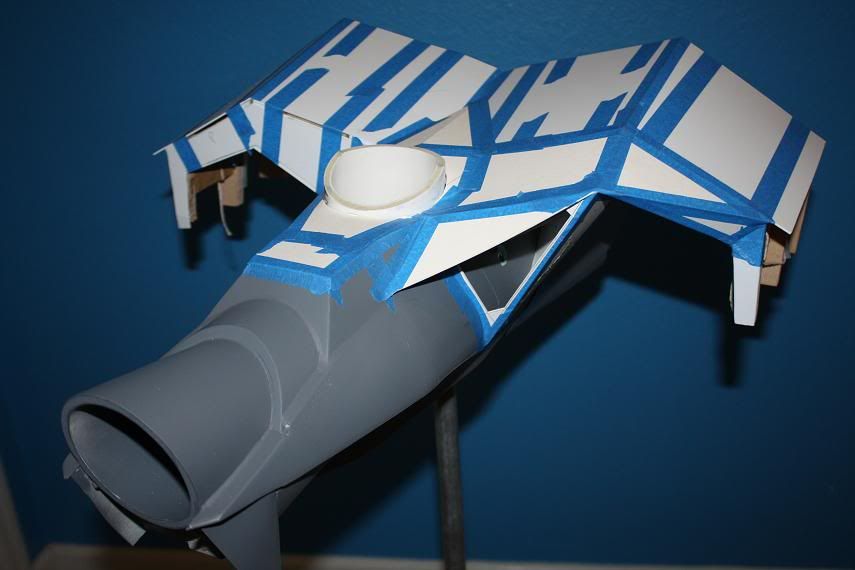 Front side hydrogen intakes construction and finish. 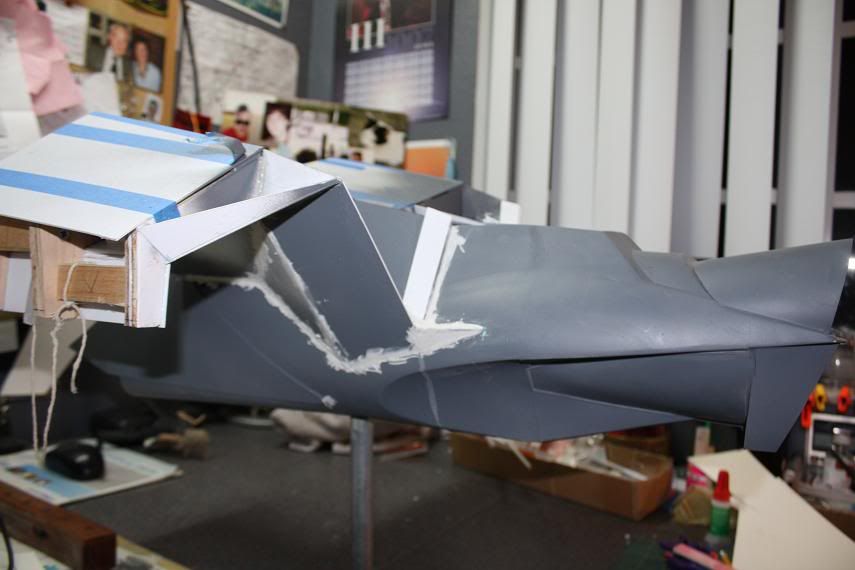 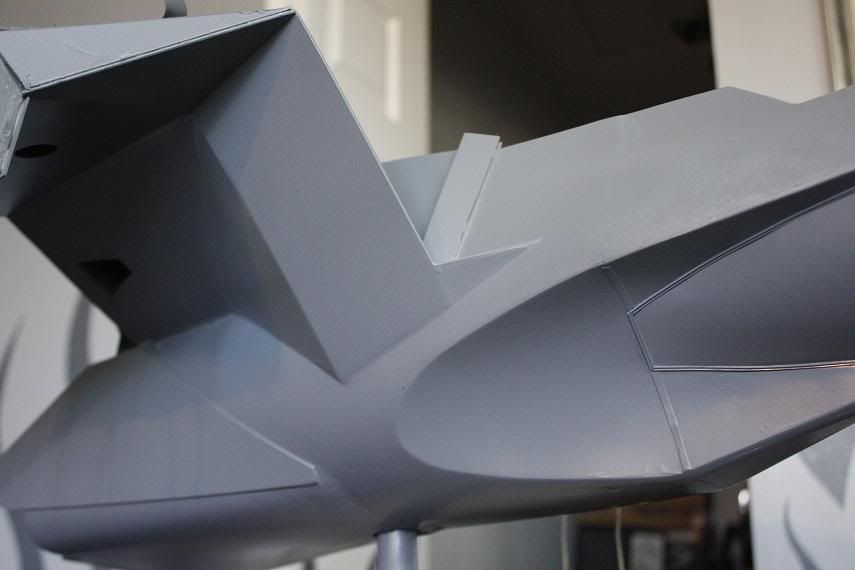 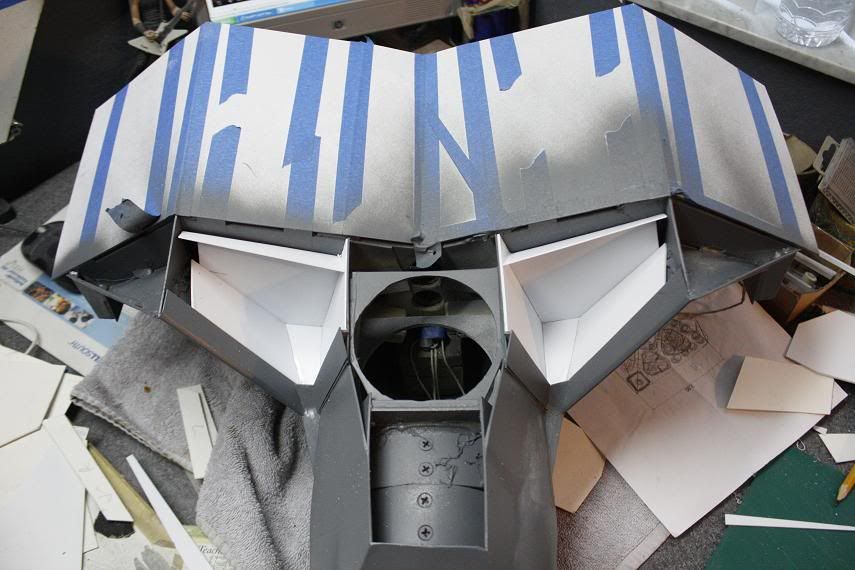 Internal workings of the side intakes, my first kit bash experience. 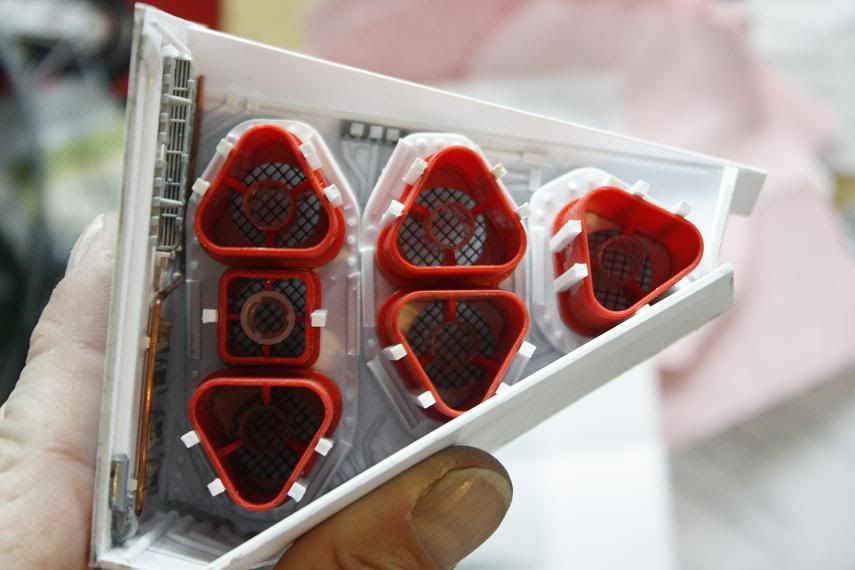 Top detail tubs. 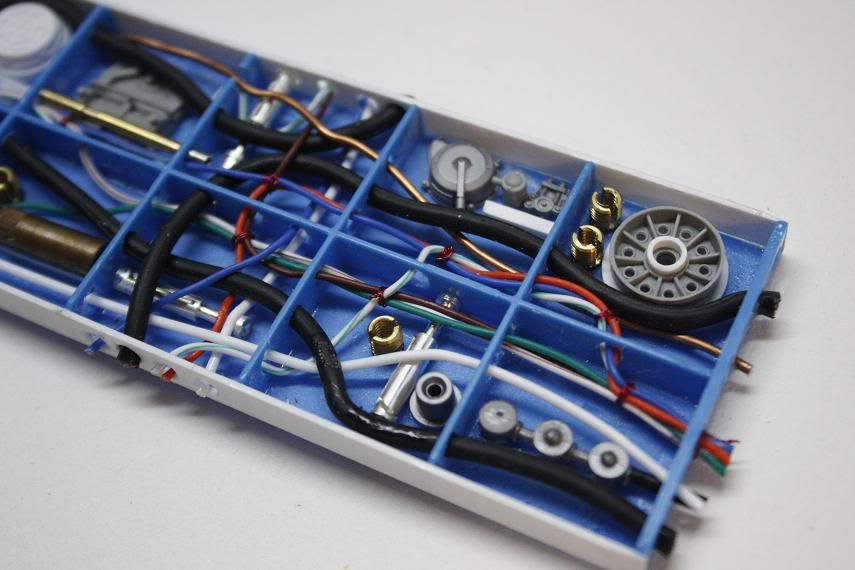 Detail tubs in position after top profile re-work 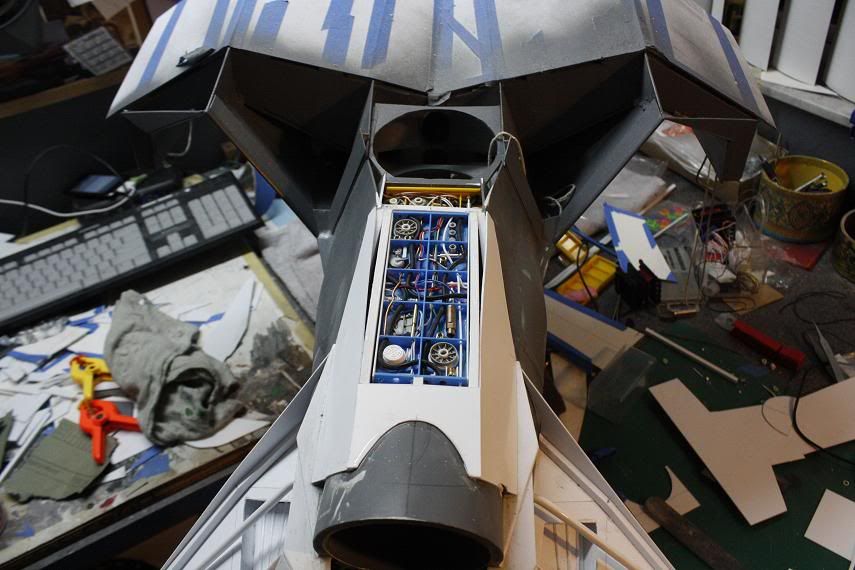 Rear central section basic shape. 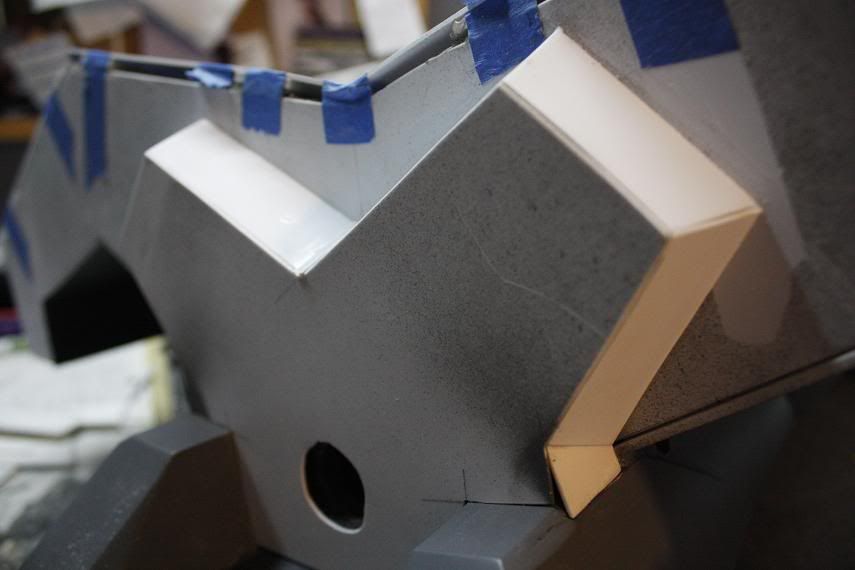 Paint on the side intakes. 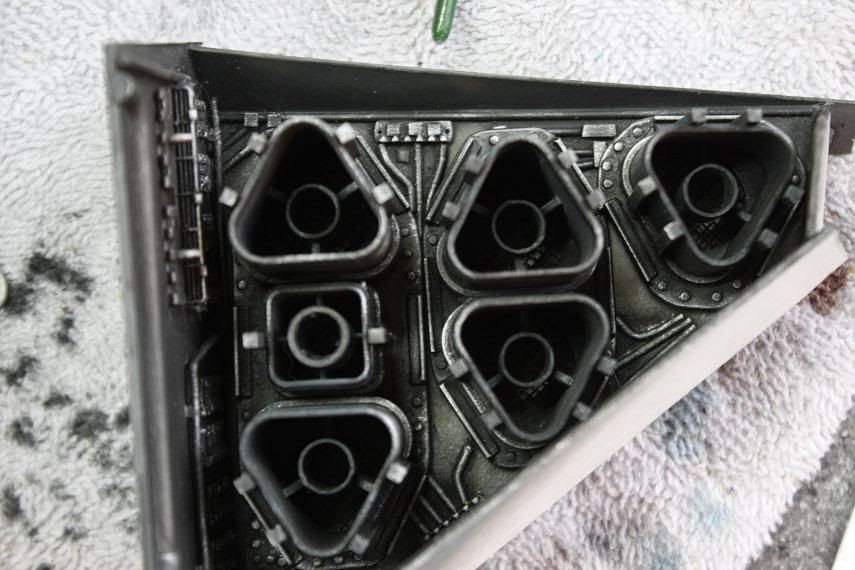 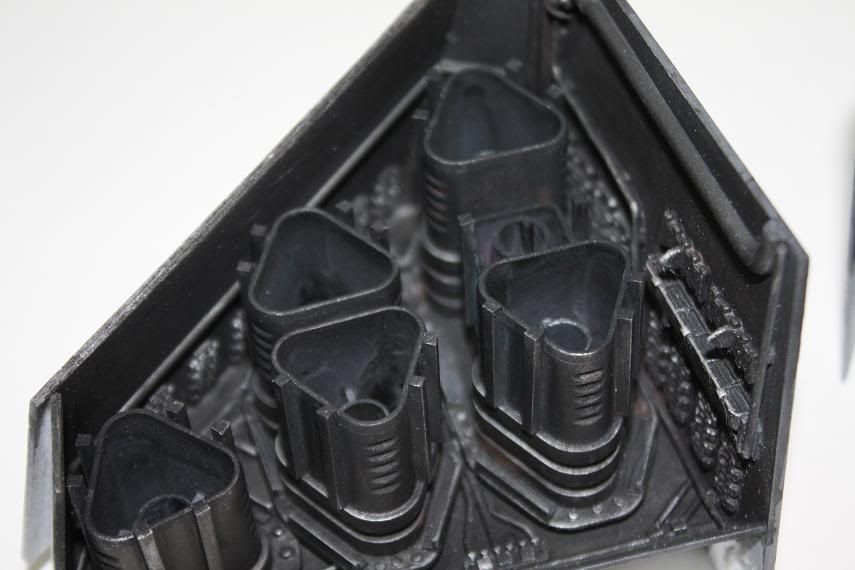 Paint on the top detail tub sections. 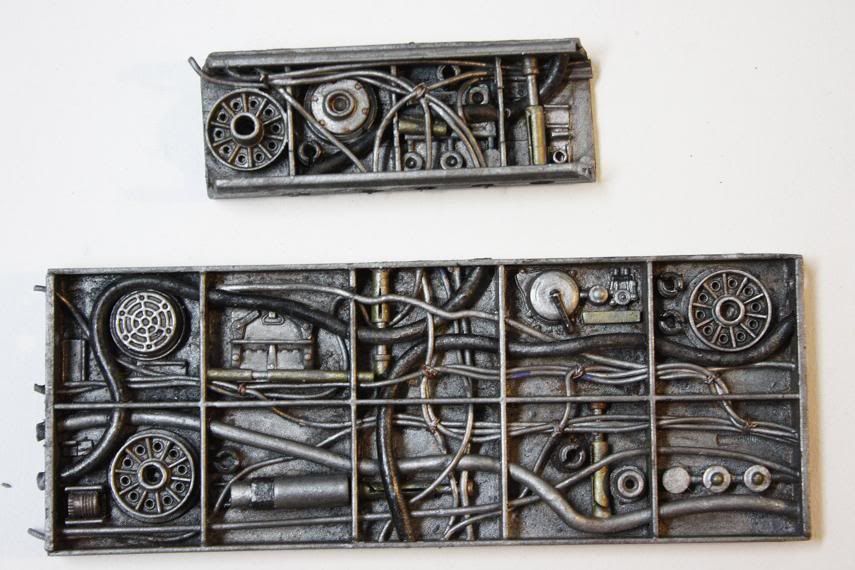 Side intakes in position with outer vanes. 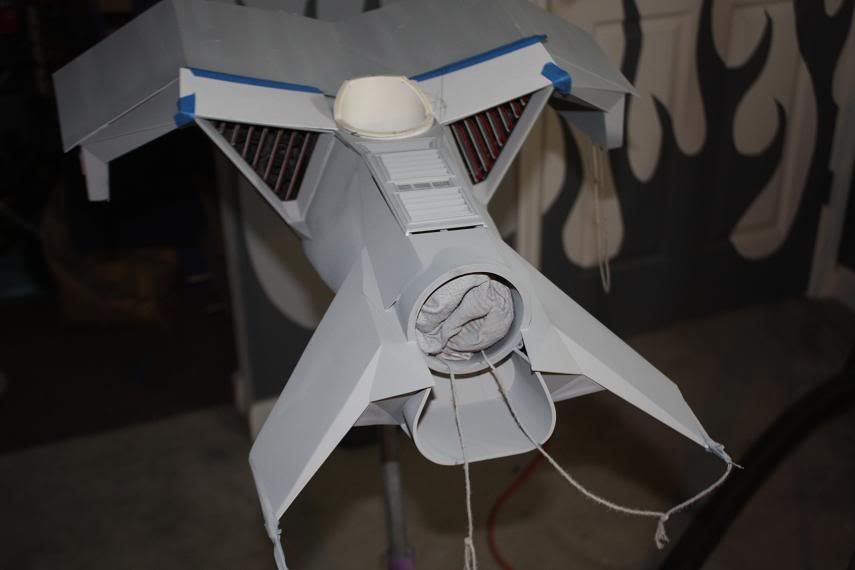 Top detail grill cover. 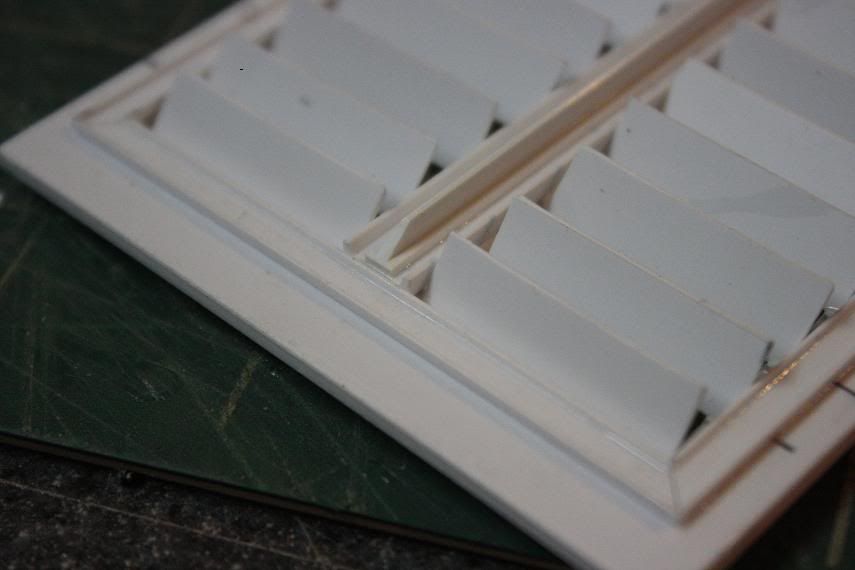 Airlock raw tub. 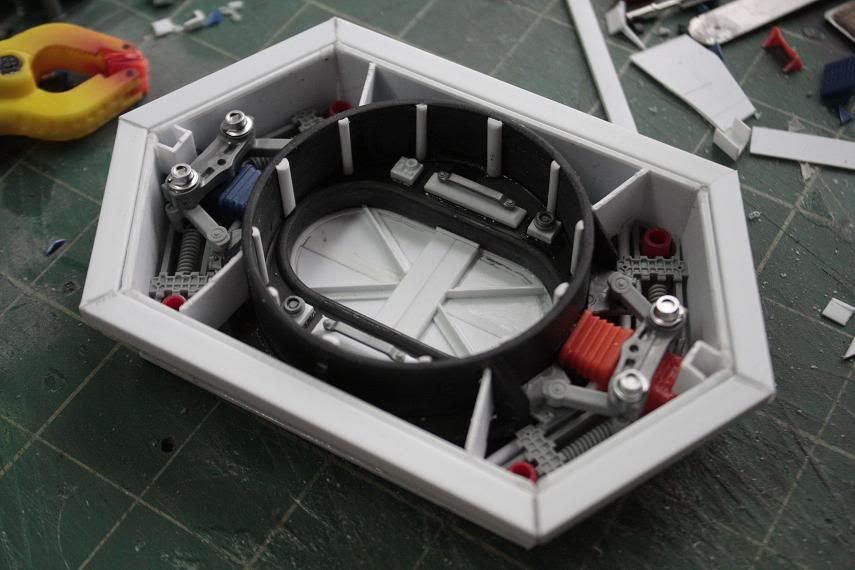 Airlock primered. Mmmmmmmmmmm primer 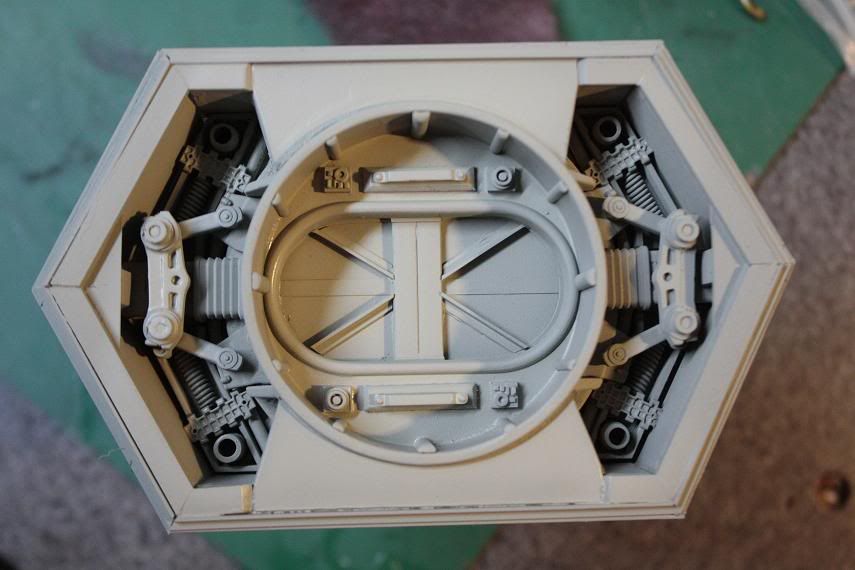 My first light test with all wires installed with switch and chip in main body 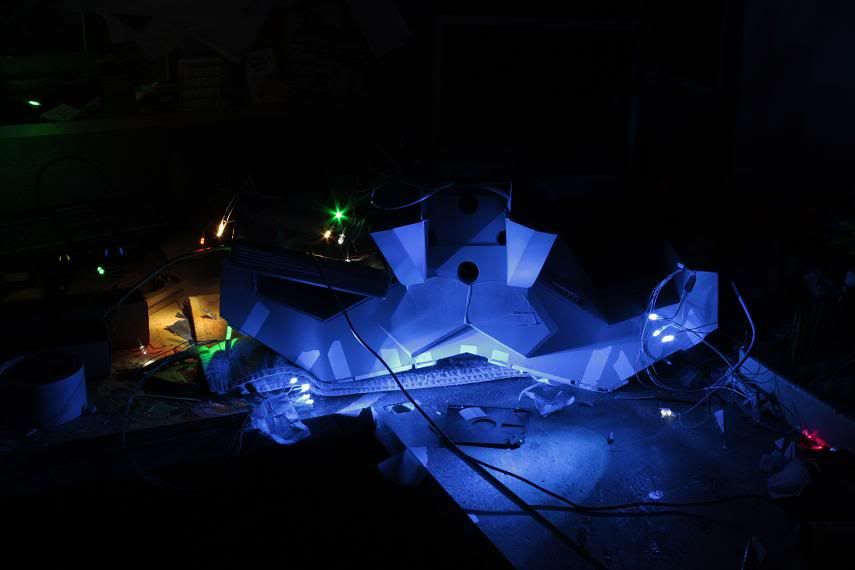 Top detail tub for rear central section. 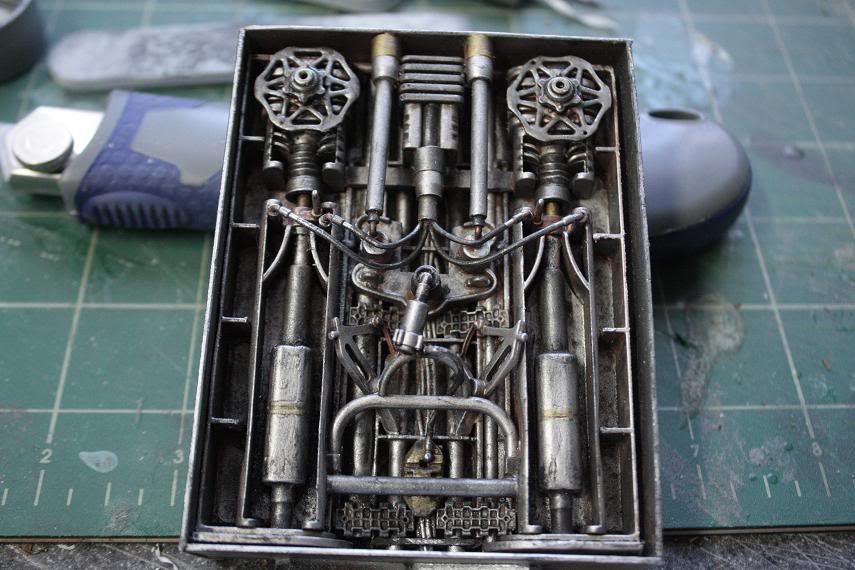 A few beauty shots with the main body shape finished. 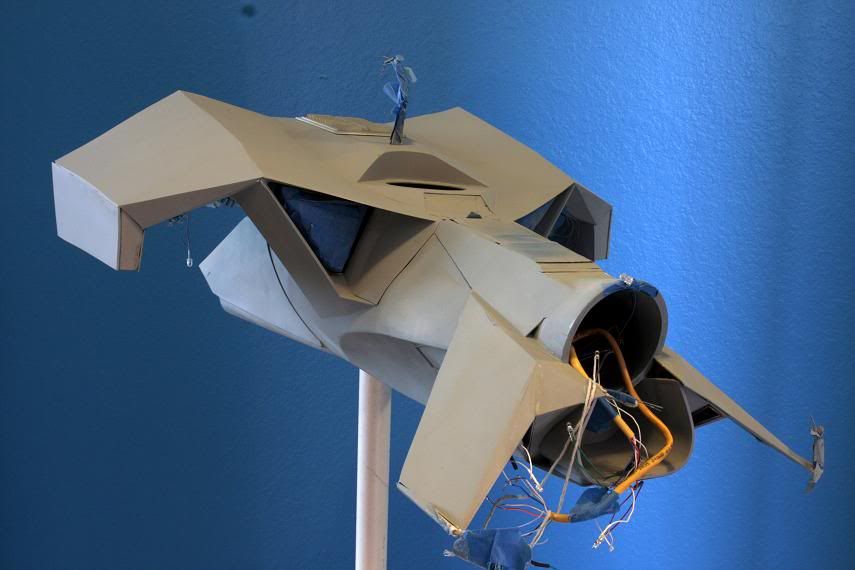 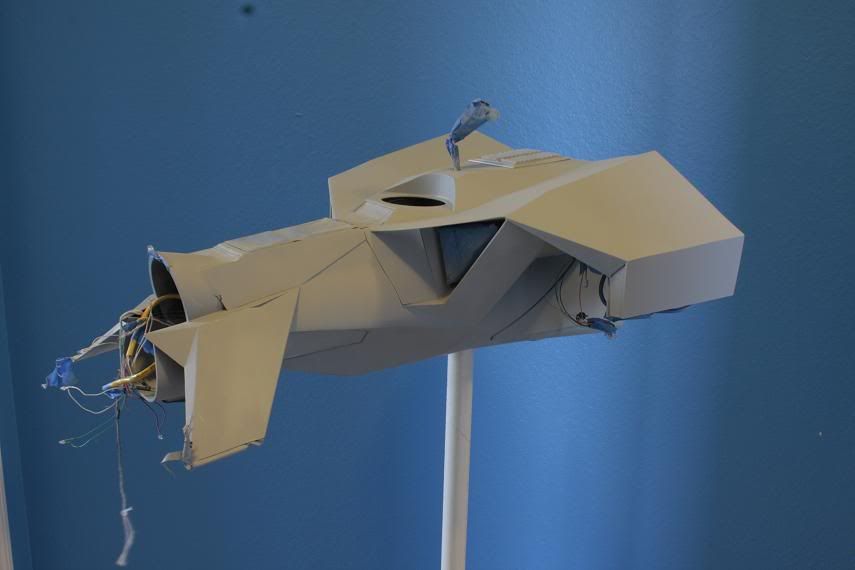 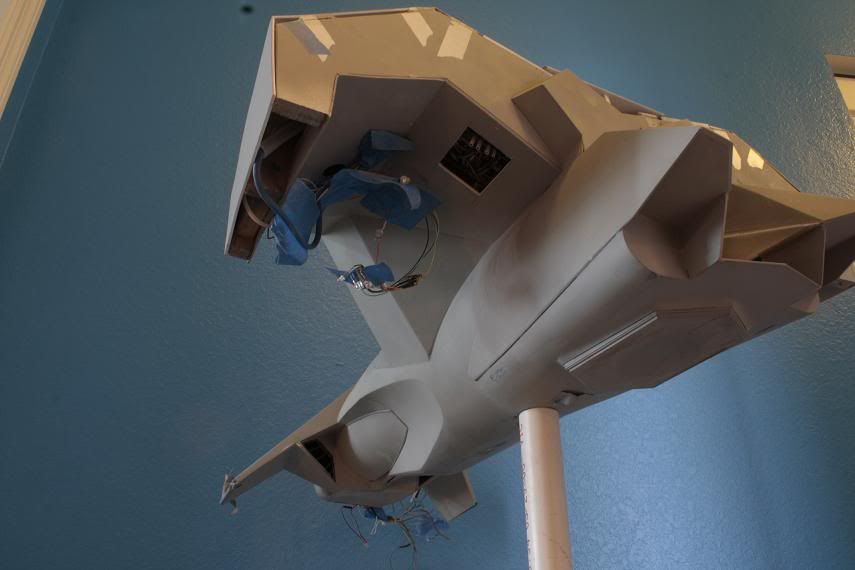 Top center detail all primer up ready for the radar array 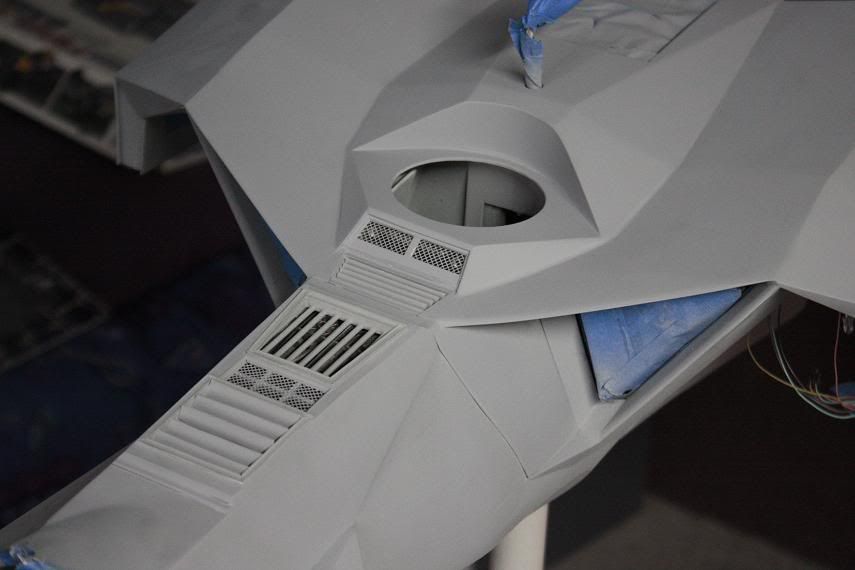 With the main body shape basically complete it was on to the engines. Engine front intake. 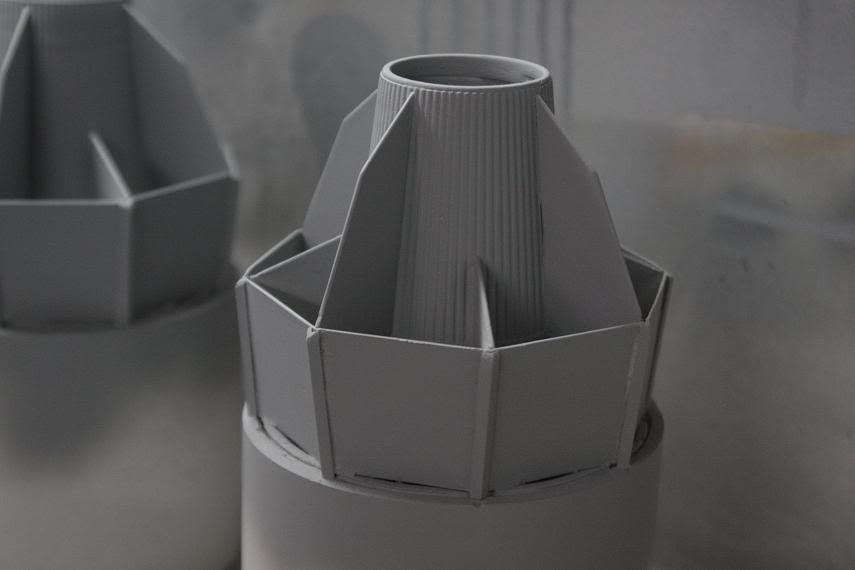 Engine rear light test. 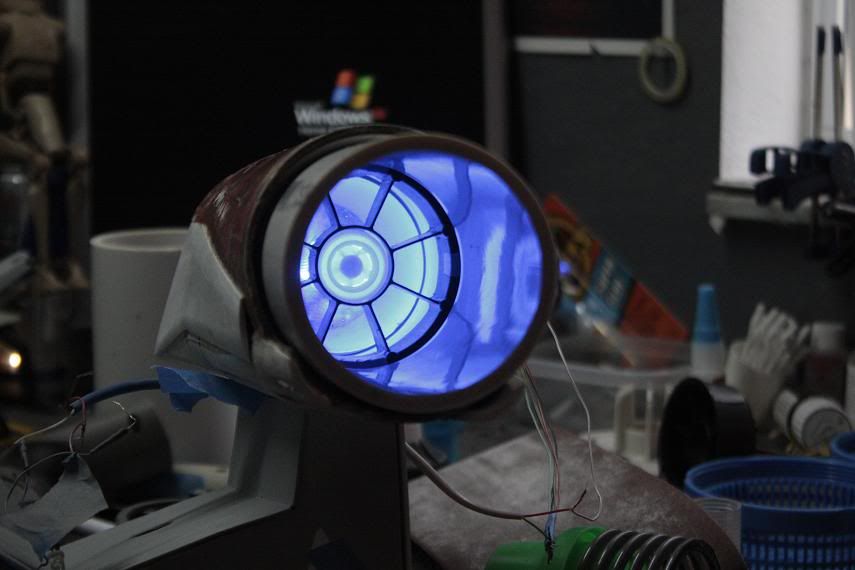 Outer Engine fairings. 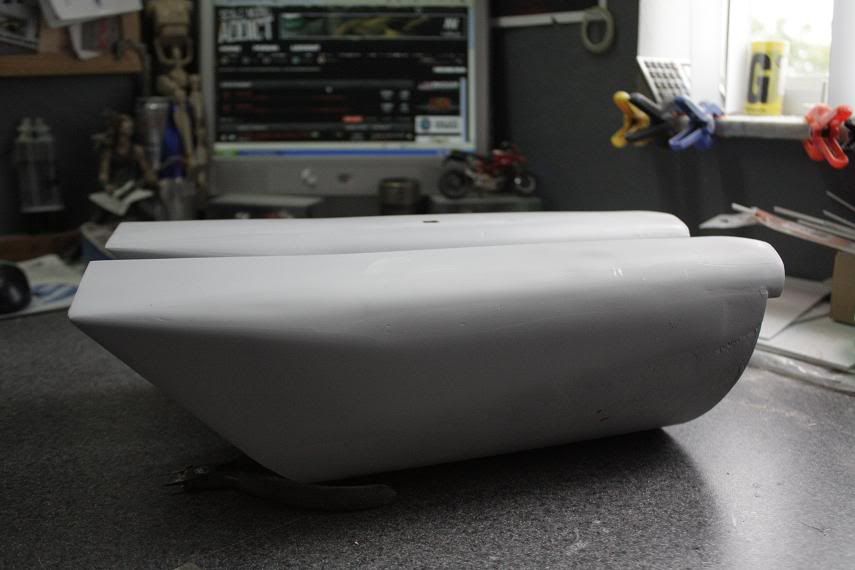 Rear engine deflector components 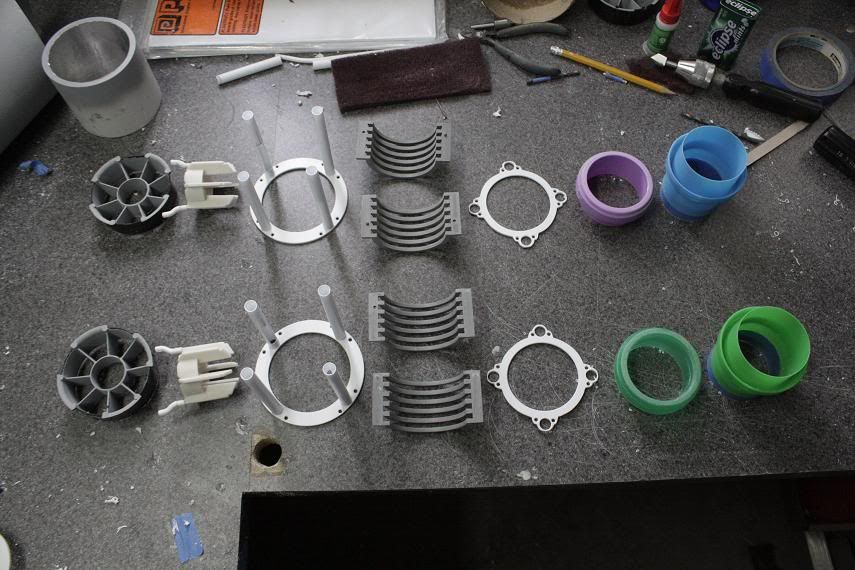 I'm currantly working on these assemblies, mainly the rear nozzels and vector vanes Sorry this post is so long but i wanted to give you the full story. My next will be shorter, i promise  Many thanks for looking, comments are always very welcome Gaggles Mcgee |
|
|
|
Post by Mence on Jun 14, 2012 13:11:32 GMT -5
Fantastic imagination, lovely stuff!
|
|
|
|
Post by `Boots` on Jun 14, 2012 15:48:04 GMT -5
Oh man that is terrific...........love the lighting!! ;D
|
|
thenylongag
Full Member
   Sept2013 MoM Winner
Member since: June 2012
Yes, we have 'NO' bananas
Posts: 304
Jun 7, 2012 11:20:57 GMT -5
Jun 7, 2012 11:20:57 GMT -5
|
Post by thenylongag on Jun 14, 2012 17:32:39 GMT -5
Thank you chaps for the kind words. I really have re-cycled a lot of stuff on this build as my funds don't allow me to buy lots of kits to 'Bash' from. I did raid my stash in the beginning and assingned 2 Tamiya 1/12th MotoGP Honda RC-V211's for mainly the engine assemblies, plus i purchased a 'flash-tastic' Revell U.S.S Missouri 1/700th & a Dragon 1/35th Soviet SU-100 tank destroyer (don't hate me Armour folks). I think i may have to get a few more, to fill out the back of the ship, which is going to have a new style of futuristic towing hitch i designed.  There are lots of 'house hold items' also Incorporated, including detergent bottle caps, mouth wash bottle caps, vodka pouring spout thingies  , pen & pencil holder, wine bottle gift tubes and an assortment of swimming pool pump accessories to name a few. The lights are very simple, the same as you would see on most aircraft, i think you can overdo the lights and make it look more like a fairground ride. ;D Thanks for stopping by. Gag1.0 |
|
multicam
Senior Member
   
Member since: January 2012
Nate
Posts: 2,039
Jan 10, 2012 14:35:41 GMT -5
Jan 10, 2012 14:35:41 GMT -5
|
Post by multicam on Jun 14, 2012 21:26:06 GMT -5
This is really cool, Gag. Love everything about it. Inspiring, sir!  I'll be hanging around for this:) |
|
thenylongag
Full Member
   Sept2013 MoM Winner
Member since: June 2012
Yes, we have 'NO' bananas
Posts: 304
Jun 7, 2012 11:20:57 GMT -5
Jun 7, 2012 11:20:57 GMT -5
|
Post by thenylongag on Jun 22, 2012 18:39:57 GMT -5
Afternoon Movers And Groovers, Thank you all so very much for taking the time to comment it realy does mean alot . ;D Pipes, pipes, pipes. Thats pretty much all i been doin lately it seems like. After looking at the 2 engine assemblies, i decided to make a few changes. Soooo, here we go...... PIX 8) The more i looked at this, the nastier i thought the holes through the flange looked..  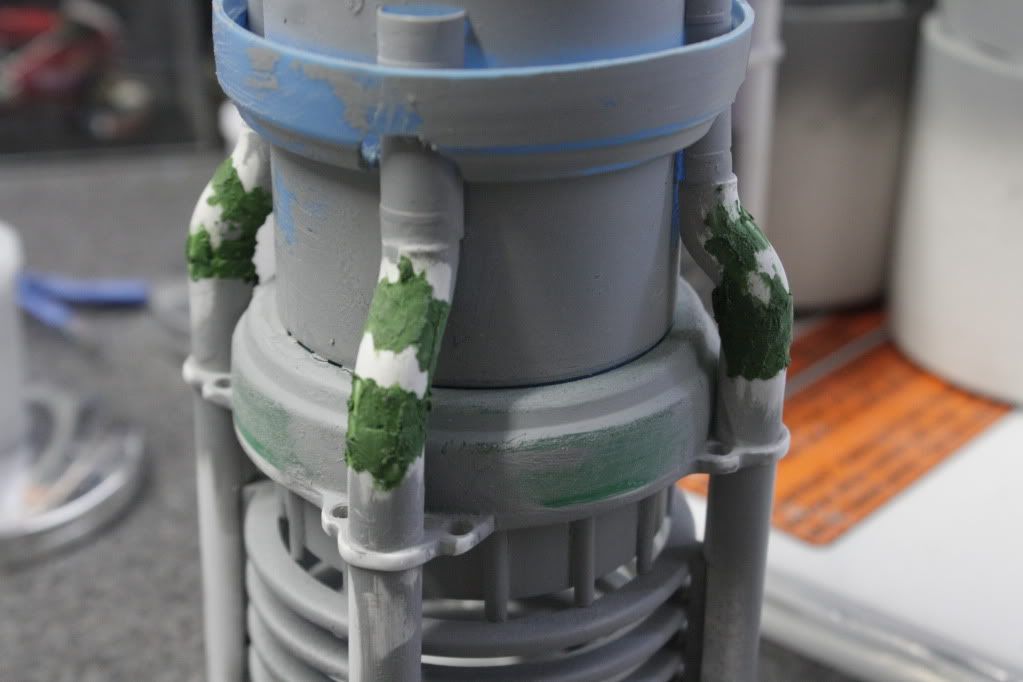 So dissasembled the top part of the assemblie and went to plan B ;D First i scored the inside of my nozzles/detergent caps, notched the tops and then slit each panel with my razor saw. 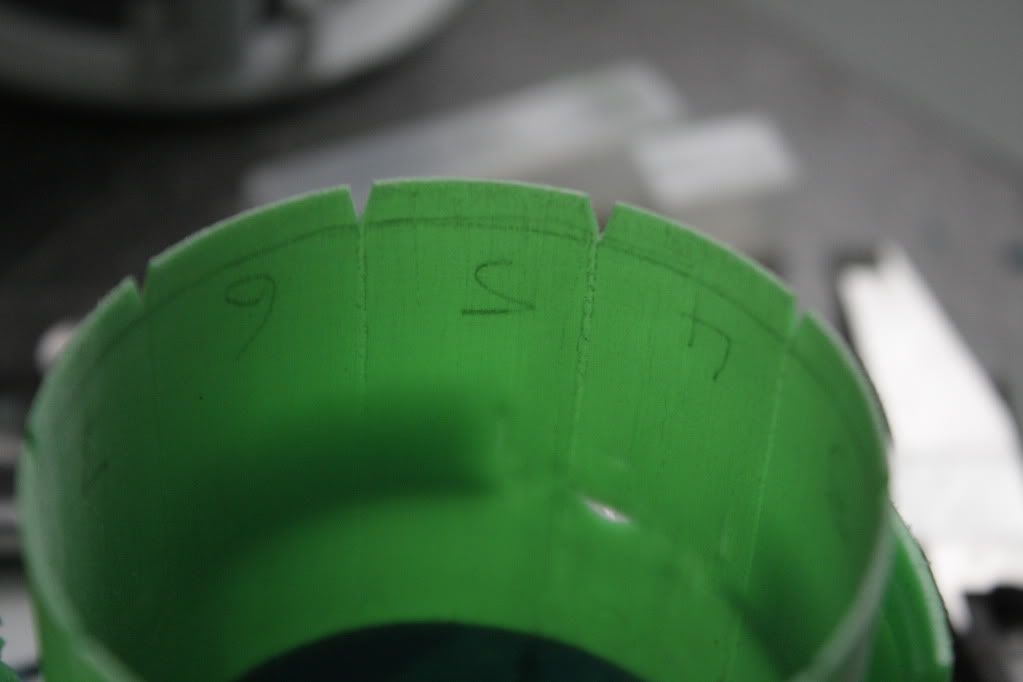 Made 10 vector thrust deflectors 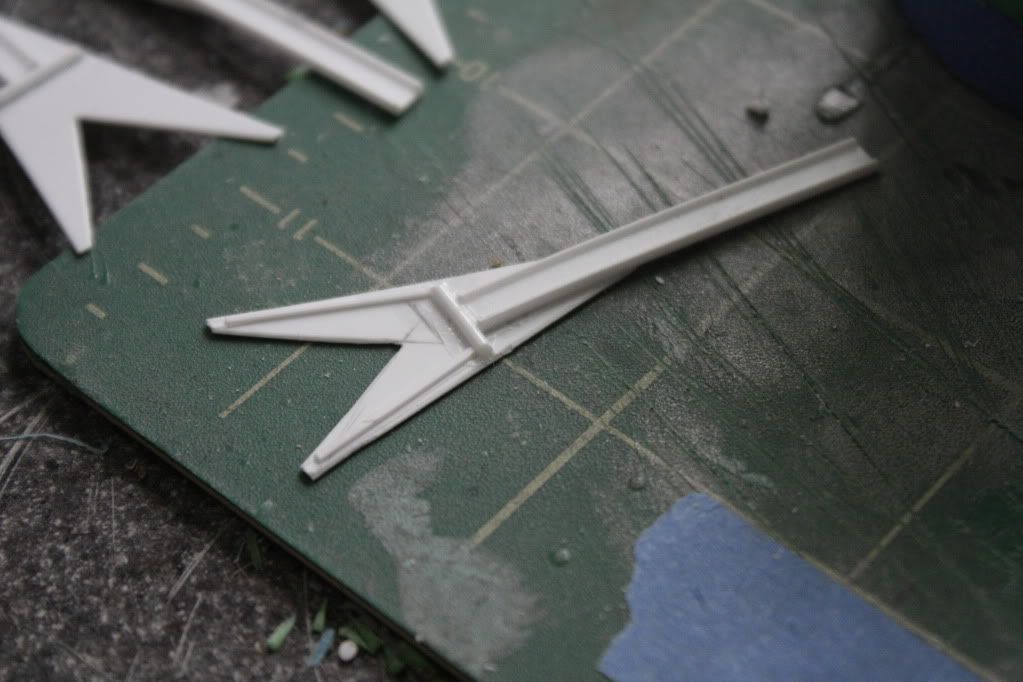 Installed them with additional actuator rods 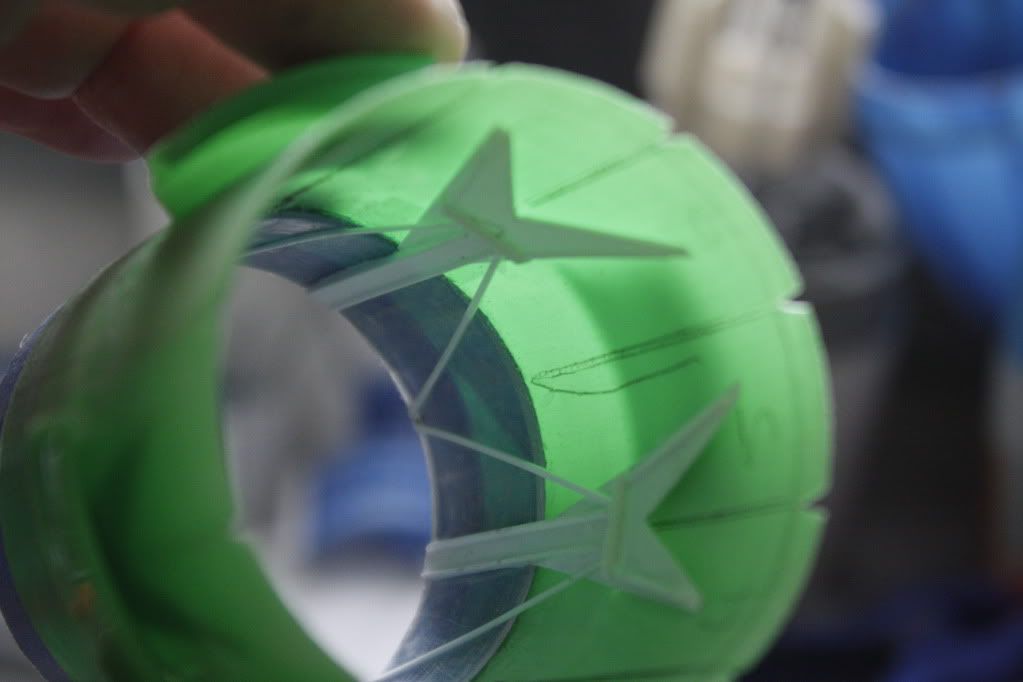 Cut the flange with wider gaps to accomodate extra details + started to add afterburner delivery greeblis. 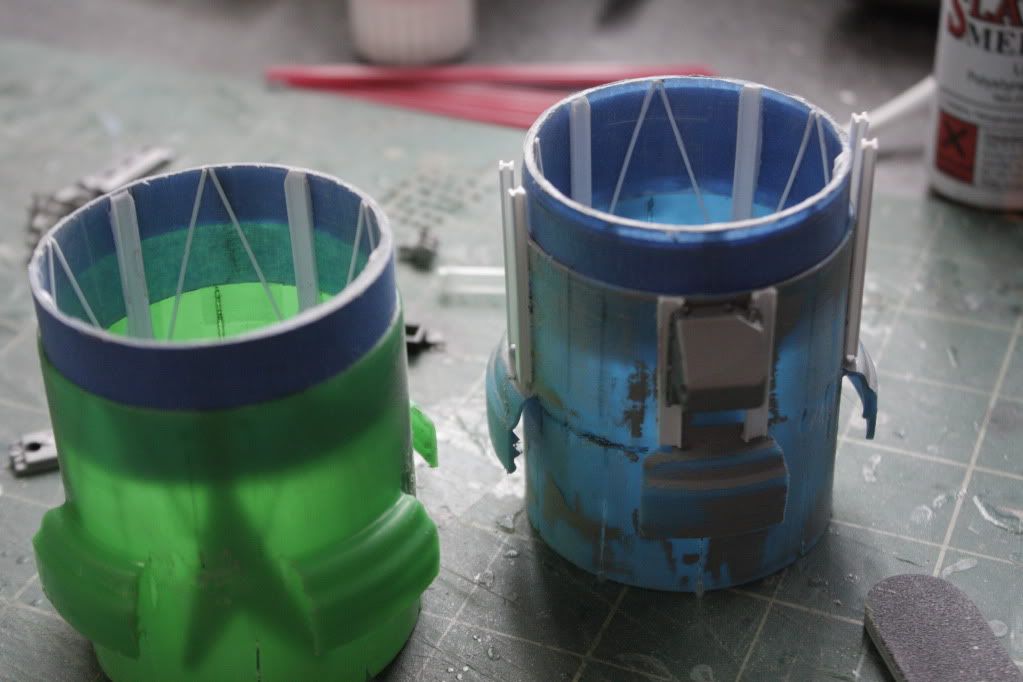 Filled and sanded the 4 support tubes & installed the external vector vane supports + more greeblies 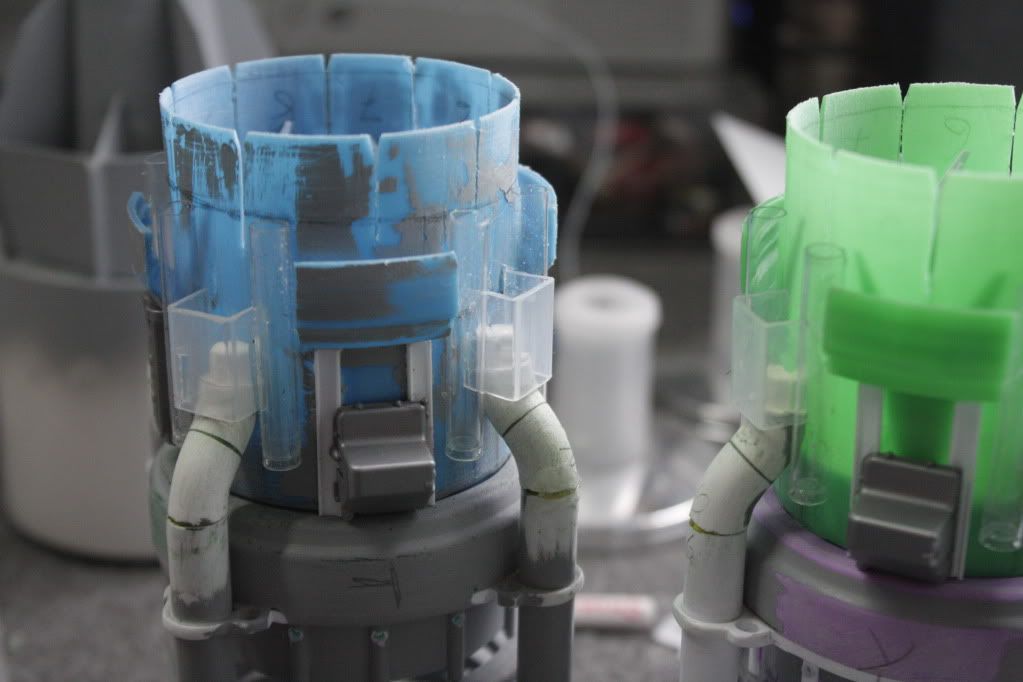 Then a coat of Primer, all together now ..... Mmmmmmmmmmmmmm Primer ;D 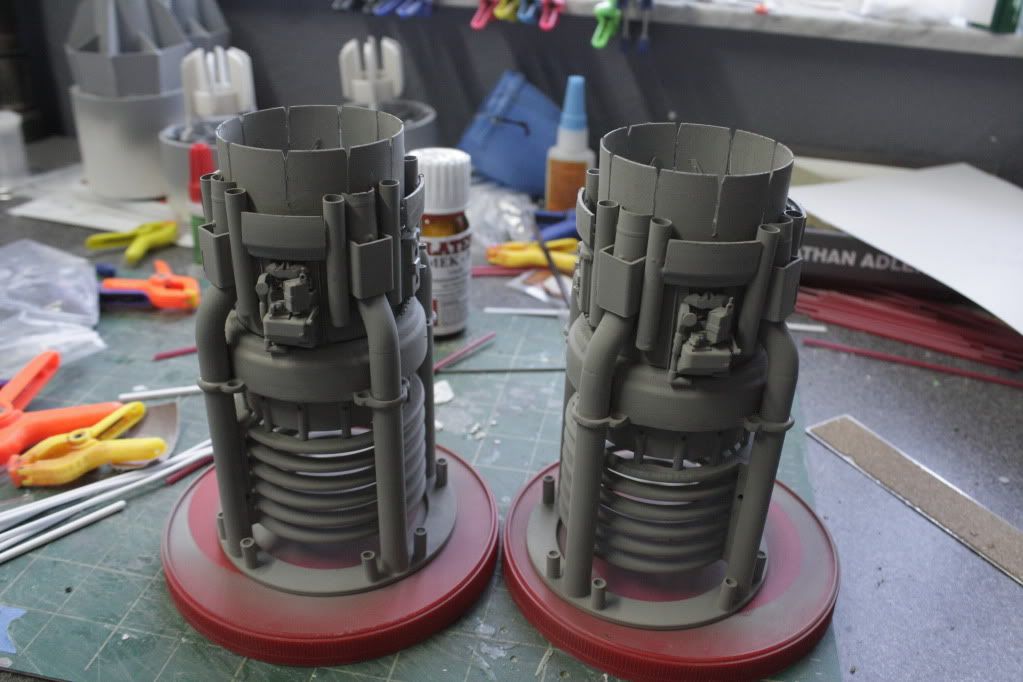 Then it was all pipes , pipes, pipes. 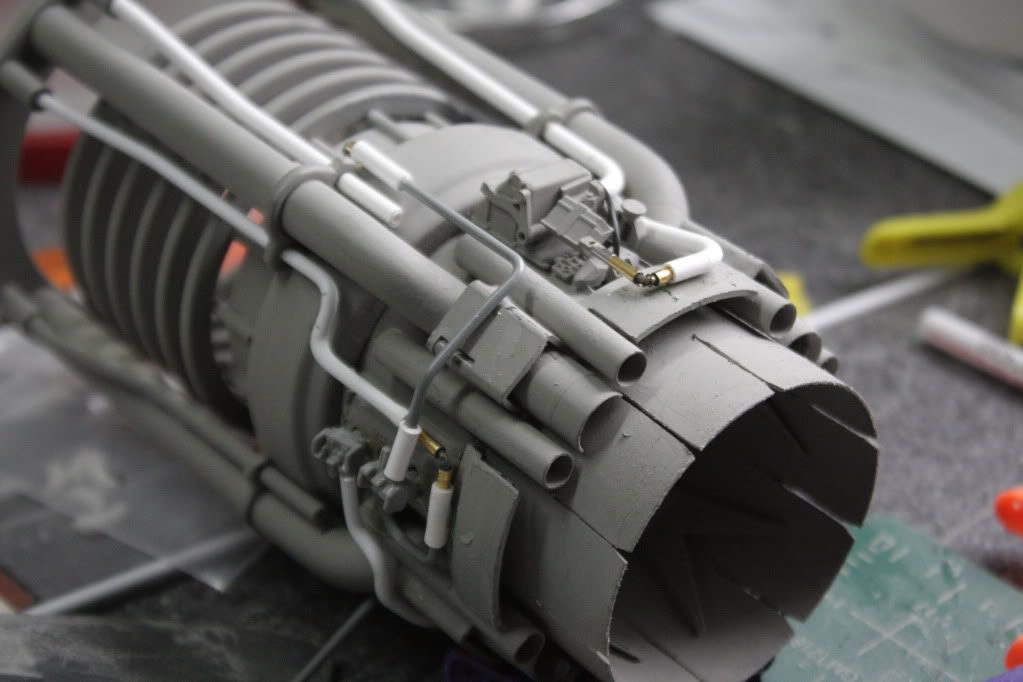 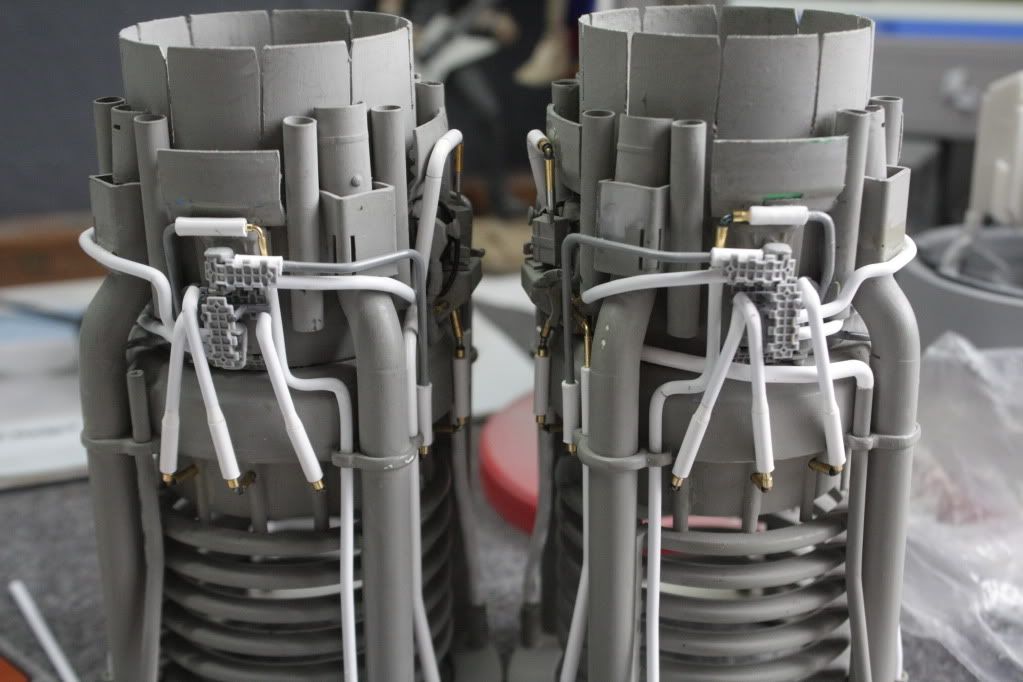 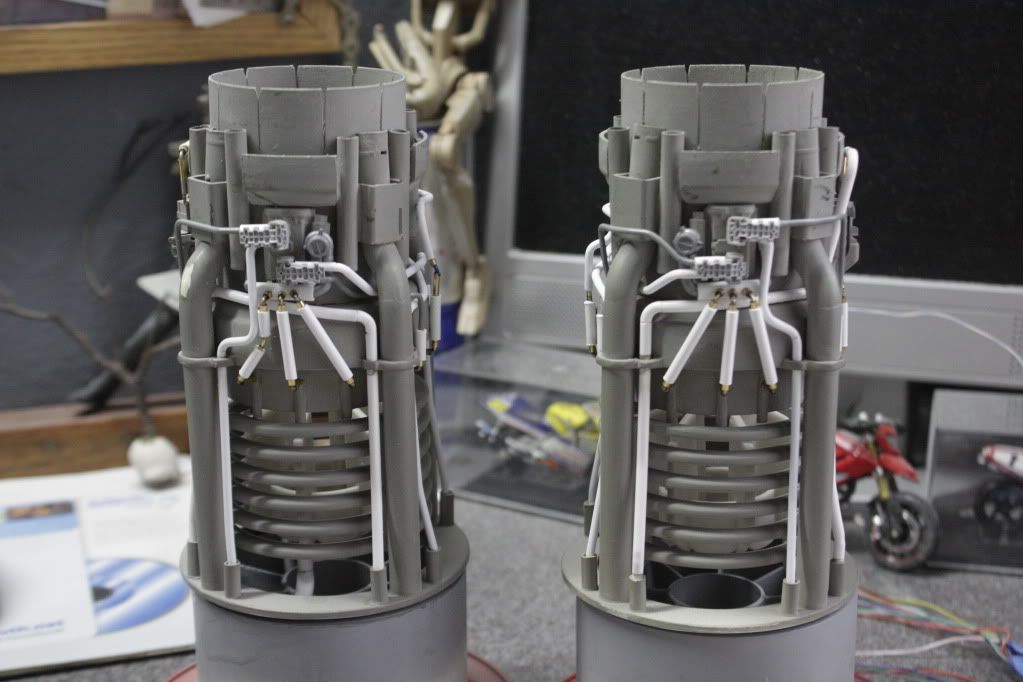 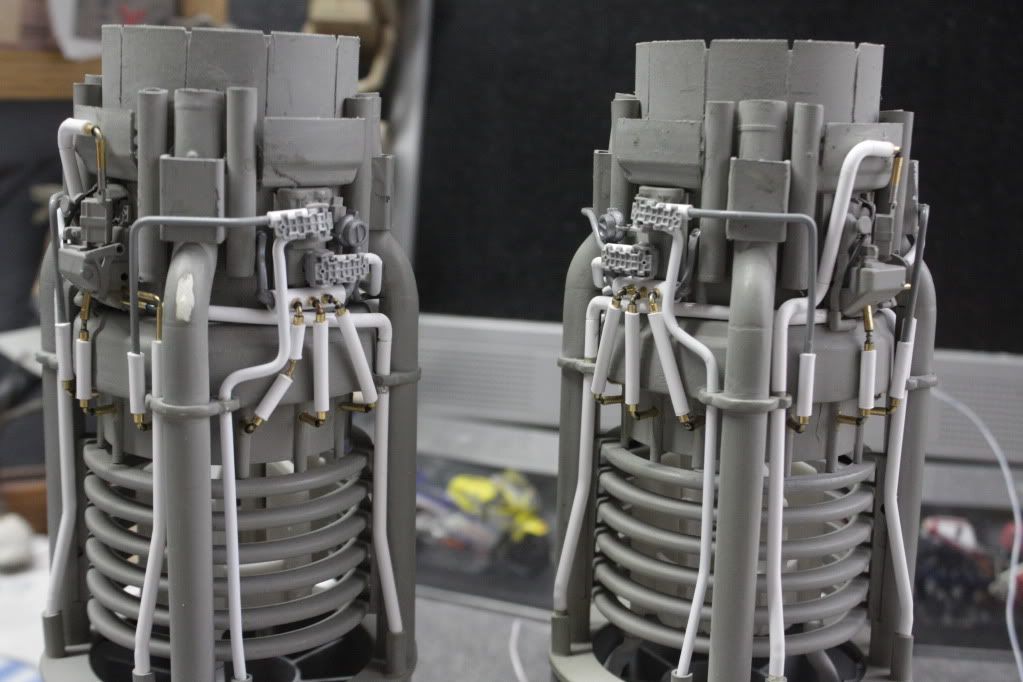 And thats the story so far. Will probably install some wiring looms also, just to pack the detail in like on the real thing. Comments always welcome guys Take it very very squeezy my friends  Gaggles |
|
|
|
Post by spud on Jun 23, 2012 13:49:16 GMT -5
Ferk me that's some crazy detailing. Awesome work Gag, Im not relay into scifi so i would never have seen this over on sma  |
|
thenylongag
Full Member
   Sept2013 MoM Winner
Member since: June 2012
Yes, we have 'NO' bananas
Posts: 304
Jun 7, 2012 11:20:57 GMT -5
Jun 7, 2012 11:20:57 GMT -5
|
Post by thenylongag on Jun 30, 2012 18:08:57 GMT -5
Ello Social buddies, Hope everybody is well and currently working on a satisfying build. Thank you very much for your kind words, it does realy inspire me. So, once again we look at the detailing of the engines. All together now "PIX"I was never happy with the rear nozzel deflectors, they looked very plastic (which they are, but in a bad way) so i set about adding some small details to diguise them a bit. First i added a piece of 0.5mm sheet to the back (X8). 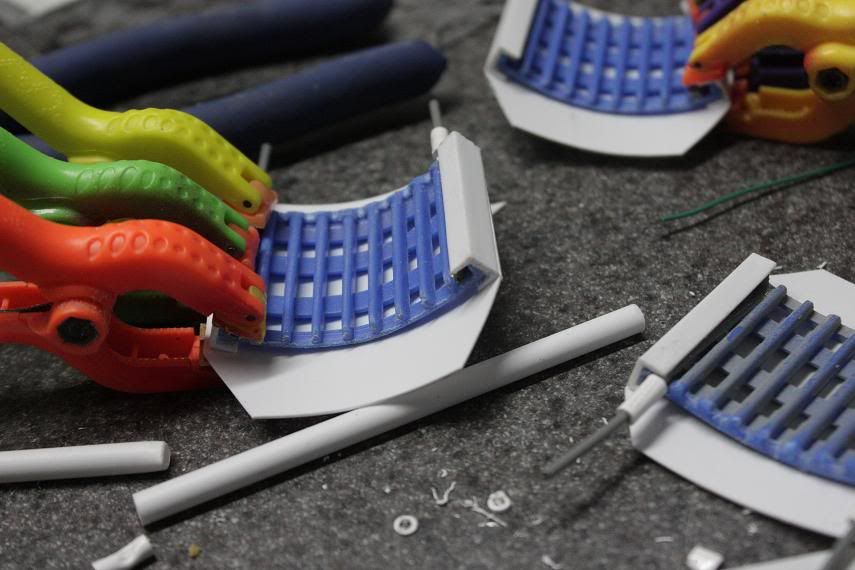 I then added 3 piece of 'U' channel to the top, being careful to allign them with the existing ribs. 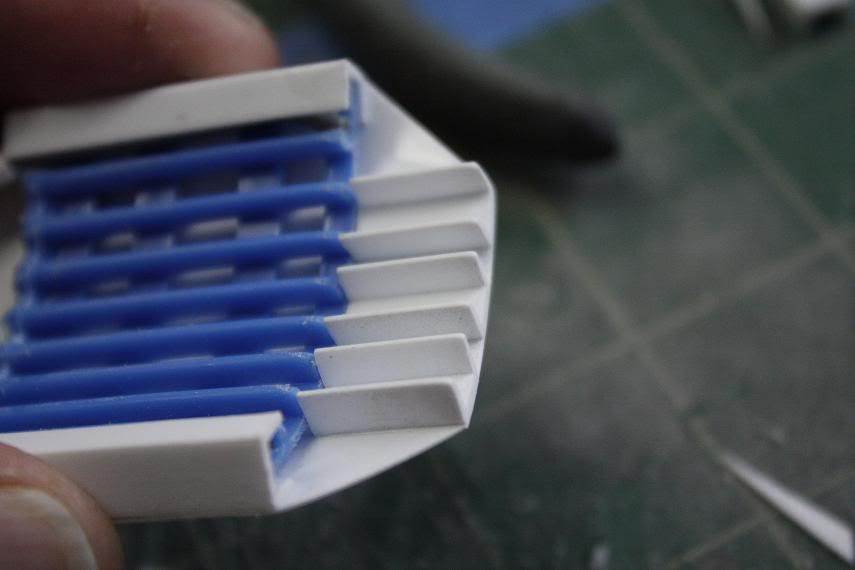 I then chamfered the ends down. 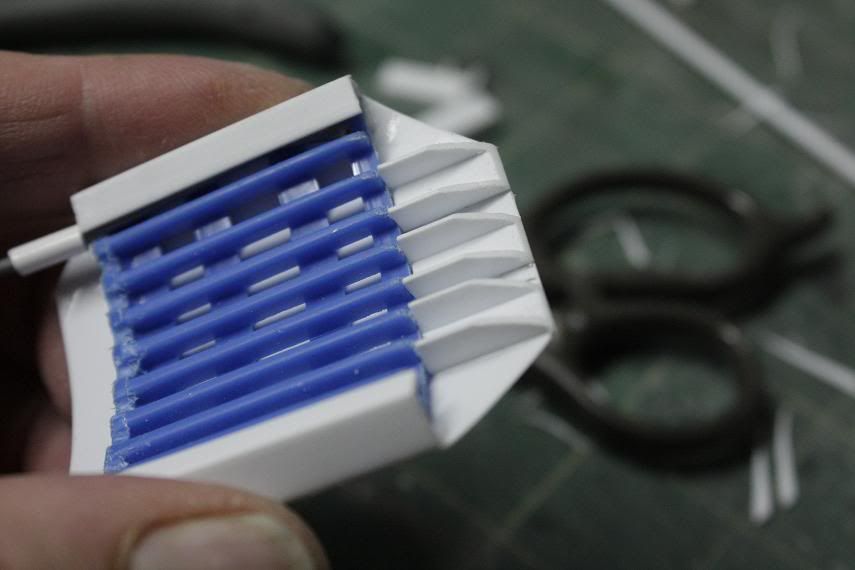 I then added more 'U' channel to cover the ends of the side supports & removed one of the U's legs 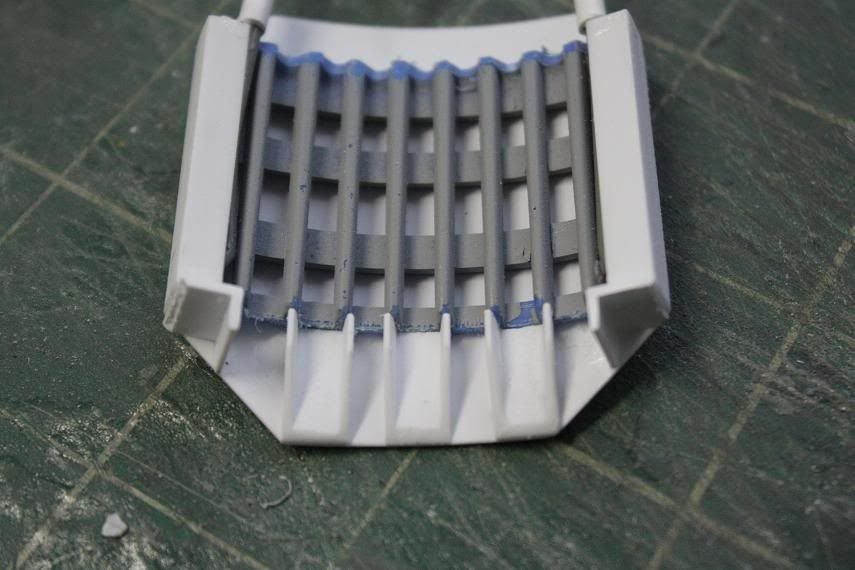 Everything was sanded smooth and then a quick test fit to see how we were looking. 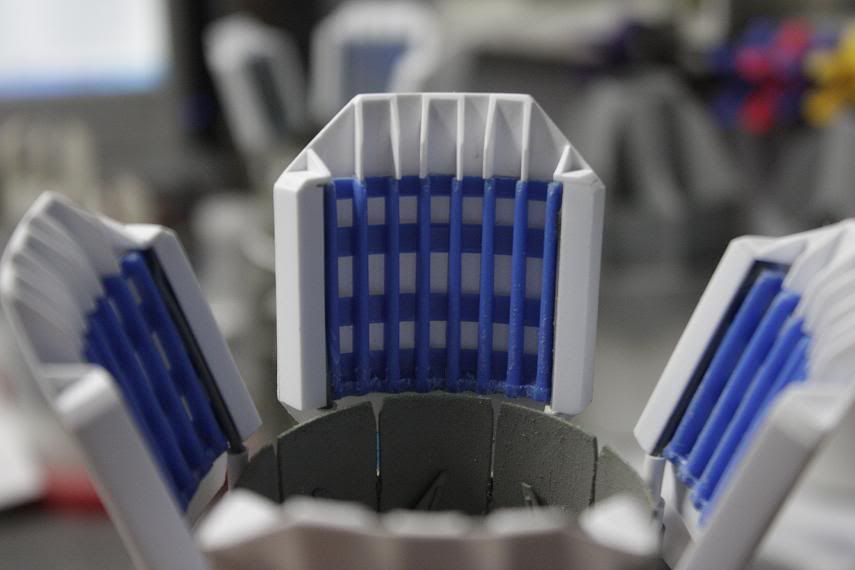 I then turned my attention to the back of the deflector, where i added 'T's, half round, small 'U' pieces of syrene for my details. 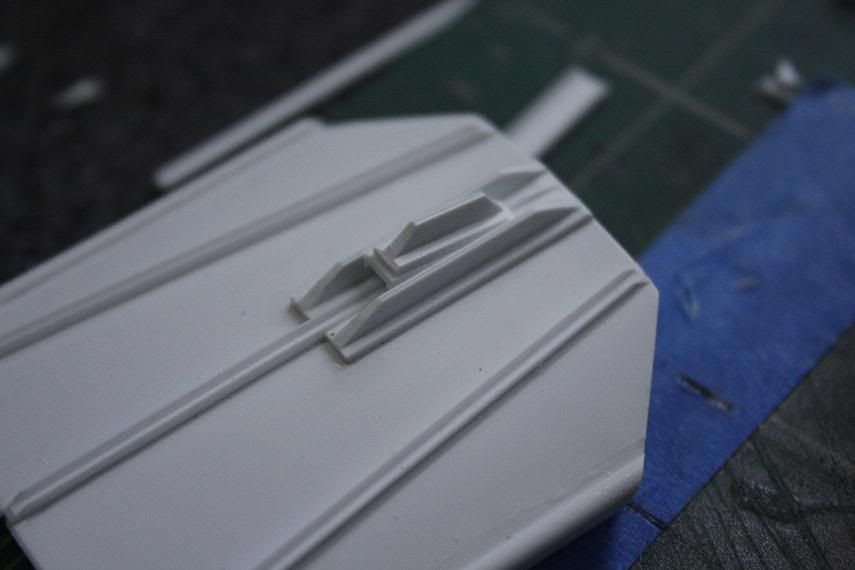 This is how both sides finished up. 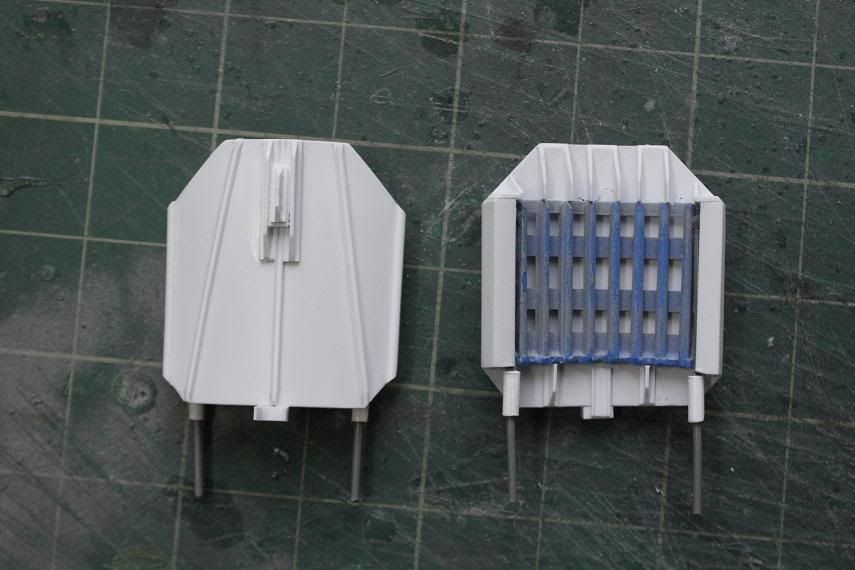 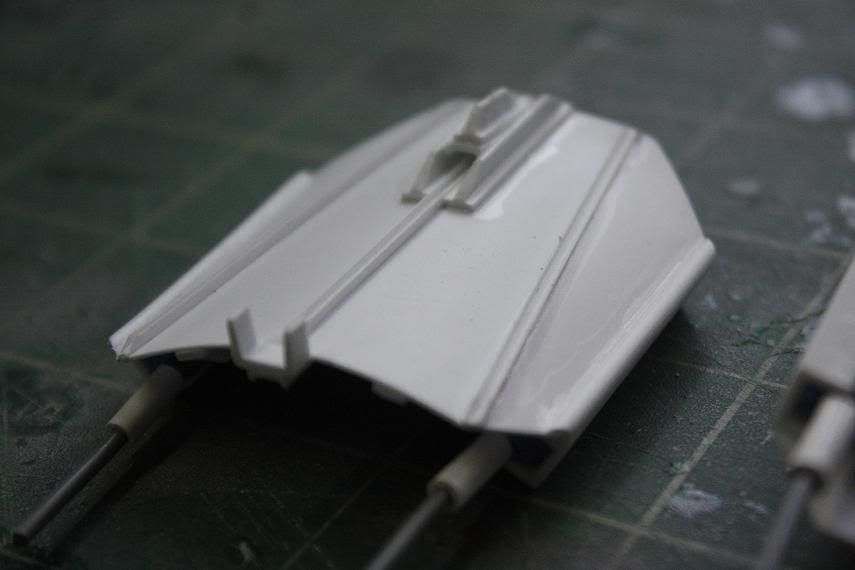 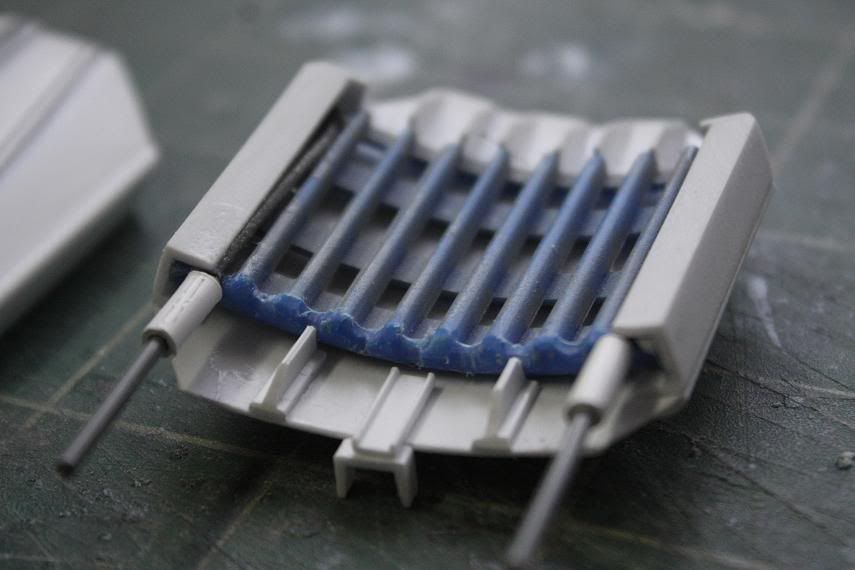 I then concetrated on the telescopic adjusters for the back of each deflector. I made 8 of everything, i dry assembled them and then dry fit one on the engine just to make sure it had the look i was after. 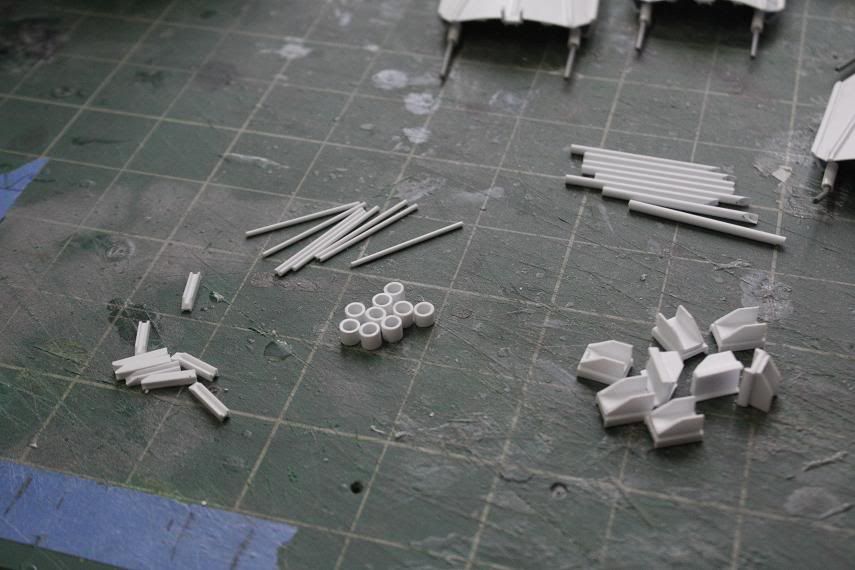 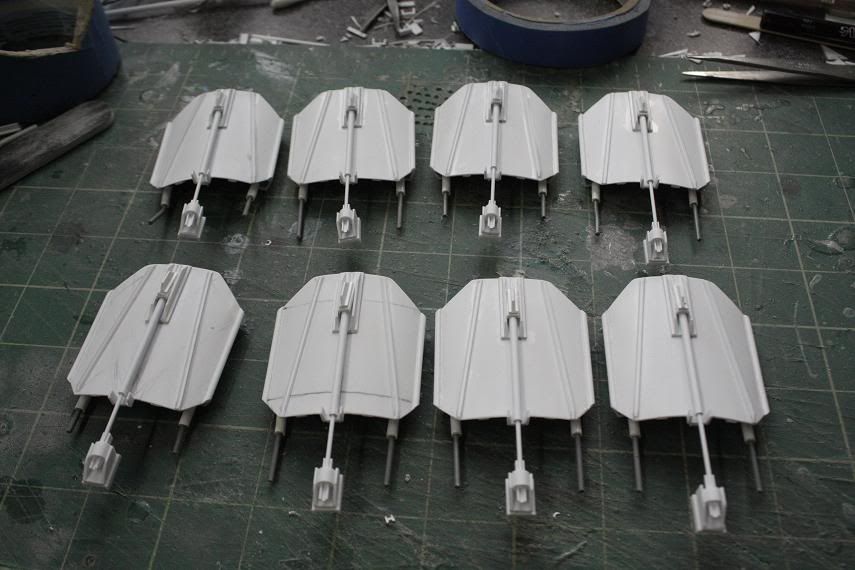 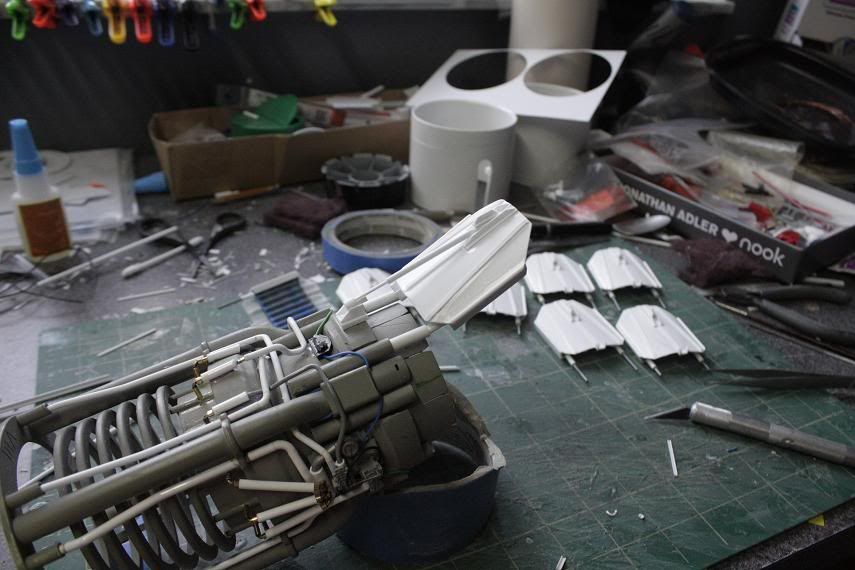 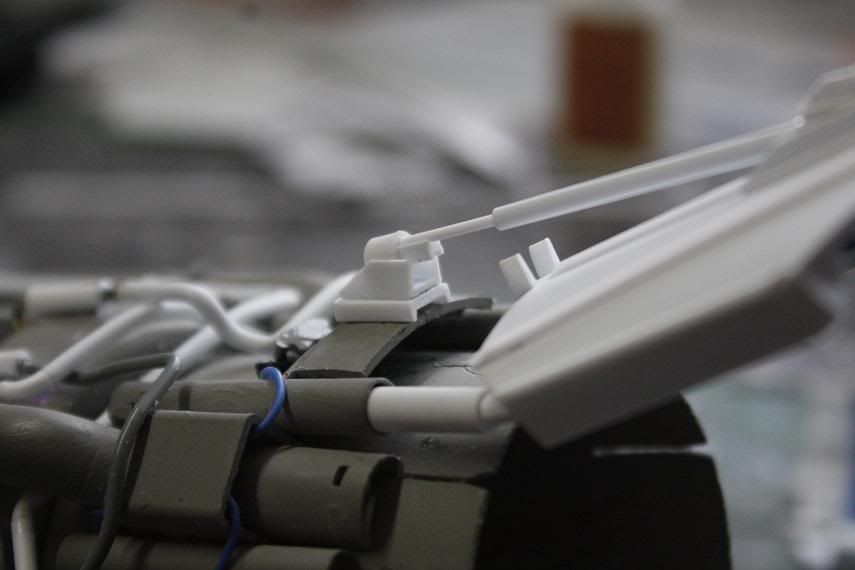 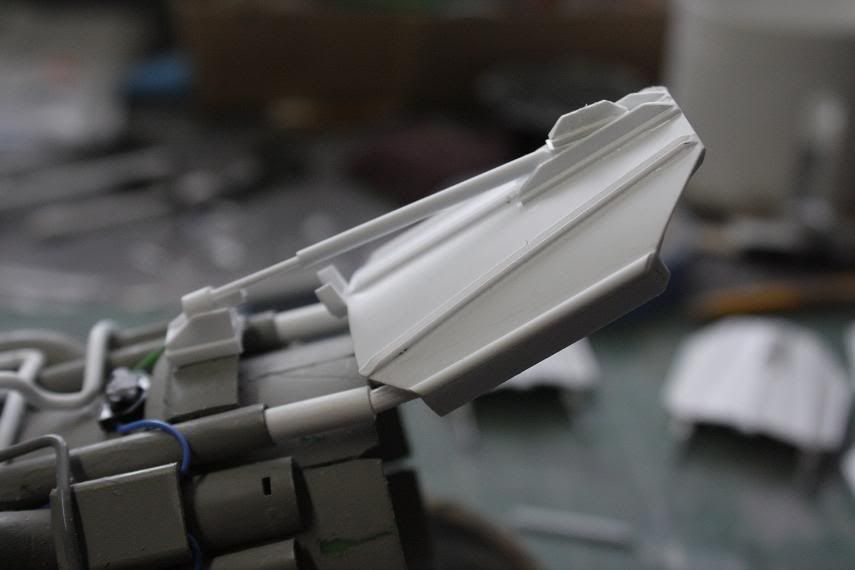 Everything is dry fit at the moment but it is exactly the look i was after. Also, i got hold of some fine gauge wire, which i plan to add for control lines on the engines and maybe attach them to the adjusters, i will have to see what looks best. I now have the dilemma of what to paint and when. I think i will have to do it in small sub-assemblies and then try not to get too much glue everywhere when i put them together. ;D Thats as far as i've got this week. Your comments are always welcome. Thanks for stopping by. The Nylonator.  |
|
|
|
Post by bbd468 on Jul 1, 2012 23:04:06 GMT -5
Man, this is pretty damn cool. Well done.  Gary |
|
multicam
Senior Member
   
Member since: January 2012
Nate
Posts: 2,039
Jan 10, 2012 14:35:41 GMT -5
Jan 10, 2012 14:35:41 GMT -5
|
Post by multicam on Jul 4, 2012 23:39:15 GMT -5
Great choices in design. This is really cool and is becoming one of my fav b-logs to keep up with. Love it. Can't wait to see how you paint it:)
|
|
thenylongag
Full Member
   Sept2013 MoM Winner
Member since: June 2012
Yes, we have 'NO' bananas
Posts: 304
Jun 7, 2012 11:20:57 GMT -5
Jun 7, 2012 11:20:57 GMT -5
|
Post by thenylongag on Jul 10, 2012 19:45:05 GMT -5
Good Evening, Thanks for the comments guys, i realy appreciate them Just a short update to a lot of realy fiddly stuff, that at times nearly resulted in me launching these things against the wall, but i just about kept my head........................... just' So, here we go.... Basically added more hydralic lines, oil lines and any other type of line i could squeeze in. Started with the 0.016wire from the back of the telescopic adjusters.  Then glued wires into 'H' profile styrene  Added a small piece of 'U' and fixed to the base unit of the adjusters  Then just threaded the wire thru all the other stuff    Then primered it all up, Deflector vanes.  Then the main units.    They are alot blacker in real life than in the photos. Now comes the scary part, painting the bloody things. My paint skills are very poor so i hope i don't mess them up too bad. Any suggestions on colours to use would be appreciated, i'm thinking mainly metallic grey, gun metal, silver, copper, gold and some blends of these. Comments welcome Gag |
|
406 Silverado
Global Administrator     
Member since: November 2011
Posts: 10,418
Member is Online
MSC Staff
|
Post by 406 Silverado on Jul 10, 2012 19:49:16 GMT -5
WOW....looking even better with the plumbing.
As for colors, well the ones you listed sound good to me. After washes are applied it'll all stand out.
|
|
multicam
Senior Member
   
Member since: January 2012
Nate
Posts: 2,039
Jan 10, 2012 14:35:41 GMT -5
Jan 10, 2012 14:35:41 GMT -5
|
Post by multicam on Jul 10, 2012 21:41:02 GMT -5
Awesome! Great stuff. Color choices sound great. You might try just different shades of grey and black for variety as well. Just a thought:)
|
|
|
|
Post by bullardino on Jul 11, 2012 6:00:13 GMT -5
Ferkin' awesome spaceship. Looks a lot better than those commonly used on sci-fi films/tv series.  |
|
thenylongag
Full Member
   Sept2013 MoM Winner
Member since: June 2012
Yes, we have 'NO' bananas
Posts: 304
Jun 7, 2012 11:20:57 GMT -5
Jun 7, 2012 11:20:57 GMT -5
|
Post by thenylongag on Jul 16, 2012 19:23:43 GMT -5
Thanks for the comments guys Basically i went with the colours i mentioned, metallic grey, crome silver, matt black, copper, gold, and a bit of metallic blue, the deflectors are a mix of titanium silver and copper. I have not yet applied any weathering.   I assembled everything in the outer fairing, the front of which is roughly based on the F-14 Tomcats intakes(my favourite aircraft) the back is my own design. These fairings will eventually get another skin and external details applied. 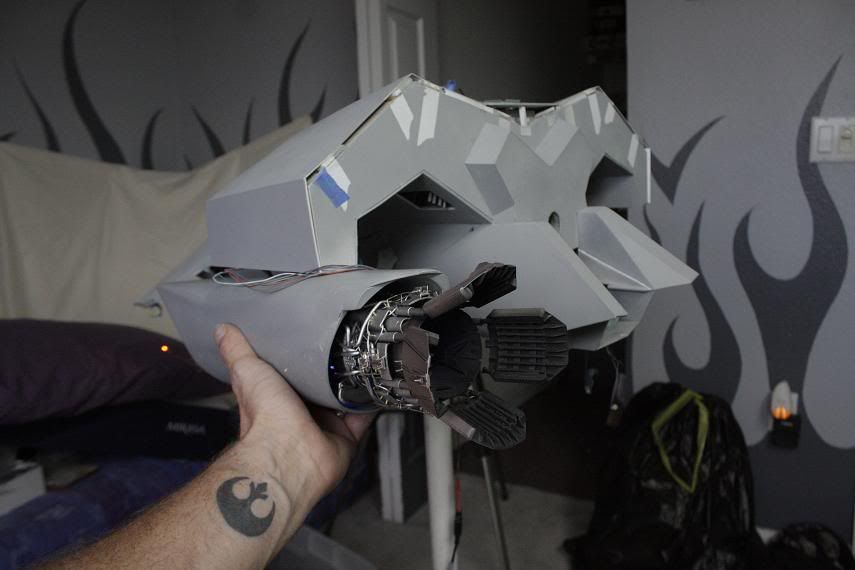 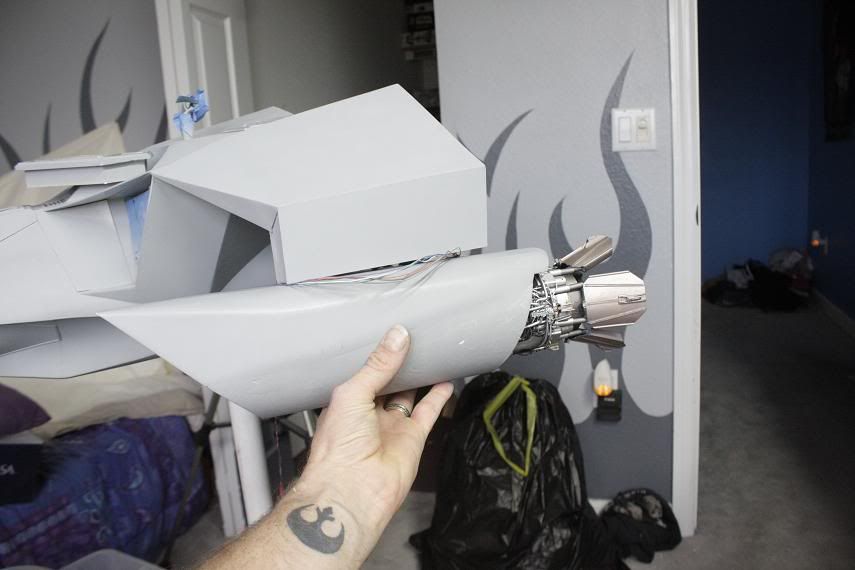  Did a quick light test also to see if i had the effect i was after. I was so pleased i made a video. ;D 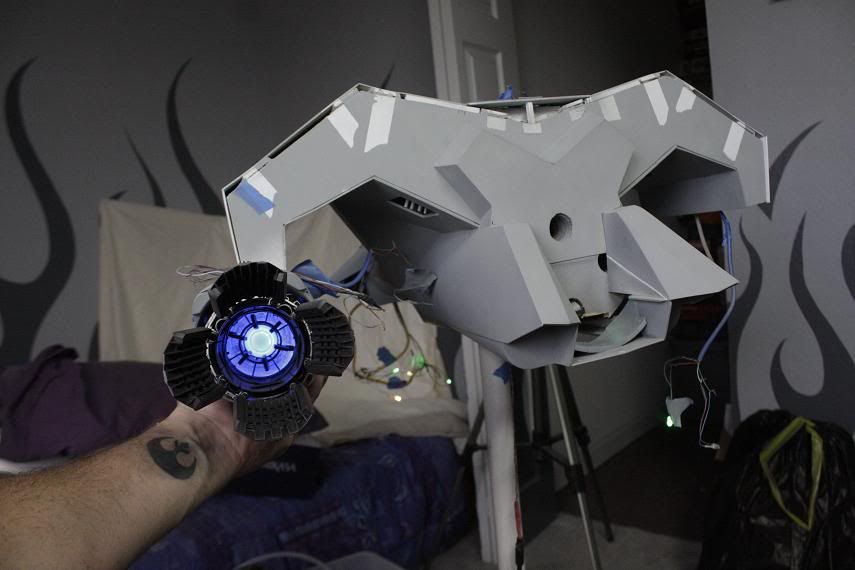  What do you think guys. I was very happy with the results. Next is the engine weathering and the painting of the front intakes.  I'm not very good confident at painting, so wish me luck? Gaggles McGee |
|
|
|
Post by spud on Jul 17, 2012 10:41:03 GMT -5
now that's a bloomin engine!!!!!
Fantastic work Gag Drive on.!
|
|
|
|
Post by dupes on Jul 17, 2012 11:47:16 GMT -5
I don't know what this thing is, but DAAAAAAAAMN!!!
|
|
Deleted
Member since: January 1970
Posts: 0
Dec 10, 2024 19:52:03 GMT -5
Dec 10, 2024 19:52:03 GMT -5
|
Post by Deleted on Jul 17, 2012 11:52:22 GMT -5
great scratch building, love the si-fi stuff  The Tube of U videos are cool too... specially the later bikini ones   |
|
|
|
Post by tobias5555 on Jul 17, 2012 12:16:12 GMT -5
That´s not modelling, that´s art. Great job.
|
|
|
|
Post by `Boots` on Jul 17, 2012 16:39:05 GMT -5
Man that is insane  .............those engines have come out sooooo dam good fella!!.......................brilliant work and imagination and look forward to more of this  |
|
thenylongag
Full Member
   Sept2013 MoM Winner
Member since: June 2012
Yes, we have 'NO' bananas
Posts: 304
Jun 7, 2012 11:20:57 GMT -5
Jun 7, 2012 11:20:57 GMT -5
|
Post by thenylongag on Oct 1, 2012 8:53:02 GMT -5
Hello Folks Thanks for the comments much appreciated Haven't been about much lately, Life and stuff including a 10 year wedding anniversary suprise party to organize for the wife, great night. Anyhoo, added some tubing and detail to the fairings, running wiring for the lights through the tubes Pix 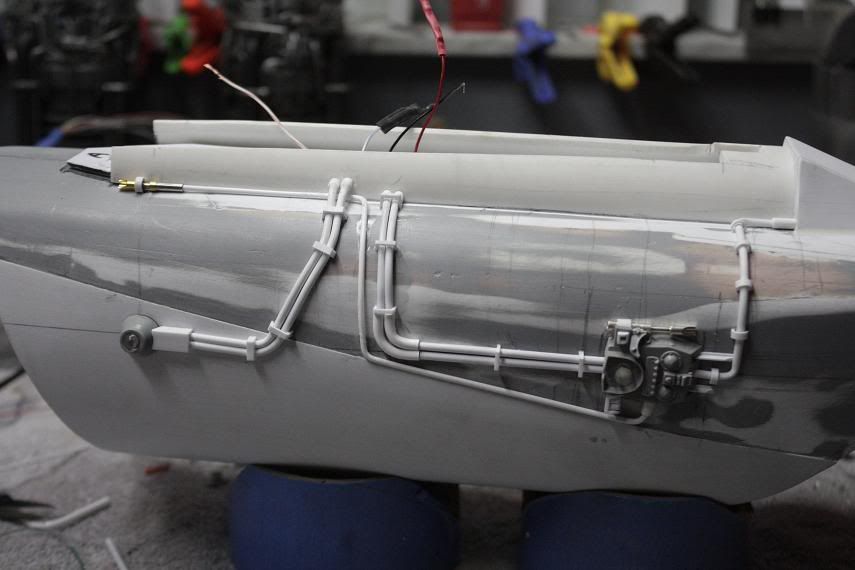 Added air brakes to the outside of the fairings, i also think they can aide on stearing, hey, i'm making this up as i go 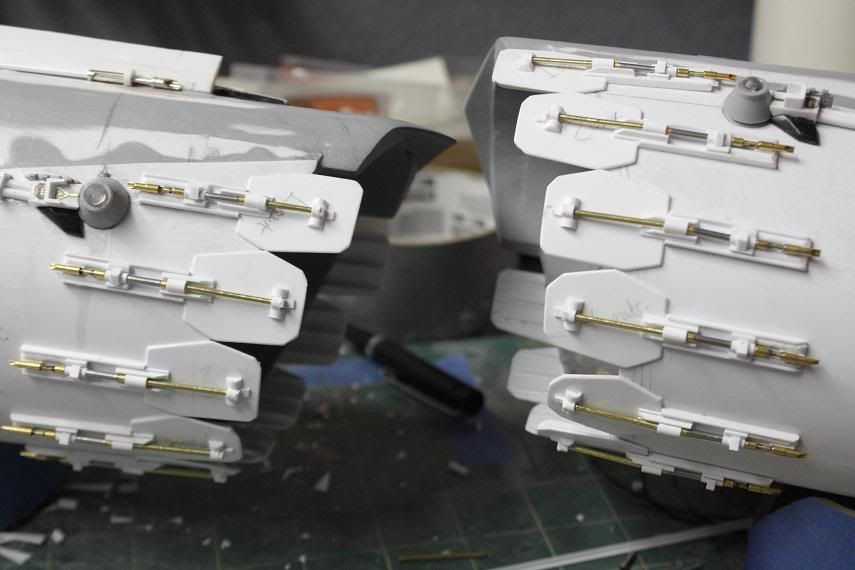 Added a combination of panelling and scribing lines. 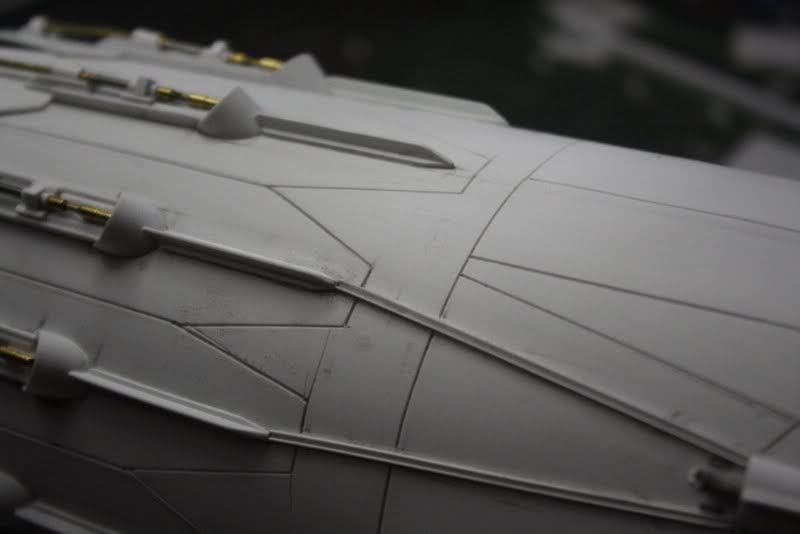 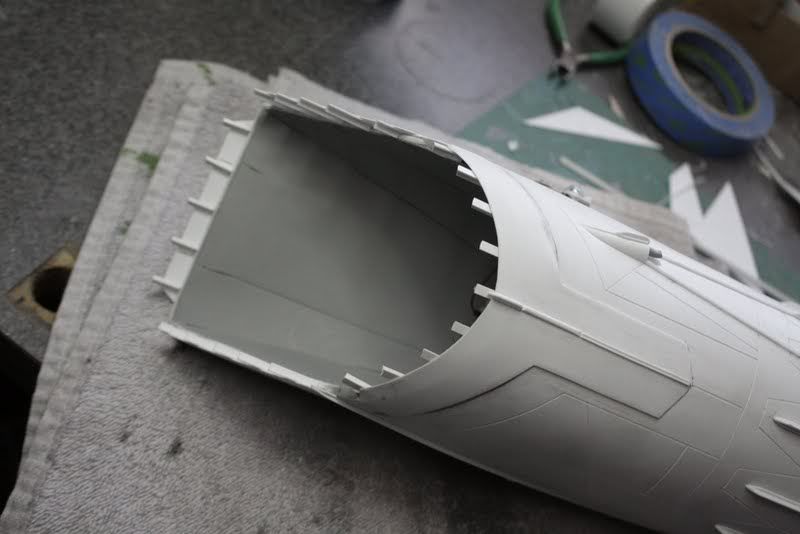 I added panelling around the front edge to house tubing for fairing cooling. 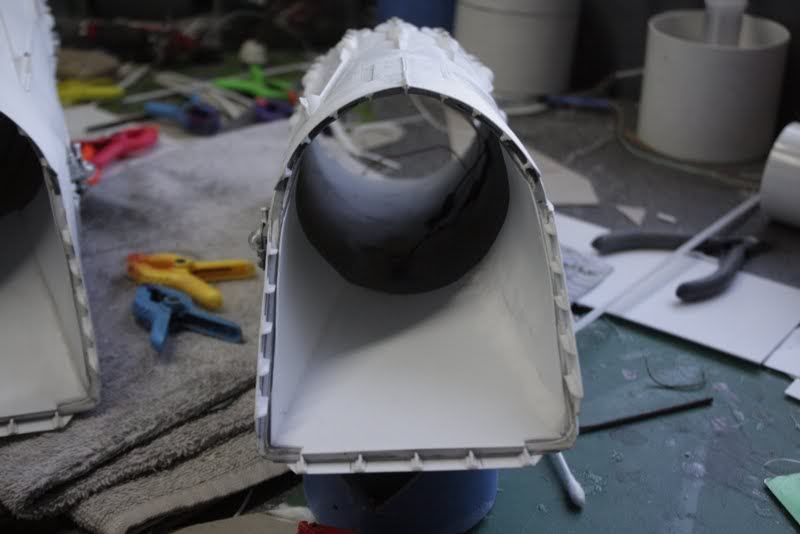 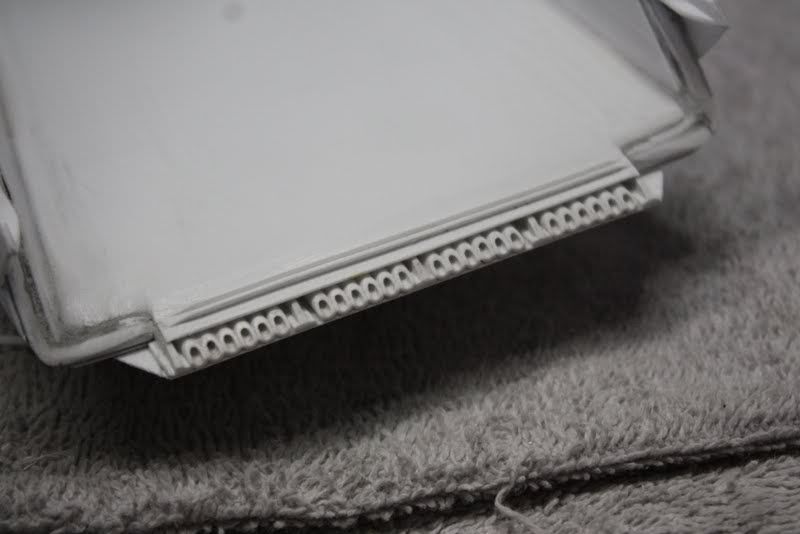 Got a layer of primer on the fairings and attached them to the ship. Had a test of the flashers and navi lights Video www.youtube.com/watch?v=KK2AdjDK1U4&feature=plcpMy favourite view from underneath 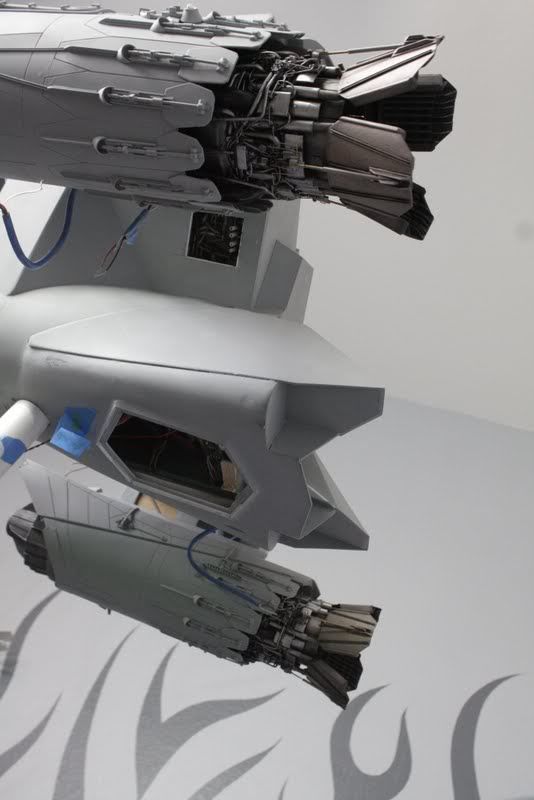 I then moved on to the underside of the front end of the ship where i scratched an extensive antenna array. 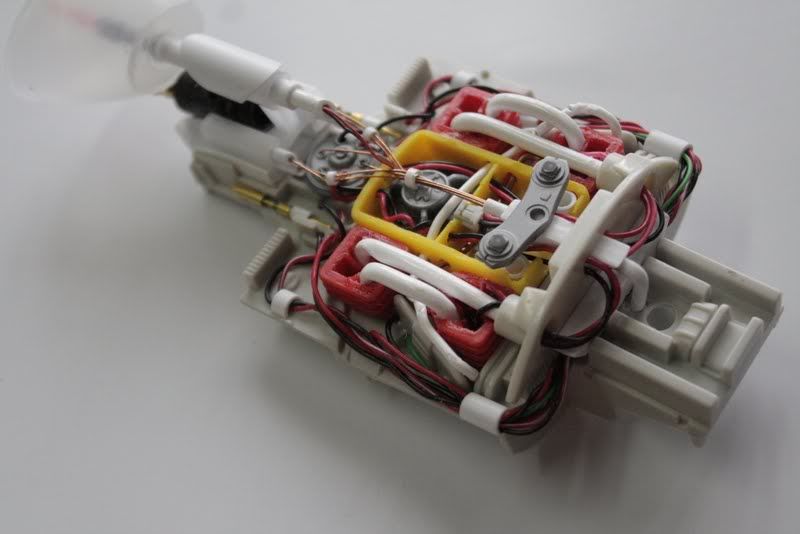 And finally with some paint, but it needs a final top coat and some weathering etc..... 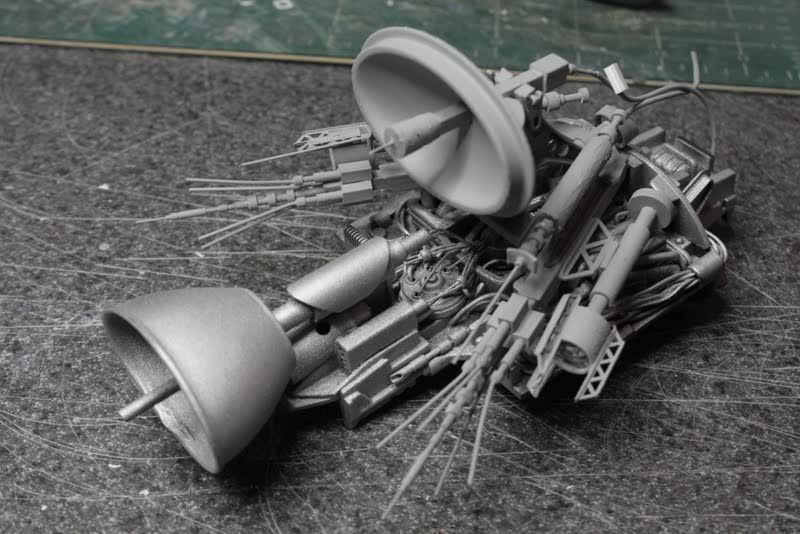 Thanks for looking Gag |
|
|
|
Post by armorguy on Oct 1, 2012 9:20:17 GMT -5
Gag, this is most impressive work !
|
|
406 Silverado
Global Administrator     
Member since: November 2011
Posts: 10,418
Member is Online
MSC Staff
|
Post by 406 Silverado on Oct 1, 2012 9:57:22 GMT -5
Man that looks awesome. Once weathered it will look even better.
|
|
thenylongag
Full Member
   Sept2013 MoM Winner
Member since: June 2012
Yes, we have 'NO' bananas
Posts: 304
Jun 7, 2012 11:20:57 GMT -5
Jun 7, 2012 11:20:57 GMT -5
|
Post by thenylongag on Oct 1, 2012 13:36:52 GMT -5
Thank you chaps for the kind words.
Dicky, i have been using more and more odd things, see if you can spot:- the deodorant cap, the eye washer and the toy Darth maul light saber and several micro plugs from an old video camera to name but a few ;D
Gag
|
|
captfue
Full Member
  
Member since: October 2012
Posts: 311
Oct 1, 2012 22:25:19 GMT -5
Oct 1, 2012 22:25:19 GMT -5
|
Post by captfue on Oct 4, 2012 9:39:20 GMT -5
Really an impressive piece.
|
|
thenylongag
Full Member
   Sept2013 MoM Winner
Member since: June 2012
Yes, we have 'NO' bananas
Posts: 304
Jun 7, 2012 11:20:57 GMT -5
Jun 7, 2012 11:20:57 GMT -5
|
Post by thenylongag on Oct 31, 2012 10:48:09 GMT -5
Ello Mates, I had shoulder surgery at the start of the month and i'm still in a sling, just can't put my arm up very high, but was going insane not being able to build so i struggled through and got back to the bench about 2 weeks ago. Then just as i got back to it my PC crapped out with a virus so i couldn't post or surf or nuffin, but it's fixed now so let the journey continue....................aaaaaaaannnnnnddddd................... ............there OFF. PIX Got a layer of crome silver on the rest of the nav/com sub assembly 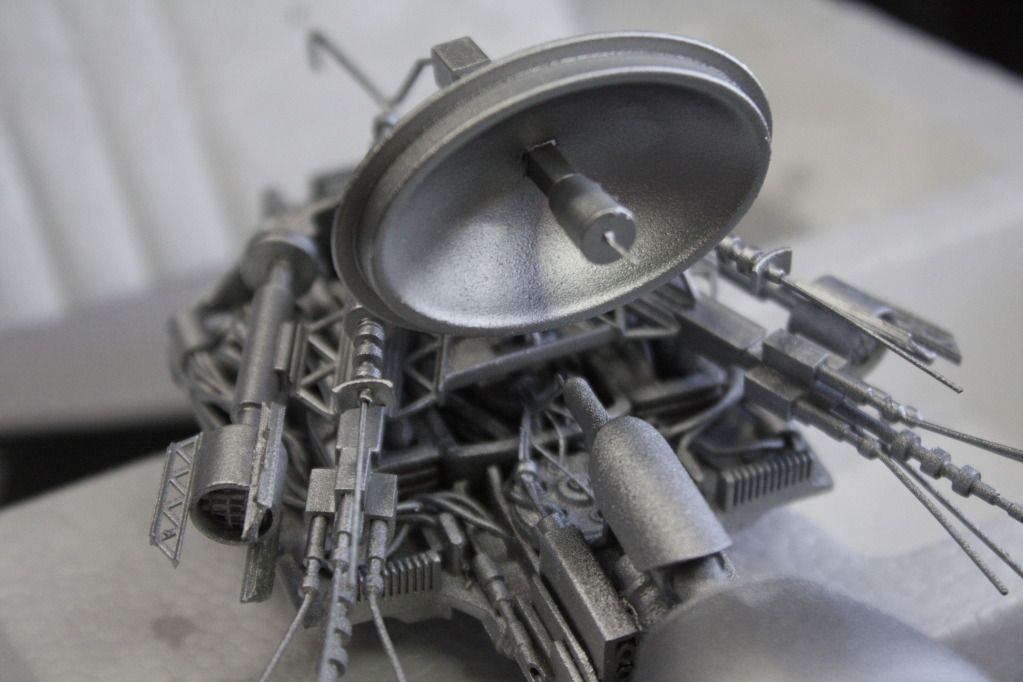 Then started the details that will go under the cockpit, i used such things as a bicycle pump holder, card board tubes, drinking straws, various styrene pieces, some fine plastic mesh, a few bike greeblies, a whisky pore spout and my favourite is the worcestershire sauce pore spout and cap antenna i created. 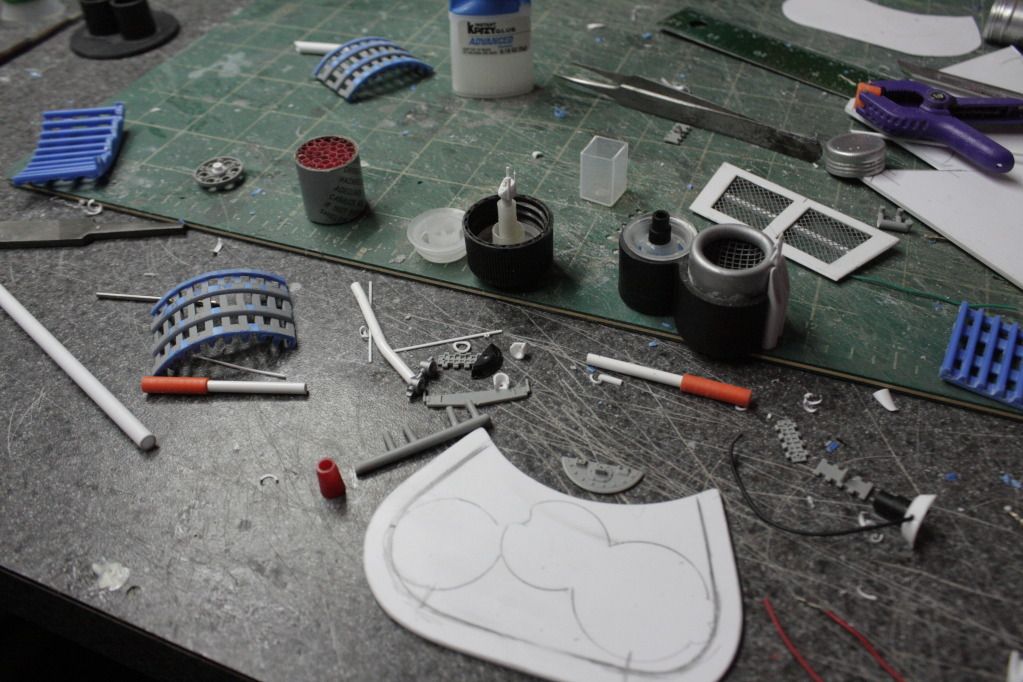 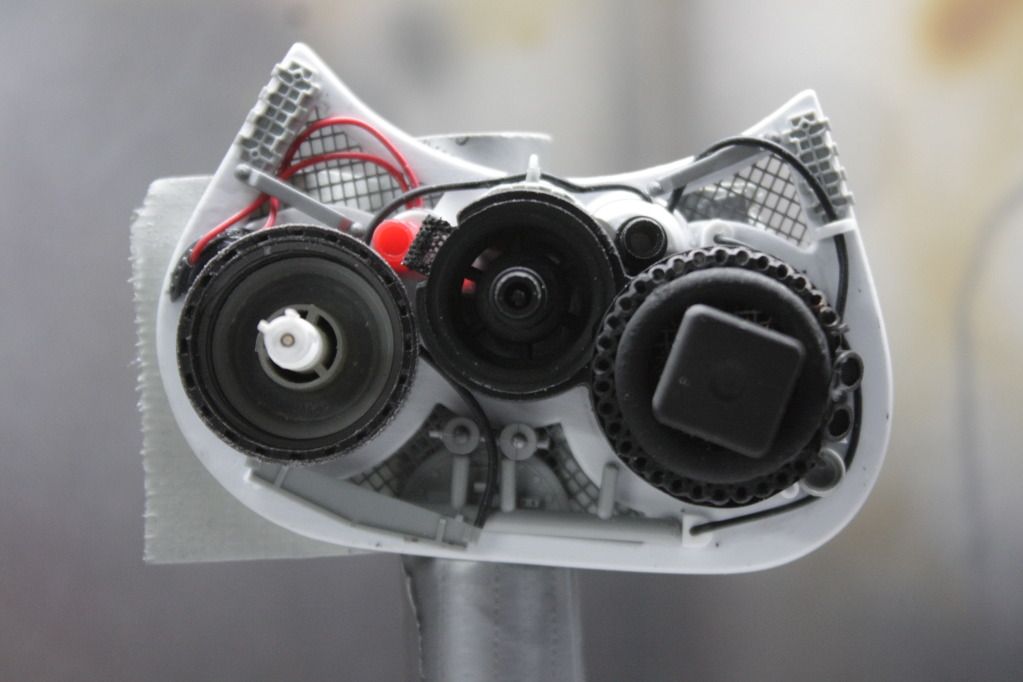 Gave it a shot of primer 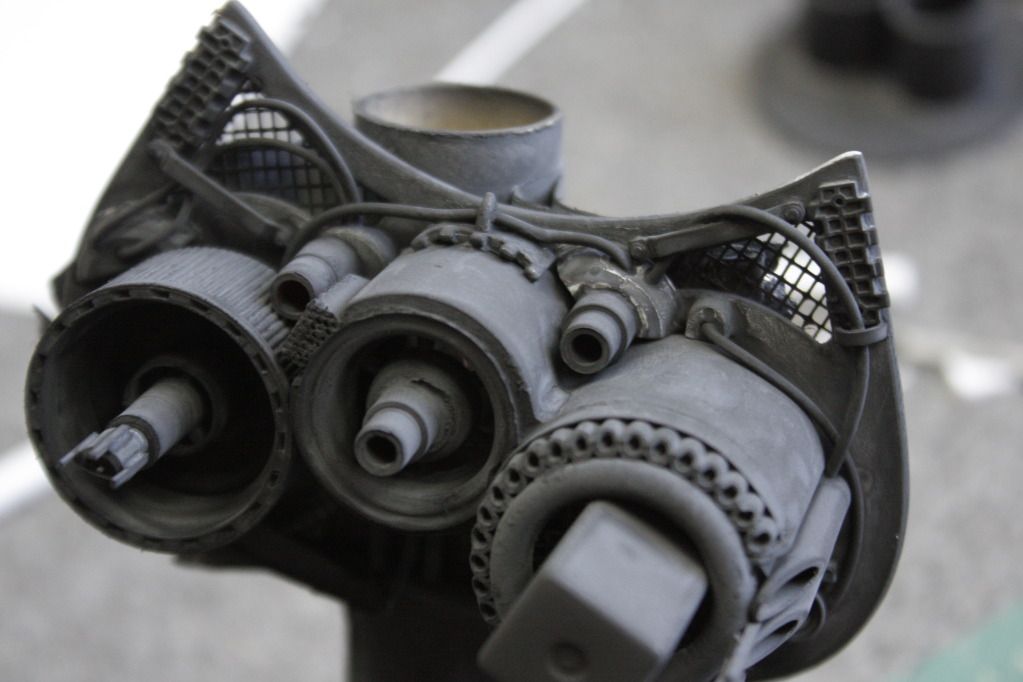 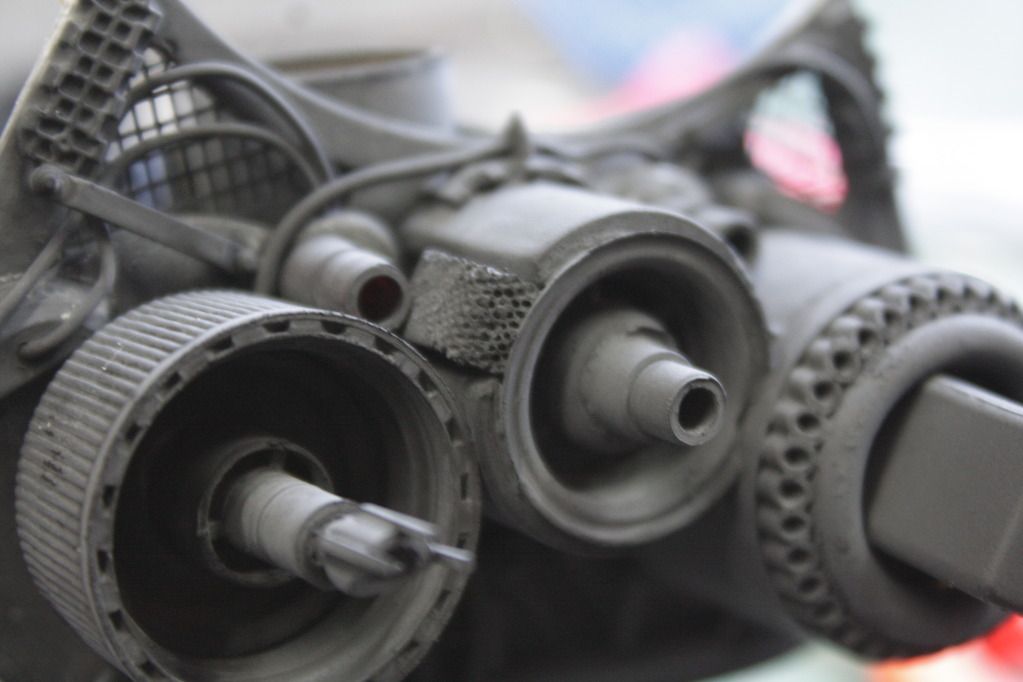 Then black in the front and crome silver on the back section 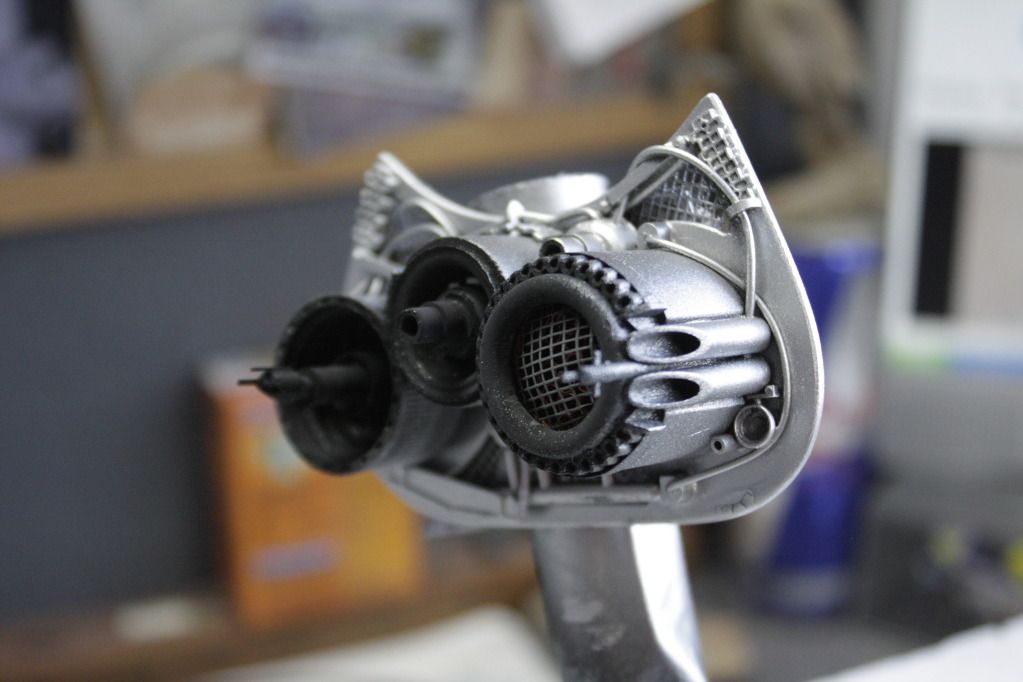 Black pastel wash and brown pastel wash then a drybrush with crome silver 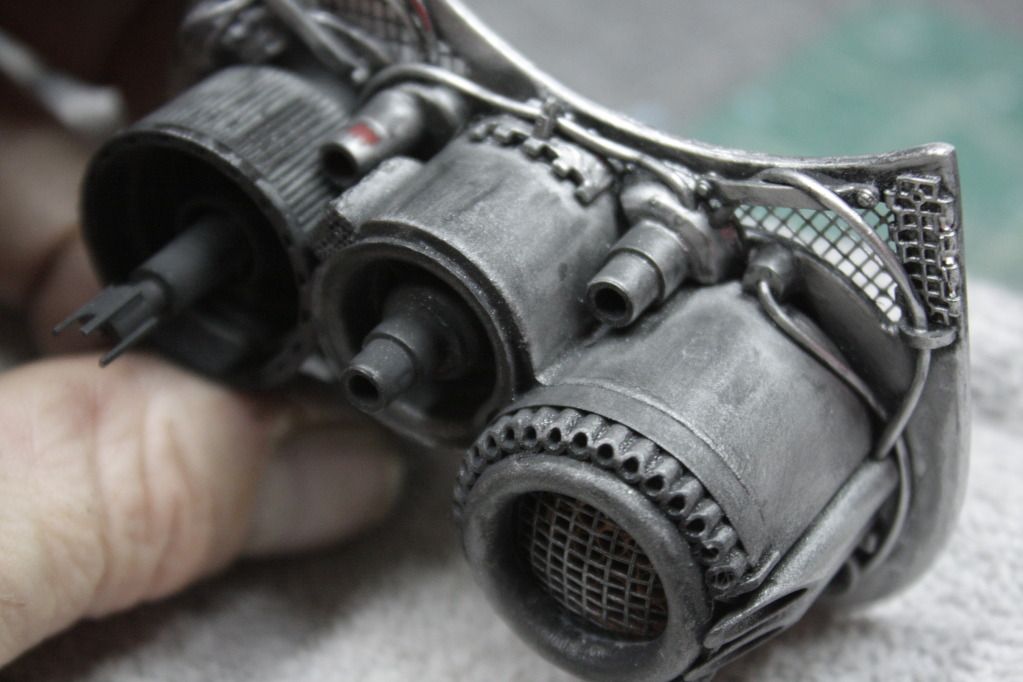 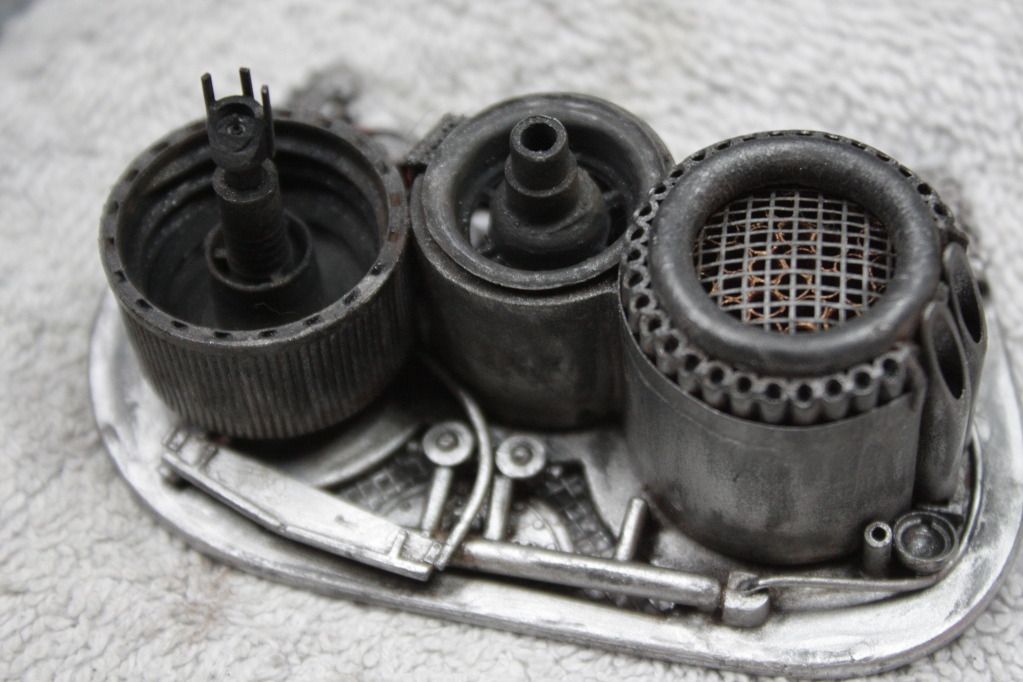 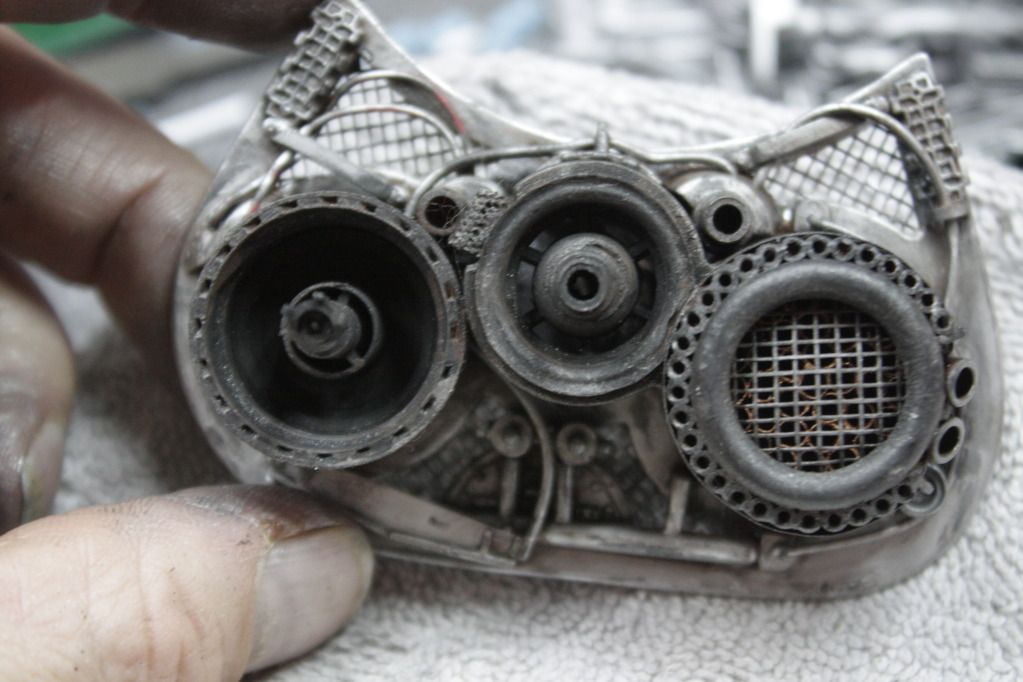 And finally a dry fit with the cockpit bubble in position. 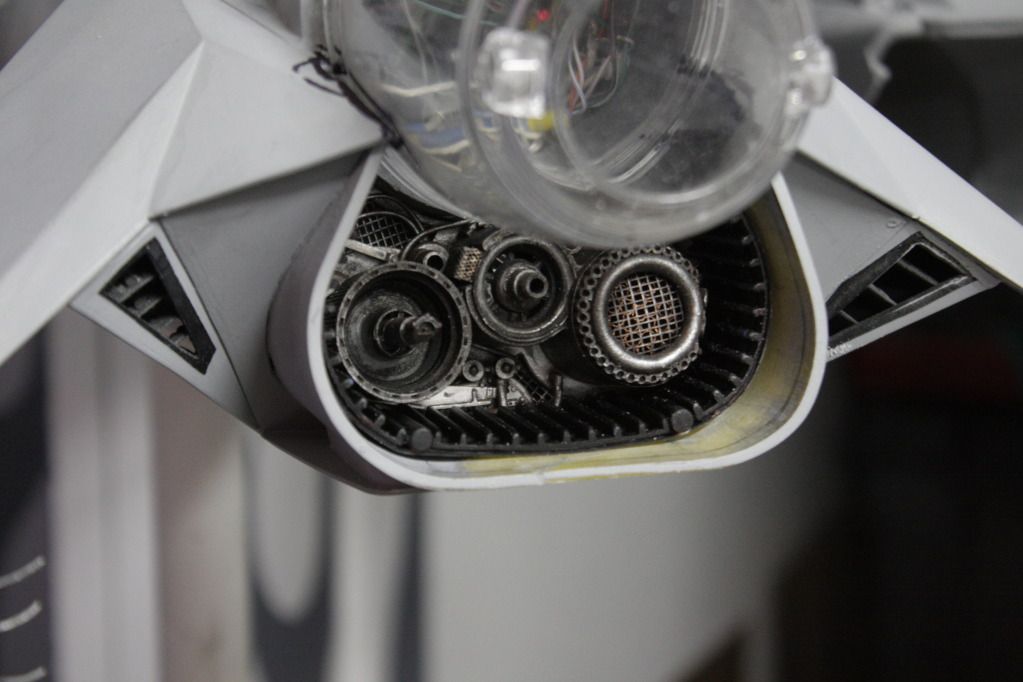 I have since reduced the size of the detail so it sits further back. Then i started skinning the underside of the wings, very time consuming and a bit uninteresting without primer but heres one or two quick shots 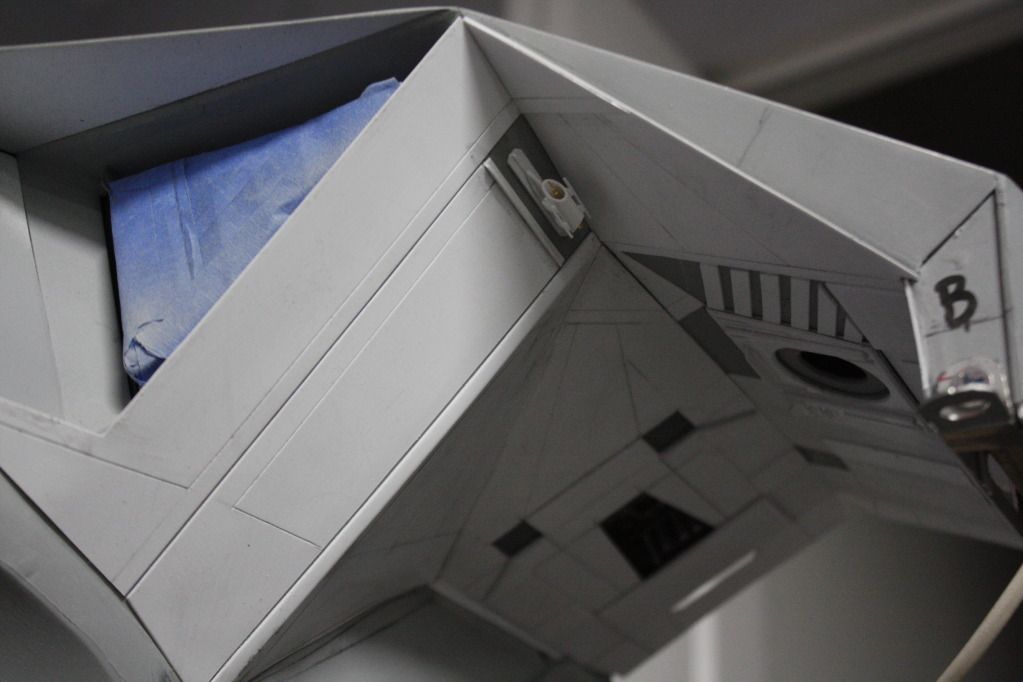 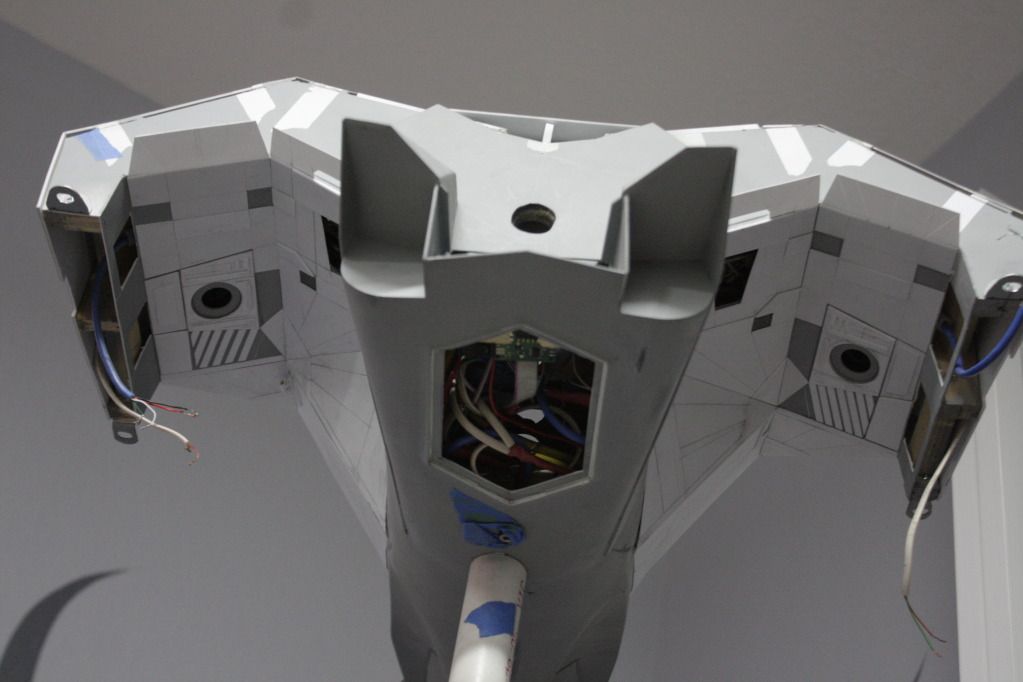 Thats about all for tonight. Will be concentrating on the back of the wings next Thanks for stopping by. Gagsterman |
|
|
|
Post by TRM on Nov 1, 2012 6:10:58 GMT -5
Been checking in on this over on SMA and I am just drooling on the detail you are coming across with on this!!! Outstanding!!!  |
|
venom1
Full Member
  
Member since: October 2012
Posts: 1,369
Oct 10, 2012 2:40:03 GMT -5
Oct 10, 2012 2:40:03 GMT -5
|
Post by venom1 on Nov 2, 2012 3:12:33 GMT -5
Dude, I love it! As a bit of a scifi nerd, this thing really floats my boat! ;D You have some exceptional scratch building skills there my friend, and your painting skills are not too scruffy either! I look forward to the next installment!!  Cheers, Sam  |
|
multicam
Senior Member
   
Member since: January 2012
Nate
Posts: 2,039
Jan 10, 2012 14:35:41 GMT -5
Jan 10, 2012 14:35:41 GMT -5
|
Post by multicam on Nov 4, 2012 9:39:10 GMT -5
"Extensive antenna aray" indeed! Simply great work, Gag! Impressive and fun to watch!
|
|
thenylongag
Full Member
   Sept2013 MoM Winner
Member since: June 2012
Yes, we have 'NO' bananas
Posts: 304
Jun 7, 2012 11:20:57 GMT -5
Jun 7, 2012 11:20:57 GMT -5
|
Post by thenylongag on Nov 23, 2012 16:22:07 GMT -5
Happy Thanksgiving to all, Thank you so much for the kind words guys it really means a lot to me and as i have said gives me lots of motivation. I have been away from the bench for a week or so because as usual my Mum is visiting from England for Thanksgiving holiday, so the mancave is returned to the guest room for a couple of weeks but here is an update on the stuff i managed to do right before she arrived. I decided to concentrate on the towing hitch section of the build. I designed an original hitch that would supply movement in all axis relative to the center line, not just in a left/right direction but also up/down and everything in between Here is a rough sketch of the design 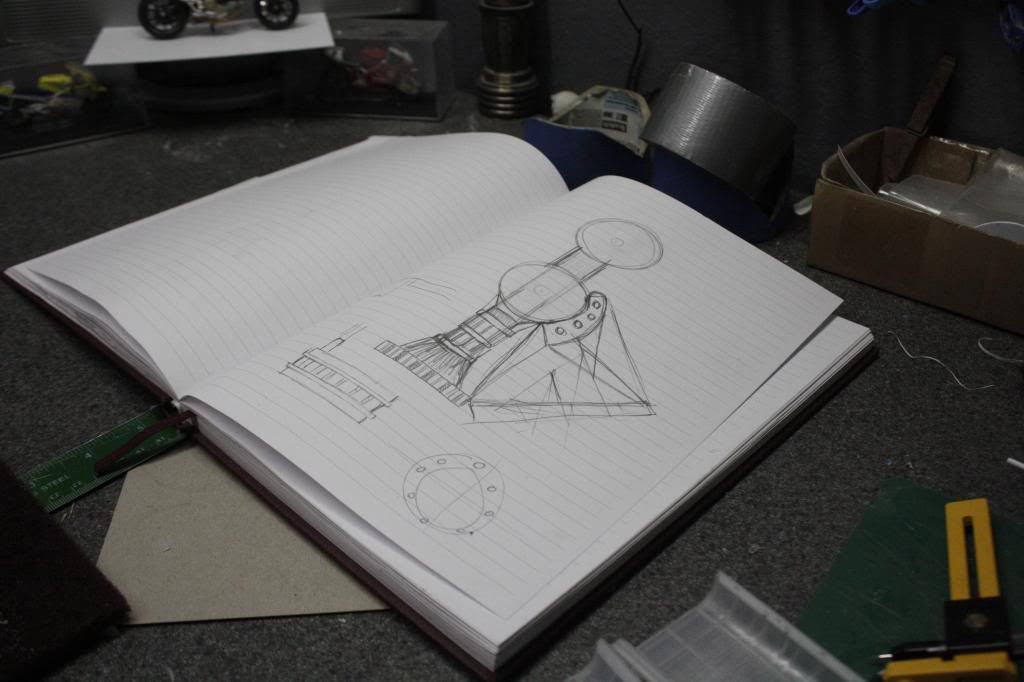 The ball closest to the ship would be held by several pads, some fixed ones undrneath the ball and two on retactable arms on the top. That was the idea, so now to a bit of fabrication: Made a base from 1mm styrene and attached my detail boxes 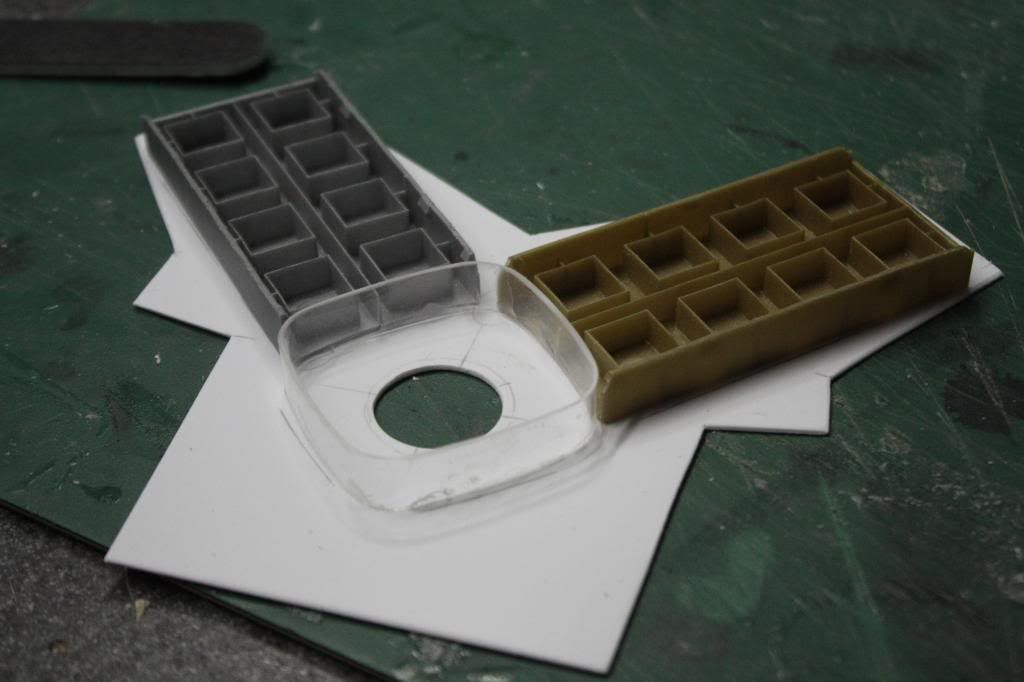 Then started the magnetic buffer assembly, this was made from a liquid cement bottle cap and styrene tubing 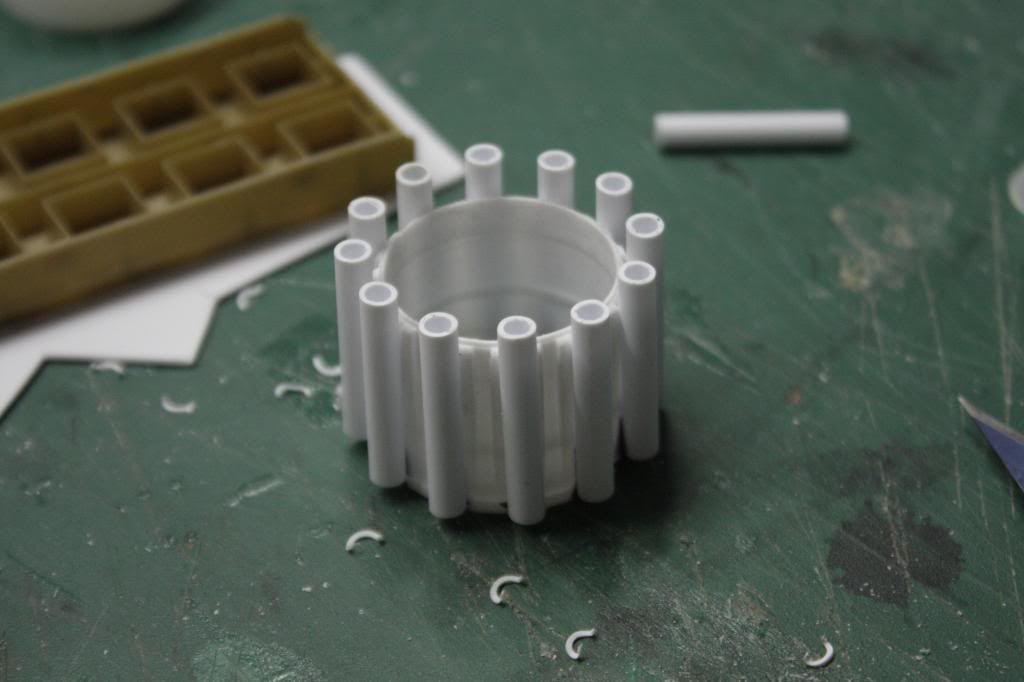 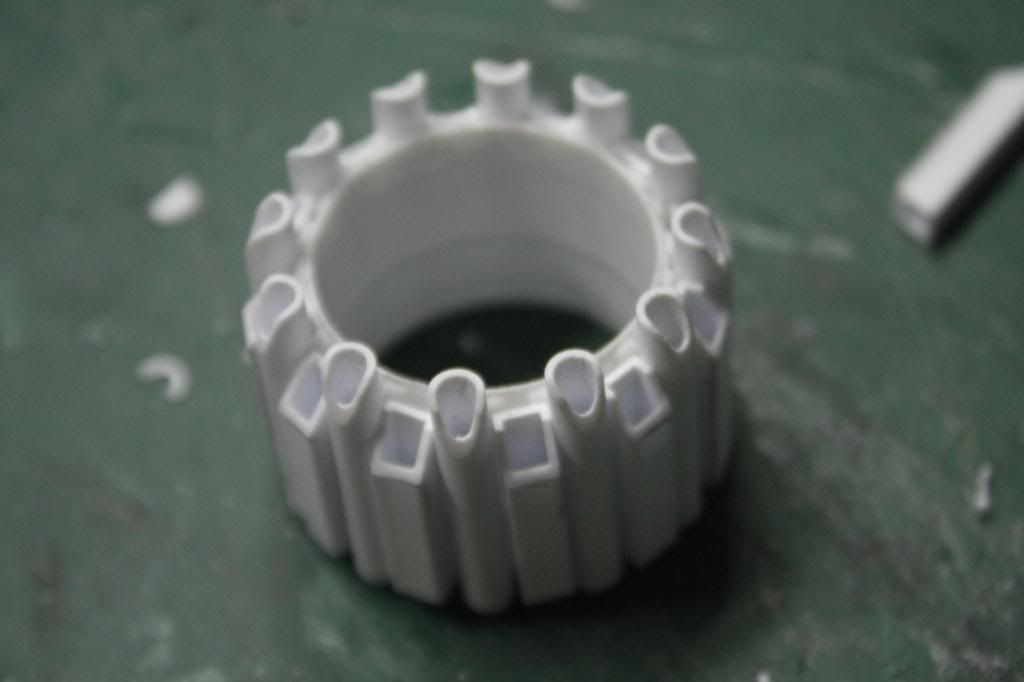 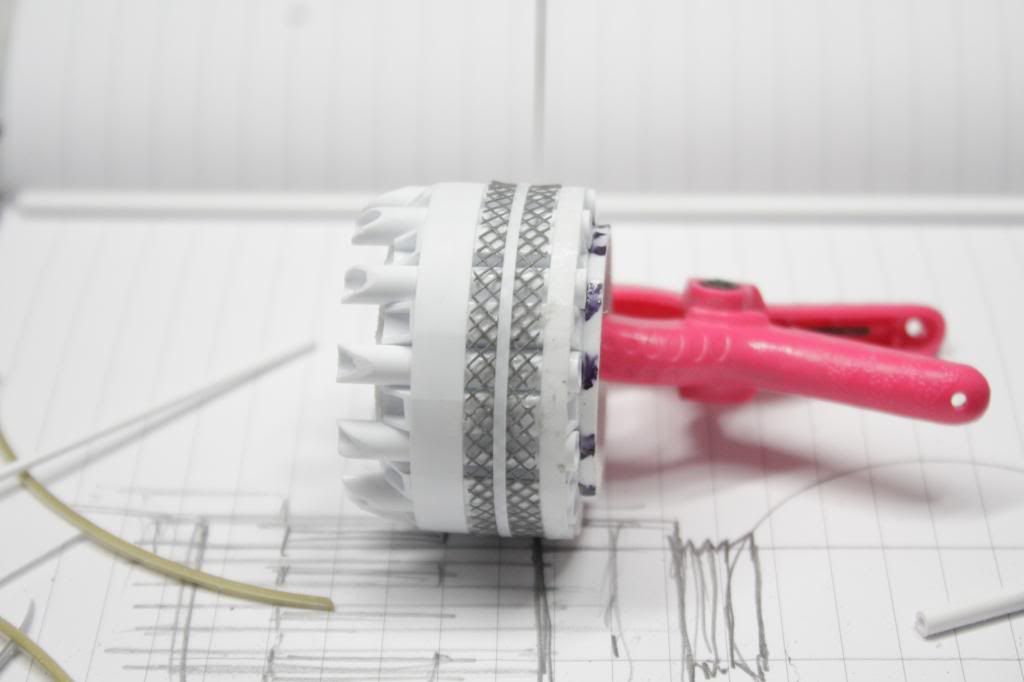 Then it was the floating magnetic vacuum heads 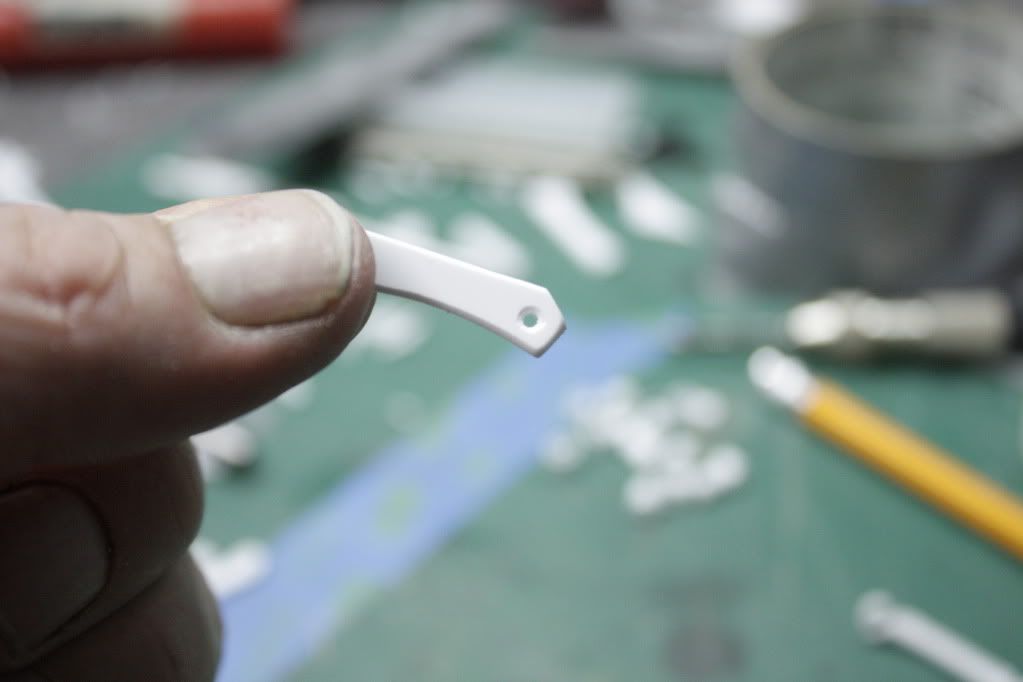 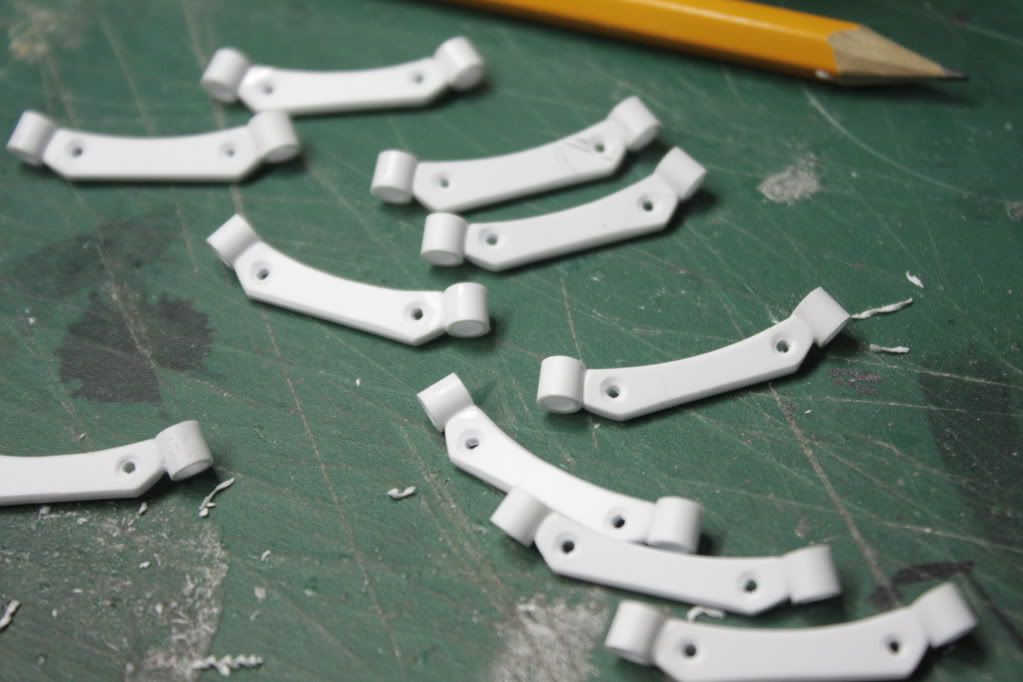 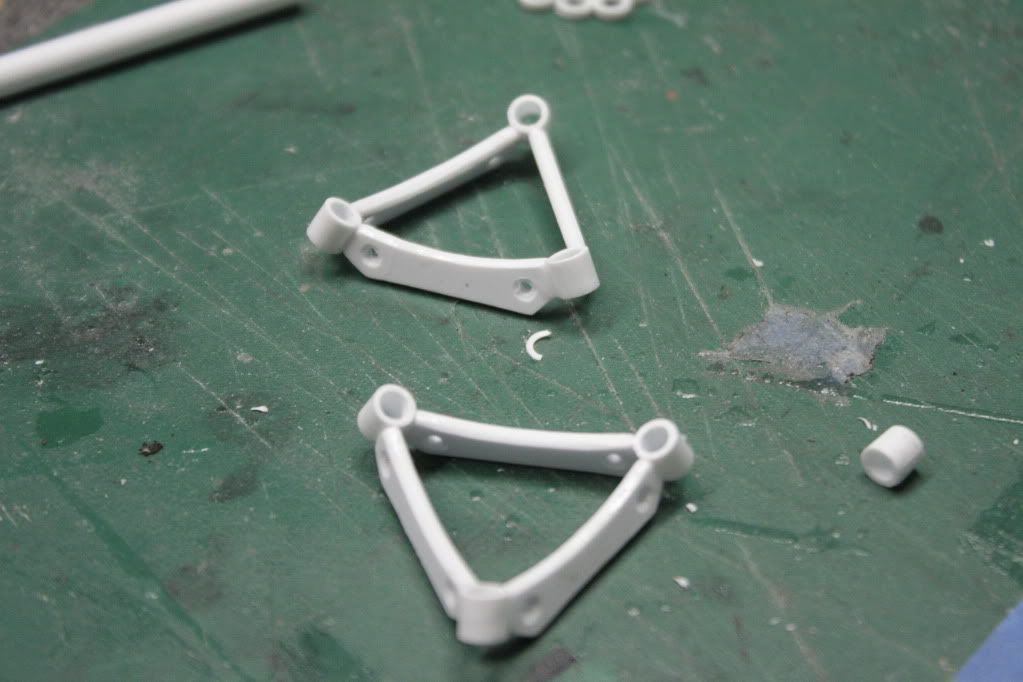 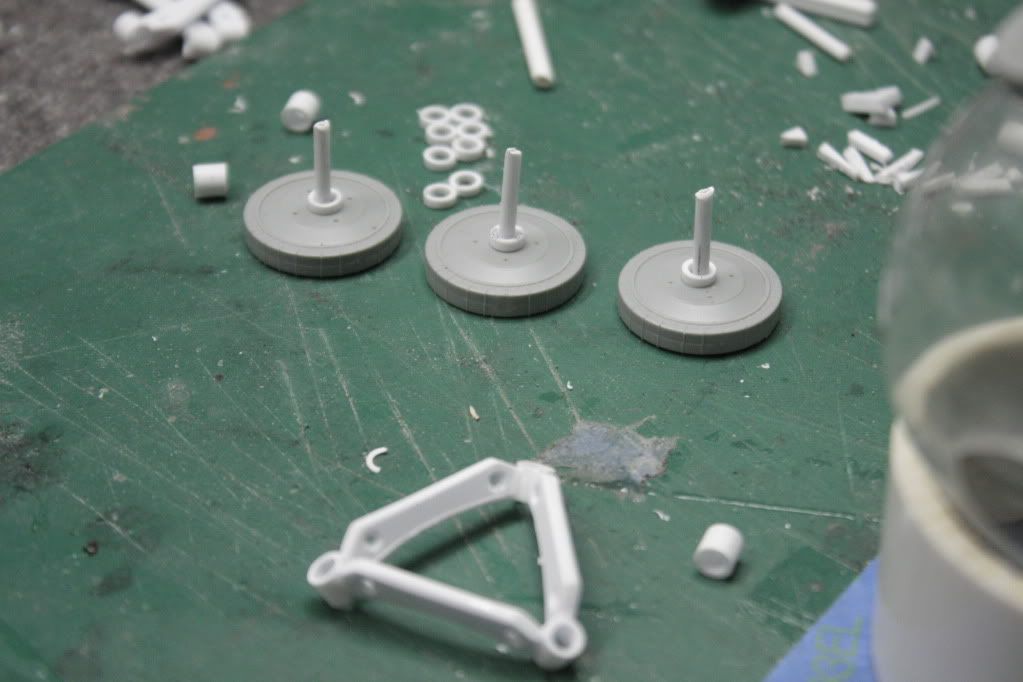 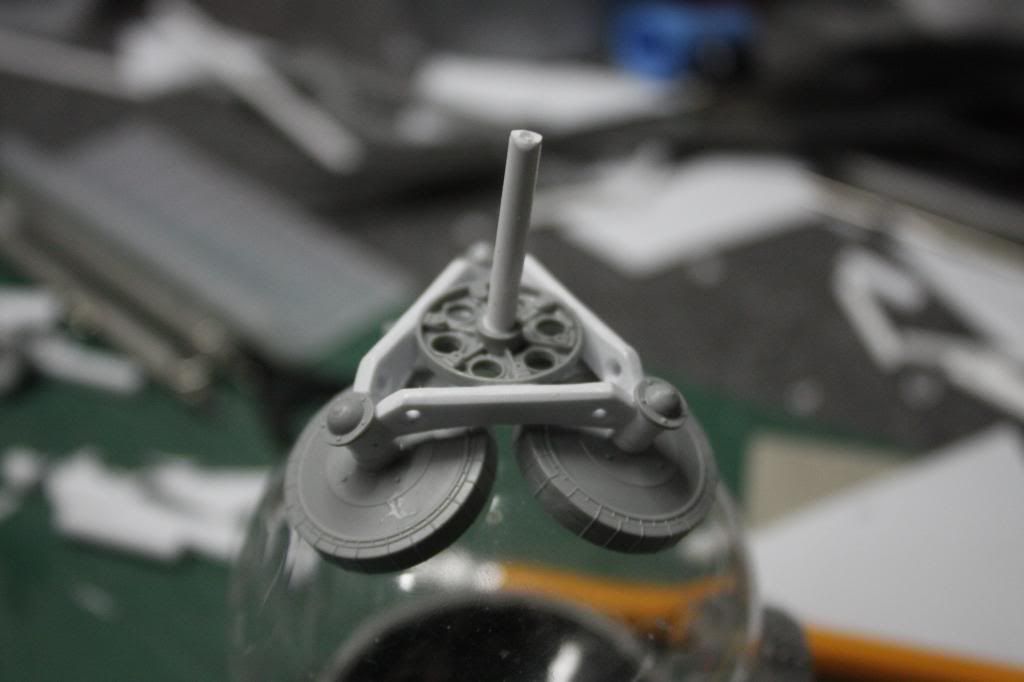 Then the arm assemblies, this was made from a display support from my ship model and other various styrene pieces and some motorbike forks. 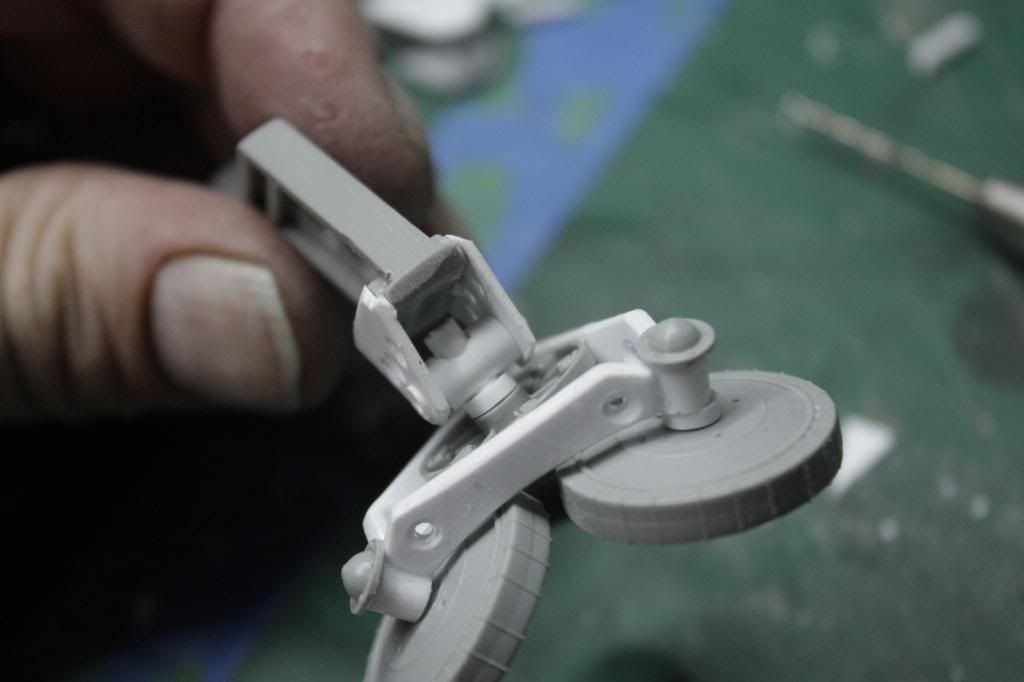 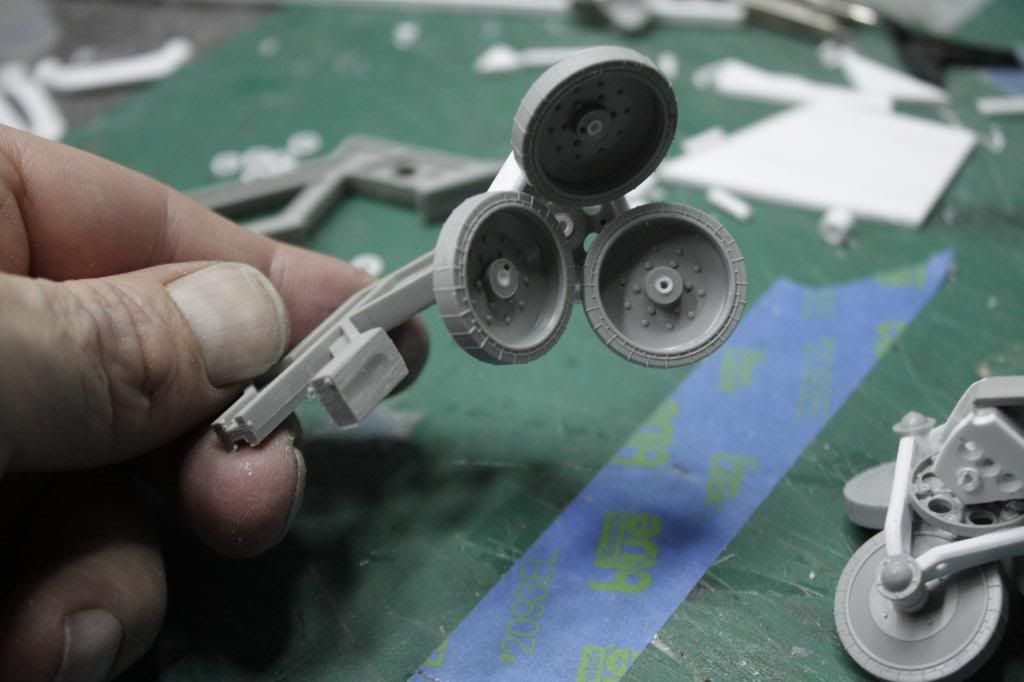 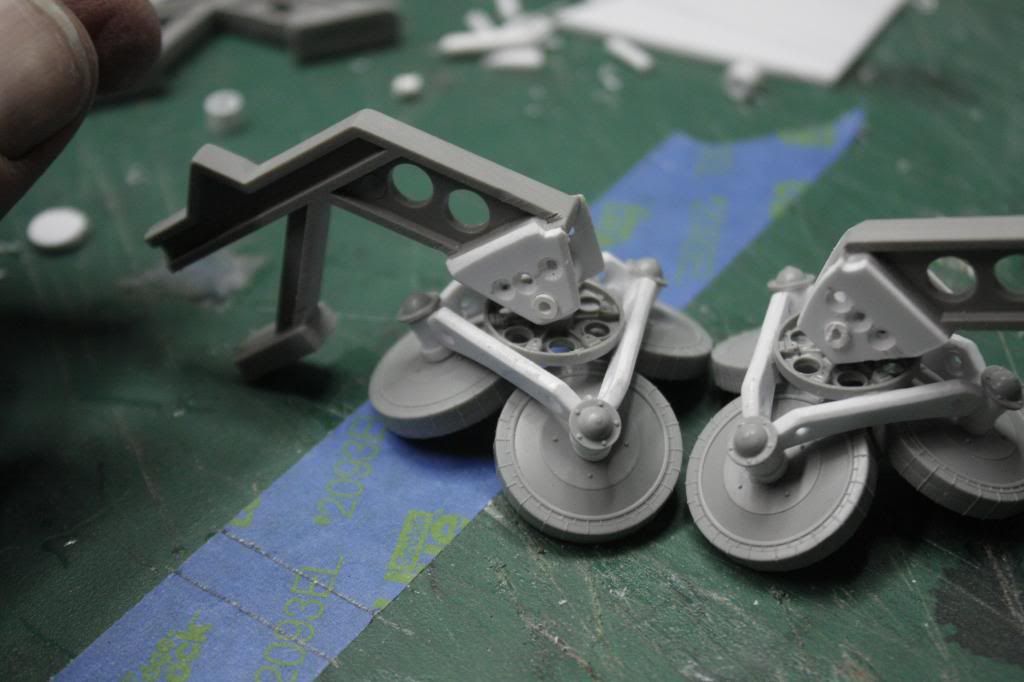 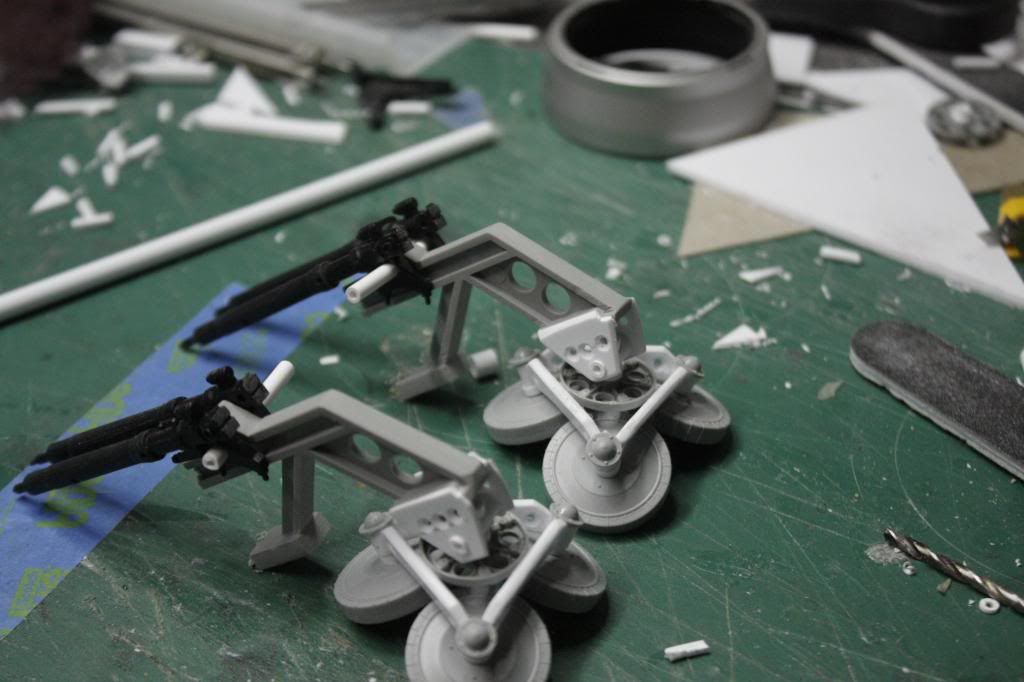 I then concentrated on the support mechanism for these arms 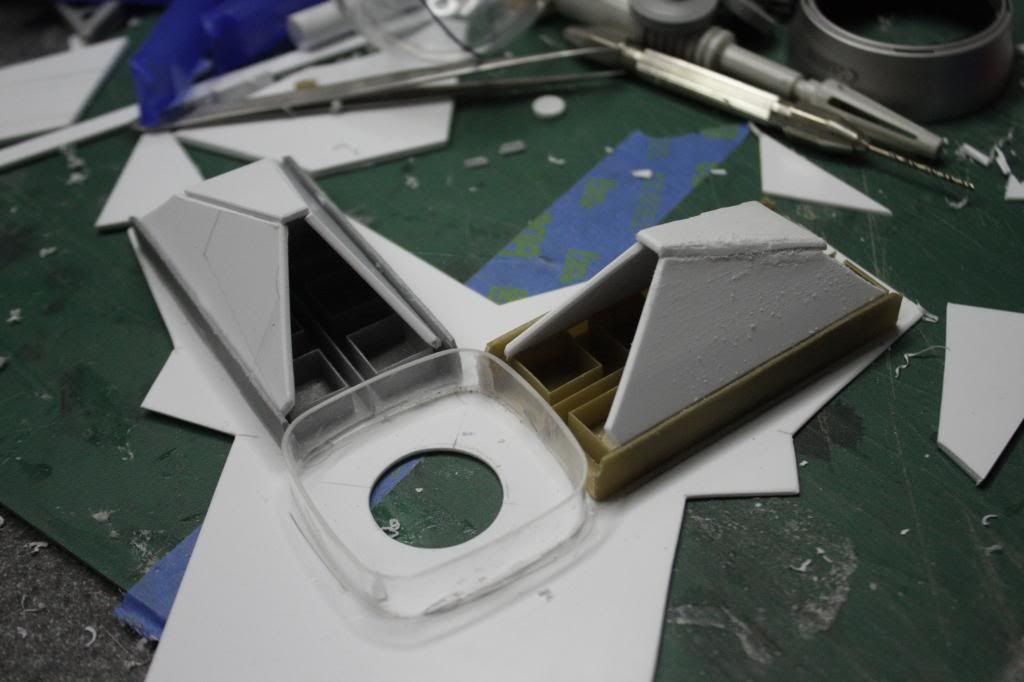 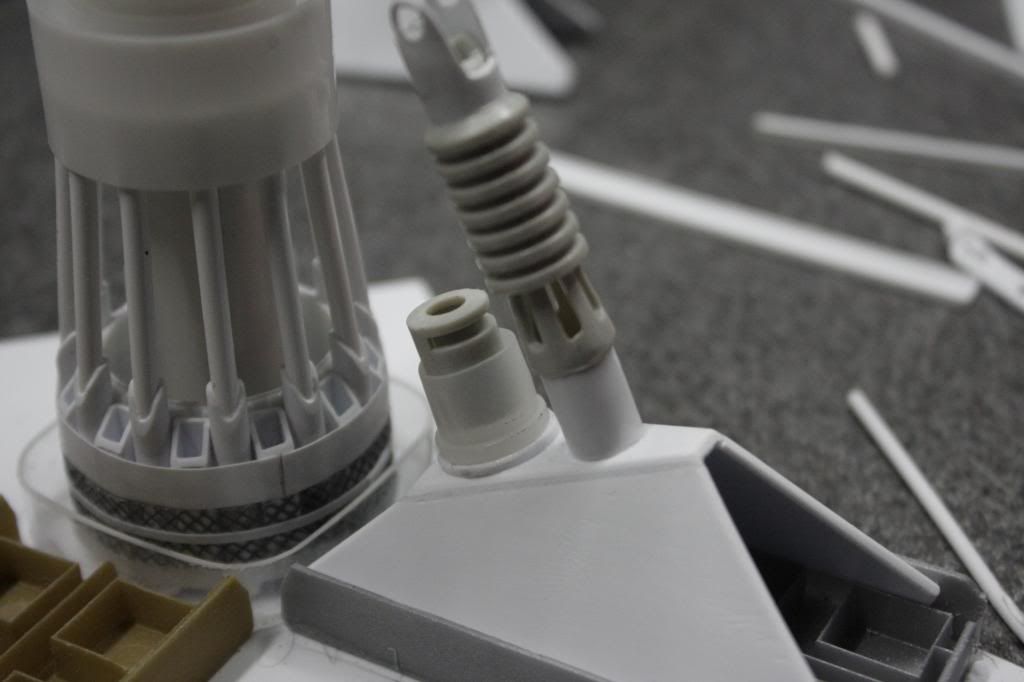 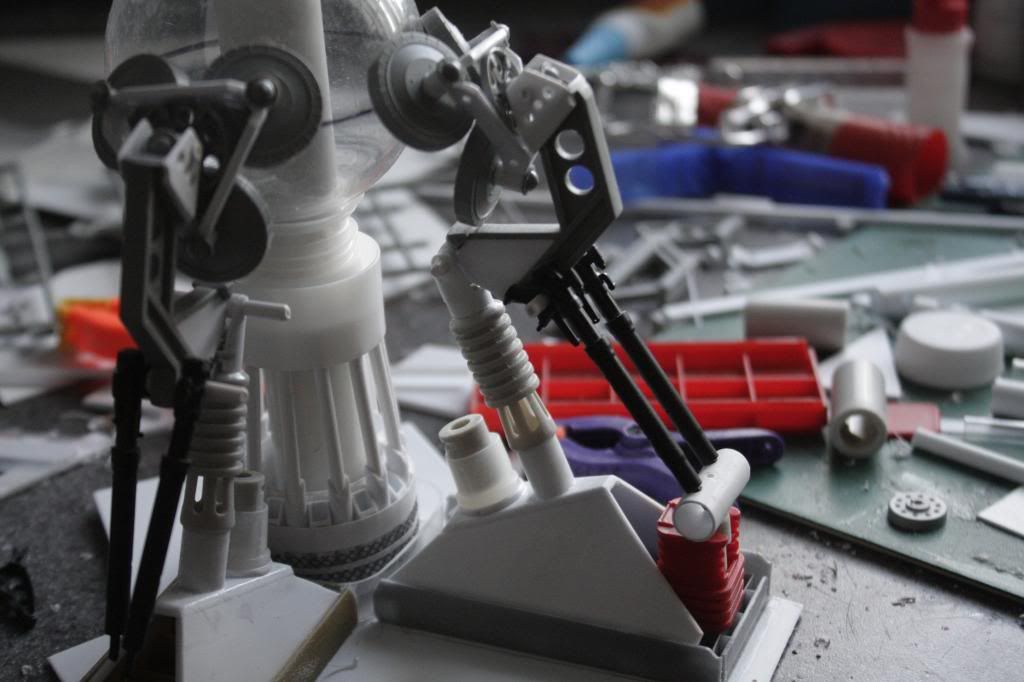 This is mainly all dry fit together as i plan to add more details like hoses and wiring and other little pieces, but i'm very happy with them as they do actually work as far as holding on to the ball of the hitch is concerned. Still have to make the fixed underside support magnetic vacuum heads but now i know what they look like so it makes it easier Thats all so far, Mum leaves on Thursday so i should have more to report in the next week or so. Take care Gag |
|





 , pen & pencil holder, wine bottle gift tubes and an assortment of swimming pool pump accessories to name a few.
