2whl
Full Member
   August '24 MoM Winner
Member since: September 2023
Posts: 445
Sept 10, 2023 12:21:52 GMT -5
Sept 10, 2023 12:21:52 GMT -5
|
Post by 2whl on Sept 14, 2023 8:20:08 GMT -5
Thank you very much guys. With this post I've caught up to where the build is presently. Radiator shroud and center console were added to the chassis. Other than the seats and belts and some small details, the chassis is done. Now updates will slow down as I start doing bodywork. 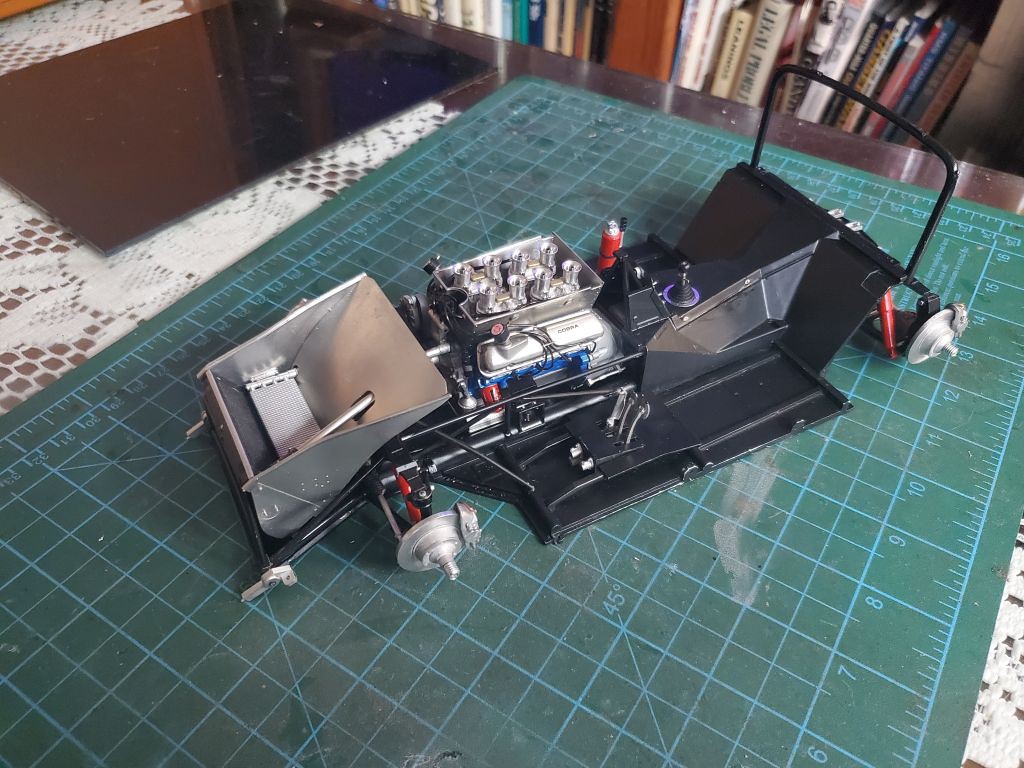 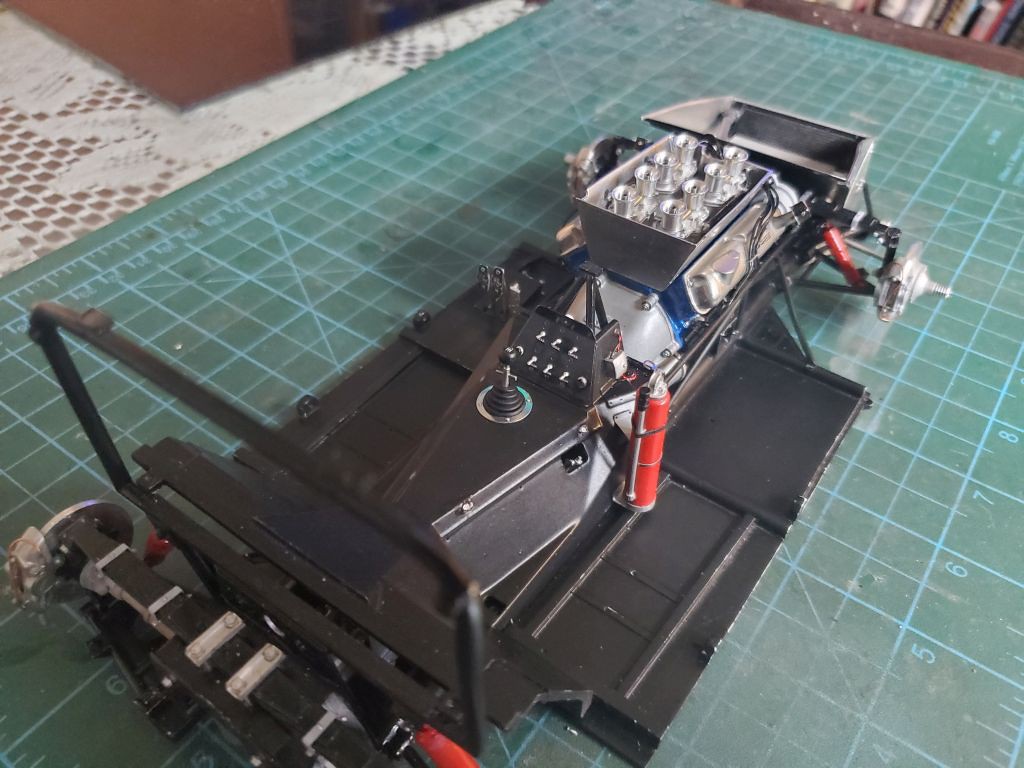 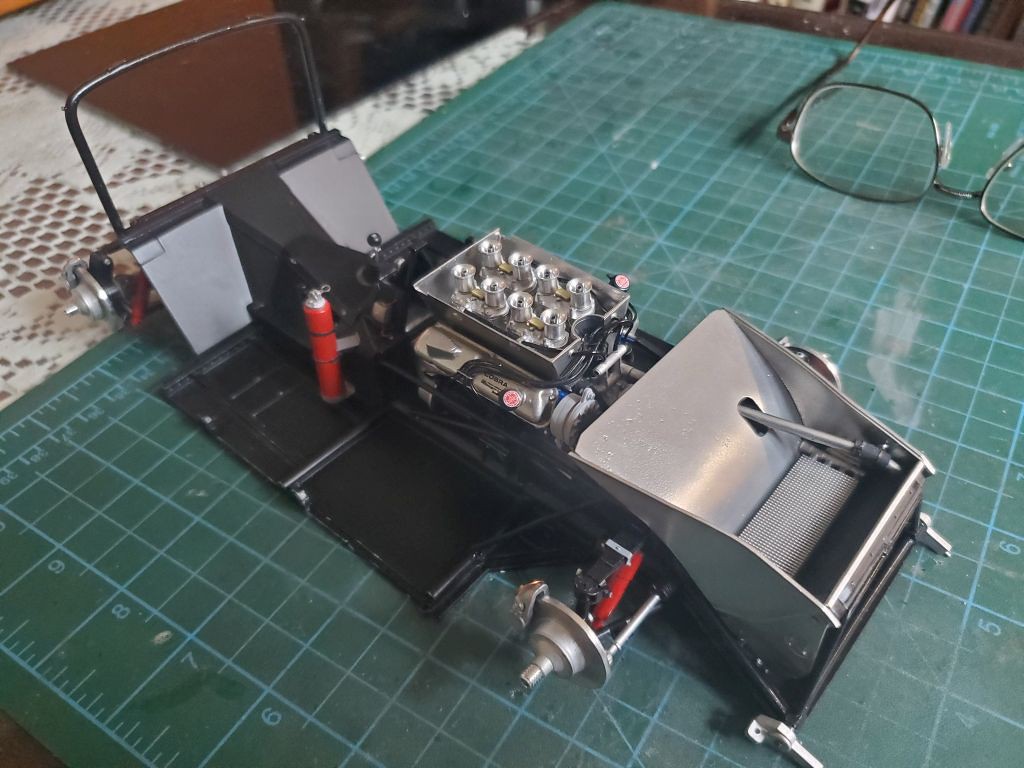 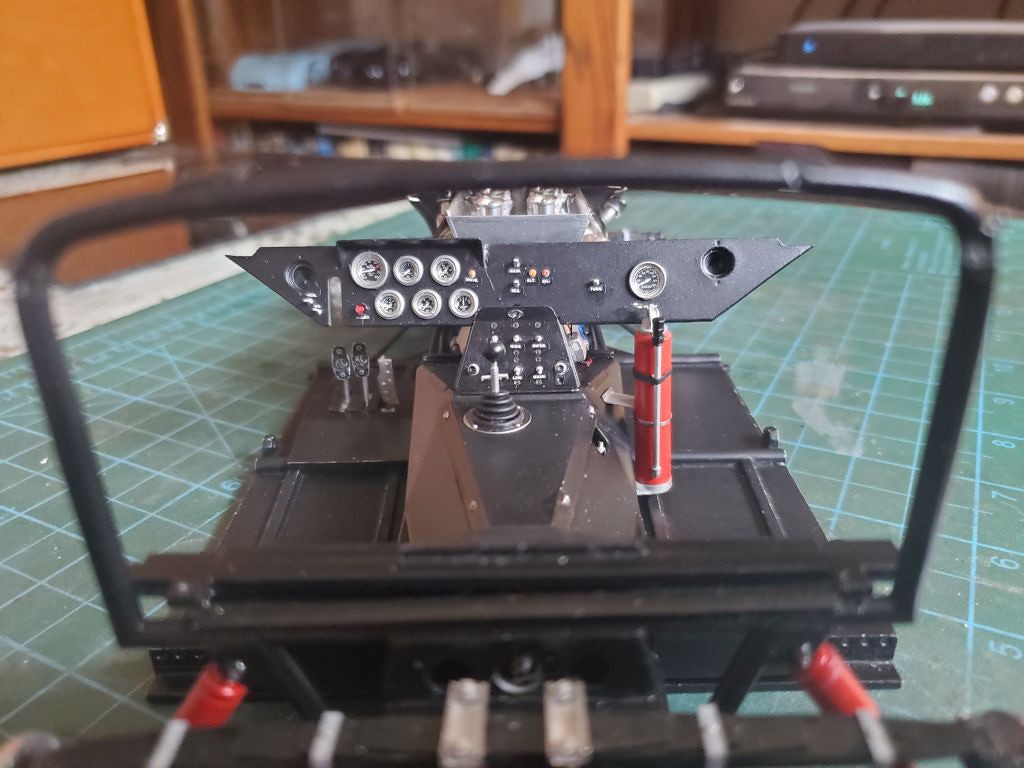 280 |
|
|
|
Post by deafpanzer on Sept 14, 2023 10:12:11 GMT -5
WOW! My guess was not even that close... I assumed $300 or so. Now I understand better why the kit is far superior than any that I have seen so far.
|
|
garydavis-Rest In Peace
Full Member
  
Member since: March 2023
RIP- September 2023
Posts: 440 
|
Post by garydavis-Rest In Peace on Sept 14, 2023 12:38:53 GMT -5
Man Paul...THAT dash LOOKS fREEK'IN AWESOME! The whole chassis is off the hook.
|
|
2whl
Full Member
   August '24 MoM Winner
Member since: September 2023
Posts: 445
Sept 10, 2023 12:21:52 GMT -5
Sept 10, 2023 12:21:52 GMT -5
|
Post by 2whl on Sept 14, 2023 13:48:44 GMT -5
WOW! My guess was not even that close... I assumed $300 or so. Now I understand better why the kit is far superior than any that I have seen so far. Andy, the 1/20 scale F1 cars cost about $300. This is a 1/20 BRM P83 Jackie Stewart 1967 that I built. 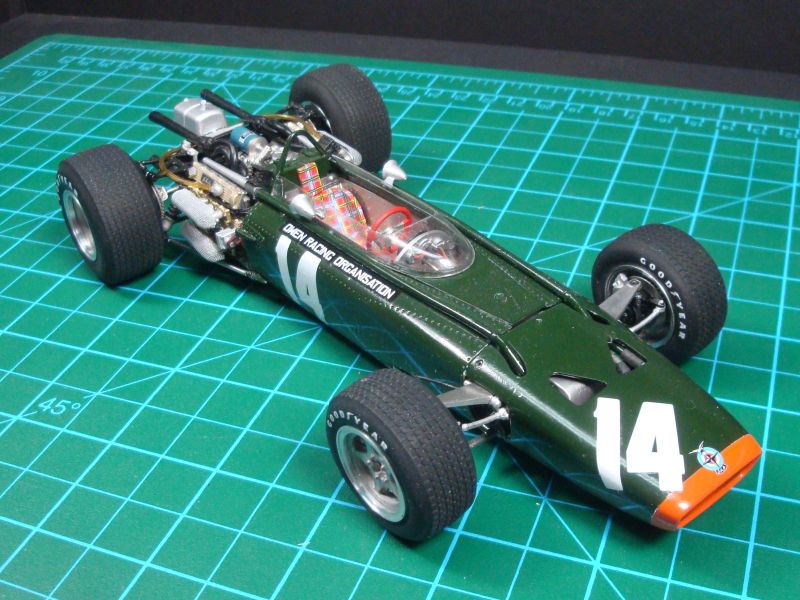 Man Paul...THAT dash LOOKS fREEK'IN AWESOME! The whole chassis is off the hook. Thanks Gary. |
|
garydavis-Rest In Peace
Full Member
  
Member since: March 2023
RIP- September 2023
Posts: 440 
|
Post by garydavis-Rest In Peace on Sept 14, 2023 13:59:27 GMT -5
That 1/20 P83 looks GREAT, Paul. I have the same kit waiting for me to get to it. Seeing yours makes me want to jump on that build right now. MFH kits are really detailed. I have a few 1/43 kits that I also have waiting for me...they as detailed as the 24th and 20th kits.
|
|
2whl
Full Member
   August '24 MoM Winner
Member since: September 2023
Posts: 445
Sept 10, 2023 12:21:52 GMT -5
Sept 10, 2023 12:21:52 GMT -5
|
Post by 2whl on Sept 14, 2023 14:10:36 GMT -5
That 1/20 P83 looks GREAT, Paul. I have the same lit waiting for me to get to it. Seeing yours maked me want to jump on that build right now. MFH kits really detailed. I have a few 1/43 kits that I also have waiting for me...they as detailed as the 24th and 20th kits. Gary, the BRM is the first MFH that I built. I got it to get my feet wet in these kits because I had purchased a 73 Tyrrell 006 which I saw live at the Nurburgring. I wanted something to practice on before tackling that kit. Since then it has snow-balled into too many 1/12th kits. |
|
41chevy
Full Member
  
Member since: June 2023
Posts: 324
Jun 5, 2023 11:01:03 GMT -5
Jun 5, 2023 11:01:03 GMT -5
|
Post by 41chevy on Sept 14, 2023 22:29:27 GMT -5
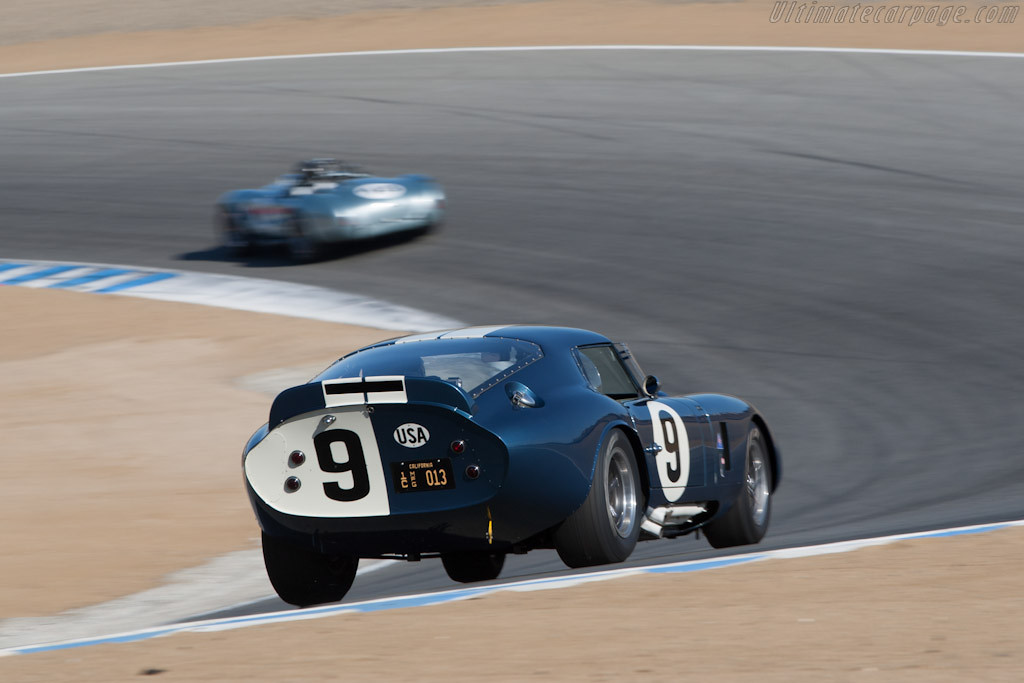
Looks absolutely real! Mr Shelby worked with Ford to wind tunnel test the body (probably one of the first aero tested) and found the flush glass added a few mph and directed the air to the spoiler smoother and more uniformly. The buggy springs eliminated the need for sway bars and could have wedges put into the center pring mount to pre load the spring for different tracks. The ran a large set of wedges front and rear a Bridge Hampton in the 60's. It was legal cheating with the buggy spring wedges
|
|
|
|
Post by kyledehart5 on Sept 15, 2023 0:26:40 GMT -5
WOW! My guess was not even that close... I assumed $300 or so. Now I understand better why the kit is far superior than any that I have seen so far. Andy, the 1/20 scale F1 cars cost about $300. This is a 1/20 BRM P83 Jackie Stewart 1967 that I built.  Man Paul...THAT dash LOOKS fREEK'IN AWESOME! The whole chassis is off the hook. Thanks Gary. This is gorgeous as well Paul. I love it. |
|
handiabled
Administrator      Apr '23 Showcased Build Awarded
Member since: February 2023
Posts: 4,391  Member is Online
MSC Staff
|
Post by handiabled on Sept 15, 2023 2:11:20 GMT -5
Awesome work sir!
|
|
|
|
Post by 406 Silverado on Sept 15, 2023 5:12:09 GMT -5
Some mighty fine work going on in here Paul. Kudos to you on that engine as it looks like the real deal. Keep up the good work and keep the updates comin.  |
|
2whl
Full Member
   August '24 MoM Winner
Member since: September 2023
Posts: 445
Sept 10, 2023 12:21:52 GMT -5
Sept 10, 2023 12:21:52 GMT -5
|
Post by 2whl on Sept 25, 2024 20:29:15 GMT -5
|
|
|
|
Post by project510 on Sept 25, 2024 22:07:02 GMT -5
Another awesome kit. Great job so far. That engine sure is good lookin haha
|
|
|
|
Post by kyledehart5 on Sept 26, 2024 3:18:43 GMT -5
Fantastic!! Glad to see you back on this one Paul!! Too cool
|
|
handiabled
Administrator      Apr '23 Showcased Build Awarded
Member since: February 2023
Posts: 4,391  Member is Online
MSC Staff
|
Post by handiabled on Sept 26, 2024 3:37:32 GMT -5
Great to see this back again! Once again you are making fitting the vacuum formed pieces look easy!
|
|
|
|
Post by 406 Silverado on Sept 26, 2024 4:46:10 GMT -5
Oh COOL!!! This one is back out on the modeling bench!! Will be watching for more updates on this bad boy Paul!!  |
|
joelw
Full Member
  
Member since: July 2024
Posts: 572 
|
Post by joelw on Sept 27, 2024 7:23:53 GMT -5
Paul,
I just found your build thread on the Shelby Daytona Coupe that I requested, or rather should I say begged to be your next build. I've already bookmarked your build thread so I can stay current as there's no way to be notified of new threads yet.
I've was a constant poster/mega fan on the other forum, but I read every update and post on these pages to get up to speed. Doesn't look like I missed a lot of new work, but to bad that I've forgotten a lot of what I read and saw previously.
The completed chassis, engine, interior dash are all simply amazing both in the kit complexity, and your ability to create them to the highest standards. I was just floored when I saw the 4 down draft Weber Carbs. Just amazing detail. For that matter so is the entire engine/trans assembly. Excellent job on the dash, instruments, and the center consul.
So far your vacuum formed glass is coming out exactly as MFH intended them to.
joel
|
|
2whl
Full Member
   August '24 MoM Winner
Member since: September 2023
Posts: 445
Sept 10, 2023 12:21:52 GMT -5
Sept 10, 2023 12:21:52 GMT -5
|
Post by 2whl on Oct 1, 2024 18:33:38 GMT -5
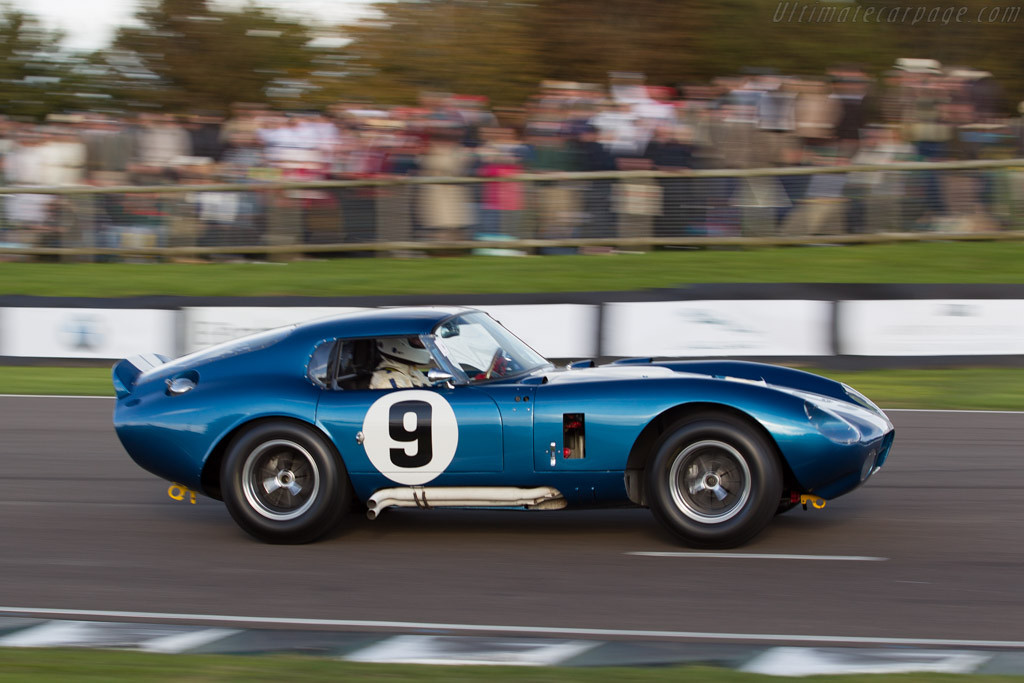 Paul, I just found your build thread on the Shelby Daytona Coupe that I requested, or rather should I say begged to be your next build. I've already bookmarked your build thread so I can stay current as there's no way to be notified of new threads yet. I've was a constant poster/mega fan on the other forum, but I read every update and post on these pages to get up to speed. Doesn't look like I missed a lot of new work, but to bad that I've forgotten a lot of what I read and saw previously. The completed chassis, engine, interior dash are all simply amazing both in the kit complexity, and your ability to create them to the highest standards. I was just floored when I saw the 4 down draft Weber Carbs. Just amazing detail. For that matter so is the entire engine/trans assembly. Excellent job on the dash, instruments, and the center consul. So far your vacuum formed glass is coming out exactly as MFH intended them to. joel Thanks Joel. But it didn't take much begging on your part. It was either this or the BT45. I've been doing a lot of little things to prepare the body for color. I wanted to get all of the outside bits sorted before I did the paint job. If you'll notice in the second and third pictures, I did get the interior painted in semi-gloss black. The right side deflector is finished. It took about two hours to get it to this point. The left side will go faster since I have my procedure done pat. 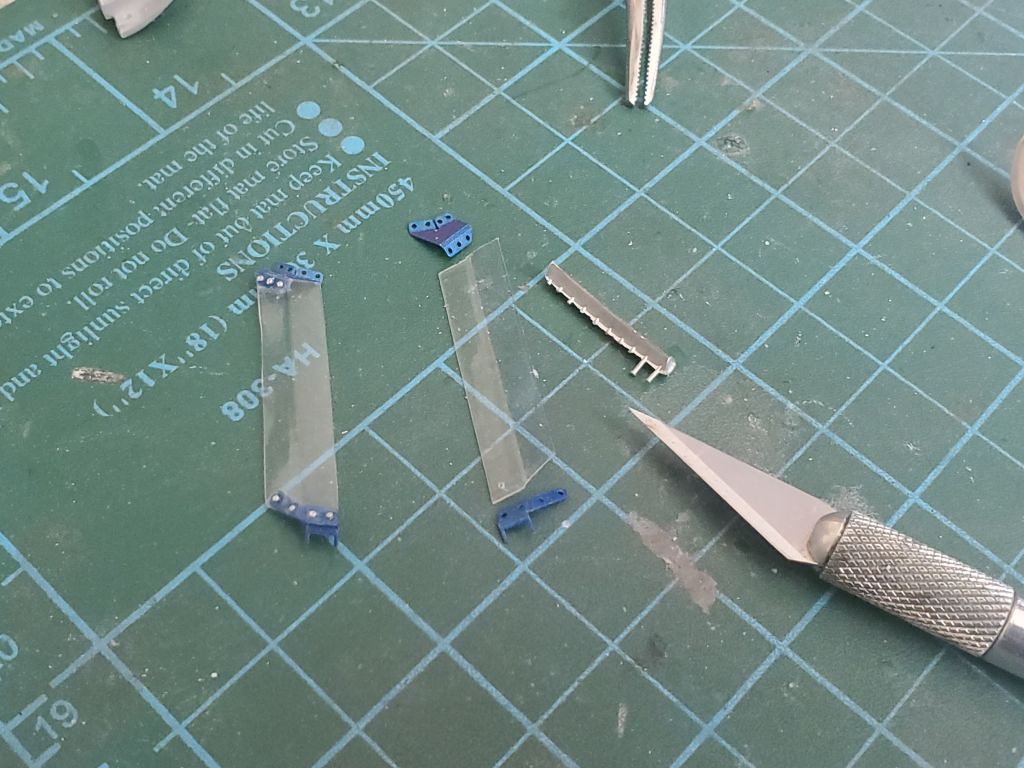 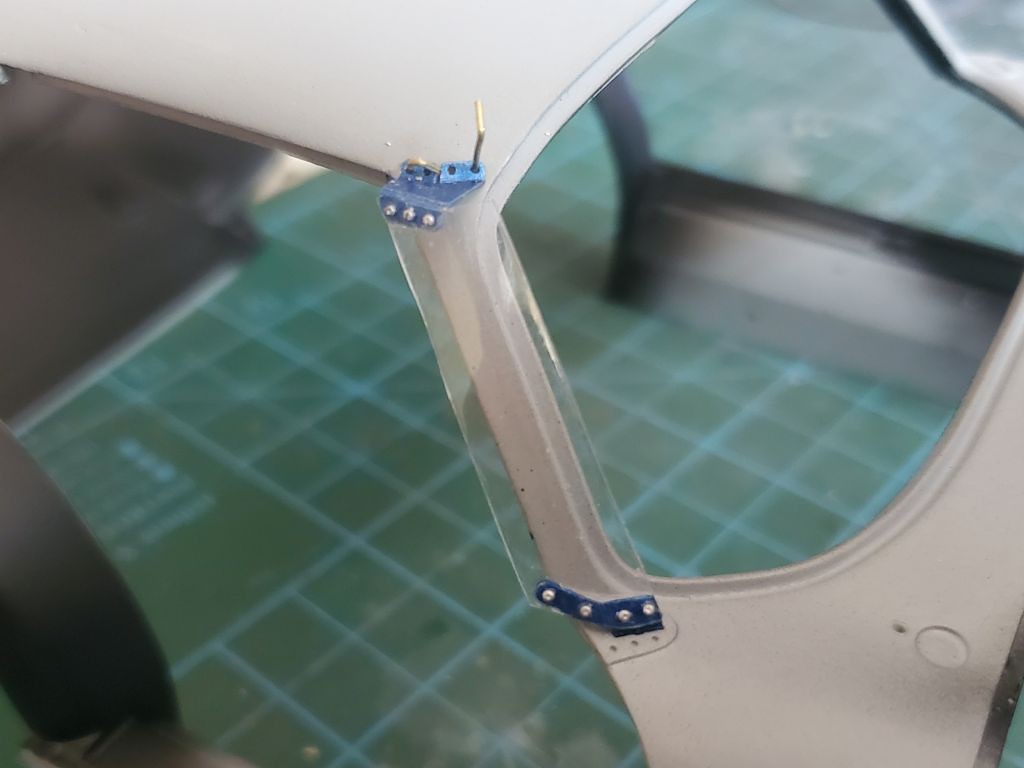 I placed the brackets on the car. Then I pinned the vac-form to the bottom bracket. Then I marked it and clamped it while I added rivets one at a time. 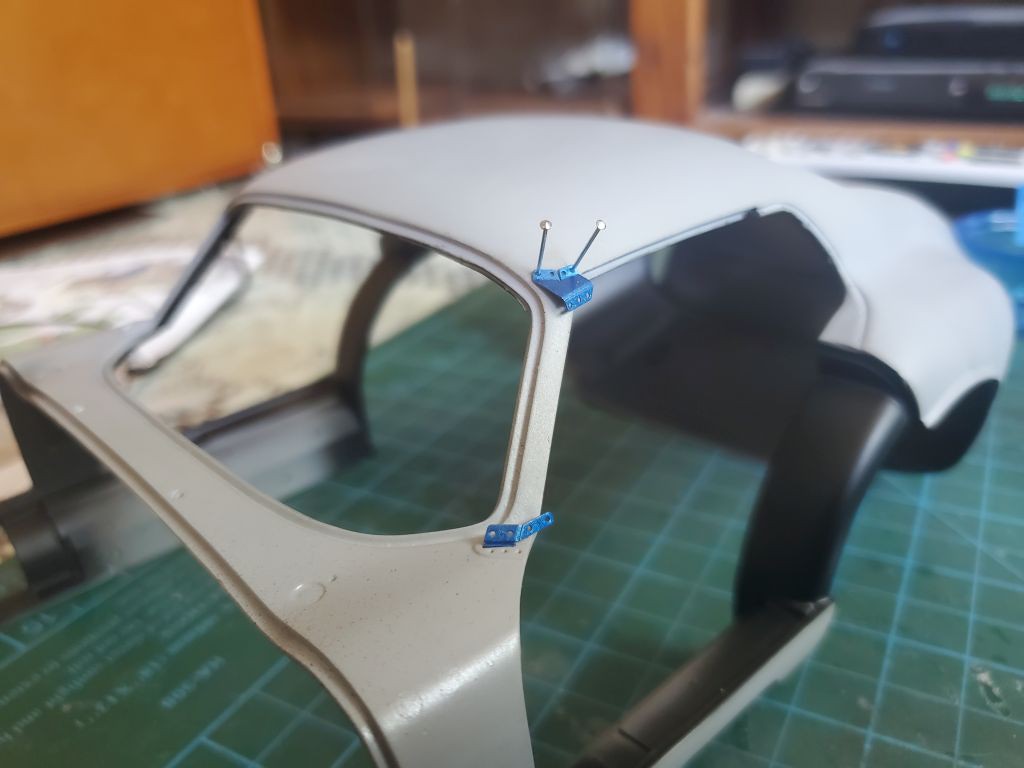 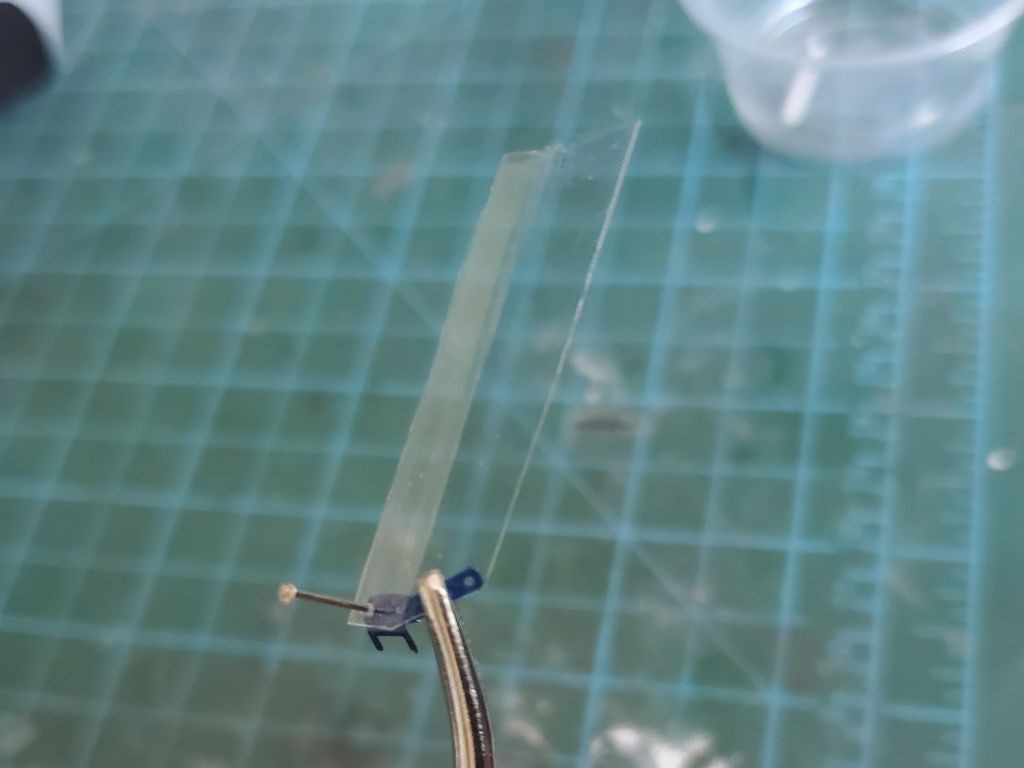 I also spent some time assembling the seat belts. 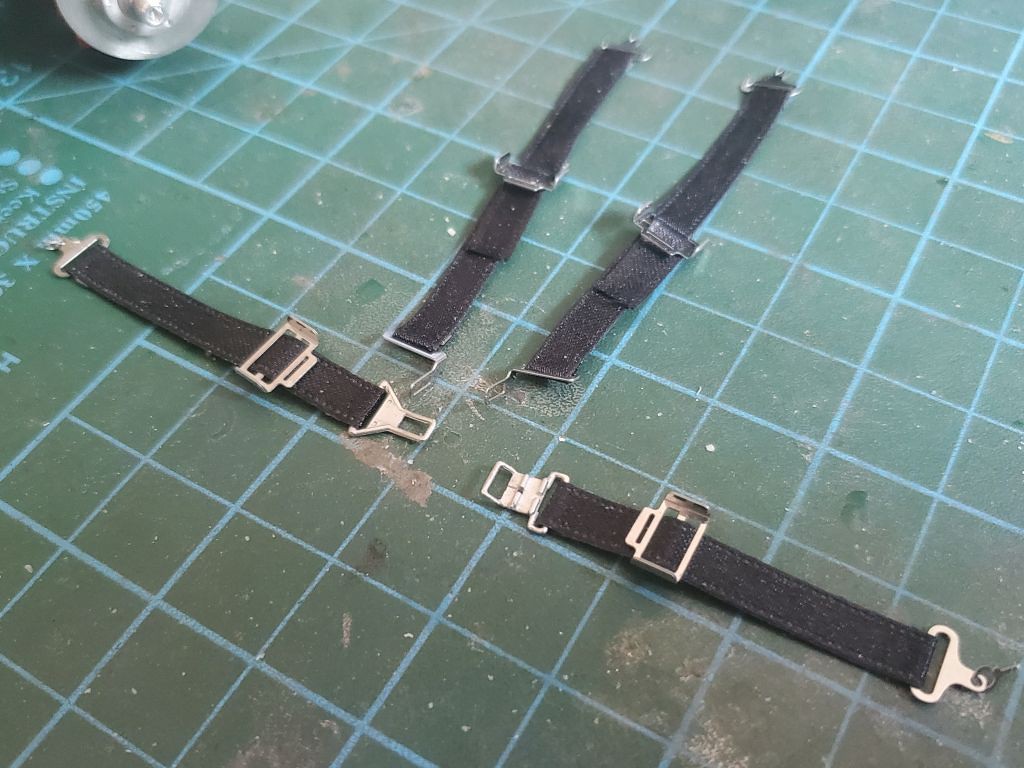 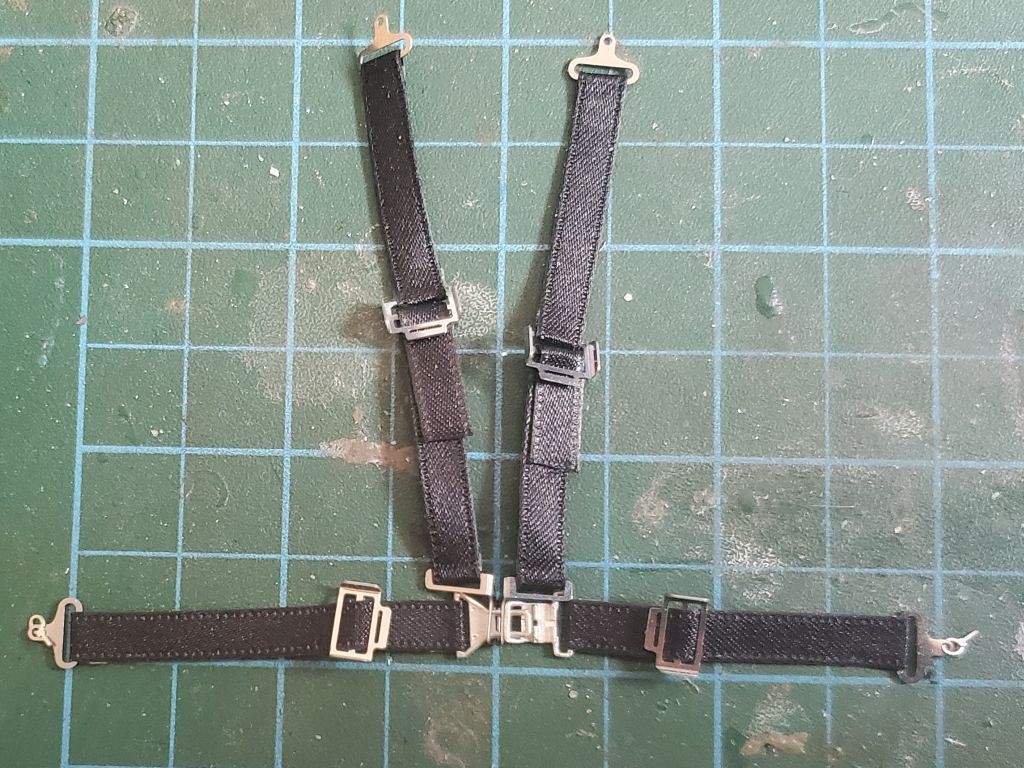 955 |
|
|
|
Post by Steve Zuleski on Oct 1, 2024 19:11:00 GMT -5
Sheesh, Paul, keepin that steady pace and you're not even winded, sheesh! I like the safety belts, incredibly detailed. From the looks of your ref pic this is gonna be another incredible paint job, too.
Ruck On, Bby!
|
|
|
|
Post by kyledehart5 on Oct 2, 2024 1:51:22 GMT -5
Amazing work. I always enjoy your vac-form and riveting work. And those belts look wonderful.
|
|
handiabled
Administrator      Apr '23 Showcased Build Awarded
Member since: February 2023
Posts: 4,391  Member is Online
MSC Staff
|
Post by handiabled on Oct 2, 2024 2:05:56 GMT -5
Just outstand work with the deflectors! The harness set looks really great! Are the adjusters and couplers metal or painted styrene? They have really nice detail.
|
|
benb
Full Member
  
Member since: July 2024
Posts: 251
Jul 17, 2024 12:07:35 GMT -5
Jul 17, 2024 12:07:35 GMT -5
|
Post by benb on Oct 2, 2024 8:01:30 GMT -5
WOW!!!
Ben
|
|
brandonk
Full Member
   Jan '24 Showcased Model Awarded
Member since: May 2023
Posts: 1,266
May 14, 2023 13:45:45 GMT -5
May 14, 2023 13:45:45 GMT -5
|
Post by brandonk on Oct 2, 2024 9:24:18 GMT -5
What he said...  |
|
joelw
Full Member
  
Member since: July 2024
Posts: 572 
|
Post by joelw on Oct 2, 2024 10:42:39 GMT -5
Paul,
Your vacu-form work is truly amazing as those wind deflectors with the metal brackets are dead on perfect. And the seatbelts and racing harness really look the part. MFH really took the time to go the extra mile on all the details especially the stitching on all the belts.
joel
|
|
|
|
Post by project510 on Oct 2, 2024 10:51:08 GMT -5
|
|
2whl
Full Member
   August '24 MoM Winner
Member since: September 2023
Posts: 445
Sept 10, 2023 12:21:52 GMT -5
Sept 10, 2023 12:21:52 GMT -5
|
Post by 2whl on Oct 3, 2024 14:07:05 GMT -5
 Just outstand work with the deflectors! The harness set looks really great! Are the adjusters and couplers metal or painted styrene? They have really nice detail. Brent, the buckle pieces in the center are white metal. The adjusters and anchors are all p/e. One of the subassemblies that I've been chipping away at is the doors. The windows have a sliding panel in them which had to be cut out of a flat clear sheet. I used a steel ruler and a one sided industrial razor. 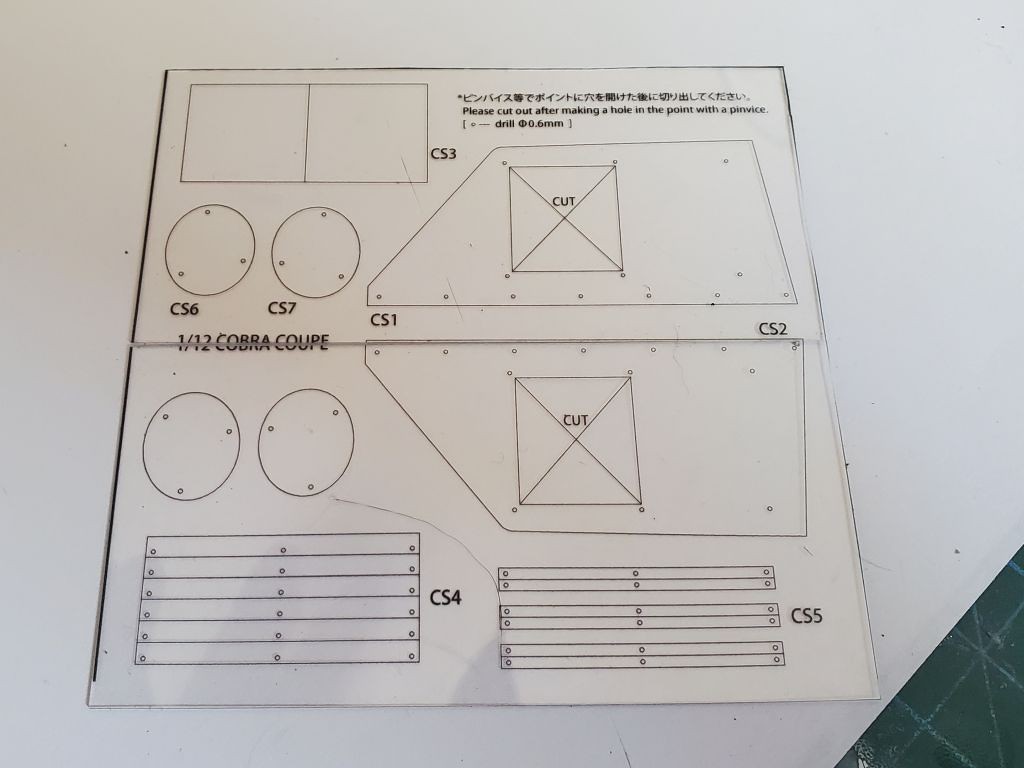 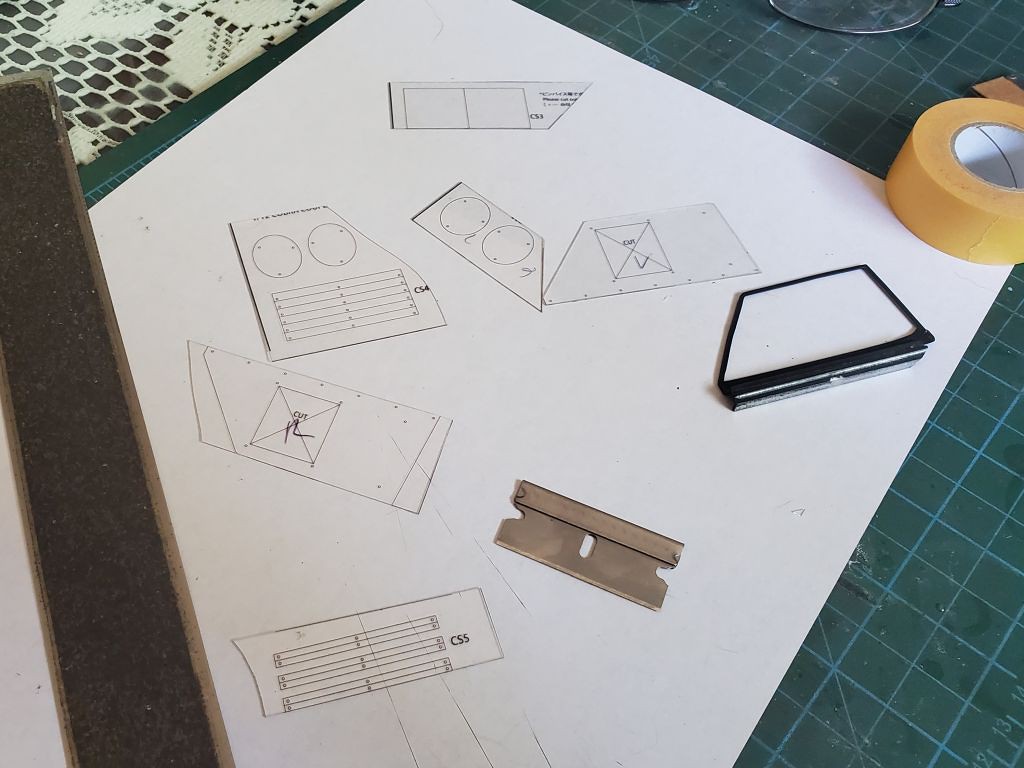 Then this morning, I gathered up my courage and taped up the body pieces. They were first sprayed with a mist coat of Tamiya TS-19 Metallic blue. Followed immediately by a second slightly heavier coat. After a 15 minute rest period, the final heavy coat was applied. Some of the interior paint got pulled up by the tape. So after a day or so, I'll re-do those spots. 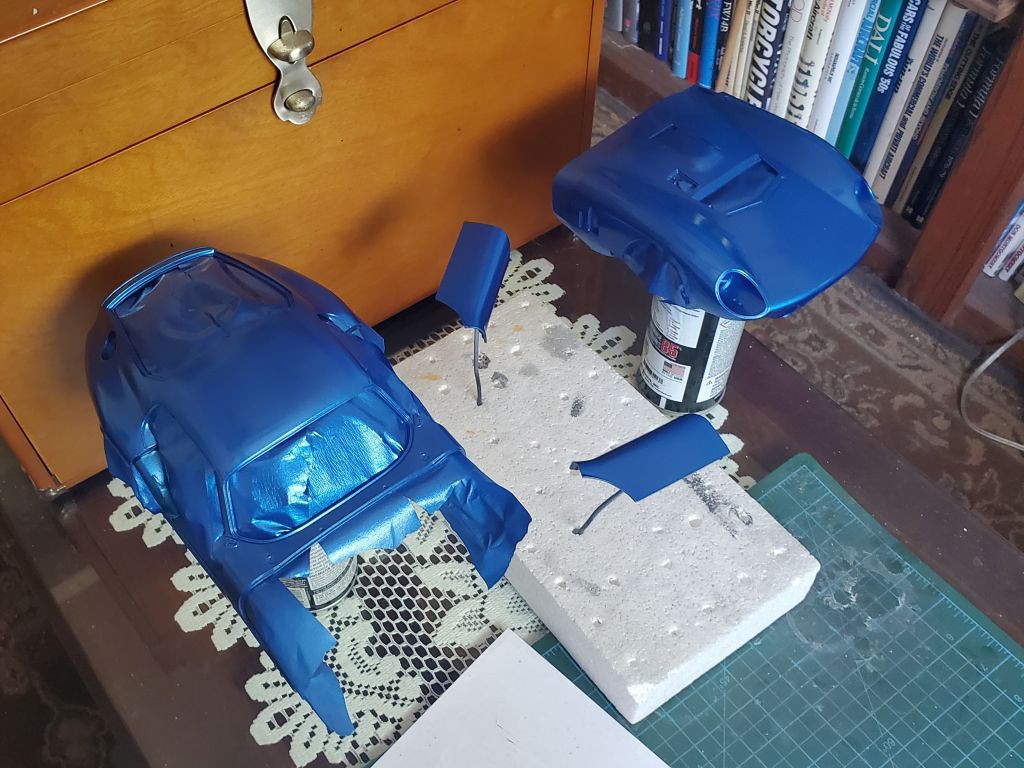 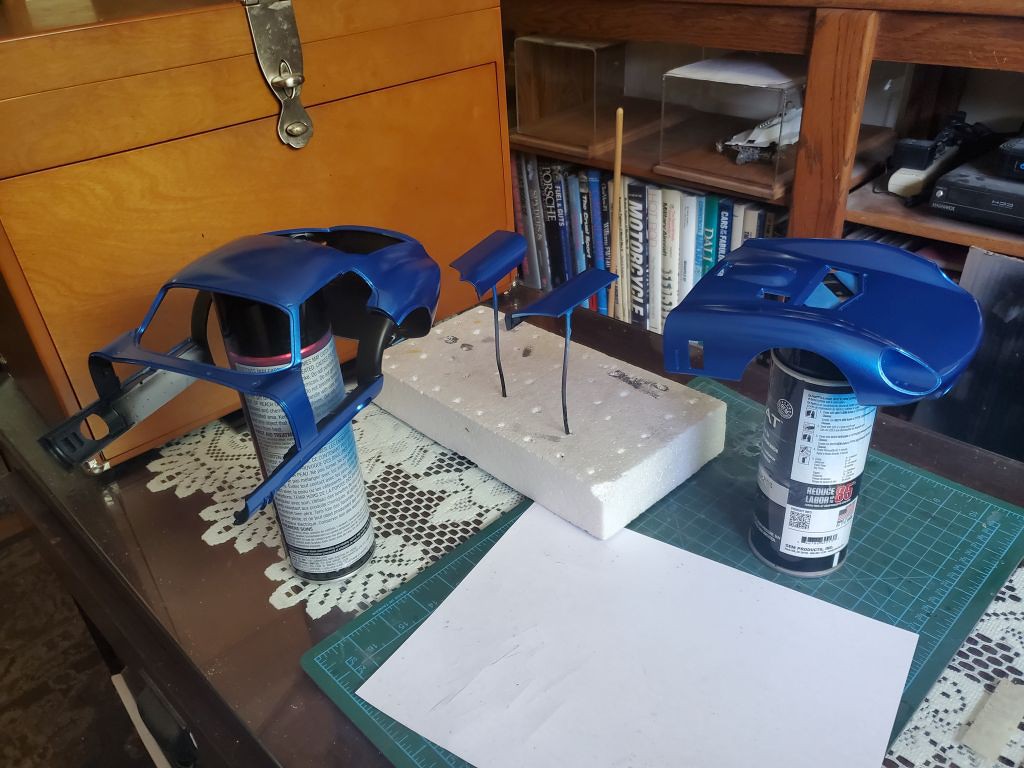 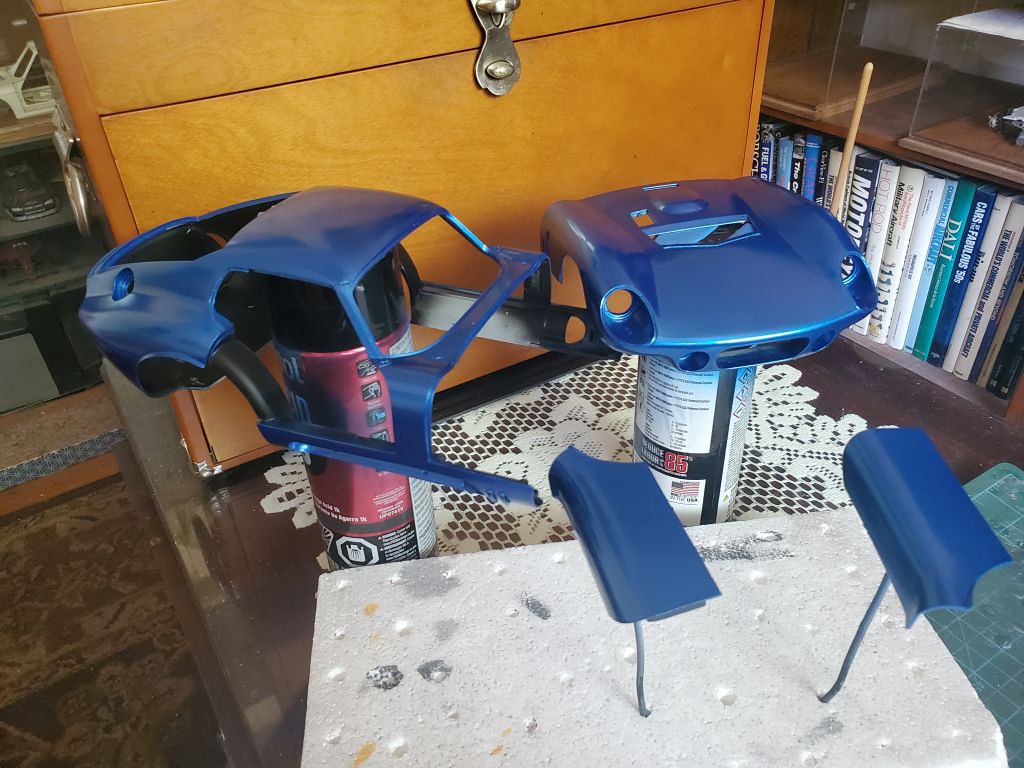 1050 |
|
joelw
Full Member
  
Member since: July 2024
Posts: 572 
|
Post by joelw on Oct 3, 2024 14:17:49 GMT -5
Paul,
The paint looks perfect, and it's just a 3 step Rattle can procedure.
As for those sliding window inserts, looking forward to how they turnout as I'm assuming that the hardest part is going to be making and then gluing those clear plastic sheet guides to the plex windows.
joel
|
|
|
|
Post by kyledehart5 on Oct 4, 2024 1:57:34 GMT -5
Beautiful color. Great paint job. Nice update
|
|
handiabled
Administrator      Apr '23 Showcased Build Awarded
Member since: February 2023
Posts: 4,391  Member is Online
MSC Staff
|
Post by handiabled on Oct 4, 2024 3:42:41 GMT -5
Great looking paintwork! I really like the color! Those windows look intimidating but when finished are going to be mind blowing.
|
|
|
|
Post by Steve Zuleski on Oct 4, 2024 4:41:48 GMT -5
Yep, that paint is looking beautiful!
|
|
2whl
Full Member
   August '24 MoM Winner
Member since: September 2023
Posts: 445
Sept 10, 2023 12:21:52 GMT -5
Sept 10, 2023 12:21:52 GMT -5
|
Post by 2whl on Oct 7, 2024 20:11:08 GMT -5
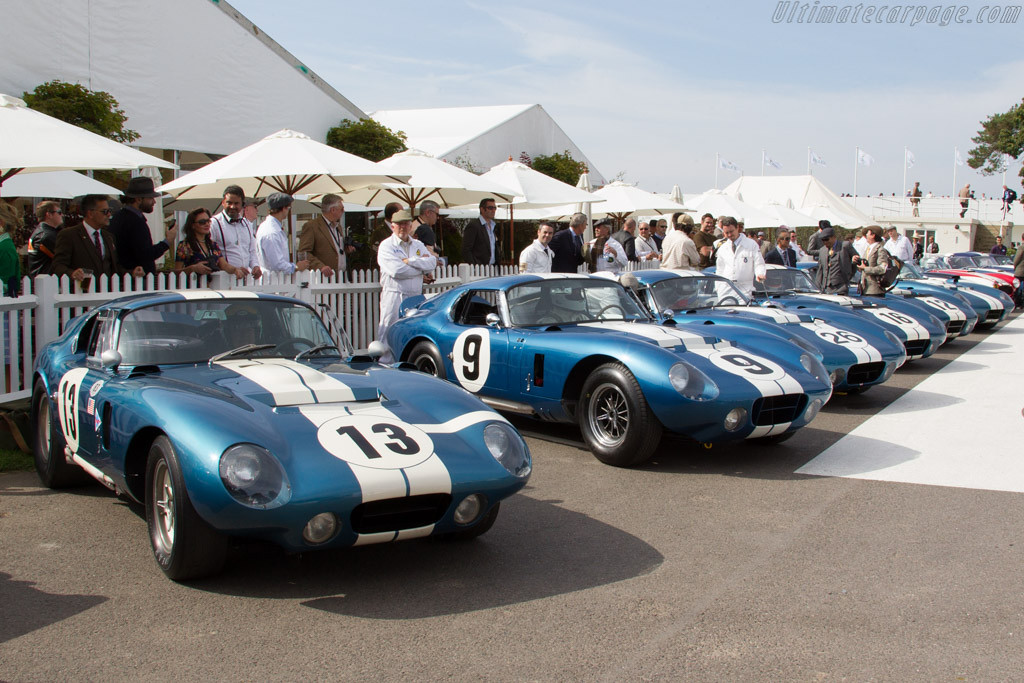 Paul, The paint looks perfect, and it's just a 3 step Rattle can procedure. As for those sliding window inserts, looking forward to how they turnout as I'm assuming that the hardest part is going to be making and then gluing those clear plastic sheet guides to the plex windows. joel Thanks Joel. The paint procedure is pretty much the same as yours. I just use something different to apply the paint. Beautiful color. Great paint job. Nice update Thanks Kyle Great looking paintwork! I really like the color! Those windows look intimidating but when finished are going to be mind blowing. Thanks Brent. The windows are a learning experience for me, that's for sure. Yep, that paint is looking beautiful! Thanks Steve Here is a progression of the first attempt at the side windows. Hopefully I'll do a better job on the other side. I used some brass rods as locators and put the rivets in one at a time. I was nervous about the sliding piece hanging up but it works quite well. 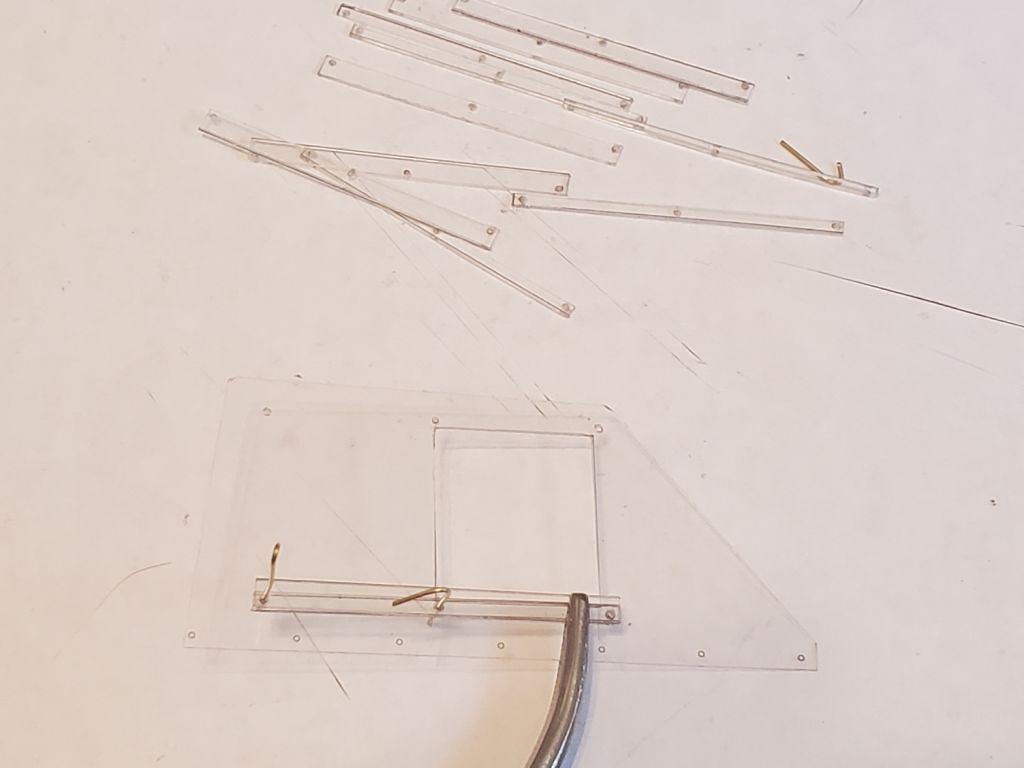 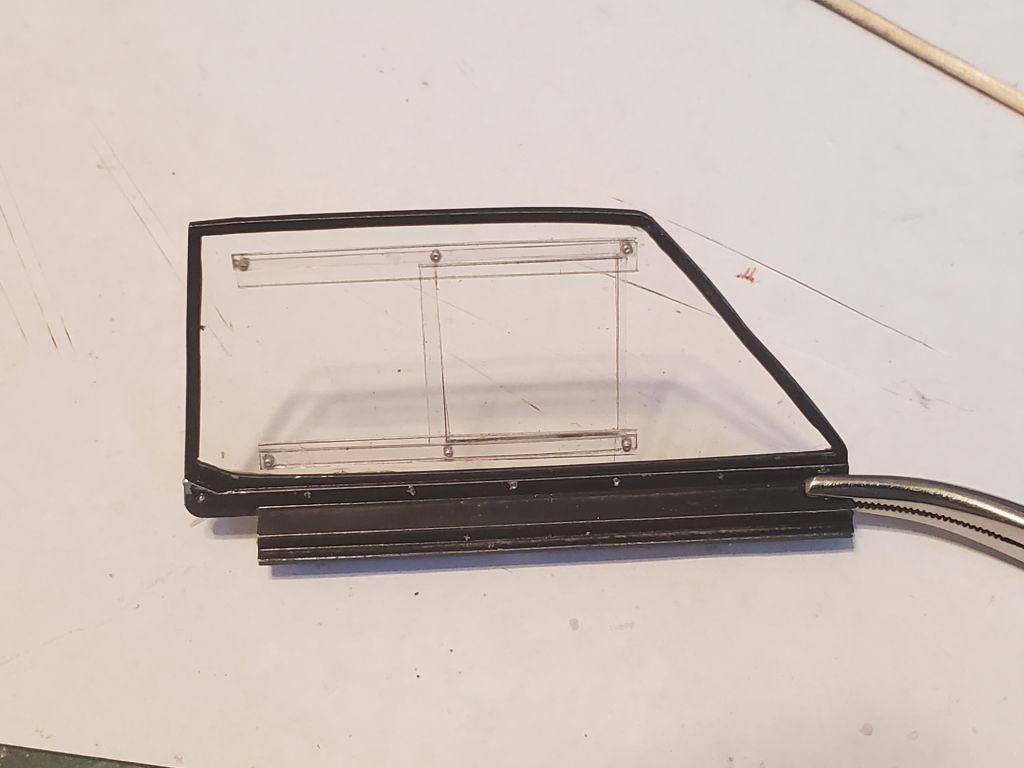 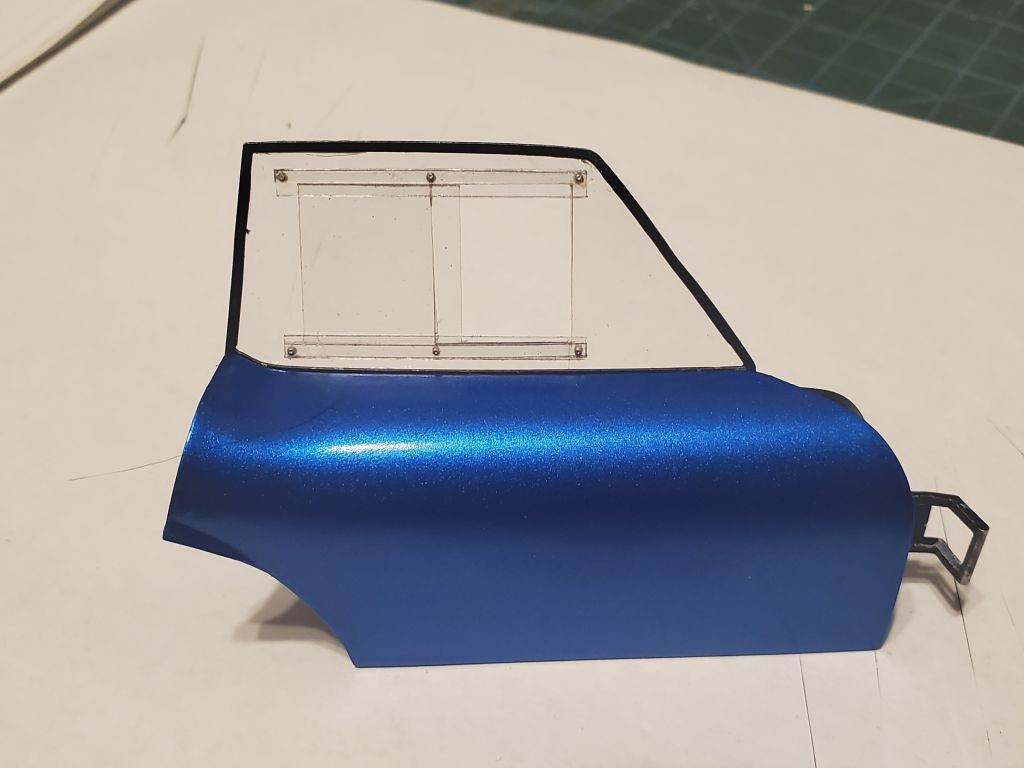 I started the decal process. I put the decals on that had a definite index for the center. The ones on the nose are located by the v for the air deflector. The cowl decal has a locator on the underside of the body that I used. And the tail had a center point also. Next I'll start adding the rest and sight between my reference decals to try to get as straight a line as possible. 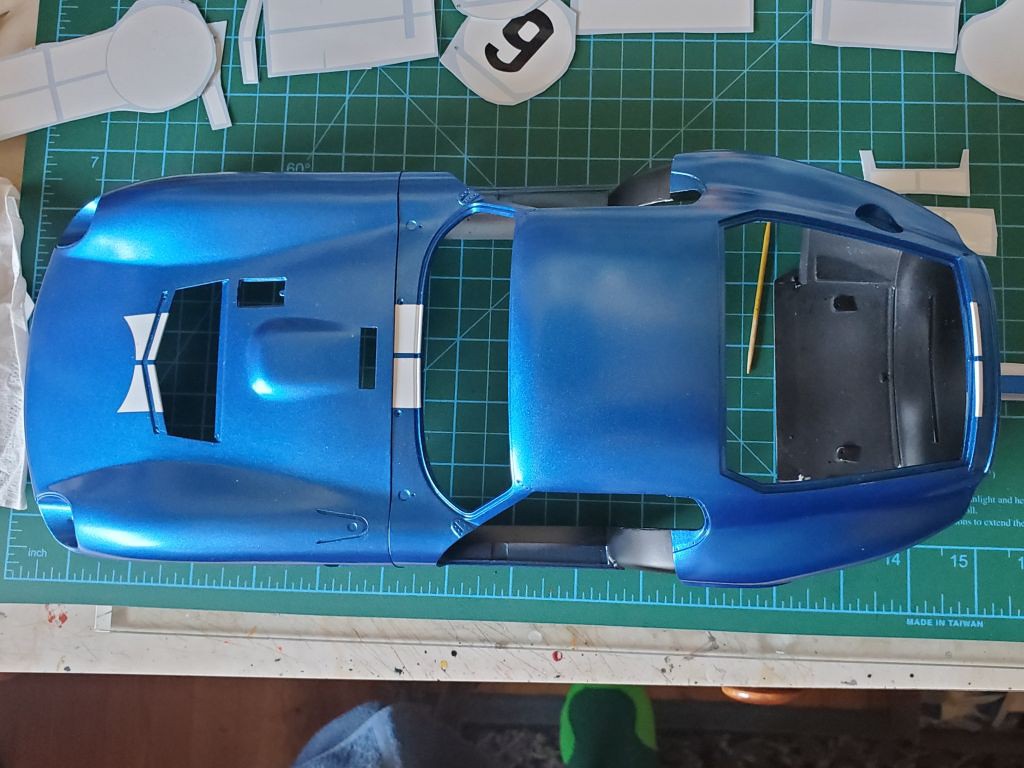 1199 |
|