atomicholiday
Full Member

Member since: September 2023
Posts: 410
Sept 4, 2023 8:25:11 GMT -5
Sept 4, 2023 8:25:11 GMT -5
|
Post by atomicholiday on Sept 18, 2023 15:37:32 GMT -5
Gentlemen! This is my first wip thread on this forum. I started this project last spring, and thought I'd update you all on my current progress. This summer, my whole focus has been on nothing but getting my paint game on. I haven't done hardly any assembly in several months. Just been prepping, priming, and painting bodies. The main reason for this is I wanted to improve my skills, but the other factor is weather. I paint outside, being in IN, that's not happening in the winter. This way, I'll have plenty to keep me busy during the winter months. The Camaro. Let's start with what's been done over the last few months, and then I'll finish up with yesterday's progress. I have a few versions of this kit, but I picked this one up most recently. They sell pretty cheap now and I couldn’t resist. 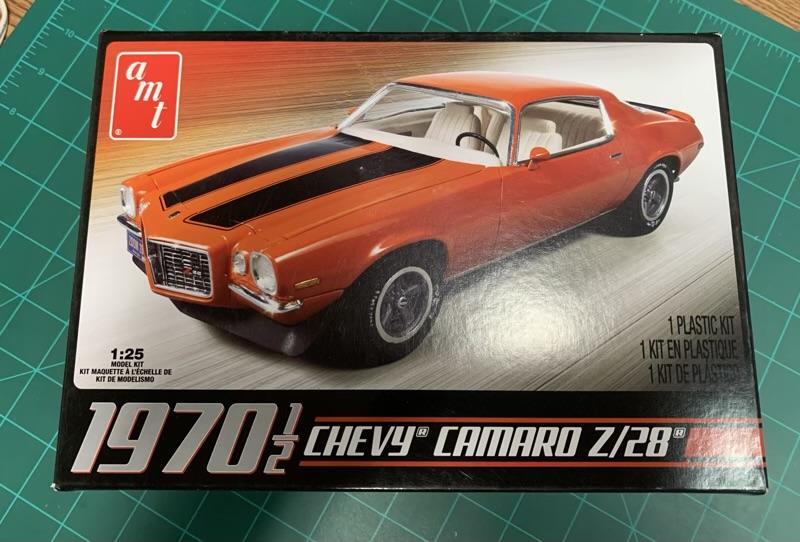 Floor pan, suspension components, wheels, and engine are painted. There is still some detail painting to do, but it’ll wait for now. I did some research, and it seems some of the Camaros had black floor pans and others had red oxide. Depends on where they were built. I’ll probably weather it very lightly, just to bring out some definition. 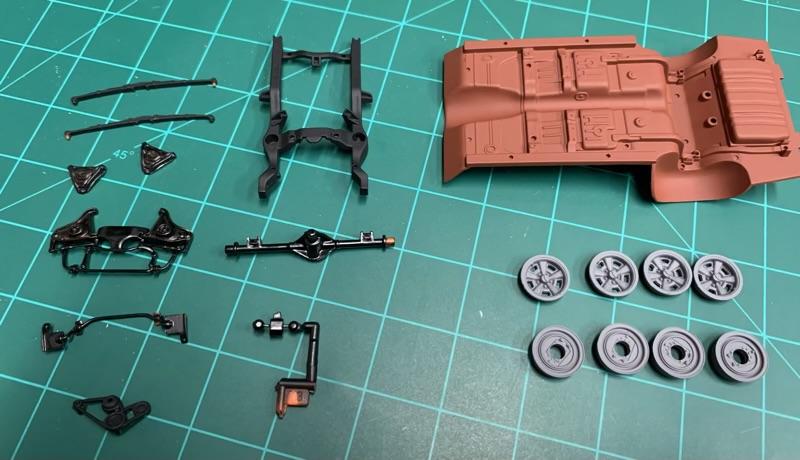 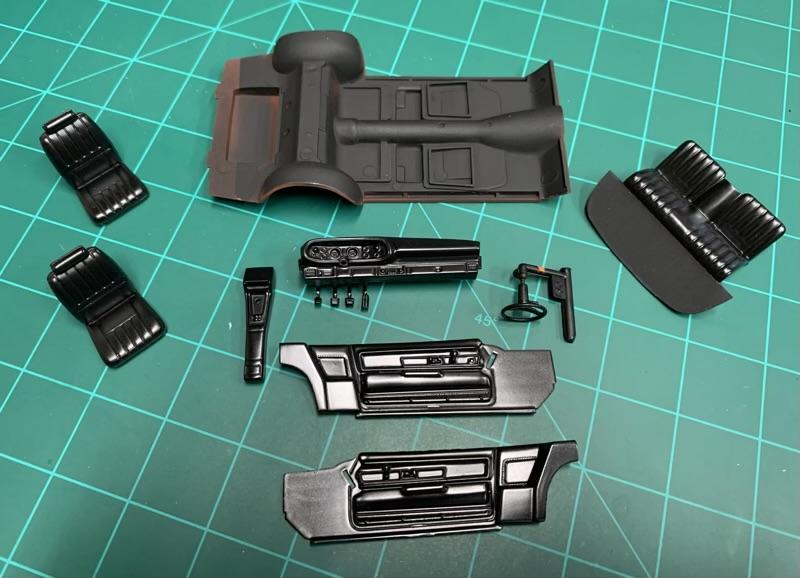 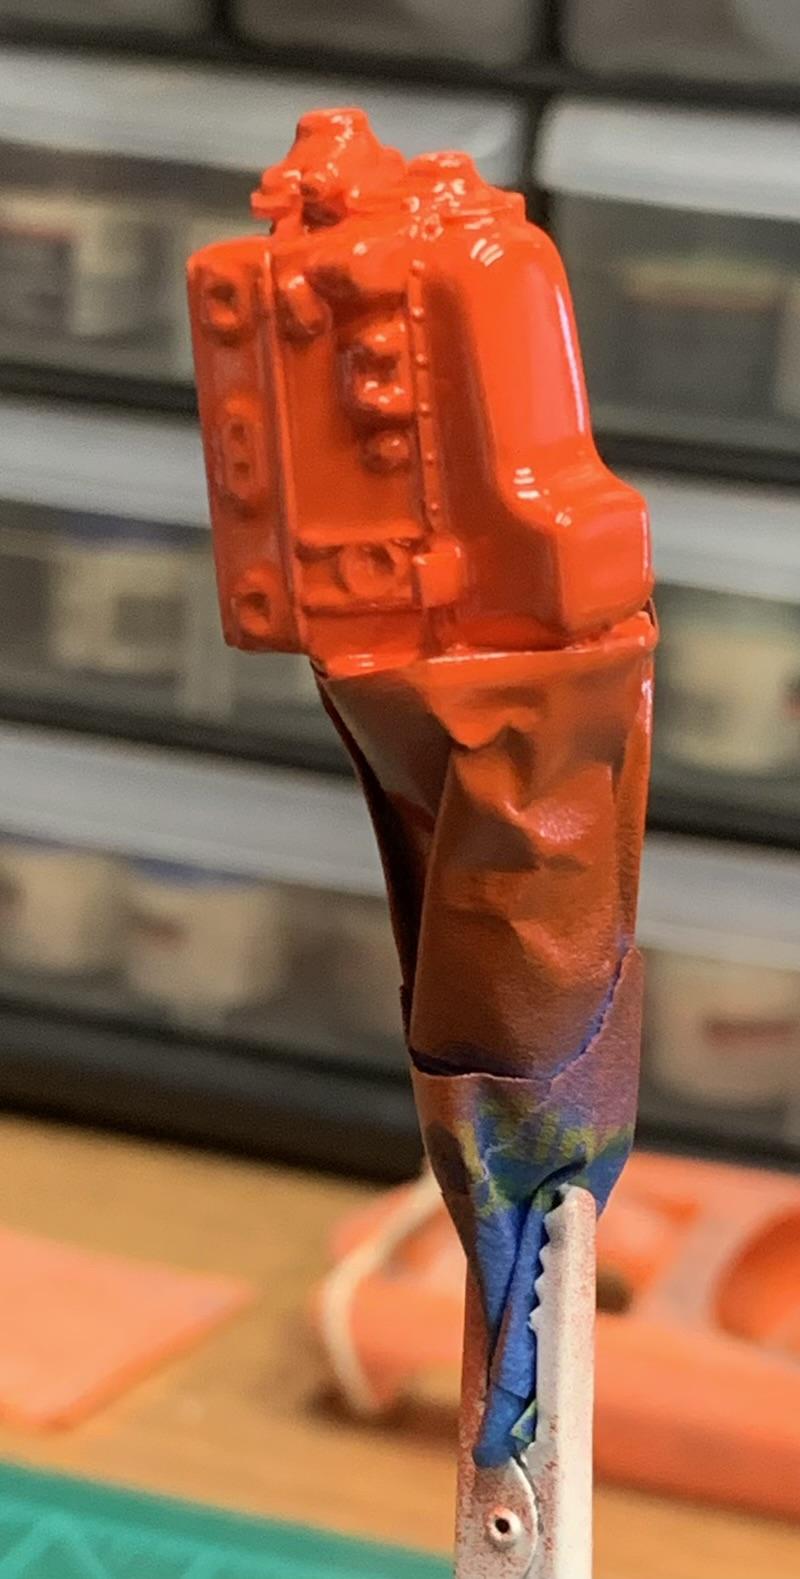 And finally, the body…. Ah yes. I plan to build this as more of a stripped version, sort of basic Camaro. I’ll still be using the same engine, but just to be different from the crowd, this one won’t have stripes, and I’m leaving the rear spoiler off. The kit comes with indents for mounting the spoiler, that are filled here. Also, there is a sink mark on the roof above the dome light. That’s filled here too. Not difficult, but this step has had to be repeated every time I stripped the body and restarted. 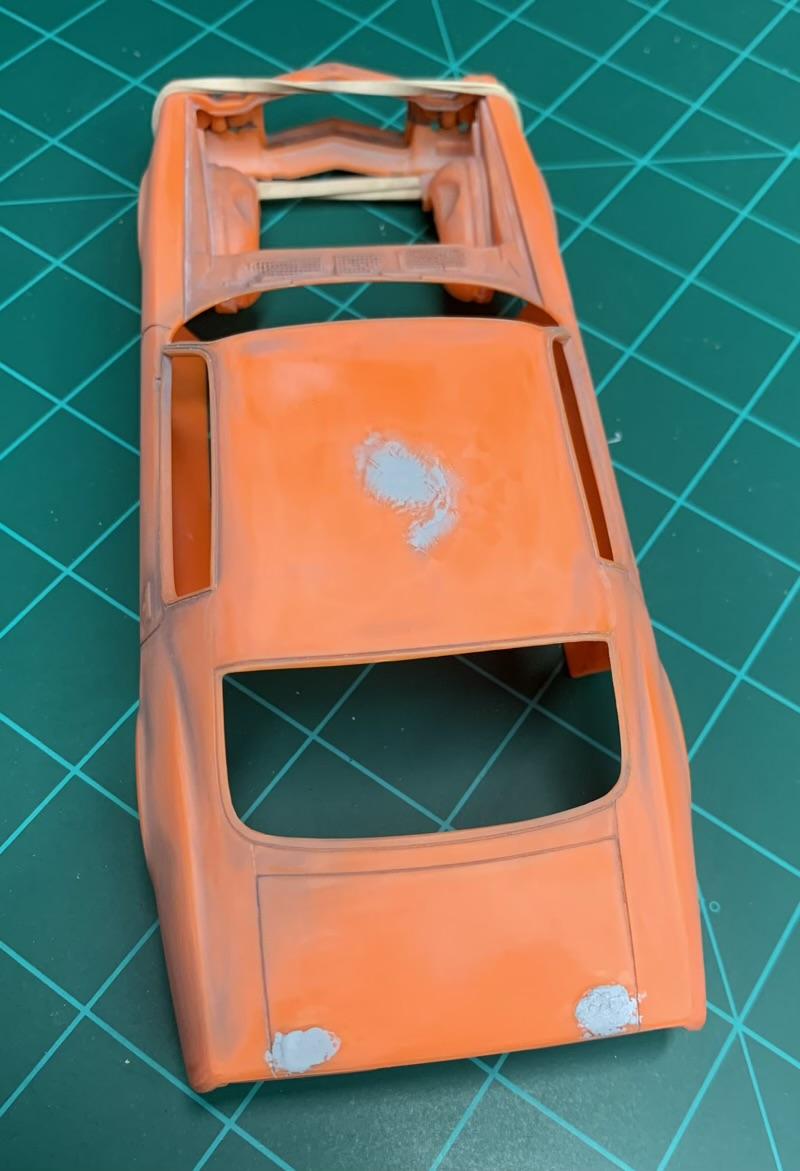 Then the firewall gap was fixed. If you’re unaware of this problem, here’s what it looks like when you start. Notice the huge gap where the firewall meets the floor pan. Best solution I found for this issue was to file off some material at the back edge of the dashboard. 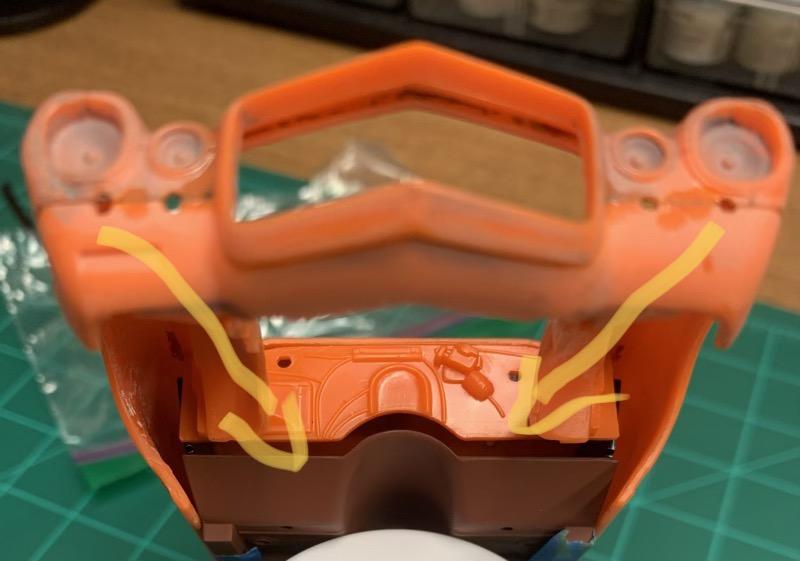 Now, for yesterdays update. This project was really started just to practice painting. And boy did I get to practice. It's been painted and stripped and repainted four times now. I reshot this about a month ago and let it gas out until yesterday, when I wet-sanded it and rubbed it out. Still isn’t perfect, but I can live with it now. And maybe more importantly, I know what went wrong. Paint is DupliColor Perfect match GM Torch Red with Perfect Match Clear, both straight from the can. 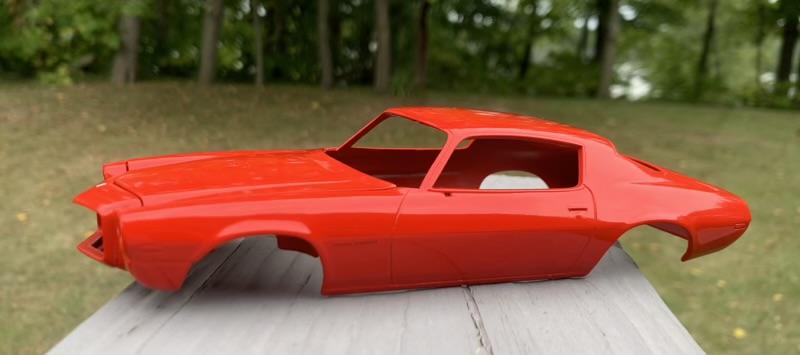 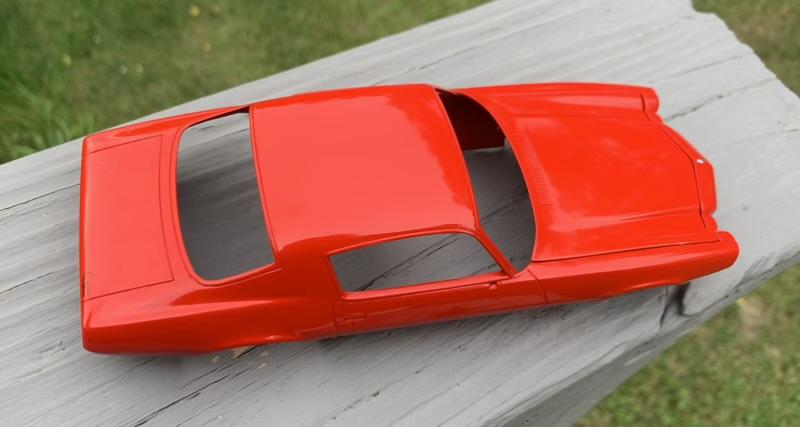 Love it or hate it, let me know what you think. As always, constructive criticism is welcome. |
|
garydavis
Full Member
Member since: March 2023
RIP- September 2023
Posts: 440 
|
Post by garydavis on Sept 18, 2023 15:49:33 GMT -5
Man AH...that body paint looks FREAK'IN GREAT! What paint did you use on the seats and door panels?
|
|
atomicholiday
Full Member
Member since: September 2023
Posts: 410
Sept 4, 2023 8:25:11 GMT -5
Sept 4, 2023 8:25:11 GMT -5
|
Post by atomicholiday on Sept 18, 2023 16:30:24 GMT -5
Man AH...that body paint looks FREAK'IN GREAT! What paint did you use on the seats and door panels? Hey thanks a lot Gary. The door cards and seats are Krylon colormaxx satin black. Stuff is awesome for vinyl parts.👍 |
|
garydavis
Full Member
Member since: March 2023
RIP- September 2023
Posts: 440
|
Post by garydavis on Sept 18, 2023 16:56:15 GMT -5
Thank you for the paint color. It does look awesome for vinyl interior. I need to get some of that for sure.
|
|
|
|
Post by deafpanzer on Sept 18, 2023 18:59:19 GMT -5
Too cool! I swear that my cousin had this car! You have my attention too.
|
|
|
|
Post by kyledehart5 on Sept 18, 2023 20:54:16 GMT -5
That all looks great for sure. Well done. And that’s a fantastic color choice on this car. This will look awesome!
|
|
handiabled
Community Relations Moderator 
Member since: February 2023
Posts: 2,441
MSC Staff
|
Post by handiabled on Sept 19, 2023 1:49:35 GMT -5
Interior and paint job are looking top notch! The door panels have the perfect satin look
|
|
|
|
Post by 406 Silverado on Sept 19, 2023 5:10:37 GMT -5
These really are great kits and build up very well. They do, however, have their hang ups. For instance...do NOT install the front subframe onto the model until after you've installed the body over the chassis. You'll thank me later. For future reference.....go to this thread for a pretty comprehensive list of things to watch out for. That paint looks GREAT btw. www.modelcarsmag.com/forums/topic/53934-is-the-amt-1970-12-camaro-any-good/page/3/ |
|
atomicholiday
Full Member
Member since: September 2023
Posts: 410
Sept 4, 2023 8:25:11 GMT -5
Sept 4, 2023 8:25:11 GMT -5
|
Post by atomicholiday on Sept 19, 2023 8:01:00 GMT -5
These really are great kits and build up very well. They do, however, have their hang ups. For instance...do NOT install the front subframe onto the model until after you've installed the body over the chassis. You'll thank me later. For future reference.....go to this thread for a pretty comprehensive list of things to watch out for. That paint looks GREAT btw. www.modelcarsmag.com/forums/topic/53934-is-the-amt-1970-12-camaro-any-good/page/3/Thanks Joe! Yeah, this one has it’s issues. Nothing that can’t be dealt with though. But it’s about the worst molding I’ve seen in a long time. It’s not the tool that’s the problem. It’s their molding process. I work in the plastic injection business, and I see this stuff everyday. The problems I see are indicative of incorrect parameters in the press settings. Looks to me like they’re doing everything they can to increase cycle time and crank these things out, at the cost of poor quality and molding defects. Anyway, thanks much for the link and advice. I’ll check it out tonight. |
|
|
|
Post by 406 Silverado on Sept 19, 2023 8:06:46 GMT -5
These really are great kits and build up very well. They do, however, have their hang ups. For instance...do NOT install the front subframe onto the model until after you've installed the body over the chassis. You'll thank me later. For future reference.....go to this thread for a pretty comprehensive list of things to watch out for. That paint looks GREAT btw. www.modelcarsmag.com/forums/topic/53934-is-the-amt-1970-12-camaro-any-good/page/3/Thanks Joe! Yeah, this one has it’s issues. Nothing that can’t be dealt with though. But it’s about the worst molding I’ve seen in a long time. It’s not the tool that’s the problem. It’s their molding process. I work in the plastic injection business, and I see this stuff everyday. The problems I see are indicative of incorrect parameters in the press settings. Looks to me like they’re doing everything they can to increase cycle time and crank these things out, at the cost of poor quality and molding defects. Anyway, thanks much for the link and advice. I’ll check it out tonight. You're right about the molding. Not the best I've seen but these kits can be built up into some really snazzy looking models. No problem brutha. Just a heads up before you get to the problem areas. Dash to windshield fit is not good either. I usually buy two of any car kit that I build so I can mock one up all the way to avoid trouble areas on the real build I'm working on at that time. It's a few extra bucks spent but can save you A LOT of frustration later. Glad you're here potna. |
|
|
|
Post by dupes on Sept 19, 2023 18:42:30 GMT -5
I don't feel like I know enough about (real) cars to be "fixing" anything in a build...I always assume that what's in the box is correct! That red coat is already better than what I've pulled off on my automotive builds. Dang.
|
|
|
|
Post by 406 Silverado on Oct 28, 2023 7:05:20 GMT -5
These really are great kits and build up very well. They do, however, have their hang ups. For instance...do NOT install the front subframe onto the model until after you've installed the body over the chassis. You'll thank me later. For future reference.....go to this thread for a pretty comprehensive list of things to watch out for. That paint looks GREAT btw. www.modelcarsmag.com/forums/topic/53934-is-the-amt-1970-12-camaro-any-good/page/3/Thanks Joe! Yeah, this one has it’s issues. Nothing that can’t be dealt with though. But it’s about the worst molding I’ve seen in a long time. It’s not the tool that’s the problem. It’s their molding process. I work in the plastic injection business, and I see this stuff everyday. The problems I see are indicative of incorrect parameters in the press settings. Looks to me like they’re doing everything they can to increase cycle time and crank these things out, at the cost of poor quality and molding defects. Anyway, thanks much for the link and advice. I’ll check it out tonight. Got anything new on this beauty Jeremy? |
|
atomicholiday
Full Member
Member since: September 2023
Posts: 410
Sept 4, 2023 8:25:11 GMT -5
Sept 4, 2023 8:25:11 GMT -5
|
Post by atomicholiday on Oct 29, 2023 15:24:08 GMT -5
Thanks Joe! Yeah, this one has it’s issues. Nothing that can’t be dealt with though. But it’s about the worst molding I’ve seen in a long time. It’s not the tool that’s the problem. It’s their molding process. I work in the plastic injection business, and I see this stuff everyday. The problems I see are indicative of incorrect parameters in the press settings. Looks to me like they’re doing everything they can to increase cycle time and crank these things out, at the cost of poor quality and molding defects. Anyway, thanks much for the link and advice. I’ll check it out tonight. Got anything new on this beauty Jeremy? Not much Joe. I guess it’s about time to bump it back up on my priority list though. I have this goofy looking little short body beetle kit I’ve been focusing on lately, but the Camaro hasn’t been getting much love. I did get a little more done to the engine. I was debating adding plug wires, but I think I’ll skip them this time. Maybe. There’s still time to decide.  |
|
atomicholiday
Full Member
Member since: September 2023
Posts: 410
Sept 4, 2023 8:25:11 GMT -5
Sept 4, 2023 8:25:11 GMT -5
|
Post by atomicholiday on Oct 29, 2023 17:26:04 GMT -5
I got back to this one for a while this afternoon. Did a little work to the wheels. Like to use a drill on a very low speed to get clean circular lines when doing this type of stuff. wheel backs before… 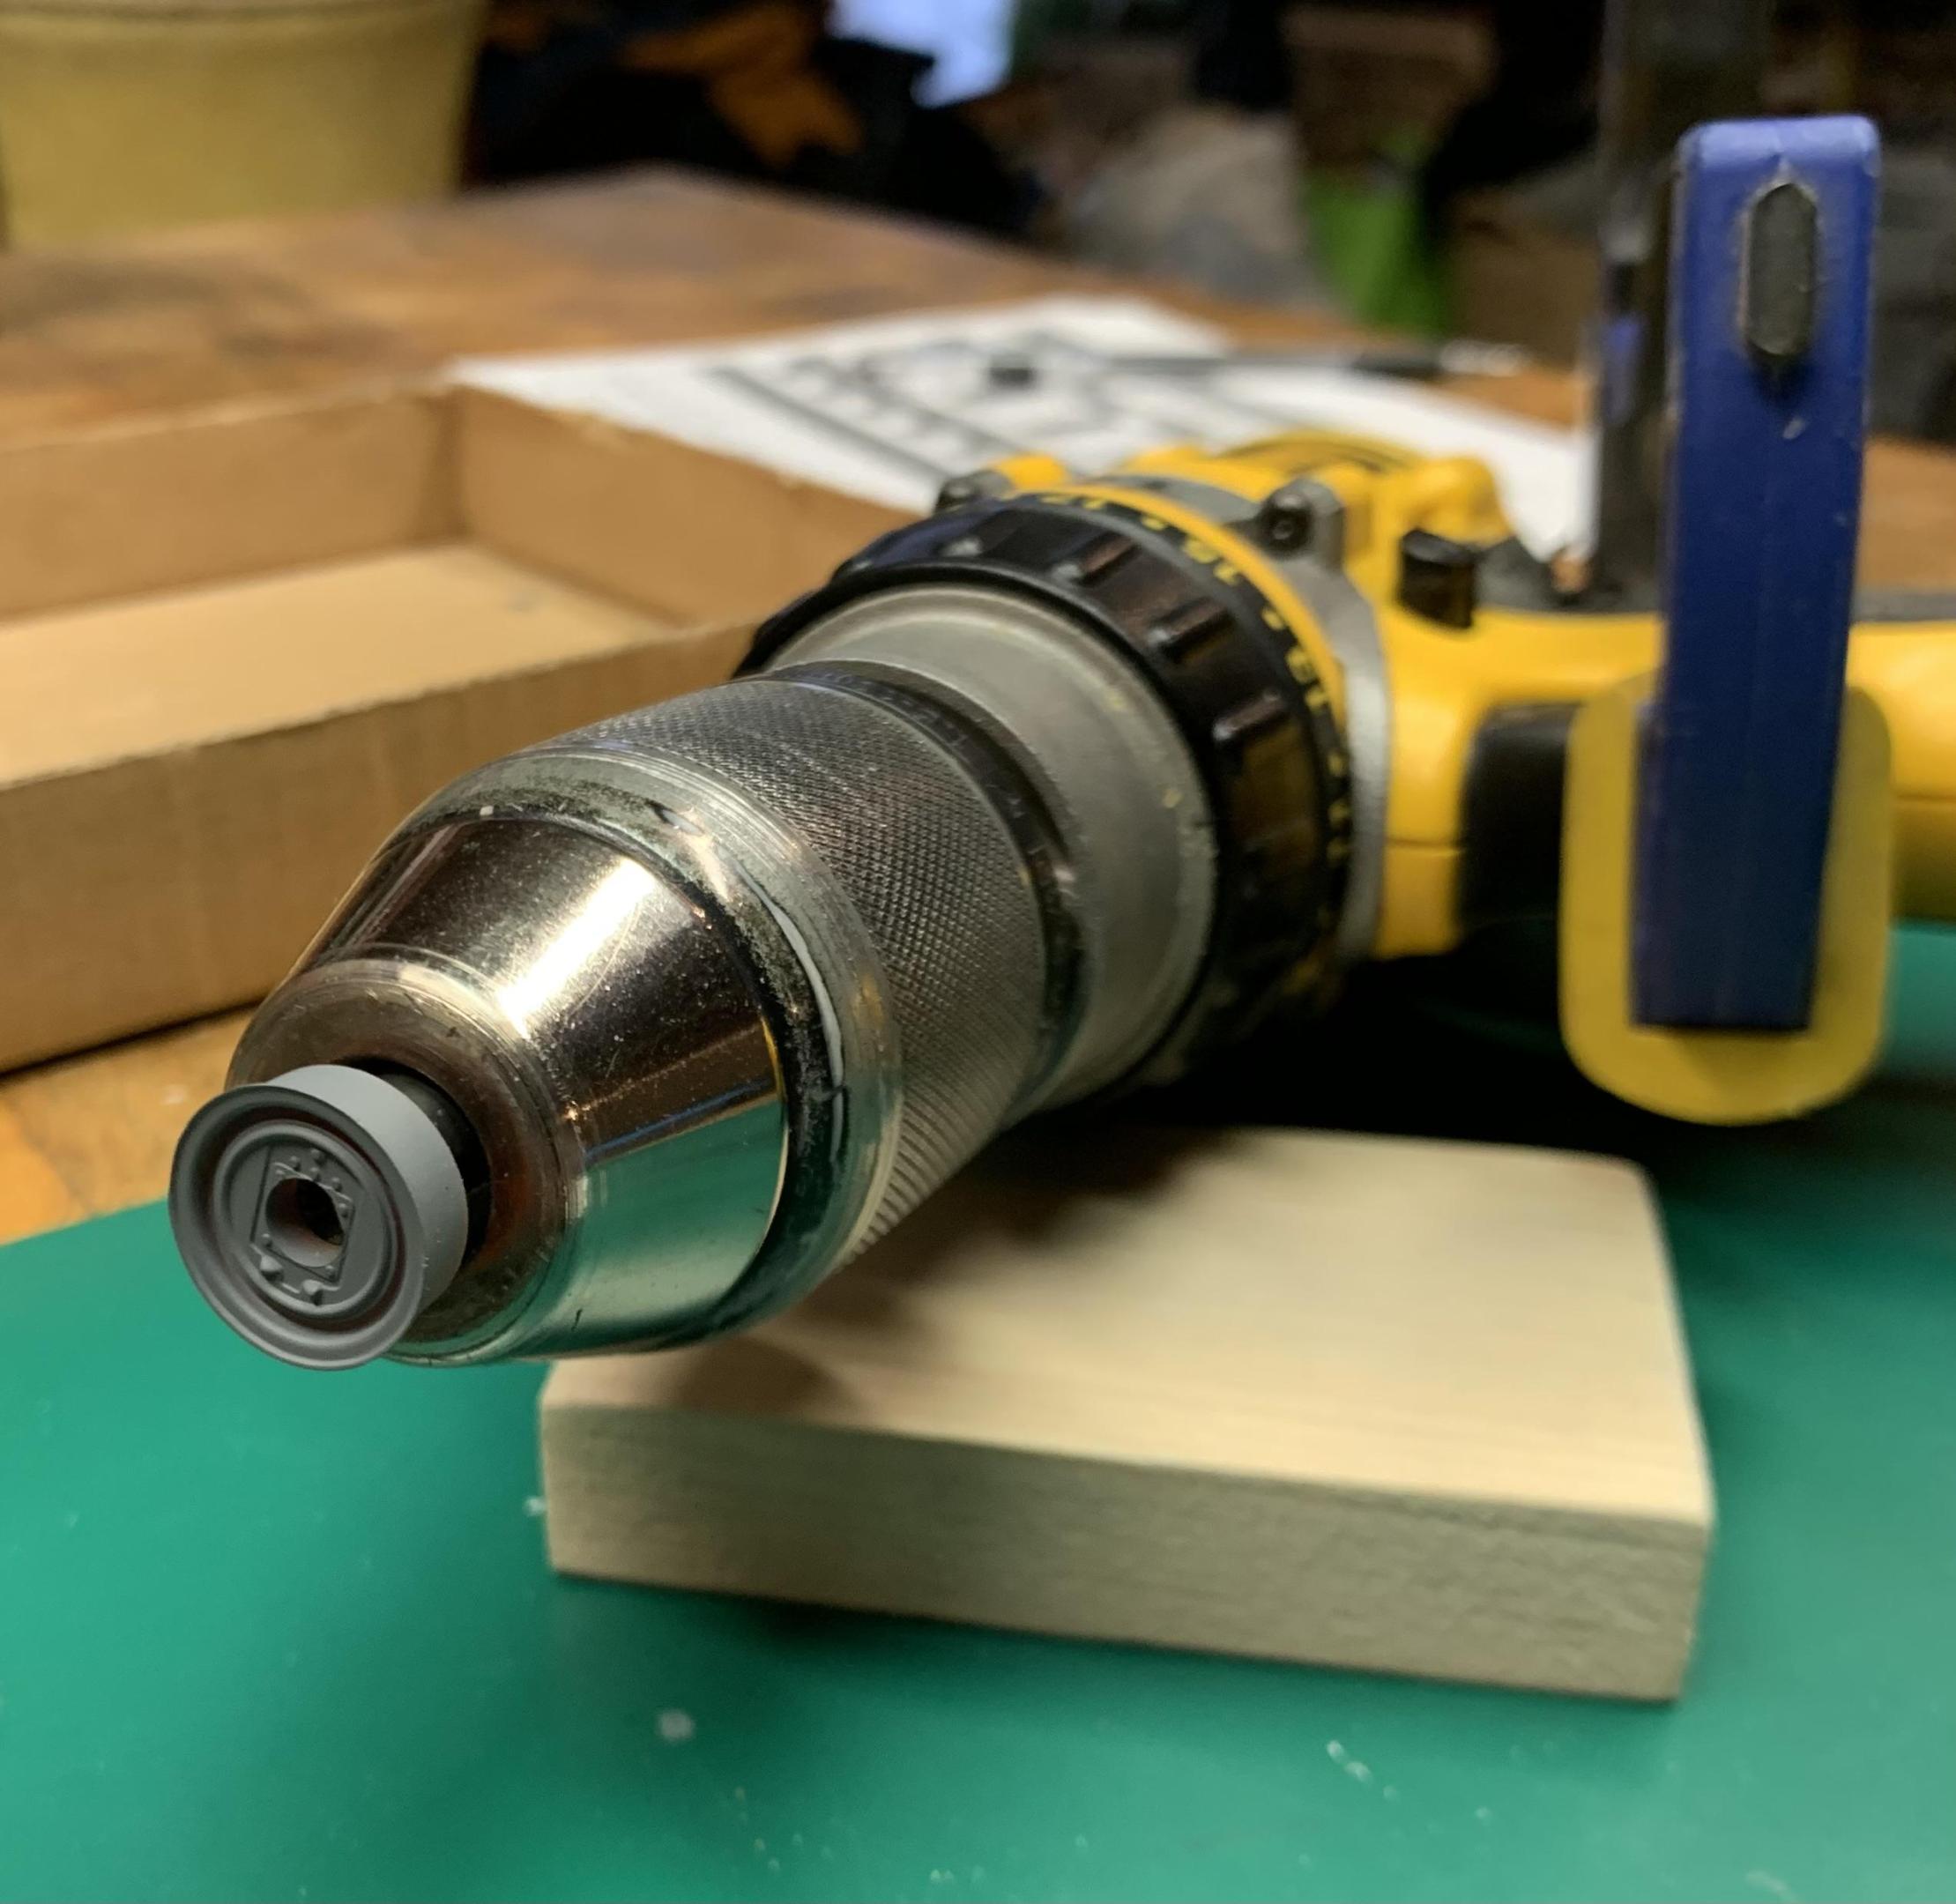 …and after. 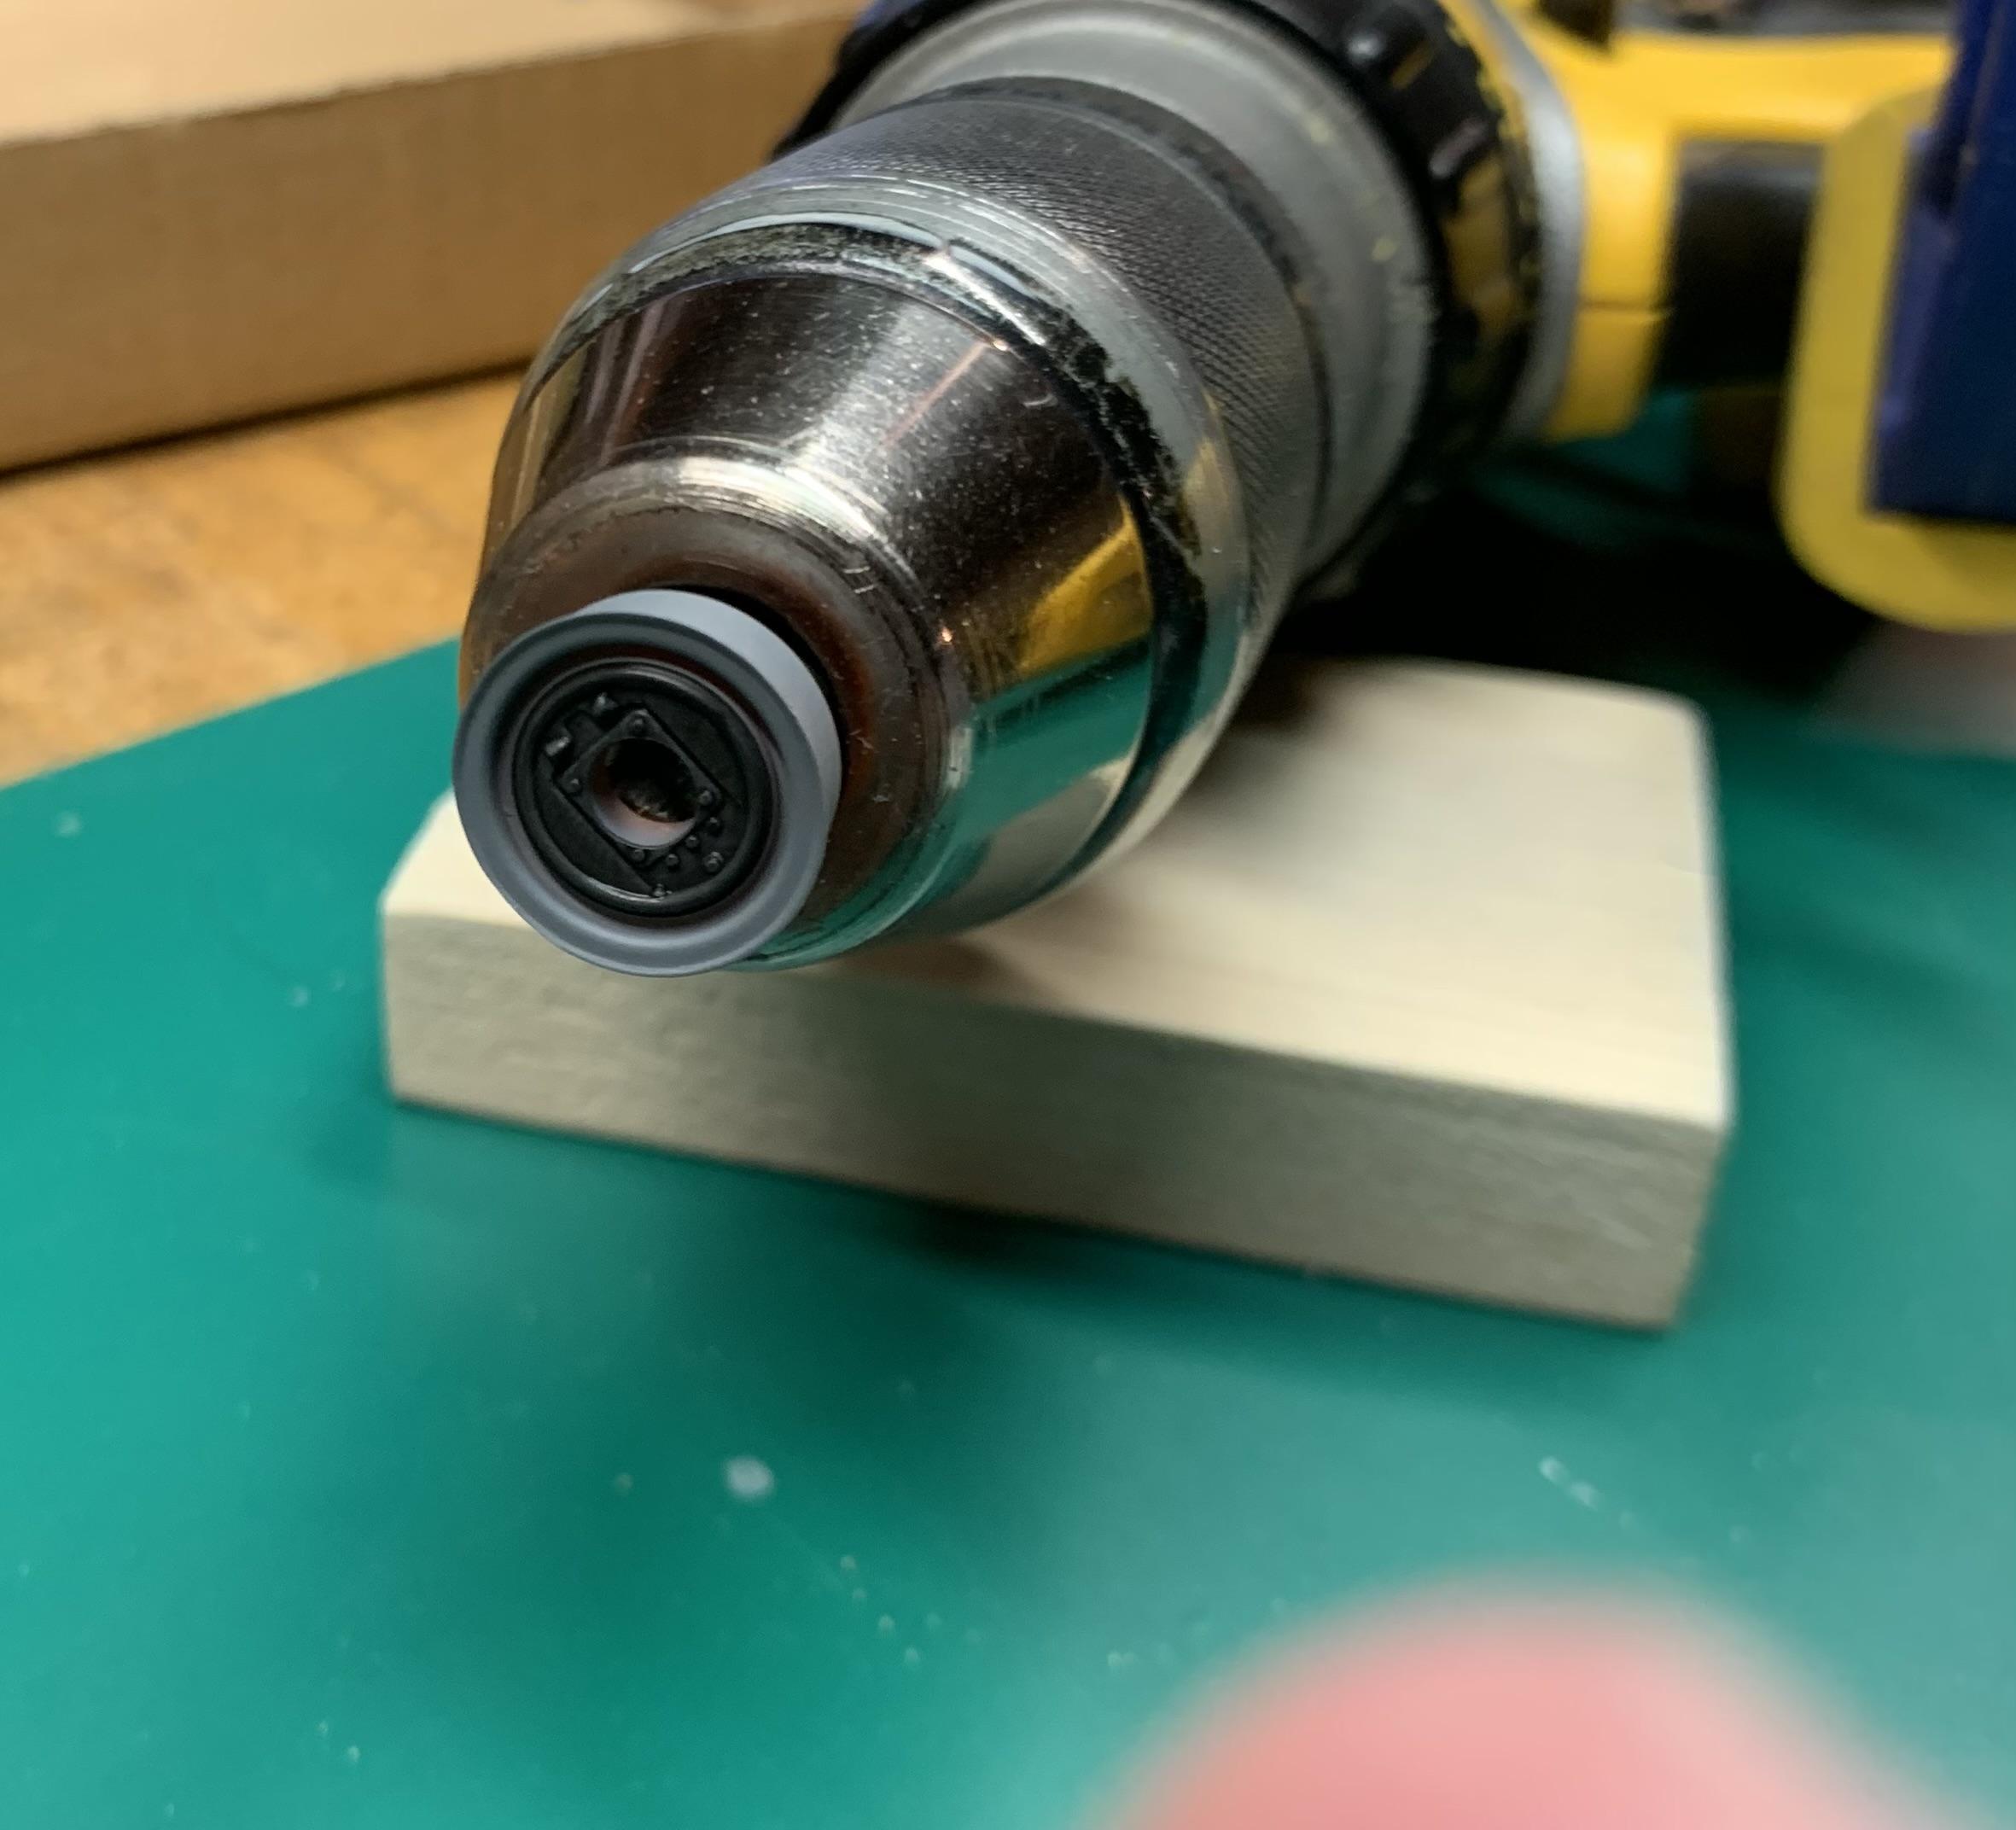 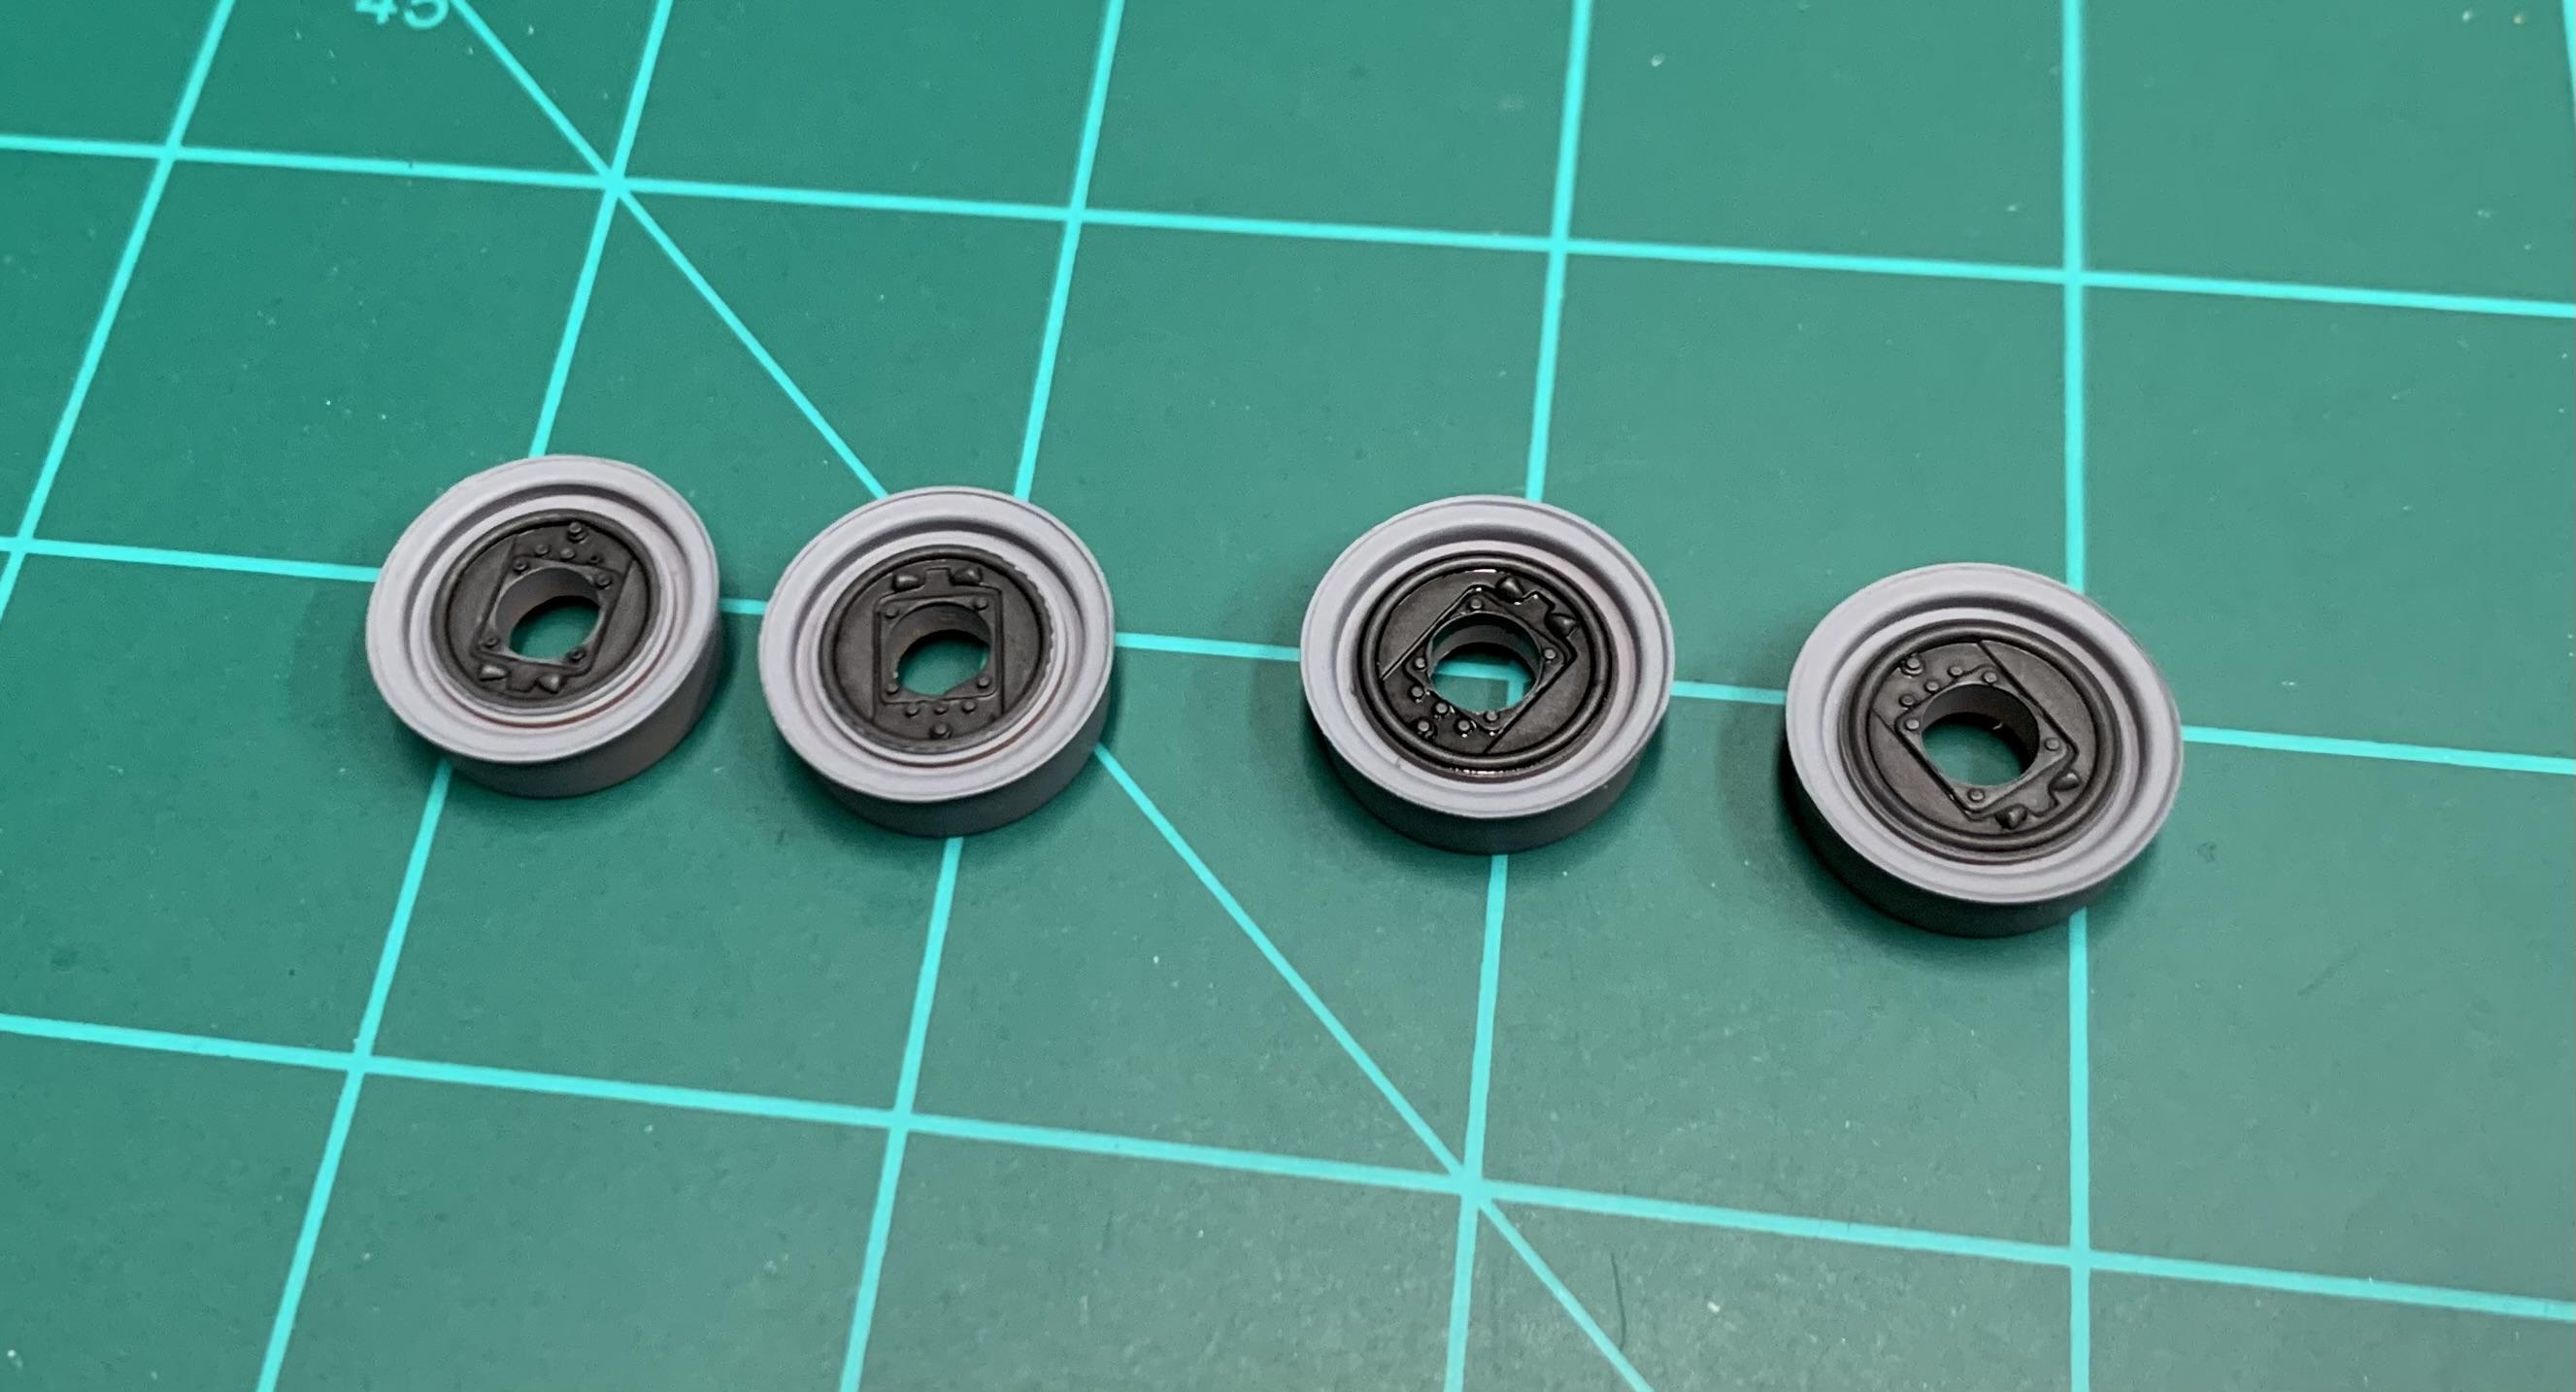 I used the same technique on the other side. 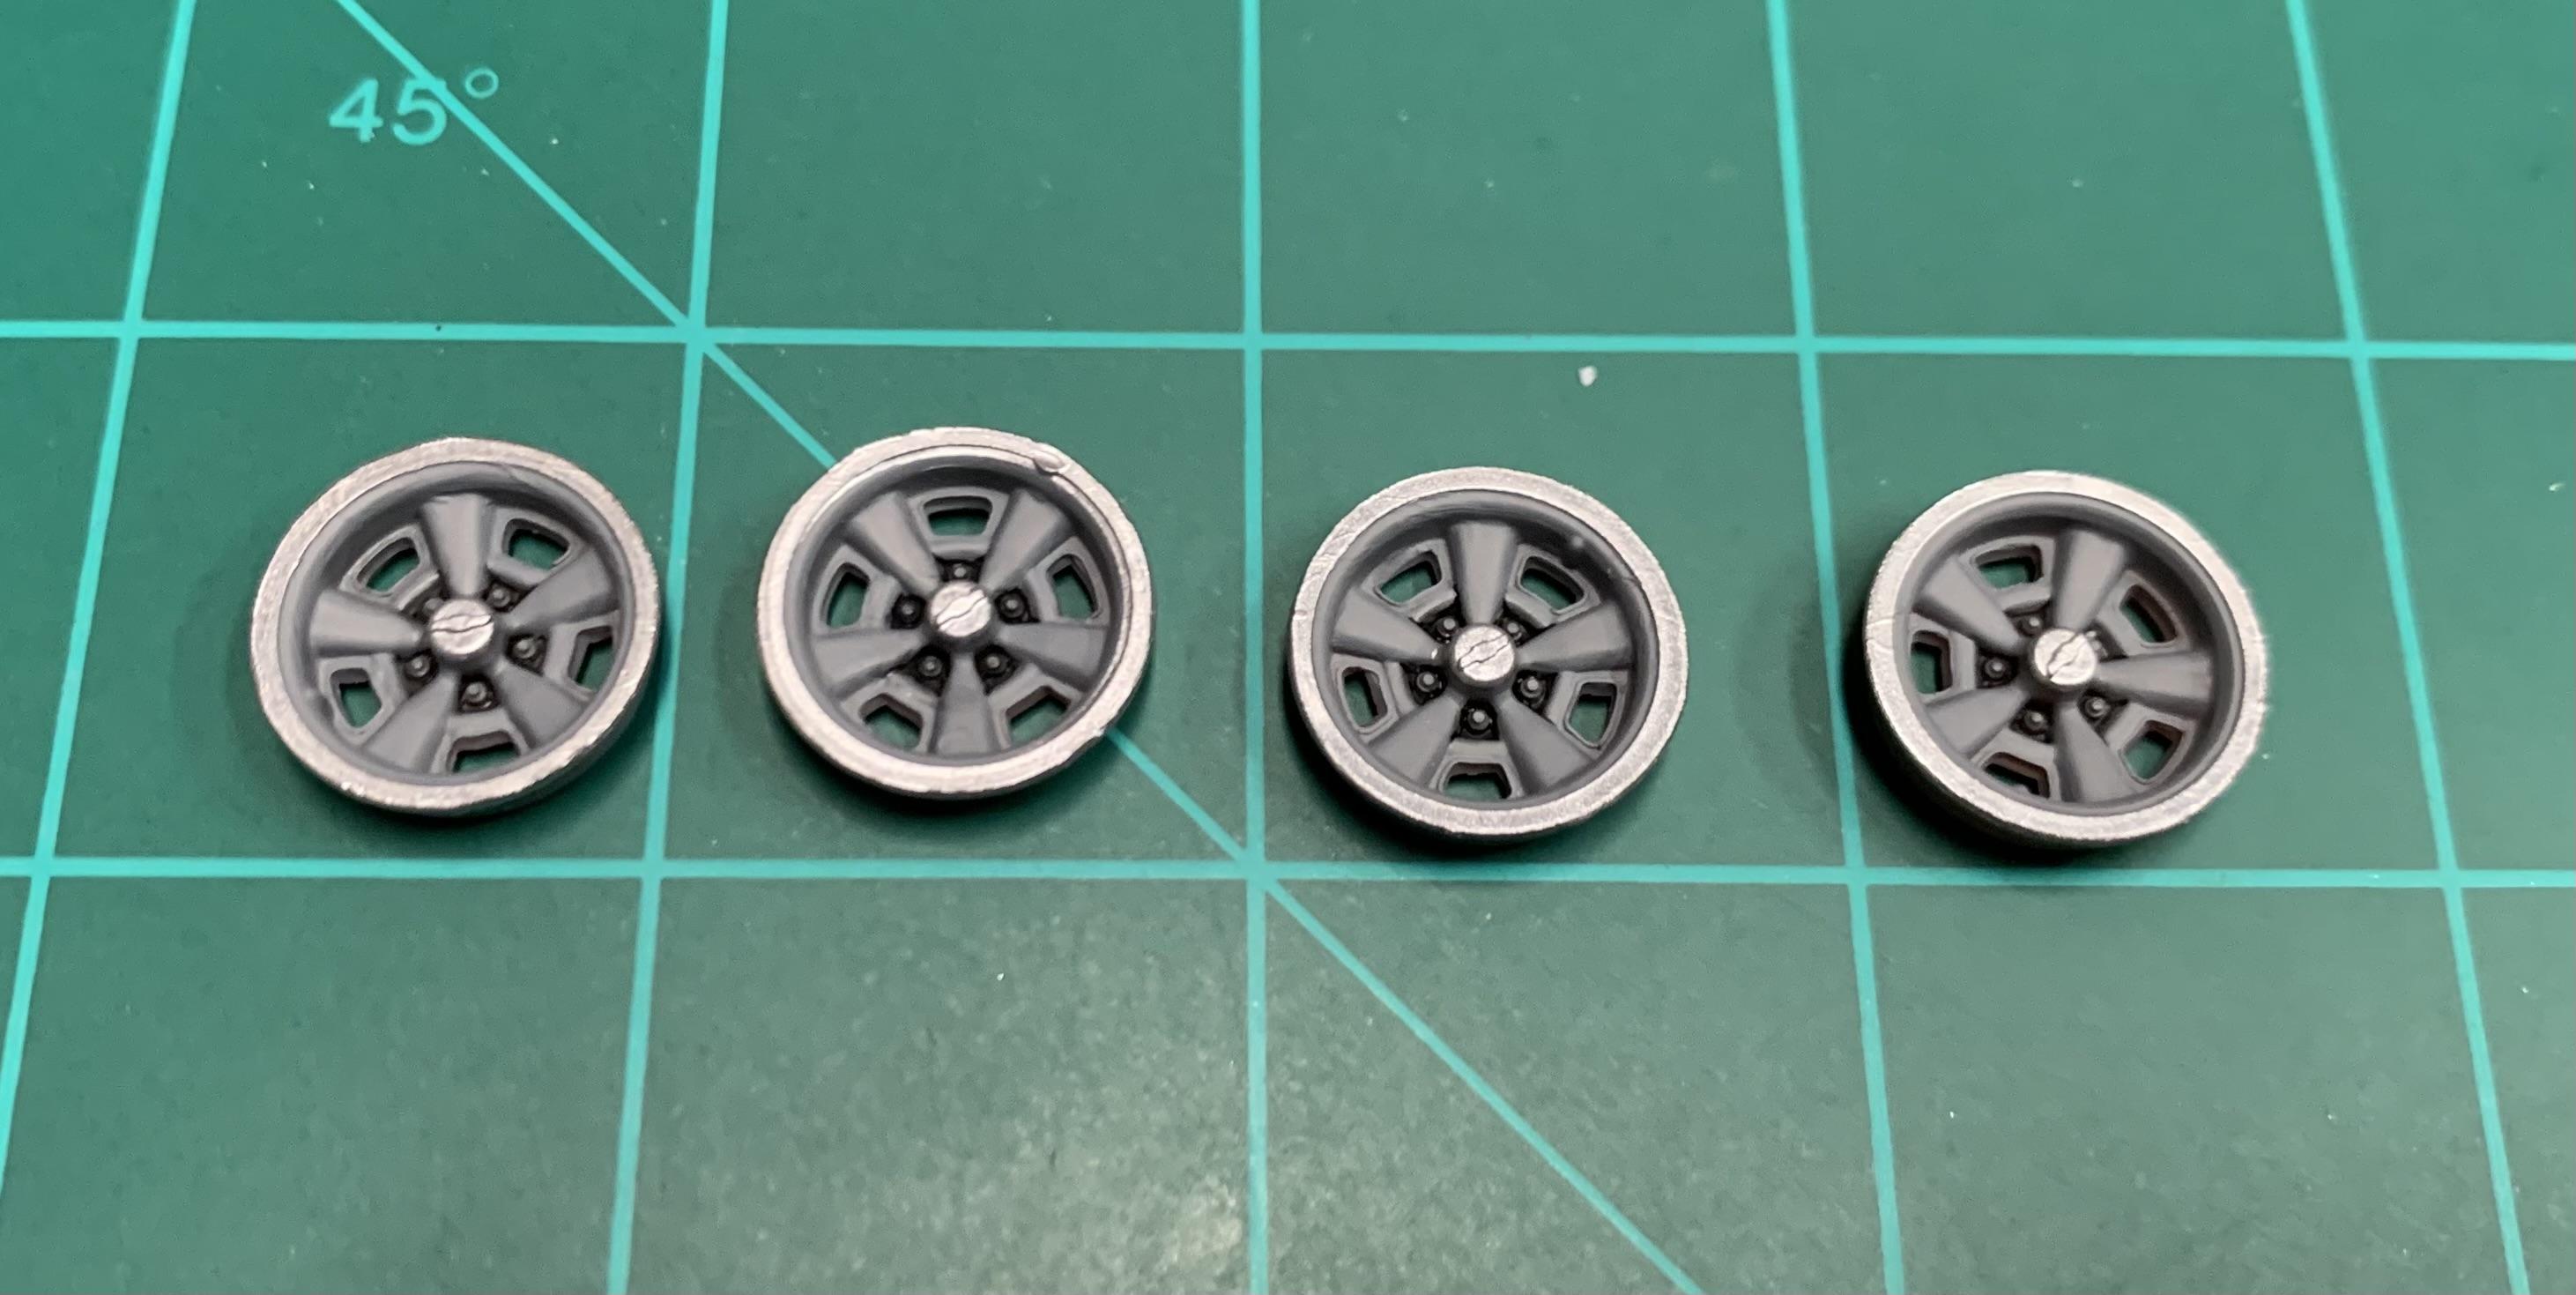 And while I was at it, I did the trim ring on this set for another project. These didn’t come out as clean as I wanted. I’ll think about it for a while, but I might redo them. 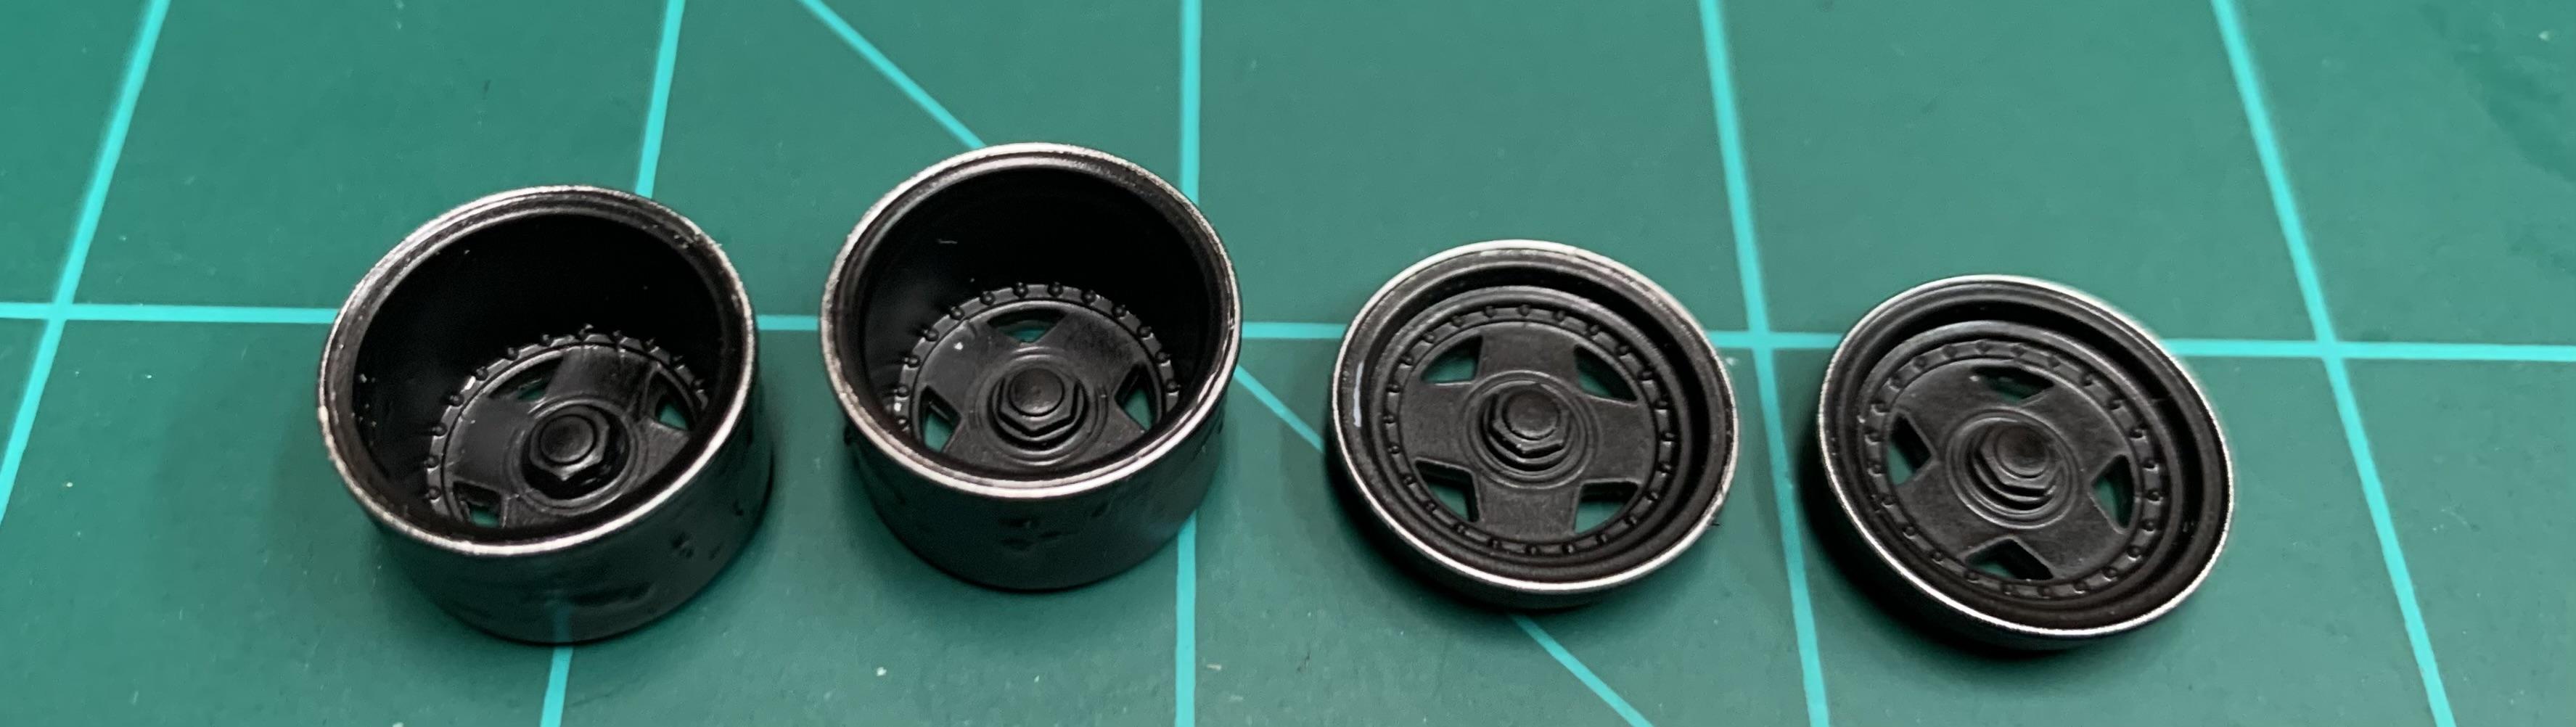 406 Silverado 406 Silverado - Hey bud, thanks for bringing this one back to the forefront of my mind. It was definitely about time to get back to it. We all just need a little nudge sometimes. |
|
|
|
Post by kyledehart5 on Oct 30, 2023 2:59:12 GMT -5
Aha. That is a good idea with the drill. Great work. Those wheels are looking really nice.
|
|
|
|
Post by 406 Silverado on Oct 30, 2023 9:37:02 GMT -5
I got back to this one for a while this afternoon. Did a little work to the wheels. Like to use a drill on a very low speed to get clean circular lines when doing this type of stuff. wheel backs before… …and after. I used the same technique on the other side. And while I was at it, I did the trim ring on this set for another project. These didn’t come out as clean as I wanted. I’ll think about it for a while, but I might redo them. 406 Silverado - Hey bud, thanks for bringing this one back to the forefront of my mind. It was definitely about time to get back to it. We all just need a little nudge sometimes. Great techniques in action here Jeremy! I almost used the factory wheels on mine but man....those things are TOUGH to get right. I think your outcome on the factory wheels is alot better than mine would be. Hmmmm.....Convo Pros? You looking at using these for this build? LOL! It wasn't so much of a nudge as it was curiosity bud. Glad to see some progress on it anyhow. You'll have to post up that Bug build of yours here as that IS a pretty nifty build. |
|
atomicholiday
Full Member
Member since: September 2023
Posts: 410
Sept 4, 2023 8:25:11 GMT -5
Sept 4, 2023 8:25:11 GMT -5
|
Post by atomicholiday on Oct 30, 2023 15:59:10 GMT -5
Great techniques in action here Jeremy! I almost used the factory wheels on mine but man....those things are TOUGH to get right. I think your outcome on the factory wheels is alot better than mine would be. Hmmmm.....Convo Pros? You looking at using these for this build? LOL! It wasn't so much of a nudge as it was curiosity bud. Glad to see some progress on it anyhow. You'll have to post up that Bug build of yours here as that IS a pretty nifty build. Thanks Joe. About the black rims. So the Camaro will be stock, straight out of the box. The black rims are for the AMT 67 Chevell pro street kit, which I've been painting bits and pieces of for a few months. I just did the trim rings because I was set up already. No WIP on the Chevelle yet, but I'll start one once I get the paint rubbed out. I'm letting it cure out for another week or so. Here's a sneak preview of that one. It looks better in this pic that it really is. It's got some nasty orange peel. If I mess it up while wet sanding, it'll end up taking a purple pond bath. Fingers crossed. 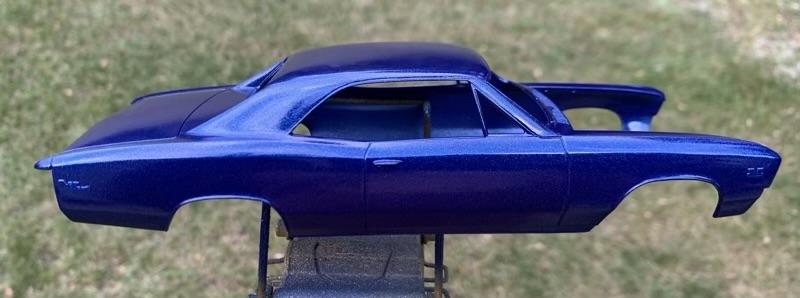 |
|
|
|
Post by Leon on Oct 30, 2023 16:14:28 GMT -5
Paint and wheels look good Jeremy!
|
|
atomicholiday
Full Member
Member since: September 2023
Posts: 410
Sept 4, 2023 8:25:11 GMT -5
Sept 4, 2023 8:25:11 GMT -5
|
Post by atomicholiday on Nov 1, 2023 16:53:37 GMT -5
This is a pretty minor update, but hey! It’s a little progress. I’ll take what I can get.👍 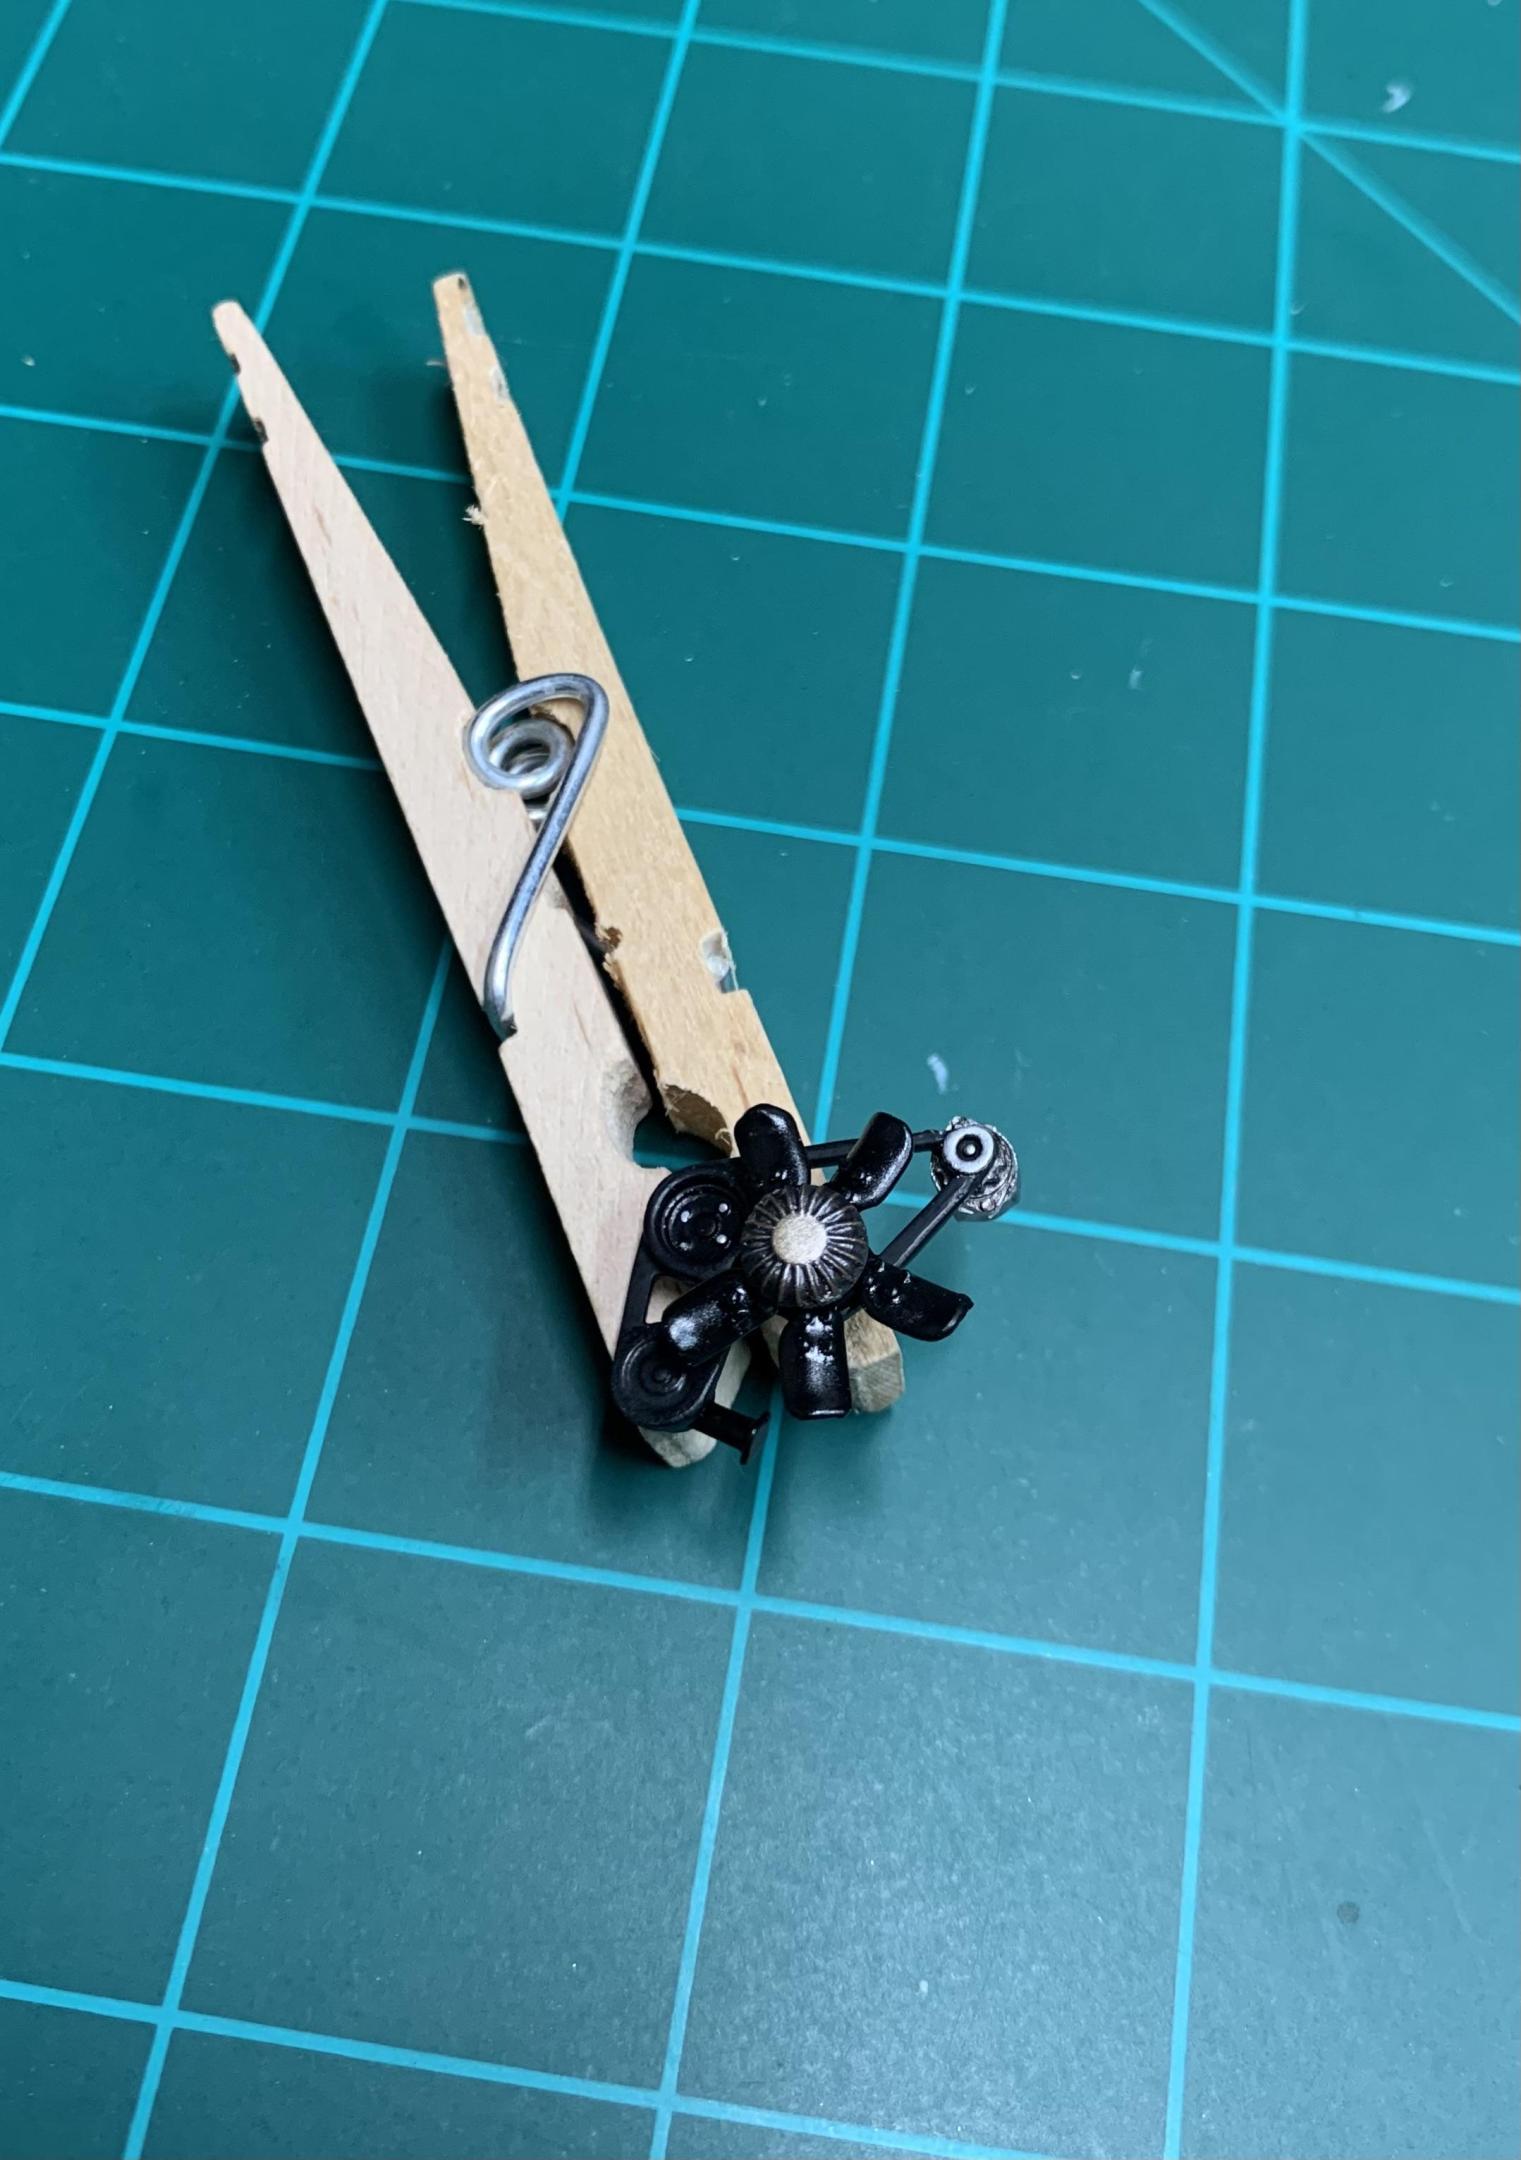 |
|
|
|
Post by kyledehart5 on Nov 2, 2023 6:16:00 GMT -5
Hey, it's progress. I really do try to move the builds forward one miniscule amount at least every day, even if it's just a 5 minute thing. That's the only way I can keep the builds moving. Sometimes I miss a day, sure, but I try my best.
|
|
atomicholiday
Full Member
Member since: September 2023
Posts: 410
Sept 4, 2023 8:25:11 GMT -5
Sept 4, 2023 8:25:11 GMT -5
|
Post by atomicholiday on Nov 2, 2023 8:10:07 GMT -5
Hey, it's progress. I really do try to move the builds forward one miniscule amount at least every day, even if it's just a 5 minute thing. That's the only way I can keep the builds moving. Sometimes I miss a day, sure, but I try my best. Me too. I usually have half a dozen “current” projects. But I’ll try to get something done on at least one of them each day if possible. |
|
|
|
Post by 406 Silverado on Nov 2, 2023 9:44:37 GMT -5
This is a pretty minor update, but hey! It’s a little progress. I’ll take what I can get.👍 Good to see this one movin' Jeremy. I really enjoyed building this engine for the most part. The fan clutch was a little wonky to me but it's hidden in the fan shroud for the most part so it's not so glaringly obvious. lol Good work so far man. |
|
atomicholiday
Full Member
Member since: September 2023
Posts: 410
Sept 4, 2023 8:25:11 GMT -5
Sept 4, 2023 8:25:11 GMT -5
|
Post by atomicholiday on Nov 8, 2023 17:27:29 GMT -5
Engine is basically done. I opted not to wire this one. Maybe next time. I do still need to finish the air cleaner, but its paint is curing now. I’m hoping to chrome the lid. We’ll see how that goes. I gave it a bit of weathering with Tamiya panel line accent. My plan is to lightly weather the undercarriage, so the engine may or may not get a little more at that time so it looks uniform with the rest. Also drilled and pinned the exhaust where the pipes will connect. That seems to be a trouble spot for me, so we’ll see if it makes the connection easier. 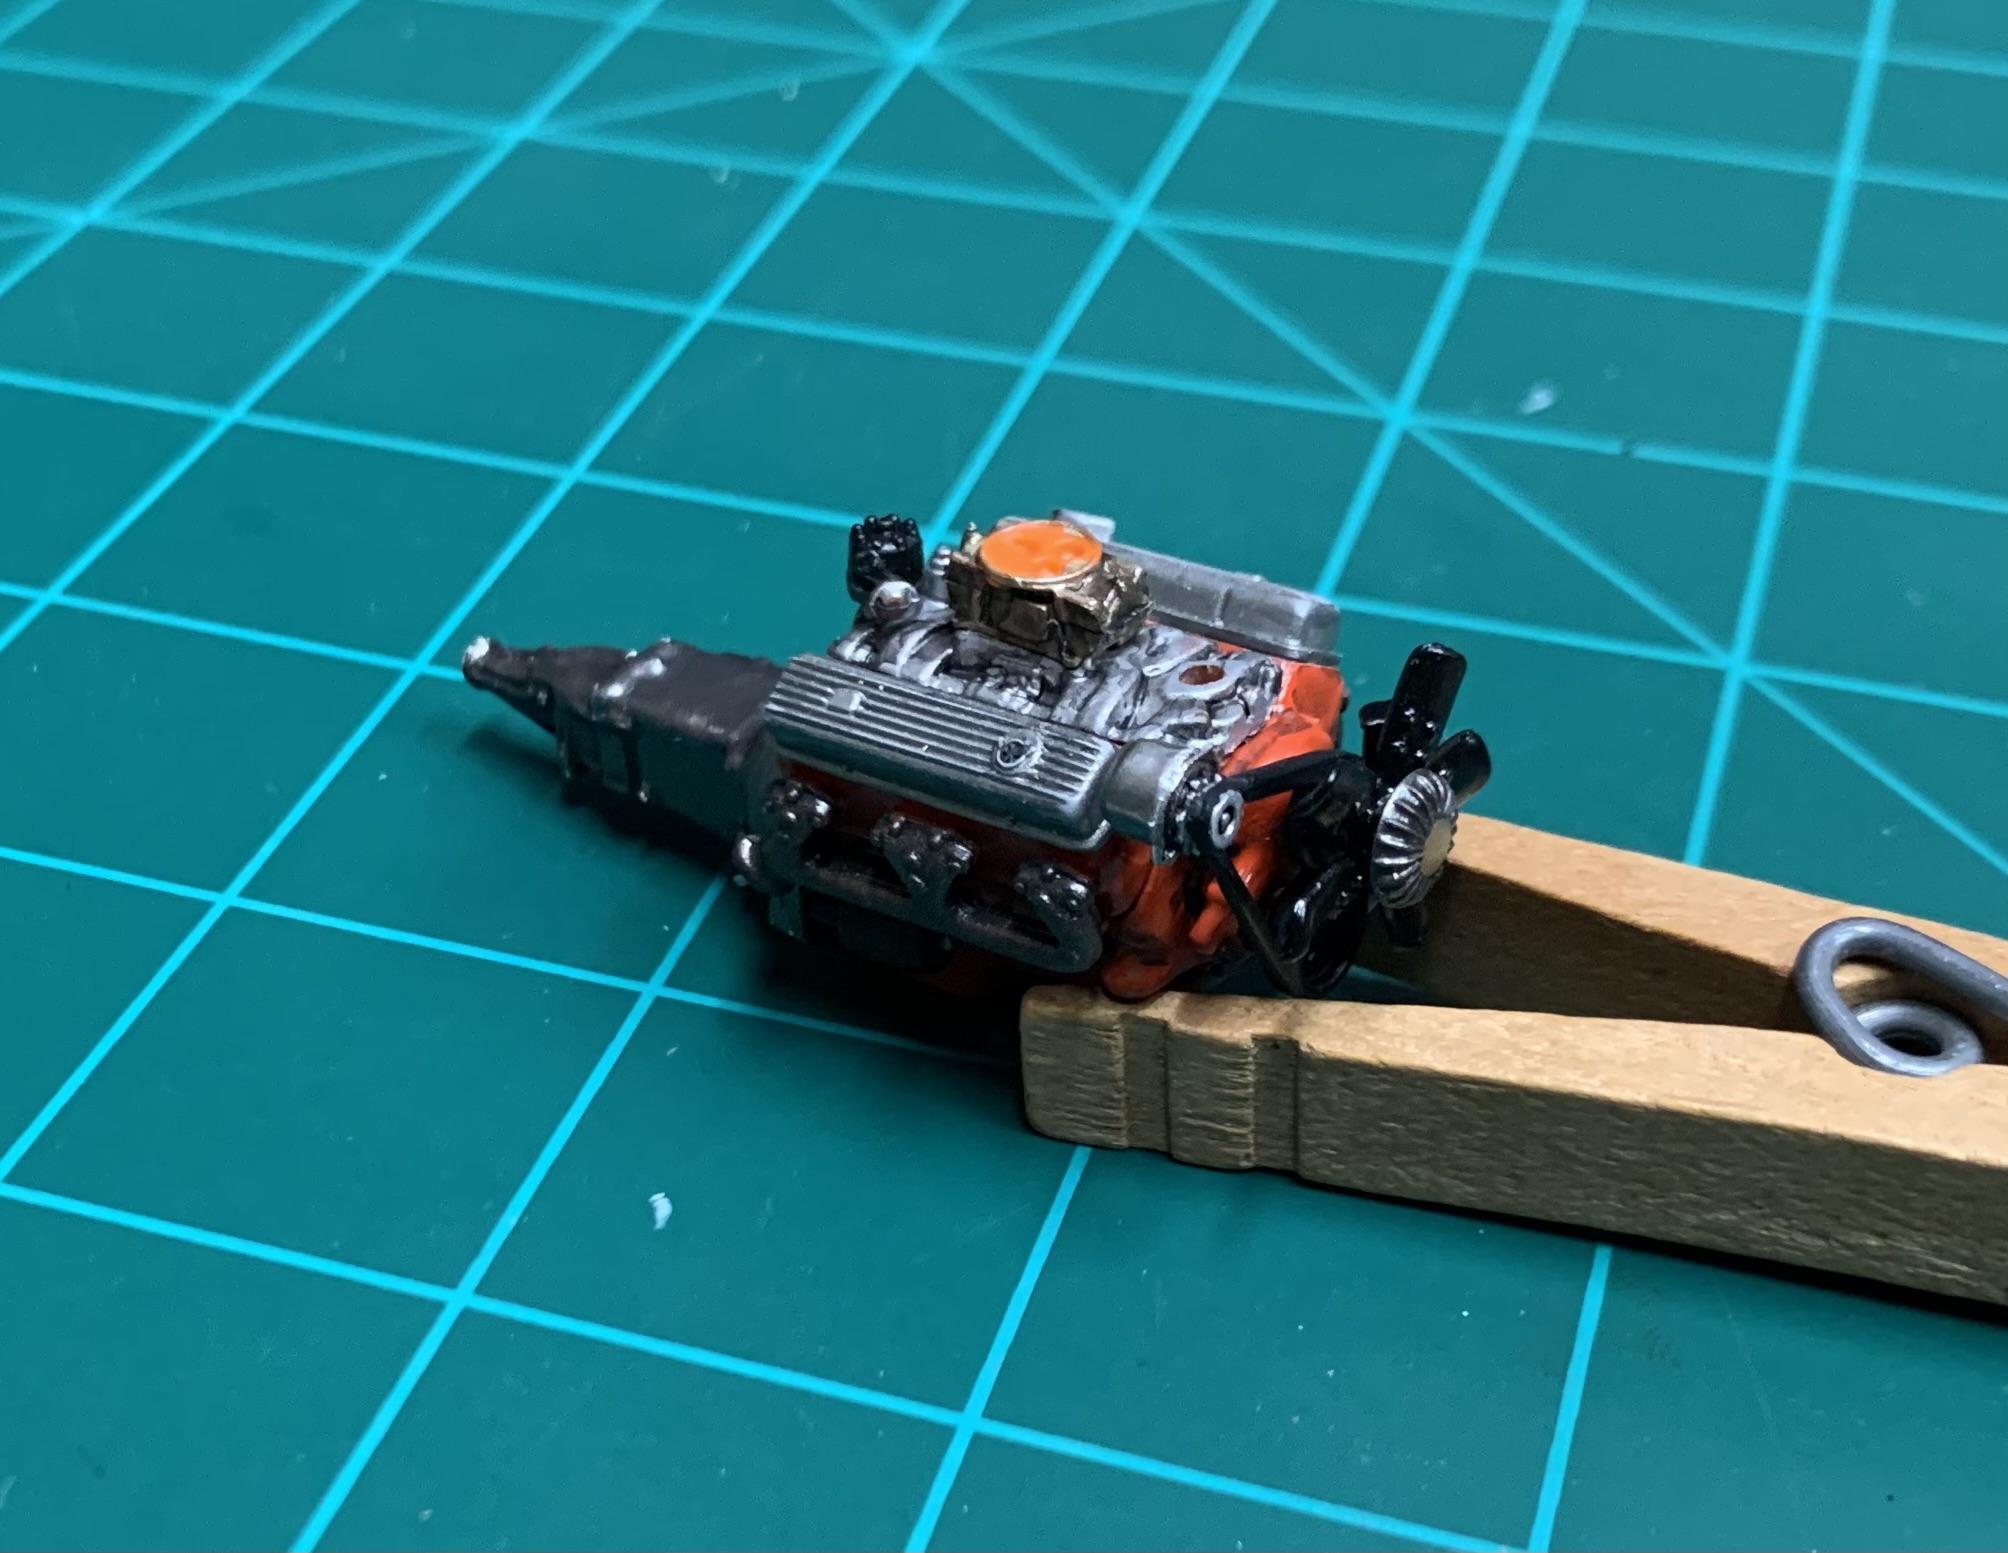 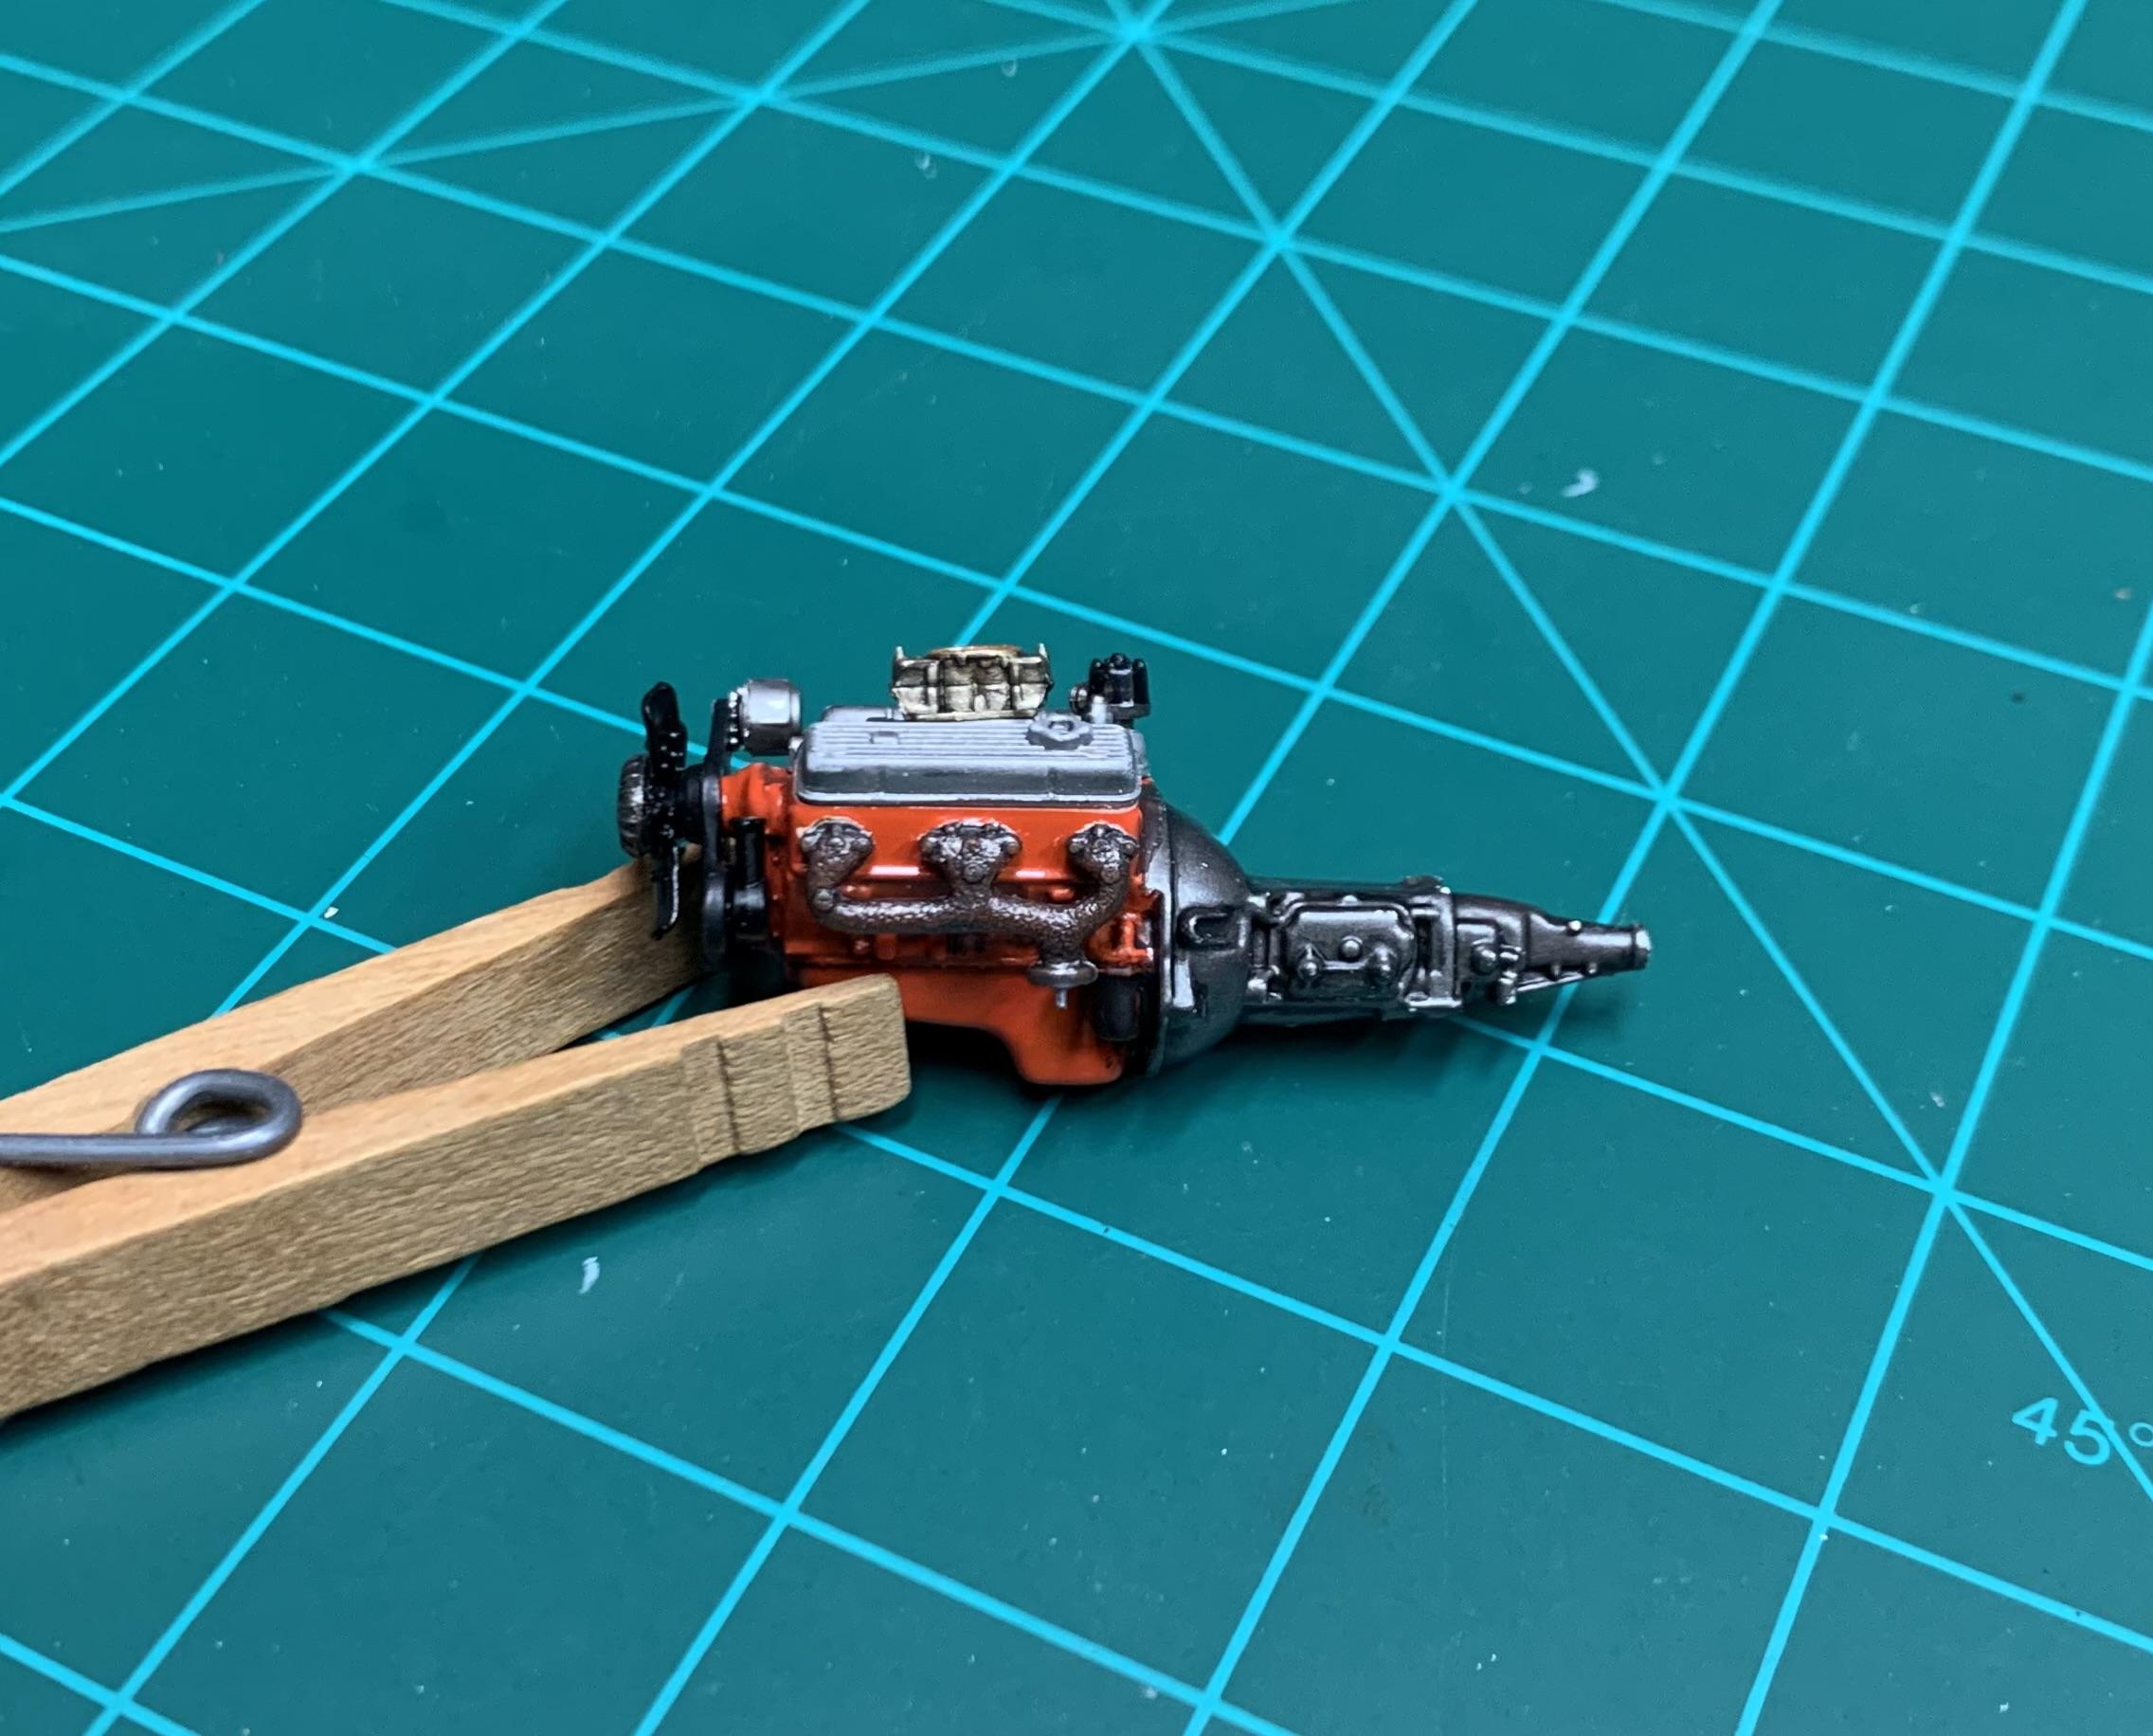 |
|
|
|
Post by 406 Silverado on Nov 9, 2023 6:00:22 GMT -5
That's a good and used look that you gave this engine Jeremy. Very convincing effects and it's making for a good addition into that engine bay. Just be careful to NOT install the subframe assembly until after you put the body over the chassis and you'll be good to go as that's one of the known issues with this kit. Lookin' good so far buddy.
|
|
|
|
Post by kyledehart5 on Nov 9, 2023 16:11:04 GMT -5
Excellent work on this one. That engine is excellent. The weathering really makes it looks the part. Very nicely done
|
|
atomicholiday
Full Member
Member since: September 2023
Posts: 410
Sept 4, 2023 8:25:11 GMT -5
Sept 4, 2023 8:25:11 GMT -5
|
Post by atomicholiday on Nov 9, 2023 18:08:36 GMT -5
kyledehart5 & 406 Silverado - Thanks guys! It's good to see things starting to come together with this one. I think my weathering here was a little heavy handed though. I might tone it down some. Quick question to anyone who's built this kit: This is regarding the sub-frame assembly mentioned by Joe. I'm thinking the best way to go about this is it to assemble the engine and sub-frame together, then attach that sub-assembly to the body, before adding the front suspension. Thinking about it, it looks like that would allow me to clamp the parts together without risk of damaging the suspension components. I guess that's not really a question, but more of a request for input. What do you guys think of that? Am I missing anything?
|
|
|
|
Post by 406 Silverado on Nov 9, 2023 18:38:16 GMT -5
kyledehart5 & 406 Silverado - Thanks guys! It's good to see things starting to come together with this one. I think my weathering here was a little heavy handed though. I might tone it down some. Quick question to anyone who's built this kit: This is regarding the sub-frame assembly mentioned by Joe. I'm thinking the best way to go about this is it to assemble the engine and sub-frame together, then attach that sub-assembly to the body, before adding the front suspension. Thinking about it, it looks like that would allow me to clamp the parts together without risk of damaging the suspension components. I guess that's not really a question, but more of a request for input. What do you guys think of that? Am I missing anything? I dunno.....I installed mine in the car like this:  BUT......I had a second car that I built up the suspension with all the modifications to lower it and bring the front wheel and tire assys towards the center of the car so the tires would be under the fenderwell. Make SURE you do plenty of mock ups to ensure stance and wheel/ tire positioning ahead of time. |
|
atomicholiday
Full Member
Member since: September 2023
Posts: 410
Sept 4, 2023 8:25:11 GMT -5
Sept 4, 2023 8:25:11 GMT -5
|
Post by atomicholiday on Nov 10, 2023 6:25:00 GMT -5
kyledehart5 & 406 Silverado - Thanks guys! It's good to see things starting to come together with this one. I think my weathering here was a little heavy handed though. I might tone it down some. Quick question to anyone who's built this kit: This is regarding the sub-frame assembly mentioned by Joe. I'm thinking the best way to go about this is it to assemble the engine and sub-frame together, then attach that sub-assembly to the body, before adding the front suspension. Thinking about it, it looks like that would allow me to clamp the parts together without risk of damaging the suspension components. I guess that's not really a question, but more of a request for input. What do you guys think of that? Am I missing anything? I dunno.....I installed mine in the car like this: BUT......I had a second car that I built up the suspension with all the modifications to lower it and bring the front wheel and tire assys towards the center of the car so the tires would be under the fenderwell. Make SURE you do plenty of mock ups to ensure stance and wheel/ tire positioning ahead of time. Now you've got me curious. Is there a problem with wheel position on this kit? Also, did you do a wip thread? I've read a few by other people, but yours seem to be more informative many times. (I'm thinking of the current vette thread, which is excellent). |
|
|
|
Post by 406 Silverado on Nov 10, 2023 7:52:53 GMT -5
I dunno.....I installed mine in the car like this: BUT......I had a second car that I built up the suspension with all the modifications to lower it and bring the front wheel and tire assys towards the center of the car so the tires would be under the fenderwell. Make SURE you do plenty of mock ups to ensure stance and wheel/ tire positioning ahead of time. Now you've got me curious. Is there a problem with wheel position on this kit? Also, did you do a wip thread? I've read a few by other people, but yours seem to be more informative many times. (I'm thinking of the current vette thread, which is excellent). In my experience with this kit and with what I've read of others who have as well.........YES!. Do you have in stock or do you have access to a second kit? If so I encourage you to mock build a second kit up ( a practice that I do with almost all of my autos now where kits are readily available) just to see where everything is OOB. I'll see if I can either find a build thread or my instruction sheet for this kit as I mark up the sheets so if anyone has any questions I can go back to it and be of help. |
|
atomicholiday
Full Member
Member since: September 2023
Posts: 410
Sept 4, 2023 8:25:11 GMT -5
Sept 4, 2023 8:25:11 GMT -5
|
Post by atomicholiday on Nov 16, 2023 13:51:01 GMT -5
Just finished up detailing the taillights. Not perfect but not too terrible. I can live with ‘em. Edit - man I need to figure out how to make my pics smaller. You can see WAY too much detail with these larger pics.🤪 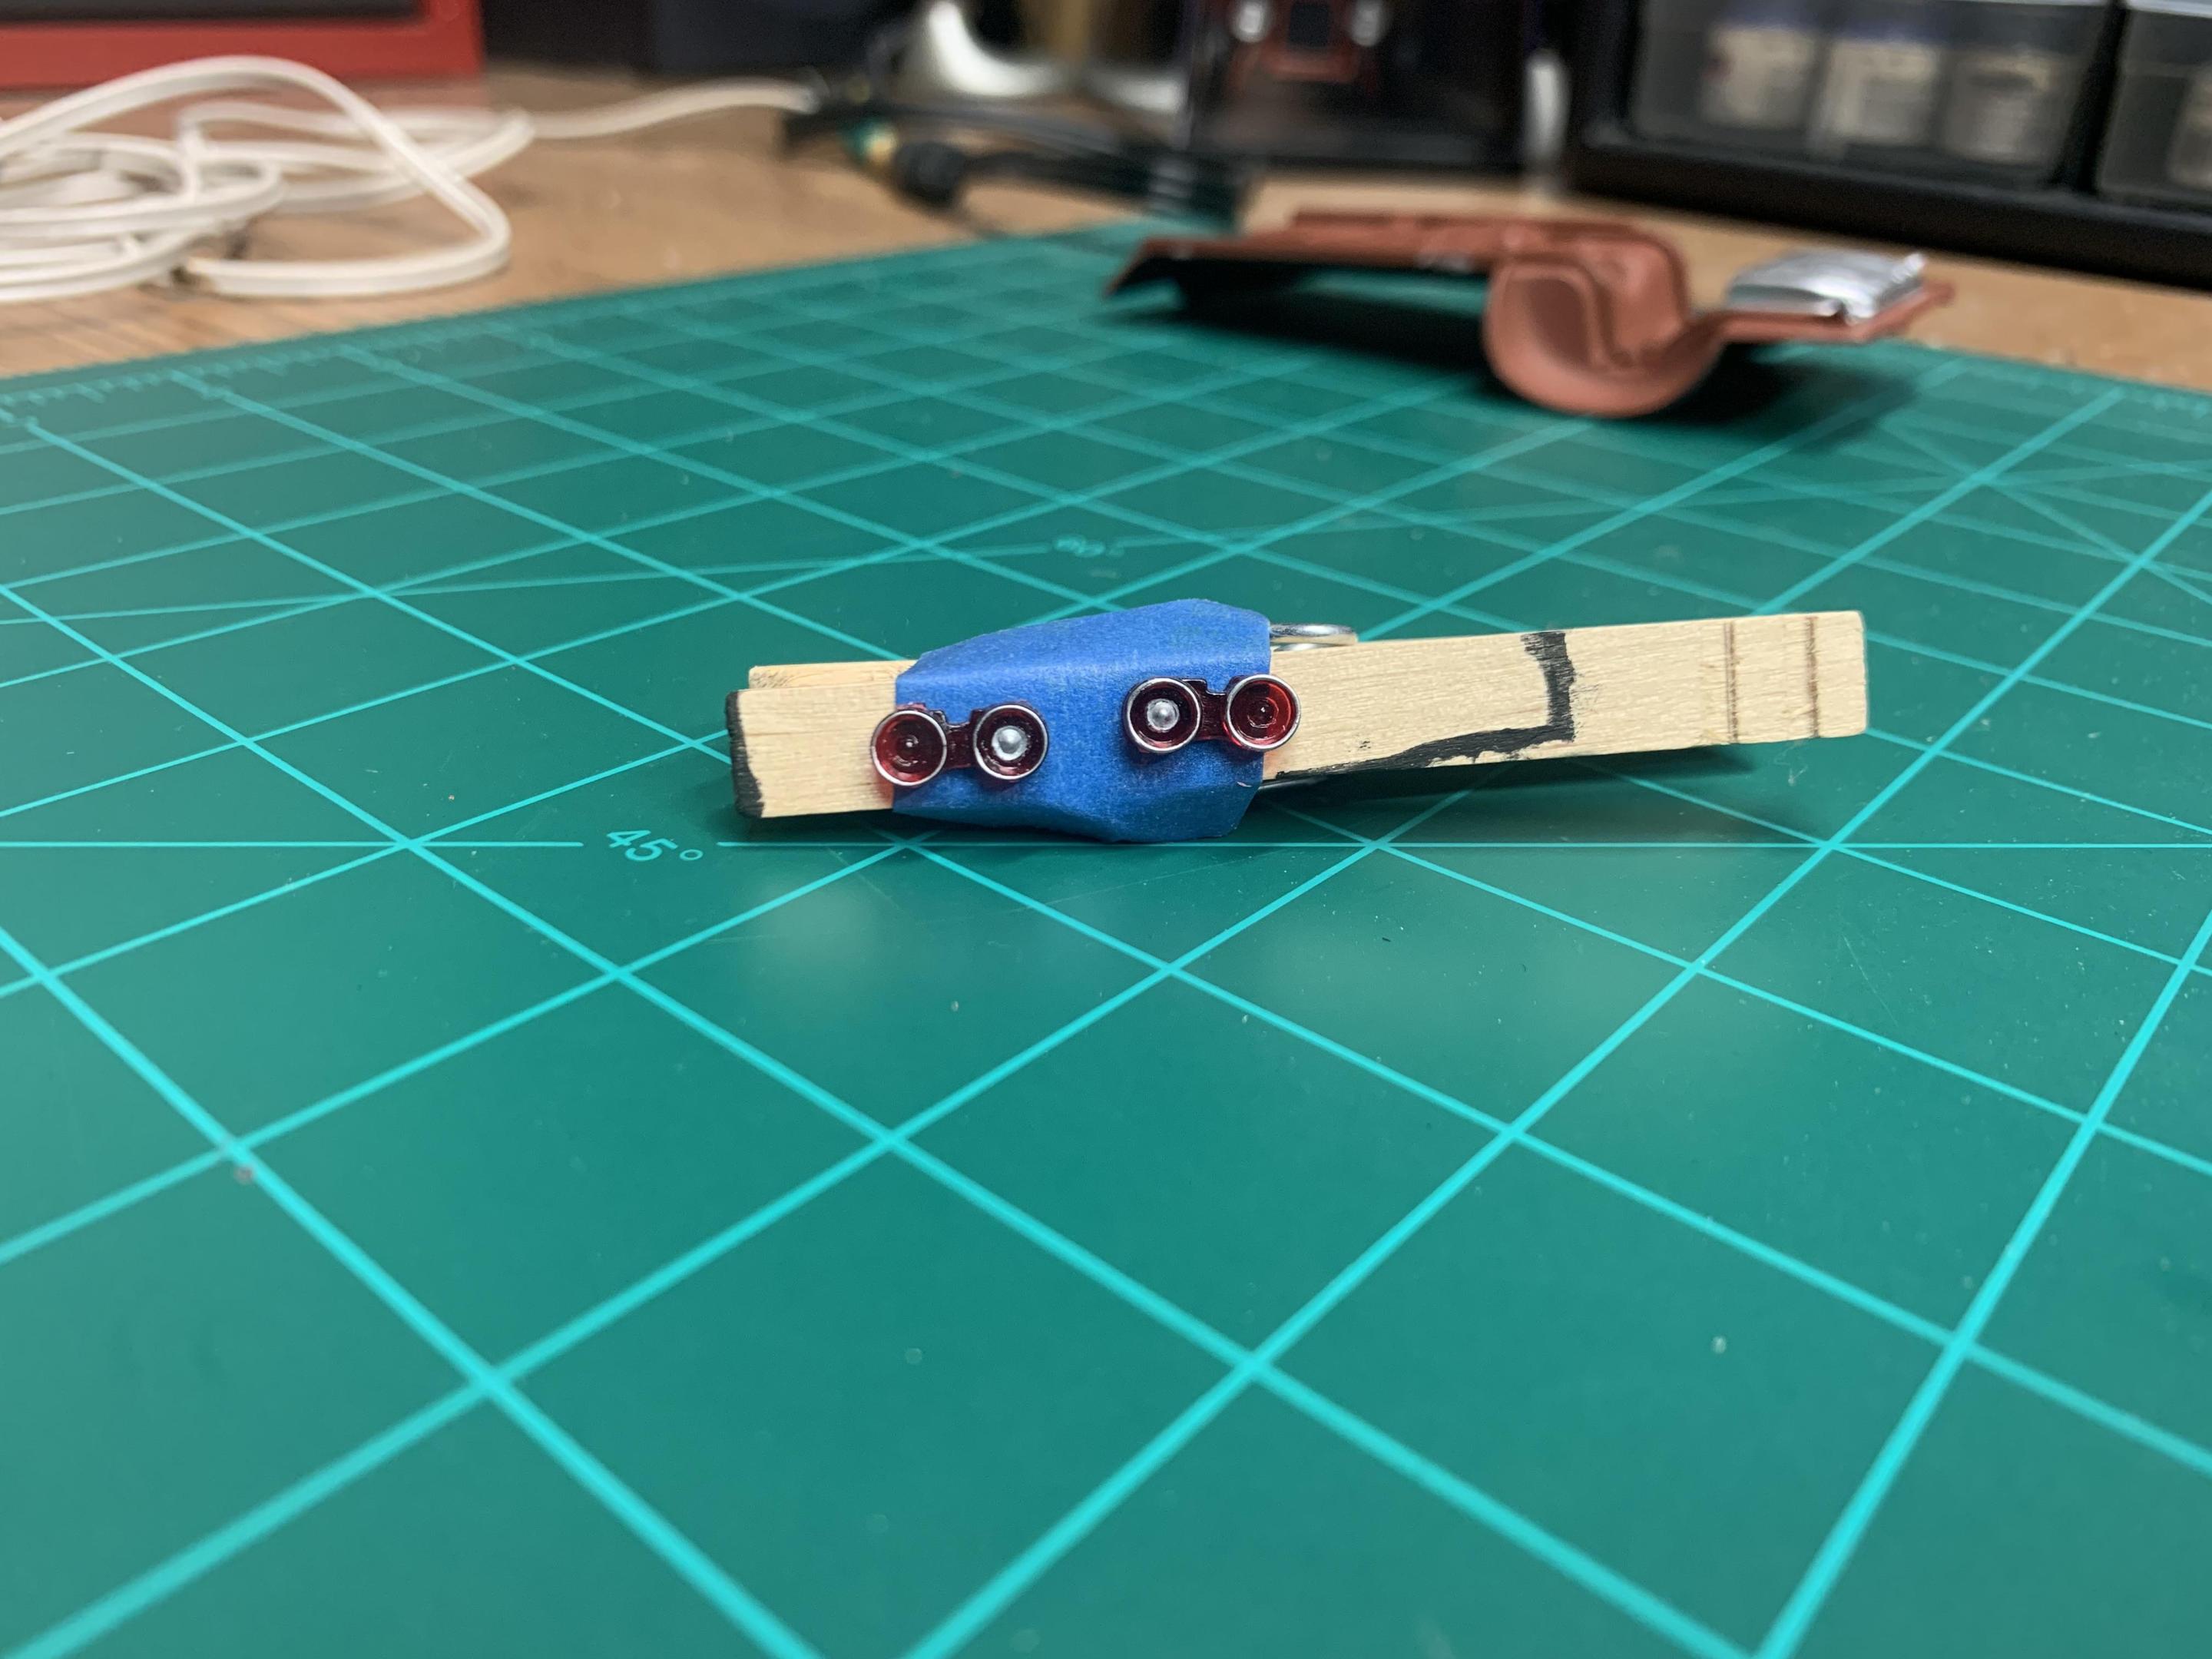 |
|


