brandonk
Full Member
   Jan '24 Showcased Model Awarded
Member since: May 2023
Posts: 1,280
May 14, 2023 13:45:45 GMT -5
May 14, 2023 13:45:45 GMT -5
|
Post by brandonk on Oct 18, 2024 14:53:54 GMT -5
I'm witnessing a master class in craftsmanship here. Amazing stuff.
|
|
jkim
Full Member
  
Member since: October 2023
Posts: 116
Oct 19, 2023 12:36:27 GMT -5
Oct 19, 2023 12:36:27 GMT -5
|
Post by jkim on Oct 19, 2024 11:55:56 GMT -5
Thanks Brandon! Hopefully, we can make this interesting as we go. I'm just glad we made it to page TWO of this thread. I've glued the front and rear cockpit bulkheads together so now I will place the sidewalls in place, one at a time, for photo purposes.   The yellow fuel line is being held in place with a blob of Blue Tack.   The cockpit sidewalls are now glued into place, completing the cockpit assembly. It is a very tight cockpit! 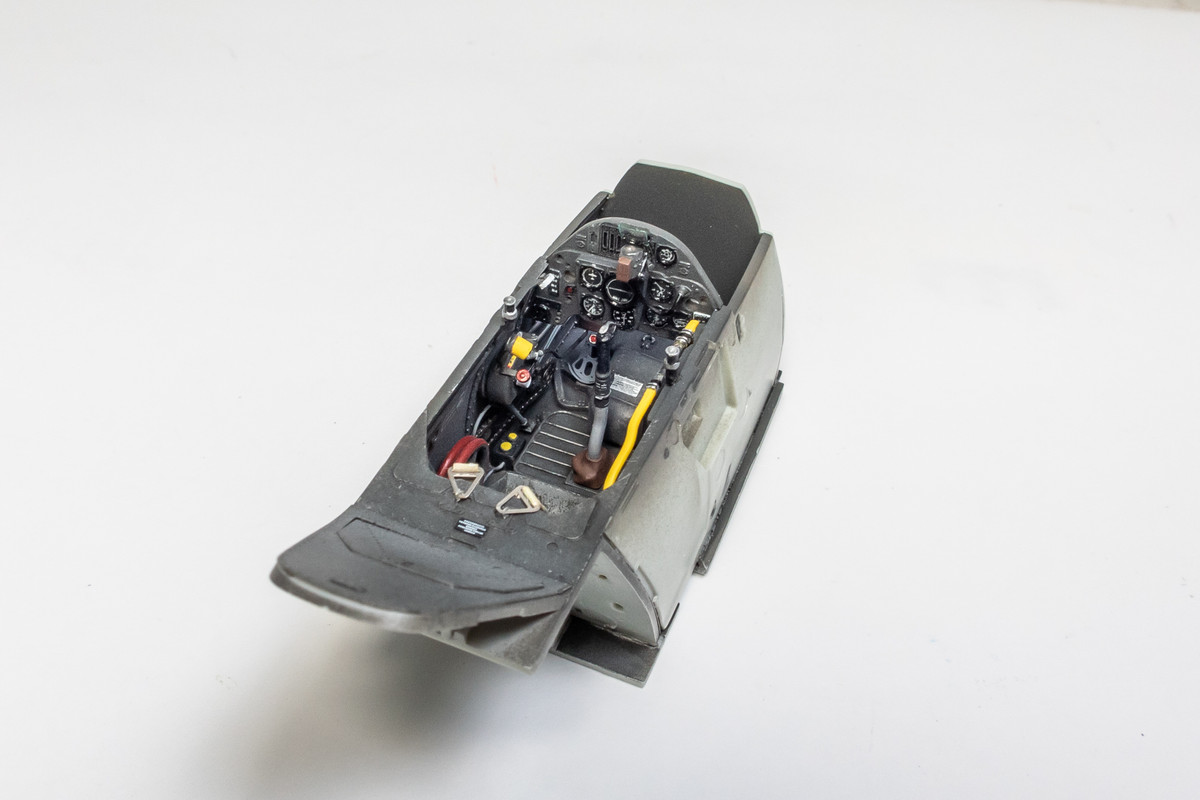   Getting ready for the next steps, I've gone ahead and applied riveting to the fuselage sides. The rivet lines are sketched onto the model using a soft-leaded pencil.  Again, I used the Galaxy Tools 1.00mm rivet wheel. I stop short of the edges and will do the last rows of rivets over the fuselage seam after the fuselage sides are glued together. After the rivets are applied, the fuselage surfaces are sanded. I've applied a dark wash to highlight the work. This is a good chance to address any issues with the panel lines as well, re-scribing where necessary. 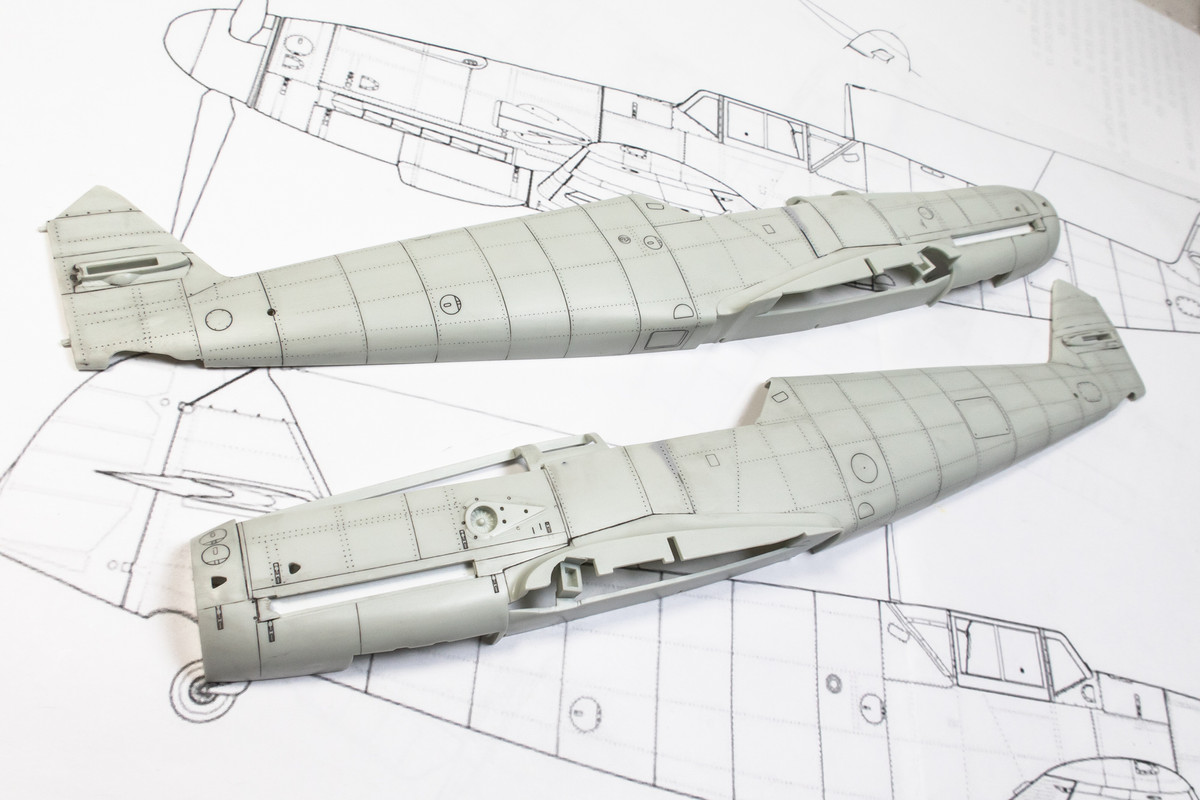  There is a spar that is glued underneath the cockpit tub. It serves to provide the correct dihedral to the wings but the tips also double for walls to the wheel wells. 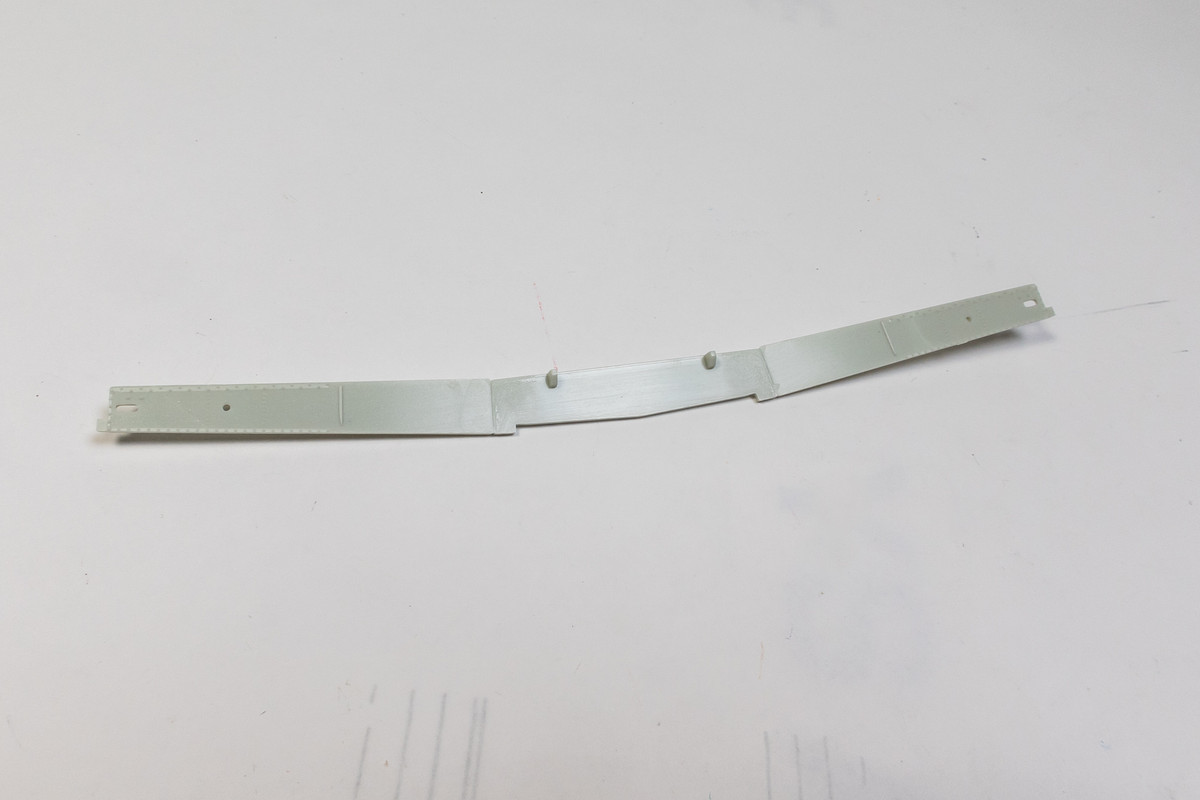 So I decided to cut the piece apart so that I can deal with the wheel wells completely separate from the spar.  The Reskit tail wheel assembly needs to be modified to fit the kit mounting.  Using the kit tail wheel as a guide, I chopped the Reskit tail wheel strut and inserted a piece of brass tube.  Next I am going to take a look at my spinner options, starting with the Airscale spinner.  |
|
|
|
Post by keavdog on Oct 19, 2024 19:12:17 GMT -5
Pit looks exceptional John. Really nice.
|
|
kyledehart5
Forum Moderator      Dec '23 Showcased Model Awarded
Member since: July 2023
Posts: 7,135
Member is Online
MSC Staff
|
Post by kyledehart5 on Oct 19, 2024 19:12:49 GMT -5
The excellent work continues!! That cockpit is incredible.
|
|
handiabled
Administrator      Apr '23 Showcased Build Awarded
Member since: February 2023
Posts: 4,427 
MSC Staff
|
Post by handiabled on Oct 20, 2024 4:56:30 GMT -5
Awesome looking rivet work John! It really adds so much to the build.
|
|
jkim
Full Member
  
Member since: October 2023
Posts: 116
Oct 19, 2023 12:36:27 GMT -5
Oct 19, 2023 12:36:27 GMT -5
|
Post by jkim on Oct 20, 2024 11:00:34 GMT -5
Thanks guys! A look at the Reskit tailwheel modified to fit the Revell kit. The white circle is where I mistakenly punched out a hole for the tail wheel that is intended for a later mark.  Getting ready for the fuselage halves to go together. I had to do a little trimming to the cockpit sides so that the fuselage would close up completely. Also, I determined that the internal framing under the gun cowling interfered with the fit so it was cut off completely.  The fuselage is glued together and the gun cowling has been glued into place. I had to rip off the gun cowling when I realized that the MG17 gun barrels needed to go in first. Luckily, the glue was not yet dry and the painted brass barrels were positioned into place using lumps of Apoxie Sculpt.   Some seam clean up needs to be performed. First the lateral glue seam on the bottom edge of the gun cowling needs to be filled since there is no physical panel line here. The rivets and panel lines over the gun cowling were added.   The fuselage seams need to be cleaned up next and then the panel lines re-established. |
|
jkim
Full Member
  
Member since: October 2023
Posts: 116
Oct 19, 2023 12:36:27 GMT -5
Oct 19, 2023 12:36:27 GMT -5
|
Post by jkim on Oct 21, 2024 11:45:03 GMT -5
Additional rivet lines around the nose have been completed.  Let's check out the spinner situation. I've got two aftermarket options here: Airscale and Barracuda Studios. As always there are plus and minus attributes associated with both. The Barracuda version is cast resin and is perfectly smooth. It comes with its own prop blades. However, the spinner is solid and a hole needs to be drilled exactly in the center in order for it to be used on the Revell kit. The Airscale spinner is 3D-printed and it has very fine concentric ridges along its surface. It doesn't come with prop blades so I'm assuming it is supposed to be used with the kit blades but they kit blades don't fit without modification to the mounting tabs. The center hole is already provided so no worries there.  I screwed up drilling the hole in the Barracuda spinner even while using the Barracuda-supplied jig. I could always fill the hole up with epoxy and drill again but I decided to move to the Airscale spinner and use the kit propeller blades. At first, I didn't see much difference between the kit and Barracuda blades but looking more closely and comparing to archive photos of G-2's, I've come to the conclusion that the kit blades are not accurate. 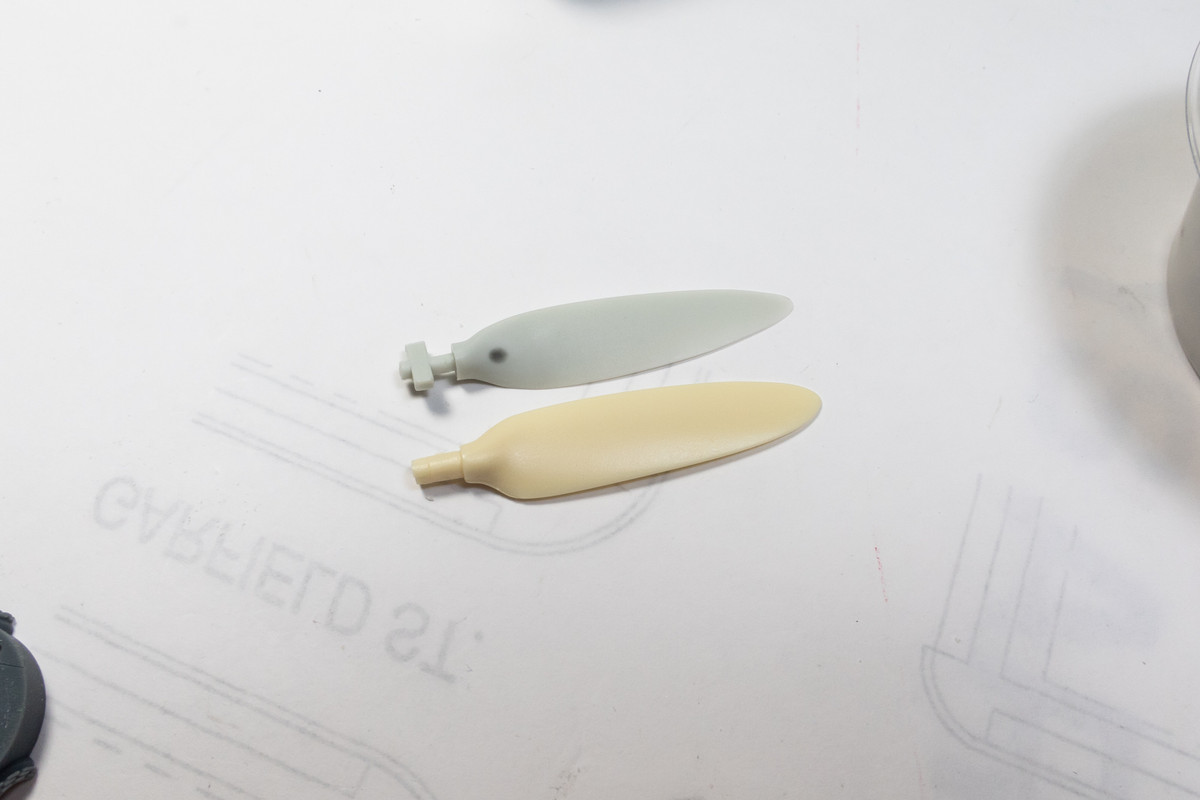 The kit blades are too narrow and pointy. And since the Revell blades are wafer-thin, it would be very difficult to modify the shape of the tips without making the blades shorter.  I decided to use the Barracuda prop blades with the Airscale spinner. First, a check to see how the spinner fits on the fuselage.  The mounting pegs on the Barracuda blades are thicker than the receiving holes on the Airscale spinner, so I had to cut them off and replace them with sections of brass tubing. The Airscale backplate is a two-part affair and it looks like the kit prop blades are supposed to be sandwiched between the top and bottom parts. However, the kit blades didn't fit so I'm not quite sure how this is SUPPOSED to work. Doesn't matter for me because I'll simply be inserting the prop blades from the outside. So the backplate was glued together without the prop blades.  The blades can be plugged in whenever it is convenient to do so.  And here is what the hybrid Airscale/Barracuda prop assembly looks like in place.  A coat of primer blends the different parts together.   I took the spinner off and began some fine sanding to remove the fine 3D-printing artifacts. And then... disaster. While trying to re-establish the rivet hole, I did this...  |
|
jkim
Full Member
  
Member since: October 2023
Posts: 116
Oct 19, 2023 12:36:27 GMT -5
Oct 19, 2023 12:36:27 GMT -5
|
Post by jkim on Oct 21, 2024 15:44:29 GMT -5
Ok, so I won't keep you in suspense any longer. The interesting thing about the resin from the 3D-printing process that I've handled is that it breaks so cleanly that the broken part can usually be put back into place very precisely. Until the joint line virtually disappears. That's a good thing but because the fit is so precise, there is not much room for any adhesive to form a strong bond and that can make for a potentially fragile repair. I pushed the broken piece into place and seeped extra thin CA glue into the joint. For added strength, I flooded the interior side of the joint with more CA glue. The repair was topped with a bit of brush-applied Mr Primer Surfacer. You can also see some of the light sanding that I did to reduce the 3D-printing artifacts.  After an airbrushed coat of Mr Primer Surfacer, the repair complete. Yes, this is the side where the break occurred. You can't see it in the photo, but there is a very slight surface irregularity in the area of the repair but for the most part, it should be unnoticeable. A big sigh of relief.  And I'm not done with the prop assembly just yet. I wanted to add a blast tube for the MG151 that fires out of the spinner. So I've added a brass tube (same diameter as the plastic prop shaft). 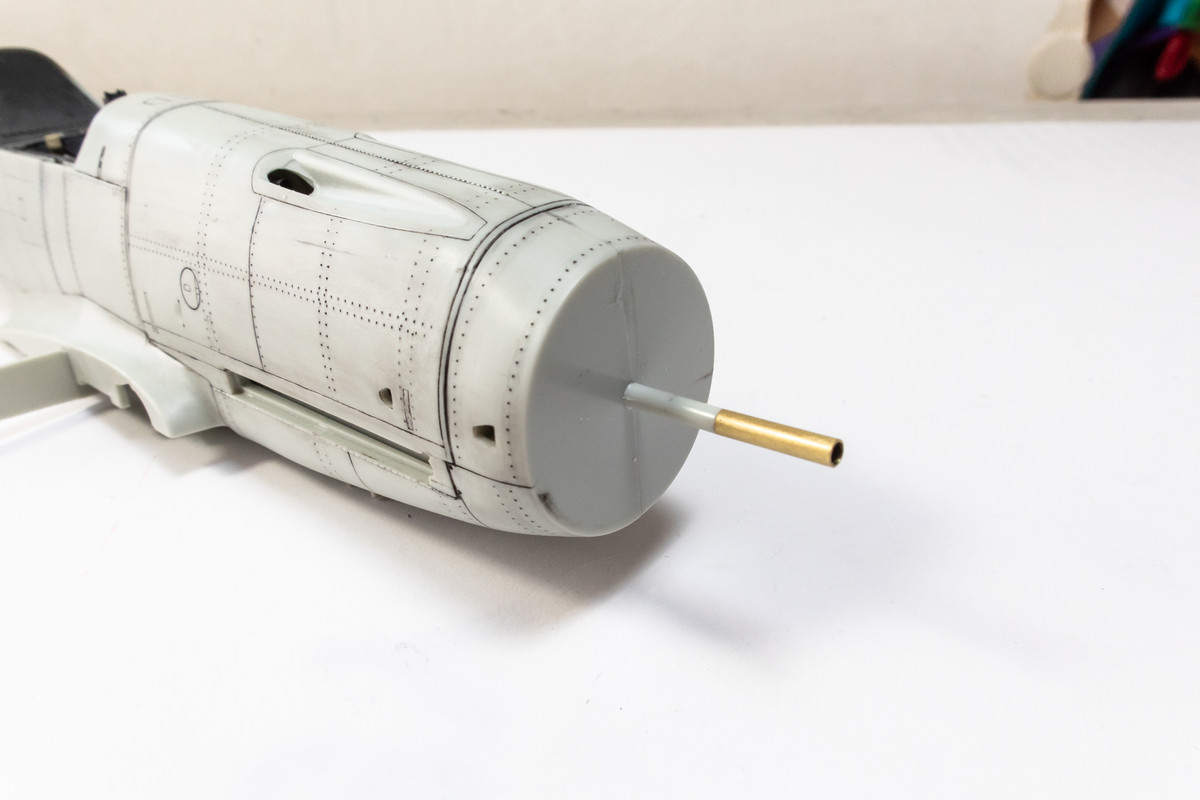 I've also added a section of larger diameter brass tubing to the inside of the spinner to help center the blast tube.  The spinner backplate assembly has been painted black and highlighted the hubs with Mr Metal Color Stainless Steel (MC212). I've not yet painted the blast tube but have treated it with Mr Metal Primer.  With everything in place, you can make out the blast tube set within the hole in the spinner.  |
|
|
|
Post by keavdog on Oct 21, 2024 15:52:44 GMT -5
Uggghhhh... I did the same thing to a 3d printed 1/24 fuel cell this past weekend. Attempting to glue and sand.
|
|
jkim
Full Member
  
Member since: October 2023
Posts: 116
Oct 19, 2023 12:36:27 GMT -5
Oct 19, 2023 12:36:27 GMT -5
|
Post by jkim on Oct 22, 2024 12:13:43 GMT -5
|
|
kyledehart5
Forum Moderator      Dec '23 Showcased Model Awarded
Member since: July 2023
Posts: 7,135
Member is Online
MSC Staff
|
Post by kyledehart5 on Oct 23, 2024 14:00:40 GMT -5
I am sorely lagging behind on posts but have been trying to make a little dent in seeing them when I can. More beautiful work. This thing looks amazing already!! Your treatments on the fuselage are bringing it to life!!
|
|
jkim
Full Member
  
Member since: October 2023
Posts: 116
Oct 19, 2023 12:36:27 GMT -5
Oct 19, 2023 12:36:27 GMT -5
|
Post by jkim on Oct 24, 2024 15:34:24 GMT -5
|
|
|
|
Post by Steve Zuleski on Oct 24, 2024 15:54:18 GMT -5
I'm quite a bit late to this SBS, but it was great going thru just the first page alone, the cockpit work, excellent, and now the rivets and details. Bookmarked, John. Ruck On!
Cheers, Ski.
|
|
kyledehart5
Forum Moderator      Dec '23 Showcased Model Awarded
Member since: July 2023
Posts: 7,135
Member is Online
MSC Staff
|
Post by kyledehart5 on Oct 24, 2024 22:44:37 GMT -5
Oh my. Another great update. Cockpit looks amazing and I’m sorry to see it go but looking forward to seeing the rest of the process. Nice work on the armor plating!
|
|
handiabled
Administrator      Apr '23 Showcased Build Awarded
Member since: February 2023
Posts: 4,427 
MSC Staff
|
Post by handiabled on Oct 25, 2024 1:51:05 GMT -5
You are really moving through this one John! Too bad the gunsight took a little damage. The revisions you performed on the fuselage elevate this ten fold!
|
|
jkim
Full Member
  
Member since: October 2023
Posts: 116
Oct 19, 2023 12:36:27 GMT -5
Oct 19, 2023 12:36:27 GMT -5
|
Post by jkim on Oct 25, 2024 18:33:45 GMT -5
Thanks guys! Appreciate the positive vibes! I'm slowly addressing the surface of the fuselage, paying special attention to a couple of seams that need to be completely eradicated. One is the horizontal seam that runs below the cowling guns and the other is a vertical seam that starts right at the rear corner of the windscreen.  There is some subtle contouring on the engine cowling in the vicinity of the seam that I want to seal. I can't/won't totally get rid of the contours but I've had to reduce it to help eliminate the glue seam. I'm not going to achieve perfection here and it won't be necessary since the dark tri-color camo pattern will disguise much of subtle tells.  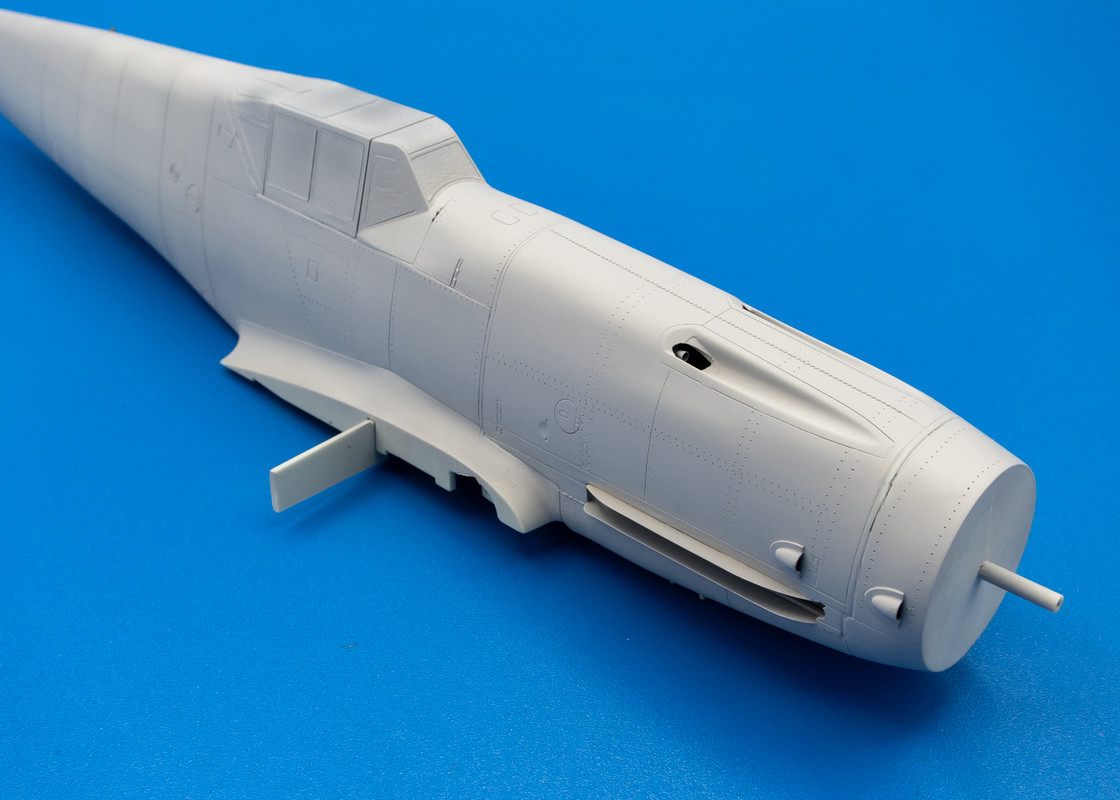  I am upgrading the various cooler and radiator grilles with PE from the Airscale set. Instead of shaving the detail off and thinning the kit parts, I cut new shapes from thinner styrene sheet. Saved me a bit of time.  |
|
kyledehart5
Forum Moderator      Dec '23 Showcased Model Awarded
Member since: July 2023
Posts: 7,135
Member is Online
MSC Staff
|
Post by kyledehart5 on Oct 26, 2024 23:43:50 GMT -5
Very nice!! Beautiful, crispy details and everything is looking just right.
|
|
handiabled
Administrator      Apr '23 Showcased Build Awarded
Member since: February 2023
Posts: 4,427 
MSC Staff
|
Post by handiabled on Oct 27, 2024 3:32:25 GMT -5
I've said it before John your attention to detail is amazing.
|
|
buddho
Forum Moderator     
Member since: February 2019
Posts: 1,287 
MSC Staff
|
Post by buddho on Oct 27, 2024 4:12:00 GMT -5
It is a pleasure to watch this masterpiece of a build come together. All the details and painstaking effort are paying off. Amazing.
|
|
|
|
Post by 406 Silverado on Oct 28, 2024 4:54:32 GMT -5
I've missed the last few updates on this beast so I spent the past 15-20 minutes catching up on what you've done to this bird and I've gotta say.....you sure don't miss much in terms of detail. The use of a metal rod in the tailwheel strut is going to be a big help on down the line and was something that I did when I built my 1/24 scale Trumpeter 109 twelve years ago and it was a good thing I did because the tailwheel strut would have broken a LONG time ago had I not done that modification. Something else that you mentioned was how tight the cockpit is in this bird and indeed it was. The pilots had almost NO wiggle room in these tiny aircraft. By way of comparison, Thunderbolt cockpits looked like a frickin' baseball field against a 109 cockpit. I really like the time and attention that you are putting into things like the prop spinner, blast tube and prop blades. This is really going to make a difference on the completed bird. Rock on John as this is turning out to be one heckuva build brother.  |
|
jkim
Full Member
  
Member since: October 2023
Posts: 116
Oct 19, 2023 12:36:27 GMT -5
Oct 19, 2023 12:36:27 GMT -5
|
Post by jkim on Oct 29, 2024 17:51:02 GMT -5
Thanks guys! Just plodding along here. I finally got the Barracuda oil cooler fairing that I ordered some weeks ago. I've added a small drain pipe using brass tubing.  This will replace the kit fairing which has some shape deficiencies.  You can see the subtle shape differences in the Barracuda fairing. And it fits well too!   Before the wing halves can be glued together, the wheel wells have been painted. I've added a strut from the spare parts bin to represent some of the hardware partially visible from the holes in the wheel well walls.  Time to glue the wing parts together.  The the other wing parts including the ailerons have been glued into place. I've left off the flaps trailing the wing radiators off for now.  And you can just make out the strut that I added. Desired effect achieved.  |
|
|
|
Post by 406 Silverado on Oct 29, 2024 18:55:23 GMT -5
Jeez John. You put just as much effort into your wheel wells and landing gear as some folks put into a whole engine/ powerplant. Excellent details in there as well as the radiators and oil cooler!! I'm looking for a kitchen sink to be thrown in there somewhere!!  |
|
TJ
Senior Member
    June '23 Showcased Model Awarded
Member since: May 2023
Posts: 2,172
May 14, 2023 18:18:36 GMT -5
May 14, 2023 18:18:36 GMT -5
|
Post by TJ on Oct 29, 2024 19:18:47 GMT -5
See what happens when I go away for a week, just took 15 minutes to catch up on all the greatness of this build. John I have a blast following your builds
|
|
handiabled
Administrator      Apr '23 Showcased Build Awarded
Member since: February 2023
Posts: 4,427 
MSC Staff
|
Post by handiabled on Oct 30, 2024 1:59:14 GMT -5
Coming together wonderfully!
Did you add the rivet detail to the Barracuda cowl or was it present when you received it? Asking because it matches the rivet line on the fuselage perfectly.
|
|
jkim
Full Member
  
Member since: October 2023
Posts: 116
Oct 19, 2023 12:36:27 GMT -5
Oct 19, 2023 12:36:27 GMT -5
|
Post by jkim on Oct 30, 2024 11:53:05 GMT -5
Thanks guys! Appreciate the comments! The Barracuda oil cooler didn't have rivets so I added them. So I was able to match up the rivet lines.
|
|
Mike
Full Member
  
Member since: December 2023
Posts: 372
Dec 28, 2023 0:41:00 GMT -5
Dec 28, 2023 0:41:00 GMT -5
|
Post by Mike on Oct 31, 2024 11:52:48 GMT -5
I just caught up with your build, John. Everything about this is a master class of talent. Now I need to go check out your other builds and see what I can gleam from your experience. This is first class. Bravo, sir.
|
|
|
|
Post by hasenpfeffer on Nov 3, 2024 20:57:18 GMT -5
Wow! I am truly impressed. The amount of detail and craftsmanship going into this are amazing. (And you mentioned this was a simple, straight forward build... LOL) Looking forward to more, John. Very entertaining indeed.
|
|
jkim
Full Member
  
Member since: October 2023
Posts: 116
Oct 19, 2023 12:36:27 GMT -5
Oct 19, 2023 12:36:27 GMT -5
|
Post by jkim on Nov 4, 2024 13:09:50 GMT -5
Thanks guys! Slight delay on the build. As I was doing work on the fuselage, I kept hearing a loose part rattling around in the cockpit. Initially, I wanted to ignore it, hoping it was something inconsequential like one of the foot pedals. On second thought, I thought it would be wiser to address now so I popped the canopy off (fracturing it in the process) and found that the loose part was the scratch-built armor plate. I have plenty of canopy spares since I've built a few Revell G-6 with the Erla canopy option so I had to mask up a new one and reinstall the armor plate. I'll post up an update soon.
|
|
jkim
Full Member
  
Member since: October 2023
Posts: 116
Oct 19, 2023 12:36:27 GMT -5
Oct 19, 2023 12:36:27 GMT -5
|
Post by jkim on Nov 5, 2024 13:07:03 GMT -5
|
|
|
|
Post by 406 Silverado on Nov 5, 2024 15:03:33 GMT -5
John that thing looks as perfect as I think you can get it so far bud. Too bad about the canopy but looks like you found a solution to the matter. Looking forward to the painting stages of this build and then again off to my favorite part of your builds......the weathering.
|
|