jkim
Full Member
  
Member since: October 2023
Posts: 116
Oct 19, 2023 12:36:27 GMT -5
Oct 19, 2023 12:36:27 GMT -5
|
Post by jkim on Oct 9, 2024 20:21:12 GMT -5
I've temporarily shelved the Italeri Folgore project and am looking to start up something new to work on. Something familiar but different. I think this one fits the bill. A Bf109G-2 on the Eastern Front.  A while back, Peter from Airscale graciously gave me a suite of aftermarket upgrades that he produced for the Revell Bf109G-2 kit to try. It's a very extensive combination of 3D-printed resin, photoetch and decals that apply to both the exterior and the cockpit and I've been wanting to check them out. That's one of the big reasons for starting on this particular build. I've not built the Revell G-2/G-4 kit but I've done two Revell G-10's and converted a Revell G-6 into a G-6/AS. So it would be familiar yet different. And Luftwaffe subjects are definitely in my comfort zone. So much so that I've collected quite a bit of aftermarket parts for the Fw190D (my favorite aircraft) and the Bf109G. A lot of them came with 2nd-hand model kits that I bought from the modeling community.  Not everything pictured will be used, especially since there are some overlaps (three versions of the exhausts, for example) but it'll be fun to pick and choose the enhancements as I see fit. Here is a preliminary list of the upgrades that I've initially gathered for this build: Airscale Pro Bf109G-2/4 Cockpit Set (Phototech) Airscale Pro Bf109G-2/4 Cockpit Details (3D-printed) Airscale Pro Bf109G-2/4 Seamless Spinner Airscale Pro Bf109G-2/4 Wheel Set Airscale Pro Bf109G Exhaust and MG131 Gun Set Barracuda Bf109F/G Separate Control Surfaces Barracuda Bf109G Standard Tailwheel with Boot Barracuda Bf109G-6 Intake and Exhaust Set Barracuda Bf109F-4 through G-14 Prop and Spinner Barracuda Bf109G Cockpit Stencils, Placards and Instrument Panel Henri Daehne Bf109G-6 Prop Set Eduard Bf109G-6 Exhaust Stacks Eduard Bf109G-6 Mask Set Reskit Bf109F/G Early Wheel Set Master MG131 Gun Barrels Synthetic Ordnance Works Bf109G Main Landing Gear Struts 1ManArmy High Definition Paint Masks for Bf109G-6 Early Let's take a closer look at some of these upgrades, starting with the Airscale stuff. First up is the Cockpit Details set and the one that I'm most excited about. It features four components: Revi C/12D gun sight, control stick, oxygen regulator and throttle quadrant.  Very useful upgrades, especially the Revi gun sight... kit-provided gun sights molded in clear plastic never work out well, IMO.  Check out the wiring on the oxygen regulator! It's amazing! Hopefully, I can extract these parts without breaking the fine wiring.  The Airscale spinner is 3D-printed and replaces a 2-piece kit spinner whose joint is awkwardly placed right through the prop blade openings and not corresponding to a real panel line.  Since the spinner is 3D-printed, you can make out very fine ridges which will need to be removed with a combination of fine sanding and primer.  I have a lot of choices when it comes to the spinner. The Henri Daehne prop set on the left, the Airscale spinner in the middle and the Barracuda prop set on the right.  Henri Daehne no longer offers his beautiful props so I am hording my little collection tightly. I'll probably set the HD set aside and consider using either the Airscale or Barracuda prop. 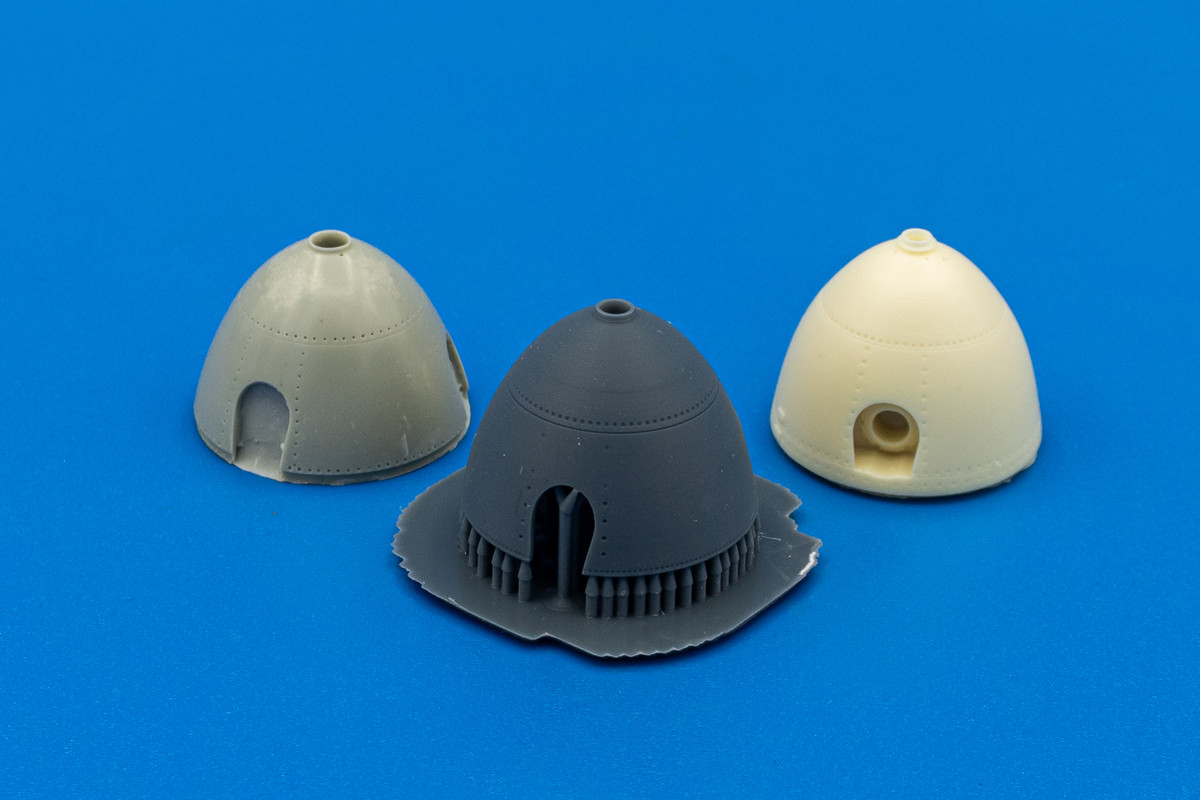 Another area where I have multiple choices is the exhausts. The Airscale set combines the exhausts with a pair of MG131 gun barrels.  I've also have a set of Eduard exhausts (which come with photoetch deflectors to replace the thick plastic) and a set of Barracuda exhausts (which are bundled with a supercharger intake and hollow air scoops.  All of them look good and feature hollowed out ends and realistic weld seams.  The Airscale gun barrels are also exquisitely molded with open cooling holes and built in mounts for a drop-in fit but they look to be slightly warped.  The Master brass barrels are obviously perfectly straight but would need to be surgically joined to a mount for use on the Revell kit.  To be continued... |
|
jkim
Full Member
  
Member since: October 2023
Posts: 116
Oct 19, 2023 12:36:27 GMT -5
Oct 19, 2023 12:36:27 GMT -5
|
Post by jkim on Oct 9, 2024 23:34:34 GMT -5
Continuing on the aftermarket tour, we take a look at the Airscale Bf109G2/4 Wheel set. It looks like the tires are traditionally cast resin while the hubs are 3D-printed. These look beautiful with really fine detail on the tires and hubs. One of the drawbacks with 3D-printed parts is the random occurence of heavy striations. You can see this on the hub set to the left while the hub set on the right looks perfect. Not sure why that happens but I've seen it more than a few times. Luckily, the back side of the hubs, where the striation is the heaviest, will be hidden against the landing gear cover when mounted.  Before I received the Airscale goodies, I had purchased a set of wheels from Reskit. Interestingly, when comparing the two (with the Reskit on the left), the tire tread is handled differently. The Reskit treads are recessed while the Airscale looks like a balloon-style tire with raised ribs. Not sure if one or both are correct... will have to do some research.  The final piece of the Airscale suite is the Cockpit Upgrade. This is an extensive multimedia set comprised of a big photoetch sheet, decals and... gulp... transparency for the metal canopy pieces! 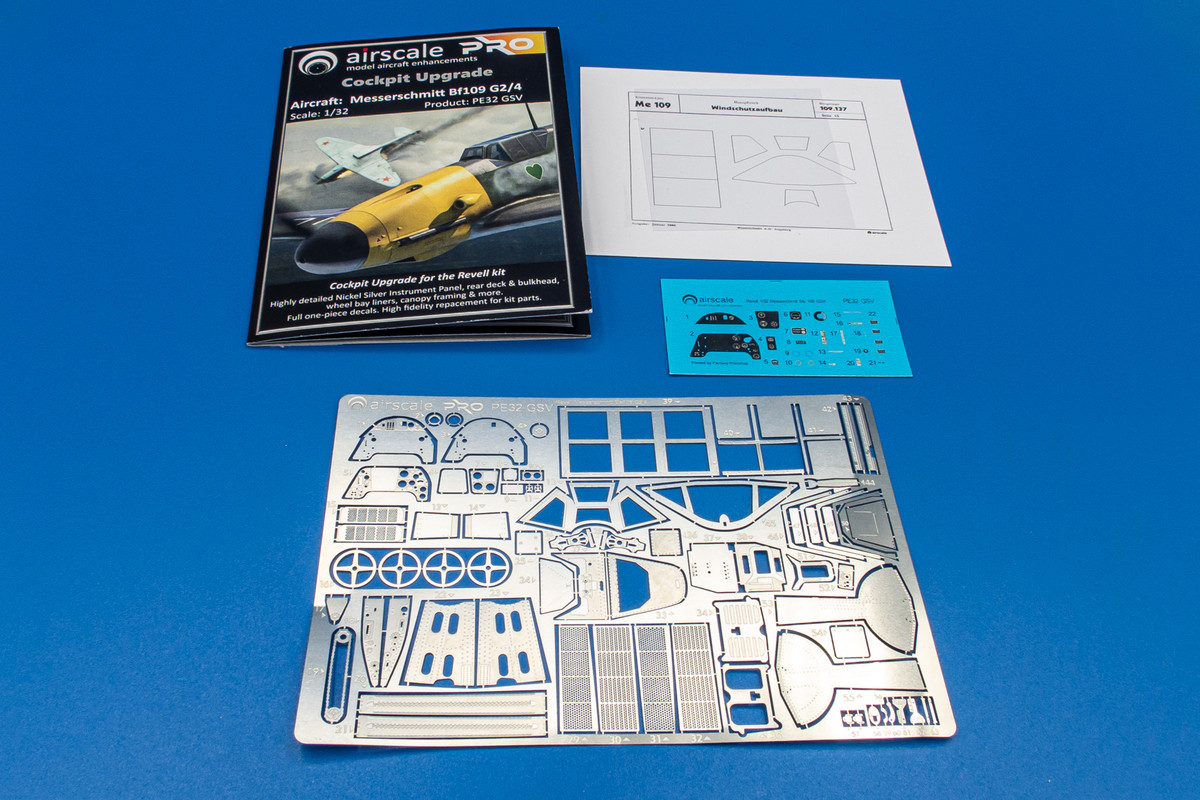 The photoetch covers a lot of the cockpit including instrument panel, rear decking, trim wheel and drive chain. And it looks like some external parts are included as well like the landing gear covers, wheel well components and the aforementioned canopy frames.  Not sure I am brave enough to utilize the photoetch canopy parts but I'll give it a shot. I assume you prime and paint the frames before attaching the clear window parts? 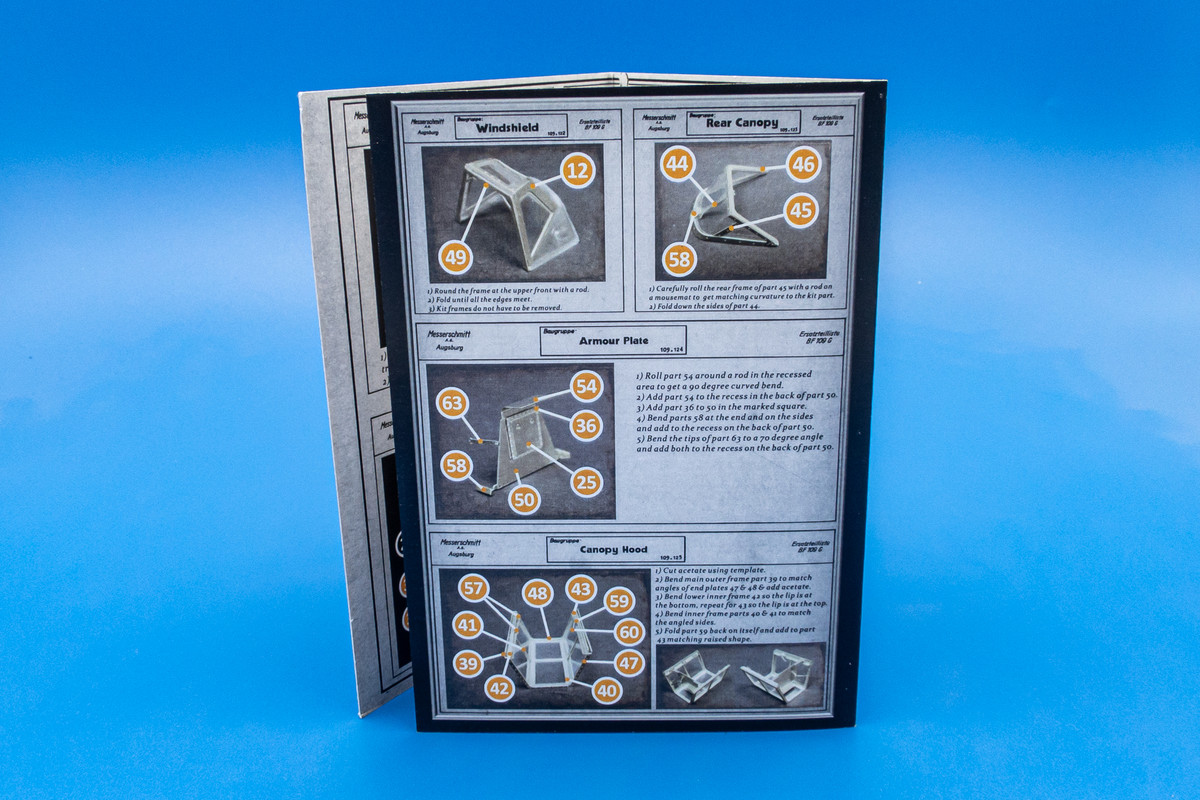 These fabric-covered control surfaces from Barracuda should address the known issue of exaggerated stitching details and overly large moisture control discs on the kit parts. 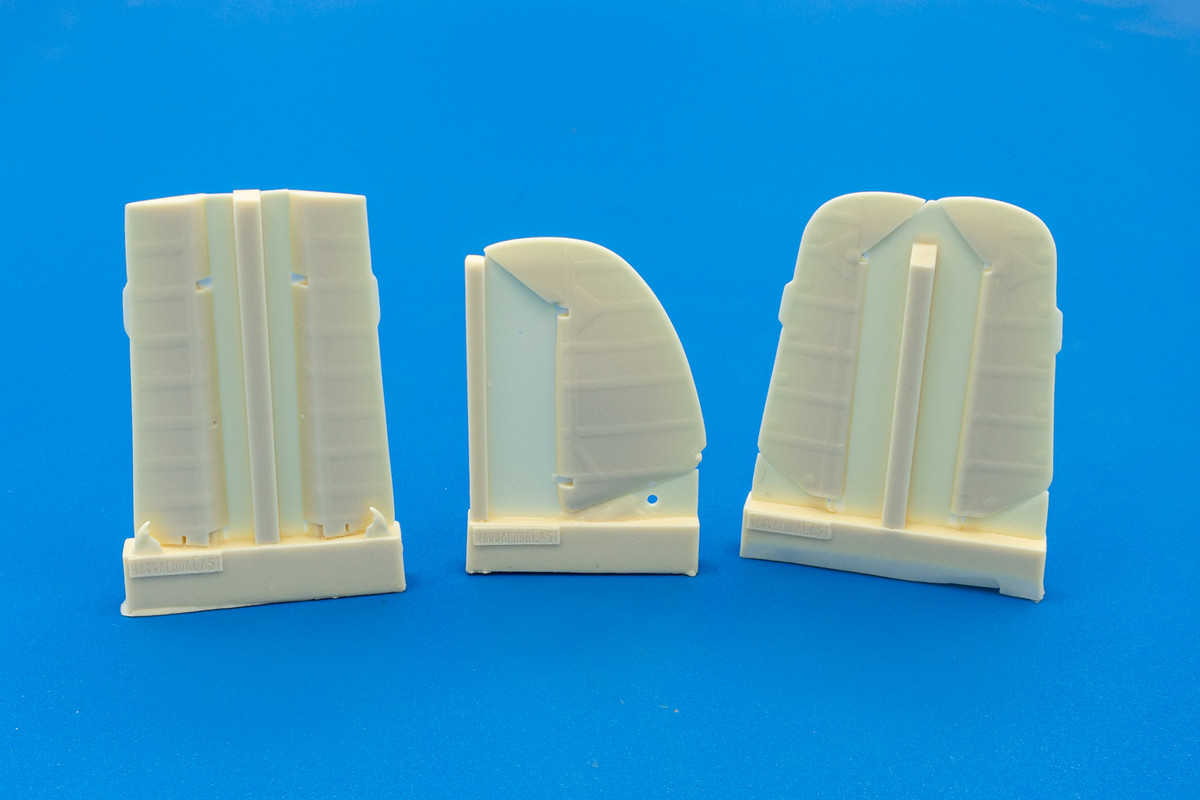 A special shout-out to Damian at Synthetic Ordnance Works. I was one of the guinea pigs as he was testing his idea of making reinforced landing gear for various aircraft models. I still have a few copies of his 109 legs and happy to use them here. The attachment point on the kit legs has been known to break and the shiny oleo portion is already shiny stainless steel.  Strangely, Revell omitted the metal corrugated foot pad needed for the G-2 and instead gives us the later wooden floor. The G-6 kit offers both floor parts but someone got mixed up and put the wrong floor into the G-2 kit. I have multiple copies of the G-6 kit so I can pilfer one of these for this build.  |
|
handiabled
Administrator      Apr '23 Showcased Build Awarded
Member since: February 2023
Posts: 4,427 
MSC Staff
|
Post by handiabled on Oct 10, 2024 2:04:11 GMT -5
I'll be along for this one John. It looks like quite the stack of aftermarket! I'll be interested to hear what you think of the reinforced landing gears.
|
|
|
|
Post by 406 Silverado on Oct 10, 2024 4:51:25 GMT -5
Good LORD man!! What an extensive review of all of these aftermarket kits that you've got lined up for this build John. I haven't used enough 3D printed parts yet to be exposed to the striation that you've mentioned but I'll be on the lookout for it now. The tires.....I believe I've seen these go either way with the tire tread ribbing being recessed or raised. If you do go the raised ribbing route those are going to have some wear and tear to them, so I'd maybe think about smoothing the center of the tire some to simulate tire wear.
I'm going to be very interested in seeing that PE cockpit frame being built up with the individual window panels. It looks like it would have a more realistic effect but sure looks a bit finicky to handle and then again when adhering the individual window panes to the frame work. I do NOT envy you on that!! lol
|
|
TJ
Senior Member
    June '23 Showcased Model Awarded
Member since: May 2023
Posts: 2,172
May 14, 2023 18:18:36 GMT -5
May 14, 2023 18:18:36 GMT -5
|
Post by TJ on Oct 10, 2024 5:25:42 GMT -5
  Yep definitely gonna watch this
|
|
kyledehart5
Forum Moderator      Dec '23 Showcased Model Awarded
Member since: July 2023
Posts: 7,137
Member is Online
MSC Staff
|
Post by kyledehart5 on Oct 10, 2024 7:03:23 GMT -5
Oh my goodness. So many options across so many facets of the model to consider at each step!! This is going to be incredible!! Cannot wait.
|
|
jkim
Full Member
  
Member since: October 2023
Posts: 116
Oct 19, 2023 12:36:27 GMT -5
Oct 19, 2023 12:36:27 GMT -5
|
Post by jkim on Oct 10, 2024 11:22:51 GMT -5
I'll be along for this one John. It looks like quite the stack of aftermarket! I'll be interested to hear what you think of the reinforced landing gears. Thank you sir! Despite all of the aftermarket stuff I'm playing with, I am thinking that this one will be a "relatively" simple build. No engine to deal with, uncomplicated wheel wells and experience with this Revell molding. I've used the Synthetic Ordnance Works landing gear on a few build already and they work great. Damian uses the kit part as a master mold and pours resin over a stainless steel rod core. Plug-n-play fit but with increased strength. Here are the SOW landing gear legs that I used on this Bf109G-6/AS conversion of the Revell G-6 kit.  Good LORD man!! What an extensive review of all of these aftermarket kits that you've got lined up for this build John. I haven't used enough 3D printed parts yet to be exposed to the striation that you've mentioned but I'll be on the lookout for it now. The tires.....I believe I've seen these go either way with the tire tread ribbing being recessed or raised. If you do go the raised ribbing route those are going to have some wear and tear to them, so I'd maybe think about smoothing the center of the tire some to simulate tire wear. I'm going to be very interested in seeing that PE cockpit frame being built up with the individual window panels. It looks like it would have a more realistic effect but sure looks a bit finicky to handle and then again when adhering the individual window panes to the frame work. I do NOT envy you on that!! lol Thanks Joe! I admit that I am a sucker for resin and photoetch upgrades! The canopy frames are interesting for sure. But since I am going to pose this model with the canopy closed, I won't be utilizing the main benefit, which is the thin-ness of the frames... much more in scale than thick plastic. We'll see... definitely worth playing with and making a comparison.   Yep definitely gonna watch this Thanks for watching, Johnny! Oh my goodness. So many options across so many facets of the model to consider at each step!! This is going to be incredible!! Cannot wait. Thank you Kyle! Like I said before, hopefully this will be a relatively simple build. But... I am going to apply rivets to the entire surface! Jumping right into the build, we start off in the cockpit. The kit foot rests are bit blobby. I dug through my stash and found a set of brass foot rests from the now defunct Eagle Editions Fw190D-9 cockpit upgrade. I cut the straps off and used thin strips of brass sheet for new straps. If I had looked at the Airscale etch fret, I would've found a set of foot rests as well.   The triangular pylon on the floorboard is the mount for the flywheel and Airscale provides a replacement so this is carefully cut off.   The kit seat back has a faint impression of shoulder harnesses. I consider this a violation of the "if you can't do something right, don't do it at all" rule and it needs to be removed to make room for more plausible belts. Unfortunately, there is also a raised triangular pad on the upper back rest that will be erased as well. The raised detail on the sides of the bulkhead will also be removed to make room for PE panels.  A lateral pen sander like the David Union D400 is very useful for this type of detail removal.  After the majority of the raised features on this part are scraped off with an x-acto blade, the D400 finishes it off and leaves a nice flat surface.  The Airscale photoetch fret provides PE replacements for the bulkhead sides.  Here is the bulkhead with the PE added and the kit bucket seat temporarily tacked on. The kit seat also has the pesky (and unconvincing) harness detail molded in and due to the shape of the part, removal will be much trickier. Outside of that, the seat itself is molded admirably thin.  I failed to mention it but the collection of 3D-printed parts from Airscale includes a clean bucket seat. And if you look closely, you'll a small triangular part included as well. I could be wrong but I'm guessing this is the thin triangular pad on the back rest that was removed when the harnesses were scraped off.  Airscale provides a PE skin for the rear deck so those parts are added. So here is the rear bulkhead with Airscale enhancements added. Harnesses will be added later.  |
|
jkim
Full Member
  
Member since: October 2023
Posts: 116
Oct 19, 2023 12:36:27 GMT -5
Oct 19, 2023 12:36:27 GMT -5
|
Post by jkim on Oct 11, 2024 18:44:12 GMT -5
Working on several different fronts. I'm getting the wing and fuselage components ready for riveting and I want all of the modular pieces attached. The two part upper wings are glued together first, which is contrary to kit instructions. It's easier this way, ensuring that the glue joint on the wing surface is nice and level and dealing with any joint issues along the wing edges later.  The upper tail part is also glued onto the fuselage halves at this time.  The engine cover side panels will be attached to fuselage before riveting but there are some things that need to be addressed before gluing. The small air scoop is solid instead of hollow. It would be difficult to hollow these out manually so I'm going to use resin scoops from the Barracuda exhaust set. Also deflectors above and below the exhaust stacks are too thick and will be replaced by Eduard brass.  The small scoops are sliced off and replaced with resin. The Barracuda supercharger intake is also tested for fit. The black dot on the intake lip is a small air bubble that has been filled with black CA glue. None of these parts will be glued in at this time as any raised feature might get in the way during the riveting process.   The plastic exhaust deflectors are cut off and the Eduard brass replacements are tested for fit. The exhausts are designed to be installed from the inside but this makes painting complicated. I want to be able to insert the exhaust stacks from the outside so my choice for which exhaust set to use (Airscale, Eduard, Barracuda) will depend on which one accommodates this change. The photo shows the Eduard exhausts just as an initial test.   I tried to straighten the Airscale MG131 barrels and ended up snapping one in two. It really doesn't matter because only the muzzle tips will be visible. Here are the Airscale barrels temporarily secured with Blue Tack.  My main worry with the Airscale barrels is the fragility of the muzzle openings. It's really fine resin and I'm afraid they'll get damaged during the masking and painting process. No such worries with the Master brass barrels and I'll be opting for these for this reason.  While the wing and fuselage parts are being puttied, I jump over to the cockpit again and take a look at more Airscale upgrades. Airscale provides a 3-part stack to replace the kit electric junction panel. It's still flat so I carefully sliced off the raised box in the middle of the panel to use on top of the Airscale photoetch. 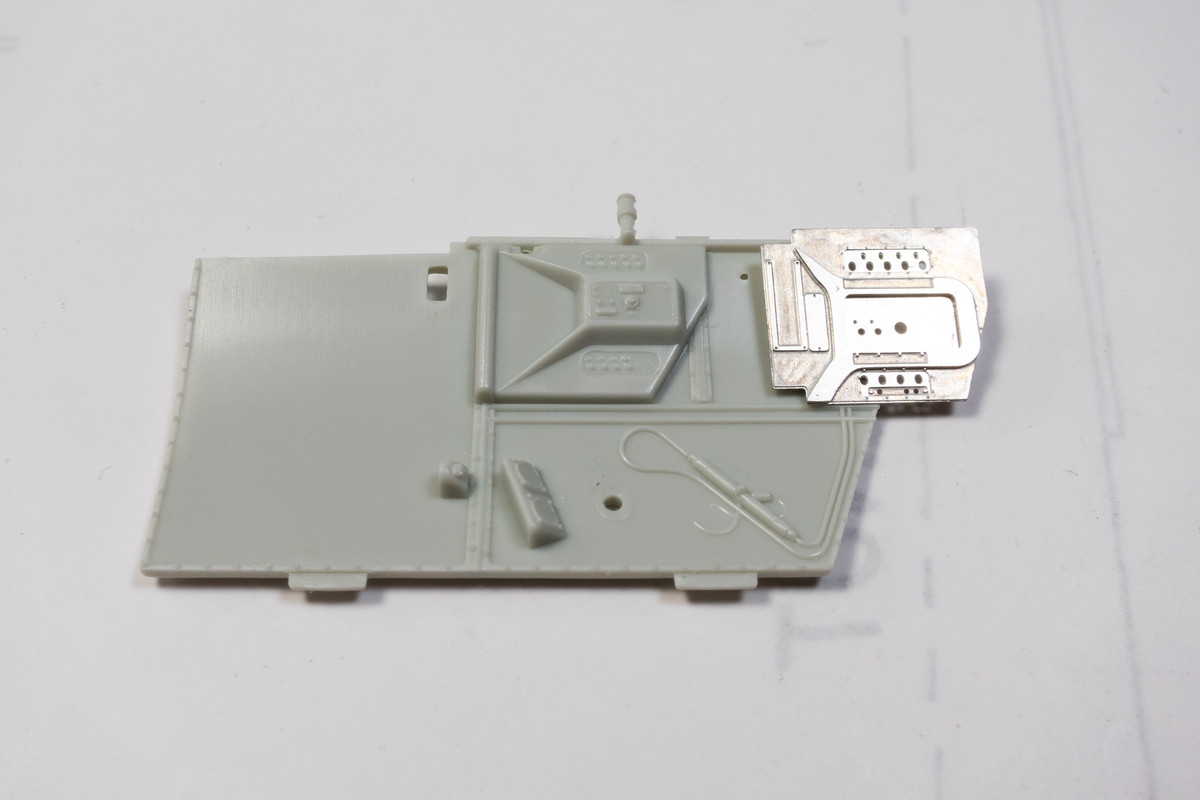 The box adds a little more 3D relief to this assembly. 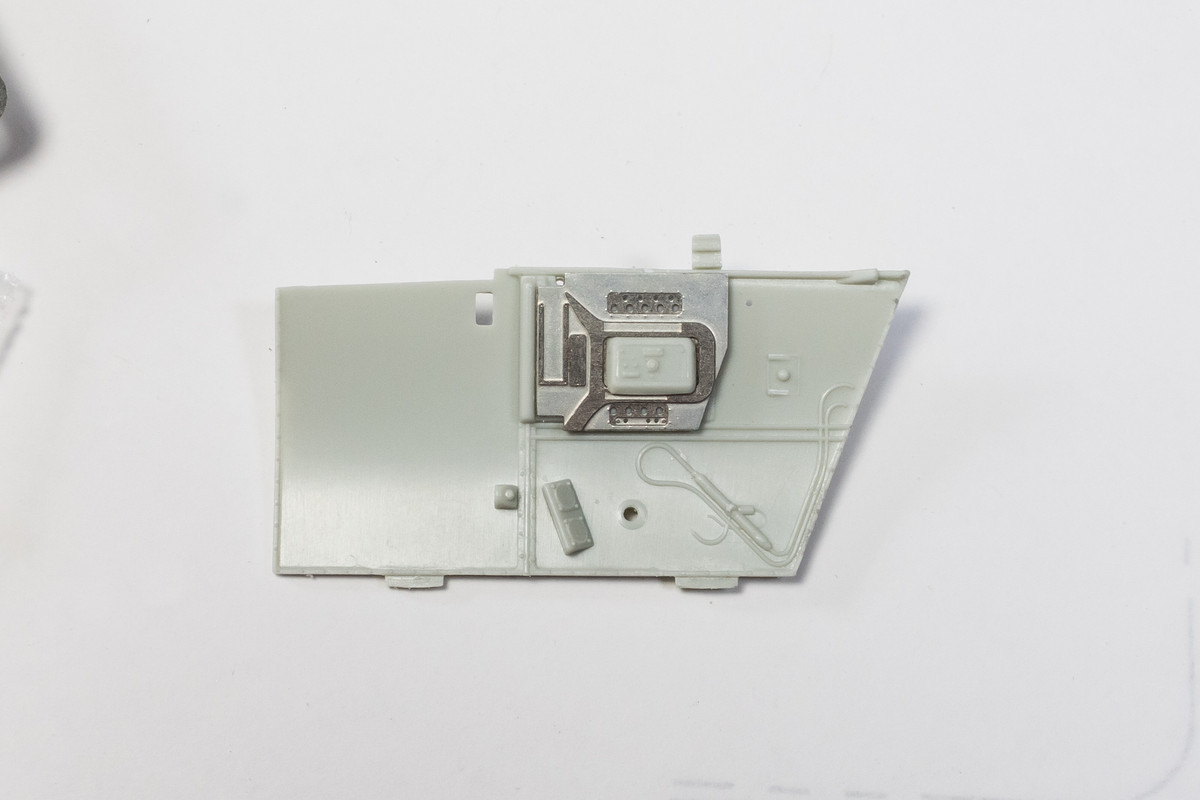 Below the electric junction panel is the oxygen regulator. This will be replaced by the 3D-printed part from Airscale.  The Airscale part is really intricate and it will be a challenge to remove it without breaking anything.  Immediate FAIL!  With the part still attached to the support tray, I need a stronger than normal repair. I opt for a section of brass tubing. Not ideal but it will have to do.  The raised detail on the sidewall will have to be carefully removed before the oxygen regulator goes on.   |
|
TJ
Senior Member
    June '23 Showcased Model Awarded
Member since: May 2023
Posts: 2,172
May 14, 2023 18:18:36 GMT -5
May 14, 2023 18:18:36 GMT -5
|
Post by TJ on Oct 11, 2024 19:21:25 GMT -5
All these extras really add a level of detail that is incredible
|
|
handiabled
Administrator      Apr '23 Showcased Build Awarded
Member since: February 2023
Posts: 4,427 
MSC Staff
|
Post by handiabled on Oct 12, 2024 7:06:13 GMT -5
I've had similar experiences with the Airscale 3d printed pieces. It seems very brittle. One again your detail work is top notch! The office is coming together wonderfully.
|
|
|
|
Post by 406 Silverado on Oct 12, 2024 8:22:56 GMT -5
Bummer about what happened trying to remove that oxygen regulator John but a good fix on it after it's all said and done. I've gotta say that the kit pieces weren't too bad to begin with. Good choice on the cowl guns too. I always use Master brass barrels on my builds and I haven't been let down yet.
|
|
jkim
Full Member
  
Member since: October 2023
Posts: 116
Oct 19, 2023 12:36:27 GMT -5
Oct 19, 2023 12:36:27 GMT -5
|
Post by jkim on Oct 12, 2024 17:35:06 GMT -5
Thanks guys! Moving on to the Airscale photoetch instrument panel. I much prefer hard-molded instrument panels in brass, resin or even plastic over the newer 3D decals like Quinta and Red Fox. So I'm really looking forward to seeing how the Airscale instrument panel looks like. The kit instrument panel is quite excellent actually and you can get really nice results using the kit plastic panel and decals.  But I'll need to shave down all of that beautiful raised detail if I want to use the Airscale product. One of the drawbacks to photoetch is its flatness and I'm afraid of losing the 3D relief that the kit panel provides.  The Airscale panel is made up of multiple layers of photoetch stacked up on top of each other. First, is the base panel face. 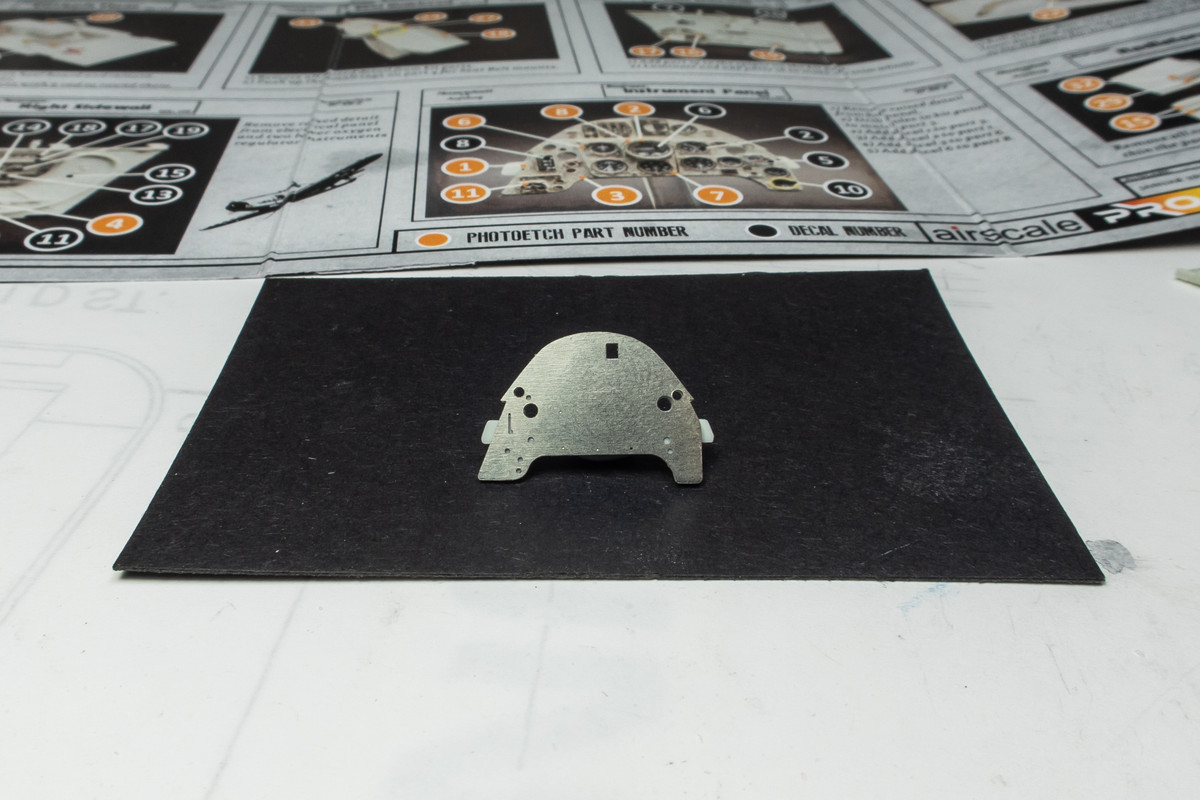 Airscale would have you paint and decal each layer of the instrument panel as you assemble it but I prefer to put the panel together and make sure its nice and clean before applying paint and inserting the instruments via punched decals.  Each successive layer builds up the 3D relief but the effect is limited due to the thinness of each metal layer.  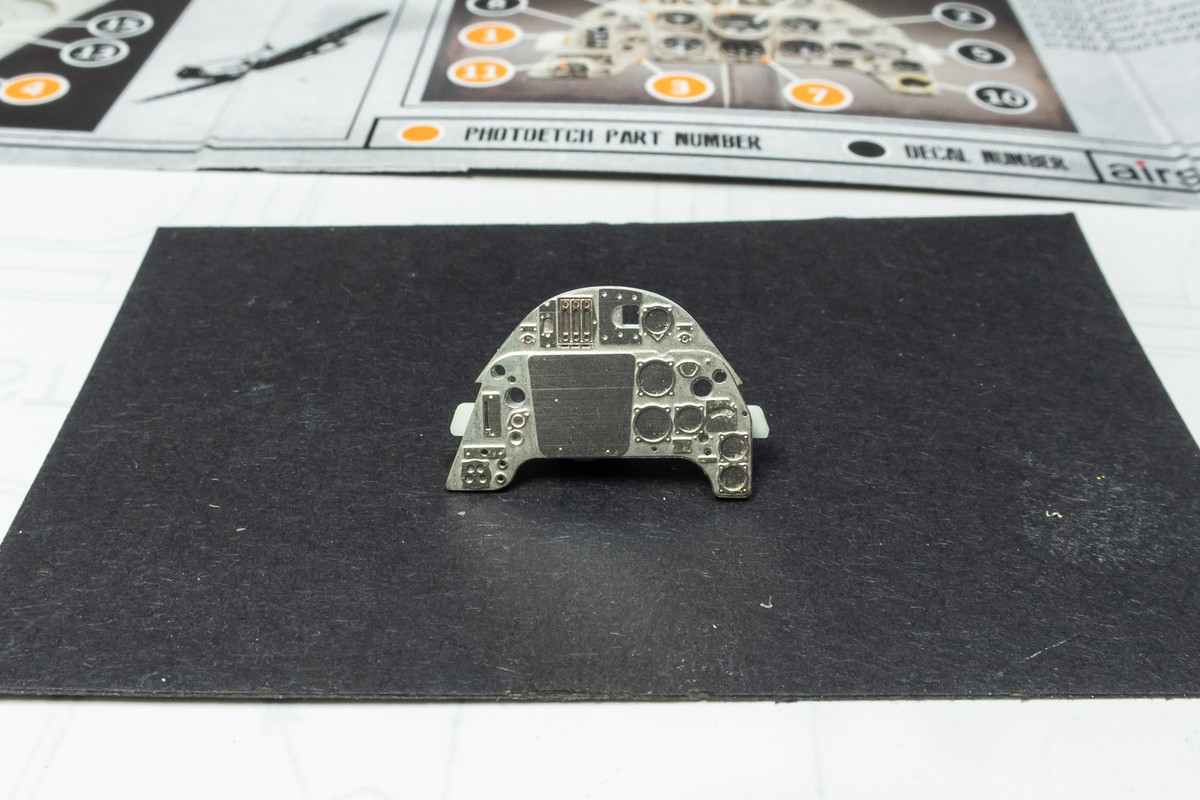 I decided to try to give the center instrument cluster more height by augmenting the spacer with thin sheet styrene. 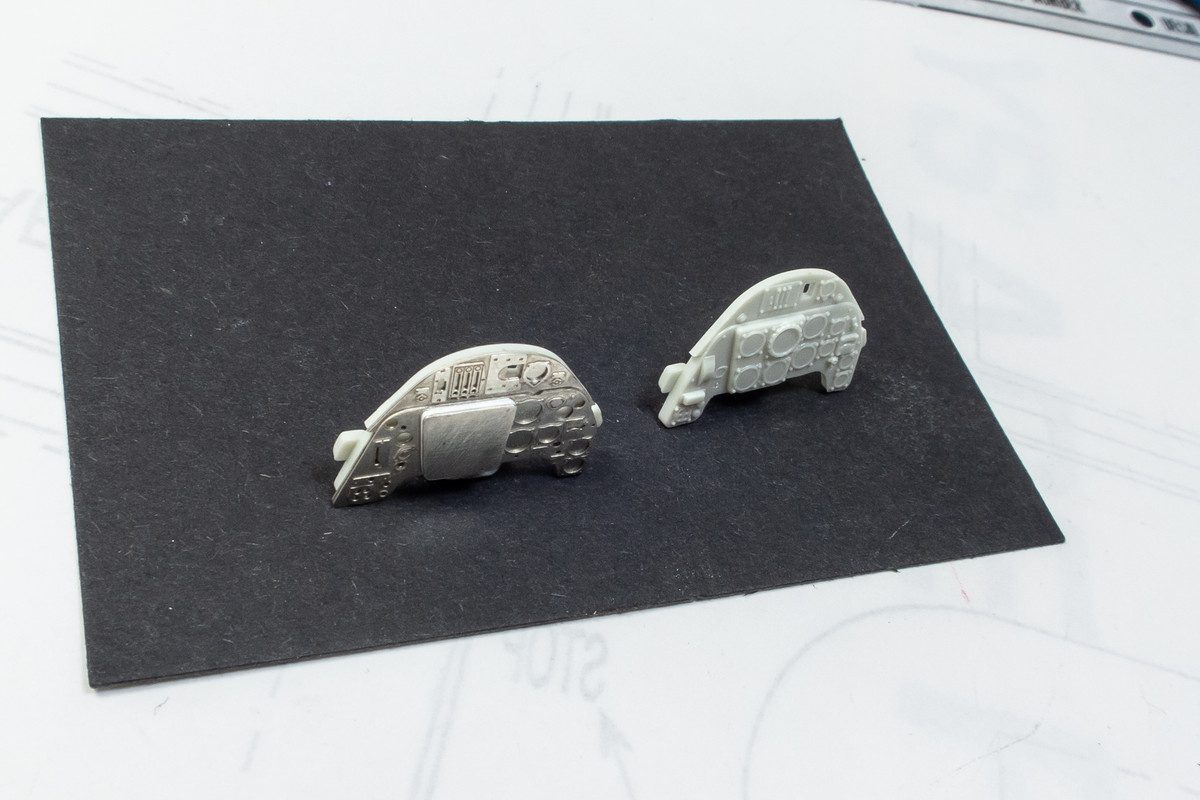 Here is the assembled panel. I'm happy with the modification that I made to add more depth to that center panel. I think the Airscale instrument panel compares favorably to the kit panel in all aspects.    The instrument panel after a coat of primer.  The Airscale Cockpit Detail set includes a Revi C/12D gun sight that I'll be using.   |
|
kyledehart5
Forum Moderator      Dec '23 Showcased Model Awarded
Member since: July 2023
Posts: 7,137
Member is Online
MSC Staff
|
Post by kyledehart5 on Oct 12, 2024 21:00:40 GMT -5
I have missed the start of this IP!! Some nice progress moving along here. This going to look great. You do such nice work.
|
|
jkim
Full Member
  
Member since: October 2023
Posts: 116
Oct 19, 2023 12:36:27 GMT -5
Oct 19, 2023 12:36:27 GMT -5
|
Post by jkim on Oct 13, 2024 1:07:50 GMT -5
Thanks Kyle! Appreciate the check-in! I've not yet cut the reflector glass from clear acetate but added a wire to the Revi C/12D gun sight.  Finally got the exhaust situation figured out. As much as I'd like to use the Airscale exhausts, the base is really thick and difficult to modify. I have to narrow AND thin the exhaust base so that it works by pushing the exhausts in from the outside instead of pushing them out from the inside. With that in mind, I chose the exhausts with the thinnest base... which happened to be the Barracuda ones. The exhaust opening have been boxed in with sheet styrene so I can install the exhausts from the outside.  Double checking the fit of the exhaust deflectors. I can now pop these off for now and re-install them later.  With the exhaust situation sorted out, I can now glue in the engine side cowlings into the fuselage. The vertical joint at the back of this panel is a very weak butt join so I've used stretched sprue to reinforce the bond from the inside. The riveting process can create a bit of force on the parts so I need all of the joints to be as strong as possible.   The riveting process is started with a small part first: the tail stabilizers. Guide lines for the rivets are drawn using a soft leaded pencil.  The rivets are then created using a ponce wheel tool. This one is by Galaxy Tools and I'm using 1.00mm pitch wheel. 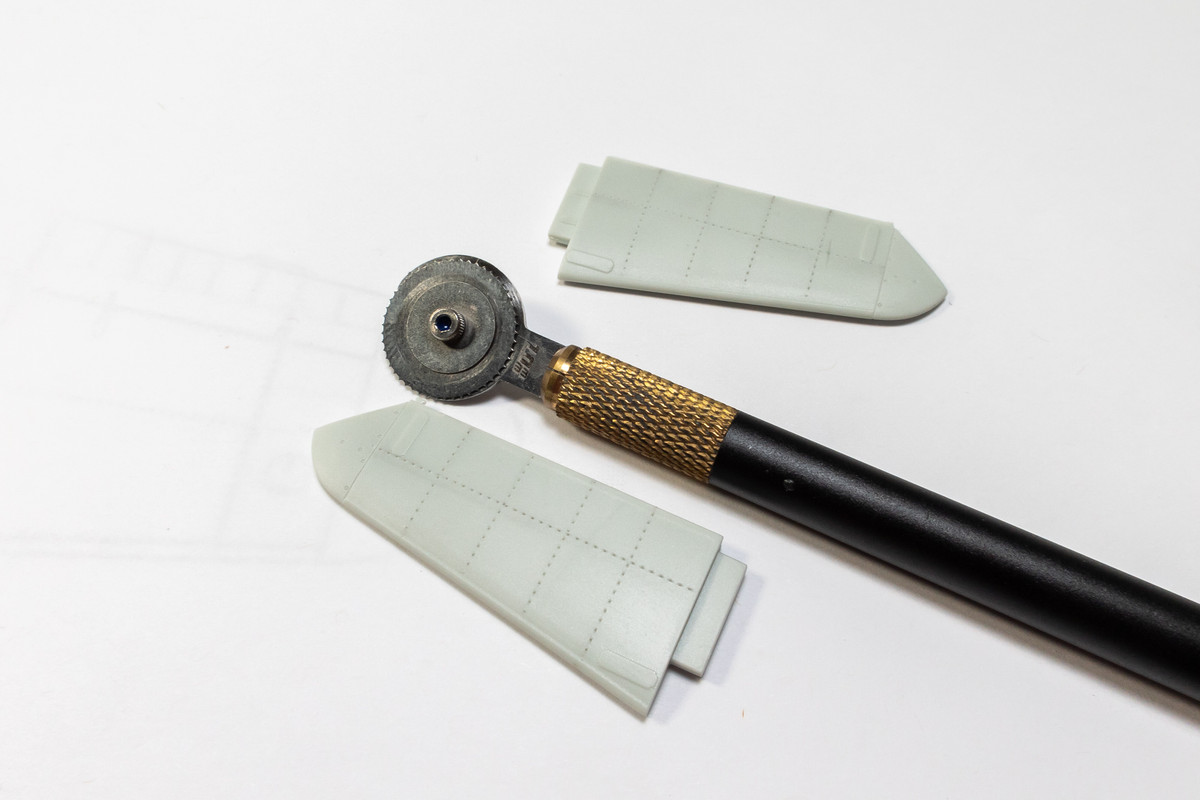 After the rivet holes are made, I sand the surface to remove the raised mounds around each hole. This gives the rivets a more subtle look, which I prefer. The stabilizers will be completed using the Barracuda versions of the movable control surfaces.  I'm going to use the Barracuda rudder as well. Fit on these is very good.  |
|
handiabled
Administrator      Apr '23 Showcased Build Awarded
Member since: February 2023
Posts: 4,427 
MSC Staff
|
Post by handiabled on Oct 13, 2024 1:08:02 GMT -5
I like your mixing or modifying aftermarket pieces to get the look you are trying to achieve. Your IP looks light-years better than the out of box version.
|
|
kyledehart5
Forum Moderator      Dec '23 Showcased Model Awarded
Member since: July 2023
Posts: 7,137
Member is Online
MSC Staff
|
Post by kyledehart5 on Oct 13, 2024 15:53:59 GMT -5
Another wonderful update with some more great looking detail and aftermarket bits. The rivet work is very nice
|
|
jkim
Full Member
  
Member since: October 2023
Posts: 116
Oct 19, 2023 12:36:27 GMT -5
Oct 19, 2023 12:36:27 GMT -5
|
Post by jkim on Oct 14, 2024 1:44:26 GMT -5
Thanks guys! Appreciate the comments! Don't underestimate how nice the Revell kit instrument panel can look. On a Revell Me262B build, I compared the kit panel with an Eduard photoetch panel and thought the kit panel looked much better. 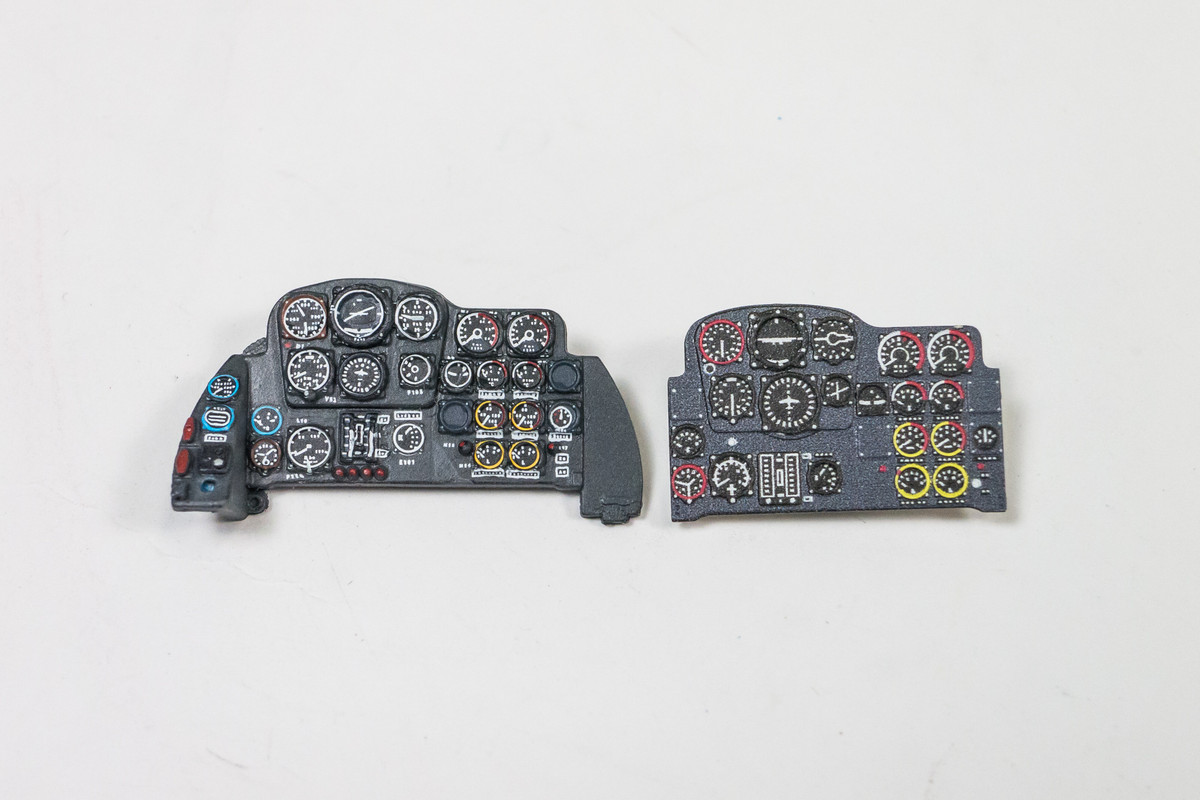 Remember the mishap with the oxygen regulator? Not happy with the repaired hose so I am going to attempt a tricky repair. First, I cut off the brass tubing section.  Luckily the end of the hose is attached to thin wiring coming out from the regulator so it maintains its relative position. This makes cutting and shaping a suitable piece from lead wire much easier.  The lead wire section is glued into place with CA glue. Wow... that turned out much better than anticipated.  I've added some wiring to the floor and sidewalls. Only the wiring bundle coming out of the electric box is painted yet.  Since there is a lot of photoetch and metal wiring, I'm going to prime all of the cockpit parts with Mr Primer Surfacer 1000.    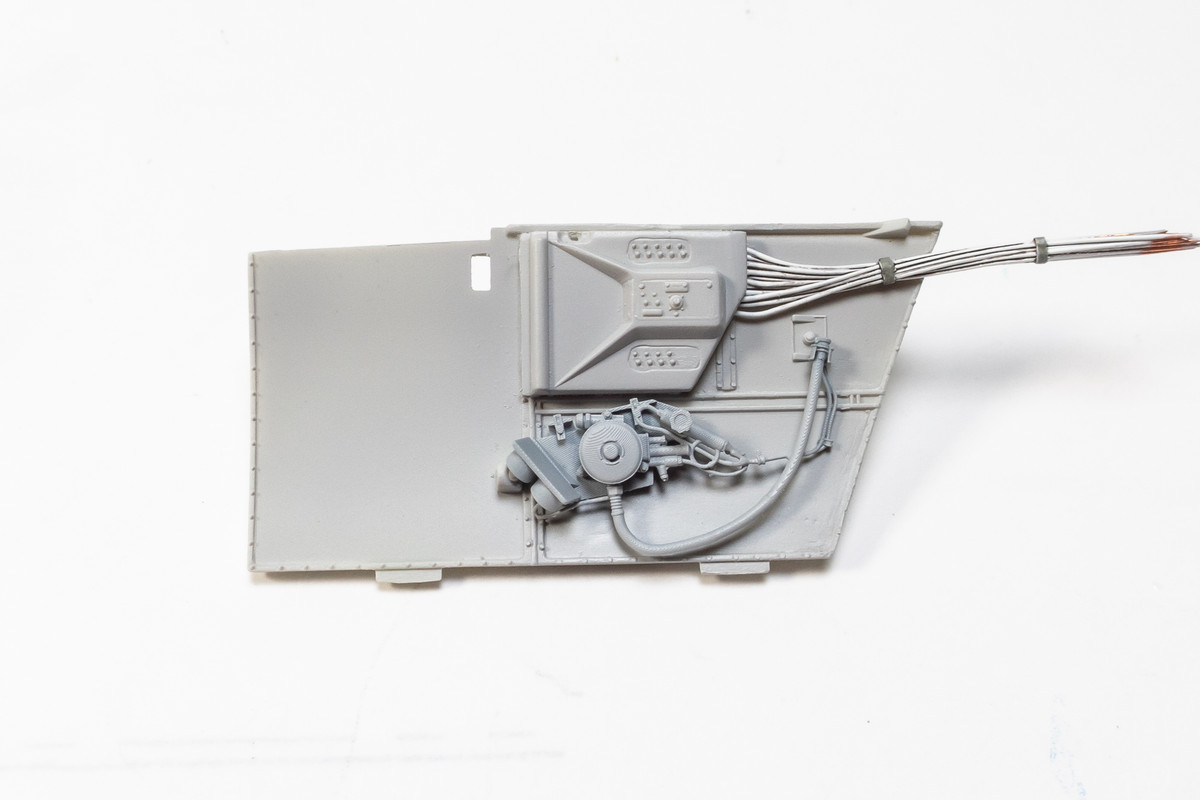 Next step is cockpit painting.  |
|
handiabled
Administrator      Apr '23 Showcased Build Awarded
Member since: February 2023
Posts: 4,427 
MSC Staff
|
Post by handiabled on Oct 14, 2024 3:40:10 GMT -5
Seamless scratchwork with the mix of pe and other aftermarket in the cockpit. This is looking killer already without any paint on it!
|
|
TJ
Senior Member
    June '23 Showcased Model Awarded
Member since: May 2023
Posts: 2,172
May 14, 2023 18:18:36 GMT -5
May 14, 2023 18:18:36 GMT -5
|
Post by TJ on Oct 14, 2024 5:37:08 GMT -5
Your fix of the fix in the oxygen regulator is seamless. The IP and gun sight look real. Amazing detail as always
|
|
kyledehart5
Forum Moderator      Dec '23 Showcased Model Awarded
Member since: July 2023
Posts: 7,137
Member is Online
MSC Staff
|
Post by kyledehart5 on Oct 14, 2024 17:48:37 GMT -5
Flawless work!! Amazing. I love how you add aftermarket, scratch build or use the kit parts wherever and however it fits your vision. So good
|
|
jkim
Full Member
  
Member since: October 2023
Posts: 116
Oct 19, 2023 12:36:27 GMT -5
Oct 19, 2023 12:36:27 GMT -5
|
Post by jkim on Oct 15, 2024 11:52:27 GMT -5
Seamless scratchwork with the mix of pe and other aftermarket in the cockpit. This is looking killer already without any paint on it! Thank you Brent! Appreciate the positive feedback! Getting a primer coat on resin and PE parts helps you get a better idea of what the parts really look like. And resin parts look really good after primer. Your fix of the fix in the oxygen regulator is seamless. The IP and gun sight look real. Amazing detail as always Thanks Johnny! I was pleasantly surprised to see how well the oxygen hose repair went! Another good thing is that the original curve of the hose has been restored and it fits better on the sidewall. Flawless work!! Amazing. I love how you add aftermarket, scratch build or use the kit parts wherever and however it fits your vision. So good Thank you Kyle! Sometimes I get so enthralled by the AM part itself that I forget to ask: is it accurate? That was the case with the electrical box on Airscale starboard sidewall. After looking at photos of the real cockpit, I figured out that the kit parts were actually more accurate and I reverted back to the kit part. Airscale:  G-2 Cockpit:  Kit Part:  |
|
jkim
Full Member
  
Member since: October 2023
Posts: 116
Oct 19, 2023 12:36:27 GMT -5
Oct 19, 2023 12:36:27 GMT -5
|
Post by jkim on Oct 15, 2024 15:58:50 GMT -5
|
|
TJ
Senior Member
    June '23 Showcased Model Awarded
Member since: May 2023
Posts: 2,172
May 14, 2023 18:18:36 GMT -5
May 14, 2023 18:18:36 GMT -5
|
Post by TJ on Oct 15, 2024 19:49:31 GMT -5
|
|
|
|
Post by keavdog on Oct 15, 2024 22:38:08 GMT -5
Nice progress John. Those details are going to look great when they all come together.
|
|
kyledehart5
Forum Moderator      Dec '23 Showcased Model Awarded
Member since: July 2023
Posts: 7,137
Member is Online
MSC Staff
|
Post by kyledehart5 on Oct 15, 2024 23:19:34 GMT -5
Jawdropping attention to detail, as per usual.
|
|
handiabled
Administrator      Apr '23 Showcased Build Awarded
Member since: February 2023
Posts: 4,427 
MSC Staff
|
Post by handiabled on Oct 16, 2024 4:09:28 GMT -5
Terrific work on the gun sight! The release handle is a great modification compared to the molded original.
|
|
jkim
Full Member
  
Member since: October 2023
Posts: 116
Oct 19, 2023 12:36:27 GMT -5
Oct 19, 2023 12:36:27 GMT -5
|
Post by jkim on Oct 16, 2024 15:17:34 GMT -5
Thanks guys! Appreciate the feedback! What does it take to get to page 2 of this thread... I had to scroll forever to get to the bottom! Painting of the cockpit parts continues as I've completed the Airscale instrument panel. The panel is RLM 66 Dark Grey (Mr Hobby Aqueous H-416) with the instrument bezels highlighted in black. The instruments were punched from the included decal sheet and placed individually.   My intention was to place punched disks of clear acetate into each instrument face but for some reason, my punch set (RP Toolz) has a hard time punching clean discs for the larger sizes (2mm+). I went ahead and secured the painted Revi C/12D gun sight into place.  Here is the completed instrument panel. BIG thumbs up on Peter's rendition of the panel. I messed up one of the instruments (air speed) but was able to pull another copy from my collection of Airscale instrument decals. I also had the Barracuda G-6 instrument panel and stencil set as a back-up but the Airscale instrument decals have noticeably better resolution. The multi-layer stacks of photoetch fit perfectly together and give the piece a surprising but satisfying weight to it, like a small coin.    |
|
|
|
Post by 406 Silverado on Oct 16, 2024 15:37:31 GMT -5
I've seemed to have lagged behind a little in keeping up with this one and every time I do there are posts on top of posts filled with eye candy. The detailing you've added so far is among the best I've seen in any aircraft build. It was mentioned earlier about your usage of all of the various parts from different vendors to bring this one together and I'd have to agree that it is indeed a good mix up of parts to get this one all together so far. For a number of years, I have enjoyed watching your builds and you get better and better at it with every project. Keep these updates coming John as this is some good stuff man.
|
|
kyledehart5
Forum Moderator      Dec '23 Showcased Model Awarded
Member since: July 2023
Posts: 7,137
Member is Online
MSC Staff
|
Post by kyledehart5 on Oct 16, 2024 18:12:25 GMT -5
That instrument panel is some next level work!!
|
|
jkim
Full Member
  
Member since: October 2023
Posts: 116
Oct 19, 2023 12:36:27 GMT -5
Oct 19, 2023 12:36:27 GMT -5
|
Post by jkim on Oct 18, 2024 12:58:40 GMT -5
Thank you for checking in! The work on the cockpit continues on several fronts. Since the seat and rear bulkhead are painted, I can work on the harnesses. I am using HGW fabric belts. For Luftwaffe projects, I buy the Me262B set since it offers TWO sets of harnesses for the same price as one.  The fabric material is separate from the metal buckles, much like the real thing, so assembly is required. Make sure you remove the paper backing from each of the fabric pieces.  I like to crumple my belts before assembly per the instructions. This gives the belts a more realistically worn appearance but it also makes assembly a little more difficult. 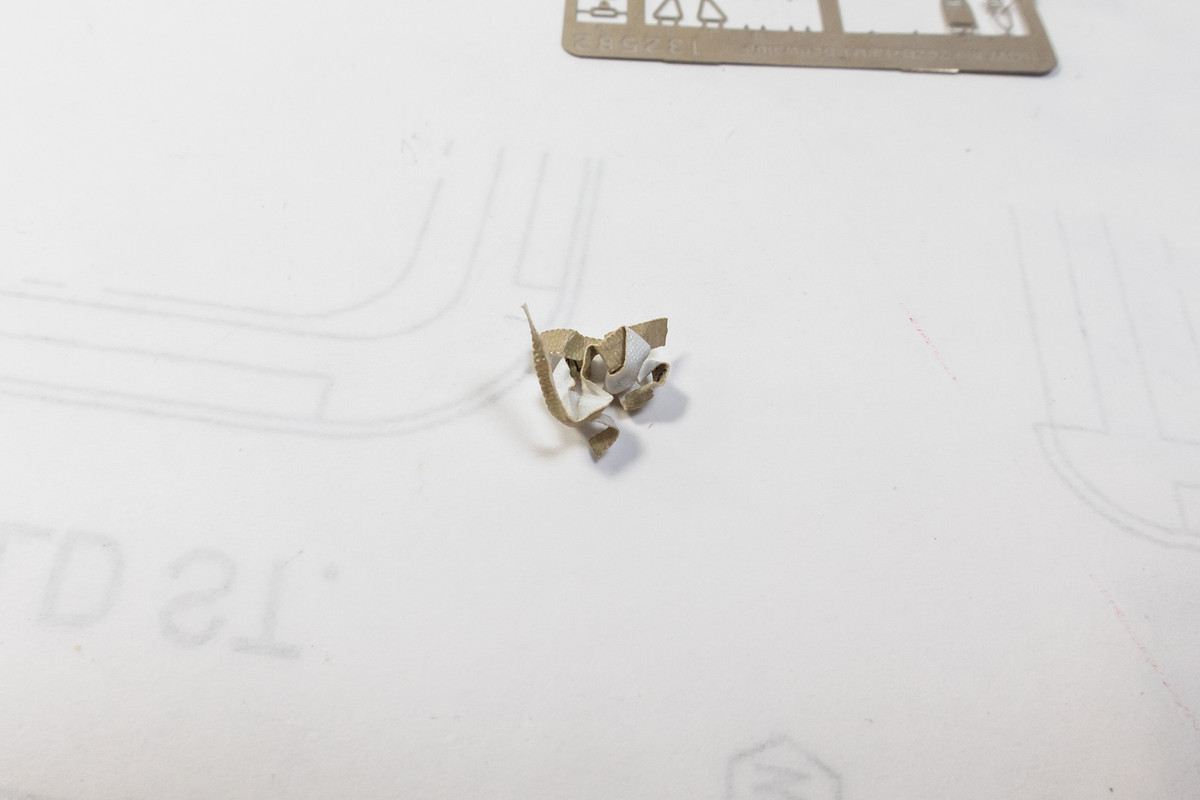 I use PVA (water-based) glue to secure the folded fabric at the end buckles. The adhesive side of a Post-It can be handy to temporarily secure each belt in place to verify consistent belt lengths and buckle locations.   Another neat thing about the HGW fabric material is that there is stitching detail that can be highlighted with a wash. Since the belt material is fabric, it can be easily stained so a gloss coat is needed. Because of the crumpling, my belts get stained anyway but it adds to the worn look.  After the belts are completed, they are installed onto the seat using dabs of CA glue.  Meanwhile, painting of the cockpit components continues. Here is a look at the Airscale oxygen regulator enhanced with a Barracuda decal.  The sidewall components have been painted and assembled.   It's time to glue the cockpit components together. I'm going to glue the bulkheads first and get photos of each sidewall in place before I complete the cockpit "box-in".  Oh... regarding the use of the 109G-6 supercharger intake. I'm not sure when the intake size changed from the F to the G series. Here is a photo of Trautloft's machine that I'm making...  Here are a couple of G-2 restorations... 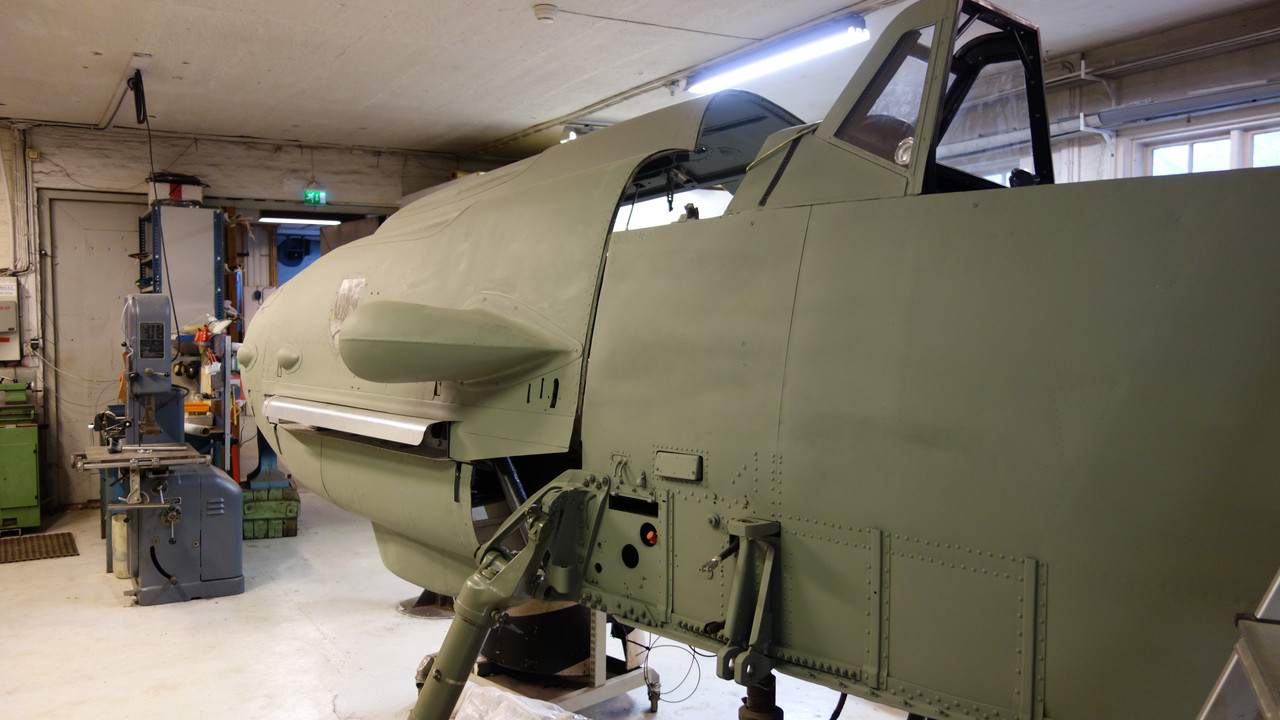  And here is the Barracuda G-6 intake mounted on my G-2 model...  I think the Barracuda intake is ok and still plan on using it. |
|


 Yep definitely gonna watch this


