|
|
Post by bbd468 on Oct 18, 2012 2:57:59 GMT -5
Hello fellas, Well...Heres my attempt at a wingy thingy. ;D Havent built one since i was 10 or 12 years old. Im 44 now and i figure its time to give it a shot. Not very many parts to this kit so its gonna be easy on me. I dont know a damn thing about Spitfires but im gonna learn now. ;D Did some work on the cockpit. Not much detail to work with so im keeping it pretty basic in paint and the like. Heres what i got done today.   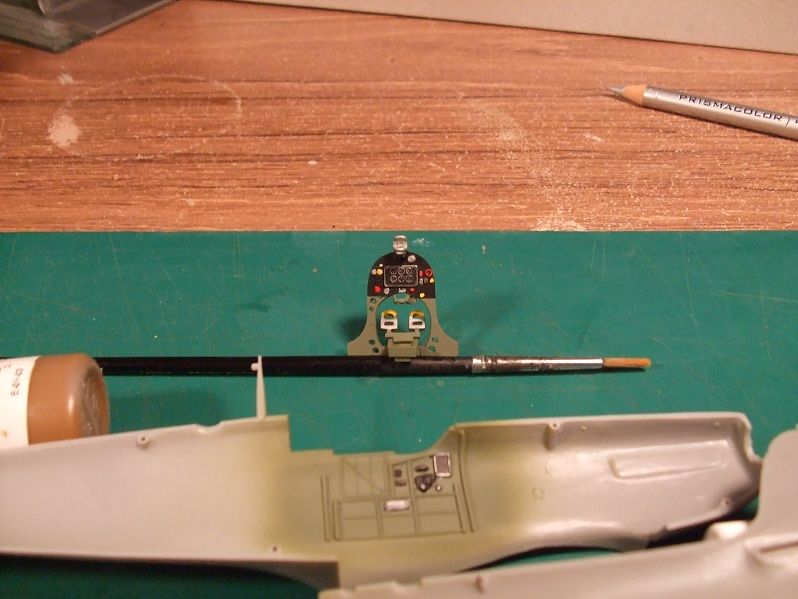 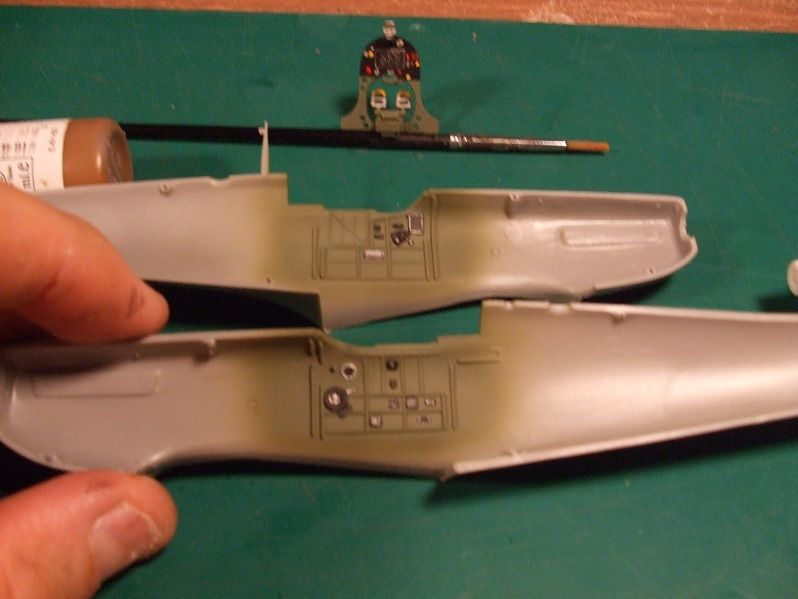 Tell me where i can improve guys...dont hesitate!  Gary |
|
|
|
Post by bullardino on Oct 18, 2012 3:14:53 GMT -5
If you're going to keep the office closed, most of the details will be lost in darkness. So, maybe, I'd get some reference pictures and add some piping, mostly in the upper and most visible part. Give a look here: spitfiresite.com/2010/07/anatomy-of-spitfire-cockpit.html, it should help.  For instance you could add the glass to the gunsight. |
|
|
|
Post by TRM on Oct 18, 2012 5:35:39 GMT -5
I'm in!!! Nice choice btw!! Looking forward to seeing you have at it! Chris. S and the other fly boys should be around soon....think yuo will have some good "Weng-men" to help out!! The office is already looking great!!
|
|
|
|
Post by armorguy on Oct 18, 2012 8:15:14 GMT -5
Always time and room for a Spit here Gary !
|
|
|
|
Post by robbo on Oct 18, 2012 9:29:45 GMT -5
Gary with a wingey thing, got to watch this one. Is it a 1/48 Gary ?
|
|
Deleted
Member since: January 1970
Posts: 0
Nov 22, 2024 18:53:03 GMT -5
Nov 22, 2024 18:53:03 GMT -5
|
Post by Deleted on Oct 18, 2012 10:03:33 GMT -5
Robbo,from where I'm sitting,it looks like 1/48,but I can't be sure!Just going by the digits in the piccies ;D ;D. Nice start there Gary,and like has been said already,when she is closed up,not much can be seen in the office,so I normally just try and accentuate some of the colour in there  |
|
|
|
Post by bbd468 on Oct 18, 2012 10:19:02 GMT -5
Thanks you guys!!!  Chrisb - Thats kinda what i was thinkin' wont much be seen anyways.  Gary |
|
|
|
Post by eastrock on Oct 18, 2012 10:35:52 GMT -5
Looking great, Gary  you can also point to Chris S, I think his building one also. |
|
|
|
Post by bullardino on Oct 18, 2012 10:45:02 GMT -5
Thats kinda what i was thinkin' wont much be seen anyways.  Gary That's what makes ac builders get the all-open syndrome  |
|
danb.
Reviews member     March 2013 MoM Winner
Member since: November 2011
Posts: 2,808
Nov 17, 2011 9:22:52 GMT -5
Nov 17, 2011 9:22:52 GMT -5
|
Post by danb. on Oct 18, 2012 12:38:07 GMT -5
Nice start Gary cant wait to see your magic unleashed on this beast nice to see armour builders havin a go at a wingy might have to start my P-47 now!!!!! god help us alll  Dan B |
|
|
|
Post by bullardino on Oct 18, 2012 13:20:30 GMT -5
That's what makes ac builders get the all-open syndrome  Hey !!! there's nowt wrong with letting it all hang out ;D ;D ;D Nice work so far Gary ,its looking good mate .Like the guys said ,some cockpits you really cant see much once they're all buttoned up . Most noticable parts are the IP & seat .If you want to make an improvement I would suggest seat belts ,but its entirely up to you . Looking good anyhoo ...keep it coming  Chris. I subscribe seat belts, they're easy to make and very effective  BTW, the way some people make planes all open remind me of Robbie Williams' video "Rock DJ".... |
|
Deleted
Member since: January 1970
Posts: 0
Nov 22, 2024 18:53:03 GMT -5
Nov 22, 2024 18:53:03 GMT -5
|
Post by Deleted on Oct 18, 2012 13:24:42 GMT -5
Nice start on your quick build Spit Gary  I'd go for masking tape belts, a bit of dry brushing and close her up  In your hands though, she'll look good whatever path you take  |
|
|
|
Post by wouter on Oct 18, 2012 13:56:38 GMT -5
ow yeah, Gary is doin' a wingy baby ;D
Looks great so far, lovely cockpit...can't go wrong with a Spit ey ^^
Cheers
|
|
|
|
Post by bbd468 on Oct 18, 2012 15:02:41 GMT -5
Hey fellas, thanks!!! Im havin' some fun doin' this flying thing. ;D You guys dont get too disapointed, but i didnt even think of making my own seat belts...DAMNIT!!! I used the kit decal seat belts.....   Ill make sure i do it up right when i do my Bf.109.  thanks for following gentlemen, Gary |
|
bigjohn
Reviews member    
Member since: December 2011
John Hale
Posts: 3,438
Dec 21, 2011 2:17:45 GMT -5
Dec 21, 2011 2:17:45 GMT -5
|
Post by bigjohn on Oct 18, 2012 18:41:12 GMT -5
Hey Gary, sitten right up front watching yeah do yer magic
|
|
|
|
Post by bbd468 on Oct 18, 2012 21:29:35 GMT -5
WOOP!!! Scramble.....Big G is taxiing down the runway!!!! CB it could be a 1/32 - Gary is 8 feet 4" and has fingers like baguettes apparently!!!! lol  Big John sending you my measurements Dicky? Your spot on!!! ;D ;D Thanks brother John! It wont take long bro and ill be gluein' tracks again in no time!  I have a Q? fellas. What would be the proper brown and green colors for the Spit in Tamiya acrylics? I have alot of greens but no browns other than plain dark brown. Thanks, Gary |
|
bigjohn
Reviews member    
Member since: December 2011
John Hale
Posts: 3,438
Dec 21, 2011 2:17:45 GMT -5
Dec 21, 2011 2:17:45 GMT -5
|
Post by bigjohn on Oct 18, 2012 21:42:01 GMT -5
CS should be able to answer that one for ya when he comes back in.
|
|
|
|
Post by bbd468 on Oct 19, 2012 0:42:38 GMT -5
Hello fellas, Im makin' speedy progress but the fit issues are not exactly first rate. I could use some wingy experts to tell me a good way to correct some of the gap issues on the wings to the fuselage without makeing a complete mess of it. Heres the Spit now.  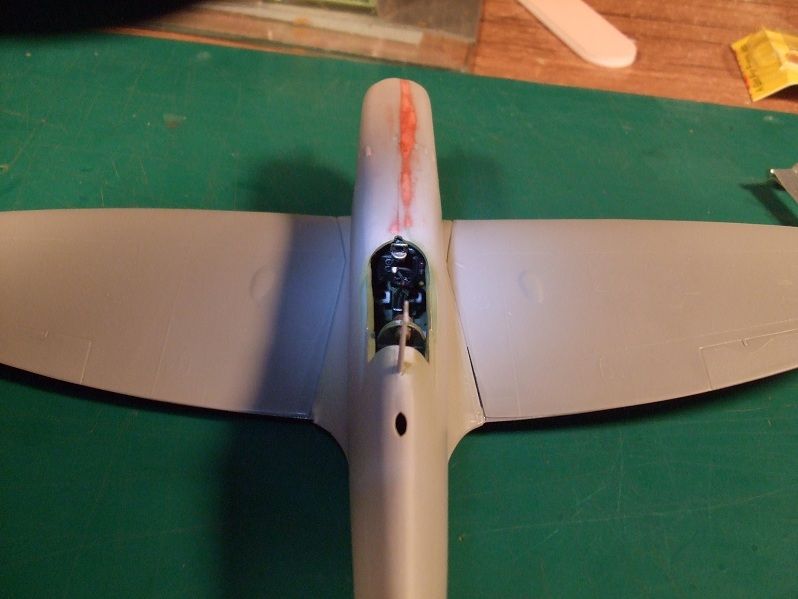  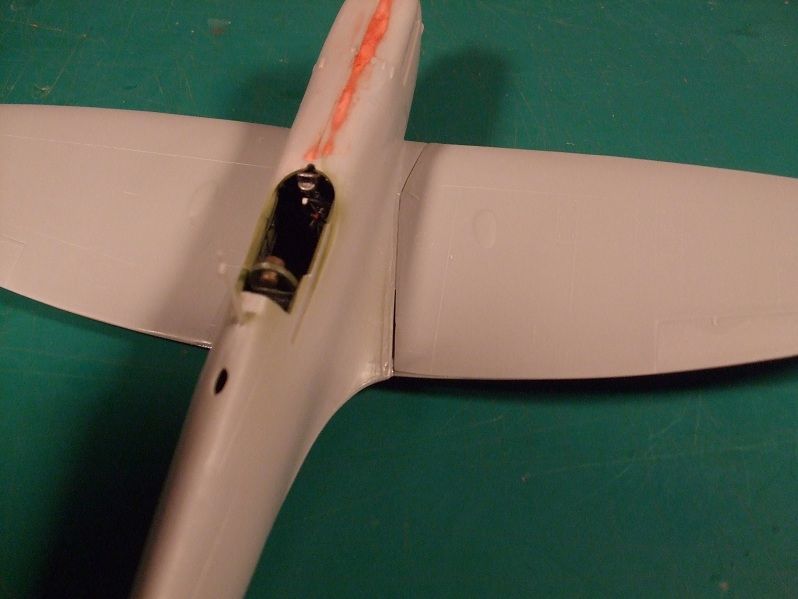   Any suggestions will be most helpful.  Thanks, Gary |
|
bigjohn
Reviews member    
Member since: December 2011
John Hale
Posts: 3,438
Dec 21, 2011 2:17:45 GMT -5
Dec 21, 2011 2:17:45 GMT -5
|
Post by bigjohn on Oct 19, 2012 6:24:59 GMT -5
according to the paint conversion chart posted elsewhere on this forum. The humbrol colors cross over to Tamiya XF52 and XF61
|
|
|
|
Post by robbo on Oct 19, 2012 6:30:40 GMT -5
Get the filler out Gary  |
|
|
|
Post by bullardino on Oct 19, 2012 6:32:57 GMT -5
Gary, I think the worst problem you have is the trailing edge of the right wing. Its connection to the fuselage is definitely wrong.
To fill the gaps you can use CA gel instead of other putty, but watch out that cured becomes a little brittle.
I subscribe the tammy tape, it's the best way to preserve panel lines.
|
|
|
|
Post by bbd468 on Oct 19, 2012 12:51:47 GMT -5
Thanks for the info fellas!  I do happen to have XF-52 Flat earth. The color just doesnt look right in the jar. Maybe i can tint it a bit. I have the green. Im sure the fit on my Hasegawa Bf 109 and Tamiya P-47 D will be much better....I HOPE!!!!  ;D Im about to start filling the gaps. Ill post later.  Thanks again, Gary |
|
|
|
Post by bullardino on Oct 19, 2012 12:54:37 GMT -5
Tamiya is a sure shake'n'bake kit. Hase I don't know, it all depends on the age of the kit. I have a an 87 Dora whose fit is far from perfect.
|
|
|
|
Post by bbd468 on Oct 19, 2012 13:05:07 GMT -5
Tamiya is a sure shake'n'bake kit. Hase I don't know, it all depends on the age of the kit. I have a an 87 Dora whose fit is far from perfect. Yeah i figured Tamiya will be better, but i dont know anything about the other kit either. Surely its better than the Spit.  The Date on the Hasegawa 109 box is 1995...that might mean trouble? Definatley doesnt have a new shine to it eh? Gary |
|
|
|
Post by robbo on Oct 19, 2012 15:01:19 GMT -5
I used Tamiya Earth on my Huricane
|
|
|
|
Post by `Boots` on Oct 19, 2012 15:49:39 GMT -5
Good to see ya going at the wingies Gary and a mighty fine job ya doing as well ;D ;D...............good luck on the filling on the roots tho bro  |
|
Deleted
Member since: January 1970
Posts: 0
Nov 22, 2024 18:53:03 GMT -5
Nov 22, 2024 18:53:03 GMT -5
|
Post by Deleted on Oct 19, 2012 16:56:47 GMT -5
Gary,the Dark Earth is right,the Dark Green,I'll let you know tomorrow,if you still need it (Tammy),what do they say for underneath?...because depending on when this a/c was used,the under fuselage can be different!
I'ts a MkII,so you may have the black/sky half and half underneath,or Sky,or ......See what I mean???
|
|
|
|
Post by bbd468 on Oct 20, 2012 8:59:04 GMT -5
Gary,the Dark Earth is right,the Dark Green,I'll let you know tomorrow,if you still need it (Tammy),what do they say for underneath?...because depending on when th is a/c was used,the under fuselage can be different! I'ts a MkII,so you may have the black/sky half and half underneath,or Sky,or ......See what I mean??? Hey Chris, Im gonna be perfectly honest with you....i dont have a clue what you said there!  ;D ;D LOL I do have a question. The camo was hard edge right? What type of putty lends itself nicely to create and mask the camo patterns? Thanks, Gary |
|
venom1
Full Member
  
Member since: October 2012
Posts: 1,369
Oct 10, 2012 2:40:03 GMT -5
Oct 10, 2012 2:40:03 GMT -5
|
Post by venom1 on Oct 20, 2012 9:54:52 GMT -5
Hey Gary, good start mate! Those raised panel lines are always a bear, especially on a kit that needs filler. It's always easier to rescribe a recessed panel line than restore a raised one. I am sure a gent of your skills will manage tho!  In regards to filler, I use a couple of things. First option is the good ol' Tamiya putty (grey stuff in the white tube with the orange lid). I almost always use Tamiya/Humbrol liquid cement to thin it out. This is a great combination as the more cement you add, the more "liquid" the filler becomes. Big gaps, less cement, small gaps, more cement. The second one I tend to use is a combination of super glue (CA) and baby powder. CA by itself is quite brittle, and becomes very hard to sand once it has set. Once you add the baby powder, it becomes much smoother and easier to sand. Normal filler also tends to crumble if you need to scribe over it whereas the CA/baby powder sands no problemo. One of the best advantages (especially if you are an impatient b@$tard like me!) is that once you put your CA/BP filler in place, you just touch it with some CA accelerator and hey presto! Ready to sand!! ;D From the perspective of the camo pattern, the "official" word was hard edged, tho I have seen equal amounts of wartime photos of Spitties showing both, so the choice is yours really (Most restored Spit's seem to be soft edge). My weapon of choice is the good ol' Blu-Tac sausage. Just roll it out thinner for a tighter pattern, larger diameter for a softer one. To give you an idea, my Italeri 1/72 UH-1 (read small!) below was done with Blu-Tac. It may look sharp but it actually has a feather to it, so it is a very controllable way to get the tightness you want... 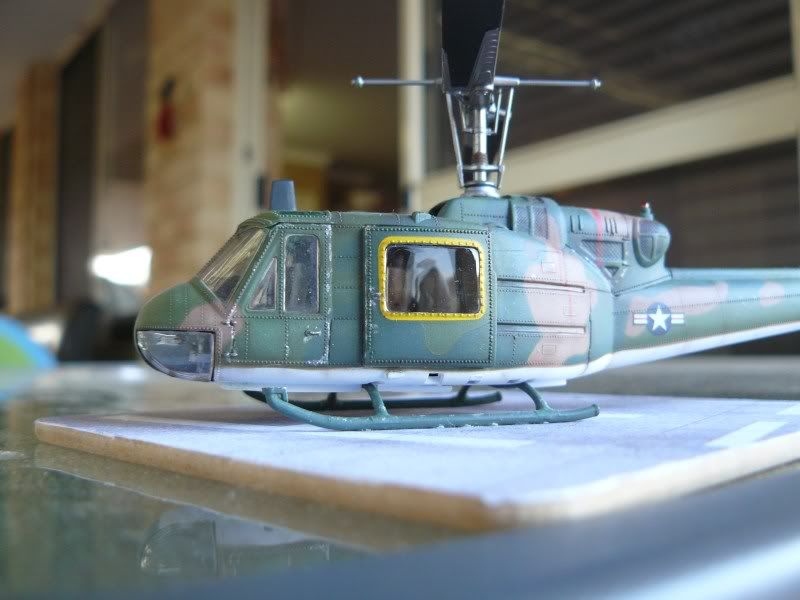 Hope this is a bit of a help mate. Look forward to seeing the bird all painted up! Cheers, Sam  |
|
|
|
Post by bbd468 on Oct 20, 2012 10:09:22 GMT -5
Hello Sam, Thanks so much for all that info - thats some great tips. Im listing them in my note book. Your 1/72 Uh-1 is sweet!!! Looks much bigger than braille.  Gary |
|