bbrowniii
Full Member
  
Member since: March 2012
If you are not part of the solution, you are part of the precipitate.
Posts: 1,239
Mar 25, 2012 22:08:04 GMT -5
Mar 25, 2012 22:08:04 GMT -5
|
Post by bbrowniii on Nov 25, 2012 21:34:33 GMT -5
Hey all So last year I really took advantage of Squadron's Black Friday sale. This year, in anticipation of another one, I took a look at the kits that were celebrating their 1st anniversary in my stash. I decided to have a go at one of them and, just for the heck of it, grabbed the one that I expect to be the biggest dog of the bunch: the Zvezda SU-39 in 1/72 scale: 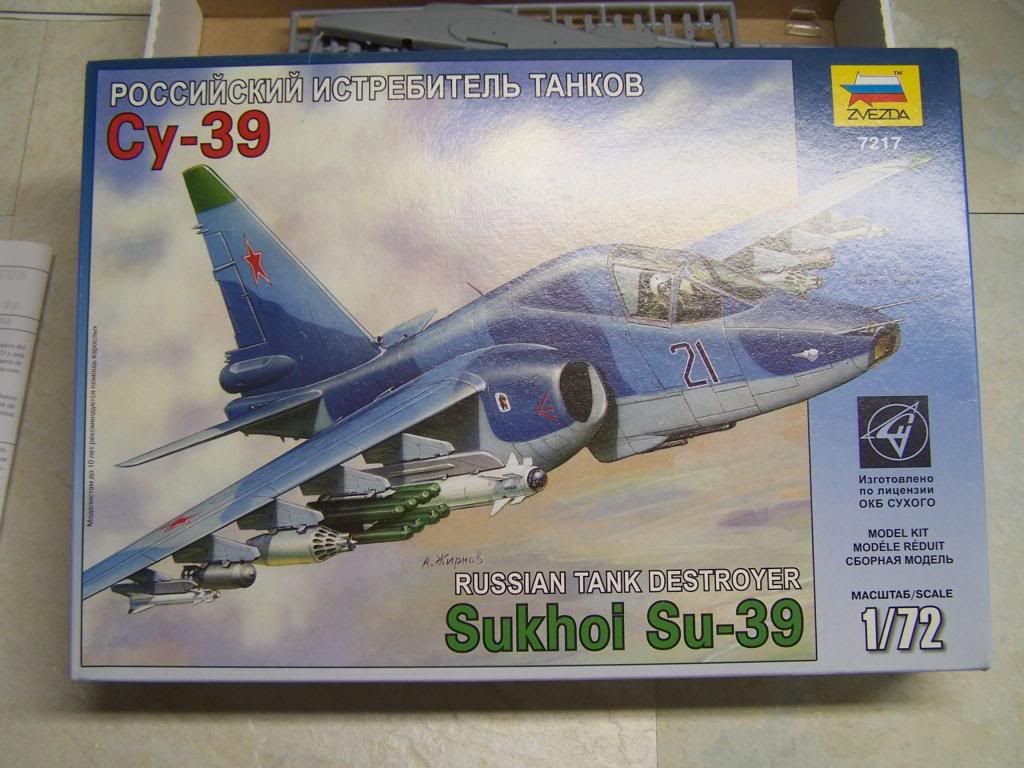 As with most aircraft, this one starts with the office. I did the standard assembly of various cockpit bits, then picked up the instrument panel. I noticed it was a blank piece of plastic. "This can't be right" I said to myself, so I pawed through the box to get the instrument decal off the decal sheet.... except there was not one.... this was not good. I got a little short of breath and my head felt a little light, I saw stars and maybe a deceased relative or two....  This would not do, but what was I going to do? This is supposed to be a quick, OOB, throw it together build, not a major overhaul. Ah well, there was nothing for it now... Out came the styrene sheet and the punch and die set. I punched out circles in a variety of sizes (initially I tried to cut a blank of the panel to punch dials into and lay that over the original, but it was too small - I could not get a hole through it without buggering up the thing, so I did the alternate and built out):  The end product isn't perfect, but at least it will give the impression that something is in there: 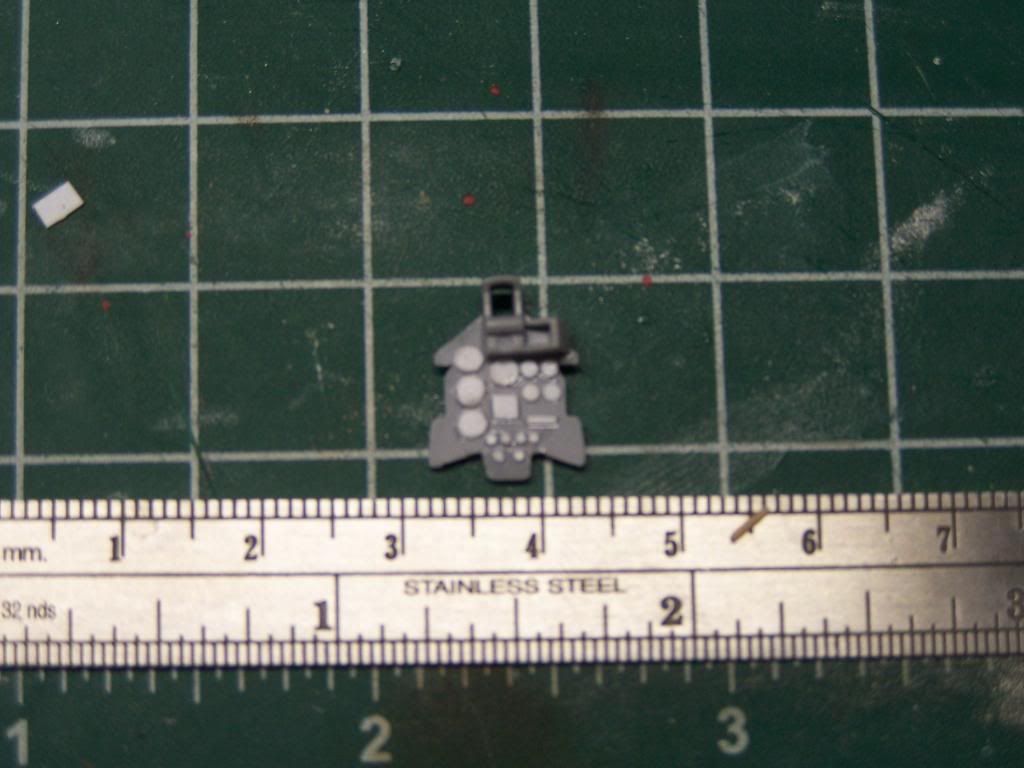 The cockpit of the SU-39 is a light blue color. I am not sure of the exact color, and to be honest, I'm not all that concerned. I have a bottle of Polly S German RLM 64 Light Blue that looked the part, so I hit the interior bits with that: 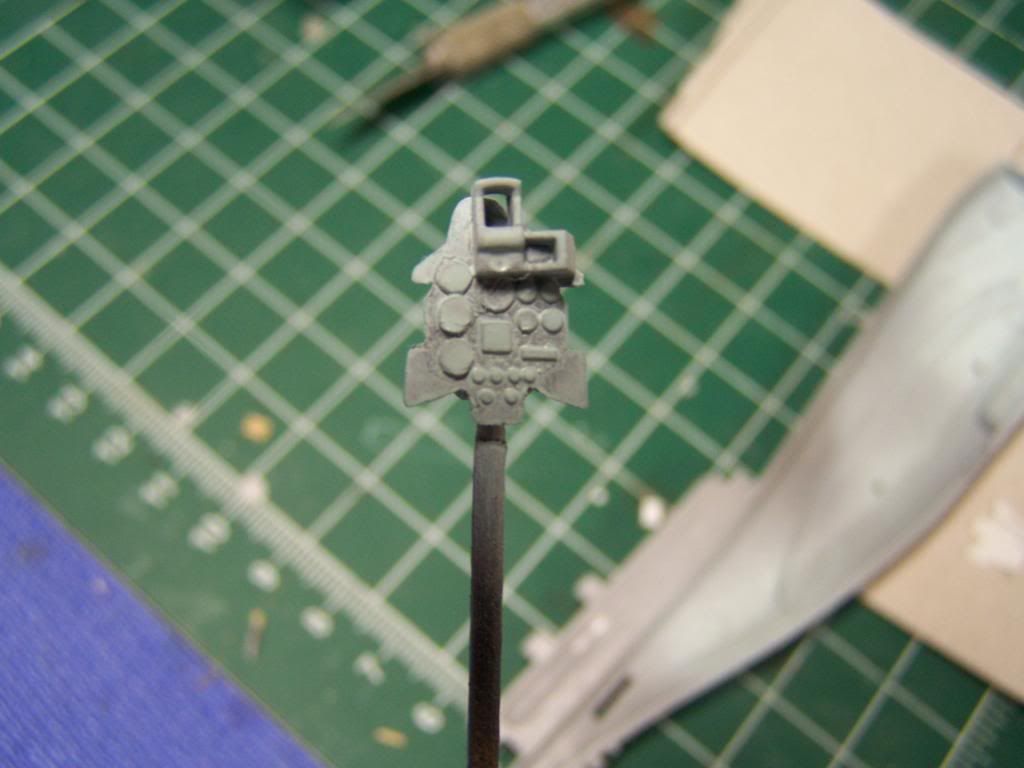 That is kind of a crappy picture, but like the paint, it does the job. This was taken after the first light coat. I find that Polly S is a bit of a PITA to airbrush and needs several coats to really do the job, so I've got to go back later and hit everything again, but I ran out of time. I also did some work on the engines and the wings. I don't have any pictures yet, but can tell you that there are fit issue all around. The engines are poorly done and will need some sort of cover over the intake so people don't have to stare into the great void that exists in the first 2/3 of its length. I'll try to get som pics of that up in the next couple days. I welcome your thoughts and observations. |
|
|
|
Post by deafpanzer on Nov 25, 2012 21:36:54 GMT -5
Nice work improving the look of your office! Reporting to duty... good luck with this build.
|
|
|
|
Post by TRM on Nov 27, 2012 22:59:02 GMT -5
Nice work on this one so far!! I'll be along for the ride!!!  |
|
ogrejohn
Full Member
   Oct '23 Showcased Model Awarded
Member since: June 2012
Go away or I shall taunt you a second time!
Posts: 1,302
Jun 1, 2012 17:33:59 GMT -5
Jun 1, 2012 17:33:59 GMT -5
|
Post by ogrejohn on Nov 28, 2012 17:48:29 GMT -5
Looks like you're off to a nice start!
|
|
venom1
Full Member
  
Member since: October 2012
Posts: 1,369
Oct 10, 2012 2:40:03 GMT -5
Oct 10, 2012 2:40:03 GMT -5
|
Post by venom1 on Jan 1, 2013 2:26:24 GMT -5
Any more progress with this one?? Cheers, Sam  |
|
modelfreak72
Full Member
  
Member since: January 2012
Why worry, each of us is wearing an unlicensed nuclear accelerator on his back.
Posts: 1,479
Jan 28, 2012 23:21:46 GMT -5
Jan 28, 2012 23:21:46 GMT -5
|
Post by modelfreak72 on Jan 9, 2013 0:33:43 GMT -5
Sweet save with the office!
|
|
|
|
Post by bbd468 on Jan 9, 2013 19:58:49 GMT -5
Thats some nice additions to tha wee office man...well done!  Gary |
|
bbrowniii
Full Member
  
Member since: March 2012
If you are not part of the solution, you are part of the precipitate.
Posts: 1,239
Mar 25, 2012 22:08:04 GMT -5
Mar 25, 2012 22:08:04 GMT -5
|
Post by bbrowniii on Jan 28, 2013 18:08:01 GMT -5
Hi guys,
Sorry I have not updated this for a while. I had to tear apart my building space to have some work done in the basement. I got everything put back together last week and have started puttering, but I've been distracted by the seminar my club is putting together. I hope to have some progress to show you on this over the weekend.
|
|
|
|
Post by Leon on Jan 28, 2013 20:21:03 GMT -5
Nice work on the office
|
|
|
|
Post by deafpanzer on Jan 28, 2013 20:25:57 GMT -5
You had to do it after seeing what Dupes has done to his? LOL No hurry... I will be here when you post your next update. I can't get over how funny that plane looks especially its nose.
|
|
bbrowniii
Full Member
  
Member since: March 2012
If you are not part of the solution, you are part of the precipitate.
Posts: 1,239
Mar 25, 2012 22:08:04 GMT -5
Mar 25, 2012 22:08:04 GMT -5
|
Post by bbrowniii on May 29, 2013 21:39:41 GMT -5
OK guys, it is time to do some updating! As some of you know, I started this project waaaaaaay back in January. Then I got sidetracked because I tore my basement apart to have some work done and really had no build area, so this got shelved. I'm not entirely set up back down in the basement yet, but I do have enough clear space to get some work done so I figured I'd show you where I stand. First, this kit is a bit of a dog. I mean, it is a Zvezda kit and it is 1/72 scale, so I did not have super high expectations to begin with. The funny thing is, at some points I find myself impressed with how they laid out the parts and the way they fit together. At other points, I'm shaking my head trying to figure out what the hell they were thinking. Ahh well... Here are a few photos of where I am at. They are not the greatest, and I apologize for that. I don't have a good photo area set up yet: After "dressing up" the control panel a bit, I threw some paint at it, then built up the rest of the cockpit. The kit comes with a pilot figure, but since I will not use him, I added some masking tape belts to the seat: 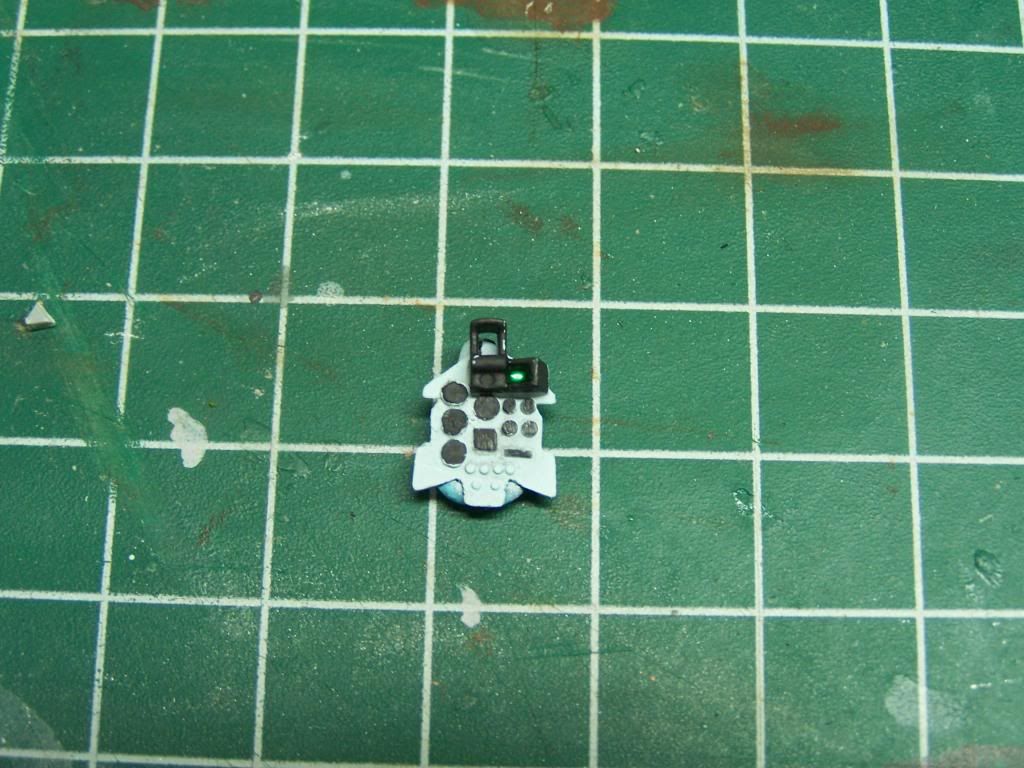  In addition, the actual plane has an armored hood around the pilots head. The artwork on the bax shows it, but there is no part for it in the kit. I added it with a bit of sheet. I thought I had a pic of that, but cannot find it, so I'll have to take one for a later update. The engine nacelles on the kit are... pigs. The fit is poor and, at both ends, there are big empty voids with nasty seams and pin marks. There is an insert for the engine fans, but they sit so deep in the part the flaws would be obvious. For that reason, I'll cover the intakes with FOD covers. I fashioned these from an eyeglass cleaning cloth coated in white glue and then, later, trimmed to shape: 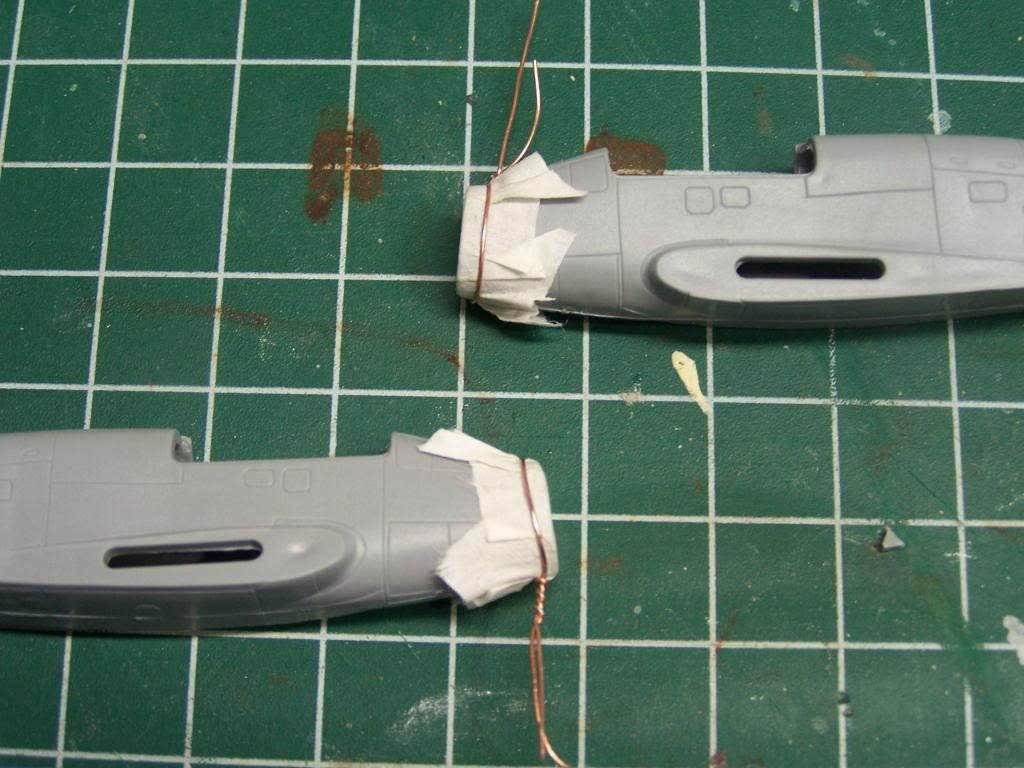 Some weight was added to the nose and then the fuse was buttoned up. Like the engines, the fit is nasty, with a big old ugly seam running down the length. Even worse, the seam split the bulkhead behind the pilots seat and there was no way to fill and sand it. Instead, I fit a thin piece of styrene, but to shapt, behind the pilots seat to cover the seam (again, a pic of that will have to come later). At this point, all the major assembly is done and ready for the application of a LOT of putty:  There is much sanding in my immediate future! I did have a "SON OF A B@*CH!" moment when I realized I'd lost a piece (actually, I'm not convinced I did lose it. The piece is C-32, but for the life of me, I cannot find a 32 anywhere on the C fret... or the A fret... or the D fret for that matter....) Anyways, it was pretty easy to use some apoxysculpt to do a rough replacement job of the missing part:  I'm turning my attention to finish up the weapons, of which the kit has a nice selection. I have most of them assembled, only a couple racks of rockets to go, and then after final assembly, I'll decide on the loadout. Hopefully this one will move along a little more briskly now and it won't take me three months to do another update. Then again, it might take me three months to get all that sanding done!!  |
|
|
|
Post by TRM on May 29, 2013 21:41:30 GMT -5
Nice to see you back at the bench with this one!! Sand away my friend!!
|
|
|
|
Post by dupes on May 29, 2013 21:43:52 GMT -5
What the heck? I thought this was ready for PAINT!!!
|
|
bbrowniii
Full Member
  
Member since: March 2012
If you are not part of the solution, you are part of the precipitate.
Posts: 1,239
Mar 25, 2012 22:08:04 GMT -5
Mar 25, 2012 22:08:04 GMT -5
|
Post by bbrowniii on May 29, 2013 22:19:45 GMT -5
What the heck? I thought this was ready for PAINT!!! ALMOST ready for paint... well, primer at least...  |
|
|
|
Post by dupes on May 30, 2013 11:21:51 GMT -5
Primer is just pre-paint. Still counts!
|
|
bbrowniii
Full Member
  
Member since: March 2012
If you are not part of the solution, you are part of the precipitate.
Posts: 1,239
Mar 25, 2012 22:08:04 GMT -5
Mar 25, 2012 22:08:04 GMT -5
|
Post by bbrowniii on May 30, 2013 12:24:12 GMT -5
And, truth is, those pics are a few days old. Most of the sanding is done, everthing is on except the wings and landing gear. Just have to tidy up a few bits and shoot some paint at it to see what happens.
|
|
bbrowniii
Full Member
  
Member since: March 2012
If you are not part of the solution, you are part of the precipitate.
Posts: 1,239
Mar 25, 2012 22:08:04 GMT -5
Mar 25, 2012 22:08:04 GMT -5
|
Post by bbrowniii on May 30, 2013 18:20:11 GMT -5
Dicky
Thanks for the encouragement. It won't be a show stopper, that is for sure. But, it is a fun little project and I have really enjoyed plugging away at it.
|
|
|
|
Post by wing_nut on May 30, 2013 18:35:20 GMT -5
missed this one back in Jan... don't want to miss it again. I am sure you will whip that kit into shape.
|
|
|
|
Post by wbill76 on May 30, 2013 19:37:57 GMT -5
Good to see you back working on this one again Boyd, whip it into shape!
|
|
|
|
Post by dupes on May 30, 2013 20:44:17 GMT -5
I can't seem to recall - what's the difference between an Su-39 and Su-25?
|
|
bbrowniii
Full Member
  
Member since: March 2012
If you are not part of the solution, you are part of the precipitate.
Posts: 1,239
Mar 25, 2012 22:08:04 GMT -5
Mar 25, 2012 22:08:04 GMT -5
|
Post by bbrowniii on May 30, 2013 22:44:51 GMT -5
I can't seem to recall - what's the difference between an Su-39 and Su-25? There is not one, truth be told. Technically, the SU-39 is an SU-25 with some upgrades, mostly to navigation and attack computers. It is also known as the SU-25TM which is an upgrade of the SU-25T. In actuality, only 8 of the SU-25TM/SU-39 have been built (according to the Wiki page on the plane). The Russians scrapped the T/TM program in the early 2000's and instead have pursued a cheaper set of upgrades for the SU-25, known as the SU-25SM. So far, about 60 aircraft have been upgraded to SM and another 10 have been factory built to that specification. |
|
|
|
Post by dupes on May 31, 2013 8:21:13 GMT -5
I wonder, then, if the Zvezda kit and the Revell kit I did several years back are the same molds. Look familiar? Other than being a 1/72 Frogfoot? 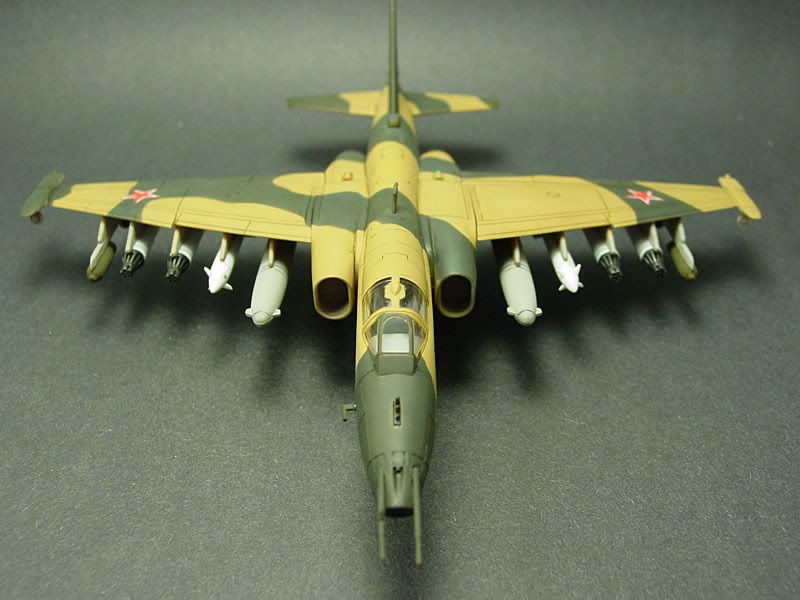 |
|
bbrowniii
Full Member
  
Member since: March 2012
If you are not part of the solution, you are part of the precipitate.
Posts: 1,239
Mar 25, 2012 22:08:04 GMT -5
Mar 25, 2012 22:08:04 GMT -5
|
Post by bbrowniii on May 31, 2013 10:07:12 GMT -5
Yup, that looks pretty similar!
What scale is yours?
|
|
|
|
Post by dupes on May 31, 2013 11:20:29 GMT -5
1/72. That's why I'm thinking they're the same tooling...Revell and Zvezda have shared molds before with armor kits, so why not aircraft?
|
|
|
|
Post by dupes on May 31, 2013 12:25:23 GMT -5
|
|
bbrowniii
Full Member
  
Member since: March 2012
If you are not part of the solution, you are part of the precipitate.
Posts: 1,239
Mar 25, 2012 22:08:04 GMT -5
Mar 25, 2012 22:08:04 GMT -5
|
Post by bbrowniii on May 31, 2013 12:35:24 GMT -5
Wow. That is snazzy! Iran, eh... hmmmm... still leaning towards Ethiopia. |
|
|
|
Post by dupes on May 31, 2013 13:28:29 GMT -5
Keep in mind that his is the 1/32 Trumpeter kit. A "bit" more detail to work with there. Heh.
|
|
bbrowniii
Full Member
  
Member since: March 2012
If you are not part of the solution, you are part of the precipitate.
Posts: 1,239
Mar 25, 2012 22:08:04 GMT -5
Mar 25, 2012 22:08:04 GMT -5
|
Post by bbrowniii on May 31, 2013 16:30:02 GMT -5
Dupes I'm not an expert by any means but I'm pretty sure the difference between a Su39 and Su25 is Su14 Dicky, You're wicked smaaaaht (my best New England accent)...  |
|
|
|
Post by wbill76 on May 31, 2013 20:06:10 GMT -5
I've got qualifications in socks-on counting Boyd  I think there's a slight error in your calculations there Dicky, isn't Su14 a compound exponent?  Wait, that's chemistry, nevermind...  |
|
DeafStuG
Full Member
  
Member since: May 2013
..
Posts: 1,283 
|
Post by DeafStuG on May 31, 2013 20:56:31 GMT -5
Good coming, I like Any aircraft Heavy arms via 80% Anti-ground and 20% Air-to-air missile.  |
|


