|
|
Post by eastrock on May 11, 2012 11:58:46 GMT -5
Hi guys, this kit is from a fellow modeler who lend me this kit to be build and keep it OOB and minimal damage as possible, knowing we been influence by Rob Darkside  now who said it will have a minimal damage  Since I can't work on the Chally or even hold an AB, hands is a bit trembling in the meantime or I just can't think straight right now, trying frustration at bay. Just can't imagine the discomfort that I'll be experiencing later on.  ok here a sprue shot of the kit. it was manufactured in 1983, even the plastic was printed made in Italy, much of the parts had a lot of flash, some parts are deformed and oversize, and I have to think about the vinyl tracks which is colored in old silver, this needs a powder coating. No engine by the way.  the hood needed repair (filler) some other parts will be covered in rust and a bit of damage to save time. ;D 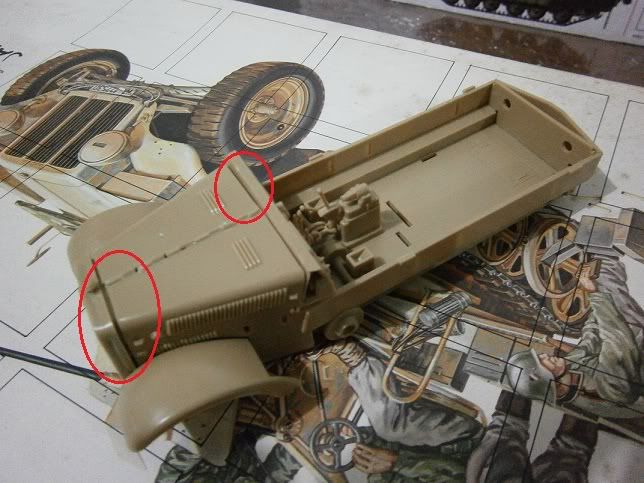 Thanks for checking it out, Cheers!!! ER |
|
|
|
Post by spud on May 11, 2012 12:02:28 GMT -5
lol this is not what i call a motivator build ;D. but looks like you have a good start on it er.
|
|
|
|
Post by 406 Silverado on May 11, 2012 12:14:12 GMT -5
I remember that kit, and it was a good one for it's time. Glad to be of influence ER. Hope you get better soon bro.
|
|
|
|
Post by eastrock on May 11, 2012 12:21:50 GMT -5
Spud this would keep my mind at bay lol
Thanks boss, lot of work for this kit... I wanted to start on the chally with the thermal pads but my focus is not going straight at this time.
|
|
|
|
Post by wbill76 on May 11, 2012 15:36:56 GMT -5
Nice to see you aren't staying idel ER, look forward to seeing what you do with this one.
|
|
johnt
Full Member
   Feb 2012 MoM and 2012 Model of the Year Winner
Member since: November 2011
Posts: 1,174
Nov 15, 2011 5:38:32 GMT -5
Nov 15, 2011 5:38:32 GMT -5
|
Post by johnt on May 11, 2012 16:19:43 GMT -5
Hi ER, I got this kit, I bought it back in the eighties. Never started it. I will be very interested to see what it's like to build!
Cheers
JT
|
|
bigjohn
Reviews member    
Member since: December 2011
John Hale
Posts: 3,438
Dec 21, 2011 2:17:45 GMT -5
Dec 21, 2011 2:17:45 GMT -5
|
Post by bigjohn on May 11, 2012 16:26:12 GMT -5
Yeah ER, I have this kit in the stash as well. Looking forward to how it turnes out.
|
|
|
|
Post by armorguy on May 12, 2012 0:03:58 GMT -5
I am curious too, this looks like a dated kit, I've never seen it before. It would be perfect to turn it into a rusty bucket.
|
|
|
|
Post by bullardino on May 12, 2012 1:20:12 GMT -5
I envy your courage. Esci kits were infamous for their poor engineering and fit. There are some that cannot be built at all, unless you scratch a lot of parts. I'm curious to see how you deal with this peculiar one  Ah, btw, a lot of esci kits have been reissued by Italeri, so it's not unlikely for this one to pop up again in the future  |
|
|
|
Post by TRM on May 12, 2012 6:14:20 GMT -5
Have at it ER!!! Name of the game is , well, staying in the game!! Looking forward to seeing where you take this. If I remember correctly this one might fit nicely in a tree you know!!  |
|
|
|
Post by eastrock on May 12, 2012 22:05:21 GMT -5
Thanks for dropping by guys, comments are much appreciated!!!  Bill, Thanks! I just wish I can pull this one up. JT / BJ, its a pleasure to see you guys riding along. G, I just wish this is my kit, I would have 2nd thoughts about it. Luigi your exactly right!!! even the figures are out of scale  T, if this was mine it will be definitely hanging in the Tree lol maybe in the future... I'll get one of the DML kits.  Figure Comparison - Figures are complete return to the owner  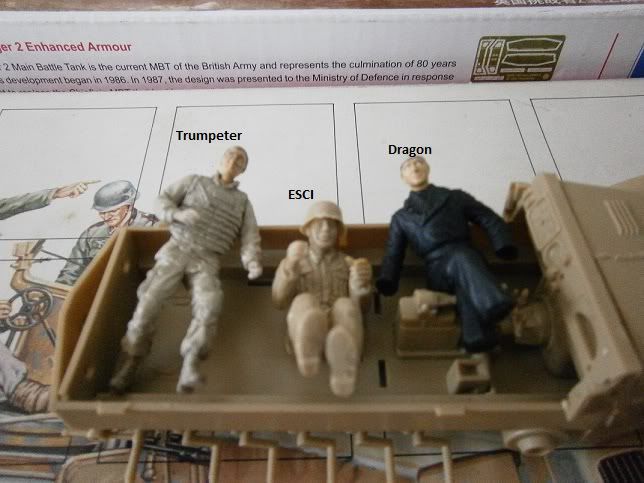 underside, did a filling of scrape sprues to fill the huge gaps on the cab especially on the right side... then re-filled it with dissolving putty to lessen the sanding. the axles will be repaired as I glued the wheels .  Thanks for looking, Cheers!! ER |
|
|
|
Post by bullardino on May 13, 2012 2:29:36 GMT -5
Oh, it was driven by Andre the Giant  |
|
|
|
Post by eastrock on May 14, 2012 1:44:34 GMT -5
Luigi all the crews are out of scale, including the
diesel and kane lol
capt, will doing with the anti aircraft gun instead of
the transport, amazingly not stated in the instruction
Another problem a huge gap between the side fenders to the tool box and to the exhaust... pics to follow...
Spud... this one will not fit the bill lol one issue after the another lol
|
|
|
|
Post by 406 Silverado on May 14, 2012 13:11:14 GMT -5
keep at it ER, cool so far
|
|
|
|
Post by eastrock on May 15, 2012 12:16:54 GMT -5
Thanks Boss!!! seems like one prob after another  Chris67, I do agree with you... since I already gave my word to the owner, I'll try to repair it as much that I can ;D Here's a small update: Before Modification see the gaps... the rear part of the fender need to be cut in order the exhaust and stowage to fit, re-glued and sand to shape. 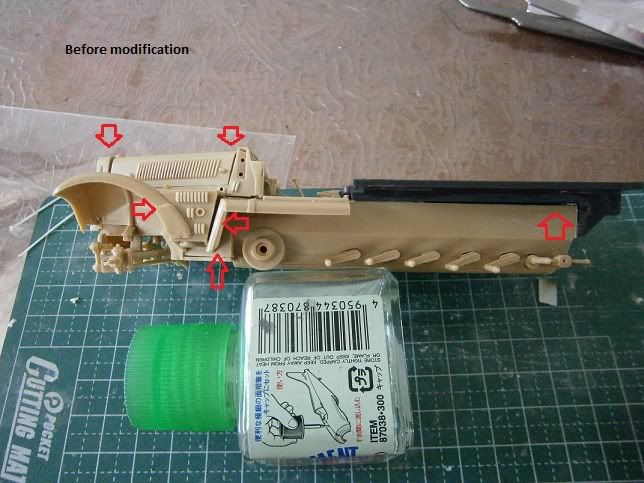 Strips of styrene needed in order to close the gap, nothing much to do on the fender itself... as you see its not straight as seen in references. will still try to fix the problem and keep the issue minimal as possible. 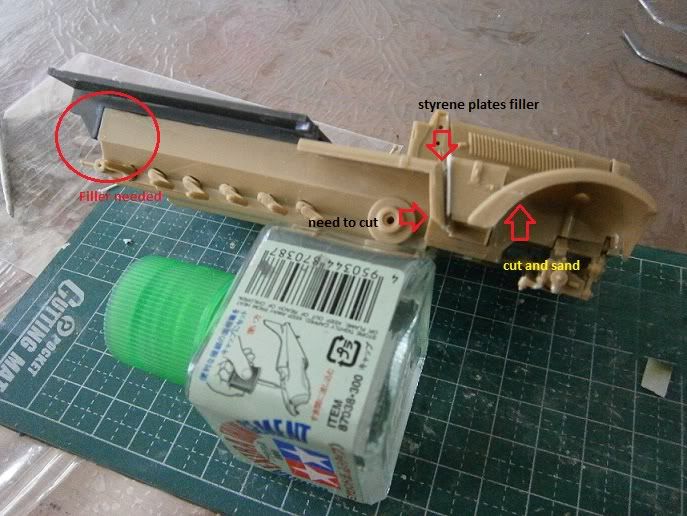 as for the base a lot of cleaning stubborn seam lines, a combination of dissolving putty for the sink marks, need to repair the base lock with Mr. Surfacer or putty. remove the pin and drill it for the base stopper. as you can see on the right. 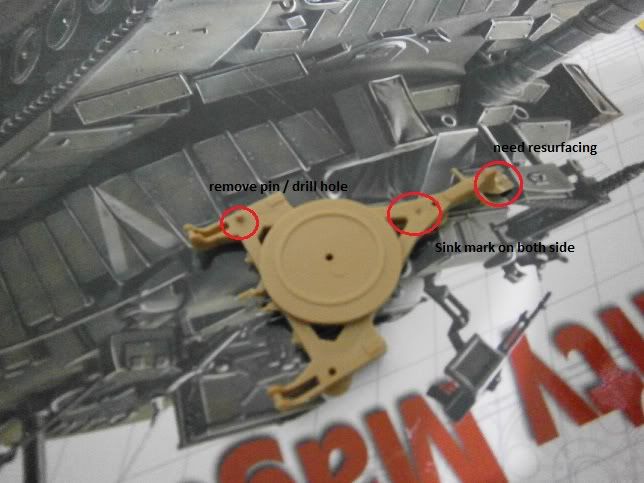 thanks for hanging around!!! ER |
|
|
|
Post by spud on May 15, 2012 15:26:59 GMT -5
making some fine headway there er
|
|
|
|
Post by wbill76 on May 15, 2012 19:16:25 GMT -5
Beat it into submission slowly but surely ER!  |
|
|
|
Post by eastrock on May 15, 2012 21:05:22 GMT -5
Capt, Thanks for hanging around! now back again to the chally as the putty and glue still need drying... have to stick another plate on both sides.
Spud, I do admit this is not a motivator build... this is a stepping stone for me, first time to build a Half-track and should be getting a Dragon or Trumpeter kit soon for me, Tommy had already suggested a dio for it lol.
Thanks, Bill! this one sure is a fighter even though the plastic is already brittle.
Cheers!!!
ER
|
|
|
|
Post by TRM on May 15, 2012 21:11:12 GMT -5
Take that bull by the horns ER!! Looking good buddy!! You seem to have a nice grasp on things!!! Keep it going!!! ;D
|
|
|
|
Post by eastrock on May 15, 2012 21:12:48 GMT -5
Thanks, Buddy!!! will have to get one of my own less than a fighter perhaps lol
|
|
|
|
Post by eastrock on May 17, 2012 13:04:01 GMT -5
Anti Aircraft gun Complete the gun is a straight forward build most of the part need to remove the seam lines, the gun shield doesn't fit well... have to do some trick via weathering. the muzzle needs to be modified as you can see in the pic it has a triangular shape. 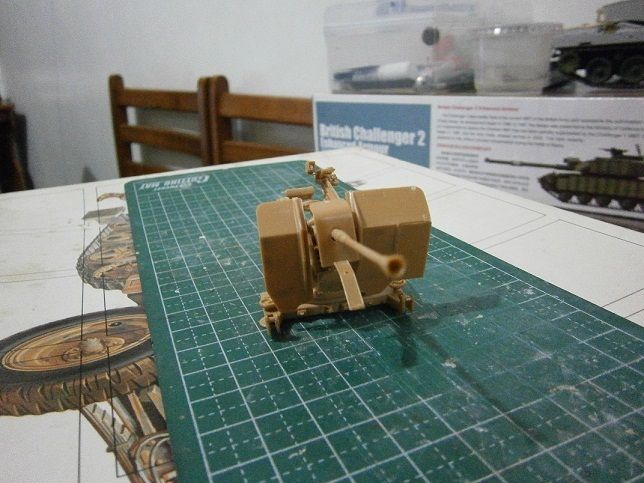 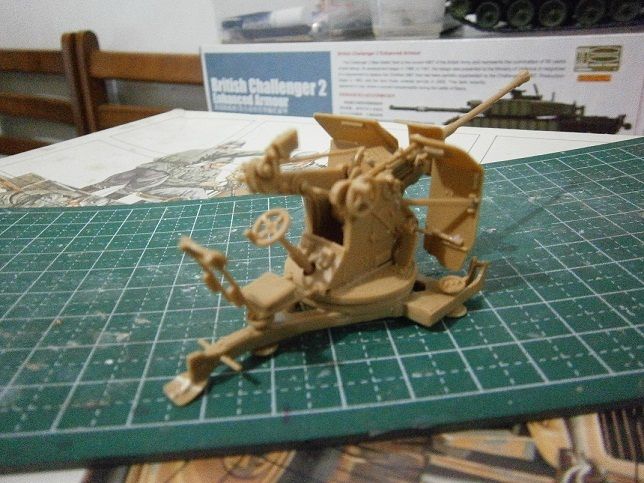 Here's a mock up of the HT with he crew on steroids lol 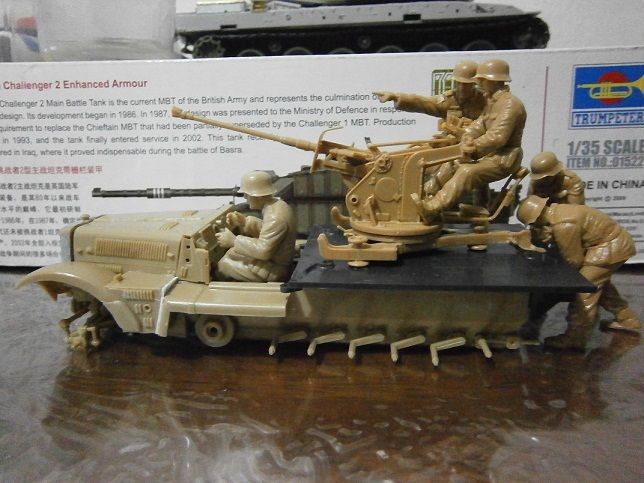 Thanks for checking!!! ER |
|
|
|
Post by wbill76 on May 18, 2012 14:19:35 GMT -5
Slowly but surely ER! Some nice progress with it...the last pic shows the trials the crew faced...would hate to be the driver!
|
|
|
|
Post by eastrock on May 19, 2012 11:00:41 GMT -5
Thanks for your kind comments Bill! ;D Priming done for base coating, all I need now is the scheme... need to choose between the Dark yellow or Desert Sand. 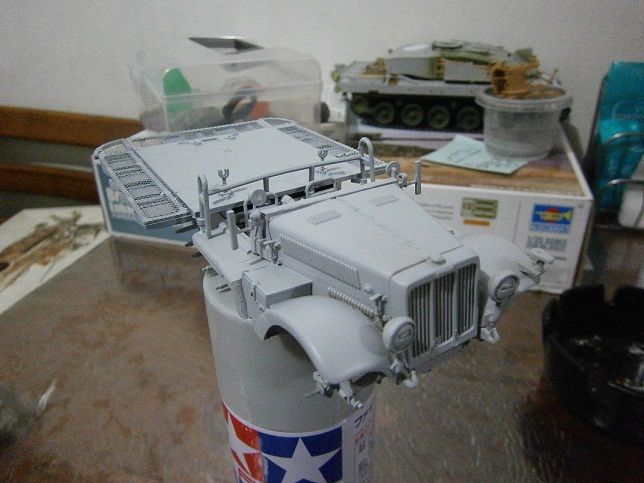 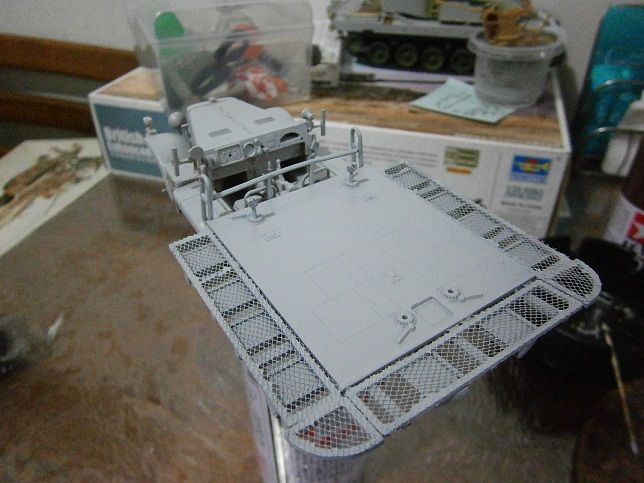 |
|
bigjohn
Reviews member    
Member since: December 2011
John Hale
Posts: 3,438
Dec 21, 2011 2:17:45 GMT -5
Dec 21, 2011 2:17:45 GMT -5
|
Post by bigjohn on May 19, 2012 11:08:06 GMT -5
looks really good with the primer on.
|
|
|
|
Post by spud on May 19, 2012 11:24:50 GMT -5
so yer asking what color yellow you should paint it.......
|
|
|
|
Post by eastrock on May 19, 2012 11:29:26 GMT -5
Thanks, BJ this kit is a fighter  Yes, Spud I'm choosing between Dark Yellow or Desert Yellow (Tamiya Acrylic) what do you think? |
|
|
|
Post by spud on May 19, 2012 11:34:46 GMT -5
desert i would pick
|
|
|
|
Post by eastrock on May 19, 2012 11:45:41 GMT -5
Ok Spud, I'll look for DAK reference
Thanks!!!
|
|
|
|
Post by armorguy on May 19, 2012 15:25:45 GMT -5
Primer...now the paint party can start, I look forward to it.
|
|
|
|
Post by wbill76 on May 19, 2012 17:21:49 GMT -5
Primer coat looks good ER, now get the rest of the paint on!  What is dif between yellows? Any exampljes German vehicles used different paint schemes throughout the war depening on time period and theater of service. In this particular case the difference between the two yellows is profound..."Desert Yellow" is Tamiya's representation of the "sand" color used as part of the desert/Tropen scheme ordered between March '41 and March '42. Dark Yellow is Tamiya's representation of Dunkelgelb, the yellow in use as part of the three tone scheme for vehicles starting in Feb '43. HTH! |
|