|
|
Post by eastrock on May 25, 2012 11:39:12 GMT -5
Thanks Spud, more updates tomorrow as well with the CR2.
|
|
johnt
Full Member
   Feb 2012 MoM and 2012 Model of the Year Winner
Member since: November 2011
Posts: 1,174
Nov 15, 2011 5:38:32 GMT -5
Nov 15, 2011 5:38:32 GMT -5
|
Post by johnt on May 25, 2012 12:46:33 GMT -5
Hi ER, good job with the worn paint and the tarp! Nice work matey!
|
|
bigjohn
Reviews member    
Member since: December 2011
John Hale
Posts: 3,438
Dec 21, 2011 2:17:45 GMT -5
Dec 21, 2011 2:17:45 GMT -5
|
Post by bigjohn on May 25, 2012 17:24:14 GMT -5
Looks much better ER. Repainting to hood did the trick.
|
|
modelfreak72
Full Member
  
Member since: January 2012
Why worry, each of us is wearing an unlicensed nuclear accelerator on his back.
Posts: 1,479
Jan 28, 2012 23:21:46 GMT -5
Jan 28, 2012 23:21:46 GMT -5
|
Post by modelfreak72 on May 25, 2012 18:53:51 GMT -5
Dam Eastrock, I missed this one. That is awesome work!
|
|
|
|
Post by wouter on May 26, 2012 0:42:50 GMT -5
nice repainting indeed. Tarp looks great as well. Think it adds a little bit more interest to the model. Great stuff!
Cheers
|
|
multicam
Senior Member
   
Member since: January 2012
Nate
Posts: 2,039
Jan 10, 2012 14:35:41 GMT -5
Jan 10, 2012 14:35:41 GMT -5
|
Post by multicam on May 26, 2012 10:22:08 GMT -5
Looking good ER!
|
|
|
|
Post by wbill76 on May 26, 2012 19:49:50 GMT -5
Nice improvement with the tark and hood re-do! You're on a roll ER!
|
|
|
|
Post by TRM on May 26, 2012 20:55:41 GMT -5
Outstanding ER!! You are spot on!!! Keep it going!! ;D
|
|
|
|
Post by eastrock on May 28, 2012 13:09:58 GMT -5
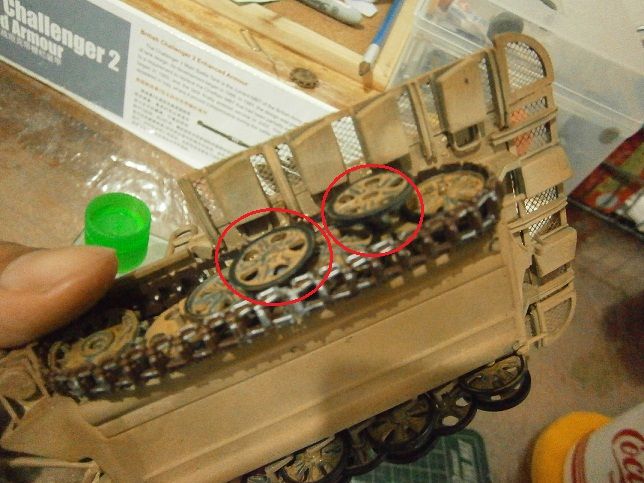
Thanks a lot guys for checking in!!! your comments are much appreciated ;D John, thanks but still need to weather the tarp with Buff for a weather look just like on your SBS Well just need to clear my head a bit... had a bike ride yesterday need some fresh air... how I wish I had also a back rider, right Tommy? ;D here's a bit of an update  some of the road wheels are already cracked and deformed due to age and pressure. the outer most road wheel should be sand or shave about 1mm or less, refer to the picture. the tracks are bit tricky and stubborn, already use primer paint but it won't stick, already use 3 kinds of CA glue and 1 solvent and still won't stick, had to hold the track about 10mins or so need to repaint it with enamel. BTW you need place the tracks first before the idler wheel due to the clearance on the fender. Thanks again for checking... Cheers!!!  |
|
|
|
Post by wbill76 on May 29, 2012 19:01:49 GMT -5
Keep slugging away on this one ER! Sounds like the kit tracks don't want to behave...and the wheels are putting up some passive resistance as well to go with it, but I have confidence you will triumph in the end!  |
|
|
|
Post by eastrock on May 30, 2012 11:37:55 GMT -5
Thanks, Bill I'm trying the best that I can... I just need to be careful especially with the small parts some are already brittle, and I broke the spot light 3x already  |
|
|
|
Post by 406 Silverado on May 30, 2012 11:47:04 GMT -5
ouch, keep at it ER. Those old kits can test ones patience for sure.
|
|
|
|
Post by eastrock on May 30, 2012 20:40:46 GMT -5
Thanks Boss! Nothing compared to what I'm going thru now
after the insubordination was justified, Now that Freakin
Thing, tryin to de-classify or transfer me to another project.
If only I could follow spud advice, will do it without hesitation.
|
|
|
|
Post by eastrock on Jun 1, 2012 8:10:10 GMT -5
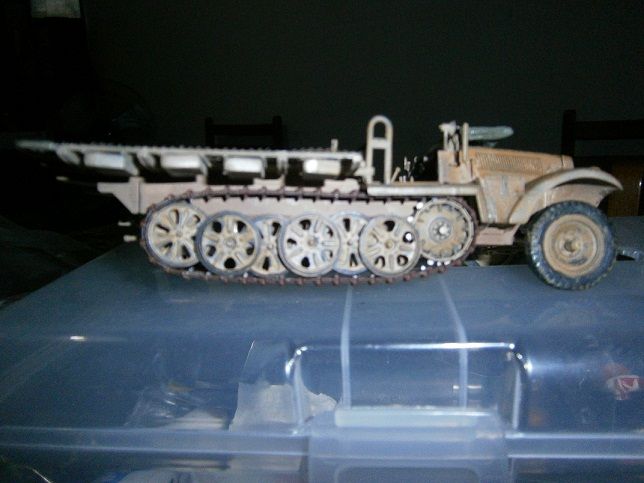
here's another update, tracks and wheels are already installed... kinda hard to tame encountered lots of problem, the pins are brittle with different size, the hole of the road wheels is not centered, some deformed and cracked due to the age of the kit, the track is hard to tame   pic with flash, if you have any suggestion to make the tracks sagged please feel free to post.  Thanks a lot for checking, Cheers!!! ;D |
|
|
|
Post by 406 Silverado on Jun 1, 2012 10:32:43 GMT -5
well ER two ways I can think of to sag the tracks. one is pinning them and the other is tieing them with thread to the wheels.
|
|
multicam
Senior Member
   
Member since: January 2012
Nate
Posts: 2,039
Jan 10, 2012 14:35:41 GMT -5
Jan 10, 2012 14:35:41 GMT -5
|
Post by multicam on Jun 1, 2012 18:23:11 GMT -5
Nice work buddy. Still watching:)
|
|
|
|
Post by wbill76 on Jun 1, 2012 20:11:34 GMT -5
Pinning is probably going to be your best bet...although if they are particularly springy, you might have to pin AND tie them down to get any kind of sag represented.
|
|
|
|
Post by eastrock on Oct 16, 2012 10:56:32 GMT -5
after a long hiatus coming back to armor is a passion, that's why I'm reviving my pending builds and plan to finish it but still I'll keep building cars just have to practice my mixing and painting skills  already mated the gun to the track, will be adding with a few details and before washing the kit.   Thanks for checking in  Cheers! ER |
|
|
|
Post by TRM on Oct 16, 2012 13:10:18 GMT -5
|
|
|
|
Post by wbill76 on Oct 16, 2012 19:41:46 GMT -5
Nice to see this one come back around ER!
|
|
|
|
Post by eastrock on Oct 16, 2012 20:27:45 GMT -5
T, I won't forget that just have to work out a bit and get a new hair cut LOL
Thanks Bill, definitely will finish her just need to finished my car entry and she's ready for the initial wash
|
|
|
|
Post by eastrock on Nov 8, 2012 23:00:28 GMT -5
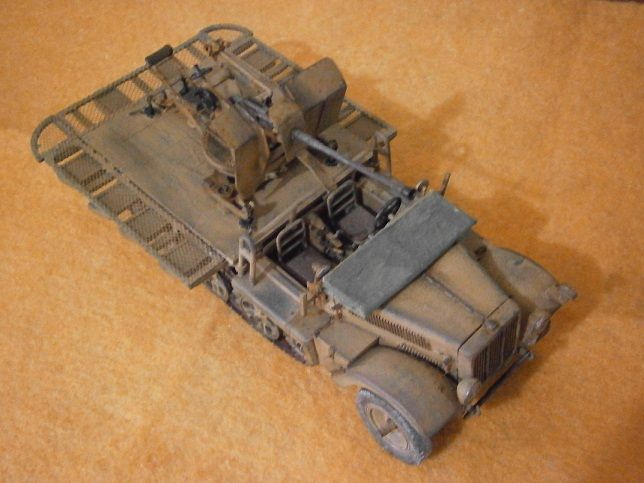
Demag finally done, with one less pending build on the bench ;D kindly check the gallery for the rest of the pics  Thanks for checking ER |
|
parkadge
Junior Member
 
Member since: June 2012
Pat McGrath
Posts: 45
Jun 30, 2012 14:54:08 GMT -5
Jun 30, 2012 14:54:08 GMT -5
|
Post by parkadge on Nov 9, 2012 17:54:05 GMT -5
Just catching up on this- great to see it built I too have it in my stash a long time.
Incidentally I always thought the Esci figures suited 1/32scale more and I used to crosskit them with Airfix multipose figures
|
|
|
|
Post by eastrock on Nov 9, 2012 21:45:03 GMT -5
Thanks for checking Dicky  Hi Pat, yup the ESCI figures are too big for the kit, I do plan to modify the kit but some parts are already brittle |
|