|
|
Post by wouter on Jan 25, 2013 13:03:21 GMT -5
heres a truely newbie type of question. do all or should i say most german armor have such extensive "personal" histories? i did a google search for king tiger 222 and came up with a large amount of information. is this common? joe well, yes and no, it depends on wether they were photographed extensively or amazing things happened to them 222 is very known because of the German news real where one can see the KT's (amongst them 222) move through the German town of Tondorf to the Belgian/German border prior to 'Wacht am Rhein' (Watch on the Rhine - like the German offensive was called, in English it's more commonly known as the Battle of the Bulge). Later on 222 was filmed when she transported the Fallschirmjäger. These photos are stills of the films. Not all tanks or KT's for that matter are known like this one. 222 is one of the more famous ones Cheers |
|
|
|
Post by wing_nut on Jan 25, 2013 15:37:13 GMT -5
Welds... There will be a lot of welds and torch cutting m,arks to add. I started on the turret. There was the faintest hint of a weld around the top that was filed out, masked with some Jammydog tape and welded. 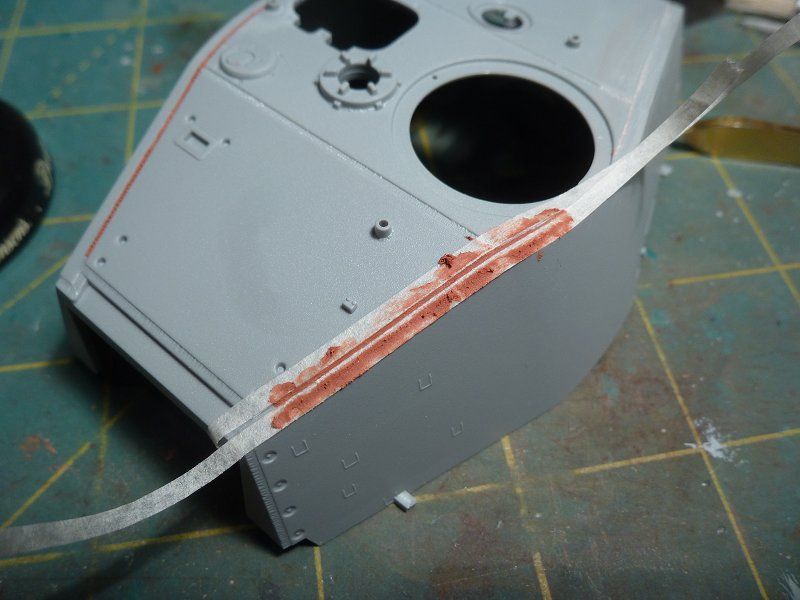 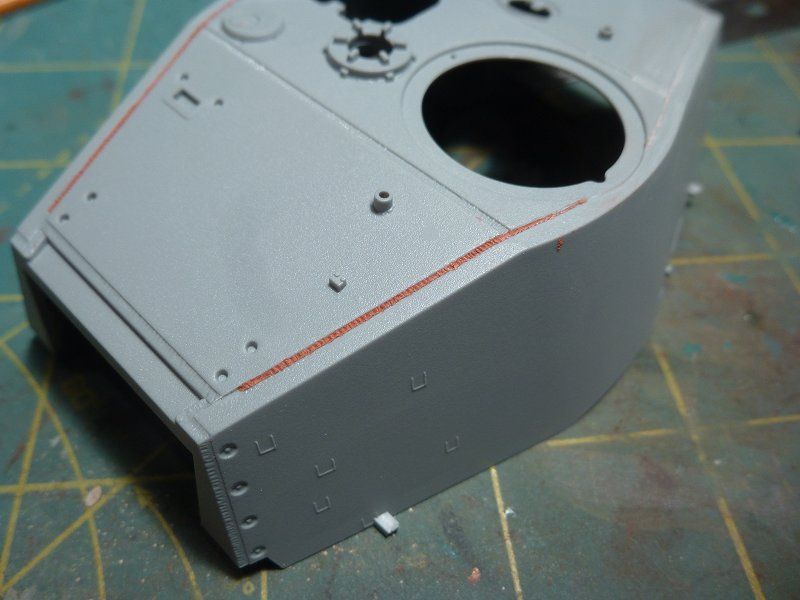  Wheels... Axles aligned, wheels sanded and mounted temporarily. 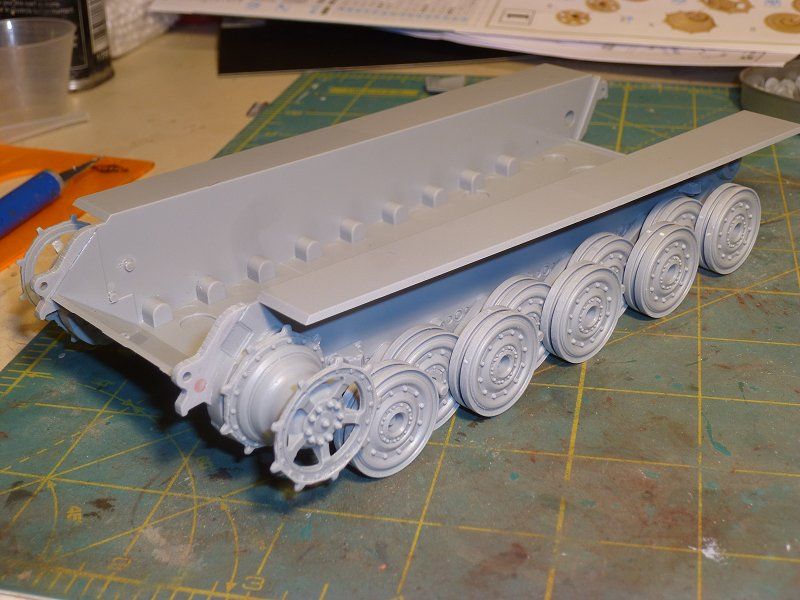 WTF?... The pivoting arm for the idler, part B1, has no way to mount to the hull. I would have thought that something would go ion form the inside of the hull to make the adjustable pivot. Is that "barley there" ring on the arm supposed to go in that gigundo hole? It doesn't really fit to well and hardly seems it would take the tension of the tracks. And a question... what would the natural angle of the idler axle be? Down and sightly back? 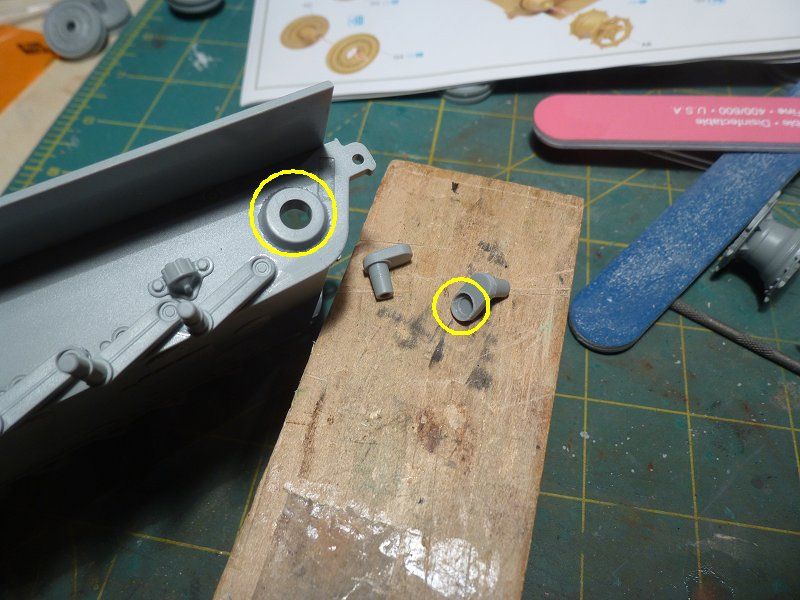 |
|
Deleted
Member since: January 1970
Posts: 0
Nov 29, 2024 21:27:26 GMT -5
Nov 29, 2024 21:27:26 GMT -5
|
Post by Deleted on Jan 25, 2013 16:23:53 GMT -5
Marc , my fellow KT builder ! Those welds with the Glazing compound came out great ! That idler ........something has to be missing ! On my DML Jagd the part that fits in that hole in the hull is molded as part of the idler arm .it still was inadequat to hold the weight and tension of the Friuls so i modified it .Maybe this pic will help show what i did and give you an idea . I extended the pivot with a piece of styrene tubing , 3/16 " ? I'll check if you want .  As far as the angle of the arm itself mine ended up at the "7 oclock" position when viewed from the out side of the idler on the left side . If you can leave them loose till you get the slack figured out . I didnt glue mine , there was enough friction on the idler arm pivot to keep it in place even with the Fiuls . |
|
|
|
Post by wing_nut on Jan 25, 2013 17:05:36 GMT -5
So it's true, great minds DO think alike. I thought of the same thing but didn't have any plastic tube in that size. And yes, 3/16 is a perfect fit in the hole. I used some brass tube, sharpened the end a bit and tapped it into the idler with a wee little hammer and put a big drop of CA down the tube. 7 O'Clock huh? So it hangs down and to the left. Wait... we are still talking about the idler right?  I know I am  |
|
Deleted
Member since: January 1970
Posts: 0
Nov 29, 2024 21:27:26 GMT -5
Nov 29, 2024 21:27:26 GMT -5
|
Post by Deleted on Jan 25, 2013 17:10:23 GMT -5
ROTFLMAO ! ;D Am not holding anything my friend !  |
|
|
|
Post by wing_nut on Jan 25, 2013 17:14:59 GMT -5
HEHE you got that even tho it said hand instead of hangs (fixed). Not a good sign brother!
|
|
hasenpfeffer
MSC Consultant      March 2024 Showcased Model Awarded
Member since: January 2013
What the...?
Posts: 510
Member is Online
MSC Staff
|
Post by hasenpfeffer on Jan 25, 2013 17:20:11 GMT -5
Marc - the CH kit I just got looks just like yours, except the part they tell you to use for the rear arm (B1) looks much more like Carl's. Wrong sprue, perhaps? Dragon has fooled me more than once by having 2 sprues or more with the same letter...  I don't know if extending the arm makes much of a difference unless not all of the surface area inside the hole on the hull is used/in contact with the axle. Carl could probably answer that... for some crunchy, orange heaven in a bag. ;D |
|
hasenpfeffer
MSC Consultant      March 2024 Showcased Model Awarded
Member since: January 2013
What the...?
Posts: 510
Member is Online
MSC Staff
|
Post by hasenpfeffer on Jan 25, 2013 17:21:37 GMT -5
eh, you guys are already makin' nice... I'm late to the party, per usual.
|
|
Deleted
Member since: January 1970
Posts: 0
Nov 29, 2024 21:27:26 GMT -5
Nov 29, 2024 21:27:26 GMT -5
|
Post by Deleted on Jan 25, 2013 18:21:24 GMT -5
Dave , lengthening the pivot of the arm just made me feel better ......  .....compensating for somethin i guess . |
|
hasenpfeffer
MSC Consultant      March 2024 Showcased Model Awarded
Member since: January 2013
What the...?
Posts: 510
Member is Online
MSC Staff
|
Post by hasenpfeffer on Jan 25, 2013 19:48:18 GMT -5
Yeah... we got a taste of that with yer jagdtiggy. LOL  ... I jest, I jest... luckily I know nothing of your need to overcompensate.  Marc, you should have built a brass rod axle that spanned the gap! Could've tensioned both sides at once... |
|
|
|
Post by wbill76 on Jan 25, 2013 20:45:30 GMT -5
Nice work on the weld seams Marc! Not going anywhere near the idler discussion though... ;D
|
|
|
|
Post by Leon on Jan 25, 2013 21:02:35 GMT -5
Mark really like how your weld seams turned out.i'll be looking for more updates
|
|
|
|
Post by bbd468 on Jan 25, 2013 23:06:30 GMT -5
Hey Marc, the turret welds look awesome! The idler...ummmm.....all i can say is when its possible...i leave it loose till tracks are in place and then glue permanent. Its not always possible but you might be able to here.   Gary |
|
Deleted
Member since: January 1970
Posts: 0
Nov 29, 2024 21:27:26 GMT -5
Nov 29, 2024 21:27:26 GMT -5
|
Post by Deleted on Jan 26, 2013 7:06:37 GMT -5
super work on the welds very neat
|
|
|
|
Post by wouter on Jan 26, 2013 9:00:02 GMT -5
great welding indeed, looks like a great tech! concerning the idler: that's strange, can't remember I had that issue with mine... to know how far you need to add the idler: well here's a photo of 222  of course, position of the idler could be adjusted by the crews, but this gives you an idea ^^ Cheers |
|
|
|
Post by wing_nut on Jan 26, 2013 10:34:12 GMT -5
Jeez Dave, why'd ya have to go and say that about spanning both sides? Now I am thinking the next logical step would be put it through a coil spring with some tension and make if fully functional. Help me, please!Why Bill, what ever do you mean  Gary, I have always glued the idler and added or taken out a link if need be. I think for this one I will need to do that since the adjustment would in this case be 2 links so that may not work out. Wouter, looking at the pic would have been the easy route. Much better to ask a question with an obvious answer ;D There is something in that photo I hadn't noted before though and makes me glad I chose to use Friuls. The sprocket overlaps the 1st road wheel. That could have made re-installing Magic Tracks tedious. I used a piece of Bare Metal foil to mask the outside eof the MG blister. If any of you non-aircraft type have not sen this stuff it is great for masking since it burnishes down perfectly and irregular shapes can be cut out easily. 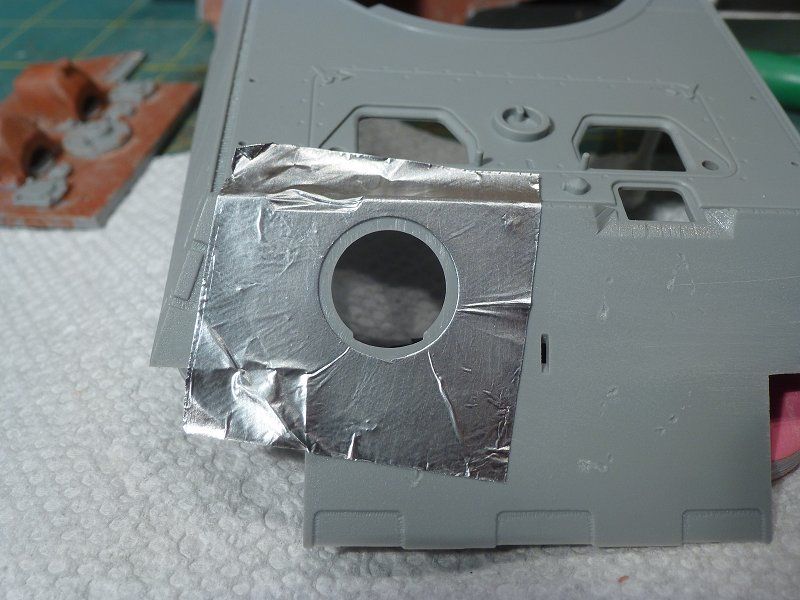  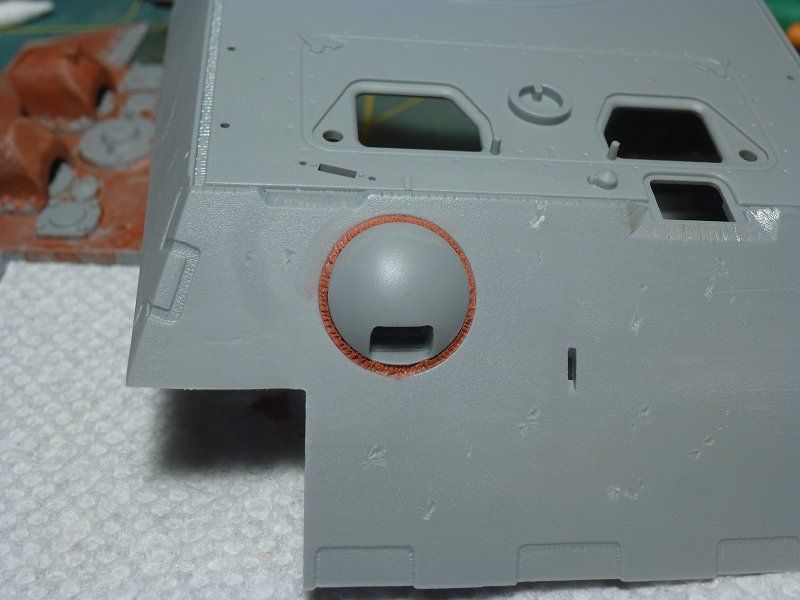 I've started on some of the hot rolled steel look. I tried Carl's method of smearing the compound with a knife but could get it to look good at all. I thinned the compound to a consistency of paint ready to be sprayed and stippled like I was doing a casting texture. Only thing different was to sand most of it off. It will show better when it's primed.  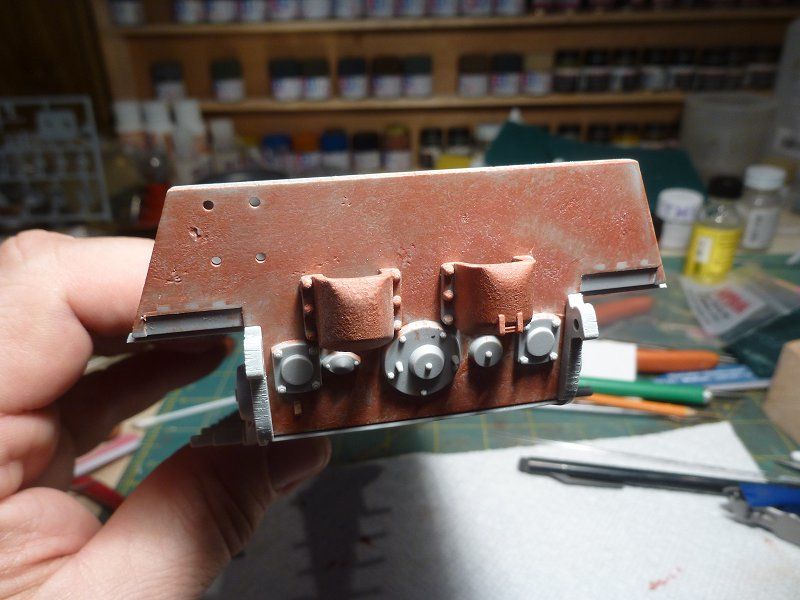 |
|
|
|
Post by wbill76 on Jan 26, 2013 10:37:06 GMT -5
Nice work on the texturing Marc, that MG blister trick with the BMF looks like it's getting its highlights done at the beauty parlor!  |
|
|
|
Post by fightnjoe on Jan 26, 2013 10:49:30 GMT -5
looking very good.
joe
|
|
|
|
Post by dupes on Jan 26, 2013 12:02:22 GMT -5
Jeeze, you're making the rest of us look bad, Wingy...those welds and texturing are spot-on, my friend.
|
|
|
|
Post by wing_nut on Jan 26, 2013 12:29:16 GMT -5
Bill, Joe, Mark thanks boys.
Bill, you know, having so little of my hair left that one occurred to me. Now where is that bald simile. Oh wait, they're all bald.
And wout... i took your cue and filled the holes of the jack block and jack ;D
|
|
|
|
Post by deafpanzer on Jan 26, 2013 14:21:17 GMT -5
Beautiful work on the welding seams and adding texture to the surface. Keep it coming buddy!
|
|
Deleted
Member since: January 1970
Posts: 0
Nov 29, 2024 21:27:26 GMT -5
Nov 29, 2024 21:27:26 GMT -5
|
Post by Deleted on Jan 26, 2013 16:14:57 GMT -5
Marc , i like it when one persons method can be altered slightly by another modeler and a better version of that method is developed ! I honestly felt that you would come up with a better way of doing this , the weld and the texturing both look superb . Tell you what bro i'm going to use these idea's on my next build my friend .
Really cool things going on here Marc !
;D
|
|
ogrejohn
Full Member
   Oct '23 Showcased Model Awarded
Member since: June 2012
Go away or I shall taunt you a second time!
Posts: 1,303
Jun 1, 2012 17:33:59 GMT -5
Jun 1, 2012 17:33:59 GMT -5
|
Post by ogrejohn on Jan 26, 2013 19:24:21 GMT -5
Oh man, that is really looking great! What are you using for the welds and texture?
|
|
|
|
Post by wing_nut on Jan 26, 2013 19:33:28 GMT -5
Thanks guys. This is looking good, but Hey, what is this 'jammydog tape'?cheers....Kenny Here you go SP... www.jammydog.com/micro_masking_tape.htmCarl I hear you my friend. I wouldn't say better, it's just what worked for me. But if it gets adopted by someone as a method that works for them too, that's what these forums are all about. And why this one seems to works so well. More time spent doing what we are doing here than worrying about what someone said and getting booted. Seriously, look at the thread. I learned a new technique. Someone has found a new product they've not heard of before and we had some ref photos flying around with circles and arrows and a paragraphs on the back describing what each one was. (Anyone remember what that's from?) |
|
hasenpfeffer
MSC Consultant      March 2024 Showcased Model Awarded
Member since: January 2013
What the...?
Posts: 510
Member is Online
MSC Staff
|
Post by hasenpfeffer on Jan 26, 2013 20:05:32 GMT -5
Yep, those welds are sweet. Very nice indeed. The texturing is gonna look great as well.  As for the axle... your setup suggestion has a flaw that I'm sure if you thought about it enough, you'd come up with it. If you had say, 0.5 track link length adjustment points, then.... lol  |
|
|
|
Post by spud on Jan 26, 2013 21:21:53 GMT -5
Awesome Job so Far Marc
|
|
|
|
Post by bbd468 on Jan 27, 2013 2:03:17 GMT -5
Man that looks awesome Marc!!! Are you using 3M Red Automotive spot putty for the welds and texture. I use it to fill but never thought of makin' welds.....if its the same stuff. Nicely done!  Gary |
|
|
|
Post by armorguy on Jan 27, 2013 2:28:22 GMT -5
Magnificent, just magnificent !
|
|
|
|
Post by Mence on Jan 27, 2013 2:28:42 GMT -5
Wow, sweet welds, very tidy.
|
|
|
|
Post by wouter on Jan 27, 2013 3:37:16 GMT -5
And wout... i took your cue and filled the holes of the jack block and jack ;D sure looks great make, and cool way of doing the weld around the ball mount, I didn't add it to mine(but hey, at that time it was my first ever build ;D), but it really makes yours stand out. And nice filling mate ;D while you're at it...the gap between the lower part of the backplate and the lower hull: if I reckall well there needs to be a weld seam as well here's a shot of 213's back which I took last year  Cheers (and keep up the great work!) |
|