venom1
Full Member
  
Member since: October 2012
Posts: 1,369
Oct 10, 2012 2:40:03 GMT -5
Oct 10, 2012 2:40:03 GMT -5
|
Post by venom1 on Mar 11, 2013 12:29:54 GMT -5
Howdly-Doodly Neighborinos!! Time for a new thread (because I'm just soooooo good at finishing current ones!!  ). My model club kicked off a club group build last month called "Tamiya OOB". As the name suggests, we can build any Tammy kit in any scale, as long as it is OOB (with the exception of decals). For my choice I picked the 1/48 Me-262 A-2a, in captured British markings. At this stage will probably be going with "Yellow 17" 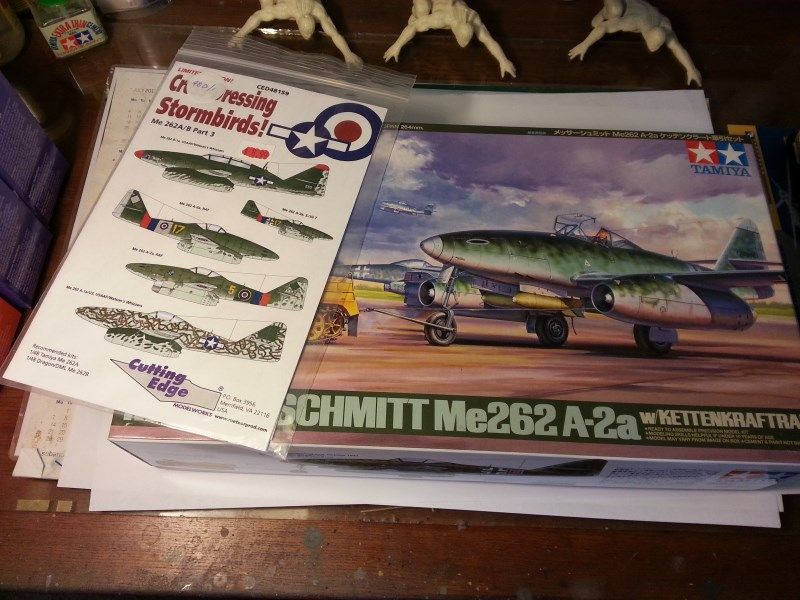 Here we are with some paint down for the cockpit and undercarriage bays. As you can see, most stuff is still on the sprues. For those in the class still paying attention, yes that is my little Italeri Wessex in the background! Managed to get an undercoat on her too, so will be able to start the painting in earnest pretty soon... 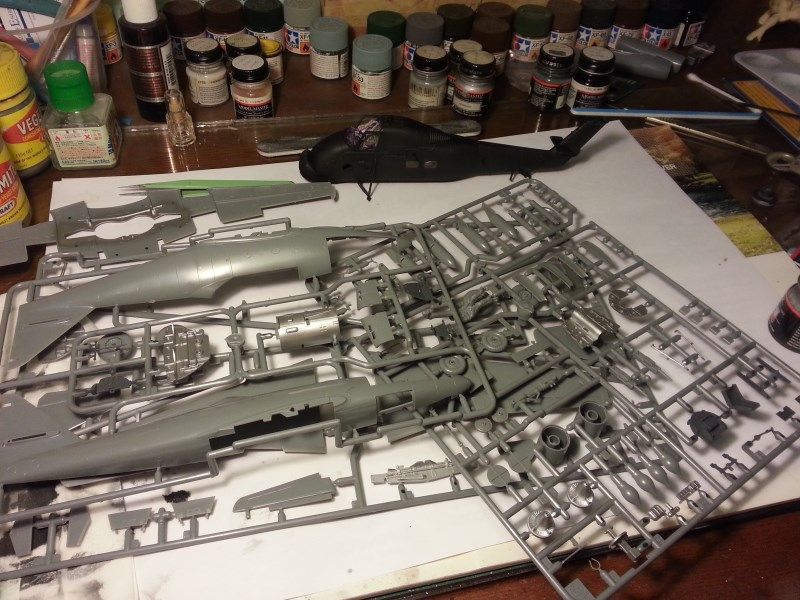 Cockpit (most of it at least...) painted and weathered 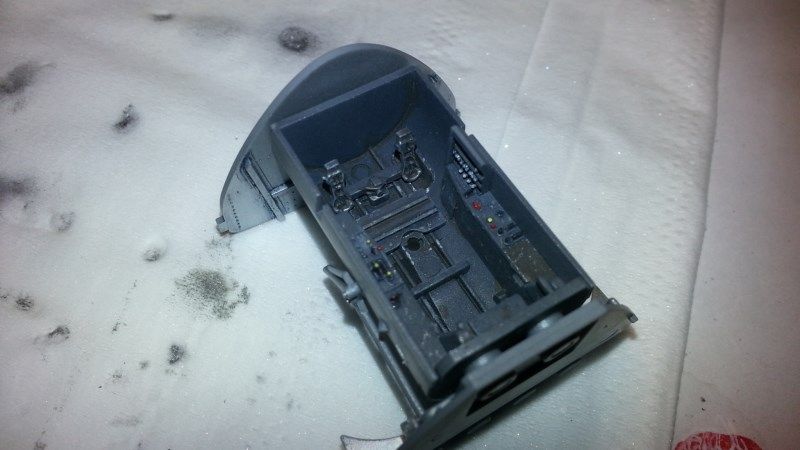 IP, painted and decalled. Future dropped into the dial faces to represent glass. As you can see, it's pretty shiny after a few coats and really looks the part! The IP looks a bit shiny in this photo, but in reality it is pretty flat... 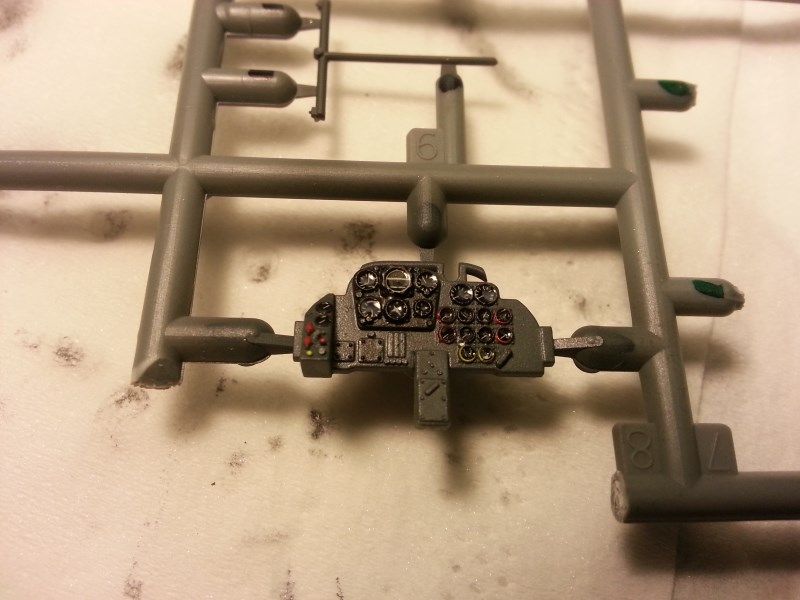 Model Master Metallizers at work. Beautiful! Very fragile though! Still yet to spray Metalizer sealer over them, so no touchy-touchy!!  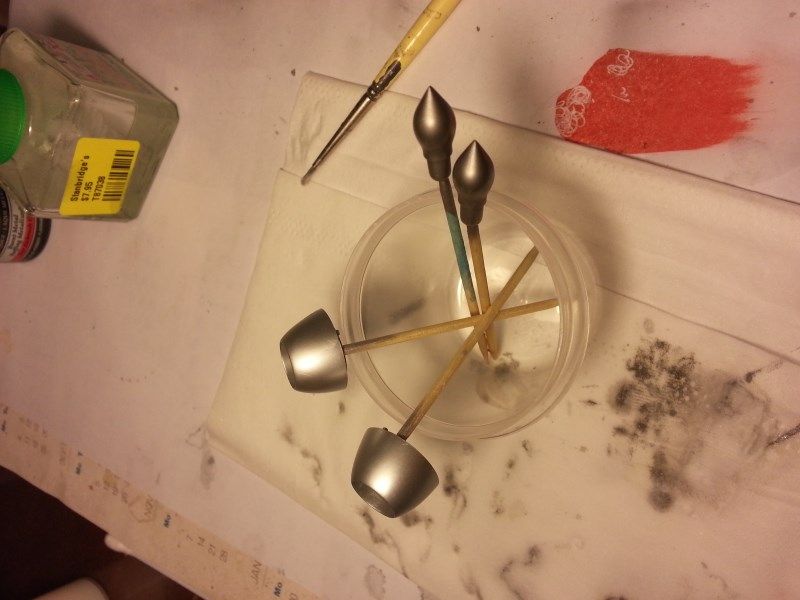 Just about to button up the nose. As you can see, the gun bay is painted. Up to this point I hadn't decided whether to close up the bay or not. I decided to do it as the paint scheme will be too much of a pain to do with them open. Bye-bye pretty gun bay!!   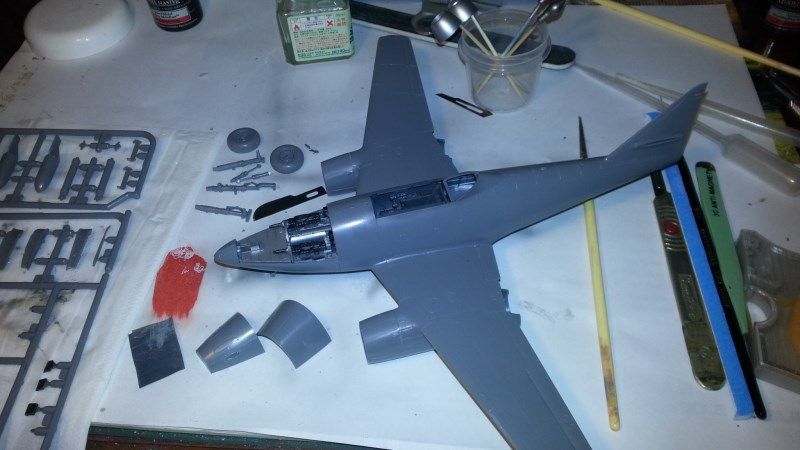 Cockpit in-situ.... 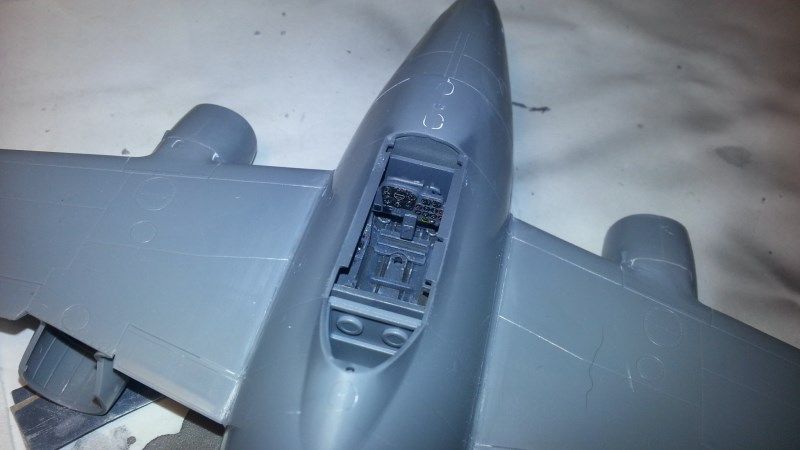 Completed U/C bay. One of the best OOB gear bays I have ever seen!! Looks fantastic with Metalizer Aluminium too!  You can see a few minor gaps on the underside. I suspect that has more to do with my ham-fistedness model building skills and less to do with Tamiya engineering!! For those of you wanting to know the answer, yes those are ejection pin marks near the landing gear mounts. I didn't notice until after the paint had gone on. No, I'm not going to bother fixing them. Yes, I am very lazy!!  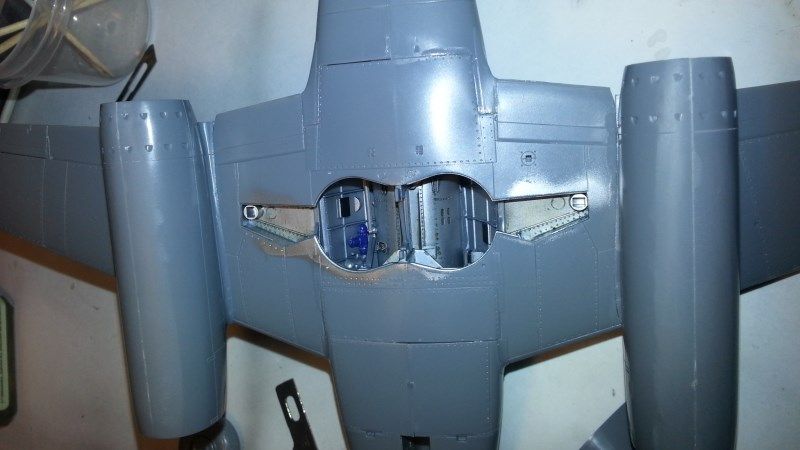 And this is where she sits as of today! Still got a little more cockpit work to do, and I need to mask up all the canopy glass before the painting begins. Little bit of filler there near the gun bay panel (Correction Fluid is a great filler for small gaps!). Once again, probably more a testament to my impatience and awesome model building skills, rather than defective Tamiya engineering. Plus, 'twas only a teensy gap anyways.... 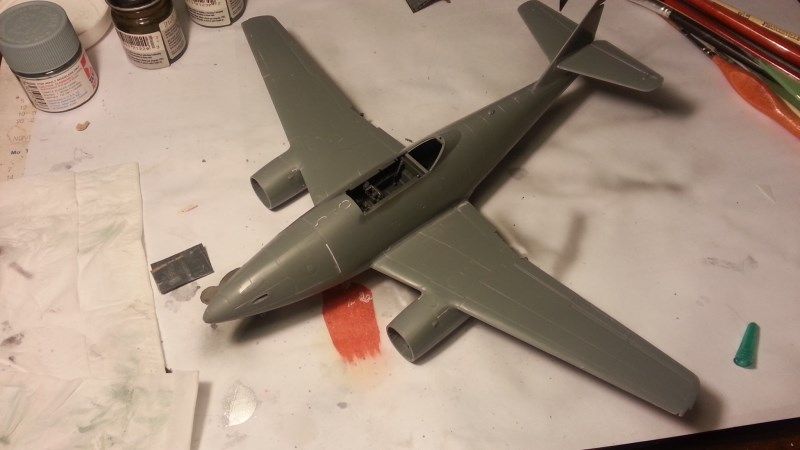 So there ya go folks! Not too bad for a couple of days work! Amazing what you can achieve when you don't have to go to work! I am liking this holiday between jobs thingy!!  Hopefully more to come soon, but enjoy! Cheers, Sam  P.S. Sorry folks. Don't seem to be able to get any images showing up in this post. It's telling me I moved or deleted the image. Apparently. Not sure why. Think it might be because PhotoBucket blows dead bears, but I can't be sure. Will try and fix it tomorrow, as it is after 1:30am at the moment and I really need to hit the sack. If anyone can tell me how to fix the whole dead bears thing that would be great. Stupid computers. P.P.S. As you can see, I fixed it! I had to paste the image address under the "BBCode" tab, not the "Visual" tab. Amazing what you can achieve with a freshly rested morning brain. Stupid computers. |
|
|
|
Post by fightnjoe on Mar 14, 2013 13:32:01 GMT -5
sam i thought i had responded to this one.
that is a decent kit. although when i did it the finished product was a ten foot model. did it oob a couple of years ago and just didnt do it justice. yours looks great. well done so far.
joe
|
|
|
|
Post by deafpanzer on Mar 14, 2013 13:42:13 GMT -5
Another 262 here at MSC?!?!? Why not! Always liked that jet. I like the American camo scheme but it sure will scare me to try it.  |
|
Deleted
Member since: January 1970
Posts: 0
Nov 26, 2024 17:17:54 GMT -5
Nov 26, 2024 17:17:54 GMT -5
|
Post by Deleted on Mar 14, 2013 14:17:32 GMT -5
Off to great start Sam  The kit looks a real gem compared to the Dragon nightmare I built a while ago  |
|
bish
Full Member
  
Member since: January 2013
Horatio Nelson 'I am a Norfolk man, and i glory in being so'
Posts: 555
Jan 13, 2013 8:57:43 GMT -5
Jan 13, 2013 8:57:43 GMT -5
|
Post by bish on Mar 14, 2013 14:27:37 GMT -5
Nice work there Sam. As for those ejection pin marks, i don't blame you. Given there location, i think i would do the same. In fact, i reckon i have in the past.
|
|
|
|
Post by wbill76 on Mar 14, 2013 19:26:22 GMT -5
That's looking pretty good from here, following along with interest.
|
|
|
|
Post by bbd468 on Mar 14, 2013 19:31:06 GMT -5
Hiya Sam! Great start on a sweet war bird....Bookmarked!  |
|
|
|
Post by Leon on Mar 14, 2013 19:37:34 GMT -5
Fine work Sam.Keep it coming.  |
|
venom1
Full Member
  
Member since: October 2012
Posts: 1,369
Oct 10, 2012 2:40:03 GMT -5
Oct 10, 2012 2:40:03 GMT -5
|
Post by venom1 on Mar 15, 2013 12:15:50 GMT -5
Joe- Thanks very much mate, I hope it continues to impress as I go! Andy- You can never have too many 262's I say!!  The American camo's are great, unfortunately they are different versions to the kit, so in this case I was restricted to either of the RAF versions. I have a few decal sheets of captured 262's, so I plan to do a few eventually, and at least one US version is on the cards.... Steve- Yeah I am in the process of building one of the Dragon ones at the mo (the 262 Mistel kit) and the Tammy kit is a much easier build!! Bish- Yeah, they would have been a bit of a mongrel to get to anyway, and me being the lazy bugger I am, well......  Bill- Bill- Glad to have you join the party mate!  Gary- Gary- Thanks mate, good to have you along! Hopefully there is more for you to look at soon! Leon- Thanks mate, will do my best!!  Geek- Geek- The Tammy kit is indeed streets ahead of the old Dragon kit, but having said that, as you said, the Dragon kit is not as bad as all that. Just needs more elbow grease than the Tamiya shake-and-bake! Don't envy you with that Italeri bird! I have build a couple of 1/48 jets from Italeri and they were (to put it bluntly) rubbish! The 1/48 Italeri F-22 nearly drove me round the bloody bend, and their F-14 was a pain in the arse as well! Its all a bit odd really, as their little 1/72 helos are bloody lovely, and their 1/72 WW2 stuff looks good too! Go figure.....  Hopefully I will have a little more for you all soon! Cheers, Sam 
|
|
|
|
Post by bullardino on Mar 16, 2013 3:29:12 GMT -5
Interesting build  And great start too  |
|
|
|
Post by TRM on Mar 16, 2013 5:32:28 GMT -5
A little late to the party Sam, but I made it! Nice job on this one!!! Lovely cluster and detail work in the well! Keep it coming!!
|
|
406 Silverado
Global Administrator     
Member since: November 2011
Posts: 10,245
Member is Online
MSC Staff
|
Post by 406 Silverado on Mar 16, 2013 9:43:25 GMT -5
Something about this plane that is sooo cool. Very nice work so far.
|
|
venom1
Full Member
  
Member since: October 2012
Posts: 1,369
Oct 10, 2012 2:40:03 GMT -5
Oct 10, 2012 2:40:03 GMT -5
|
Post by venom1 on Mar 16, 2013 10:26:59 GMT -5
Geek- Yeah, I'm with you on that one mate! I am at the stage now where I want to build a kit without a stack of pitfalls. Engineering with kits nowadays is such that I shouldn't have to accept rubbish build quality on a kit. For me the fun is in the painting and finishing, not lathering on buckets of filler and breaking out the orbital sander!!  T- T- Welcome to the party mate! Glad you like what you see, hopefully I will have some more for you too look at real soon!  Scratchmod- Scratchmod- Hey Boss, welcome to my little corner of the fun house! Yeah, always been a big fan of the 262, such a timeless design, so far ahead of it's time that it doesn't look out of place in the skies today! Glad you like what I've done so far, hopefully I will continue to impress!  Cheers, Sam 
|
|
multicam
Senior Member
   
Member since: January 2012
Nate
Posts: 2,039
Jan 10, 2012 14:35:41 GMT -5
Jan 10, 2012 14:35:41 GMT -5
|
Post by multicam on Mar 25, 2013 8:07:47 GMT -5
I don't spend enough time hear in the wingie section! This is sure to be great. Nice work so far, Sam.
|
|
Tojo72
Forum Moderator      Sept '24 Showcased Model Awarded
Member since: November 2012
Posts: 5,330
Member is Online
MSC Staff
|
Post by Tojo72 on May 6, 2013 9:02:54 GMT -5
great work so far,those Tamiya 262's are real nice kits.
|
|
|
|
Post by dupes on May 6, 2013 9:07:07 GMT -5
Niiice! Haven't seen the brit-captured markings before. Hey, if that sheet will mark another complete 262 when you're done (Yellow 5 if you're doing Yellow 17?), let me know - would be willing to buy/trade/whatever for one bird's worth.  |
|
bish
Full Member
  
Member since: January 2013
Horatio Nelson 'I am a Norfolk man, and i glory in being so'
Posts: 555
Jan 13, 2013 8:57:43 GMT -5
Jan 13, 2013 8:57:43 GMT -5
|
Post by bish on May 6, 2013 10:23:45 GMT -5
Hows this build coming along, surely you can't keep us waiting much longer.
|
|
venom1
Full Member
  
Member since: October 2012
Posts: 1,369
Oct 10, 2012 2:40:03 GMT -5
Oct 10, 2012 2:40:03 GMT -5
|
Post by venom1 on May 8, 2013 8:01:20 GMT -5
Multicam - Thanks very much mate, nice to have you on board! Tojo - Thanks mate, yes they are beautiful kits indeed! A virtually perfect fit with no filler required, gotta love it! Dupes - Thanks very much mate, yeah, I love all captured stuff on all sides, so I have known about the Brit 262's for many years. I am actually building Yellow 5! If you are still keen on 17 let me know, I will probably just send you the decals for 17 for nothing, as there really aren't that many. I would like to keep the rest of the sheet as I plan to do an American one at some stage but I am not sure which one I want to do yet. PM me and we'll discuss!  Bish Bish - Actually mate I have done quite a bit, I have just been up to my usual lazy standards when it comes to posting!!  My bird now has all the German markings on her and I have done a wash to dirty her up a bit. I am now at the stage where she needs a flat coat and then I am going to have my first crack at the oil dot weathering method before the "under new management" markings (RAF) go on! Thanks for lighting a fire under me Bish! I have the photos of my progress on my phone and computer, I just need to upload them to PB and then post them so y'all can see where I am at!!  I have been pretty busy lately but I will make an effort to post where I am at to catch you guys up. Watch this space!! Cheers, Sam 
|
|
|
|
Post by dupes on May 8, 2013 8:24:24 GMT -5
No problemo - either one is cool! PM inbound.
|
|
venom1
Full Member
  
Member since: October 2012
Posts: 1,369
Oct 10, 2012 2:40:03 GMT -5
Oct 10, 2012 2:40:03 GMT -5
|
Post by venom1 on May 10, 2013 12:27:01 GMT -5
Righto, time for a MAJOR update! This is more a testament to my inherent laziness with regards to posting rather than my building speed! Sorry folks, hopefully this will make amends.....  Okey-doke, where were we?.... Oh right, the paint! So anyway, all the major gluey bits are stuck together, just needed to fit the windscreen and rear canopy and get stuck into masking. I like to mask canopies with Bare Metal Foil. I find it less of a pain to work with than tape and gives a nice sharp edge. I then protected the cockpit with tape and then it was time for a bit of pre-shading. That left us here... 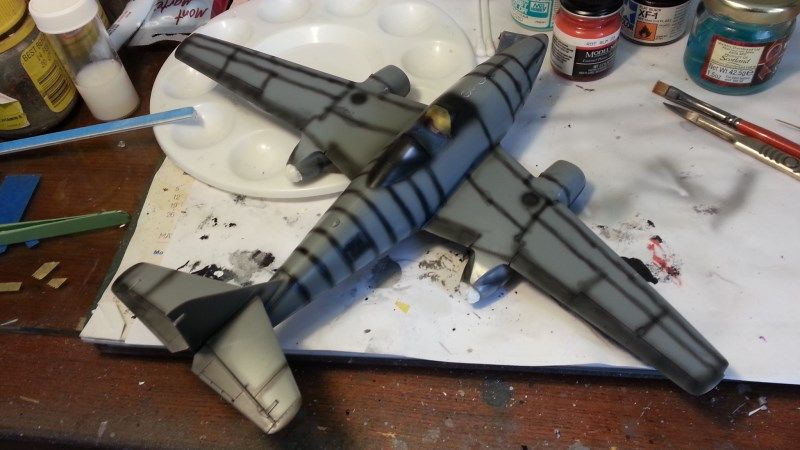 Undercarriage bays were stuffed with tissue and Maskol. Bit o' tissue in the back ends to stop the enginey bits gettin' paint on..... 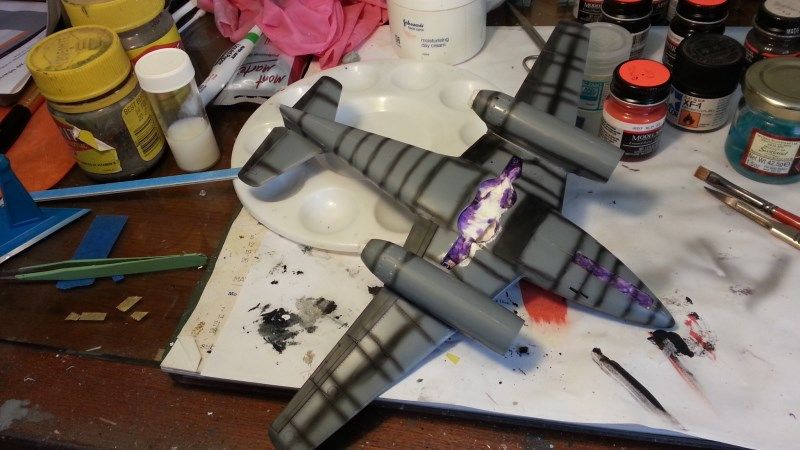 As you can see, I haven't bothered to prime. I usually don't. Y'know. The whole "lazy" thing. Ennyhoo! A bit of flat black in all the appropriate places and she's good for round two.  Next cab off the rank was some actual colour (not "color". Queens English folks!   ) in the form of RLM76 Lichtblau. The entire underside, engine pods, tail and most of the fuselage were done like this, layering it on bit by bit to achieve the required amount of "bleed through" from the black underneath. We are then left with this. 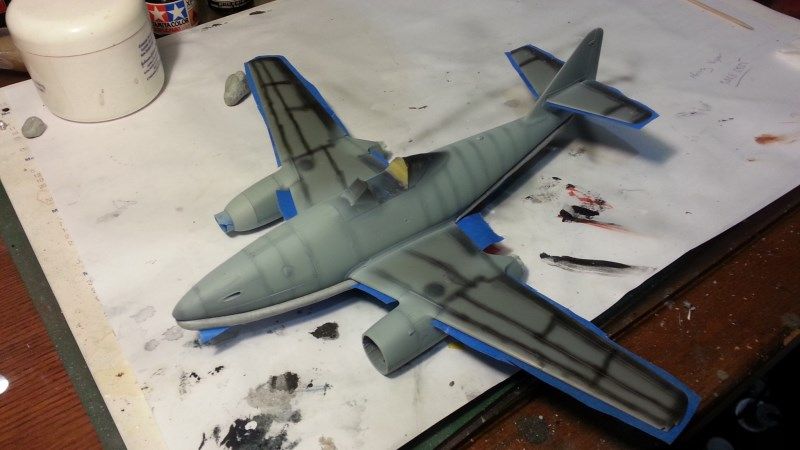 As you can see, masking is already done for the next round of colours. The underside of the wings has been masked off with painters tape, and Blu-Tac has been used to protect the belly. The mottling will come almost all the way down the fuselage sides so we don't want to create a sharp edge to stop the paint. Now the real fun begins!! Green! The fuselage was sprayed with a mottling of both RLM82 Dunkelgrun and RLM83 Lichtgrun, while the tops of the wings and horizontal stabilizers received a solid fill of RLM82. Hooray!!  Once the masking was removed we have this!! 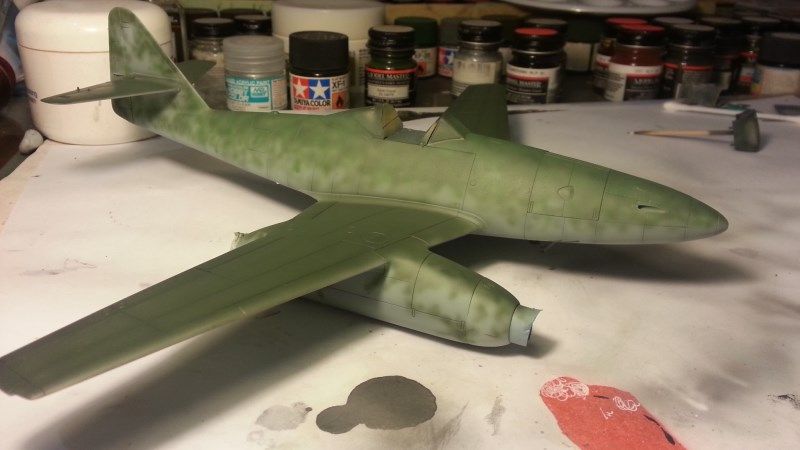 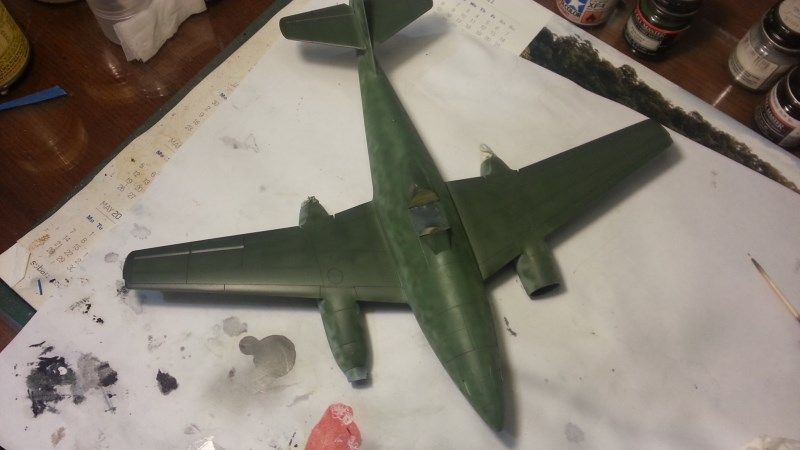 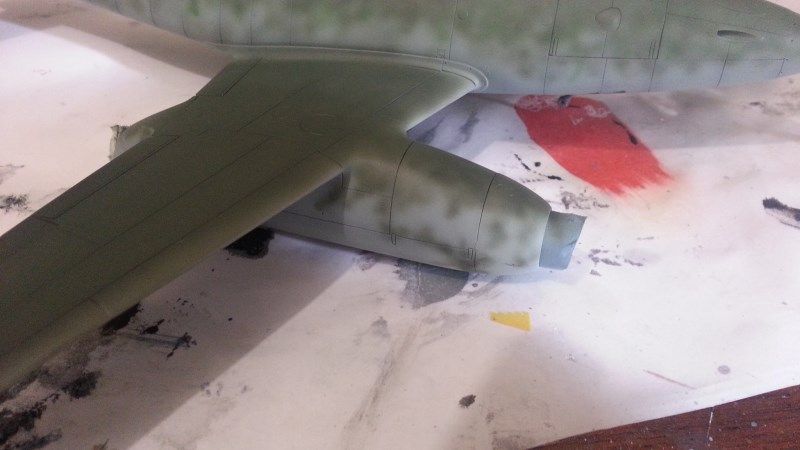 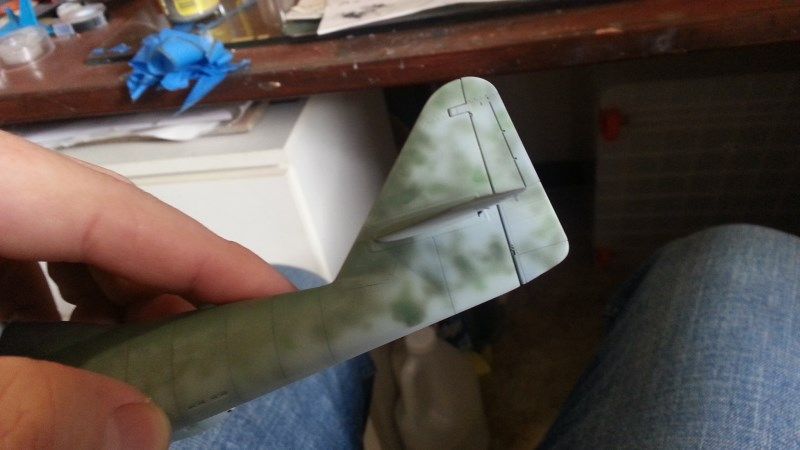 Not bad at all considering this is my first crack at a decent mottling paintjob. Hooray for me!  Apologies for some of the crappy pix, some of these were taken on my mobile. While most of the time they are brilliant, occasionally some of them are not so much! Now for something completely different. Wheels!  These are basically finished, except I will maybe give the hubs another coat of Future as they are still too flat. They need to be a semi-gloss. Apart from that, they are pretty much good to go! As this is part of an OOB group build, I will not be adding any brake lines... 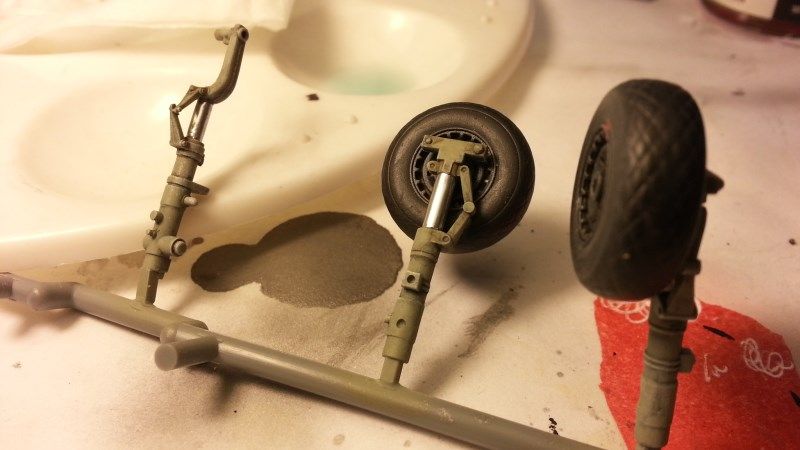 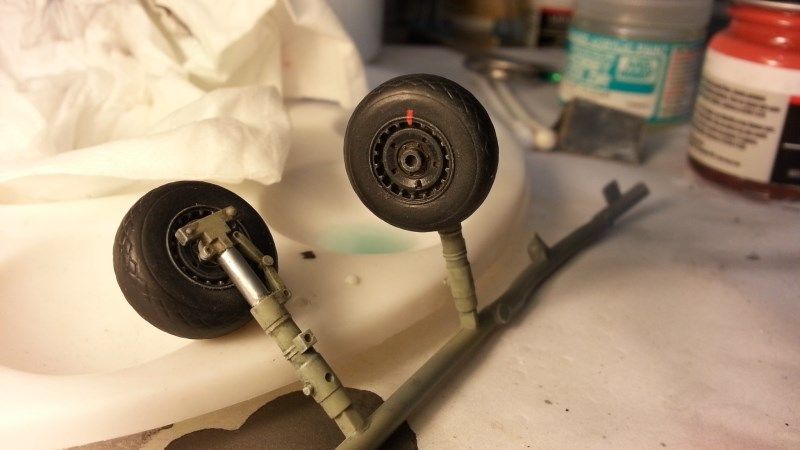 Right, back to wingy bits. Next up, she was masked up in preparation for the blue and red tail bands, and the repainted grey engine cowl. For this I used RLM24 Dunkelblau, RLM23 Rot and RLM63 Lichtgrau repectively. Oh, by-the-by, all paints are Model Master enamels unless noted otherwise. Love 'em!  She looka lika thisa! 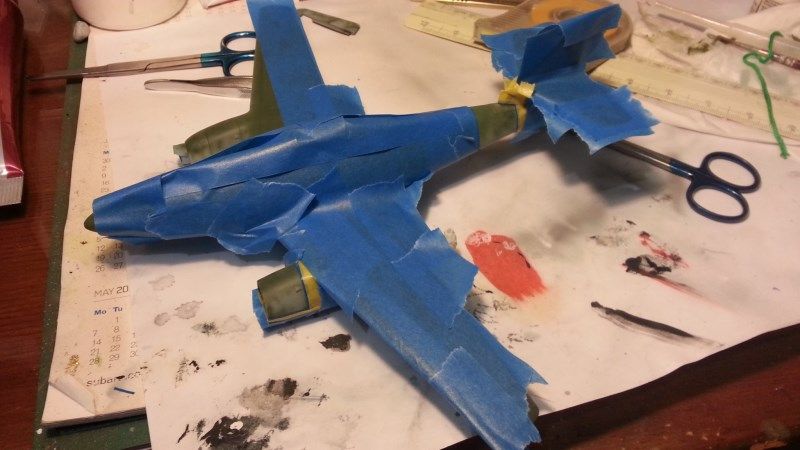 Nurse, please remove the bandages!..... Viola! 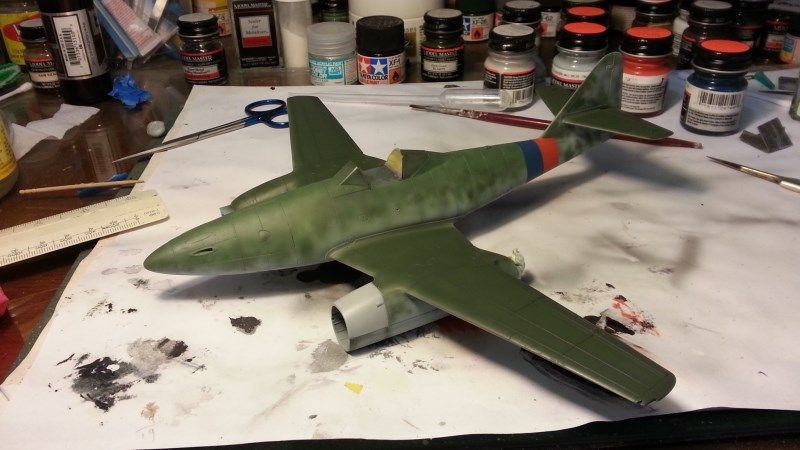 Next up, a coat or three of shiny (aka Future) in preparation for the decals. Brush painted of course.... 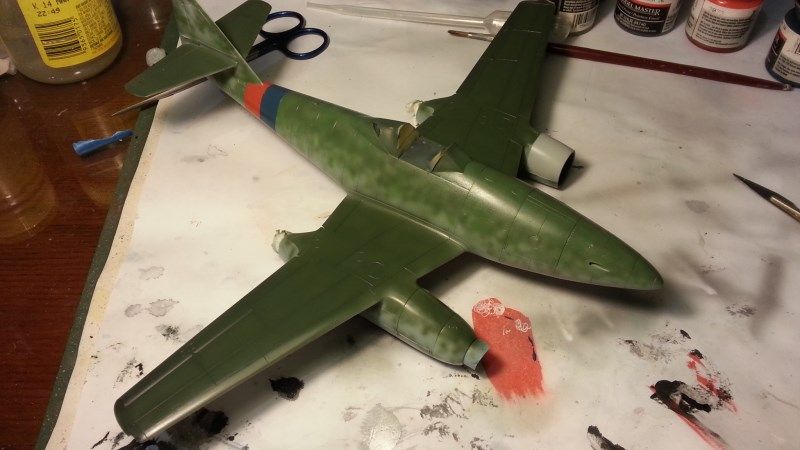 Next up, fun with decals.  To be honest, this is the first Cutting Edge decal set I have used, and I wasn't overly impressed. They took a lot of work to get them to settle into the panel lines, and the Balkenkruz on the underside of the wings, while being mostly ok, refused to settle into all of the rivet divots (heh-heh. Say that out loud a lot...). In the end I used the Tamiya Balkenkruz (big crosses for all you non-wingyists) and swastikas, which, despite being decidedly thick, settled in with that fabulous Tamiya style that we all know and love.  So, after much decalling fun, we wuz left wit dis... 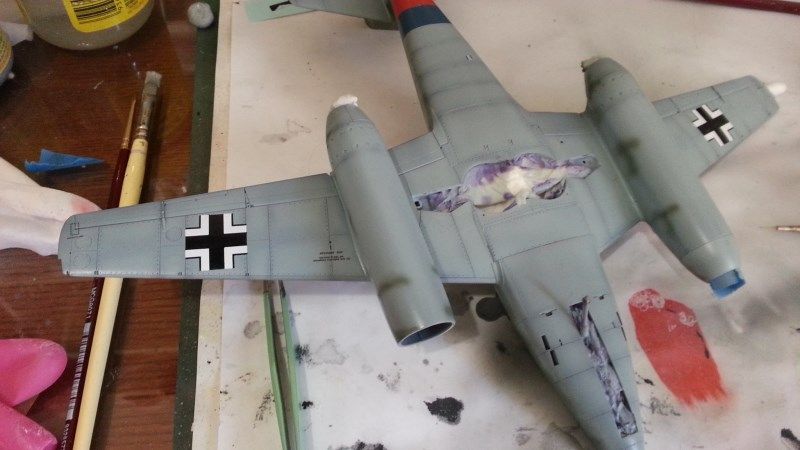 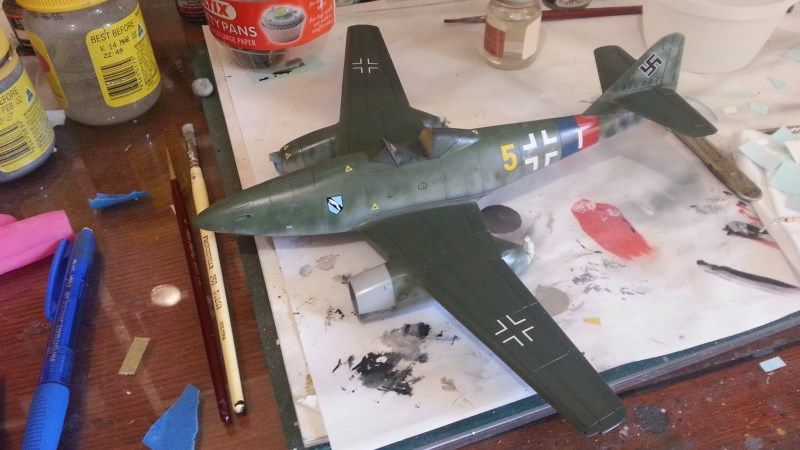 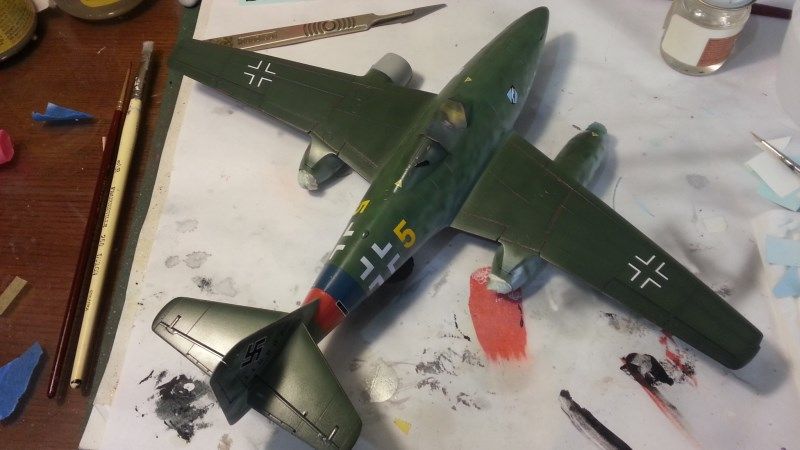 Oh, while I remember, if yer a fan o' the ol' 262, you really can't go passed these series of books for reference..... 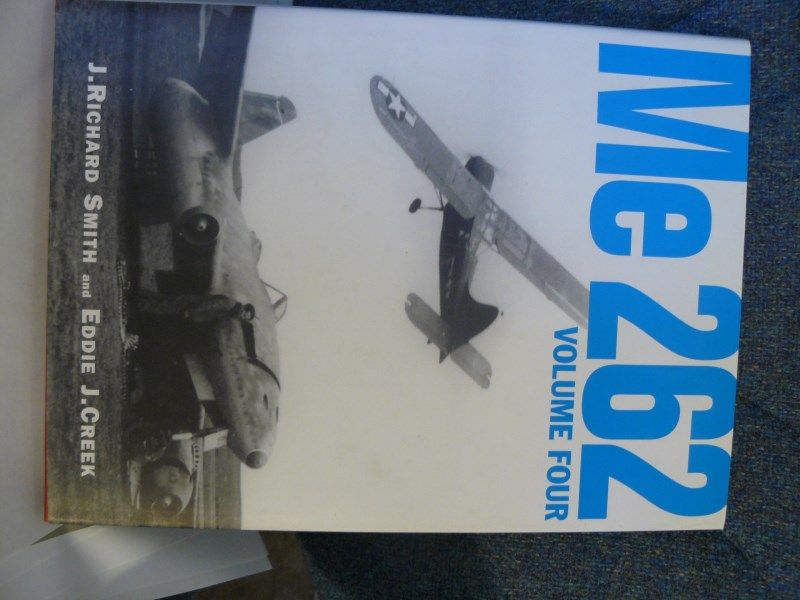 Simply magnificent! (sorry 'bout the sideways bit). I only have this particular volume at the mo, but they are, to put it simply, bloody brilliant. Loads of colour profiles, cutaways, photos, and detailed history. I picked up this volume as it has a lot of colour profiles and photos of captured birds in it. Hooray! Here is a profile of the bird I am doing before they applied the British stuff... 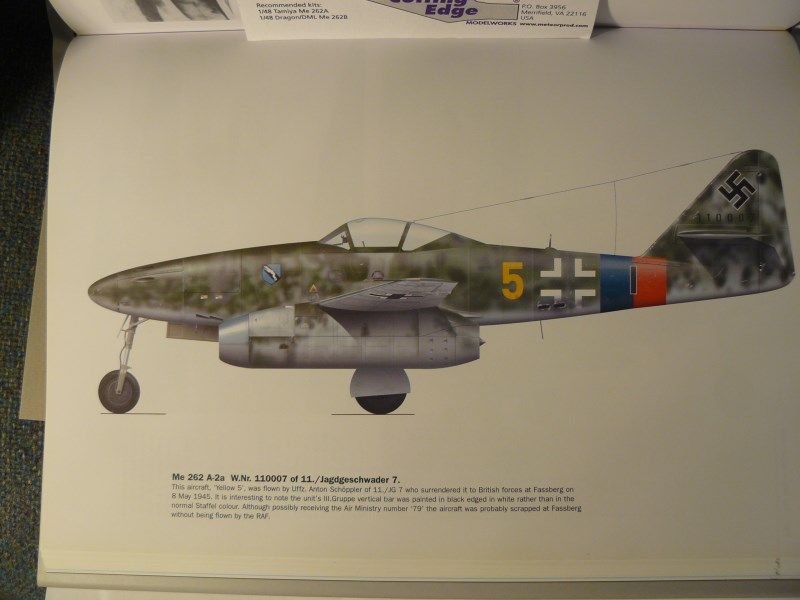 And here is the decal sheet beside it. As you can see, pretty much nailed it, grey cowling and all. Just a little hard to represent the complicated mottling with the limited printing process... 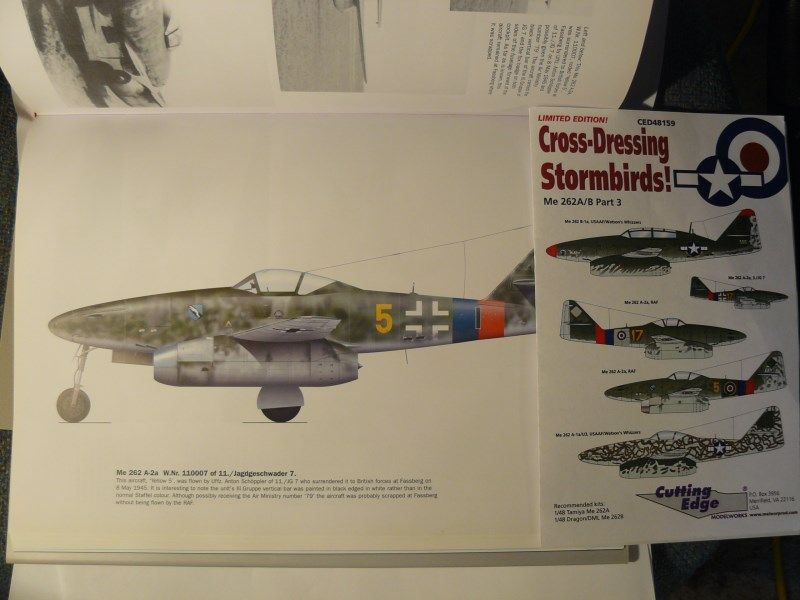 So, after a loooooong story (probably with Goldilocks and the Muffin Man in there somewhere!) we come to present day. After a Paynes Grey (not "Gray"... again, Queens English   ) panel line wash, followed by an acrylic flat coat, here be-eth she! 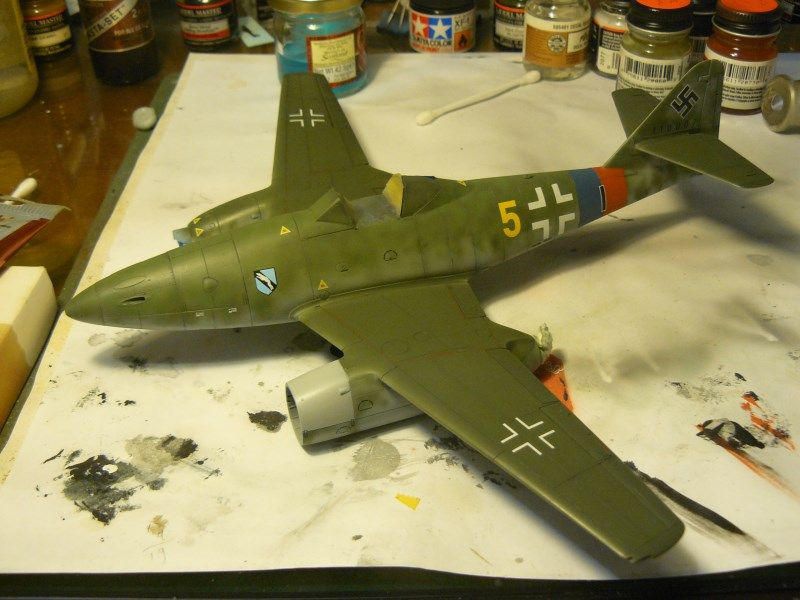 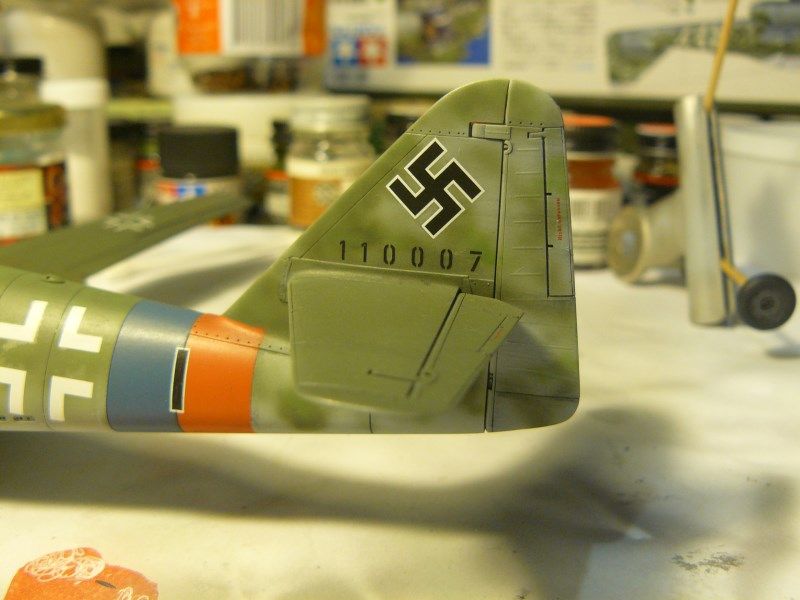 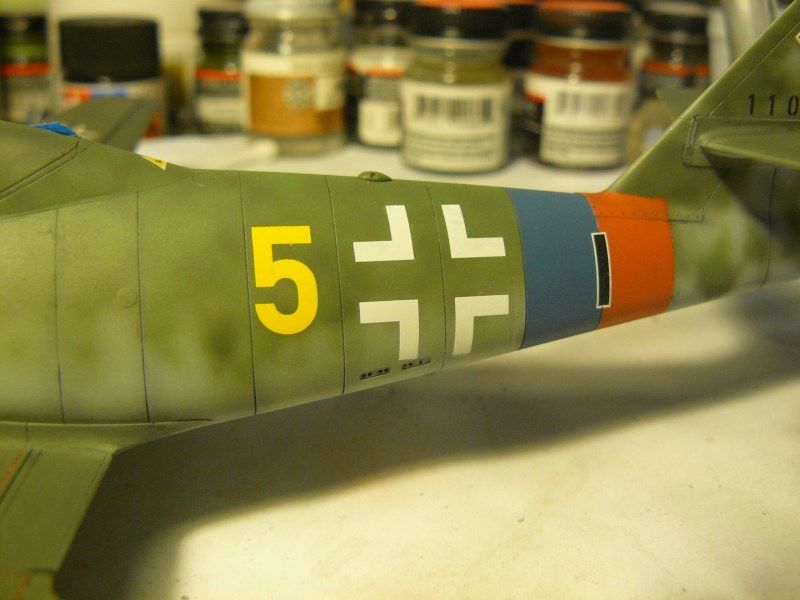 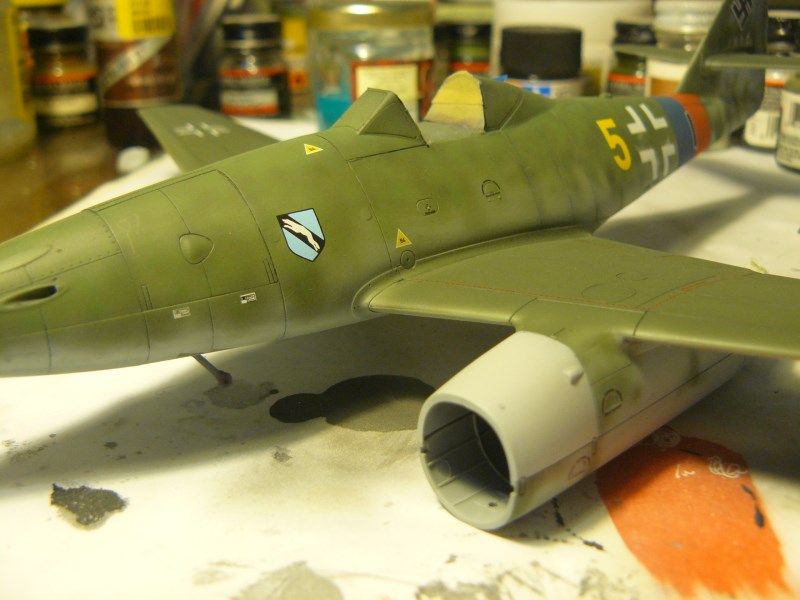 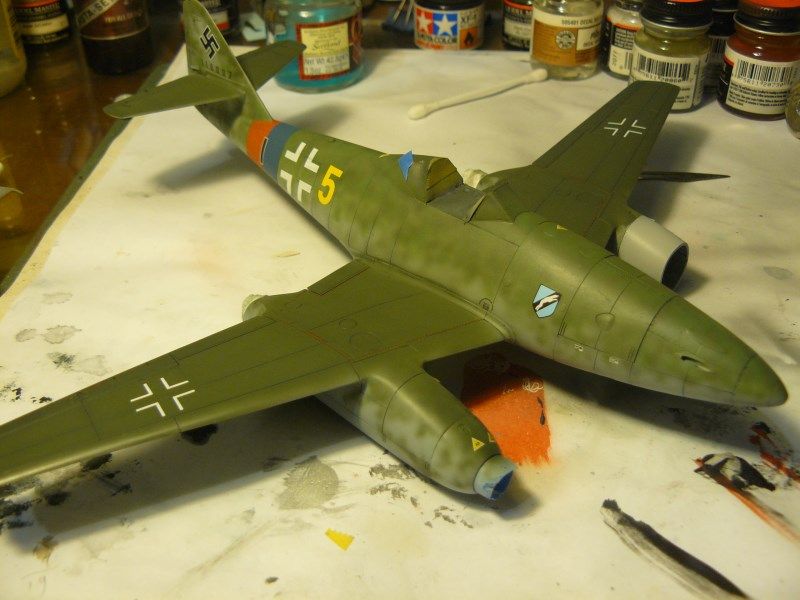 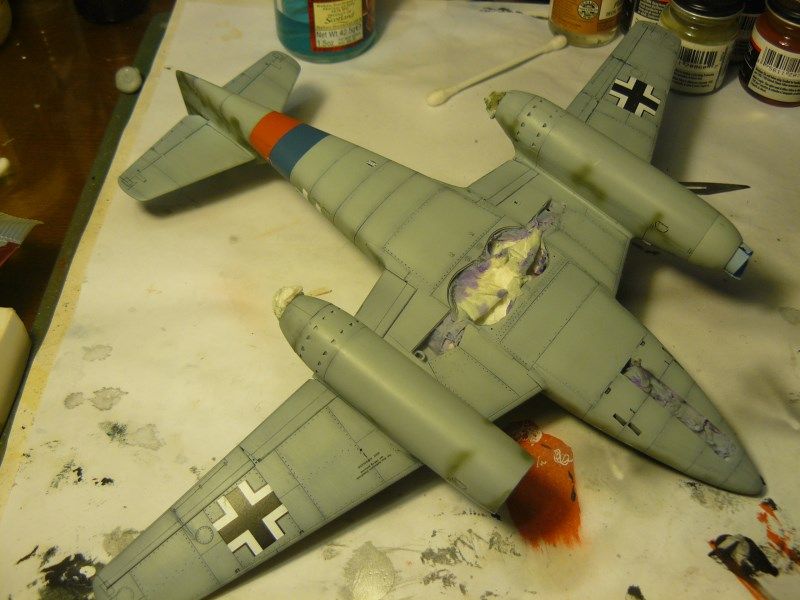 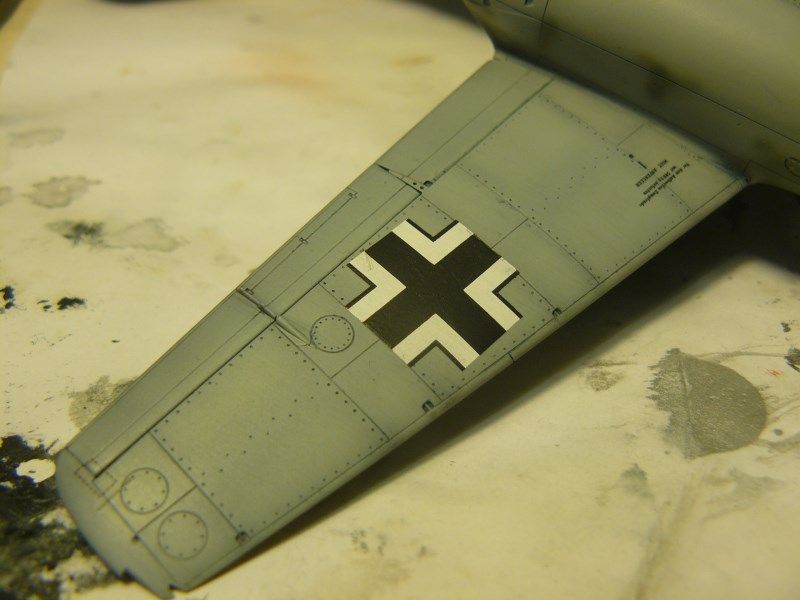 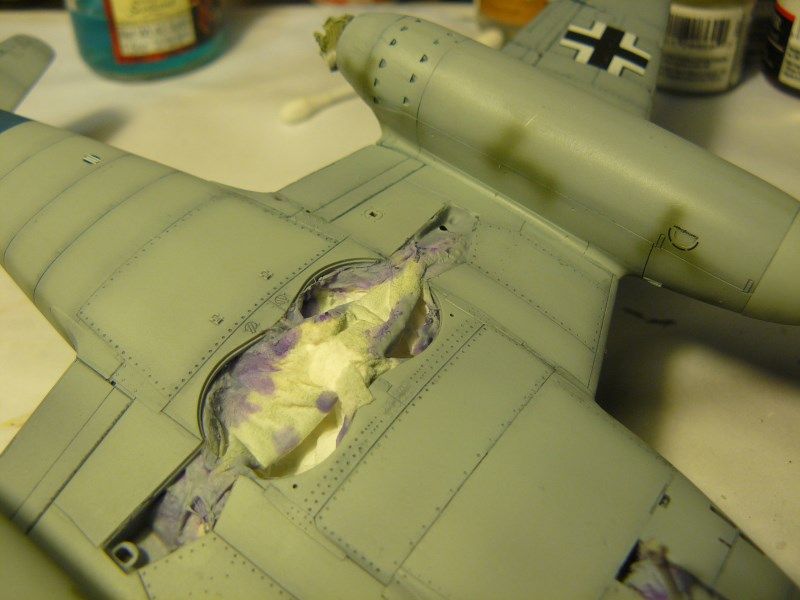 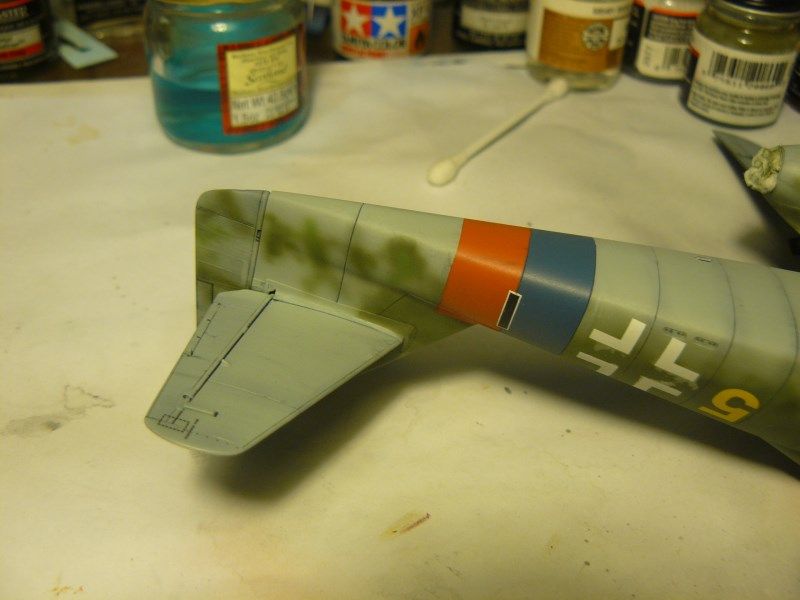 What's next? Why, thanks for asking! After being inspired by Jamie Haggo's blog, I will be having my first crack at the dot oil method for weathering. Time will tell how that turns out! Probably weather with some pastels and stuff as well. Once done, I will then paint over the Balkenkruz and swastikas (probably in a Dark RAF green) just enough for the markings to be visible through the paint, and then apply the British markings. Hopefully there will then be a distinct difference between the grotty old plane and the shiny new markings! Hopefully it will look good. Hopefully I shan't naff it up. Hopefully the magic model fairy is listening.... So there you go! Stay tuned true believers (must be getting late, I'm channeling Stan Lee....), for all is not done. Hopefully in the not too distant future, I will get off my lazy butt and post more updates whence they be done!! Later, alligators!! Cheers, Sam  |
|
|
|
Post by bbd468 on May 10, 2013 12:35:01 GMT -5
WOOOOHOOOOOO!!!!! Nice update Sam! That paint/camo job is top shelf dude.....just gorgeous!!!  |
|
|
|
Post by dupes on May 10, 2013 17:06:42 GMT -5
WOW, man - that looks GREAT! Paint work, decals, washes, everything. Think I'm going to steal your "Payne's Grey" wash color. Been using black or brown (or a mix) for years, but I think the grey (QE  ) looks more appropriate. |
|
bigjohn
Reviews member    
Member since: December 2011
John Hale
Posts: 3,438
Dec 21, 2011 2:17:45 GMT -5
Dec 21, 2011 2:17:45 GMT -5
|
Post by bigjohn on May 10, 2013 17:41:39 GMT -5
Sweet Sweet Sweet looking build man!
|
|
|
|
Post by fightnjoe on May 10, 2013 19:32:11 GMT -5
very sharp. excellent work on the paint job.
joe
|
|
|
|
Post by Leon on May 10, 2013 20:02:30 GMT -5
That is one bad a** ME Sam.You nailed this one.   |
|
|
|
Post by wbill76 on May 10, 2013 20:39:17 GMT -5
Now there's a big dose of progress! Love the paint work on the tail bands and cowling in particular. Markings look great as well, looking forward to the next round.
|
|
venom1
Full Member
  
Member since: October 2012
Posts: 1,369
Oct 10, 2012 2:40:03 GMT -5
Oct 10, 2012 2:40:03 GMT -5
|
Post by venom1 on May 10, 2013 22:09:02 GMT -5
Gary - Thanks mate, appreciate the kind words! Must say, I'm well chuffed with how she's come out thus far. Let's hope it continues!  Dupes Dupes - Thanks for the encouragement buddy! Yeah I reckon Paynes Grey is the bee's knee's. I find that a black panel wash is just too harsh, and any sort of brown panel wash makes my planes look like they've been covered in dirt at some stage!  A Paynes Grey gives a nice panel accent without looking like dirt, and by doing a series of light washes, you can build it up to just the right amount depending on the weariness of the aircraft. Feel free to copy!  BJ BJ - Thanks pal!  Joe Joe - Appreciate it Joe! I'm pretty happy with how the paint came out too!  Leon Leon - Wow, thanks mate! Hopefully that sentiment lasts to the end of the build!!  Bill Bill - Yeah thanks, I like it too. The cowling I think will look especially good once the unpainted intake goes on as well. I like the asymmetry of it all! The next round I should have some (hopefully successful!) oil weathering in place. Watch this space.......  Cheers, Sam 
|
|
|
|
Post by deafpanzer on May 12, 2013 20:15:50 GMT -5
Catching up here! Stunning paint job... dig the decals too!
|
|
venom1
Full Member
  
Member since: October 2012
Posts: 1,369
Oct 10, 2012 2:40:03 GMT -5
Oct 10, 2012 2:40:03 GMT -5
|
Post by venom1 on May 12, 2013 23:48:23 GMT -5
Thanks Andy! Yeah, I'm pretty stoked with it thus far, although there is a teensy bit of silvering on the fuselage Balkenkruz which is disappointing. Not too fussed though as it will be painted over (just enough to be visible underneath) which will eliminate the evidence! Before that though, I need to get the weathering done. Never done the oil dot method, so I am both apprehensive and excited at the same time. Weird feeling. As long as it turns to joy and not despair on completion I don't care!!  Gonna try and have a crack at it during the week, so hopefully will have something to show by the weekend!! Cheers, Sam  |
|
venom1
Full Member
  
Member since: October 2012
Posts: 1,369
Oct 10, 2012 2:40:03 GMT -5
Oct 10, 2012 2:40:03 GMT -5
|
Post by venom1 on May 13, 2013 0:04:41 GMT -5
Hey Geek, Great, thanks for the advice mate! I will definitely keep your advice at the front of my mind when I am starting! I assume I work the paint in localized circles rather than blending it in the airflow direction? I really appreciate any advice that comes my way, especially with stuff I've never done before! Between the advice I get here and Jamie's excellent blog, I am hoping I will be able to do a half decent job......  Cheers, Sam  |
|
 ). My model club kicked off a club group build last month called "Tamiya OOB". As the name suggests, we can build any Tammy kit in any scale, as long as it is OOB (with the exception of decals).


 You can see a few minor gaps on the underside. I suspect that has more to do with my ham-fistedness model building skills and less to do with Tamiya engineering!!


 ). My model club kicked off a club group build last month called "Tamiya OOB". As the name suggests, we can build any Tammy kit in any scale, as long as it is OOB (with the exception of decals).


 You can see a few minor gaps on the underside. I suspect that has more to do with my ham-fistedness model building skills and less to do with Tamiya engineering!!


