mz3
Full Member
   March '24 Showcased Build Awarded
Member since: October 2012
Posts: 651
Oct 14, 2012 21:09:43 GMT -5
Oct 14, 2012 21:09:43 GMT -5
|
Post by mz3 on Mar 24, 2013 18:02:12 GMT -5
Quick build, goes together really fast. Not a lot of parts. 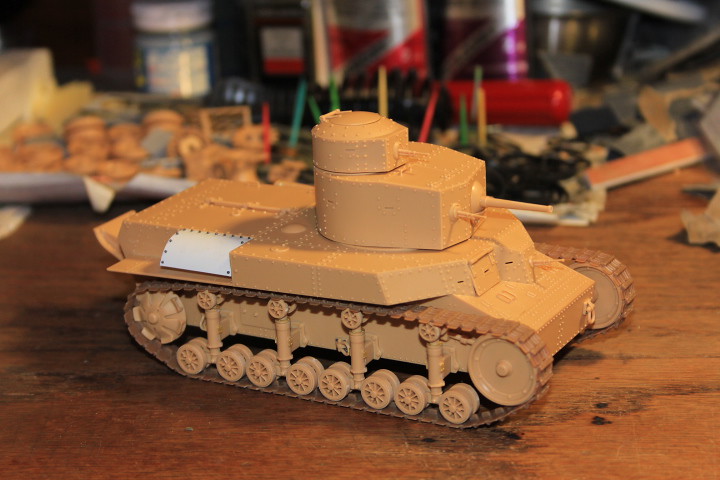 Took a few days building after work and in between steps on the Abrams in my other post. 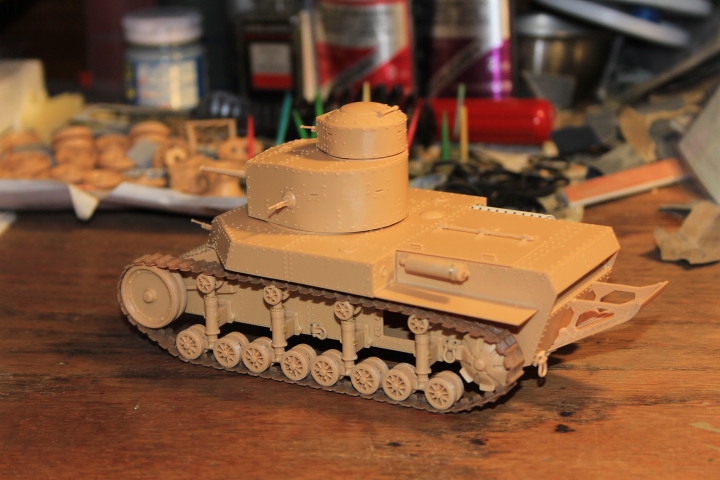 I scratch built the air intake, not sure if it's right, could only find one pic online and measurements on a review for the kit. 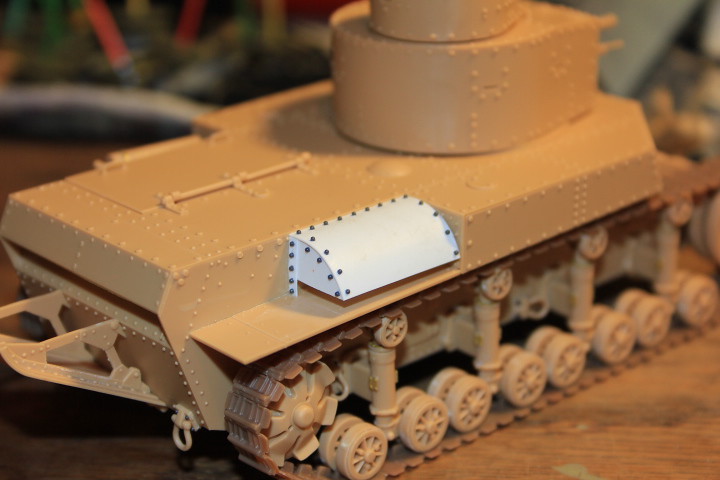 Looks good enough for me. Paint will be simple faded green, nothing special. |
|
|
|
Post by Leon on Mar 24, 2013 18:23:29 GMT -5
Nice work mz3.  |
|
sfcmikej
Full Member
  
Member since: December 2012
Peace through superior firepower.
Posts: 153
Dec 4, 2012 10:00:36 GMT -5
Dec 4, 2012 10:00:36 GMT -5
|
Post by sfcmikej on Mar 24, 2013 19:30:40 GMT -5
Looking good MZ. I love the interwar year armor.
Mike
|
|
|
|
Post by deafpanzer on Mar 24, 2013 20:46:21 GMT -5
Great start... nice work on the air intake!!!
|
|
danb.
Reviews member     March 2013 MoM Winner
Member since: November 2011
Posts: 2,808
Nov 17, 2011 9:22:52 GMT -5
Nov 17, 2011 9:22:52 GMT -5
|
Post by danb. on Mar 25, 2013 2:21:41 GMT -5
Great work nice to see another early tank cant wait for the paint  Dan B |
|
|
|
Post by bullardino on Mar 25, 2013 2:53:19 GMT -5
Very nice  |
|
|
|
Post by wbill76 on Mar 26, 2013 20:31:00 GMT -5
Got to love these pre-war designs. Looking forward to seeing it with paint on!
|
|
|
|
Post by TRM on Mar 26, 2013 20:40:38 GMT -5
Nice work on this!!! Time for a little "Prime-time" I think!!!
|
|
|
|
Post by Teabone on Mar 27, 2013 12:56:50 GMT -5
"Looks good enough for me." Paint will ................
That is my motto for all my builds I never stress over the fine points. Nice looking build.
|
|
mz3
Full Member
   March '24 Showcased Build Awarded
Member since: October 2012
Posts: 651
Oct 14, 2012 21:09:43 GMT -5
Oct 14, 2012 21:09:43 GMT -5
|
Post by mz3 on Mar 29, 2013 19:31:00 GMT -5
Grrr... 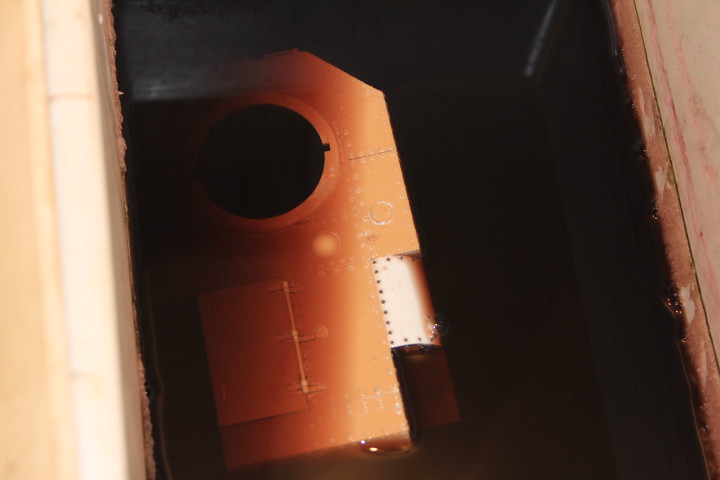 I had to strip the primer off. I tried to use Vallejo white primer, but it didn't work at all. It was scratching off too easy. Not sure why. I wanted to have it painted with at least a base coat by now.  |
|
|
|
Post by Leon on Mar 29, 2013 19:46:02 GMT -5
MZ hope the next round goes better.  |
|
mz3
Full Member
   March '24 Showcased Build Awarded
Member since: October 2012
Posts: 651
Oct 14, 2012 21:09:43 GMT -5
Oct 14, 2012 21:09:43 GMT -5
|
Post by mz3 on Mar 29, 2013 20:11:44 GMT -5
Thanks, I'm going to use my normal black automotive primer. Anywhere the Vallejo is sticking I will try to use as the base for rust and dirt. I hope.
|
|
mz3
Full Member
   March '24 Showcased Build Awarded
Member since: October 2012
Posts: 651
Oct 14, 2012 21:09:43 GMT -5
Oct 14, 2012 21:09:43 GMT -5
|
Post by mz3 on Apr 7, 2013 13:44:47 GMT -5
Primer, round 2, FIGHT!!!! Alright, some of the old primer didn't come off- 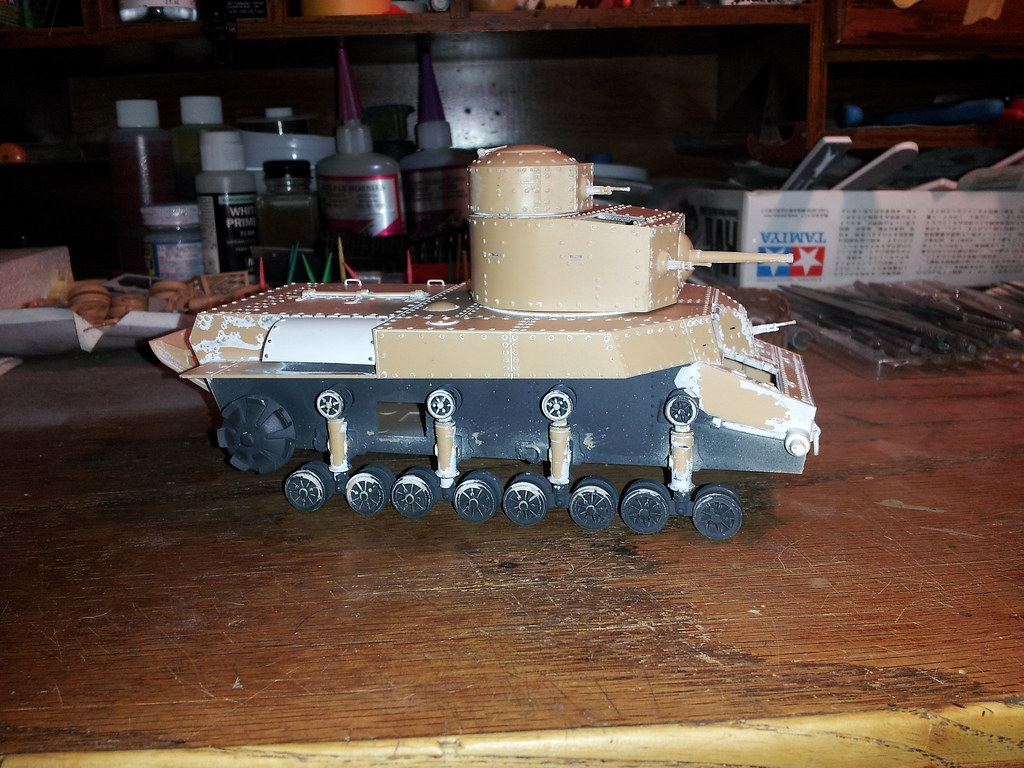 So, there is something I've wanted to try for a while and this is the prefect time to do it. I went ahead and sprayed the black auto primer over the whole thing. What I'm hoping for is the look of rust under paint. Where the paint starts to bubble because of the rust under it. 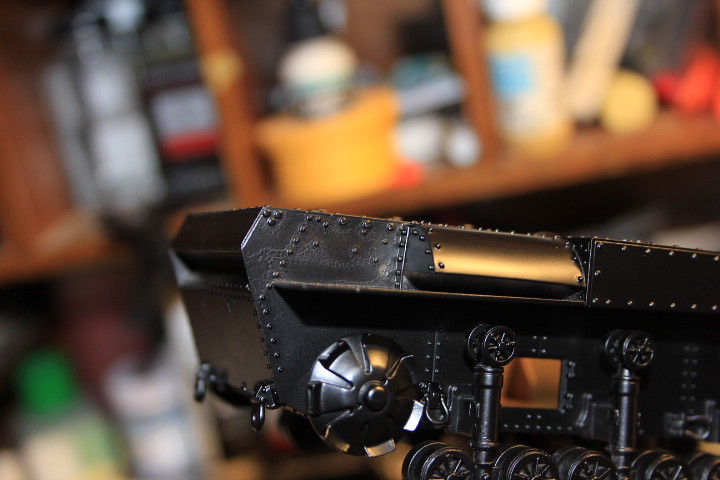 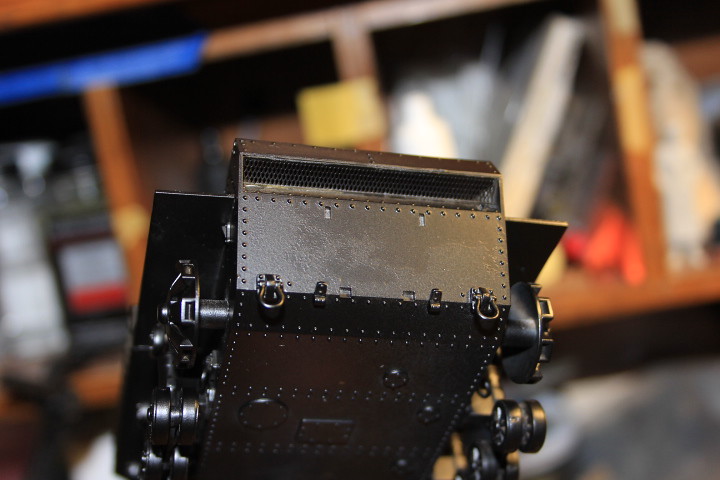 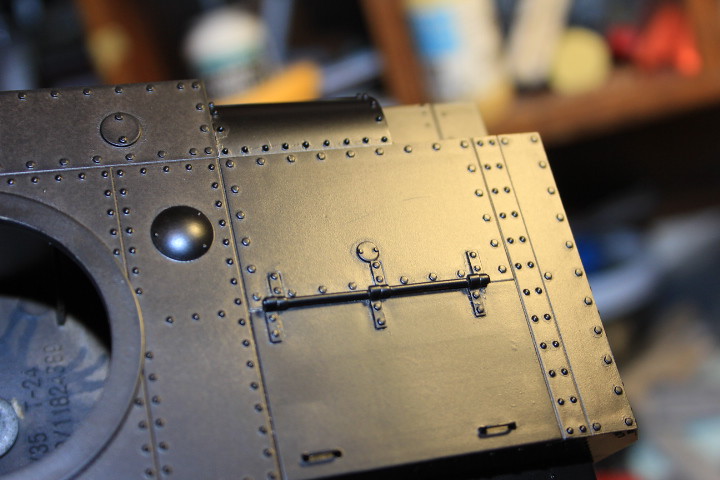 I'm thinking after the base coat, some oils and pigment will get it to look the way I want. I also lost about half of the PE parts on the suspension, nothing major, I'll just cover the areas with a little more mud/dirt then I usually use. Paint goes on later today. Hopefully. |
|
|
|
Post by Leon on Apr 7, 2013 13:50:32 GMT -5
Round 2 is looking good.Great idea on the paint bubbling cause of the rust.  |
|
|
|
Post by deafpanzer on Apr 7, 2013 20:09:17 GMT -5
I have to say it is starting to look realistic now with the bubbles! Great work there...
|
|
paulh.
Senior Member
   
Member since: November 2011
build, fail, learn, succeed - ENJOY
Posts: 2,389
Nov 15, 2011 15:54:51 GMT -5
Nov 15, 2011 15:54:51 GMT -5
|
Post by paulh. on Apr 8, 2013 13:20:15 GMT -5
nice job MZ!
|
|
|
|
Post by wbill76 on Apr 8, 2013 20:10:36 GMT -5
Sounds like a good plan MZ, nice to see this one moving forward again.
|
|
|
|
Post by TRM on Apr 8, 2013 20:39:37 GMT -5
Nice base coat!! Moving forward to the fun stuff soon!!!
|
|
mz3
Full Member
   March '24 Showcased Build Awarded
Member since: October 2012
Posts: 651
Oct 14, 2012 21:09:43 GMT -5
Oct 14, 2012 21:09:43 GMT -5
|
Post by mz3 on Apr 8, 2013 20:52:05 GMT -5
Thanks guys. Paint went on nice with no problems. The bubbled paint may not happen. As I was painting all the areas where the primer was stuck, they kinda faded away. I might be able to get a couple of them to come out. Anyways, green green green!!! 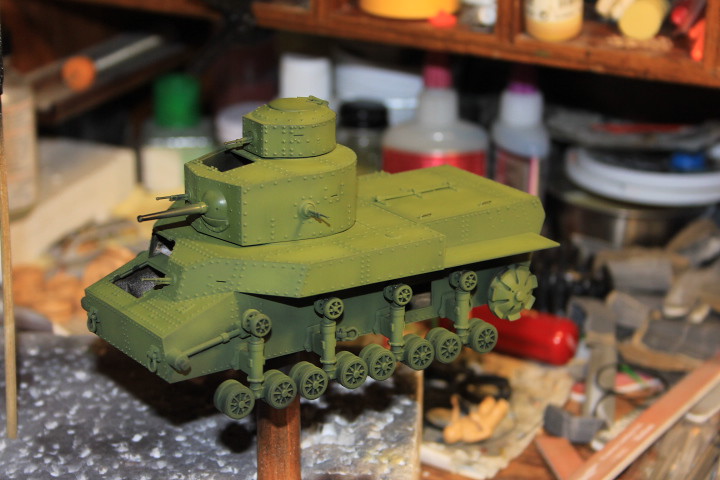 I used Tamiya Olive green and yellow green mixed at different ratios. It's faded, the flash is making it look like it's not. I also sprayed Vallejo Satin mixed 50/50 with tap water on everything to protect the paint. Now for the fun part- 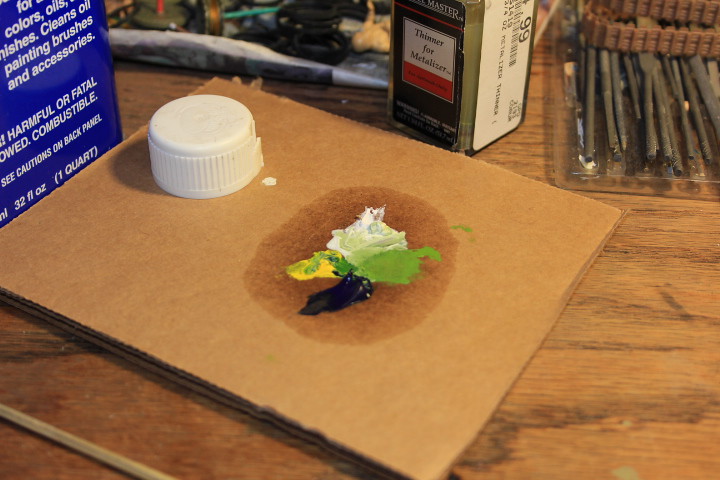 I use oils to do paint chips. Usually I only do a dark brown color, but this time I am using a green first. The color is slightly varied. I put the oils on the cardboard last night to soak out some of the oil. Then with a sponge, I start chipping. 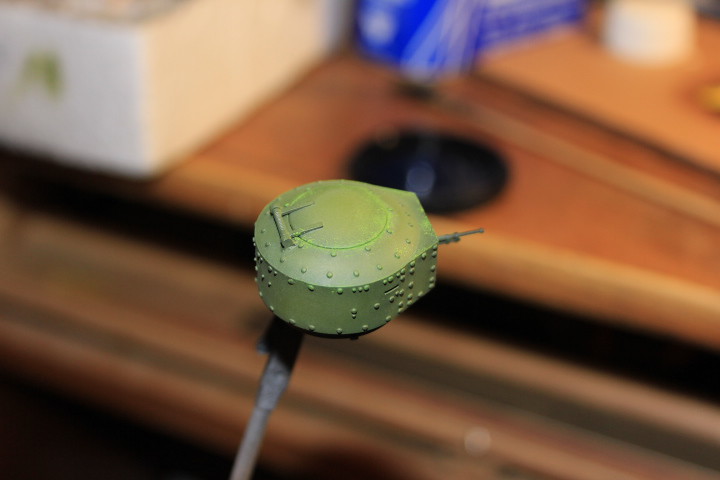 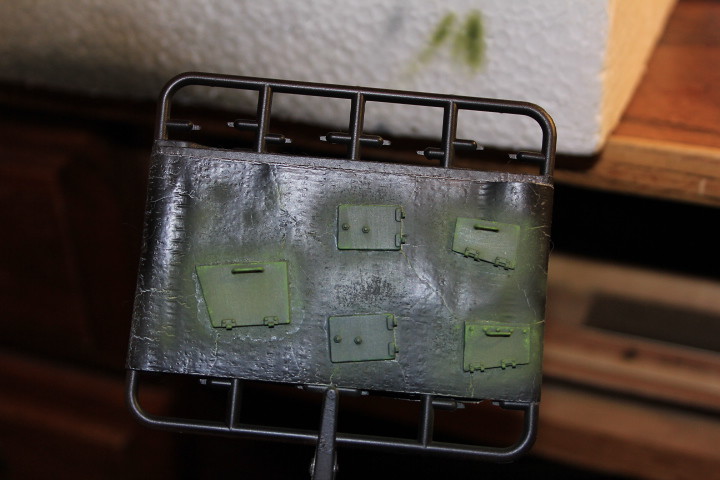 Then I soak everything with odorless mineral spirits, blending and removing here and there.  I'll let this sit for a day or 2 before I start with the dark brown chips. I've found chipping with oils is a lot easier then using enamel or acrylic. |
|
|
|
Post by wbill76 on Apr 10, 2013 20:17:57 GMT -5
Nice start to the chipping! Man what a weird little design this vehicle had...didn't realize until your latest set of photos that it had another MG turret on top plus MGs sticking out the sides of the turret.
|
|
ironhand6
Full Member
  
Member since: March 2013
Posts: 280 
|
Post by ironhand6 on Apr 10, 2013 23:00:02 GMT -5
good save,i hate when a paint/primer goes on badly.im curious on how you use oils for chipping so im keeping an eye on this build.
|
|
|
|
Post by bullardino on Apr 11, 2013 1:13:46 GMT -5
Nice job. Interesting technique for chipping, I'll definitely try it in the future  |
|
|
|
Post by Leon on Apr 11, 2013 4:45:56 GMT -5
Coming a long nicely MZ.I am also interested on how you did the chipping with oils.  |
|
mz3
Full Member
   March '24 Showcased Build Awarded
Member since: October 2012
Posts: 651
Oct 14, 2012 21:09:43 GMT -5
Oct 14, 2012 21:09:43 GMT -5
|
Post by mz3 on Apr 11, 2013 19:39:32 GMT -5
Nice start to the chipping! Man what a weird little design this vehicle had...didn't realize until your latest set of photos that it had another MG turret on top plus MGs sticking out the sides of the turret. I think that's the main reason I like this one so much. At times it seems like there are guns everywhere on this thing. Chipping with oils paints is pretty much the same as using any other paint and sponges, except you have more time to get the chips to look the way you want them to. Also, I posted that I use Odorless Mineral Spirits above, I actually use Odorless Turpenoid. Sometimes I do use OMS, but it's very rare. The OT takes a little longer to dry, but that gives you a good amount of time to work the chips. I also will run the OT through my airbrush in some areas to move/work the chips for more randomness. I haven't taken pics yet, but I filled in most of the green chips with Raw Sienna. I'm thinking about doing a few more with a different green and Burnt Sienna, to get more rustyish colors. Also using oils, if you don't like the chips, it's very easy to completely remove them without damaging the basecoat. If you use acrylics, which I think most people do. |
|
ironhand6
Full Member
  
Member since: March 2013
Posts: 280 
|
Post by ironhand6 on Apr 11, 2013 23:07:47 GMT -5
interesting. i will definately try oils on my t34. could you show me the sponge you use please? ive never understood what to use here.
|
|
mz3
Full Member
   March '24 Showcased Build Awarded
Member since: October 2012
Posts: 651
Oct 14, 2012 21:09:43 GMT -5
Oct 14, 2012 21:09:43 GMT -5
|
Post by mz3 on Apr 12, 2013 21:25:24 GMT -5
These are the sponges I use... 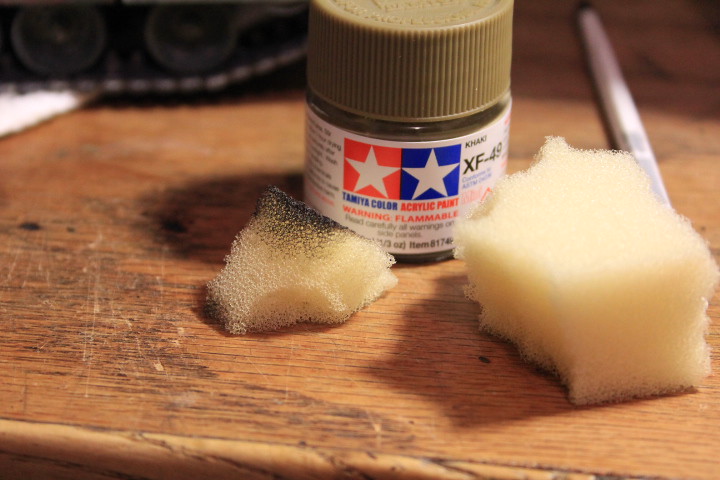 I think a more proper term would be foam. I've gotten it from a number of places. Electronic boxes, appliances at work. I used a real sponge years ago and it sucked. Here are some pics with Raw Sienna chips... I thought this looked really nice until I realized that most of it will be covered by the wheel... 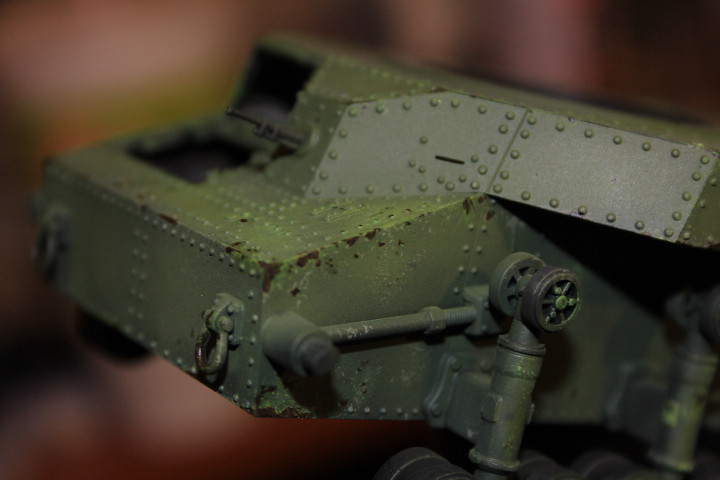 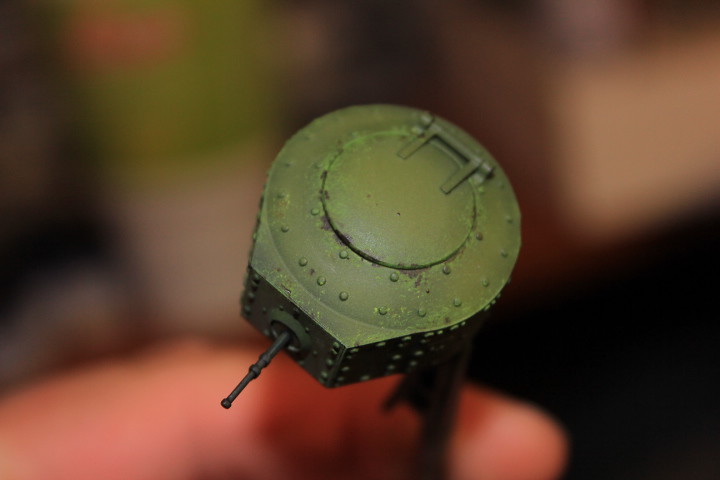 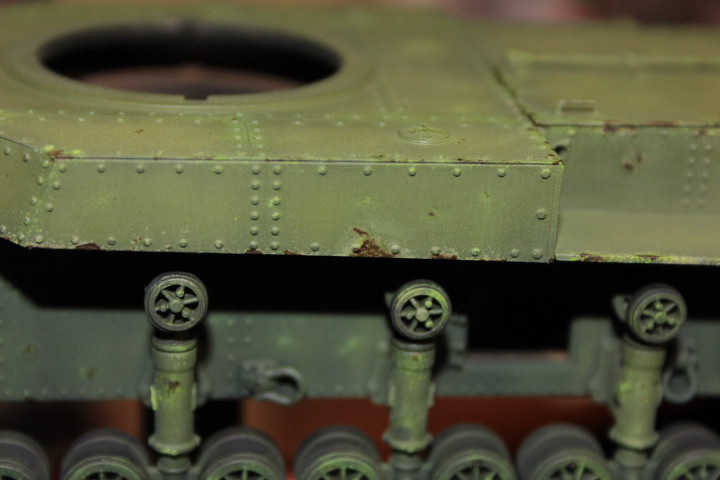 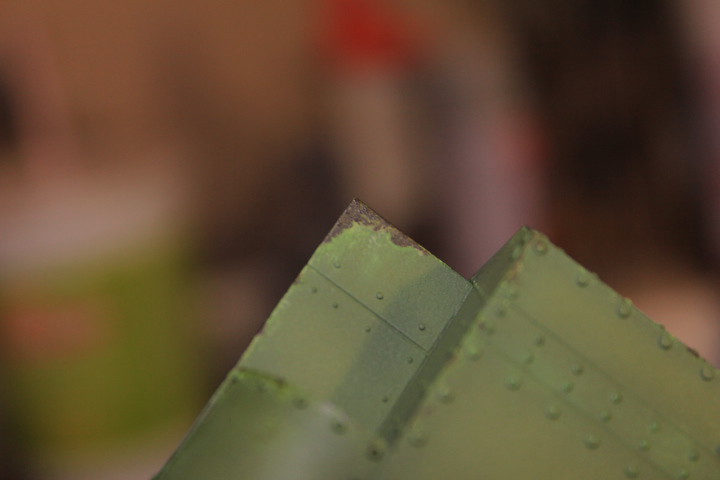 I used a brush to fill the green chips in. Then hit them all with the OT. More to come... |
|
|
|
Post by bbd468 on Apr 12, 2013 22:41:07 GMT -5
Thats a cool little tank there MZ3. Ive not seen one built before. Looks great...luv tha chipping too.  Gary |
|
|
|
Post by bullardino on Apr 13, 2013 3:53:04 GMT -5
Great chipping  |
|
|
|
Post by deafpanzer on Apr 13, 2013 19:14:51 GMT -5
Excellent chipping work there!
|
|
Deleted
Member since: January 1970
Posts: 0
Nov 27, 2024 23:45:03 GMT -5
Nov 27, 2024 23:45:03 GMT -5
|
Post by Deleted on Apr 13, 2013 19:31:34 GMT -5
This is looking sweet.
G
|
|