|
|
Post by wbill76 on Apr 14, 2013 20:34:19 GMT -5
Ditto to the gang's comments, making good progress on beating this one up. I feel for you about working on an area, feeling very satisfied with the result, then realizing it's going to be hidden away! But at least you know it's there.  |
|
|
|
Post by Teabone on Apr 18, 2013 23:09:24 GMT -5
Got onto this a little late which seems to be my M.O. so often. Like the kit and the improvements you have made. When I got to the primer part I thought I would throw in "what I do" which may not be what most builders do for primer. Depending on the color of the styrene I may not prime at all but if I do I use rattle cans of RustOleum for duck boats. They have a series of colors to paint your duck boat comoufalge. I also use their red primer for some things. It cover better that anything else dries quickly and the cost is not bad. I on occasion use their flat white for interiors though it is not quite as easy for those small interior details where the airbrush is best. Bones
www.rustoleum.com/CBGProduct.asp?pid=124
|
|
paulh.
Senior Member
   
Member since: November 2011
build, fail, learn, succeed - ENJOY
Posts: 2,389
Nov 15, 2011 15:54:51 GMT -5
Nov 15, 2011 15:54:51 GMT -5
|
Post by paulh. on Apr 21, 2013 14:20:44 GMT -5
Nice job with oils- never considered that as an option.Might just give it a go.
P
|
|
|
|
Post by rbaer on Apr 22, 2013 16:29:12 GMT -5
I like the chips. And thinking about it, around the running gear is a perfect place for chips, since the tracks throw a LOT of junk around....
|
|
multicam
Senior Member
   
Member since: January 2012
Nate
Posts: 2,039
Jan 10, 2012 14:35:41 GMT -5
Jan 10, 2012 14:35:41 GMT -5
|
Post by multicam on Apr 28, 2013 10:29:46 GMT -5
Looks very good. I love the rust chips on the bottom of the "fenders". Nice work so far:)
|
|
|
|
Post by Teabone on Apr 28, 2013 20:54:31 GMT -5
An interesting vehicle, the basis for the Komintern Tractor which fought bravely with about 800 surviving the Great Patriotic War so it must have had some good mechanical features. I want to do one of those Tractors some future day.
Bones
|
|
mz3
Full Member
   March '24 Showcased Build Awarded
Member since: October 2012
Posts: 651
Oct 14, 2012 21:09:43 GMT -5
Oct 14, 2012 21:09:43 GMT -5
|
Post by mz3 on Apr 29, 2013 13:28:30 GMT -5
Bones- Usually I use a black, self etching automotive primer from a can. It goes on really thin and dries in less then 10 minutes. The only parts I've found to have problems with it is on some Dragon PE. Other then that I love it. This time I just wanted to try something different. Didn't work, so I went back to the old primer. The main reason I even use primer is to check for mistakes/missed things before I paint. The auto primer also can be removed fairly easy and works great for pre-shading with the way I usually paint. There are times when I don't use primer, but it's pretty rare. Some pics- First off, I want to say that I am a dumbass! I went all the way through stripping, cleaning, priming, repainting, fading, chipping, rusting and assembling before I realized one of the hatches was missing. It took hours to find it, luckily it was safely tucked away in the VERY LAST PLACE I LOOKED, under a paper towel I set my tools on. So here is the whole process of painting on this model... Black self etching primer that I forgot to take a picture of, no big loss... 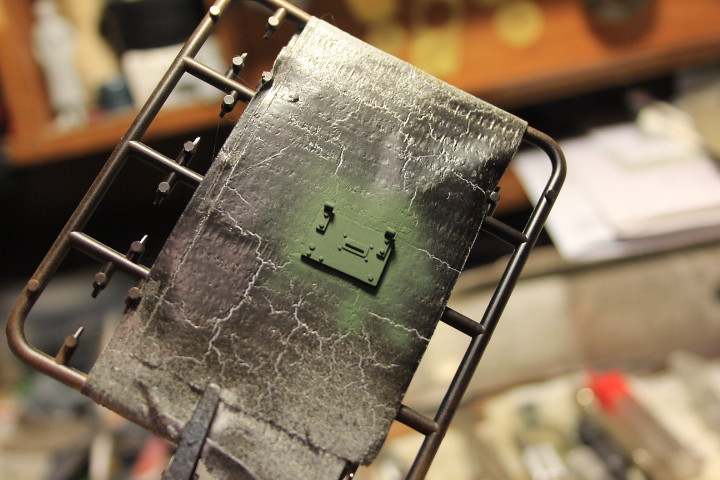 Basecoat Tamiya Olive Green XF-58 mixed 50-50 with lacquer thinner. 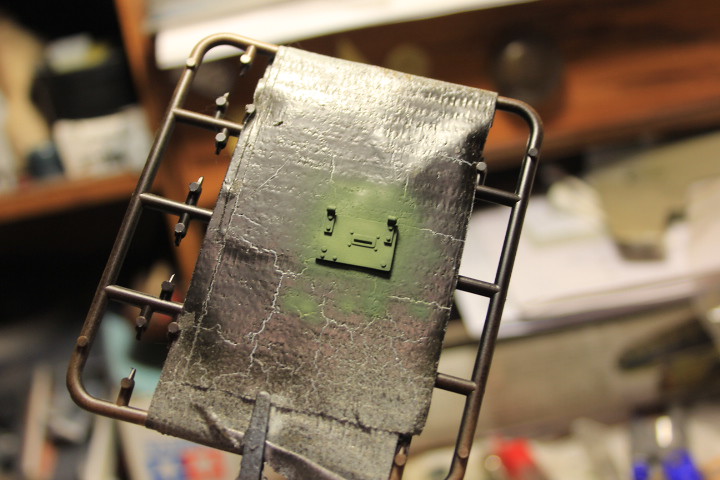 Fading with Tamiya Yellow Green XF-4 mixed into the Olive Green. 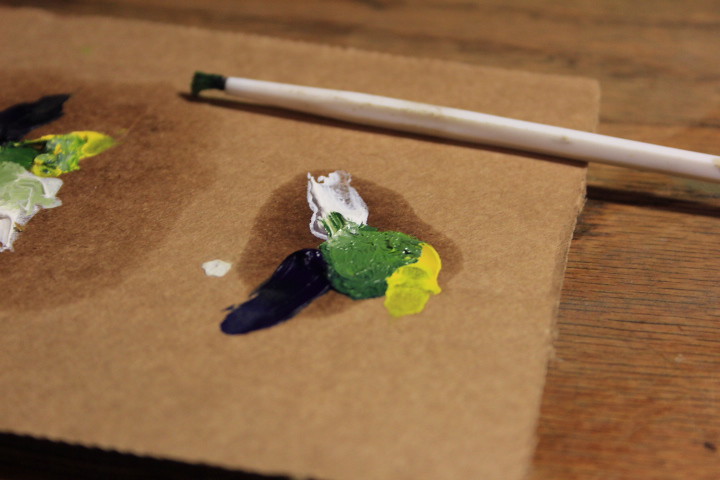 Oils mixed to get green colors. 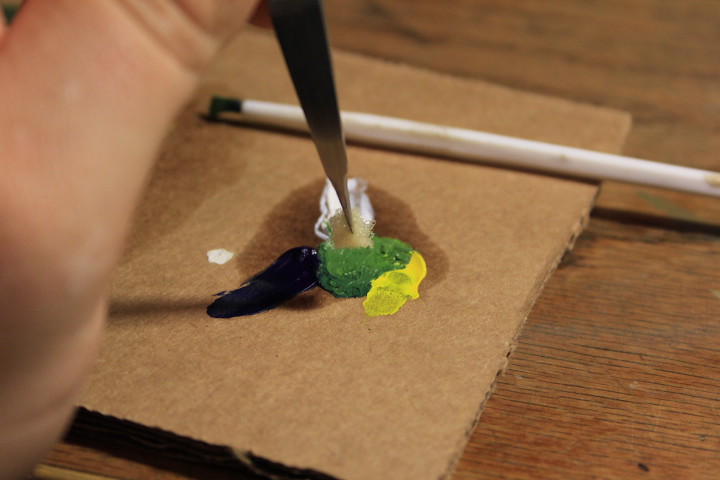 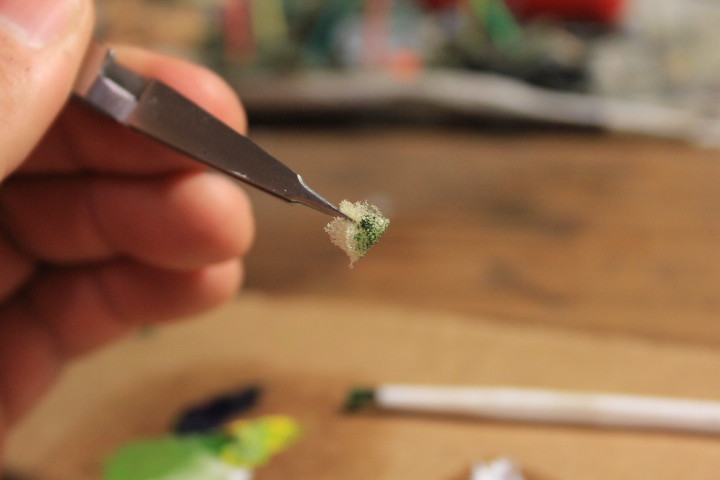 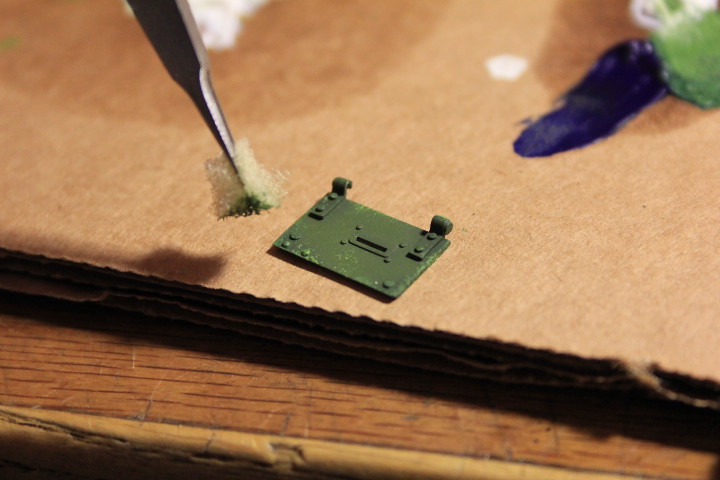 Chips using sponge/foam. 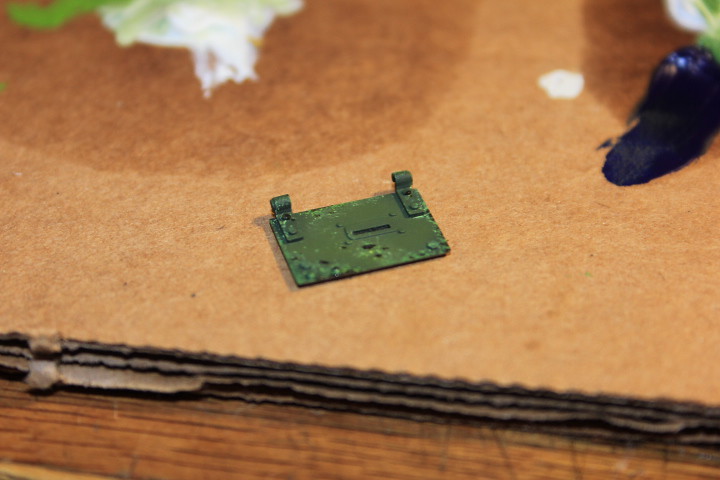 "Rust" with Raw Umber oil paint. 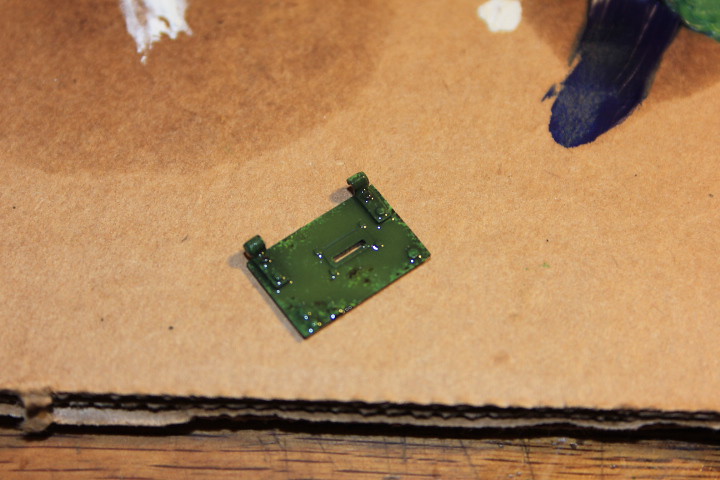 Soaking in Odorless Turpenoid, removed some of the chips and moved some others around a little. Doing this also helps the oil paint settle down and gives a kind of blended look to the chips without using a brush. A brush will simple wipe away the smallest chips. 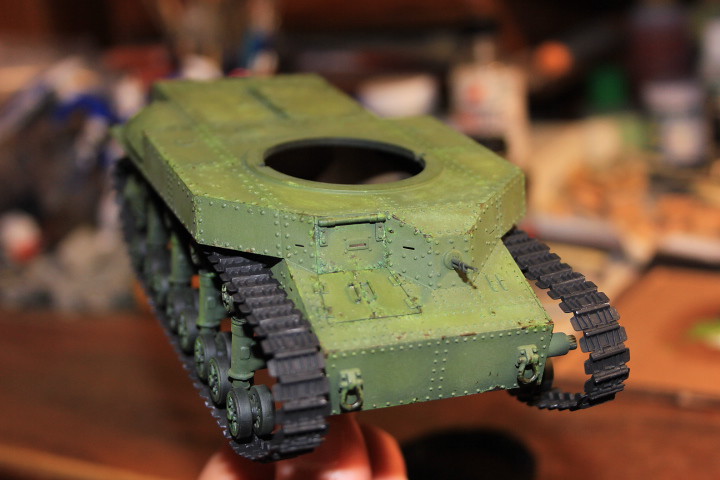 Then, once it's dry, set it in place. I'll probably start pin washing this today, as it's been sitting for about a week now. I'm trying to get my bench clear so I can start working on some new projects, so I've got 3 different models going at the same time. |
|
|
|
Post by Teabone on Apr 29, 2013 17:48:08 GMT -5
mz3
First off, I want to say that I am a dumbass! I went all the way through
stripping, cleaning, priming, repainting, fading, chipping, rusting and
assembling before I realized one of the hatches was missing. It took
hours to find it, luckily it was safely tucked away in the VERY LAST
PLACE I LOOKED, under a paper towel I set my tools on. So here is the
whole process of painting on this model.
That sounds like one of my finishes and parts searches. The sponge is a good trick that I will try, and I use oils though not in the primary colors, mine are more in the burnt and raw umber, yellow ochre, crimson alizarin, white, black, red iron oxide and other variations primarily for weathering effects. I don't like the time it takes to dry but they do give some good shades for the build. I also often don't prime unless the undercoating will be beneficial to the base coat often red or black flat primer.
The effect on the hatch is very nice.
Bones
|
|
mz3
Full Member
   March '24 Showcased Build Awarded
Member since: October 2012
Posts: 651
Oct 14, 2012 21:09:43 GMT -5
Oct 14, 2012 21:09:43 GMT -5
|
Post by mz3 on Apr 29, 2013 18:16:18 GMT -5
Something I keep forgetting to mention, the OT seems to help the oils dry faster. I'm not sure how much faster, but it is faster. Like next day fast. It might just be the very small amount of paint being used or something else I don't know about.
|
|
|
|
Post by deafpanzer on Apr 29, 2013 20:05:30 GMT -5
Great chipping work there!!! Keep it coming...
|
|
|
|
Post by wbill76 on Apr 29, 2013 20:20:43 GMT -5
Very nice update, love where this one's headed! I think we've all done that part disappearing act before...sometimes even with the part literally under your nose!  |
|
|
|
Post by bullardino on Apr 30, 2013 1:55:09 GMT -5
Great update, the oli chipping technique is very interesting. As I said above, it's something to be tried once  |
|
mz3
Full Member
   March '24 Showcased Build Awarded
Member since: October 2012
Posts: 651
Oct 14, 2012 21:09:43 GMT -5
Oct 14, 2012 21:09:43 GMT -5
|
Post by mz3 on Apr 30, 2013 13:34:01 GMT -5
The flash is making the colors extra bright, but here it is ready for weathering... 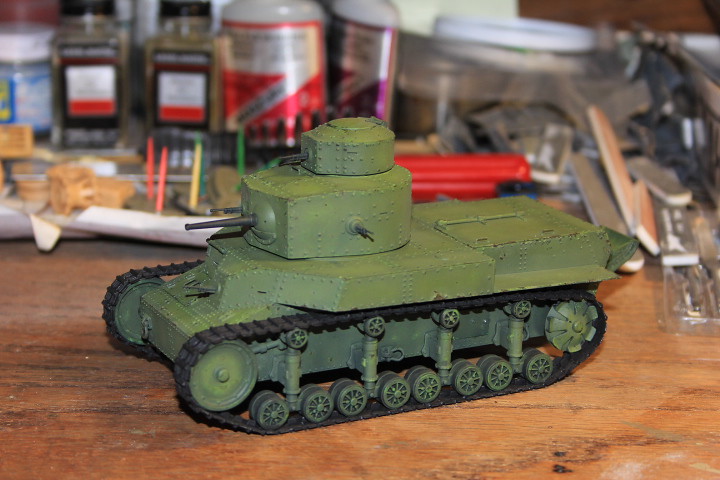 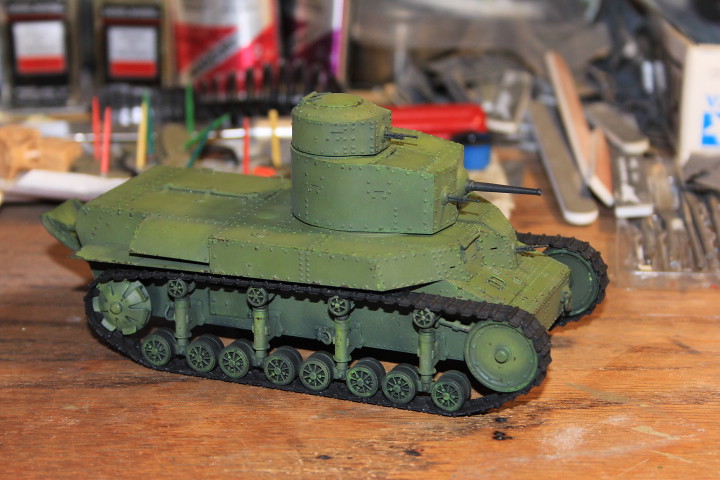 I'm doing something different this time, hopefully it doesn't turn into a mess like the primer. I set the track in place. They were starting to fall apart and annoy me. I usually leave tracks off until after weathering, but this time I will try it like this. I don't see anything that will cause problems, there is enough space between the suspension arms that I can get whatever behind them. |
|
|
|
Post by Teabone on Apr 30, 2013 13:52:15 GMT -5
Something I keep forgetting to mention, the OT seems to help the oils dry faster. I'm not sure how much faster, but it is faster. Like next day fast. It might just be the very small amount of paint being used or something else I don't know about.
Bones.
|
|
|
|
Post by Teabone on Apr 30, 2013 13:55:49 GMT -5
The problem I have when tracks are installed is if I want to do mud or something heavy gets real difficult after the tracks are in place without impacting the finish on the tracks.
Bones.
|
|
mz3
Full Member
   March '24 Showcased Build Awarded
Member since: October 2012
Posts: 651
Oct 14, 2012 21:09:43 GMT -5
Oct 14, 2012 21:09:43 GMT -5
|
Post by mz3 on Apr 30, 2013 21:04:39 GMT -5
Pin washed... 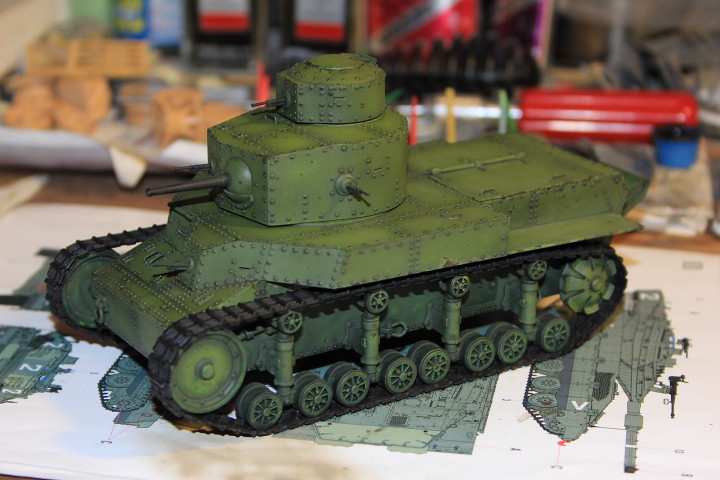 I used a mix of Raw Umber and Black. |
|
|
|
Post by TRM on Apr 30, 2013 21:05:49 GMT -5
Oh that just makes her pop!!! Nice job!!!
|
|
|
|
Post by bullardino on May 1, 2013 3:46:57 GMT -5
Wonderful, mz  |
|
martyncrowther.
Full Member
  
Member since: December 2011
Not Jaymes
Posts: 699
Dec 27, 2011 14:40:09 GMT -5
Dec 27, 2011 14:40:09 GMT -5
|
Post by martyncrowther. on May 1, 2013 7:37:35 GMT -5
Fine work MZ your impressive paintjob really makes me want the kit now  |
|
mz3
Full Member
   March '24 Showcased Build Awarded
Member since: October 2012
Posts: 651
Oct 14, 2012 21:09:43 GMT -5
Oct 14, 2012 21:09:43 GMT -5
|
Post by mz3 on May 4, 2013 14:59:52 GMT -5
Thanks for the comments. Update time... Painting the exhaust, I think I learned this from ScratchMod's site a couple of years ago- 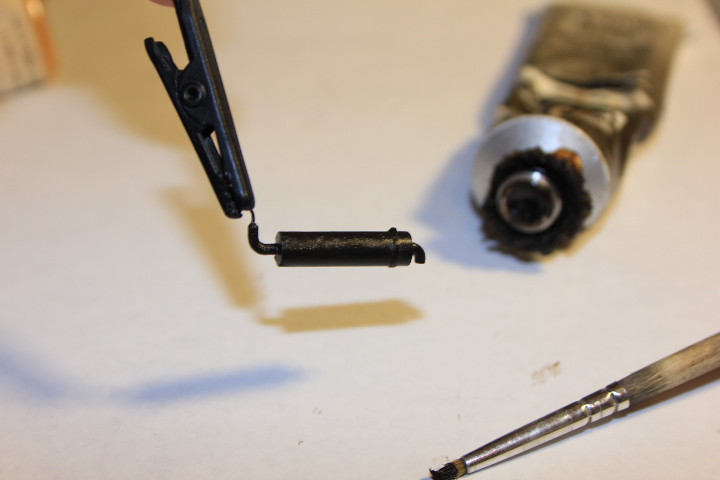 Started with black primer, then added raw umber oil paint. 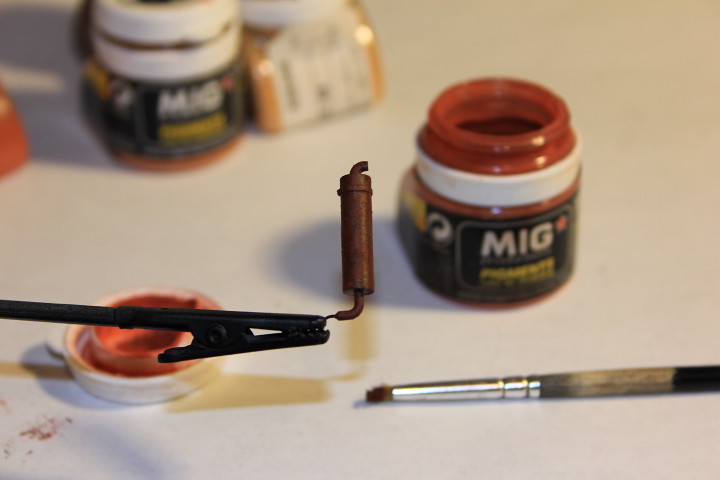 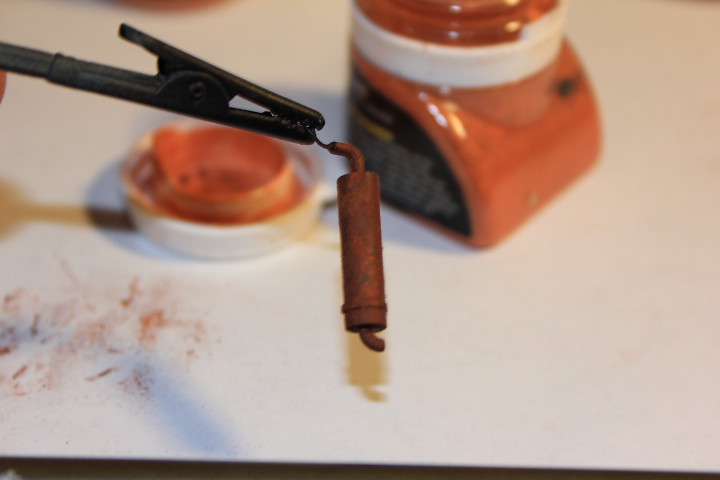 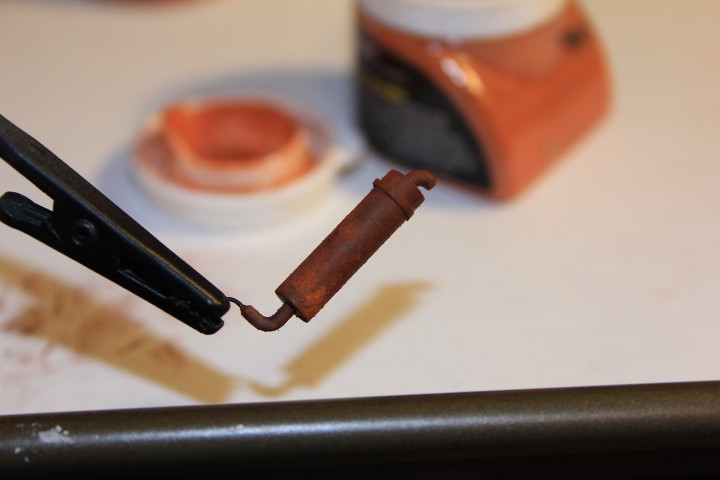 Rust pigments added- Standard rust, then light rust and finally orchid rust. Then I soaked it in Odorless Turpenoid, dried the oil over night. Next day... 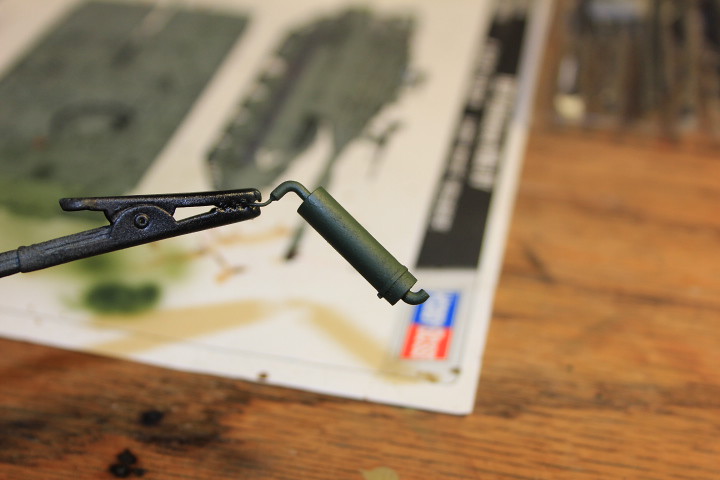 I hit it with some Tressemme extra firm control all day humidity resistance chipping solution... I mean hairspray. Then sprayed some of the base Olive green over it. 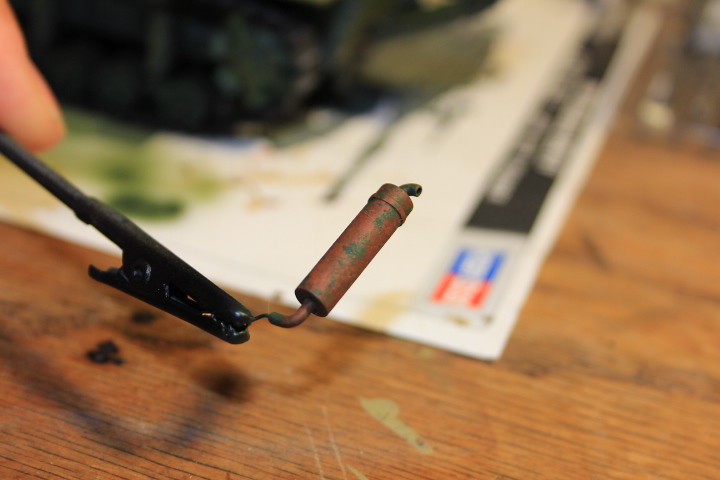 Then chipped away. 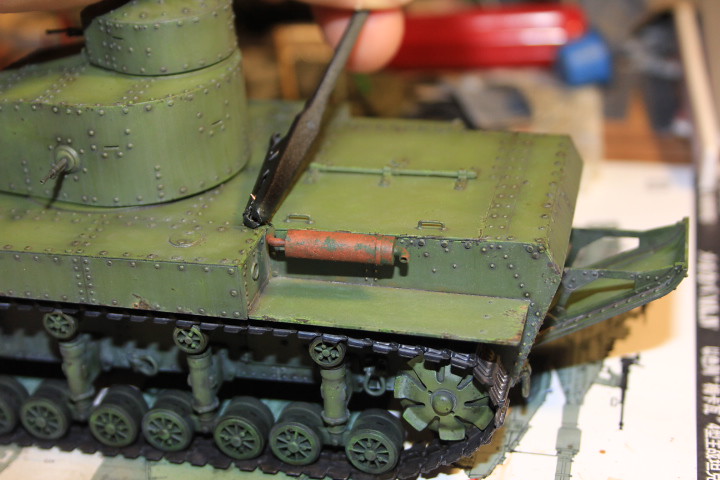 I also added the first step of streaks and dirt- With flash- 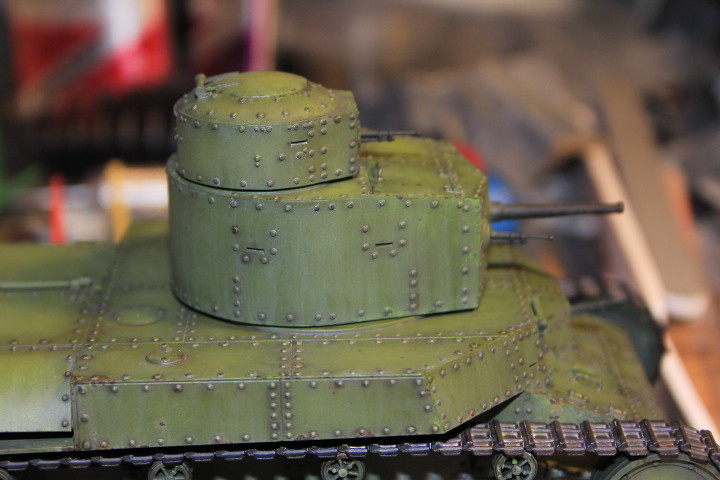 without flash- 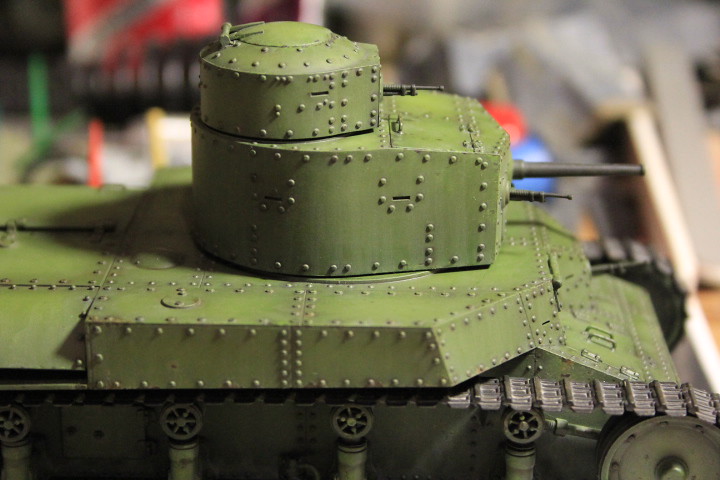 |
|
|
|
Post by wbill76 on May 4, 2013 17:48:12 GMT -5
Nice work on that muffler. Streaking and other wear are giving this one some nice character as well.
|
|
|
|
Post by bbd468 on May 4, 2013 19:40:22 GMT -5
Fine job on all accounts! Great looking T-24 fella.  Gary |
|
|
|
Post by Teabone on May 4, 2013 22:07:43 GMT -5
Nice pictures of the work as you build it, I agree with a base of black for exhaust pipes and muffler's it brings the color tone right down for the heat and rust colors.
Bones
|
|
mz3
Full Member
   March '24 Showcased Build Awarded
Member since: October 2012
Posts: 651
Oct 14, 2012 21:09:43 GMT -5
Oct 14, 2012 21:09:43 GMT -5
|
Post by mz3 on May 18, 2013 16:52:36 GMT -5
update time, if my computer will let me  I've been having a rough time trying to decide what to do with this, so I just started doing anything. First up was spraying on a rust color over all of the panel lines/edges. The color was Model Masters burnt sienna. 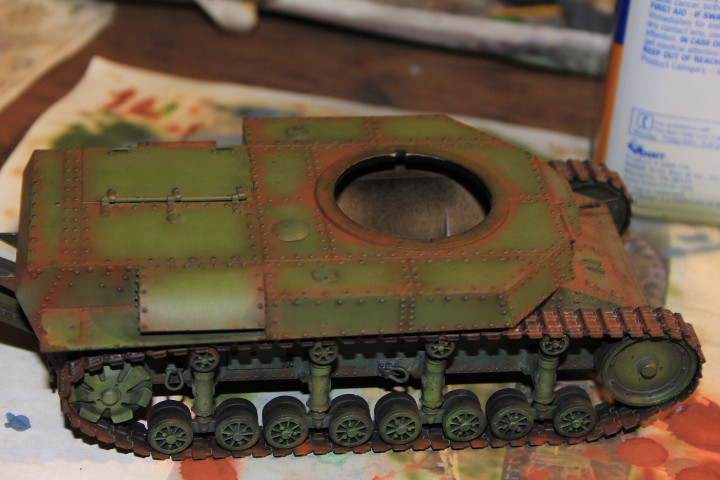 Then I used a stiff brush and OT to remove most of it before it set. 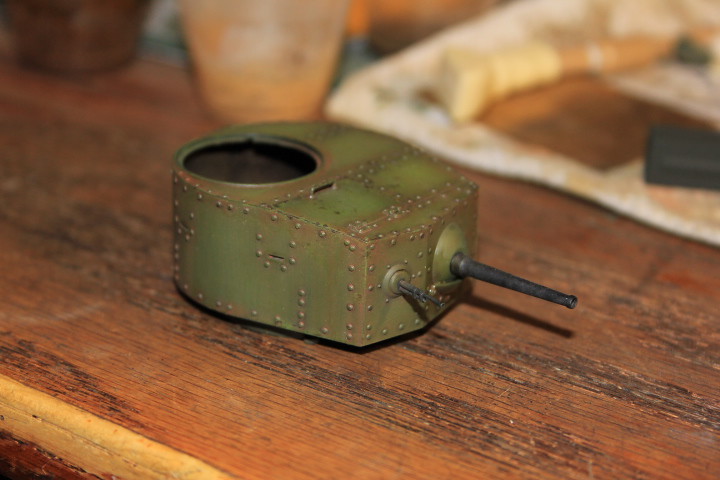 The flash is making it look brighter then it really is. But this is what I got all over, I like it. 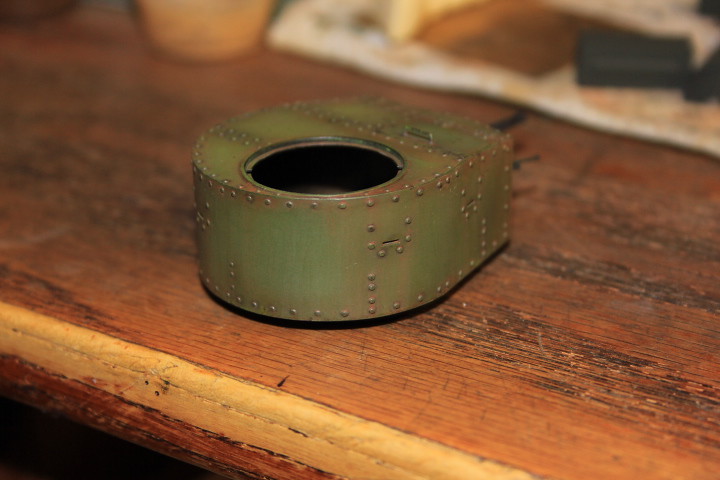 Then I started working pigment washes in. 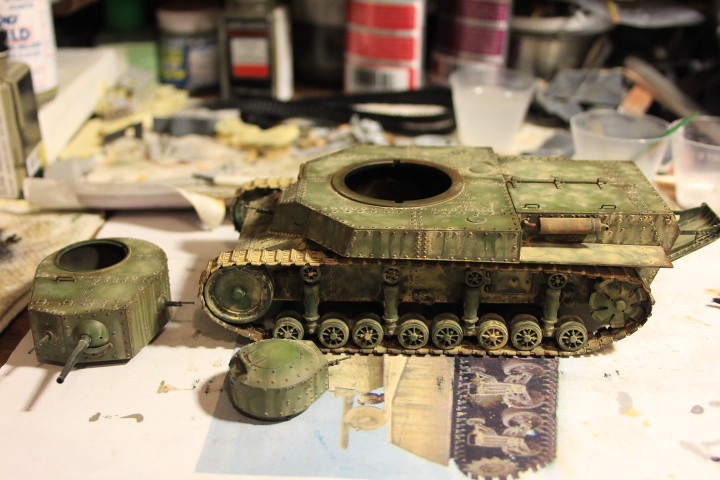 I started with the Middle East Dirt left over from my Merkava built, then hit it with Russian earth. Then I used black and white oil washes over the dirt and then hit that with European dirt. Each layer was sealed with Vallejo matte before the next layer went on. The matte really tones done the dirt making it look better then that picture. 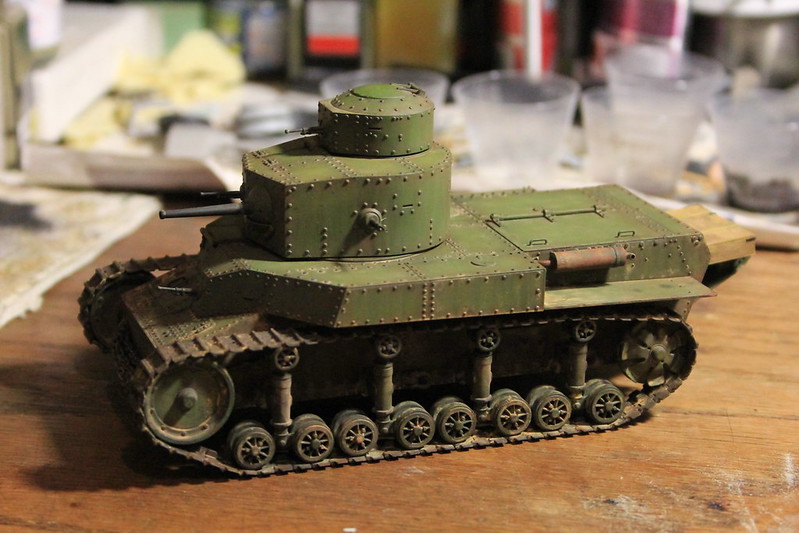 I added the box on the rear/anti-tip thing because there is no detail on the inside of the supports. They are just blank and I didn't really want to fix it. I will have some rope holding it in place in a day or so. I use some old kite string I've had since I was a youngling. I color it with orchid yellow oil paint then weather it like the tank. Usually turns out really nice. |
|
|
|
Post by Teabone on May 18, 2013 17:01:10 GMT -5
Mz3
Are you saying that all you did between the bottom pic and the next one up was matte coat.
Bones
|
|
mz3
Full Member
   March '24 Showcased Build Awarded
Member since: October 2012
Posts: 651
Oct 14, 2012 21:09:43 GMT -5
Oct 14, 2012 21:09:43 GMT -5
|
Post by mz3 on May 18, 2013 17:13:11 GMT -5
Yeap. I've been doing this for a couple of years. I did a resin kit that was mostly rust pigments. I found that using a matte/flat coat would tone down the rust and make it darker and sealed it in. I started using it on the dirt pigments and got about the same results. I start with pigment that is brighter then I want, like the Middle east sand (or dirt, whatever it is), spray the matte, let it dry. It will darken the pigment, making it look about where I want it to be. Since the matte is thinned with water, you can saturate the pigment and get clumps of it to stay where they are. It took some practice, but it works really well.
|
|
|
|
Post by TRM on May 18, 2013 18:01:31 GMT -5
WOW, that blended up nicely! Looking really nice there all dirtied up!!!
|
|
|
|
Post by bullardino on May 19, 2013 2:19:38 GMT -5
Very interesting technique. You have your way, completely different from most modellers. And it works great  |
|
|
|
Post by Teabone on May 19, 2013 12:08:30 GMT -5
Yeap. I've been doing this for a couple of years. I did a resin kit that was mostly rust pigments. I found that using a matte/flat coat would tone down the rust and make it darker and sealed it in. I started using it on the dirt pigments and got about the same results. I start with pigment that is brighter then I want, like the Middle east sand (or dirt, whatever it is), spray the matte, let it dry. It will darken the pigment, making it look about where I want it to be. Since the matte is thinned with water, you can saturate the pigment and get clumps of it to stay where they are. It took some practice, but it works really well.
Great effect may be just what I have needed on occasion, looks like you have created a whole new way of obtaining a stunning finish. I have had less than good luck with Vallejo paints so I will have to find a matte I like for that coating.
Bones
|
|
Thomas_M/
Full Member
  
Member since: May 2013
Don´t panic! I am German!
Posts: 217 
|
Post by Thomas_M/ on May 19, 2013 12:18:19 GMT -5
First, I did not know the kit at all, and really had no idea what to expect from your build here.
Now, after having seen all the steps here I am amazed. This is such a great WIP to learn another way to do a tank kit, wetting my mouth to do one myself hopefully soon!
Absolutely fine build and paint job, mate! I really like the final result, being as surprised as Bones that a simple overcoat with matte varnish has such an impact on the pigments.
Thanks for sharing this here!!
|
|