|
|
Post by deafpanzer on Apr 9, 2013 15:27:23 GMT -5
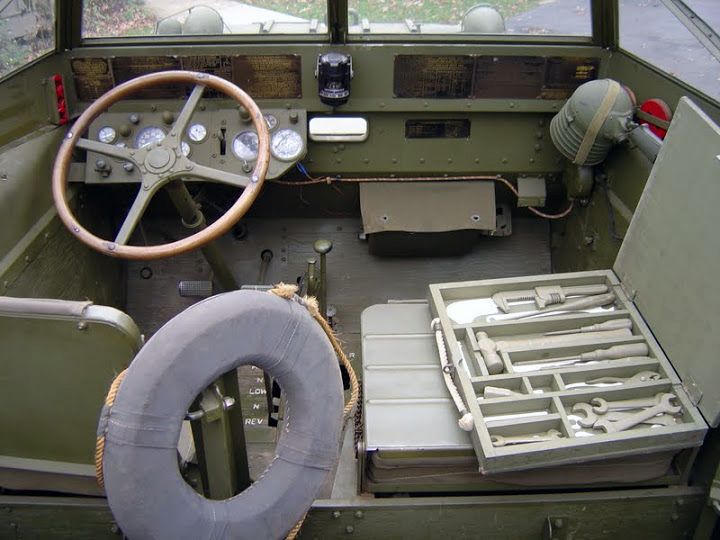
Guys- Quick update... I lied again. Was not planning to work on it last night but after a short nap I was at it again for two hours. Damn this addiction... damn them all! Added more PEs to the cockpit or whatever you call that area...  I am so glad I bought this Eduard PE set... it made me realize Italeri has really missed or dropped a lot of details in its kit such as 2 rifle holders, wood walls, 3 fire extinguishers clasps, etc.  Now I can't figure out what is this round tilted thing at the passenger's side on the wall... obviously not to hold a cup of coffee. Any idea you what it is for? Maybe to hold spot lamp, heavy binocular or June Playboy issue???
|
|
|
|
Post by Leon on Apr 9, 2013 15:37:04 GMT -5
Andy the office looks awesome.Good work fella.  |
|
Deleted
Member since: January 1970
Posts: 0
Nov 25, 2024 12:22:45 GMT -5
Nov 25, 2024 12:22:45 GMT -5
|
Post by Deleted on Apr 9, 2013 17:11:28 GMT -5
The "round thing" is a mounting plate for a hand held spot light.  G |
|
|
|
Post by deafpanzer on Apr 9, 2013 18:15:27 GMT -5
Leon- Thanks Birthday Wizard!  G G- Bingo! That was a great picture of the office... perfect! I see something I can add to mine. Thank you very much! I think I need to move my piece closer to the corner since Eduard instruction was in the center.
|
|
Deleted
Member since: January 1970
Posts: 0
Nov 25, 2024 12:22:45 GMT -5
Nov 25, 2024 12:22:45 GMT -5
|
Post by Deleted on Apr 9, 2013 19:27:50 GMT -5
Yes move it forward a bit. Every photo I found of the plate alone showed it up in the corner, and had that strap hanging from it.
G
|
|
|
|
Post by deafpanzer on Apr 9, 2013 19:33:53 GMT -5
That's what I had in mind... make a strap or make the whole thing but I need more pics of the spot light. Should be easy to make but will look around for more pics. You have been big help... thank you again!
|
|
|
|
Post by wbill76 on Apr 9, 2013 19:36:39 GMT -5
You're hooked on the Duck Andy! Nice progress, got to love those added details.
|
|
|
|
Post by deafpanzer on Apr 9, 2013 20:59:30 GMT -5
I am afraid you are correct... have the mojo right now for this and I better not stop while I still have it. LOL Thanks buddy!
|
|
|
|
Post by Leon on Apr 9, 2013 23:01:51 GMT -5
This wizard says lets see some magic on that DUKW.  |
|
|
|
Post by bbd468 on Apr 9, 2013 23:17:55 GMT -5
My goodness Andy, your quite tha PE Guru these days! Great work buddy.  Gary |
|
|
|
Post by bullardino on Apr 10, 2013 1:28:29 GMT -5
Another stunning progress, Andy  |
|
|
|
Post by TRM on Apr 10, 2013 5:54:30 GMT -5
Still doing a mighty fine job there Mr. Andy!! Yeah, you are probaly best not doing this like the pic I sent ya! LOL!! Kepp up the great work!!
|
|
|
|
Post by Tobi on Apr 10, 2013 11:02:54 GMT -5
Hi Andy! That's interesting, thank you. I wasn't aware that these notches do exist in WWII era photos. Must have been indeed late in the war and very rare.
Rifle brackets have been eliminated on 3/11/44, by the way. I can recommend a German publication by Tankograd about the DUKW, called Technical Manual. It has many photographs and drawings from the original manual and completely dual-language texts. English and German.
I find Korea is an interesting and awfully neglected topic. Don't be too generous with rust streaks, as the notches were meant as an anti-corrosion measure!
|
|
|
|
Post by Teabone on Apr 10, 2013 12:17:45 GMT -5
Andy
Your DUKW Manual is on the way, I found this morning that I have the Field Manual for loading ships and amphibious craft. Not a lot on the interior but lots of dimensions on exterior of a number of auxiliary craft. Will send if you want.
Bones
|
|
|
|
Post by Teabone on Apr 10, 2013 12:41:41 GMT -5
Some scans I made from the manual seeing you are way ahead of the manual nomenclature on your build. Also some pics from how the radios were installed if you had planned on a radio. Bones Unfortunately for whatever reason I can not get the photo bucket IMG to work    so you get what you get. |
|
|
|
Post by Teabone on Apr 10, 2013 12:43:31 GMT -5
|
|
|
|
Post by Teabone on Apr 10, 2013 12:44:56 GMT -5
And a little more
 
|
|
|
|
Post by Teabone on Apr 10, 2013 12:46:42 GMT -5
Andy
The manual that is on its way will show you where all these plugs went in the vehicle.
Bones
|
|
|
|
Post by Teabone on Apr 10, 2013 12:51:14 GMT -5
|
|
|
|
Post by bbd468 on Apr 10, 2013 13:17:50 GMT -5
WOW....Teabone hooked you up Andy!!!  |
|
Deleted
Member since: January 1970
Posts: 0
Nov 25, 2024 12:22:45 GMT -5
Nov 25, 2024 12:22:45 GMT -5
|
Post by Deleted on Apr 10, 2013 14:54:51 GMT -5
Certainly putting the details into this one and she's looking very nice so far  |
|
|
|
Post by deafpanzer on Apr 10, 2013 18:19:24 GMT -5
Leon- Maybe you can help me... use your wizard magic on my wife so she can let me buy more model kits and militaria stuff? LOL Gary- Thanks brotha!!! Me guru? I wish... you should have seen Uncle Tony, Marc and others PE work. I still don't know how to do soldering but that's one of my goals this year to learn and master in it. LOL about Teabones... no kidding! Feeding me more mojo which is a big plus! Luigi- Thanks buddy! Mr T- Exactly... too pretty to be destroyed. LOL! But next time I might do that then I will not put so much PE into you know. I really loved the picture of damaged Duck you sent me! Thanks for dropping by y friend! Tobi- One of reasons why I dig this forum... we are not just building but we enjoy the discussion of historical aspect of the vehicles we are building. In my book some of the early or initial models during the trails they had holes then apparently it was dropped and they returned at end of WWII. Or few DUKWs had them maybe for special purposes. That's something I need to look thru my book but it is not that great. Thanks for the tip about the book... not sure if I can afford to cough another dime into this build as I have spent nearly $100 for this already and maybe $60 more for two more items... that bumpers set you recommended earlier and couple of resin figures to go with this. LOL Thanks again for being a great help! Teabones- AWESOME! Can't wait to see them. Thanks for posting some here so I can keep building especially the office. Great details such as plugs and its holder by the driver seat... you are the best! Steve- Hey! Thanks buddy! It has been fun so far... hope it stays that way. 
|
|
redleg12
Full Member
  
Member since: August 2012
www.redleg2scale.com
Posts: 401
Aug 28, 2012 18:59:10 GMT -5
Aug 28, 2012 18:59:10 GMT -5
|
Post by redleg12 on Apr 10, 2013 19:16:26 GMT -5
Andy - The past few weeks have been nuts for me so I am trying to catch up. Love the duck, great piece of history. Nice work on the details. I am sure the AM will perk up this tired old kit. But more important is the modeler....your just the guy!!
Rounds Complete!!
|
|
|
|
Post by Leon on Apr 10, 2013 20:39:41 GMT -5
Sorry Andy,magic wand is in the repair shop.Your on your own for a while.  |
|
|
|
Post by armorguy on Apr 12, 2013 13:22:52 GMT -5
KA ZAAAAAAM !!!
Sorry for jumping in so late Andy ! Man this must be the best Duckw I 've seen !
|
|
multicam
Senior Member
   
Member since: January 2012
Nate
Posts: 2,039
Jan 10, 2012 14:35:41 GMT -5
Jan 10, 2012 14:35:41 GMT -5
|
Post by multicam on Apr 12, 2013 16:38:12 GMT -5
This is looking awesome, Andy! Great work buddy! I thought I bookmarked this last time I looked and thought, hey I wonder if DP has updated his DUK and then I realized I didn't BM it and had missed some updates:( A mistake not to be repeated:) Good stuff, Brother!
|
|
|
|
Post by rbaer on Apr 13, 2013 10:45:20 GMT -5
I thought I'd slip in between the quacks and take a peek......
Very nice work Andy. I'm looking forward to seeing what you do with the stowage, looks like it'll be FUN to paint (tounge firmly in cheek, or bill as the case may be).
|
|
|
|
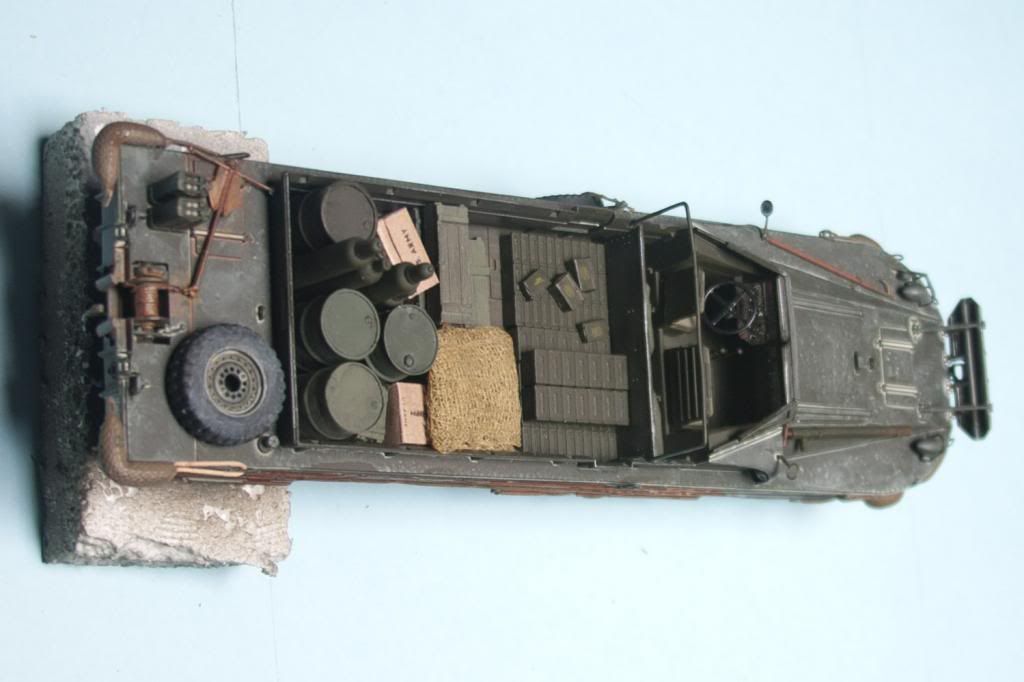
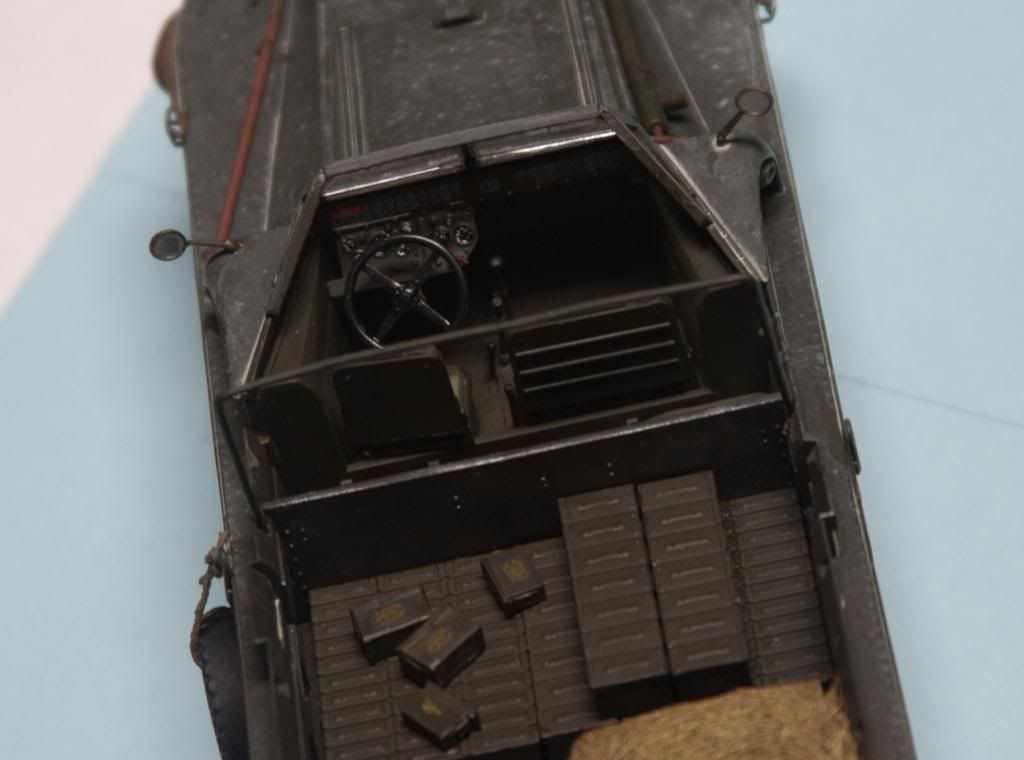
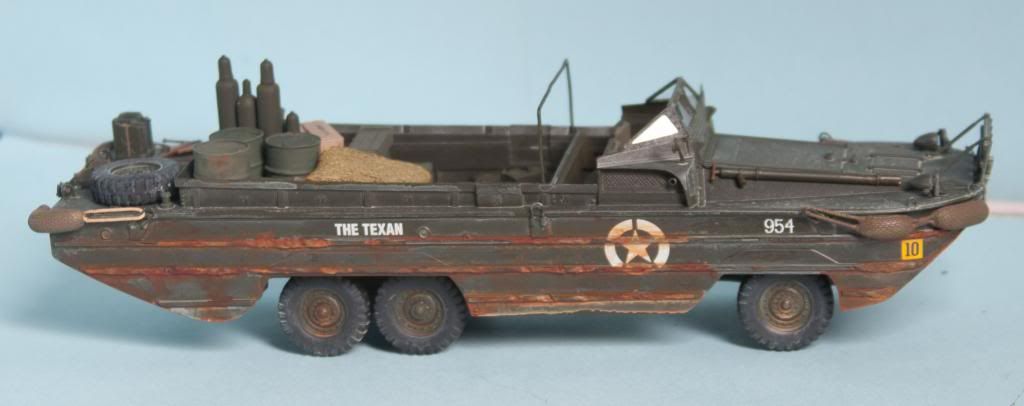
Post by Teabone on Apr 13, 2013 16:36:13 GMT -5
Andy
I took some more shots of my DUKW which is really not as detailed as yours but it shows what I did some time back with that kit.


|
|
|
|
Post by deafpanzer on Apr 13, 2013 22:26:01 GMT -5
Guys- Sorry for being slow... being away from home on biz trip for nearly three days. Wifi at hotel was crappy too! Good to be home now... catching up! Mike- Hey! Always good hearing from you my friend! Figured this will make some friends who are big fan of "green" and hauls artillery happy... I really liked a kit that had a howitzer inside. Maybe one day... thanks for the nice words. PE set is a MUST for this kit to spice it up. Leon- Your wand fixed yet? I need your help... I bought a small kit while I was on a business trip. Help!  Dicky Dicky- Thanks mate! Agree about Teabone... that's what makes this forum great! Can't wait for it to arrive in the mail... perfect timing cause I haven't done anything to it since Wednesday before I went away for three days. I really like what you said... Mother Goose? Maybe I should name it after all? LOLOLOLOL Armorguy- LOL Thanks! Hope it will come out great!!! Nate- LOL Hope it is working now. Really appreciate you tagging along... hope to work on it tomorrow. I am too tired to lift my finger but strong enough to have some diet coke and rum drinks and press the buttons on the TV remote control.  RB RB- Thanks buddy! Stowage should be the fun part for this build... hope I have enough?  TB TB- That's a stunning duck! Great work! Really dig the stowage especially the camo net. Thanks for sharing... it keeps me motivated to build mine!
|
|
|
|
Post by deafpanzer on Apr 13, 2013 23:07:04 GMT -5
Guys- Was hoping to post a quick update during my biz trip but I couldn't... more PE added   Top piece had no details... just sunken holes. Bottom piece with PE sure looks much nicer.  Thanks for looking!
|
|