bigjohn
Reviews member    
Member since: December 2011
John Hale
Posts: 3,438
Dec 21, 2011 2:17:45 GMT -5
Dec 21, 2011 2:17:45 GMT -5
|
Post by bigjohn on Jun 9, 2013 6:13:37 GMT -5
Thanks kindly John :)To quote Micky D's (I'M LOVIN IT)  Micky D's.............Now i'm hungry and the closest Micky D's is 13 miles away...  Ha ha, Keep up the good work buddy! |
|
|
|
Post by deafpanzer on Jun 9, 2013 16:42:46 GMT -5
Sorry I have missed nearly whole week worth of update... back home now catching up. That big gun is looking real good... it will definitely many guys jealous.
If you are not comfortable applying pigments on the hull I always start at the very bottom first to get better feeling since nobody can see that part well.
|
|
|
|
Post by fightnjoe on Jun 9, 2013 18:49:47 GMT -5
looks impressive leon. you did a very good job with both the paint job and the initial weathering.
joe
|
|
|
|
Post by Leon on Jun 10, 2013 2:09:31 GMT -5
Andy,thanks kindly  .Glad you popped in to have a look.  Joe,much appreciated  .I'm really happy how it turned out as this is my first time.  |
|
|
|
Post by Leon on Jun 11, 2013 18:55:29 GMT -5
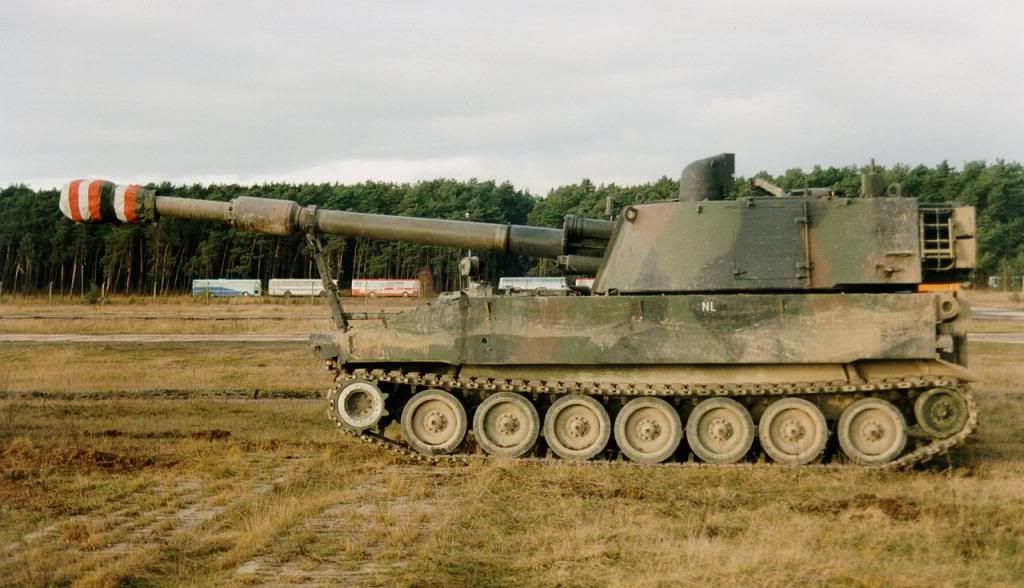
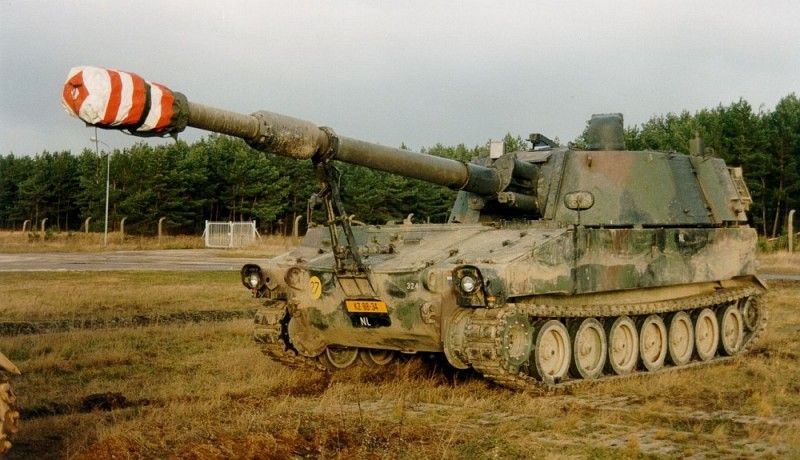
Hey guys,i was looking at some 109 images and this one caught my eye.I would like to try this on my 109 what do you guys think? I have the AK dust and dry light mud acrylics.Think this would look really good if i can pull it off.   REFERENCE ONLY |
|
|
|
Post by fightnjoe on Jun 11, 2013 19:16:13 GMT -5
leon it is definitely doable. i say go for it.
joe
|
|
|
|
Post by Leon on Jun 11, 2013 19:30:14 GMT -5
Thanks Joe,think i,ll practice on my test piece first.   |
|
|
|
Post by wbill76 on Jun 11, 2013 20:07:40 GMT -5
Leon, Go with what you like, if the pic moves you then give it a shot! Even better if you decide to create a simple base for it to give it context for the weathering. That field scene wouldn't be hard to do at all.  |
|
|
|
Post by Leon on Jun 11, 2013 20:16:41 GMT -5
Thanks kindly Bill  .Haven't given any thought about a base,but something a long those lines would look pretty good.  |
|
iking.
Full Member
  
Member since: November 2012
Posts: 244
Nov 22, 2012 3:24:55 GMT -5
Nov 22, 2012 3:24:55 GMT -5
|
Post by iking. on Jun 12, 2013 1:58:09 GMT -5
the paint job is terrific comrade!  love to see this weathered:D cheers! iking |
|
|
|
Post by Leon on Jun 12, 2013 4:00:30 GMT -5
Thanks you Iking,very much appreciated  .The last pics i posted are with the filter and wash applied.Just trying to decide on a dust or light mud effect.  |
|
|
|
Post by TRM on Jun 12, 2013 4:55:42 GMT -5
That would be a nice effect there Leon! You entioned having AK's Dust...do you happen to have some Dust Effects, the wash? Either way you can definately make this happen! Bill show some great lower end dusting on his Neubau-Fahrzeug: modelerssocialclub.proboards.com/thread/3564/dml-neubau-fahrzeug-nr-3 and the splatter is fairly easy to obtain as well! |
|
|
|
Post by bullardino on Jun 12, 2013 8:37:21 GMT -5
Leon go for it. Thet 109 did some wading and the dried mud effect is really nice to see.
I agree with Todd, Bill's dusting is really effective. I used his techinque to dust my shermie and I really like it (and it ain't difficult to control).
|
|
|
|
Post by bbd468 on Jun 12, 2013 9:50:11 GMT -5
Hey Leon, Id love to see you do something like that! As long as you build up that effect you'll do great and the M109 will look awesome!  |
|
|
|
Post by Leon on Jun 12, 2013 17:16:32 GMT -5
Todd,thank you  .The AK dust (AK-723) i have is the acrylic dust paint from the tracks and wheels set.I think I'll experiment with it by applying it in thin layers to build up the effect i want on my test piece.  Luigi,thank you  .You did a great job on the shermie.I really like the dried mud effect to.Going to paint my test piece to see how much effect i want to get.  Gary,thanks bro 8-)Layering and build up are the key words on this.  |
|
|
|
Post by Leon on Jun 12, 2013 17:33:41 GMT -5
Dicky,thanks fella  .I am going to give this my best shot and really break out of my comfort zone  .Really like how the LAV turned out. |
|
|
|
Post by Teabone on Jun 12, 2013 23:37:13 GMT -5
Leon
One way or the other it will be a giant step in the learning process and if you go slowly in light coats you can adjust and change directions as you go. Learning what you can do is the only way you will gain and learn what you can do and what not to do. Clint Eastwood and maybe DickyF or some Martian said "a man has to know his limitations."
Bones
|
|
|
|
Post by Leon on Jun 12, 2013 23:48:57 GMT -5
Thanks Bones,i totally agree with you on the learning process.  |
|
|
|
Post by Tobi on Jun 13, 2013 11:45:02 GMT -5
Thanks Joe,think i,ll practice on my test piece first.   Leon, start with your test piece and if you are confident enough move to the hull underside! That M109 will look good...  Cheers, Tobi |
|
|
|
Post by Leon on Jun 13, 2013 15:05:27 GMT -5
Thanks Tobi for the advice.That is what i plan to do.  |
|
|
|
Post by Leon on Jun 16, 2013 16:00:30 GMT -5
|
|
Deleted
Member since: January 1970
Posts: 0
Dec 2, 2024 5:49:44 GMT -5
Dec 2, 2024 5:49:44 GMT -5
|
Post by Deleted on Jun 16, 2013 16:12:41 GMT -5
Hey Leon,to my eye,the 'dirt' looks too contrived?,ie it just don't look like it was caused 'naturally',if you get my meaning?
|
|
|
|
Post by Leon on Jun 16, 2013 17:11:04 GMT -5
Thanks CB,that's i was thinking mate.Gotta figure out how i can fix it.  |
|
|
|
Post by wbill76 on Jun 16, 2013 18:23:45 GMT -5
 Looking back at the pic you posted for reference Leon, try to compare how it looks to what you've got on the vehicle and adjust accordingly. You can see how some of the mud was 'thrown' up to a certain level on the vehicle sides but didn't stay everywhere in the same levels of accumulation. You can also see that there's more of a uniform/consistent accumulation on the wheels vs. the tires (because the tires would contact the tracks and there more mud would come off that way and get thrown around). You've got a good base laid down with the pigments, now it's time to remove and adjust it where needed.  |
|
|
|
Post by Leon on Jun 16, 2013 19:32:28 GMT -5
Thank you Bill,very much appreciated.  |
|
danb.
Reviews member     March 2013 MoM Winner
Member since: November 2011
Posts: 2,808
Nov 17, 2011 9:22:52 GMT -5
Nov 17, 2011 9:22:52 GMT -5
|
Post by danb. on Jun 17, 2013 1:44:46 GMT -5
Hey Leon great to hear the muddyfications have started as the others have said it looks a bit un natural but dont panic i had this problem with my abrams i used a dampened brush with isopronol alchol on it gently scrub away dont remove all of it because you can use this as the 1st dirt layer then use pigments for mud splatters apply them by flicking the pigments off of a stiff brush or using a AB to blow pigment mix of the brush please try the thinner idea on a area you will not see as it could ruin the paint work if not done correctly and i dont want to blamed for ruining such a sweet kit  Hope this helps ya buddy Dan B |
|
|
|
Post by Leon on Jun 17, 2013 3:49:49 GMT -5
Dan,thanks for the kind comment buddy  .I already started removing the mud from the tires using a dampened q-tip.So far so good.Going to try and work on the hull when i get home from work tonight.  |
|
|
|
Post by TRM on Jun 17, 2013 5:54:36 GMT -5
On the right track here Leon. Good base and then soften it up and add layers adjusting as you go! Agreeing with both Dan and Bill here on the approach and I am sure you are working it out just fine! A slightly damp brush with water or alcohol stippling the brush works well as does a soft et stiff bristled brush working the tires blending the effects. Keep it going there!!
|
|
|
|
Post by Tobi on Jun 17, 2013 11:56:38 GMT -5
Hi Leon,
next I would suggest a flat brush moistened (not wet) with thinner and then move from top to down on the hull sides to soften the effect and create rainmarks.
Did you seal the camo with a clear coat before? For dust and dirt I prefer to work with enamel on acrylic base coat, because the thinner won't affect the color beneath.
Cheers,
Tobi
|
|
Deleted
Member since: January 1970
Posts: 0
Dec 2, 2024 5:49:44 GMT -5
Dec 2, 2024 5:49:44 GMT -5
|
Post by Deleted on Jun 17, 2013 14:53:02 GMT -5
 Looking back at the pic you posted for reference Leon, try to compare how it looks to what you've got on the vehicle and adjust accordingly. You can see how some of the mud was 'thrown' up to a certain level on the vehicle sides but didn't stay everywhere in the same levels of accumulation. You can also see that there's more of a uniform/consistent accumulation on the wheels vs. the tires (because the tires would contact the tracks and there more mud would come off that way and get thrown around). You've got a good base laid down with the pigments, now it's time to remove and adjust it where needed.  Looking again at this picture,the dirt/weathering suggests that it may well have been driven through a 'Tank Dip'/large puddle,and then been re used for another demo?The buses in the background suggest the 'demo' scenario more likely,IMO,...hence the dirtier image than I had envisaged  |
|