|
|
Post by bbd468 on May 24, 2013 21:25:21 GMT -5
that's a brave choice, Bill. I think it is a bit demanding. However, not that extreme as this one on top.  Now that's an example with a crew that had too much time on its hands!  OH MAN, I sooooo want to do that top camo if i get this kit!!!  Bill, ya think they had a regimental best camo competition and ya reckon it won?  |
|
afvfan
Senior Member
   
Member since: December 2012
Bob
Posts: 1,772
Dec 10, 2012 17:32:38 GMT -5
Dec 10, 2012 17:32:38 GMT -5
|
Post by afvfan on May 24, 2013 23:38:31 GMT -5
I'll be sneakin' in here to keep an eye on this one, Bill. Looks like you're off to a good start.
|
|
|
|
Post by wbill76 on May 25, 2013 10:23:36 GMT -5
Gary, probably their version of the MoM! Bob, no sneaking required, plenty of room for everyone! Just don't try to take any of Carl's Cheetos and you're set. 
|
|
|
|
Post by wbill76 on May 25, 2013 18:02:37 GMT -5
Taking full advantage of the Memorial Day extended holiday (and of course taking time to also remember and honor all of those who have died in service to their country!), work continued with the focus shifting to the upper hull and fenders. Steps 6 and 7 deal with the rear hull details with Step 6 assembling the air exhaust deflectors, the muffler and heat shield, and the tow hitch. The heat shield was annealed over the gas burner flame on my kitchen stove, then curved to shape using the metal handle of my Xacto knife to get it close to the required curve and the muffler itself served as the former to get it curved the rest of the way. I drilled out the muffler exhaust pipe since the kit supplied part just had a molded depression for its mouth. 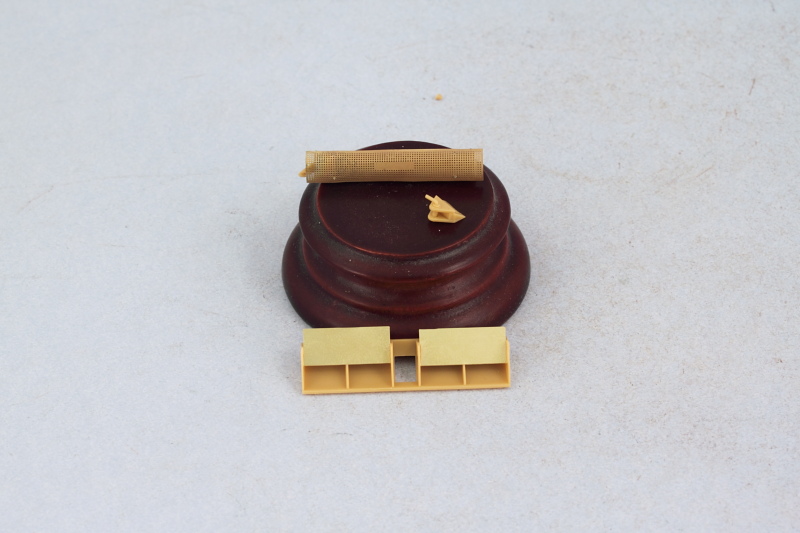 These parts were installed in Step 7 along with the rear hull overhang plate that includes the Notek rear light and standard brake lights. The engine exhaust extension pipe was installed as well to round things out. 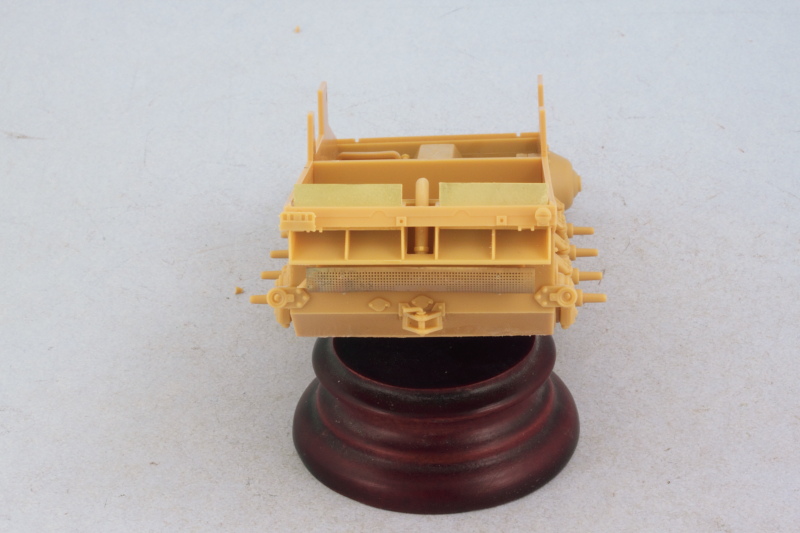 Step 8 is a simple step, it installs the driver's instrument panel under the hull glacis plate as well as the driver's long grab handle, part E19. I added the grab handle later on after realizing as I wrote this that I had neglected to install it. The glacis plate was added to the front hull and fit beautifully, no clearance issues at all with the instrument panel and the transmission. 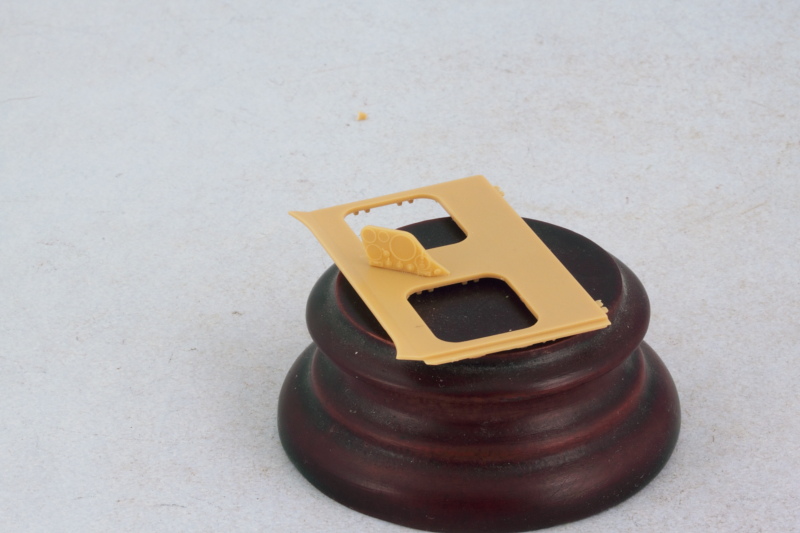 Steps 9 to 11 deal with the fenders and while the instructions have you put all the details on the fenders first and then install them, that's generally not a good idea so I switched things around a little bit. Both fenders were added after receiving their kit-supplied PE blanking plates for the tool mounts. 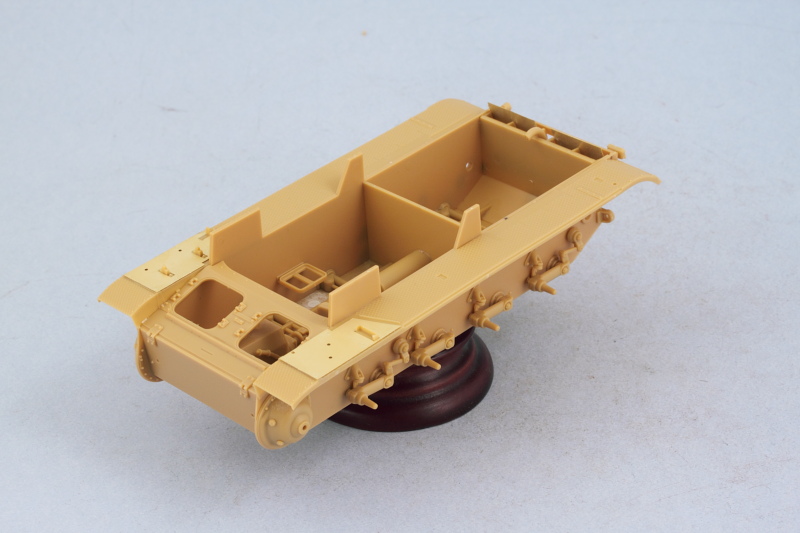 Next up will be adding all the various details (except the tools) to the fenders and starting work on the gun base mount. |
|
|
|
Post by Leon on May 25, 2013 18:30:21 GMT -5
Coming a long nicely Bill.Nice work on the exhaust shield.
|
|
|
|
Post by tonylee-Rest In Peace on May 25, 2013 18:38:38 GMT -5
Don't you wish the plastic was gray and not what it is Bill?  Tomorrow is race day so I guess Monday will be the next build day. Tony lee |
|
bigjohn
Reviews member    
Member since: December 2011
John Hale
Posts: 3,438
Dec 21, 2011 2:17:45 GMT -5
Dec 21, 2011 2:17:45 GMT -5
|
Post by bigjohn on May 25, 2013 19:02:24 GMT -5
I do like the looks of this kit!
|
|
|
|
Post by wbill76 on May 25, 2013 19:04:33 GMT -5
Leon and BJ, thanks for following along! Don't you wish the plastic was gray and not what it is Bill?  Tomorrow is race day so I guess Monday will be the next build day. Tony lee Yes, I do wish it was gray but then it wouldn't be a Bronco kit if it were!  I understand you've got your priorities Tony for race days, enjoy all those left turns!
|
|
afvfan
Senior Member
   
Member since: December 2012
Bob
Posts: 1,772
Dec 10, 2012 17:32:38 GMT -5
Dec 10, 2012 17:32:38 GMT -5
|
Post by afvfan on May 25, 2013 21:11:40 GMT -5
Bill, in the rear view above, is it just a bad camera angle, or does the hull have that bad of warp in it?
|
|
|
|
Post by deafpanzer on May 25, 2013 21:55:56 GMT -5
Dig that camo!!! That's something I'd like to try one day... great process on your little Marder! Is it safe to say we may be expecting two more updates?
|
|
|
|
Post by TRM on May 25, 2013 22:08:44 GMT -5
Excellent progression on this one Bill!!
|
|
|
|
Post by bullardino on May 26, 2013 4:19:36 GMT -5
Great progress, Bill  |
|
|
|
Post by wbill76 on May 26, 2013 9:58:31 GMT -5
Bill, in the rear view above, is it just a bad camera angle, or does the hull have that bad of warp in it? Just the camera angle Bob, not sure why exactly it shows up that way but I noticed it as well when I was shooting. Andy, at least one more for sure.  T T and Luigi, thanks as always!  |
|
Deleted
Member since: January 1970
Posts: 0
Nov 25, 2024 5:44:20 GMT -5
Nov 25, 2024 5:44:20 GMT -5
|
Post by Deleted on May 26, 2013 14:10:29 GMT -5
Cool!! love the camo scheme very unusual and bound to get attention.
|
|
|
|
Post by wbill76 on May 26, 2013 14:30:43 GMT -5
Have to agree Pete! Just to be clear though I'm not going to attempt that ropy-three-tone pattern. I'm going to be aiming for the box art camo scheme on my particular build.  |
|
|
|
Post by wbill76 on May 26, 2013 20:21:19 GMT -5
More progress to report today so let's get right down to it! Work continued on the fenders with the addition of many of the details called for in Steps 9-11. The right side received the engine air intake and I replaced the flimsy kit supplied PE bars with rod styrene. Turns out later on in the build that this area is completely hidden away so it's not that critical either way. What is critical is the placement of the intakes and after placing the first one and doing some test fits with the rear engine deck, I realized it's actually much easier to install the intakes into the engine deck vs. trying to place them precisely on the fenders...so that's why only one is installed in the pic below.  You do need to be sure you choose the correct engine deck as there are two in the kit. I mistakenly did my test fits with the standard deck used on the II-D instead of the slightly modified one for the Marder II. Fortunately they are the same dimensions with the same placement so not a huge deal. Here you can see how the intakes fit into the deck vs. trying to place them on the fenders. I also had to modify the kit-supplied fire extinguisher by removing the rear mount pin and sanding down that area as the kit would have you leave the pin just hanging in mid-air over the fender and looking very out of place in the process.  Step 12 deals with the front hull driver's plate and provides the option of installing the visors either open or closed. I closed the right side since there isn't a crew member in that position regardless but posed the driver's side visor open. The rear portion of the gun mount also installed over the firewall to round things out in this step. 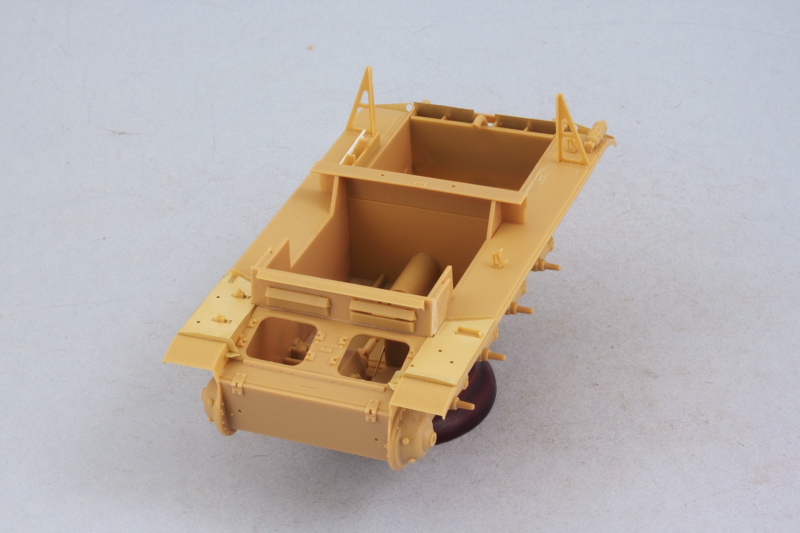 There's a lot of very nice detail provided on the interior side of the plate, but no armored glass blocks. 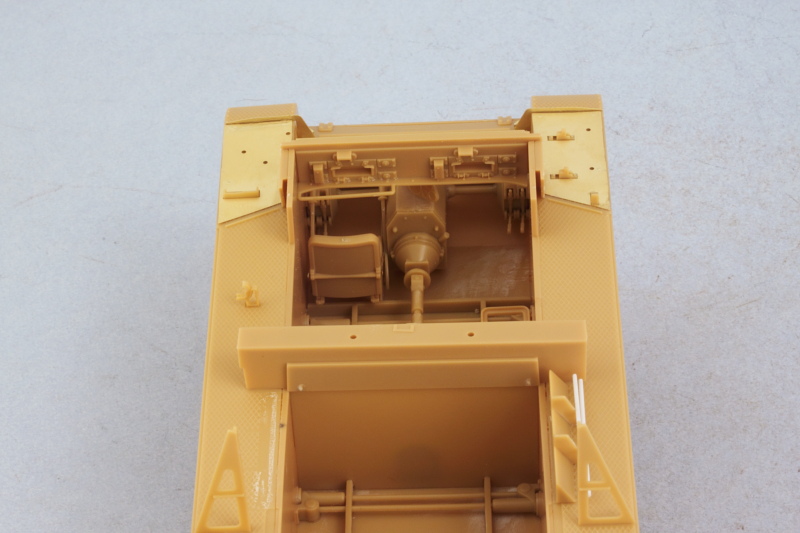 Skipping ahead a bit, I went to Step 15 to work on the rear engine deck (using the correct part this time!) and installed that in position on the hull. Once that had set up, I added all the access hatches, hinges, and lifting hooks. Bronco likes to do a lot of little parts with some of the assemblies and the rear travel lock for the main gun has this tiny little hinge trap part with tiny little pins on the lock itself. I suppose if you were really careful it could remain movable but I chose to lock it down in the stowed position. 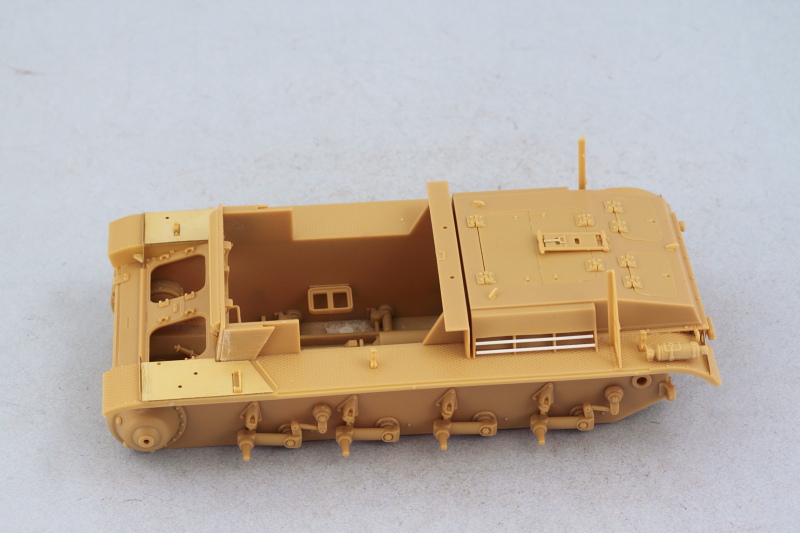 Again skipping a bit, I proceeded to Step 17 to install the rear fighting platform extensions. It's these extensions that render the previous intake work virtually unseen and the tolerances here are tight. They are designed to fit tightly over the triangular brace supports added earlier and fit flush against the hull, so if your placement of either the fenders or the braces is just a touch off, you'll have to use some elbow grease to get everything back into proper alignment. I found the little PE bracing struts for the extension to be too tall to sit properly so didn't use them as this area is practically hidden from view regardless once the fighting compartment side armor is fitted and the mesh screens in place. 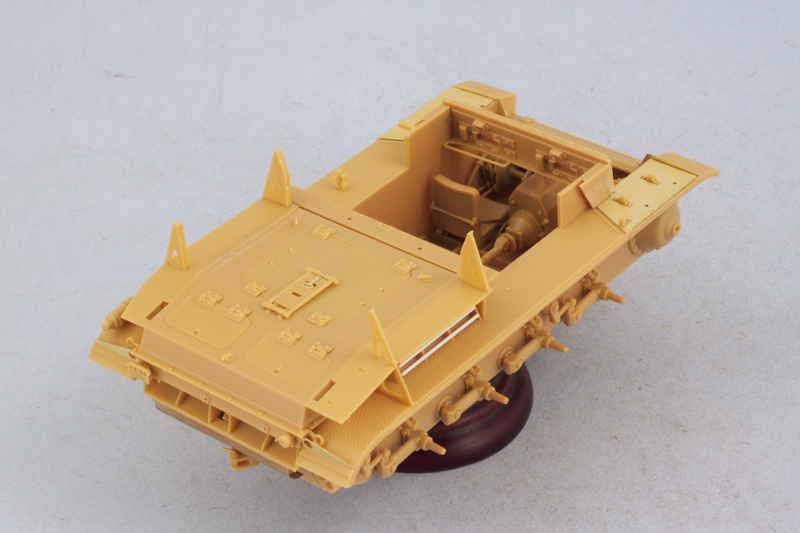 After giving it some careful thought in terms of how best to tackle the interior painting and detailing work, I decided to leave the driver's roof plate off and keep the large 8-round ammo box and gun mount base parts separate. The roof plate received its details as called for in Steps 13-14 and the gun mount base was assembled per Step 18. The vehicle's radio receiver unit was installed into the PE frame and then in position under the roof with a small hole drilled with a #76 finger drill to take the antenna wiring later on when it's installed. The large ammo box is taken care of in Step 16. Here again is Bronco's small part tendency on display, the box is made up of two large parts but 8 tiny PE handles and another 8 tiny plastic wing nuts to get it assembled. The PE is extremely fragile and the handles are all connected together on the PE fret, making it a delicate job to remove them cleanly without bending or distorting their shapes in the process. 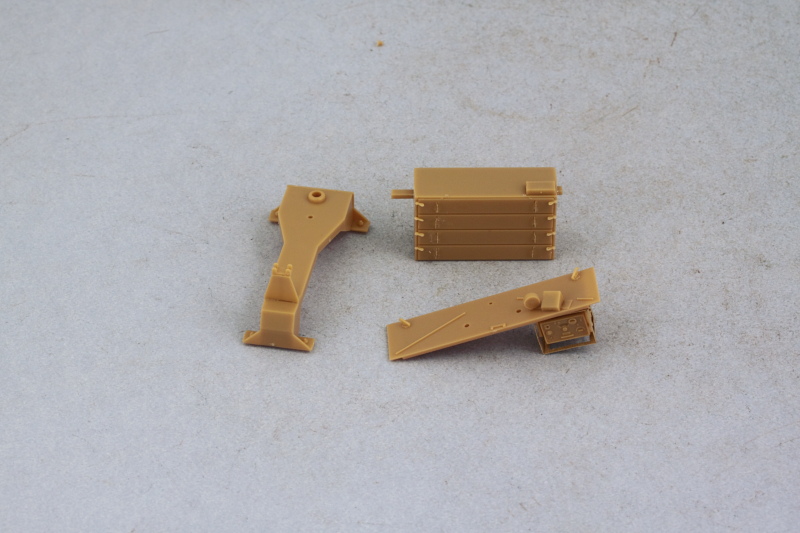 Next up will begin work on the fighting compartment side panels. |
|
|
|
Post by bbd468 on May 26, 2013 20:30:28 GMT -5
Shes buildin up real nice so far Bill. Che lookie berry goot!   |
|
|
|
Post by Leon on May 26, 2013 20:30:54 GMT -5
Bill you are really making great progress on this.I like all the detail on this.  |
|
bigjohn
Reviews member    
Member since: December 2011
John Hale
Posts: 3,438
Dec 21, 2011 2:17:45 GMT -5
Dec 21, 2011 2:17:45 GMT -5
|
Post by bigjohn on May 26, 2013 20:41:17 GMT -5
I get more impressed with this kit with each update. Nice work Bill!
|
|
|
|
Post by wbill76 on May 26, 2013 20:42:35 GMT -5
Thanks Brothers Gary and Leon! Doing my best to take full advantage of the holiday weekend. Bronco's steps are deceptive...some of them look so simple yet take more time than you expect like that ammo box for example.  |
|
|
|
Post by deafpanzer on May 26, 2013 21:19:20 GMT -5
Looking REAL GOOD!!! I think I am sold... gonna add it to my wish list at Hobby Intel. Oops! I meant My Hobby Info.  One more update... please!!! I promise I will post an update on my DUKW tonight!  |
|
|
|
Post by wbill76 on May 27, 2013 10:11:55 GMT -5
Will do my best Andy! Glad to hear you've gotten hooked on this little beauty.  |
|
|
|
Post by tonylee-Rest In Peace on May 27, 2013 10:16:45 GMT -5
Bill that's a piece of cake compared to the Alan kit. You kids have got it so easy these days  Tony lee |
|
|
|
Post by wbill76 on May 27, 2013 10:22:19 GMT -5
Bill that's a piece of cake compared to the Alan kit. You kids have got it so easy these days  Tony lee I've built Alan kits before Tony, so I definitely know what you mean!  |
|
Deleted
Member since: January 1970
Posts: 0
Nov 25, 2024 5:44:20 GMT -5
Nov 25, 2024 5:44:20 GMT -5
|
Post by Deleted on May 27, 2013 14:13:06 GMT -5
lovely details it sure will look good under a coat of paint
|
|
|
|
Post by wbill76 on May 27, 2013 18:49:55 GMT -5
I'm looking forward to painting this one soon Pete! Or at least getting some paint done...this one's got to move in stages. This update is especially for Andy!  Had a blast watching Star Trek: Into Darkness so that took up a good chunk of the day but also got in some more time as part of the 3-day weekend on the Marder. My original plan was to install the front portion of the fighting compartment to the driver's roof plate and use that as a single unit for painting and detailing. That was shelved when I discovered that the front compartment plate had a slight warp to it that will have to be dealt with when it is installed along with the side plates later on, so it's left separate for now. I did add the base of the antenna mount to it and also worked on the side plates as called for in Steps 21-23. The three-round ammo boxes were assembled (each is a 10 part assembly including the PE details) and installed as were the mount plates for the crew seats and the base of the tarp support rails. 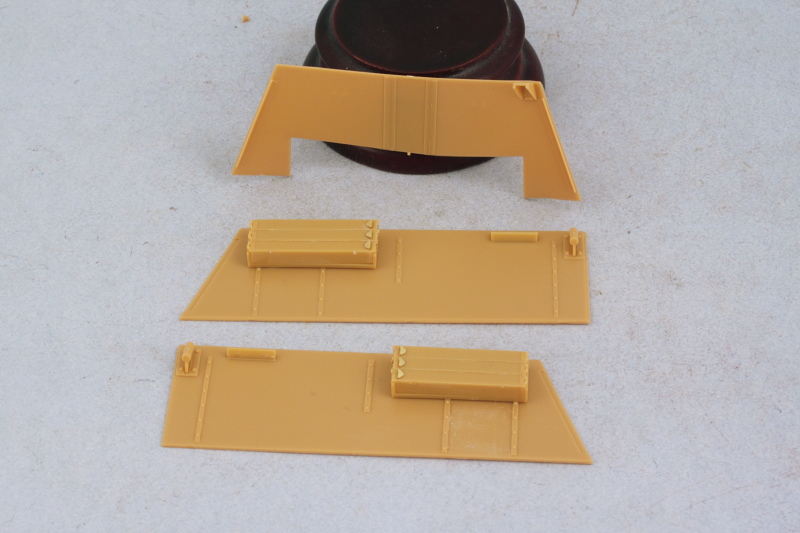 Rounding out the day's efforts, I returned to the previous steps and installed the remaining front hull details. The front hatches were installed along with the main headlights, the Notek light, and the siren. 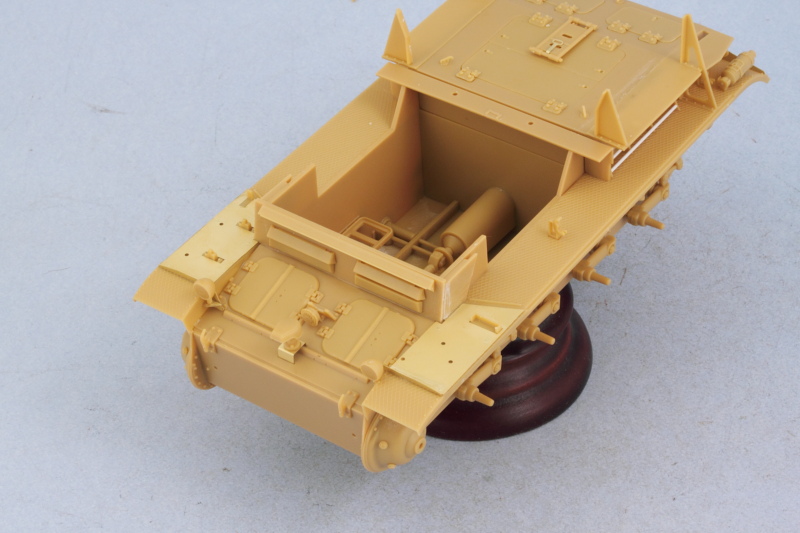 Next weekend should see some paint and detailing work done on the lower hull interior as well as more progress on the fighting compartment elements. |
|
|
|
Post by deafpanzer on May 27, 2013 22:01:34 GMT -5
Three updates in a week! OMG! We should make every weekend a holiday from now on. Wish I could match you with my updates!  Told ya the movie was damn good! I liked it even better than Iron Man 3 even tho my boys liked it better... not me. |
|
Deleted
Member since: January 1970
Posts: 0
Nov 25, 2024 5:44:20 GMT -5
Nov 25, 2024 5:44:20 GMT -5
|
Post by Deleted on May 28, 2013 0:14:24 GMT -5
Hmmmmm ...So you watched Star Trek and now the kit has its on Warpage ?
Some clean building going on here Bill !
|
|
|
|
Post by bullardino on May 28, 2013 8:59:10 GMT -5
Impressive build, Bill  Love every single detail of it  |
|
|
|
Post by wbill76 on May 28, 2013 10:04:44 GMT -5
Andy, felt good to get in some solid bench time over the holiday, but if you want every weekend to be 3-day, just move to France!  Carl Carl, funny you should mention that, perhaps there's some evil time-dimension-related plot at work here...  Luigi Luigi, thanks as always for the comments!
|
|