|
|
Post by wouter on May 29, 2013 8:01:48 GMT -5
Marder II build looks nice so far. Looking forward to see some more Bill magic!
Cheers
|
|
|
|
Post by wbill76 on May 29, 2013 10:34:56 GMT -5
Thanks Wouts! This one's rolling along nicely. Going to have some fun with it as you would expect with an open-top build.  |
|
|
|
Post by wbill76 on Jun 2, 2013 17:16:05 GMT -5
I didn't get a solid enough block of time to do paint work so instead focused my efforts on the Pak 36(r) main gun. Step 28 assembles the breech, the recoil tray, the gun barrel and muzzle brake, and the recoil sled as a multi-sub-assembly process. Lots of parts involved in this step, 23 in total. Some putty and sanding work was necessary on the breech to get a seamless result, but otherwise everything else went together smoothly. The gun barrel is one piece with separate multiple pieces for the muzzle brake with the barrel having only a very fine seam that is easily sanded away. I left the recoil sled unglued as directed in the instructions as this will make it much easier to paint and detail things later on. 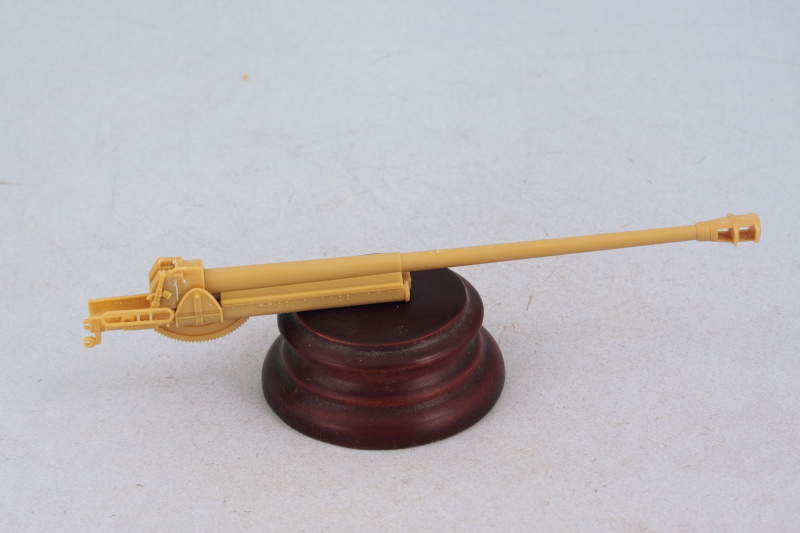 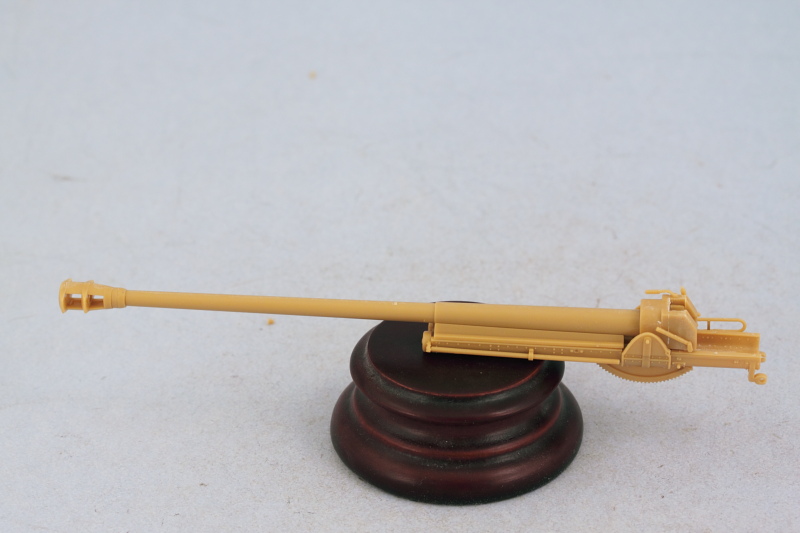 Step 29 addresses the gun mount and various details for the sides of the mounts. The instructions would have you attach all the fine/delicate parts to the mount sides first and then join the sides together along with the work done in Step 28 but that's not really a good idea given just how tiny/fragile some of those details are. This step has 28 parts so a lot going on here as well including separate tiny knobs for the elevation and traverse wheels. If done with care, the gun will remain able to elevate. I left off the gunner's sight for now as it will be detailed later. There is a small error in the instructions, the little diagram showing how G12 attaches to G52 has G52 upside down vs. how it really should be and is shown correctly in the main diagram in the step. I also looked ahead at Step 33 and added the small parts F23 and F26 at this stage and also installed the mount base plate F5 to the base frame assembled previously in Step 18 along with the front travel lock parts in the open position. The gun itself is dry fit only to the base frame to allow for flexibility in the paint and detail areas. 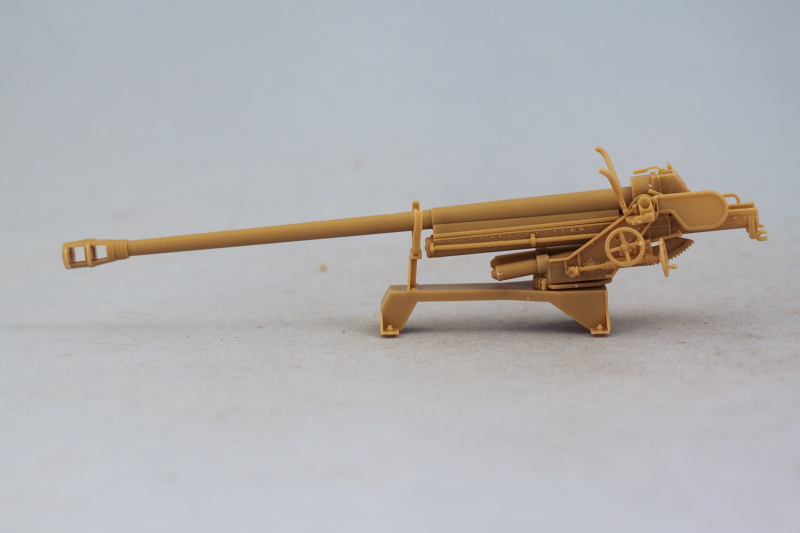 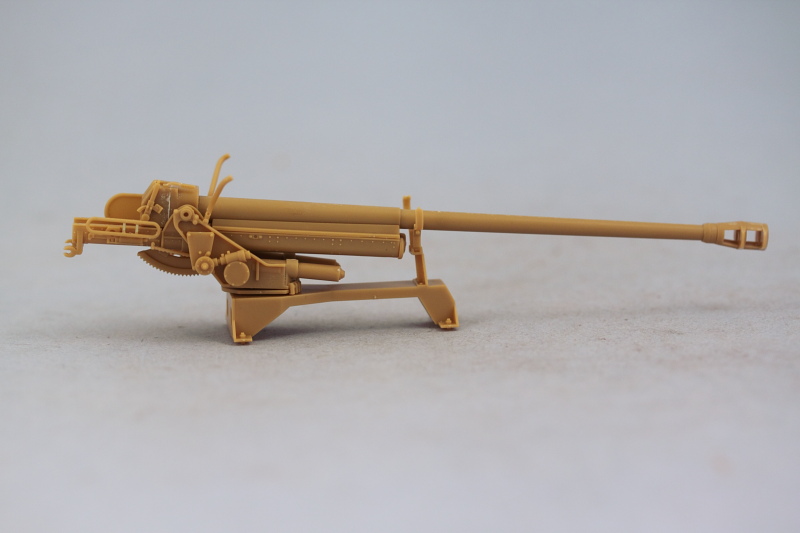 Just to make sure everything was playing nice, I did a test fit with the driver's roof plate and the main hull. 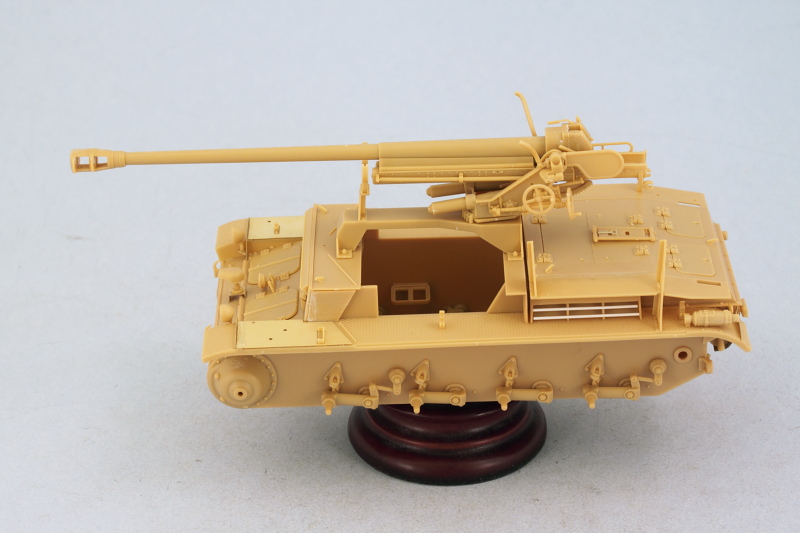 Next up will be working on the splinter shield and its details to get it ready for paint. |
|
Hinksy
Full Member
  
Member since: June 2012
THE ENGLISH LIONHEART - HINKSY!
Posts: 1,016
Jun 22, 2012 16:46:21 GMT -5
Jun 22, 2012 16:46:21 GMT -5
|
Post by Hinksy on Jun 2, 2013 17:31:25 GMT -5
Hi Bill, This is looking sweeeeet! I love that gun assembly - beautiful  I cannot wait to see what you do with this thing - it's also making me want to bust out that Bronco II D right now, it's definately up next! Keep the updates coming, Ben  |
|
Deleted
Member since: January 1970
Posts: 0
Nov 25, 2024 5:55:22 GMT -5
Nov 25, 2024 5:55:22 GMT -5
|
Post by Deleted on Jun 2, 2013 18:21:17 GMT -5
Top notch construction Bill !
|
|
|
|
Post by bbd468 on Jun 2, 2013 18:25:21 GMT -5
Fine buildification Brother Bill! Shes a nice-un.  |
|
|
|
Post by tonylee-Rest In Peace on Jun 2, 2013 18:26:37 GMT -5
Head and Shoulders above the old Alan offering buddy. The gun looks really nice.  Tony lee |
|
|
|
Post by wbill76 on Jun 2, 2013 19:32:35 GMT -5
Dicky, toughest part is deciding how to show off as much of the details as possible. Bronco has crammed details on top of details with this one. They even include the cross rod for the elevation hand wheel that transits the interior of the gun mount as a separate part. Totally hidden once assembled but it's there in case you need it!  Ben Ben, glad it's providing you with some inspiration! The II-D is calling your name when you sleep at night...  Carl Carl and Gary, thank you kindly sirs! Tony, no question about that, the Alan kit might as well be a paper cut-out!  Over 50 parts go into the gun...it's definitely raised my level of respect/appreciation for Bronco kits for sure. The only downside is that while it does provide a lot of detail, some of the parts are TINY...so great care is called for in their removal from the sprue and placement/attachment. Toothpicks and spit have bailed me out numerous times on this one already. 
|
|
|
|
Post by tonylee-Rest In Peace on Jun 2, 2013 20:16:25 GMT -5
|
|
|
|
Post by Leon on Jun 2, 2013 20:29:43 GMT -5
Agree with the guys Bill.Your doing an excellent job.  |
|
|
|
Post by TRM on Jun 2, 2013 20:36:10 GMT -5
Definitely nice work Bill!! Expecting nothing less!! Was off a few days on keeping up, but up to speed now!! Nice job on those intakes btw!! And the pea-shooter is looking might fine!!! Keep it coming!!!
|
|
|
|
Post by wbill76 on Jun 2, 2013 22:51:59 GMT -5
Thanks Leon! T, Glad you've had the chance to catch up. Intakes are one of those 'never going to be seen areas' but we know it's there.  The pea-shooter has the ironic distinction of being longer than the hull on the vehicle itself, something I didn't realize until I had them side-by-side as I was putting it away for the week. |
|
|
|
Post by deafpanzer on Jun 2, 2013 23:08:11 GMT -5
Jeez, the gun is much bigger than I expected! What is going on? Why is everybody building big guns now?!?!?! My DUKW has no gun...  Looking mighty good!!! |
|
|
|
Post by wbill76 on Jun 3, 2013 10:49:59 GMT -5
Thanks Andy! Your poor duck needs to add some hardpoints under the wings to be taken seriously! This one isn't truthfully a big gun, it's just a tiny chassis!  |
|
|
|
Post by armorguy on Jun 5, 2013 6:56:07 GMT -5
Bill, please inspire me, I still have a Tristar Marder III on the shelf and I don't like the number of parts ! This looks like a well detailed kit to me, give it hell my friend !
|
|
|
|
Post by wbill76 on Jun 5, 2013 10:39:15 GMT -5
Thanks Bob! Happy to do my part for stash reduction stimulus!  |
|
406 Silverado
Global Administrator     
Member since: November 2011
Posts: 10,225
Member is Online
MSC Staff
|
Post by 406 Silverado on Jun 5, 2013 16:42:42 GMT -5
Just got caught up Bill. Mighty clean work there fella. This looks like a really nice kit and a fun one to paint and weather.
|
|
|
|
Post by wbill76 on Jun 5, 2013 16:44:41 GMT -5
Just got caught up Bill. Mighty clean work there fella. This looks like a really nice kit and a fun one to paint and weather. Thanks Rob! I keep debating with myself on when to start the paint and such for the different stages...but pretty soon I'm going to run out of excuses not to start at least on the interior!  |
|
|
|
Post by Leon on Jun 5, 2013 16:54:02 GMT -5
What ever you decide Bill,i'll be waiting.  |
|
|
|
Post by wbill76 on Jun 5, 2013 20:30:29 GMT -5
What ever you decide Bill,i'll be waiting.  Thanks Leon...the trick for painting is always getting a solid block of time to work with. Building/Assembly can be done in bits and pieces if needs be, so it's easier to scrape together sessions for that part of the build...but eventually all roads lead to the same end.  |
|
|
|
Post by armorguy on Jun 8, 2013 14:38:46 GMT -5
Hi Bill, no update coming up yet my friend ?
|
|
|
|
Post by wbill76 on Jun 8, 2013 16:39:05 GMT -5
Hi Bill, no update coming up yet my friend ? Should have an update for tomorrow AG! Got sidetracked today with various things including some yard work (although not to the same level as Andy!) so haven't been able to get in any time today but tomorrow for sure.  |
|
|
|
Post by wbill76 on Jun 9, 2013 20:20:12 GMT -5
After some careful thought, I decided to go ahead and paint and detail the lower interior of the fighting compartment before doing any more work on the gun and splinter shield. The vast majority of the interior is hidden away once the gun is mounted and the splinter shield in place so I was selective in terms of what was painted and detailed and what wasn't as a result. First up, I airbrushed a 50-50 mix of Model Master enamel Light Gray/Panzer Dunkelgelb over the various interior components from previous steps. Strips of blue painter's tape were used to mask off the critical join points on the compartment sides and on the fenders to avoid having to scrape paint and ensure a good join was possible down the road. 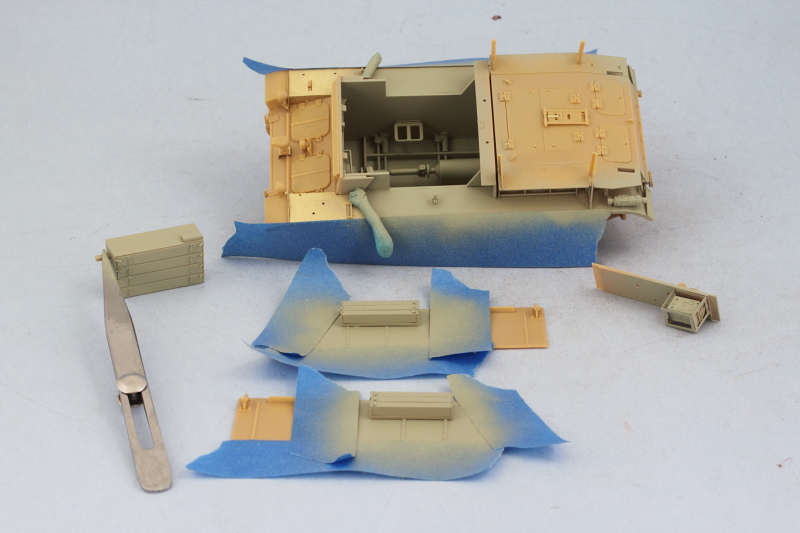 Next I spent some time on the radio, adding wiring for the loud speaker, a power plug that disappears into the driver's compartment, and the cable for the antenna. 0.5mm solder was used for the wiring and carefully bent to shape as needed and then glued into place with CA gel. 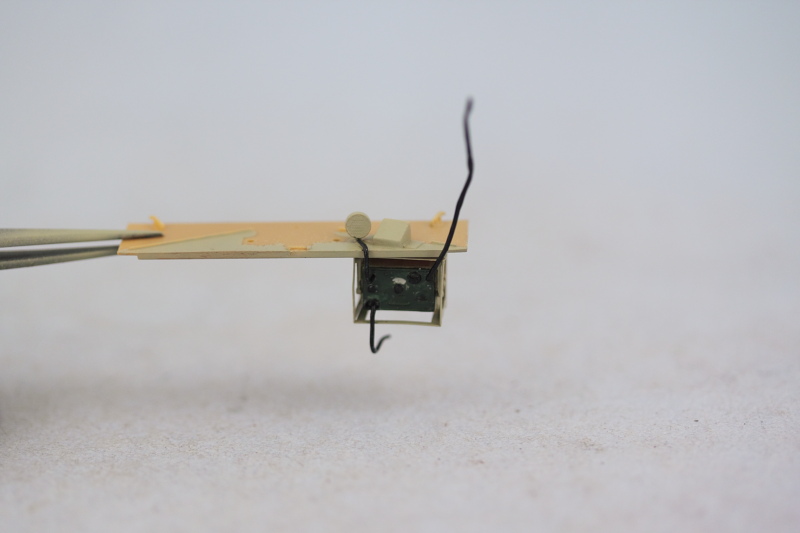 The driver's roof panel was installed into place and some light wear/scuffing added to the interior by stippling some enamel Burnt Umber in various spots. The radio operator's seat was also detailed and added at this point as were the gun cleaning rods. 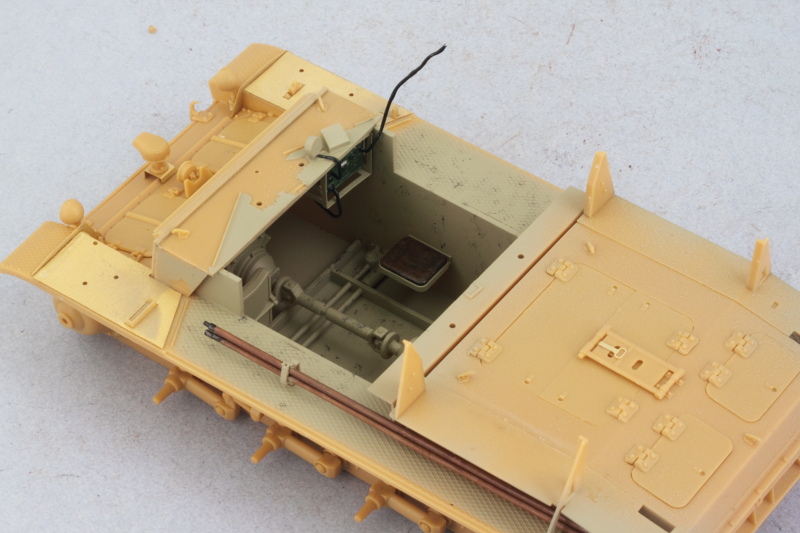 With that out of the way, I installed the large ammo bin that sits under the gun mount and installed the compartment side walls. This was essential due to the warped condition of the angled front compartment plate as the side panels were going to help provide some much needed leverage to get it into the correct position. I used regular glue at the bottoms and liquid glue along the angled braces and hull side extension plates to ensure they were solid and lined up correctly. 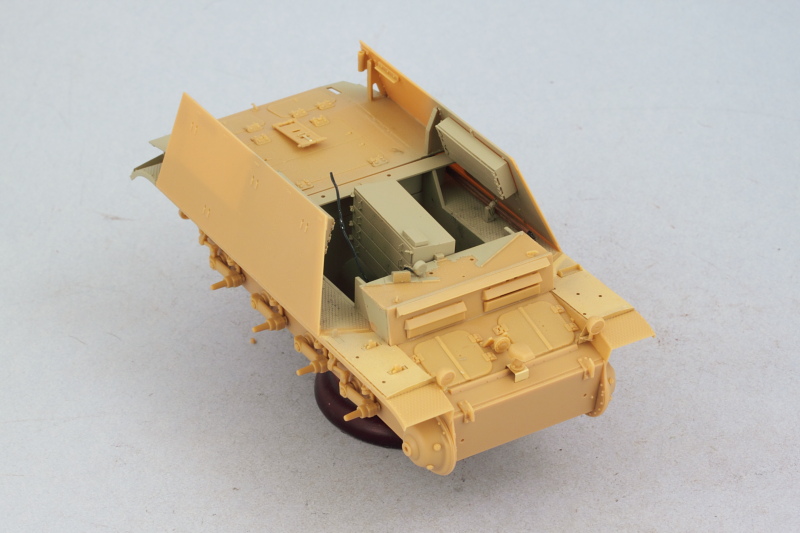 Last but not least for the day, the front panel was installed. It's a thin panel to begin with which is why I think it had the slight warp to begin with so care was necessary when installing it not to create a distortion from one side to the other with finger pressure. Prior to installing it, I airbrushed the same 50/50 mix from earlier on it's interior side as my original plan of painting it in place post-install turned out to be less than ideal due to the space constraints. After the glue had set, some small amounts of putty and sanding were needed at the base in various places to fill small gaps that couldn't be closed otherwise. 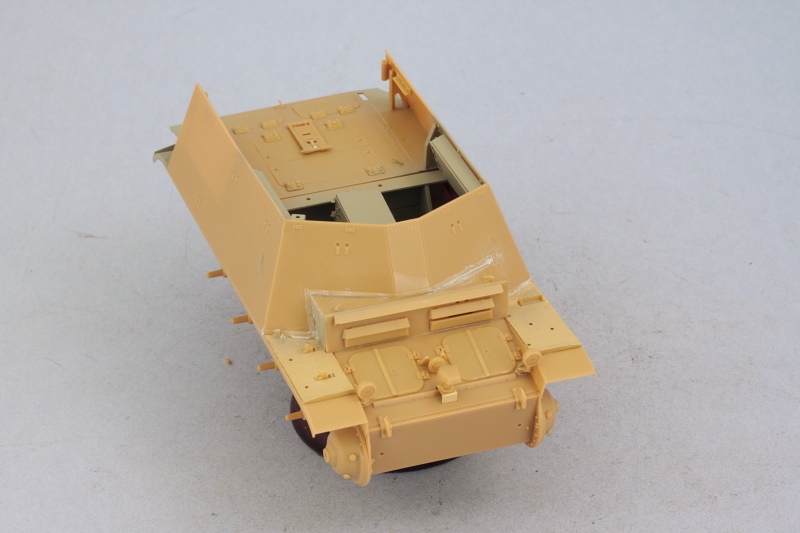 Next up will be getting the rest of the compartment painted and detailed and then return to working on the gun components. |
|
|
|
Post by TRM on Jun 9, 2013 20:24:14 GMT -5
Great update Bill!! Love that Ra-did-eo!! Sweet!! Color a nice too!! Moving right along on this one!! Getting jealous now that you a sling paint!!!  |
|
|
|
Post by tonylee-Rest In Peace on Jun 9, 2013 20:41:45 GMT -5
Starting to look like something now Billy Boy. Still taking notes Tony lee  |
|
bigjohn
Reviews member    
Member since: December 2011
John Hale
Posts: 3,438
Dec 21, 2011 2:17:45 GMT -5
Dec 21, 2011 2:17:45 GMT -5
|
Post by bigjohn on Jun 9, 2013 20:50:49 GMT -5
Great update Bill, nice to see some paint fly!
|
|
406 Silverado
Global Administrator     
Member since: November 2011
Posts: 10,225
Member is Online
MSC Staff
|
Post by 406 Silverado on Jun 9, 2013 20:53:48 GMT -5
Another great update Bill. I have the Dragon Pz II Marder II I have been tempted to start...but the thought of doing an interior is not very apealing atm. Soooo I will just watch you do it...lol
|
|
|
|
Post by wbill76 on Jun 9, 2013 21:11:00 GMT -5
T, this one's got to be done in fits and starts...which means assemble, paint, assemble, paint, etc. until at least the interior is done...then it will be paint, weather!  Tony Tony, glad to be of assistance! With the compartment on it's starting to look like a Marder finally instead of just a collection of parts strewn about my workbench.  BJ BJ, felt good to get some paint flowing on this one! Thanks for following along. Rob, happy to provide some 'vicarious' interior work...I'm like you, I have to be in the mood for an open-top build or it's just not enjoyable. Have the same kit in the stash as well, but it's going to have to wait a while before it's number comes up. The II-D trumped it for a change! 
|
|
|
|
Post by fightnjoe on Jun 10, 2013 8:05:20 GMT -5
bill she is another of your clean and efficient build ups. stunning work.
joe
|
|
406 Silverado
Global Administrator     
Member since: November 2011
Posts: 10,225
Member is Online
MSC Staff
|
Post by 406 Silverado on Jun 10, 2013 8:10:19 GMT -5
T, this one's got to be done in fits and starts...which means assemble, paint, assemble, paint, etc. until at least the interior is done...then it will be paint, weather!  Tony Tony, glad to be of assistance! With the compartment on it's starting to look like a Marder finally instead of just a collection of parts strewn about my workbench.  BJ BJ, felt good to get some paint flowing on this one! Thanks for following along.
Rob, happy to provide some 'vicarious' interior work...I'm like you, I have to be in the mood for an open-top build or it's just not enjoyable. Have the same kit in the stash as well, but it's going to have to wait a while before it's number comes up. The II-D trumped it for a change!  [/font] Have to agree Bill, if your not in the mood, or have the mojo for it, forget it. I have three Marder III's as well but they will have to wait. A good'ol KV might be what I need next, simple easy build. The Thor build is finished and just needs painting...might break out a KV afterall. Looking forward to seeing this Marder get some exterior work and then paint, should be very cool. |
|