|
|
Post by Teabone on Jun 7, 2013 22:09:33 GMT -5
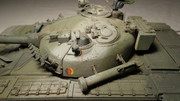
This picture is the bottom of the Chassis. I will dust it tomorrow and work on the crew cabin weathering.
|
|
|
|
Post by tonylee on Jun 8, 2013 10:11:16 GMT -5
Nice chassis work sir  Tony lee |
|
|
|
Post by armorguy on Jun 8, 2013 14:40:57 GMT -5
...Cabin weathering...sounds yummy to me Bones ! Chassis looks great.
|
|
|
|
Post by Teabone on Jun 8, 2013 17:46:53 GMT -5
ArmorGuy & Tonylee
Thanks for viewing and commenting it helps keeping on.
Bones
|
|
|
|
Post by wbill76 on Jun 8, 2013 19:48:07 GMT -5
Chassis's looking good Bones, nice foundation to work from.
|
|
|
|
Post by Teabone on Jun 8, 2013 21:21:02 GMT -5
Chassis's looking good Bones, nice foundation to work from.
Thanks for the support, its like the great builders always say you have to have a good foundation, I think it has gone well and other than the dimension problems and lousy windscreen wipers the kit is one of Tamiya's better ones for assembly.
Bones
|
|
|
|
Post by Teabone on Jun 8, 2013 21:24:04 GMT -5
A progress picture on the doors.
|
|
|
|
Post by Teabone on Jun 8, 2013 22:08:50 GMT -5
Here is the start of the Pheasant which to avoid misunderstanding I will label each picture "PHEASANT" to keep them separate from the FAT.
As I begin with this kit I discovered that there are a lot of nice photo's available but not many review articles other than one I think I saw on the IMPS site some time ago. As kits with a lot of detail go this one is right up in the top percnetage. On the possible down side is the large amount of PE parts with no styrene alternative parts. I believe that takes this kit out of the beginners range. I am not complaining even though I have not had a good relationship with PE parts and CA glue, I do love detail and look forward to trying this out.
Too start I cut out all the parts for two wheels and tires.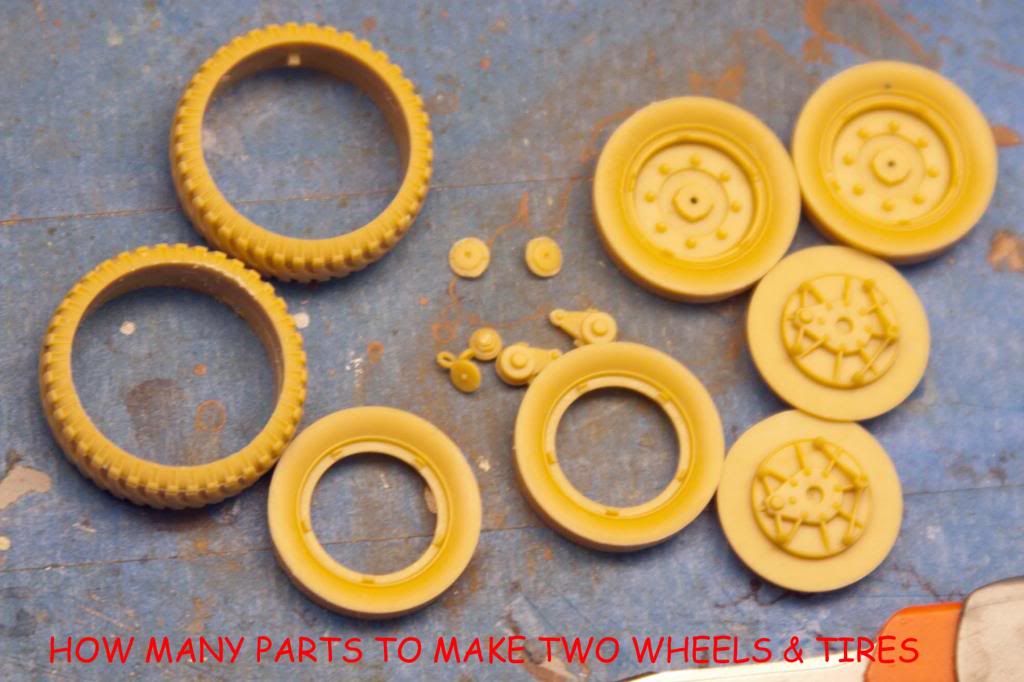
|
|
|
|
Post by Teabone on Jun 8, 2013 22:10:58 GMT -5
"PHEASANT"
Now that is a fair number of parts for two wheels and Tires but the really look nice when put together.
|
|
|
|
Post by Teabone on Jun 8, 2013 22:12:40 GMT -5
"PHEASANT"
Now with the breach I did not take enough pictures of the parts because I did not want to loose track of them as I assembled them so all I can show you is the breach about 75% complete with two VERY small PE parts that go on the breach.
|
|
|
|
Post by Teabone on Jun 8, 2013 22:18:07 GMT -5
"PHEASANT"
The finished breach with the two VERY small PE parts in place. Al I cans say at this point is so far so good.
|
|
|
|
Post by Teabone on Jun 8, 2013 22:20:52 GMT -5
"PHEASANT"
Those guys are tough to see, trust me they are there.
|
|
|
|
Post by Teabone on Jun 8, 2013 22:29:23 GMT -5
I am getting to that point is life where I forget what I am doing and this was an example. The post that appeared here last evening was in error and should have been posted on the Bone Yard Thread, sorry for the confusion, I have corrected where it too where it belonged.
Bones
|
|
pt109
Full Member

Member since: April 2013
Stop staring at me! heheheh
Posts: 491 
|
Post by pt109 on Jun 9, 2013 1:01:54 GMT -5
This next piccy shows some miscellaneous parts under construction, there was not much to this vehicle to start with so a lot of stuff had to be improvised along the way.
The kit OOB machine gun barrel was a club that had to go and of course there was no OOB action for this weapon and I did the best I could with it from the earlier vehicle plan profile. All Fords until 1932 used updraft carburetors so I had to create one. The turret hatch was easy from Styrene using the cut out part for a pattern.
And the steering wheel from styrene rod to scale along with a fuel tank to scale which will ride inside the cab with the driver. To our current thinking with a constant fear we are not safe riding with 10 gallons of fuel setting next to you probably seem a little dangerous particularity if a bullet were to penetrate the cab. All Ford Cars from the beginnings in 1910 or so to 1928 placed the fuel tanks beneathe the front seat where the driver was able to check the fuel level (no gauge) from time to time.  Bones, I like where you're going with this one.....nice scratch work, always nice to see additional details. On the seats, last time I did something similar, I just used Woodland Scenics white glue but you have to coat the tissue pretty well, hold the tissue over the part (say a seat) and apply liberal amounts of the glue, try brushing it on. Let it dry and apply more as you go until it gets firm. It could be the plastic....I used it on an Italeri kit years ago. Paul |
|
|
|
Post by bullardino on Jun 9, 2013 15:01:48 GMT -5
Great progress  |
|
|
|
Post by wbill76 on Jun 9, 2013 20:52:31 GMT -5
Great work there Bones - some exemplary scratcherisationary techniques on the bench there....nice job  Yeah, what he said! Nice update Bones, keep on trucking! |
|
|
|
Post by Teabone on Jun 9, 2013 23:26:24 GMT -5
Great progress
Thanks for the look and nice words, I dont know if you caught it or not but the post with the small scratch parts was in the wrong thread, I moved them over to the Bone Yard where they belonged, I think I'm getting ready for the assisted living place soon I wont be able to remember my way home.
Bones
|
|
|
|
Post by Teabone on Jun 9, 2013 23:50:54 GMT -5
|
|
Deleted
Member since: January 1970
Posts: 0
May 14, 2024 6:52:34 GMT -5
May 14, 2024 6:52:34 GMT -5
|
Post by Deleted on Jun 10, 2013 5:24:40 GMT -5
Fantastic Scratch building!!
|
|
|
|
Post by bullardino on Jun 10, 2013 9:09:43 GMT -5
I was rather sure that both the pheasant and the FAT didn't have any turret Yet all the progress you're making on this one is awesome |
|
|
|
Post by ceresvesta on Jun 10, 2013 9:12:43 GMT -5
Nice progres Bone! Good job with the seats.
|
|
|
|
Post by Teabone on Jun 10, 2013 22:32:35 GMT -5
Fantastic Scratch building!!
Bones
|
|
|
|
Post by Teabone on Jun 10, 2013 22:43:15 GMT -5
I was rather sure that both the pheasant and the FAT didn't have any turret Yet all the progress you're making on this one is awesome
You are always right on top of what is being said in the posts and I really appreciate it. What happened is I got confused one night and I posted a segment of my Polish Armored Car pictures that belonged in Teabones Bone Yard to this thread and before I caught the mistake and placed the post where it really belonged pt109 left his post which I can not move and that has the turret in it. I have to apologize for the confusion.
I have to tell you that the Pheasant Kit is really an interesting build. There are so many small parts it is unbelievable, if you don't like "fiddly" stuff you would not like this kit. There are a large number of PE parts which I normally would not do but so far I have been able to build the smallest parts OK. Don't know why someone has not done a good build review of it yet.
Bones. |
|
|
|
Post by Teabone on Jun 10, 2013 22:49:09 GMT -5
Nice progres Bone! Good job with the seats.
Bones
|
|
pt109
Full Member
Member since: April 2013
Stop staring at me! heheheh
Posts: 491
|
Post by pt109 on Jun 10, 2013 22:53:07 GMT -5
After a brief experiment with glues I have found that the Elmer's glue pictured does the job. Those who have been following the Polish Armored Car posts on the Teabones Bone Yard will recognize the seat that I used which I built but was a throw away because it was too big. It does not have pronounced seat cushions so its not the perfect example but it worked for me.
The picture of it shows some material I was curious about that comes from those pieces of material the wife throws in the dryer to take the static out of the clothes. Some builders are using this for canvas and I wanted to know how it worked. In this experiment it was a failure, its too open and made from some synthetic material that was difficult to cut with the glue on it to trim it to the seat.
I started over by splitting the layers on a sheet of Kleenex much like I did on the FAT seats. I then thinned the Elmer''s glue with water about 60/40 Glue/Water and think that could be 50/50 now that its done. The glue adhered just fine, I brushed some on the seat and the side of the Kleenex that was going to be face down. I let them set a couple of hours and then with a fresh scalpel blade I trimmed it and removed any excess very cleanly with no difficulty. I now think that a full thickness sheet of Kleenex might make a better texture but that will have to wait for another time. 
This is what the Kleenex seat looked like after paint, with a little care and some depressions it will be fine.  I did not try the Tight Bond which is a better product that Elmer's because I'm not sure how clear it will get when dry and as Elmer's does the job "it ain't broke don't fix it" is my motto.Bones I did not try the Tight Bond which is a better product that Elmer's because I'm not sure how clear it will get when dry and as Elmer's does the job "it ain't broke don't fix it" is my motto.Bones
Nice job on the seat, well now you will have it down on your next build...great details you're adding most of what I did was on the exterior. I like how you did the wheels, I remember running into that issue as well, not sure what I did it was a while ago and it's painted now so would never know anyway,...hahah Paul |
|
|
|
Post by Teabone on Jun 10, 2013 23:00:26 GMT -5
Nice job on the seat, well now you will have it down on your next build...great details you're adding most of what I did was on the exterior. I like how you did the wheels, I remember running into that issue as well, not sure what I did it was a while ago and it's painted now so would never know anyway,...hahah Paul
Thank you for your suggestions and keeping watch and it is always amazing what I can cover up with paint but it can on occasion make mistakes into a glaring example kind of like a two edged sword cuts both ways..
Bones
|
|
macmcconnell
Full Member
Member since: December 2011
Posts: 1,238
Dec 11, 2011 12:07:33 GMT -5
Dec 11, 2011 12:07:33 GMT -5
|
Post by macmcconnell on Jun 11, 2013 1:21:42 GMT -5
great detail work
Mac
|
|
|
|
Post by ceresvesta on Jun 11, 2013 8:23:08 GMT -5
Good idea.It would be great to see the difference between the two.
|
|
vlpbruce
Full Member
Member since: March 2013
Posts: 1,463
|
Post by vlpbruce on Jun 12, 2013 22:06:27 GMT -5
Great work my friend.
|
|
|
|
Post by Teabone on Jun 13, 2013 0:00:58 GMT -5
Mac, vlpbruce and ceresvesta
Thank you for the nice words of support, I was looking around for a seat to try the two layer Kleenex and I found an old seat that needs some work to make it workable, I'm going to look for a better one but if not Ill use it and we will see what two sheets looks like.
Bones
|
|