|
|
Post by wbill76 on May 30, 2013 20:11:07 GMT -5
T's nailed it...about the time the little voice says 'maybe just one more thing...' is usually when it's time to stop!  Looking forward to seeing you two make hay on these projects!  |
|
|
|
Post by dupes on May 30, 2013 20:43:05 GMT -5
I know that you guys are right, but MAN doesn't it hurt to ruin a brilliant paint job.
Being able to visualize what it is you're trying to do also helps...I don't feel like I have that. Once I dig through the piles o' magazines etc. I'm usually able to find a "look" that I can try to duplicate, but I don't feel like I have my own style. Or even a simple go-to checklist when it comes to weathering. At least nothing beyond filter/overall wash, chip, oil dot, pin wash, maybe pigments. 4 or 5 steps - not enough LAYERS!
|
|
|
|
Post by TRM on May 30, 2013 21:28:35 GMT -5
Dupes...you have your own style!! It does show in your work. As for the 4 or 5 steps...this is all that the layers are basically. Light coats of each, building up slowly are the layers. Also, enhancing "layer 5" with another "layer 3" or combination therein is part of it. Apprehension is a major player. Nothing wrong with liking the way something looks clean (I must be getting soft in my old age by saying that). So visualizing and application thereof are not always cohesive. This is why starting small is the way to go. Muddy running gear is a great start for anyone...materials and overall application of them. Pin washes, dots, filters and more play crucial parts and making the weathering "convincing" takes a little practice. Stepping back often and looking at your project from outside your work zone helps a bunch! As for check lists....I have never been one for lists...ask my wife!! LOL!! Just remember to protect your work! If you have applied a filter to start and followed by a selective, non-overbearing pin wash or two...protect it once dried. This way if you apply the next layer and mess it up...simply remove back to the layer prior and start over. Once you get more comfortable with things, you can trust yourself to skip some of the protective layers...this also depends on the medium of choice at the time. Some layers can easily be removed by the next. Might be time to break out an unpainted queen and have a go on some things??  |
|
|
|
Post by dupes on May 31, 2013 8:48:24 GMT -5
Nothing wrong with liking the way something looks clean (I must be getting soft in my old age by saying that)...Pin washes, dots, filters and more play crucial parts and making the weathering "convincing" takes a little practice. See, the funny part is that I don't WANT my stuff to be clean...it just ends up that way because I don't know how to convincingly make it look less so. I want to be able to duplicate the ridiculously awesome "real" looking heavily weathered schemes I always see! |
|
Deleted
Member since: January 1970
Posts: 0
Nov 24, 2024 4:41:07 GMT -5
Nov 24, 2024 4:41:07 GMT -5
|
Post by Deleted on May 31, 2013 11:35:16 GMT -5
Go for it Dupes .
I think I am where you are .I tend toward the clean builds but really enjoy looking at a well weathered model .
Its an art being able to pile all of those weathering techniques on a model and make it look convincing in the end .
|
|
|
|
Post by dupes on May 31, 2013 11:41:08 GMT -5
That really is the issue is the "convincing" part. Far too easy to slap a bunch of stuff on there and have it be very obvious what you did instead of being able to blend it all in the right proportions and make it look REAL.
|
|
|
|
Post by TRM on May 31, 2013 12:50:45 GMT -5
That really is the issue is the "convincing" part. Far too easy to slap a bunch of stuff on there and have it be very obvious what you did instead of being able to blend it all in the right proportions and make it look REAL. This is where the "layers" come into play! Small amounts built up. Kind of change things up as you go. Using plenty of reference shots of various similar items in various weathered condition give the continuity....and convincing-ness-ism-es--'s  LOL...make it convincing!!! Ask yourself what you want to achieve for the end game result!! Most of the time I, and I am pretty sure Rob as well as other do this...think about the painting and weathering right from the start!! visualize...then do! |
|
bbrowniii
Full Member
  
Member since: March 2012
If you are not part of the solution, you are part of the precipitate.
Posts: 1,238
Mar 25, 2012 22:08:04 GMT -5
Mar 25, 2012 22:08:04 GMT -5
|
Post by bbrowniii on May 31, 2013 13:14:17 GMT -5
Did you say that in your best Yoda voice?  |
|
|
|
Post by TRM on May 31, 2013 13:45:39 GMT -5
(((LOL)))  |
|
|
|
Post by wbill76 on May 31, 2013 20:25:33 GMT -5
I know exactly how you feel Dupes...that's where I was at a while back as well...the trick I found was to 'see' (like T said) what I wanted to in terms of what effects others were producing on their builds and then work to replicate that in my own way, making alterations as I tried them out and experimented with them. Some techniques survived and got incorporated into a 'standard' approach, others got ditched, and some survived for a while but were then supplemented or replaced with others depending. It's a journey, not a destination, and you're not going to get there the first time every time (although sometimes happy accidents do occur!). If I was going to try something radical/new on a build, I typically would pick one that I wasn't too heavily invested in as the first 'guinea pig' if you will. The other option is to use an older model and/or a sheet of practice plastic card as a test bed, much lower risk for trying out things that way too. First step's always the toughest but when you are pushing the envelope you have to be prepared for slightly unexpected/unanticipated outcomes and be one with the moment! That and don't be afraid to strip/redo if you have to.  |
|
|
|
Post by bullardino on Jun 1, 2013 8:03:24 GMT -5
Well, I find that the fun is in the unexpected  I think that if it'll ever happen that I don't have anything new to try, I'll lose all the mojo. The results aren't the best, but it's still fun to do them  |
|
|
|
Post by Tojo72 on Jun 1, 2013 8:19:39 GMT -5
Looks like a great project
|
|
|
|
Post by dupes on Jun 1, 2013 8:44:33 GMT -5
Yep, Bill's got it. I think that once I have a reliable, repeatable weathering foundation I'd play around with it a bit, but for right now I'm still looking!
Thought I'd be a day behind Boyd in posting Wirbelwind updates - went to bed uncharacteristically early for me last night, so didn't get to start. Got any pics, buddy?
|
|
bbrowniii
Full Member
  
Member since: March 2012
If you are not part of the solution, you are part of the precipitate.
Posts: 1,238
Mar 25, 2012 22:08:04 GMT -5
Mar 25, 2012 22:08:04 GMT -5
|
Post by bbrowniii on Jun 1, 2013 9:54:23 GMT -5
Thought I'd be a day behind Boyd in posting Wirbelwind updates - went to bed uncharacteristically early for me last night, so didn't get to start. Got any pics, buddy? Not yet. Got some things to do with the kids early today so I hope to crack into the box later this afternoon or early evening. |
|
bbrowniii
Full Member
  
Member since: March 2012
If you are not part of the solution, you are part of the precipitate.
Posts: 1,238
Mar 25, 2012 22:08:04 GMT -5
Mar 25, 2012 22:08:04 GMT -5
|
Post by bbrowniii on Jun 1, 2013 22:06:33 GMT -5
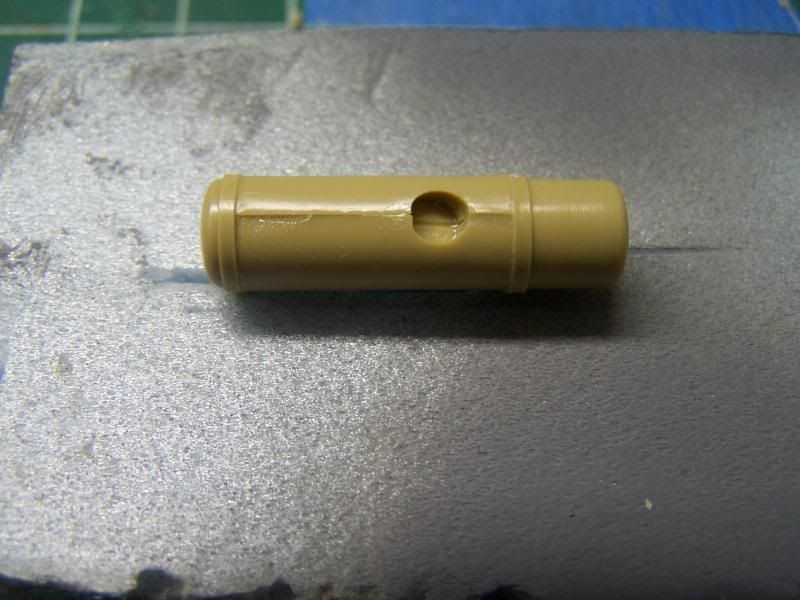
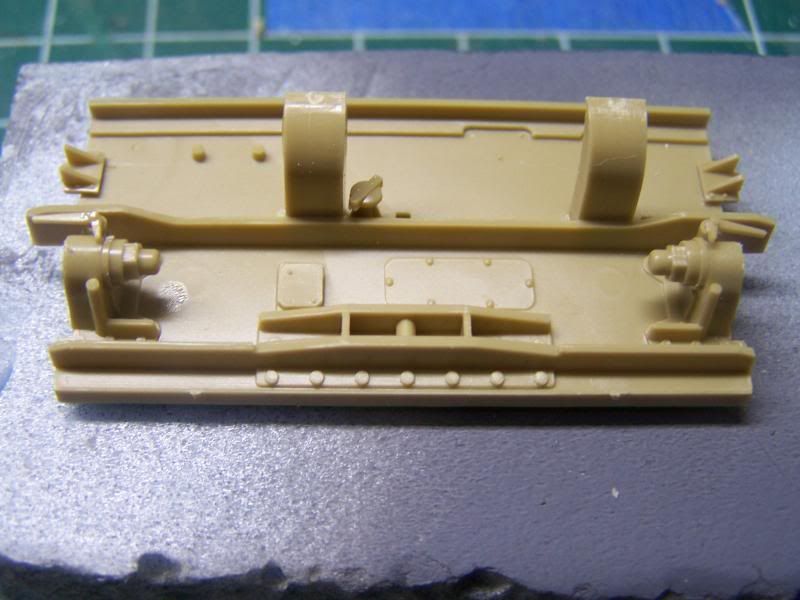
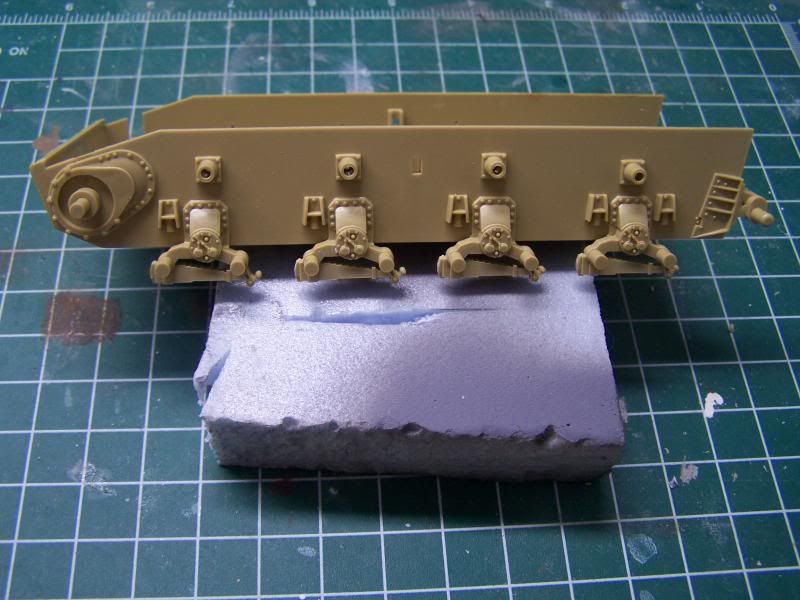
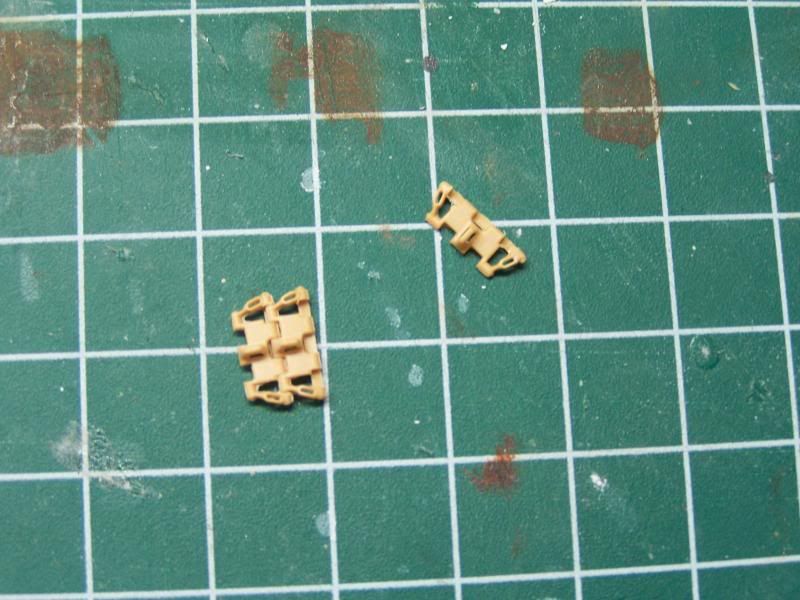
WOO-HOO it has begun, and I drew first blood!! (Well, at least I posted the first pics) I didn't get a ton of work done tonight - just started on the rear plate/muffler and the suspension. Everything went together with no problems, although the muffler will need some seam attention before I attach it.    Since it is an area that I often get bogged down in, I decide to set the kit aside for a bit and start work on the tracks from Tristar. I have to admit that I am a bit disappointed by the amount of cleanup each link needs - there is a ton of flash. But other than that, they seem to go together pretty well.  Well, I jumped out ahead of the pack, but I suspect this is the last time I'll enjoy the pristing views from the lead. I know that dupes got a lot done today, and he'll be posting pics soon... |
|
|
|
Post by TRM on Jun 1, 2013 22:08:02 GMT -5
Where are we at Boys?!?!?!? LOL!! Weather was too fine to not head out for a bit today, so I would expect the building would have been save for the night!! Pics, pics, Pics, pics, pics  |
|
Deleted
Member since: January 1970
Posts: 0
Nov 24, 2024 4:41:07 GMT -5
Nov 24, 2024 4:41:07 GMT -5
|
Post by Deleted on Jun 1, 2013 22:45:28 GMT -5
Good start !Tracks be a pain in the bottom . good to get them out of the way . T, can you see the pics now ?  |
|
|
|
Post by dupes on Jun 2, 2013 8:42:54 GMT -5
Alright. Tried to do this last night, but totally got bogged down in the May MoM voting. Yowza. That's a rough lineup! So here's what I'm starting with. I reserve the right to add ridiculous amounts of aftermarket at any time!   And where I got to between dinner and bedtime last night - did as much as I could before having to crack into the Eduard PE set:  Man, it's been a while since I've built a Tamiya kit. DML could take some notes from these guys...roadwheels with only one attachment point! Makes for awfully easy cleanup. |
|
|
|
Post by dupes on Jun 2, 2013 8:46:35 GMT -5
Oh, and the evolution of what happens to my kit boxes every time I crack into a new one: 1) Cat detects fresh cardboard that smells of plastic.  2) Cat attempts to get comfortable.  3) Cat watches an episode or two of Fringe.  4) Cat finally gets tired and destroys kit box altogether spilling out of it.   |
|
|
|
Post by TRM on Jun 2, 2013 8:57:11 GMT -5
I see them now Boyd!!! Nice start!!! Looks like you will have an easy go at the build!! Gotta feel lucky yours didn't come with the cat optional part!!  You too Dupes....where does the cat part actually get glued?!! Might be tough to get that part to stand still long enough to stick!! But would be fun to try and weather!! LOL!! Off to a great start too my friend!! |
|
|
|
Post by dupes on Jun 2, 2013 9:00:02 GMT -5
The cat part - not gluable. He ends up getting stuck to every model I build once I start PAINTING.  |
|
|
|
Post by TRM on Jun 2, 2013 9:05:43 GMT -5
LOL...good and bad I suppose! Solve the weathering issue...incorporate the fur into grass on the muddy sections!! Win WIn!!
|
|
multicam
Senior Member
   
Member since: January 2012
Nate
Posts: 2,039
Jan 10, 2012 14:35:41 GMT -5
Jan 10, 2012 14:35:41 GMT -5
|
Post by multicam on Jun 2, 2013 9:46:36 GMT -5
Just caught up on this one:) Lovely to have another duel! Great advice T and Bill. They've said it all Dupes, just jump in a do it until it looks how you want it to look:) Most layers are fairly forgiving if you work in small sections (I'm thinking oils and AK stuff). Good stuff so far fellas.
P.S. I love that pic with the hay buried WW. Very cool. Those soldiers had too much time on their hands:)
|
|
|
|
Post by bbd468 on Jun 2, 2013 10:13:14 GMT -5
Hey Dupes, Love the Cat update! Paper Sacks and cardboard boxes are favorites of my cat as well. I guess its a serious part of their healthy development of stealth, stalk and attack!  Wonder if the Japanese word Ninja translates to Cat?  |
|
|
|
Post by TRM on Jun 2, 2013 10:21:04 GMT -5
Hey Dupes, Love the Cat update! Paper Sacks and cardboard boxes are favorites of my cat as well. I guess its a serious part of their healthy development of stealth, stalk and attack!  Wonder if the Japanese word Ninja translates to Cat?  Doesn't look like too much "Stealthy" action going on there Gary!!  |
|
|
|
Post by bbd468 on Jun 2, 2013 10:29:05 GMT -5
Hey Dupes, Love the Cat update! Paper Sacks and cardboard boxes are favorites of my cat as well. I guess its a serious part of their healthy development of stealth, stalk and attack!  Wonder if the Japanese word Ninja translates to Cat?  Doesn't look like too much "Stealthy" action going on there Gary!!  LOL I assumed it was his day off from training.   |
|
|
|
Post by TRM on Jun 2, 2013 10:35:04 GMT -5
LOL..day off ey? With the average of 13 to 16 hours of nap time for cats I wonder where the day begins and ends!!  |
|
Deleted
Member since: January 1970
Posts: 0
Nov 24, 2024 4:41:07 GMT -5
Nov 24, 2024 4:41:07 GMT -5
|
Post by Deleted on Jun 2, 2013 12:14:39 GMT -5
Funny line of cat pics Dupes !!!  . I'll be keeping tract of how this build goes and what pe you use since I have one of these in the stash ! |
|
bbrowniii
Full Member
  
Member since: March 2012
If you are not part of the solution, you are part of the precipitate.
Posts: 1,238
Mar 25, 2012 22:08:04 GMT -5
Mar 25, 2012 22:08:04 GMT -5
|
Post by bbrowniii on Jun 2, 2013 13:34:56 GMT -5
I knew it. I KNEW IT. He's gonna absolutely BURY me in PE, then send in the cat to finish off the dirty work.  |
|
|
|
Post by dupes on Jun 2, 2013 16:09:55 GMT -5
Hahahaha...headed back to the bench now to dig into that PE set. Let me see what else I can scrounge up to throw at this baby.
Update tonight!
|
|