|
|
Post by Teabone on Jun 13, 2013 17:30:22 GMT -5
Thanks for the comments gents ! Bones, I'll keep your tip in mind mate !
The below pictures show the MEK method that I use that I said I'd post.
Bones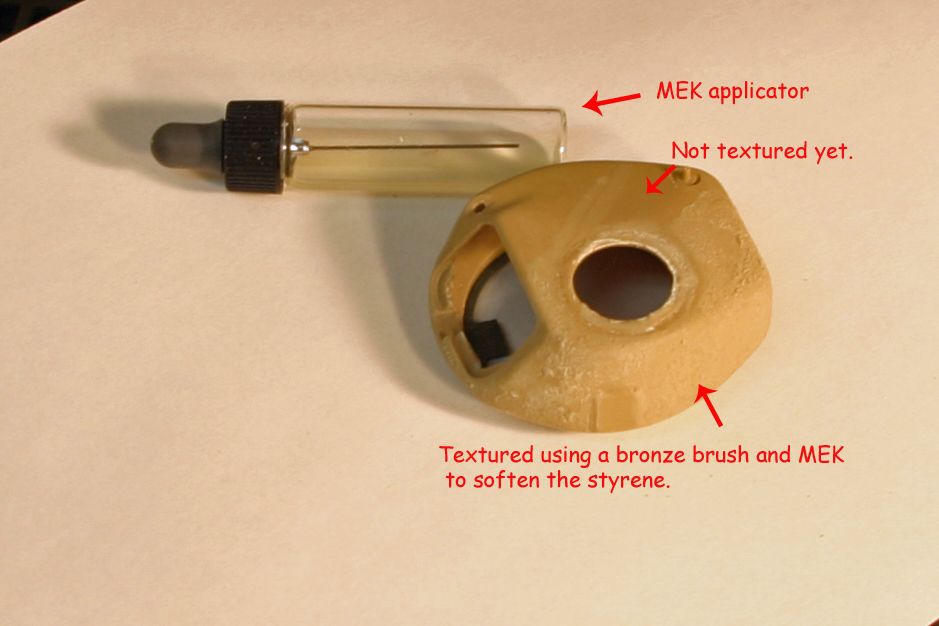 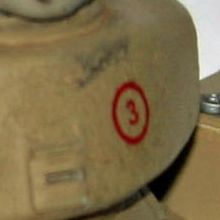 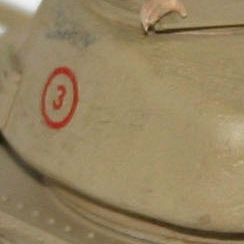  Pictures do not show it perfect but you should be able to get the idea of what I did. Pictures do not show it perfect but you should be able to get the idea of what I did. |
|
bigjohn
Reviews member    
Member since: December 2011
John Hale
Posts: 3,438
Dec 21, 2011 2:17:45 GMT -5
Dec 21, 2011 2:17:45 GMT -5
|
Post by bigjohn on Jun 13, 2013 18:36:38 GMT -5
Sweet looking paint work Guy!!
|
|
|
|
Post by wbill76 on Jun 13, 2013 19:54:20 GMT -5
We have color! Woohoo!
|
|
Deleted
Member since: January 1970
Posts: 0
Nov 26, 2024 19:48:56 GMT -5
Nov 26, 2024 19:48:56 GMT -5
|
Post by Deleted on Jun 14, 2013 12:45:43 GMT -5
nice build love it!
|
|
|
|
Post by armorguy on Jun 14, 2013 13:40:23 GMT -5
Thanks friends, today I expected to do more but there's always a new tomorrow ! 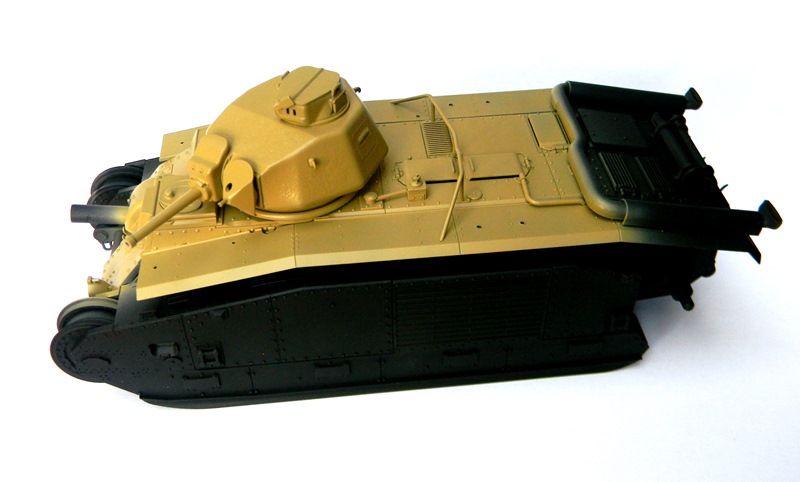 Not a revolutionary what if night camo...  Best regards ! AG. |
|
Deleted
Member since: January 1970
Posts: 0
Nov 26, 2024 19:48:56 GMT -5
Nov 26, 2024 19:48:56 GMT -5
|
Post by Deleted on Jun 14, 2013 21:33:17 GMT -5
Hmmm , this is an interesting start on the paint !
|
|
|
|
Post by armorguy on Jun 15, 2013 11:33:28 GMT -5
More Dark yellow today fellas. After spraying on the Dark Yellow I added a bit of White X2 and Laquer Thinner to the prepared paint, to lighten the horizontal parts.  Probably I start airbrushing the brown tomorrow. Best regards ! AG. |
|
|
|
Post by 406 Silverado on Jun 15, 2013 11:37:39 GMT -5
oops, wrong tank,builder and camo. Still, nice camo AFV.
Guy, I use the MEK for gluing all my kits, and also for texturing too. I sometimes use a stiff toothbrush. Will be doing this on the KV II cast mantlet.
Paint looks good so far. Wish I could be painting right now.
|
|
|
|
Post by armorguy on Jun 15, 2013 11:50:40 GMT -5
Thanks Rob, a friend of mine MEK-glues too. I'll have to give it a try especially for texturing. This photo inspires me a lot. 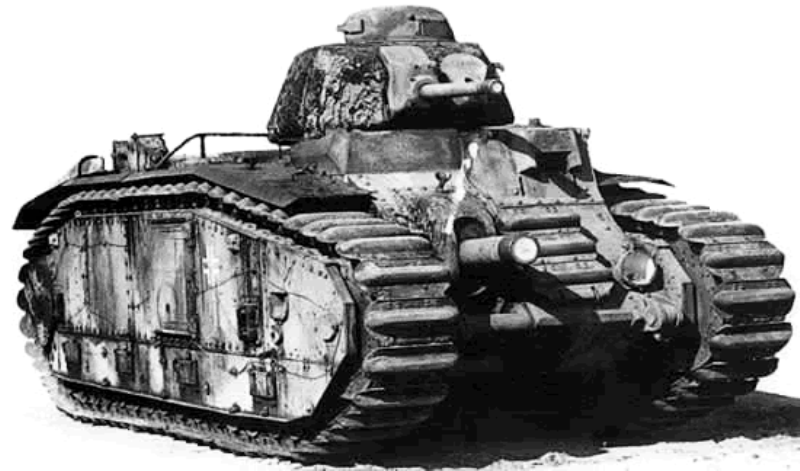 I try to add a soft, almost semi transparent camo. BTW : some of the Channel Island Chars were coated with a product looking like tar. Particularly the turrets show this. I think it was an experiment ? AG. |
|
|
|
Post by 406 Silverado on Jun 15, 2013 12:02:44 GMT -5
yeah I love that pic too. Looks very worn and dirty.....fun with weathering. I will be getting this kit very soon I hope. Looks like a simple build and lots of fun to paint and weather.
|
|
|
|
Post by armorguy on Jun 15, 2013 12:11:43 GMT -5
yeah I love that pic too. Looks very worn and dirty.....fun with weathering. I will be getting this kit very soon I hope. Looks like a simple build and lots of fun to paint and weather. I will be getting another one of these too Rob, I can't wait to start building a French Char version, and picking an interesting camo scheme. |
|
afvfan
Senior Member
   
Member since: December 2012
Bob
Posts: 1,772
Dec 10, 2012 17:32:38 GMT -5
Dec 10, 2012 17:32:38 GMT -5
|
Post by afvfan on Jun 15, 2013 14:11:23 GMT -5
AG - the 2 tone yellow looks good. That'll give you a great base for the other colors. I wish I had taken the time to texture the cast parts. Your turret looks good.
Rob - sorry for the confusion....but thanks for the compliment.
I just posted a question on the guards over on another forum. Maybe someone there can give us a semi-definitive answer about them. If someone does, I'll post it here. Between letting the clear dry, decaling, and recoating them, I figure I have a few days yet before I'll be ready to proceed.
|
|
|
|
Post by deafpanzer on Jun 15, 2013 14:28:41 GMT -5
GREAT PROCESS!! Can't wait to see more...  |
|
|
|
Post by Teabone on Jun 15, 2013 15:36:30 GMT -5
ArmorGuy
My experience, I tried using MEK for glue and in the right situations it works well, places where you can assemble a part and use a capillary applicator along the seams leaves no residue and gives you a nice tight joint. There are other places where Extra Thin is better so rather than switch back and forth between the two I stayed with Extra Thin just for ease of use and for me the MEK applicator was a little fiddly to load at times.
Bones
|
|
|
|
Post by wbill76 on Jun 15, 2013 17:30:51 GMT -5
Nice paint update AG! The thick coating you're referring to wasn't tar, it was actually zimmerit if you can believe it or not! Field applied for sure and very rough, but that's what you see on the surviving examples from the Channel Islands. For the hull sides they didn't use zimmerit but had some kind of screen or hanging 'drape' type of arrangement IIRC (can't find the link I had about it but will post it if I dig it up again). It was a make-shift anti-magnetic experiment that was done only with these handful of vehicles in an attempt to bring them up to standard with other Pz vehicles as best as possible at the time.
|
|
|
|
Post by Leon on Jun 15, 2013 17:47:30 GMT -5
Great progress Guy.Looking forward to more updated.  |
|
afvfan
Senior Member
   
Member since: December 2012
Bob
Posts: 1,772
Dec 10, 2012 17:32:38 GMT -5
Dec 10, 2012 17:32:38 GMT -5
|
Post by afvfan on Jun 16, 2013 0:37:38 GMT -5
|
|
|
|
Post by armorguy on Jun 16, 2013 6:02:26 GMT -5
This prooves it is a rubber skirt indeed ! Thanks Bob, and it's a great pic to have in my thread !
Bill, thanks mate, so it was zimmerite, amateuristically added to the Chars ! Nice to know.
|
|
|
|
Post by Teabone on Jun 16, 2013 13:53:48 GMT -5
Great find on the picture, another lesson learned, also may be the reason so many were missing when dragged over a hard edge.
Bones
|
|
danb.
Reviews member     March 2013 MoM Winner
Member since: November 2011
Posts: 2,808
Nov 17, 2011 9:22:52 GMT -5
Nov 17, 2011 9:22:52 GMT -5
|
Post by danb. on Jun 16, 2013 15:23:22 GMT -5
Great progress fella  Dan B |
|
|
|
Post by armorguy on Jun 17, 2013 9:44:22 GMT -5
Guys...guys...guys...something kinda bad luck happened this afternoon, but please keep smiling just like me please.
I had finished my brown camo job, and I filled my airbrush with green. I cleaned the airbrush and appearantly I forgot to screw on the nozzle entirely. The airbrush pulled air from the nose and the green paint in my cup got blown out and spead out in a green Goblin rain, guess where it came down...on my Char.
I immediately tried to clean it up but as I use Laquer thinner, it was already eating its way to the plastic.
My own mistake, no man overboard, it's only a model.
The paint was removed entirely and I will start again friends.
Give me a couple of days for this recovery overation please.
But we keep smiling, in fact this is about modelling too, falling and rising.
Lesson learned : screw the nozzle on boyz.
Best regards ! AG.
|
|
|
|
Post by wouter on Jun 17, 2013 10:25:11 GMT -5
yeah, big bummer, but I'm pretty sure you're not the first and probably not the last to encounter that stuff  well, it looked great so far, a repaint can only mean it will only look even better! Cheers |
|
afvfan
Senior Member
   
Member since: December 2012
Bob
Posts: 1,772
Dec 10, 2012 17:32:38 GMT -5
Dec 10, 2012 17:32:38 GMT -5
|
Post by afvfan on Jun 17, 2013 10:40:33 GMT -5
Sad news, AG. Thankfully, it is a recoverable mistake, but I feel your frustration!
|
|
|
|
Post by bbd468 on Jun 17, 2013 11:33:25 GMT -5
Thanks friends, today I expected to do more but there's always a new tomorrow !  Not a revolutionary what if night camo...  Best regards ! AG. I rather like the Night camo look. Stealthy!  Lookin nice my man!  |
|
|
|
Post by 406 Silverado on Jun 17, 2013 18:04:03 GMT -5
Bummer G. I am sure it'll look even better second time around.
|
|
bigjohn
Reviews member    
Member since: December 2011
John Hale
Posts: 3,438
Dec 21, 2011 2:17:45 GMT -5
Dec 21, 2011 2:17:45 GMT -5
|
Post by bigjohn on Jun 17, 2013 18:09:01 GMT -5
Hang in there brother! I know you can fix it!
|
|
|
|
Post by Leon on Jun 17, 2013 19:13:49 GMT -5
Glad your spirits are still up AG  .You'll get her fixed right.  |
|
|
|
Post by Teabone on Jun 17, 2013 19:14:26 GMT -5
ArmorGuy
Know the feeling, had to remove a paint job myself once and hope it never happens again. Only one solution and that is to rise up and go again.
Bones. PHOENIX PHOENIX
|
|
|
|
Post by wbill76 on Jun 17, 2013 20:17:16 GMT -5
Sorry to hear about that AG but I'm sure you'll recover in a couple of days and it will be better than ever the second time around. You're not alone for sure...there's an area on the wall and ceiling next to my spray booth that's got a nice splattering of enamel Burnt Umber...Mr. Genius here decided it would be a good idea to ensure there was sufficient airflow getting to the needle by putting my finger over the end of the nozzle and lightly depressing the trigger...forgetting that I'd screwed the needle down tight when I'd swapped out paint colors just a couple of minutes prior. The top cap on the paint cup blow out like Old Faithful!  |
|
|
|
Post by armorguy on Jun 18, 2013 13:10:10 GMT -5
Well guys, I have already ordered another Char B1 BIS for the near future, coz' I want a couple of these in my collection, showing different camo patterns. This one however will be finished, Mr Murphy in the house or not. And it wont be a camo version, nor a grey one. The unlucky kit was cleaned yesterday and painted again today. I went for an easy solution after my airbrush protest. So it's still in progress... as a captured 'Beute' Char, a green one, with the white star decals, and named "Vercors". Decals are planned for tomorrow, here's the change of plan on photo :  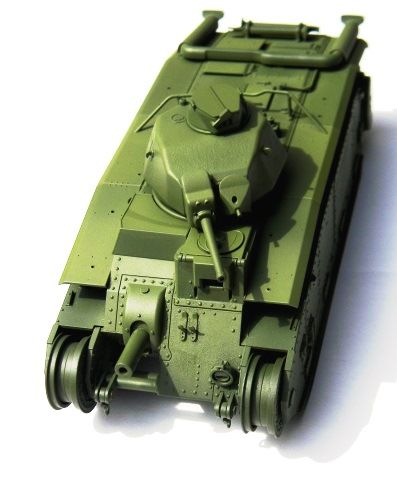 Best regards ! AG. |
|