Deleted
Member since: January 1970
Posts: 0
Nov 26, 2024 19:40:20 GMT -5
Nov 26, 2024 19:40:20 GMT -5
|
Post by Deleted on Jun 18, 2013 13:31:16 GMT -5
nice recovery! theses things are sent to try our patience that's for sure!
|
|
|
|
Post by Teabone on Jun 18, 2013 15:41:00 GMT -5
ArmorGuy
A quick recovery that shows no sign of its misadventure.
Bones
|
|
|
|
Post by wbill76 on Jun 18, 2013 19:41:57 GMT -5
Cool! That will keep Murphy guessing! Nice looking green finish there AG.
|
|
|
|
Post by armorguy on Jun 19, 2013 13:42:49 GMT -5
Pete, Bones, Bill,thanks fellas ! Today I decided not to attach the decals but I've already sprayed on the Clear for optimal placing conditions. Then I moved on to the exhausts. This is how it looks now, tomorrow I think I can finish them.  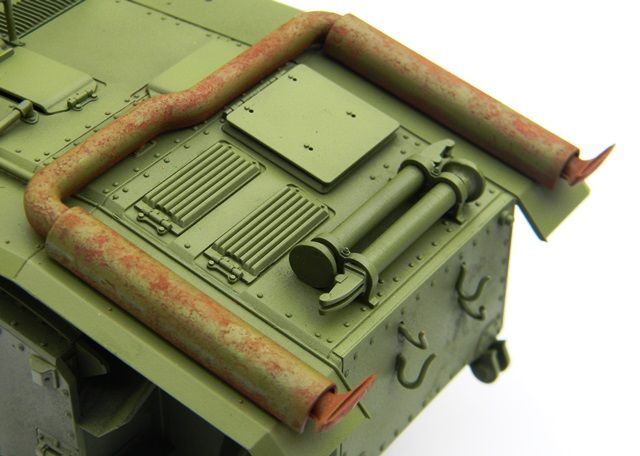 Rob's "pigments on thick oil paint wash method" was used for this effect. Best regards, AG. |
|
|
|
Post by Leon on Jun 19, 2013 19:59:02 GMT -5
Nice recovery AG,that is looking fantastic and the exhaust is looking aces.
|
|
|
|
Post by wbill76 on Jun 19, 2013 20:21:34 GMT -5
Looking forward to seeing more of those exhausts AG, nice foundation for sure!
|
|
|
|
Post by armorguy on Jun 20, 2013 4:01:55 GMT -5
Kenny, it was a pretty expensive solution but it worked 100% : washing it all off with Laquer Thinner (Tamiya). Bill, today is modelling day my friend, don't know where to start first LOL ! Leon, thanks bud ! VERCORS : Decals where added and sealing starts now. First washes follow soon... 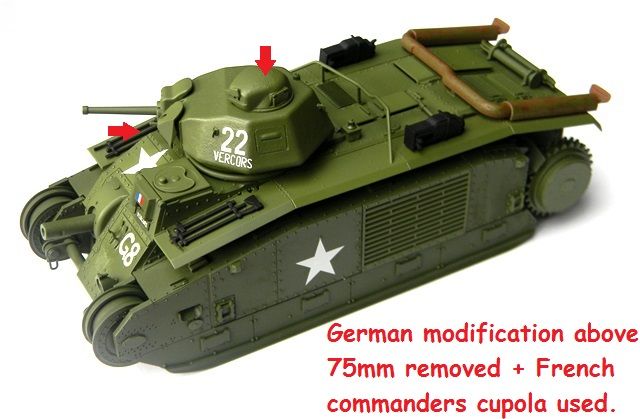 Best regards ! AG. |
|
|
|
Post by ceresvesta. on Jun 20, 2013 7:25:48 GMT -5
Superb A.G.Nice recovery indeed...psheeww. How exactly did you acheive this finish on the exhaust? They are just spot on!
Phil.
|
|
|
|
Post by Tobi on Jun 20, 2013 11:51:03 GMT -5
The exhausts look stunning, where is the technique explained, please?
Cheers,
Tobi
|
|
Deleted
Member since: January 1970
Posts: 0
Nov 26, 2024 19:40:20 GMT -5
Nov 26, 2024 19:40:20 GMT -5
|
Post by Deleted on Jun 20, 2013 12:03:29 GMT -5
Its a Beaut' Guy !
|
|
|
|
Post by armorguy on Jun 20, 2013 12:11:24 GMT -5
I'm happy to explain it to you guys :
Once you experienced the method there's no way back I'm afraid, it's very difficult to achieve the same results by hand painting with fine brushes.
First there was the green layer of acrylic paint,
followed by adding Tamiya matt Red Brown,
then a thick Burnt Sienna oil paint wash was applied,
pigments (rust color tones) were then dabbed into the wet oil paint wash, use enough of them, it's better to apply too much,
excess can always be removed by simple blowing (of the pigments of course !),
then an acrylic green paint layer was applied onto the pigments, be careful not to blow them all away (!), lower your air pressure,
let dry for about an hour and start peeling, picking and rubbing with tooth picks, stiff brushes...
Thanks for your support friends ! AG.
|
|
|
|
Post by tobias5555 on Jun 20, 2013 12:19:21 GMT -5
Nice rusting on the exhaust.
|
|
|
|
Post by 406 Silverado on Jun 20, 2013 12:36:13 GMT -5
Looks fantastic in the new paint G. LOVE the exhausts. I want this kit mainly to have fun with the exhausts.
|
|
|
|
Post by armorguy on Jun 20, 2013 12:50:09 GMT -5
Thanks Tobias ! Thanks Rob, the exhausts are the most attractive parts of the whole kit, as are the massive tracks ! Wash was applied : 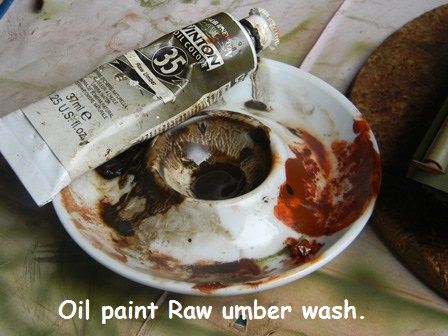 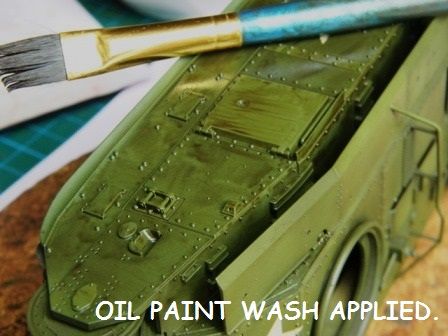  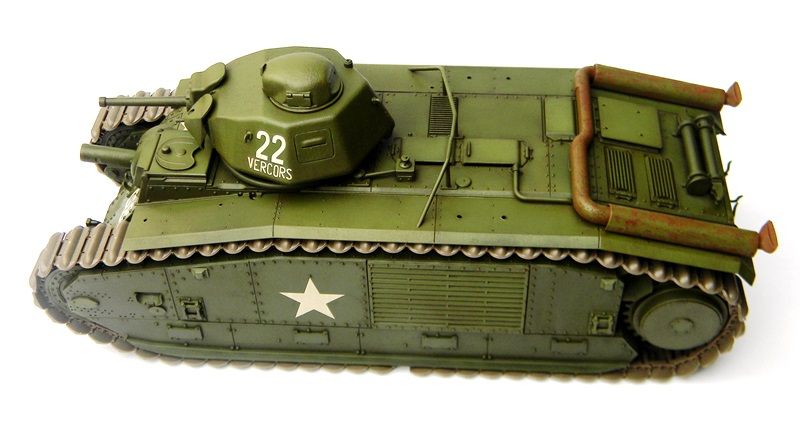 This primary wash is such fun to apply, it's at this point that the model gets its first boost I believe. |
|
|
|
Post by 406 Silverado on Jun 20, 2013 12:54:47 GMT -5
The exhausts look stunning, where is the technique explained, please? Cheers, Tobi Tobi. I no longer have these SBS's on my website but here is one here that is similar and gives you a rough idea how it works. Also if you have the AK Magazine issue #1 there is an article in there. modelerssocialclub.proboards.com/thread/249/old-crusty-rust-chipping |
|
|
|
Post by 406 Silverado on Jun 20, 2013 12:58:58 GMT -5
Guy, I'll be using this technique on my Panther once I am able to paint again. I have the rust coat on her but that's about it.
|
|
|
|
Post by armorguy on Jun 20, 2013 13:00:51 GMT -5
Cool Rob, looking forward to your updates !
|
|
|
|
Post by armorguy on Jun 20, 2013 13:01:59 GMT -5
The exhausts look stunning, where is the technique explained, please? Cheers, Tobi Tobi. I no longer have these SBS's on my website but here is one here that is similar and gives you a rough idea how it works. Also if you have the AK Magazine issue #1 there is an article in there. modelerssocialclub.proboards.com/thread/249/old-crusty-rust-chippingThat's it ! Isn't that a revolutionary method ?! |
|
|
|
Post by Teabone on Jun 20, 2013 13:13:15 GMT -5
ArmorGuy
I don't know about revolutionary but it certainly is easy to understand and very well photographed, impressive for sure.
Bones
|
|
|
|
Post by armorguy on Jun 20, 2013 13:19:53 GMT -5
Thanks Bones, I think the pigment method of Rob is quite impressive and closest to reality. My results aren't revolutionary, that's for sure LOL !
|
|
Deleted
Member since: January 1970
Posts: 0
Nov 26, 2024 19:40:20 GMT -5
Nov 26, 2024 19:40:20 GMT -5
|
Post by Deleted on Jun 20, 2013 13:31:37 GMT -5
Nice of you to post the SBS on the oil wash Guy !
|
|
|
|
Post by Teabone on Jun 20, 2013 16:20:49 GMT -5
I never knew that the Bis fought in those colors so I learned something, using that color scheme could be called revolutionary. I thought somewhere I was hearing German colors but in this fast changing digital world things are forever leaving me way behind.
Bones
|
|
johnt
Full Member
   Feb 2012 MoM and 2012 Model of the Year Winner
Member since: November 2011
Posts: 1,174
Nov 15, 2011 5:38:32 GMT -5
Nov 15, 2011 5:38:32 GMT -5
|
Post by johnt on Jun 20, 2013 17:06:29 GMT -5
Superb chipping on those exhausts, G!
Cheers
JT
|
|
|
|
Post by wbill76 on Jun 20, 2013 20:14:10 GMT -5
Nice progress Guy with the markings and initial weathering. now the fun begins!  |
|
|
|
Post by TRM on Jun 20, 2013 21:01:01 GMT -5
WOW, was I off a few days on this one...taking care of business G!! Awesome color work and sweet rusting on that mufflers!! Enjoying the weathering now!!! I promise to stick around for a while this time my friend!! LOL!! Keep it coming!!
|
|
|
|
Post by Tobi on Jun 21, 2013 0:24:45 GMT -5
The exhausts look stunning, where is the technique explained, please? Cheers, Tobi Tobi. I no longer have these SBS's on my website but here is one here that is similar and gives you a rough idea how it works. Also if you have the AK Magazine issue #1 there is an article in there. modelerssocialclub.proboards.com/thread/249/old-crusty-rust-chippingThank you so much. I have to try this myself for sure! Cheers, Tobi |
|
braille
Junior Member
 
Member since: July 2012
If you absolutely need to have a city competely destroyed overnight, call the Marines!
Posts: 97 
|
Post by braille on Jun 21, 2013 3:26:49 GMT -5
Great project Guy and excellent recovery with a most interesting paint scheme. Some very good pointers and links by you and your audience too, thanks for sharing. Looking forward to more . . .
|
|
afvfan
Senior Member
   
Member since: December 2012
Bob
Posts: 1,772
Dec 10, 2012 17:32:38 GMT -5
Dec 10, 2012 17:32:38 GMT -5
|
Post by afvfan on Jun 21, 2013 10:55:01 GMT -5
I have to agree with everyone else....very nice recovery!
|
|
|
|
Post by armorguy on Jun 21, 2013 18:00:02 GMT -5
Thank you for the kind responses friends ! Today I found this pic showing the camo-in-progress hours before the paint was blown out of my airbrush cup. 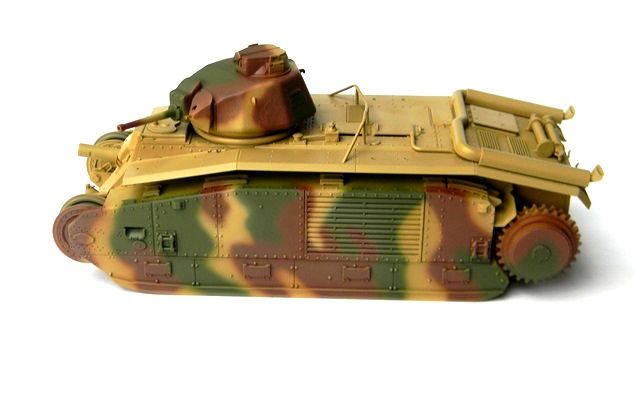 You can imagine I felt a bit down for a couple of seconds. But no worries, the green Vercors is still there and an update follows soon. Slightly off topic now : tomorrow we go for another doggie, also a Kaninchen Daschund. This is Bob, my biggest little buddy : 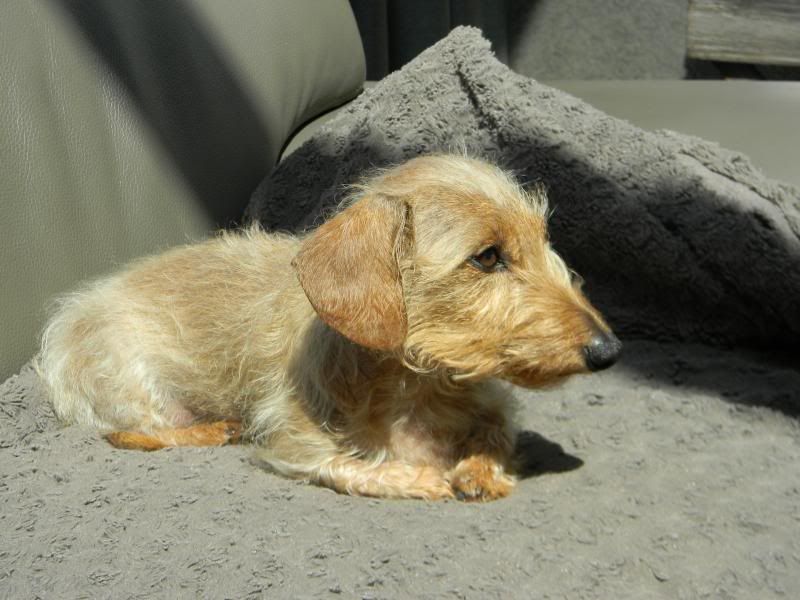 |
|
|
|
Post by TRM on Jun 21, 2013 18:03:34 GMT -5
Camo looks great G!! Sometime "things" just happen, good to hear you got a handle on it!
Great looking pup there!! Nothing like having a good companion and soon two!! Make sure you show a pic or two!!
|
|