redleg12
Full Member
  
Member since: August 2012
www.redleg2scale.com
Posts: 401
Aug 28, 2012 18:59:10 GMT -5
Aug 28, 2012 18:59:10 GMT -5
|
Post by redleg12 on Jul 7, 2013 8:27:56 GMT -5
Marc - OMG....you and modern US armor!!! Nice work so far. There is a large group working on the Thunder Run Dio. You can follow the Thunder Run Dio on Facebook www.facebook.com/groups/368206119873831/ The project is being coordinated by Bob Burick who has written a book on the subject. Looking at the FB page you get an idea of everyone involved. Welcome to the group... Rounds Complete!! |
|
|
|
Post by wing_nut on Jul 7, 2013 12:48:53 GMT -5
Thanks Gary. Marc - OMG....you and modern US armor!!! Like my daughter might say... "I know, right!" That FB page link is a dead link BTW Got some bench time this morning... too damn hot to be outside. Working on the tracks in sections. Clamped top keep the shape around the road wheel. Lights and fenders attached with some micro-freakin'-scopic metal parts  . I cut off the rubber parts of the fenders and replaced it with thinner styrene. Wish I had done what Wouter did and just thinned it. I got to work on these a bit.  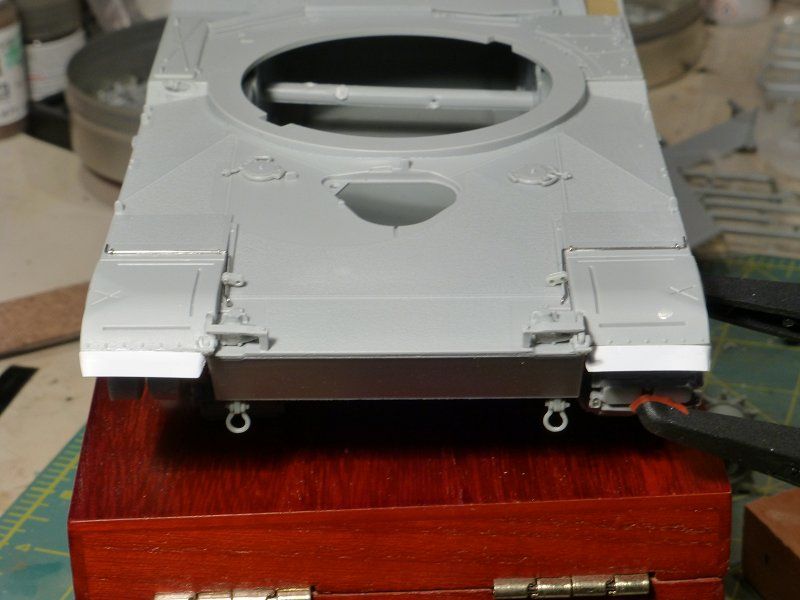 I filed a groove in a wood block to accept the guide tooth on the tracks for easy assembly. Looking at some pics of the tracks those pivoting parts have holes for a bolt or pin I assume so I poked the hole with a scribing tool. I'll hit them with a wire brush to take off some of the mold seam but it really isn't as obvious as it is in the pic with the stark lighting. 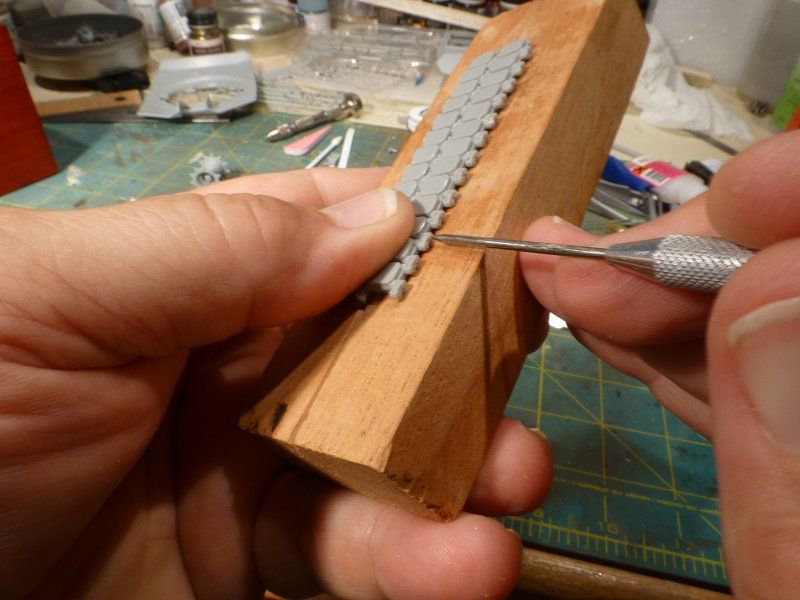 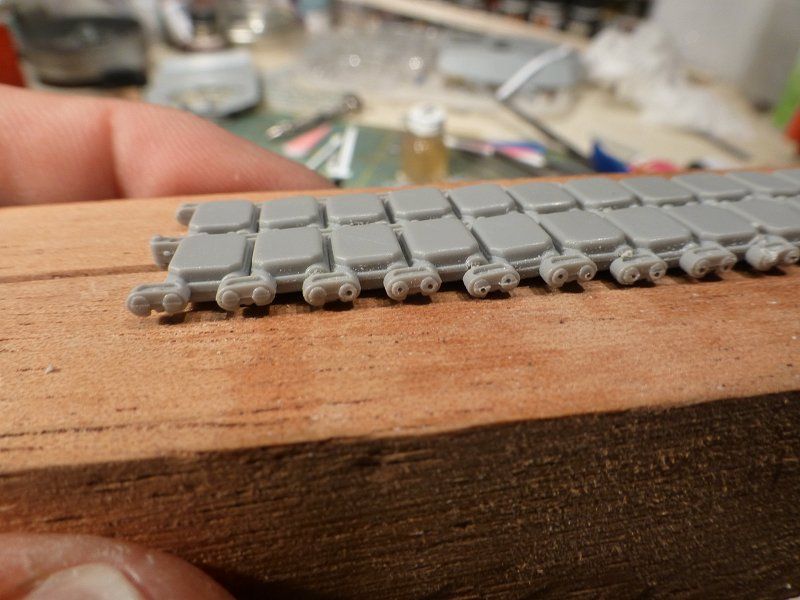 |
|
|
|
Post by wouter on Jul 7, 2013 13:41:36 GMT -5
nice to see an update. I actually like those styrene replacements for the front skirts. And drilling holes in each tracklink? You crazy man  . I thought that the parts you drilled were the boltheads of the pivoting pins? But then again, I practically now nothing about this  Looks good! Cheers |
|
|
|
Post by wbill76 on Jul 7, 2013 16:36:58 GMT -5
Wow Marc, now that's what I call dedication! Just don't stab yourself with that scriber and you'll be fine. Making tracks for sure on this one!  |
|
|
|
Post by wing_nut on Jul 8, 2013 6:42:10 GMT -5
wout, yeah I thought that too 'til I saw this photo. And no drilling... just some poking  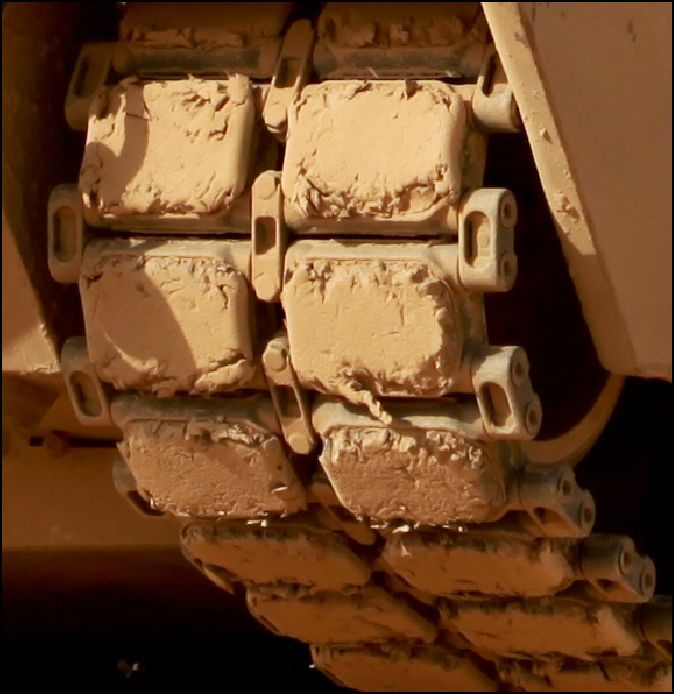 Bill, sure wish I had read your warning earlier  Thanks Dicky. Considering how freakin' hot it's been here lately I was it were Xmas (sorry, no smiley sweating like a pig) |
|
|
|
Post by wouter on Jul 8, 2013 8:40:15 GMT -5
yeah, found a similar shot as well...great crazy detailing I'd say. Worn pads look cool as well! btw, I found an error in the instructions (probably not the last ey  ) Step 7 mentions that you have to add part U24 on the left and part U25 right (the caps for the rear lights). Well, it's actually the other way around, otherwise it looks odd...luckily I was just in time to see the error :/ Cheers |
|
|
|
Post by wing_nut on Jul 8, 2013 10:50:17 GMT -5
Step 7 mentions that you have to add part U24 on the left and part U25 right (the caps for the rear lights). Well, it's actually the other way around, otherwise it looks odd...luckily I was just in time to see the error :/
Thanks for that heads up bro. On my way to put a few bug red circles 'round that right now.
|
|
|
|
Post by wing_nut on Jul 26, 2013 7:02:07 GMT -5
Jeez, it's been so long since I've posted I feel like I need to the introduce yourself forum and start all over again.  Grabbing a 1/2 here and there, when I am not falling asleep at 8 PM  , I have managed to get this far. I did notice wouters has not posted for a while on his M1 either. I wonder if he was letting me catch up. Here is where I am at the moments. Questions re. the smoke launchers. I have left mine off for the moment because I see in mostly photos they are covered. I was planning on doing that but started to think... If the tank you advancing into battle, would those covers be off? Most models I see have the launchers empty. Again if headed into the fray wouldn't they have the grenade loaded?  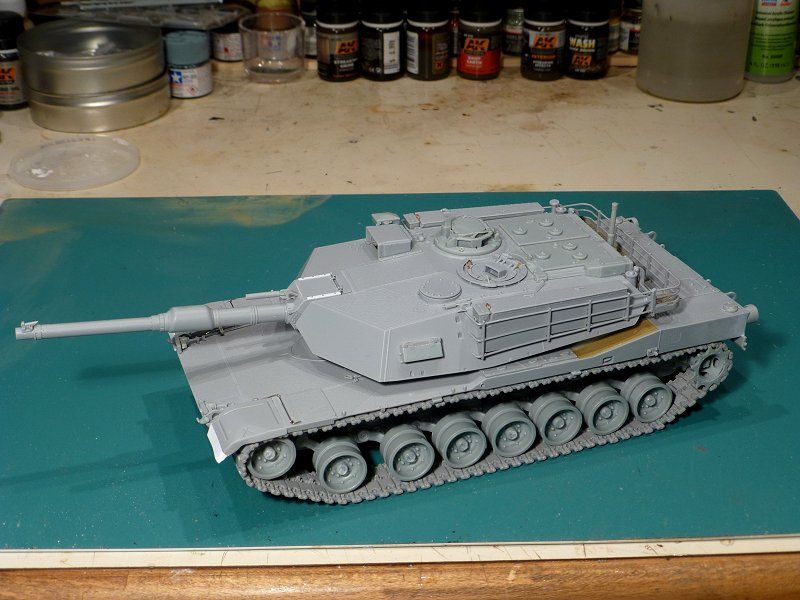 |
|
|
|
Post by imatanker on Jul 26, 2013 7:46:27 GMT -5
I am no expert on modern armor or on any armor for that matter but what you say makes sense to me. Build is looking fantabulous Bub.
|
|
|
|
Post by bbd468 on Jul 26, 2013 9:49:54 GMT -5
Hello Marc (AKA Wing_Nut) My name is Gary and im a modelholic. Wonderful to meet you.  Brother Marc, the Abrams looks damn fine! Nice, clean build so far and im lookin forward to some of that smelly colored stuff!  |
|
|
|
Post by wing_nut on Jul 26, 2013 10:51:40 GMT -5
Thanks tanker... I thought that makes sense too.
Hi Gary, I'm a modelholic too. I am on the 12 steps program.
1. Buy model kit.
2. Open box and fondle the little clear plastic bags
3. Wipe away the drool
4. Cut open individual plastic bags
5. Organize the sprues
6. Wipe away more drool
7. Cuts parts from sprues
8. Clean and check fit of each part
9. Glue all the parts together
10. Paint and weather model
11. Put model on shelf (Usually a bit of drooling here too)
12. Go back to #1 and do it again… and again... and again…
And thanks or the comment my friend
|
|
|
|
Post by bbd468 on Jul 26, 2013 11:04:26 GMT -5
Thanks tanker... I thought that makes sense too. Hi Gary, I'm a modelholic too. I am on the 12 steps program. 1. Buy model kit. 2. Open box and fondle the little clear plastic bags 3. Wipe away the drool 4. Cut open individual plastic bags 5. Organize the sprues 6. Wipe away more drool 7. Cuts parts from sprues 8. Clean and check fit of each part 9. Glue all the parts together 10. Paint and weather model 11. Put model on shelf (Usually a bit of drooling here too) 12. Go back to #1 and do it again… and again... and again… And thanks or the comment my friend LMAO   ........NICE!  Im glad im not the only Drooler here. I tend to were a drool bib when modeling.  |
|
|
|
Post by imatanker on Jul 26, 2013 11:07:54 GMT -5
I have to keep a gallon jug filled with water on my bench so I don't get dehydrated.  |
|
|
|
Post by bullardino on Jul 26, 2013 11:15:42 GMT -5
Very nice, I had totally missed this from the start. Luckily it didn't take too long to catch up  Can't wait to see it painted  |
|
|
|
Post by Leon on Jul 26, 2013 16:10:56 GMT -5
Looking really good Marc  .I would go with the loaded launchers.  |
|
|
|
Post by Tojo72 on Jul 26, 2013 16:13:27 GMT -5
nice clean build going on Marc
|
|
|
|
Post by wbill76 on Jul 26, 2013 16:44:28 GMT -5
I would vote for loaded launchers as well Marc if for no other reason than to show off the detail! Nice progress on this baby...and your 12 step program would get a LOT of followers if you decided to formalize it.  |
|
|
|
Post by wing_nut on Jul 26, 2013 20:23:48 GMT -5
Luigi, Leon, Anthony, Bill... Thanks guys.
I agree with you guys, I think loaded would be the way to go since this is being modeled as if it's its way into Baghdad.
|
|
|
|
Post by Tobi on Jul 27, 2013 15:08:32 GMT -5
Nice picture of the real track, already saved for later, but making two holes in the pins on every single end connector? I'm not ready for this yet...
Cheers,
Tobi
|
|
Deleted
Member since: January 1970
Posts: 0
Dec 2, 2024 3:08:54 GMT -5
Dec 2, 2024 3:08:54 GMT -5
|
Post by Deleted on Jul 27, 2013 15:30:52 GMT -5
I find if you keep a bottle of beer at your work station, it helps you from being so hydrated:)
|
|
|
|
Post by wing_nut on Jul 27, 2013 15:49:13 GMT -5
Dog...beer at the bench? I am definitely well hydrated :-)
Yeah dicky, that's the way I am going to go. If do one or two popped... the Dragon part has the holes as cone shaped... is that correct or should it be more of a tube? even though i am not ready for paint,what color would the grenades be?
|
|
|
|
Post by wing_nut on Jul 28, 2013 8:44:23 GMT -5
So what the hell... I'm up... might as well put the time to good use. So I warmed up the soldering iron and put together the extended bustle rack. A photo posted in the "TR" group build on FB showed what the mounting hooked looked like so I made them out of some leftover PE "sprue".  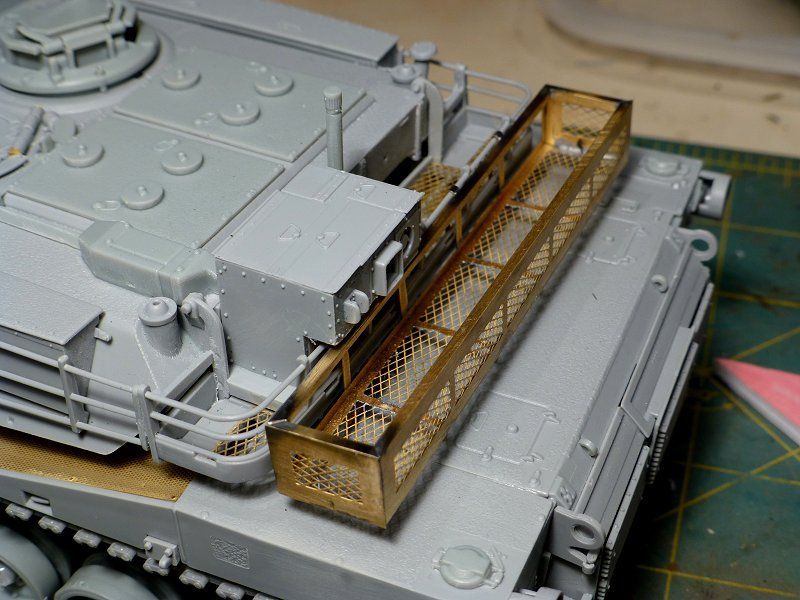 |
|
|
|
Post by imatanker on Jul 28, 2013 10:09:23 GMT -5
Nicely soldered with no warping I see. Well joined my friend. Jeff T.
|
|
|
|
Post by Leon on Jul 28, 2013 10:20:33 GMT -5
very nice work on the rack Marc.  |
|
|
|
Post by wbill76 on Jul 28, 2013 20:08:09 GMT -5
The only time you will ever hear me say this to you Marc, but that's a nice rack you have there.  |
|
|
|
Post by imatanker on Jul 29, 2013 2:29:55 GMT -5
The only time you will ever hear me say this to you Marc, but that's a nice rack you have there.  I'm glad I'm not the only one that thought of that.  |
|
|
|
Post by bbd468 on Jul 29, 2013 11:27:06 GMT -5
Marc, that is some fine PE and soldering work right there! The rack looks awesome brother.  |
|
|
|
Post by rbaer on Jul 30, 2013 10:33:32 GMT -5
The only time you will ever hear me say this to you Marc, but that's a nice rack you have there.  Bwa ha ha!!!!! Oh, to able to solder PE..... and I'm a welder and automotive electrical guy. Where's the logic in that? So I'm seeing a few of these M1s for the Thunder Run builds, and a lot of you guys are beating up the track pads. That's dedication. Seriously. |
|
jackh.
Full Member
  
Member since: December 2011
Posts: 1,195
Dec 15, 2011 2:51:27 GMT -5
Dec 15, 2011 2:51:27 GMT -5
|
Post by jackh. on Jul 30, 2013 12:18:21 GMT -5
Great progress. I would say the reason for having the covers on even in hostile environment, could be that they haven't any use for them unless they where in a tank versus tank battle since you normally use them to cover your withdrawal from the enemy tanks  . Anyway with all the new sighting/heat signature equipment it wouldn't be that effective. |
|
|
|
Post by Mence on Jul 30, 2013 14:09:28 GMT -5
Very nice, makes me want to restart my SEP.
|
|