|
|
Post by TRM on Jul 20, 2013 23:05:20 GMT -5
Hey folks, I just got done wit a review of this kit for the nice folks at InScale.org. If you get the chance, head on over and check it out please. inscale.org/public/?p=5953Great little kit for the money. Fair amount of detail and so far pretty easy to work with I think. Not wanting to waste any time here, I will get right to it! The Kit: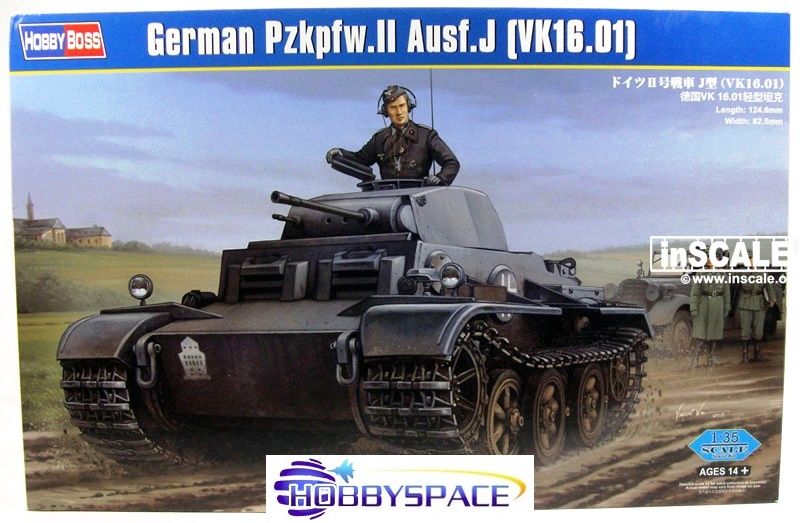 There are a few pics out there referencing the Ausf. J of the Pz.II world, not many as there were only 22 made and a small handful put to the field in the capacity in which they were intended. 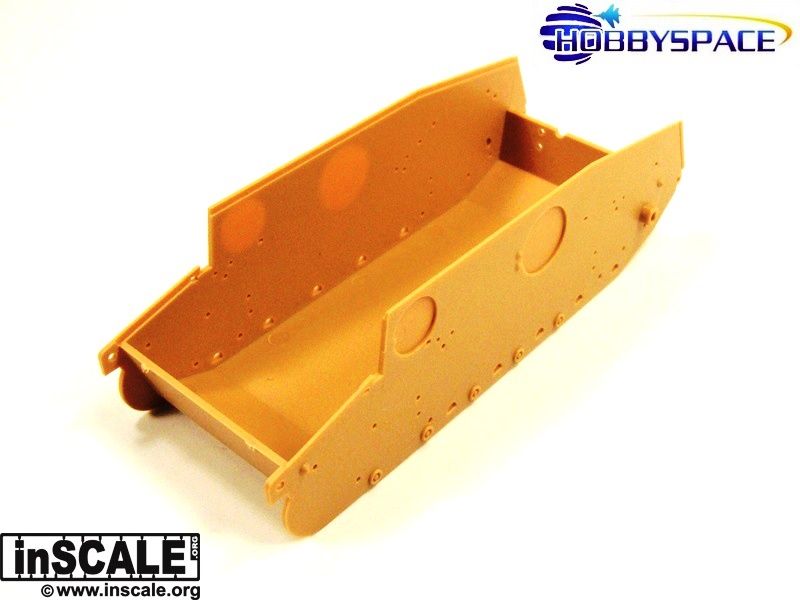 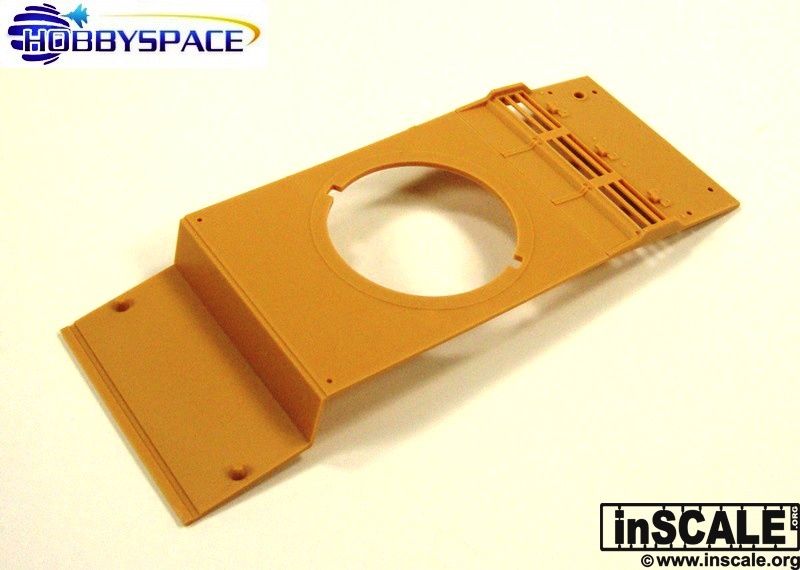 The upper and lower hull fit together nicely in the initial dry fit. 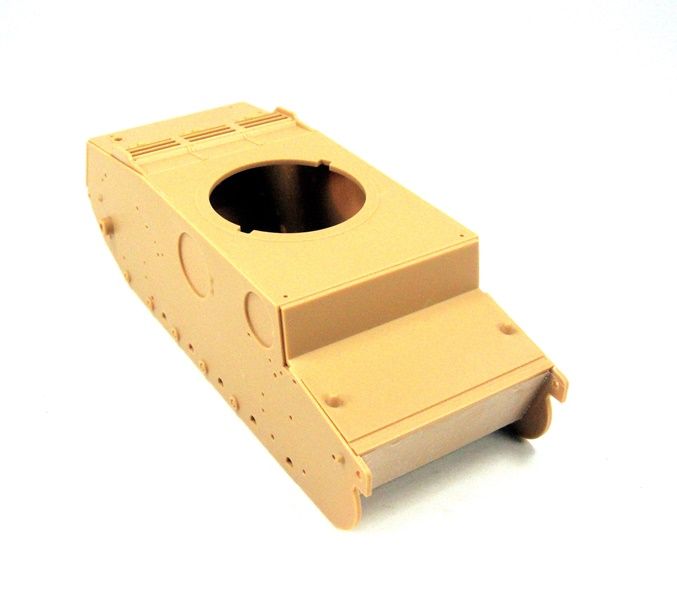 I was fortunate to have received the kit just prior to going on vacation. Whilst hanging out in the nighttime quiet time I managed to clean up a few parts for myself... 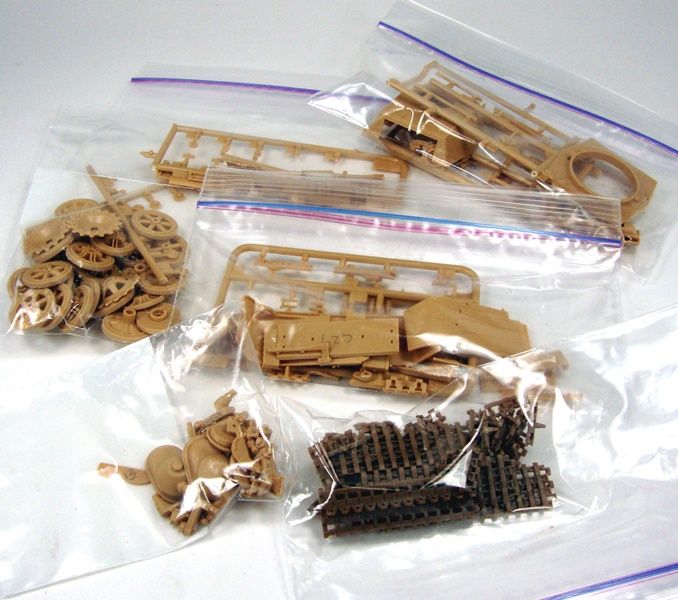 I waited until I got back to start the gluing process. 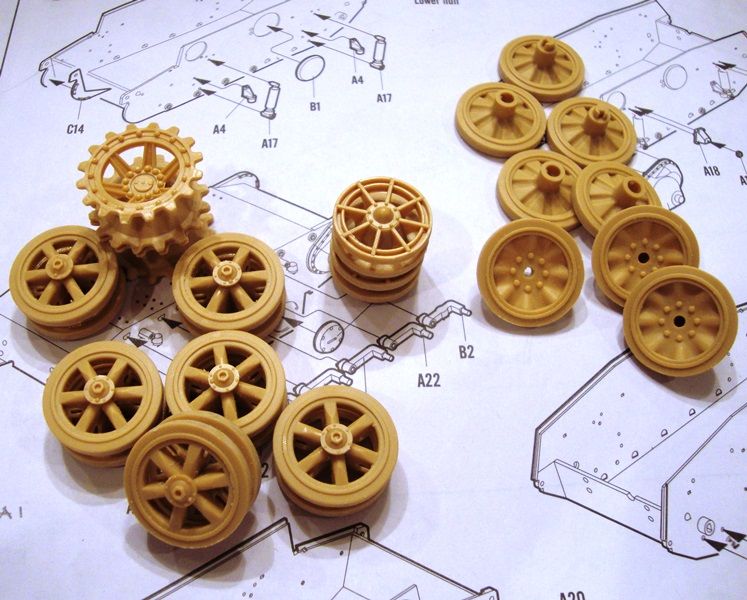 The road wheel were an easy clean up and went together like a cham. Having these cleaned and ready ahead of time made light work of assembly of the wheels and it was onto the suspension. 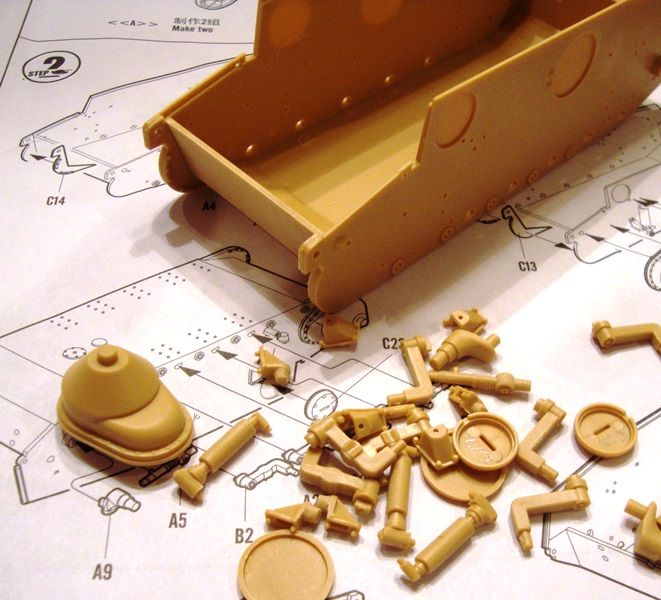 Pretty straight forward here. After fitting the backing plate for the transference onto the lower hull there was a little sanding and clean up needed to bring this into spec. 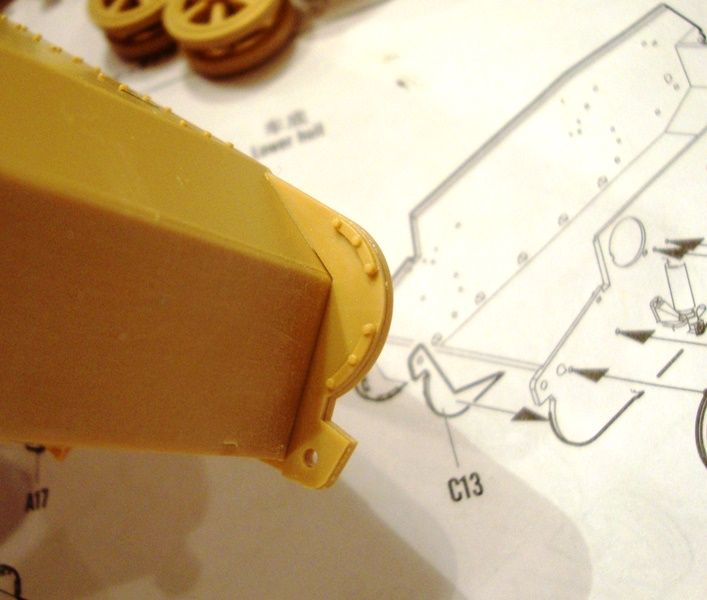 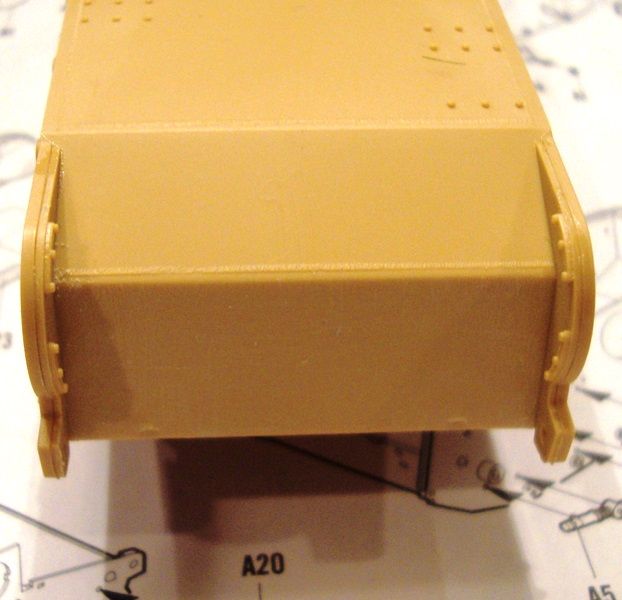 On the real deal, the case is mounted through the solid one piece hull plate. With the added part there is a joint that has to be sanded. The suspension parts, once cleaned, went together fairly routine as there is not a lot of complicated parts even to the original tank here; swing arms, struts and wheels is just about it. 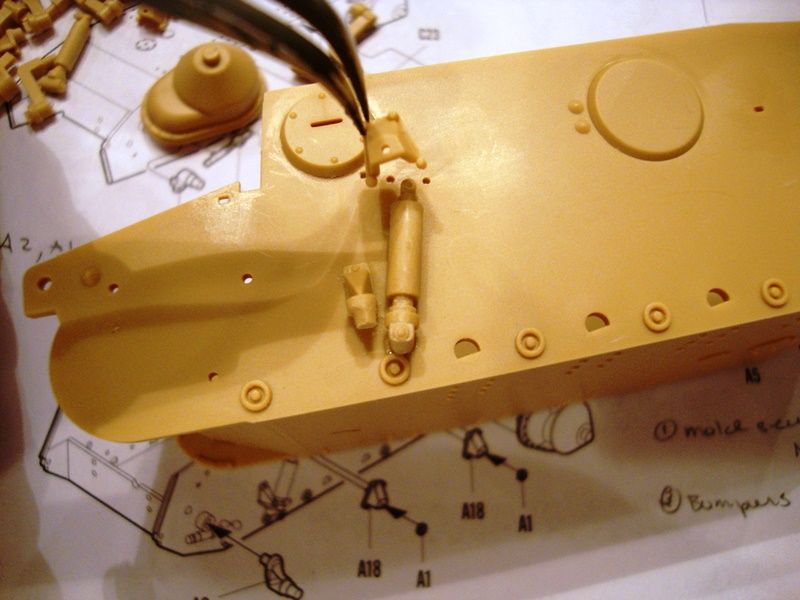 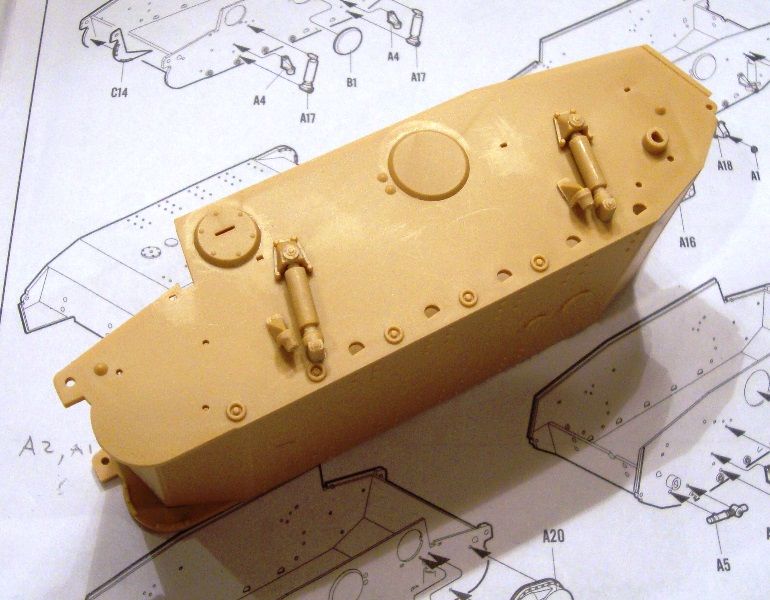 There are a couple of tiny pieces that need to be assembled onto the strut covers. 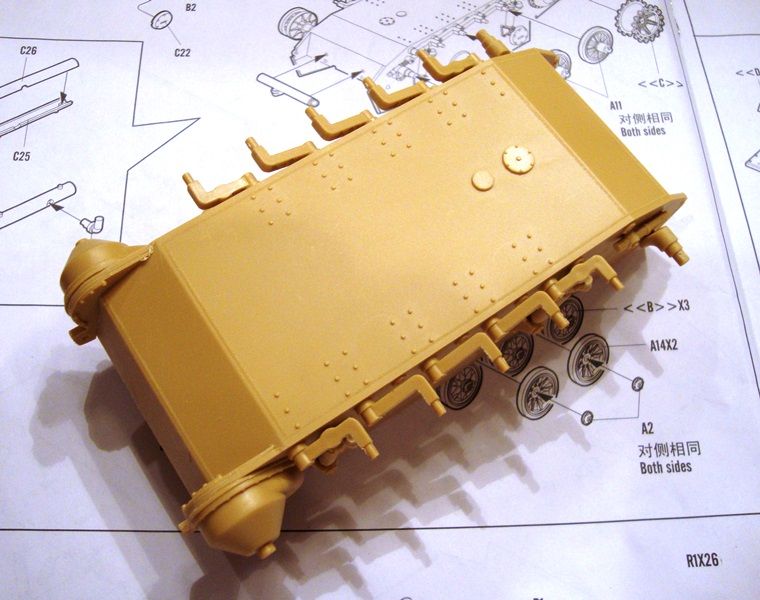 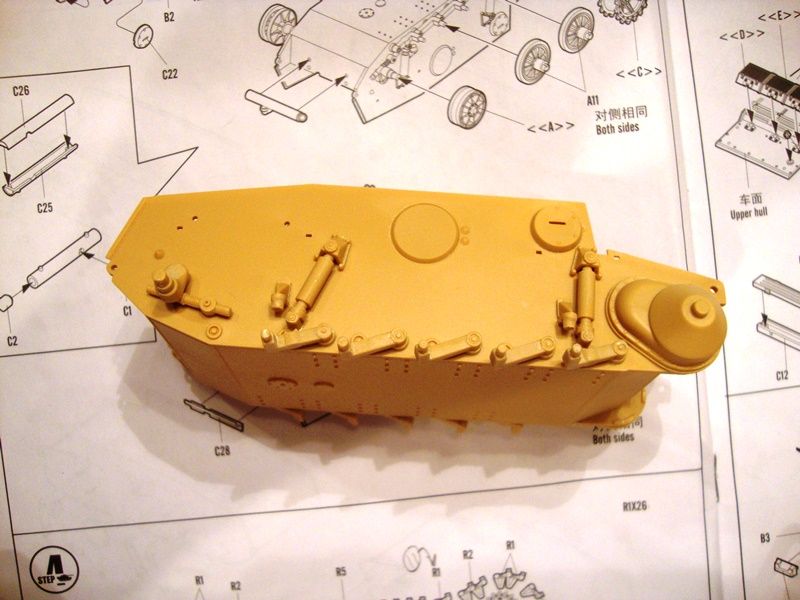 Now a quick check of the wheels. All of the wheels and the idlers fit snug on the swing arms. The sprockets however do not. The sit there for the pic but are a bit loose and fall off pretty easy. Your call if you want to glue these in place per the instruction early on or wait until the tracks are done. 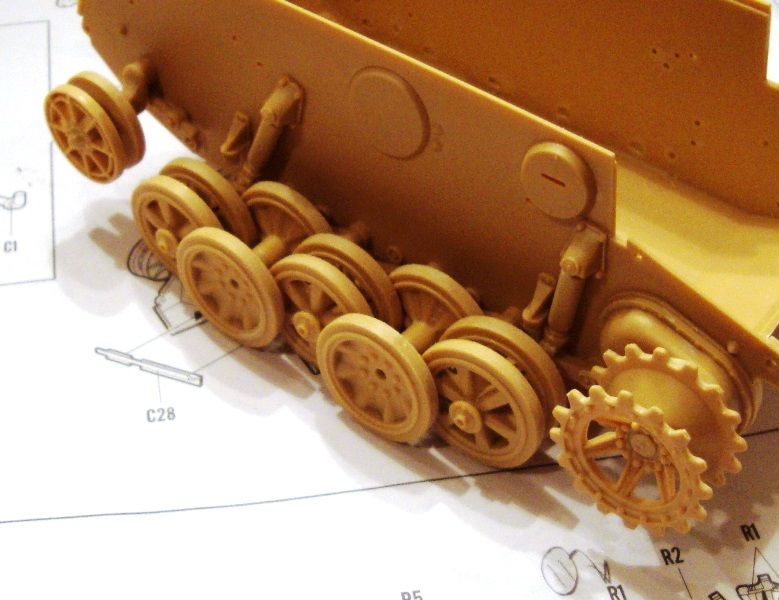 This part of the build went pretty quick. I jumped right on to the upper hull Moving forward there is a nice sheet of PE with this kit. Part of which is the three intake screens for the rear deck. 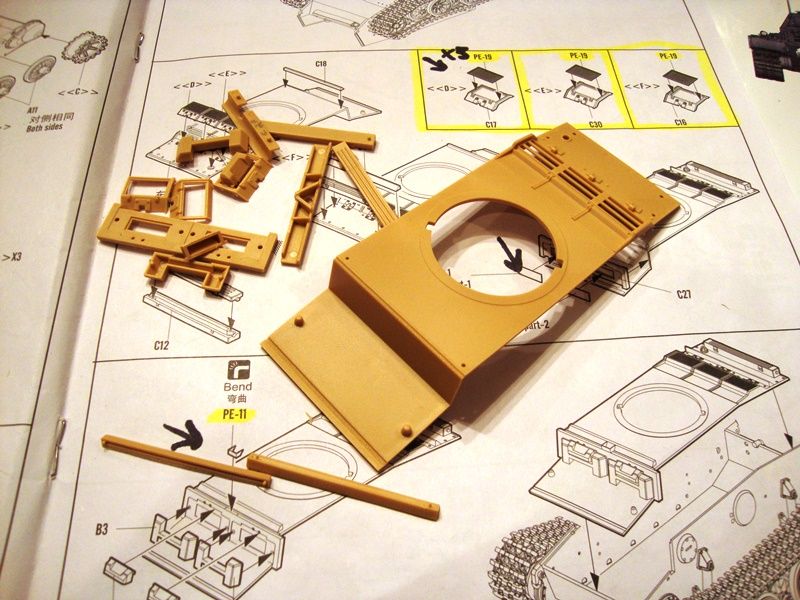 As you can see, I like to highlight all the sections that require photo etching. This ensures that I do not skip past a part as I have in the past.  This is pretty much the first time using PE cutters. I always used the flat razor approach. I can tell you these are a nice addition to the toolbox. The cut virtually flush to the part leaving very little sanding. Care is needed for especially delicate parts as they want to bend the part depending on where you have the tab placed in the cutters. 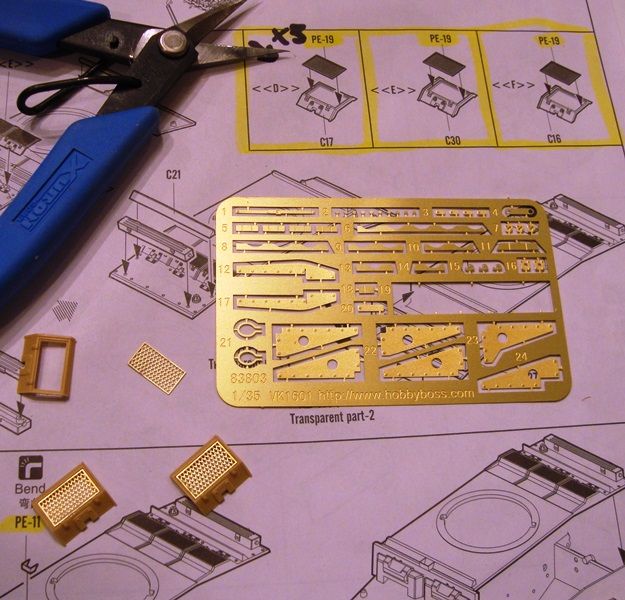 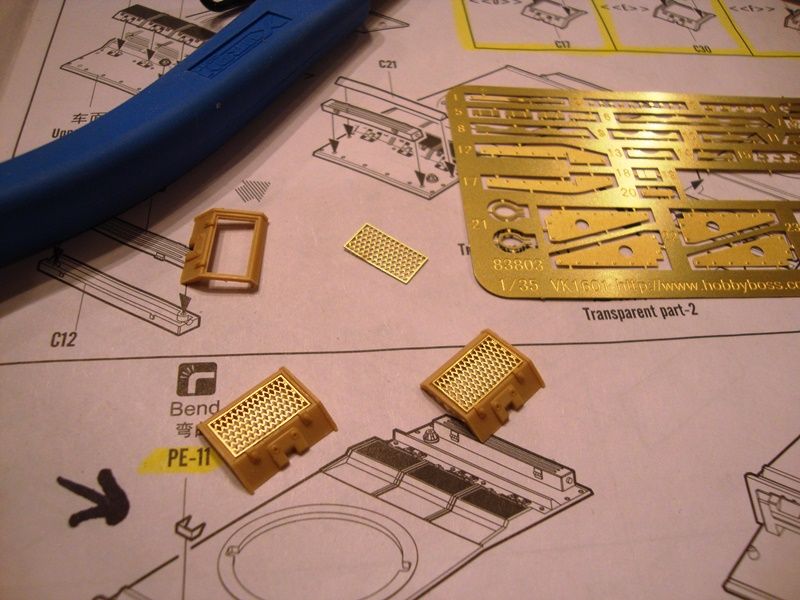 Couple snips, a dab of glue and the vent just fall together. 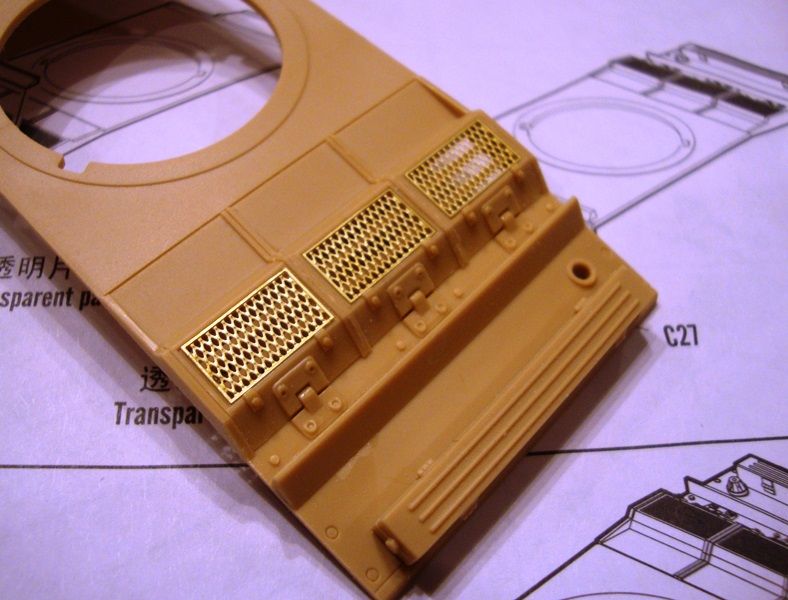 Flipping to the front have I attacked the vision ports. These parts can be assembled open or closed. There is some clear acetate included with the kit to replicate the vision glass but even in the wide open position they are almost completely obscured by the cover plate. 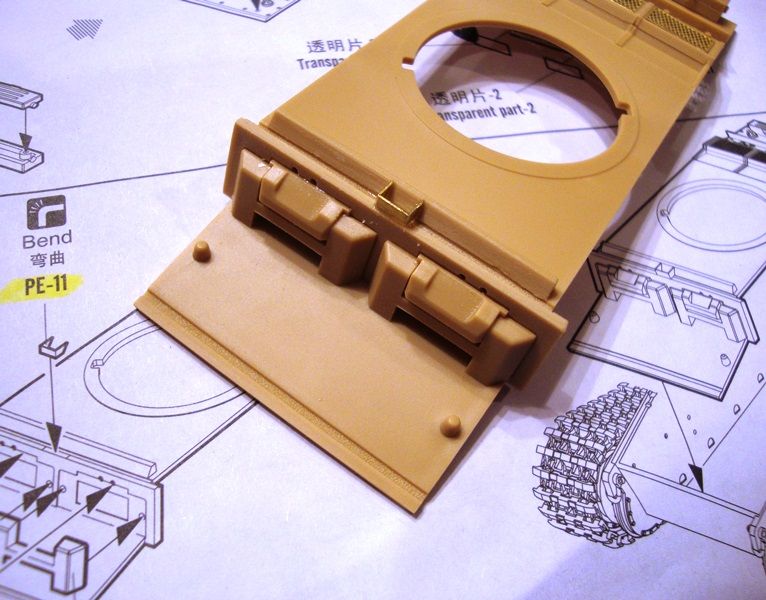 I will move onto the fenders, more PE and other peripherals soon! Thanks for dropping by!!  |
|
|
|
Post by Leon on Jul 20, 2013 23:37:51 GMT -5
T,that looks like a sweet kit.Very clean build so far.
|
|
|
|
Post by TRM on Jul 20, 2013 23:49:23 GMT -5
Thanks Leon! Tiny little thing but pretty fun so far!
|
|
|
|
Post by tobias5555 on Jul 21, 2013 0:09:27 GMT -5
I got mine on yetserday and build it in the garden. It´s a great kit.
|
|
|
|
Post by TRM on Jul 21, 2013 0:12:44 GMT -5
Not too bad ey? Nice choice with the outside building! Almost tried that but with the heat wave it probably would have melted!! LOL!!
|
|
|
|
Post by tobias5555 on Jul 21, 2013 3:06:22 GMT -5
I worked in the shadow of a tree, so no mealting this time.
|
|
Deleted
Member since: January 1970
Posts: 0
Nov 26, 2024 17:25:15 GMT -5
Nov 26, 2024 17:25:15 GMT -5
|
Post by Deleted on Jul 21, 2013 3:07:21 GMT -5
Vacation ? Building a kit for a review while on vacation ? Talk about addicted to plastic bro ! Naw , not really . I understand the dedication T . Looks like a nice kit so far . hopefully it'll stay that way . I just bought a pair of those p.e. nippers myself and have found the same bendage of of the pe part after its nipped off . Not real bad bending but its something to watch for , right ? I rolled out the bend in the p.e. with the tip of a brush handle , while the p.e. rest on a hard flat surface like a piece of glass . Oh well , I know you know this stuff that I know so pay no attention if you do know .....know what mean ?  |
|
ogrejohn
Full Member
   Oct '23 Showcased Model Awarded
Member since: June 2012
Go away or I shall taunt you a second time!
Posts: 1,302
Jun 1, 2012 17:33:59 GMT -5
Jun 1, 2012 17:33:59 GMT -5
|
Post by ogrejohn on Jul 21, 2013 4:20:57 GMT -5
Looks like a fine start on a nice kit T!
|
|
|
|
Post by TRM on Jul 21, 2013 8:33:30 GMT -5
Rob - Thanks! As for the PE...honestly a kit like this is the way to go. One small sheet and the sheet is a good mil thickness. Thinner ones get frustrating sometime form their delicate nature. There are only a couple of quick 90's to be bent, so no complicated, over the top 15 piece toolboxes. Just straight forward! Edit - 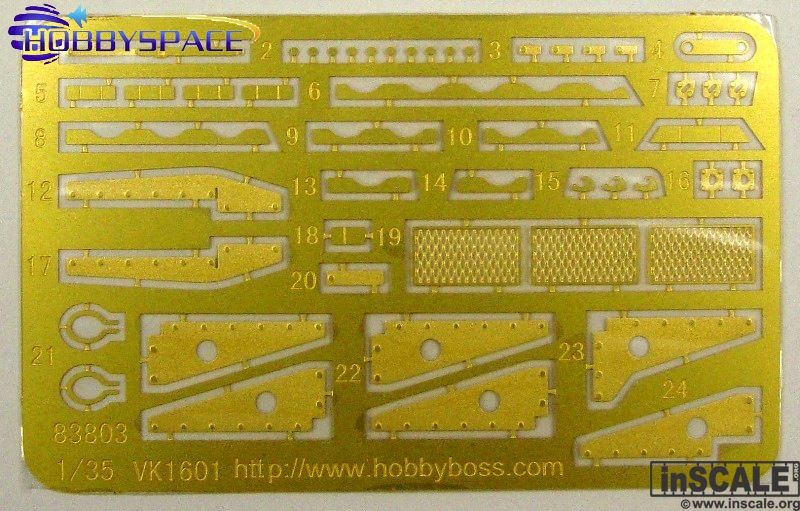 This is the sheet. Straight forward like I said. Quick 90 degree bends on the brackets! After that it's just taking your time on the tiny little hooks on the turret! This is not what you want to start on BTW...this is for one kit...Pz.IV Ausf. J....NOT FOR THE TIMID! LOL! The second pic is one of two or three of just little bracket, clasps and doo-dads!! Oh Boi!! 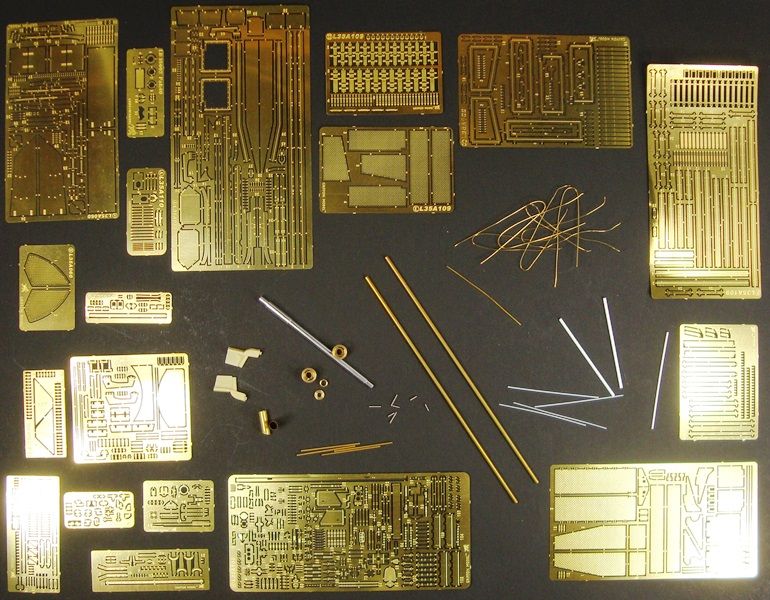 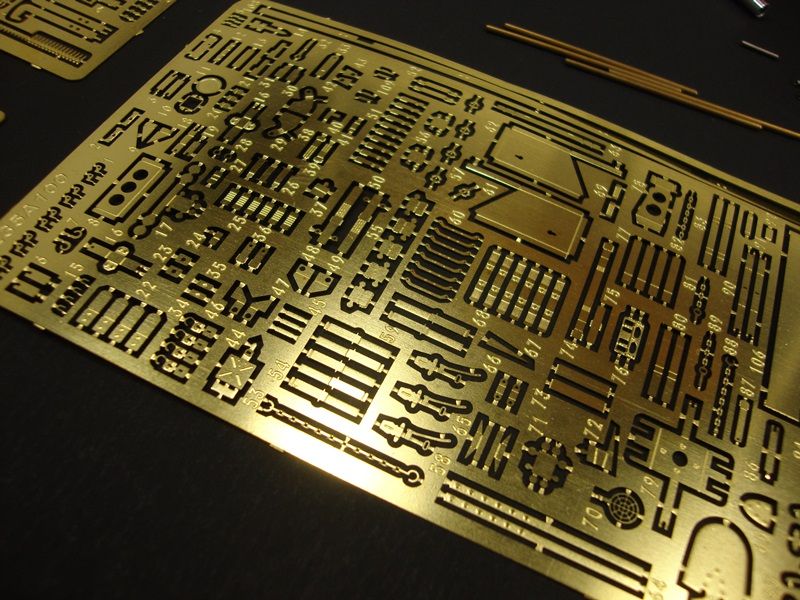 Nice call on the tree Tobias! I have the large deck umbrella at the pool with the table...but the temp was 98F under it...I suspect it was cooler due to the water (pool)...LOL!! NOT! Might try some outside gluing today, suppose to be cooler...89!!! Carl - LOL...it was my vacation too!!  I only cleaned some parts is all working on those downtime hours...in between beach and dinner and after 10PM. Nothing wrong with letting us know what you do to correct something! The little tips help everyone brotha'!! As stated above to Rob, this is a thicker mill and was right at the edge of bending on a couple pieces. After that, a piece of plexi-glass and a straight razor...oh and some double-overed masking tape...place the sheet on it, chop the microscope part off and voila...stuck to the tape, not flyer precariously through the air until it resides ever so nicely into the jaws of the awaiting abyss of the carpet monster!! Thanks John! Great little kit!! Easy Peezy to build! We will see how she paints next!! |
|
406 Silverado
Global Administrator     
Member since: November 2011
Posts: 10,245
Member is Online
MSC Staff
|
Post by 406 Silverado on Jul 21, 2013 9:16:37 GMT -5
Good to see this finally surface here bro. Nice clean work so far, and man that is a ton of brass for the J. I think I might still have some pe from an older kit with mesh skirts.
|
|
|
|
Post by deafpanzer on Jul 21, 2013 9:22:28 GMT -5
Way too much PE! I used to love them but now they scare me after my recent excessive PE encounter on the Tiggy. LOL You have my attention... I am starting to believe you are lying that you don't have little helpers.
|
|
|
|
Post by TRM on Jul 21, 2013 9:23:27 GMT -5
Hey Boss!! Top of the morning to ya! Thanks...on the Pz.II!! Filling some time is all! Funny thing about the PE for the IV is not only are you having to go through a mind boggling kit of upwardly 1000 parts on the DML kit, you need to work your way through a 1000more tiny metal pieces!!! Not too sure on this one!! LOL!! Only about 3 parts shy of making the whole think out of metal!!
Almost missed you there Andy! Building my way up to using the Pz.IV set one of these days!! Might need a few more of the nice paced kits and maybe a couple shake-n-bake Tamiya jobbies!!
|
|
Tojo72
Forum Moderator      Sept '24 Showcased Model Awarded
Member since: November 2012
Posts: 5,331
Member is Online
MSC Staff
|
Post by Tojo72 on Jul 21, 2013 9:37:16 GMT -5
Looks like a great project,but that way too much brass for me,I look forward to following along.
|
|
|
|
Post by TRM on Jul 21, 2013 9:38:59 GMT -5
Thanks Tojo! No worries on the pile of brass on this one! The one sheet is perfect for this job!!
|
|
|
|
Post by wbill76 on Jul 21, 2013 11:02:52 GMT -5
Very cool! Love these 'beefed-up' panzers, looking forward to seeing what you're doing with it T!
|
|
Deleted
Member since: January 1970
Posts: 0
Nov 26, 2024 17:25:15 GMT -5
Nov 26, 2024 17:25:15 GMT -5
|
Post by Deleted on Jul 21, 2013 11:34:04 GMT -5
T you just gave me a couple of good hints on the separating of the pe from the brass tree ...the straight razor , Plexiglas and masking tape . Bro "Its a good thing "( Martha Steward ?)  |
|
Deleted
Member since: January 1970
Posts: 0
Nov 26, 2024 17:25:15 GMT -5
Nov 26, 2024 17:25:15 GMT -5
|
Post by Deleted on Jul 21, 2013 12:27:47 GMT -5
Great how to on this kit T! Man, it's loaded with all the trimmings!
|
|
|
|
Post by TRM on Jul 21, 2013 13:14:45 GMT -5
Thanks Bill!! Glad to have you on board!! Martha has one thing on me Carl...she spent time in the Danbury Women's Federal Penitentiary!  Tip #2 - I like this one as I have used it too many times...Take a pair of nylon stockings, ask first, the wife might have issues...with it; put it over the vacuum attachment. When you vac the area you think the darn piece was launched it will get trapped on the surface of the nylon.  When you shut off the vac it usually will just fall off so make sure you have a container or sheet of paper to let the part drop on. Thanks Dicky!! Appreciate it! Thanks Bruce! These newer little kits have some nice offerings for short money! Well worth the effort to check around on some of them! |
|
|
|
Post by Leon on Jul 21, 2013 13:40:12 GMT -5
T, great tip on the nylons and vacuum. ;)Could have used that when i building the 109 instead of on my hands and knees looking for those microscopic parts.   |
|
|
|
Post by TRM on Jul 21, 2013 22:05:53 GMT -5
Welcome Leon! Can never have enough PE tricks!! LOL!! I should have an update on this tomorrow afternoon/night. Moving right along!!  |
|
|
|
Post by TRM on Jul 22, 2013 5:23:23 GMT -5
Always best to start small on the brass. Once you get comfortable with working with it, it becomes less frustrating. Work you way up to more complex parts and soldering.
|
|
afvfan
Senior Member
   
Member since: December 2012
Bob
Posts: 1,772
Dec 10, 2012 17:32:38 GMT -5
Dec 10, 2012 17:32:38 GMT -5
|
Post by afvfan on Jul 22, 2013 12:05:18 GMT -5
Well T, here we go again. Seems we're working on the same tank, except mine is the old Alan kit.
Nice start on yours. You're right about the PE being simple on this one (though I had to buy the Eduard set for mine). Are you planning on using AM barrels?
|
|
|
|
Post by TRM on Jul 22, 2013 13:11:01 GMT -5
Hello Rob, Well it would depend on what you were building. A lot of the Dragon, Hobby Boss, Trumpy...yadda yadda yadda have usually something in the way of PE added with the kit. These are decent to work with. If you are looking in the aftermarket range I guess this is more of a preference call. Griffon is decent and there is an enormous selection for armor...ET is not bad either. Voyager can go either way with me....some is thick and simple to play with and others just problematic. Eduard is well rounded and has a lot of nice pre-painted pieces. Really tough to say and would depend on the genre and model. I spent close to $100 for a huge set for a ship and it was not really worth the effort...spent $20 on a set and been blow away! Not to get too long winded here, pace yourself. If you want to try out playing with some PE any of the companies I mentioned usually will have online reviews or contents listing on the site...not to mention you could post the question here on the site and SOMEONE here has probably built it. If you have a kit and want to have a go at some thing, check with Griffon 1st as this will be the most extensive....you may want to just add fenders to something and not the whole kit and caboodle. Once you get familiar with it you can ad some nice details to the average kit...and even some below average...LOL!! Just steer clear of dumping a ton of the duckets on tons of PE until you are sure this is what you want and if it is actually worth it. Most armor looks fantastic without any PE and a lot of builder just don't bother. Tool clasps and hinges are sweet to add if you ask me...but by and large these can be some of the more difficult to assemble, even for the more experienced. HI Bob!! Didn't miss you there...first things first!  Thank you Sir! Yours gave me a little mojo to dig into this!! Thanks again!!  I seen a couple of little add on sets I was tempted for but for all intents and purposes of the build with the review I can show what the buyer can get with the kit for the most part. Not limited to this, yes, I am using a form of aftermarket barrels...."form" being I cannibalized a Flak 38 I build a while back for the 2cm and had an MG34 painted I never used lying there...ripped the barrel off both and stripped them. I guess I can build a couple more as the Flak was a Quad!!  |
|
afvfan
Senior Member
   
Member since: December 2012
Bob
Posts: 1,772
Dec 10, 2012 17:32:38 GMT -5
Dec 10, 2012 17:32:38 GMT -5
|
Post by afvfan on Jul 22, 2013 13:47:43 GMT -5
Nice concise answer you gave Rob there, T..... only I believe he was asking about etch bending tools ("etch-mate").  On a different subject, looking at your pics it begs to question which intake set up is correct. Your HB kit has sealed boxes with screened tops, while the Alan version uses closed boxes with louvered fronts. With so few built, it's strange they would use 2 versions. |
|
|
|
Post by TRM on Jul 22, 2013 16:29:54 GMT -5
Hi Rob...again! I just went to edit something and thought I would just start over....lol...then you posted!!  LOL....Nice catch Bob!! They say if you put a typewriter in front of a monkey and wait long enough, it will write a novel.....yup, it's true!!! WOW, I saw "mate" as a friendly Brit greeting...what a dope I am! Back to you in a second Bob... LOL....Nice catch Bob!! They say if you put a typewriter in front of a monkey and wait long enough, it will write a novel.....yup, it's true!!! WOW, I saw "mate" as a friendly Brit greeting...what a dope I am! Back to you in a second Bob...
Sorry Rob! My bad! Etchmates are great...I have just been too cheap to pick one up. I use small flat mouth bull nose and needle nose pliers to do a variety of bends along with a variety of other paraphernalia! Pliers work excellent for most bends; clamp piece in the jaws and take a flat razor to bend the piece! Holding the piece down with one blade and bending with the other works just as well! If you have the extra dough for one, have at it, you will not be disappointed! The small ones are fine for just about everything.
OK, Bob, Not sure on the intakes. From what I found in the way of research that I can assume the 22 J's might have been the same. With that, Yeah, there appears to be louvers in the vents inside...The F/G versions were slightly different rear deck styling. 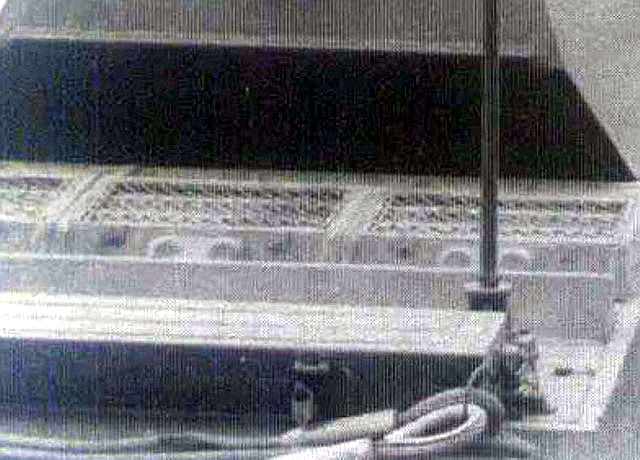 So I am thinking this was pretty close. Since I came back to edit, move, screw everything up post...I figured I would pop up some pics. The rest of the kit seemed to fall together. The turret was a breeze and I managed to salvage the KwK 38 for another day. Since she is all closed up, the AM barrel was all that was needed....the rest was gluing some track pieces together and tool clean up! 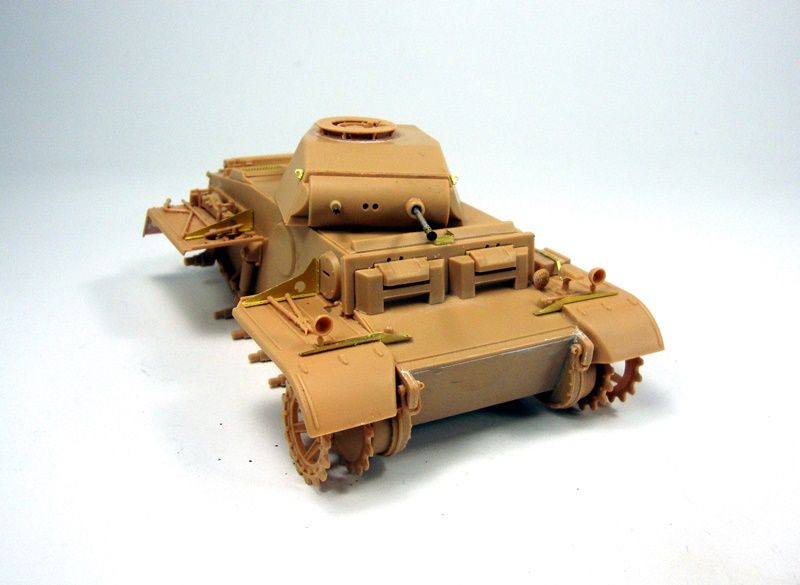 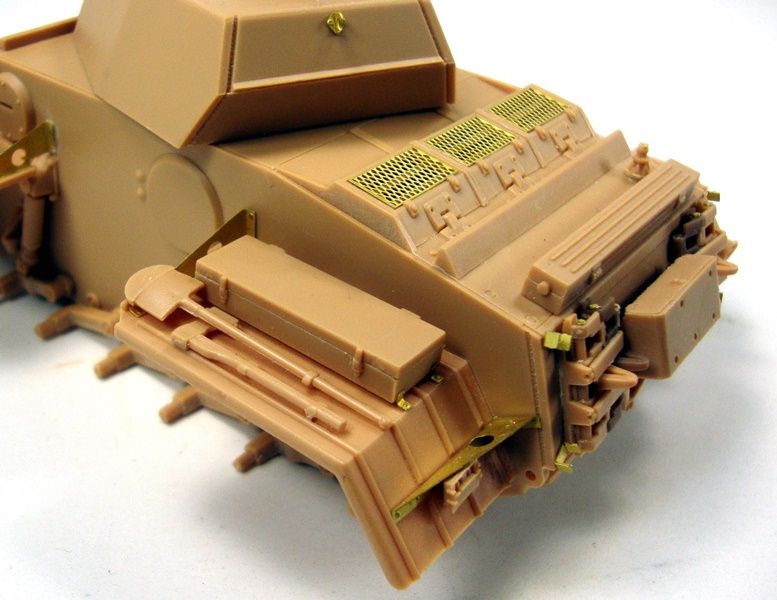 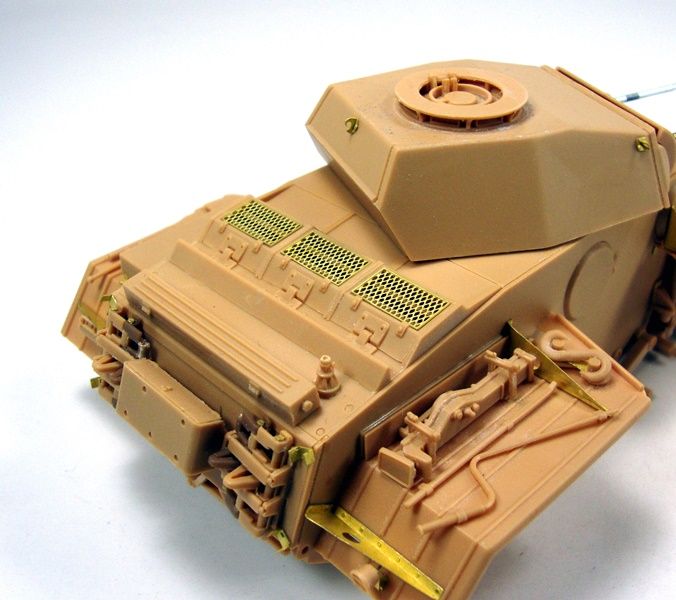 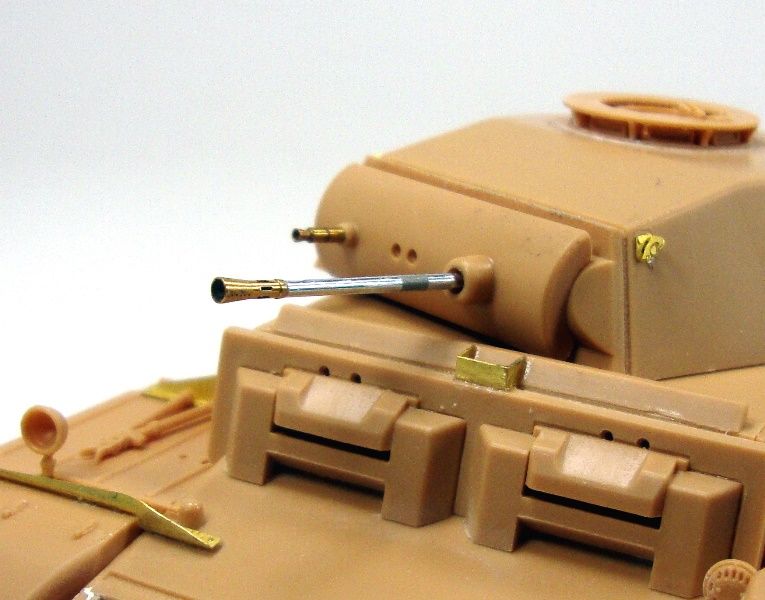 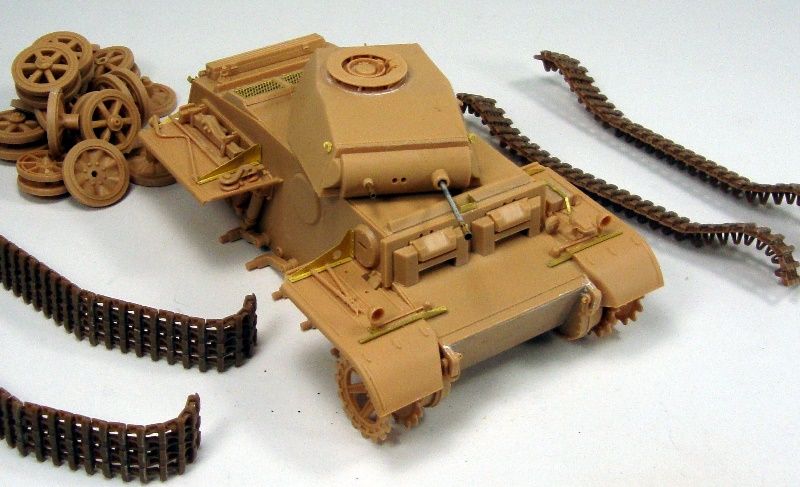 This one get put one the line now! I will get this primed up at some point this week I think and then maybe some color over the weekend. As always, thanks for swinging by!!
|
|
afvfan
Senior Member
   
Member since: December 2012
Bob
Posts: 1,772
Dec 10, 2012 17:32:38 GMT -5
Dec 10, 2012 17:32:38 GMT -5
|
Post by afvfan on Jul 22, 2013 16:40:52 GMT -5
Thankyou t. Most informative mate .gonna have a crack at it. Cheers rob Gee, guess I was the one who misunderstood the question. Oops! It just hit me that you must be talking about my uparmored "F" model. I don't remember posting pictures of the "J" I'm currently doing... or did I??  |
|
|
|
Post by TRM on Jul 22, 2013 16:58:44 GMT -5
Thankyou t. Most informative mate .gonna have a crack at it. Cheers rob Gee, guess I was the one who misunderstood the question. Oops! It just hit me that you must be talking about my uparmored "F" model. I don't remember posting pictures of the "J" I'm currently doing... or did I??  LOL...I don't think you did either! I would like to see then at some point! Now I am curious somewhat. I have only found a couple pics of the J's and only the 1 or 2 good shots of the rear. I certainly wouldn't think it would be impossible that the played mix-n-match either! Mmmmmm??? Edit...found another pic...  |
|
afvfan
Senior Member
   
Member since: December 2012
Bob
Posts: 1,772
Dec 10, 2012 17:32:38 GMT -5
Dec 10, 2012 17:32:38 GMT -5
|
Post by afvfan on Jul 22, 2013 17:12:01 GMT -5
Here is what the intakes look like on mine looking towards the back of the tank. I also noticed that in the rear of the tank yours has the smoke box centered, flanked by links, while mine is to the right with links on the left. Go figure...  |
|
afvfan
Senior Member
   
Member since: December 2012
Bob
Posts: 1,772
Dec 10, 2012 17:32:38 GMT -5
Dec 10, 2012 17:32:38 GMT -5
|
Post by afvfan on Jul 22, 2013 17:17:15 GMT -5
Just saw that the antenna location was different, too. HB's is like in the pic you posted at the back, mine's right behind the turret.
|
|
|
|
Post by TRM on Jul 22, 2013 20:12:22 GMT -5
Hi Bob...again! LOL!! Awesome camo work my friend!! My hat is off to you having the patience for that!!! Not sure exactly what Alan had in mind on the placements other than lack of knowledge for the time maybe? Still it all comes down to a nice finish...yours is heading there for sure!!
Just got done laying some primer...looks like the time frame is just stepped up a bit!!
|
|


 I only cleaned some parts is all working on those downtime hours...in between beach and dinner and after 10PM. Nothing wrong with letting us know what you do to correct something! The little tips help everyone brotha'!! As stated above to Rob, this is a thicker mill and was right at the edge of bending on a couple pieces. After that, a piece of plexi-glass and a straight razor...oh and some double-overed masking tape...place the sheet on it, chop the microscope part off and voila...stuck to the tape, not flyer precariously through the air until it resides ever so nicely into the jaws of the awaiting abyss of the carpet monster!!


