Deleted
Member since: January 1970
Posts: 0
Nov 25, 2024 18:20:56 GMT -5
Nov 25, 2024 18:20:56 GMT -5
|
Post by Deleted on Aug 21, 2013 17:41:17 GMT -5
The whole forum has gone mad.....some one mentioned CB and paint...can't be so.. No Ferkin chance!!!!!   As has been said already....this Forum is goin totally Topsy Turvy with regards who's doing what build!!!!!!Jeeez....Might even try another 1/72 A/C build!!!! |
|
Deleted
Member since: January 1970
Posts: 0
Nov 25, 2024 18:20:56 GMT -5
Nov 25, 2024 18:20:56 GMT -5
|
Post by Deleted on Aug 21, 2013 18:30:05 GMT -5
Andy - You have my answer.....name the day fella I'm a ferkin' coiled spring!!!!  SAID ZEBEDEE!!!!!  (it's a PUPPET!!!!) |
|
ogrejohn
Full Member
   Oct '23 Showcased Model Awarded
Member since: June 2012
Go away or I shall taunt you a second time!
Posts: 1,302
Jun 1, 2012 17:33:59 GMT -5
Jun 1, 2012 17:33:59 GMT -5
|
Post by ogrejohn on Aug 21, 2013 18:55:34 GMT -5
Nice choice Bill! I've got the Z-39 and I must say there are indeed some awfully small parts. Those flak guns are quite intimidating. I'll certainly be watching this one!
|
|
|
|
Post by wbill76 on Aug 21, 2013 19:45:24 GMT -5
Andy, the gauntlet has been thrown! You're in for it now, not only is Dicky a coiled spring, he's scratch built it himself!  OJ OJ, Dragon did a great job with the Flak guns, they even have hollow muzzles...in 1/350! 
|
|
|
|
Post by 406 Silverado on Aug 22, 2013 10:07:25 GMT -5
Not started yet !!
|
|
|
|
Post by wbill76 on Aug 22, 2013 10:38:01 GMT -5
Patience Rob, you know the drill on when to expect updates!  |
|
|
|
Post by 406 Silverado on Aug 22, 2013 11:03:50 GMT -5
LOLOLOL
yep, Sunday I'll be ready with a cold beer (or coffee) and the popcorn.
|
|
|
|
Post by deafpanzer on Aug 22, 2013 14:32:25 GMT -5
Around 6-7pm! Better hurry before the real NFL games starts or we have lost Bill for several months.
|
|
|
|
Post by wbill76 on Aug 22, 2013 20:28:29 GMT -5
Around 6-7pm! Better hurry before the real NFL games starts or we have lost Bill for several months. I don't stop building just because it's NFL season. I pick/choose the games I decide to watch and since I'm a Niners fan living in Texas, the number of games I get to see are somewhat limited. Fortunately I have the NFL Audiopass, so when the games aren't available, I listen to them while at the workbench and get the best of both worlds!  |
|
thug626
Senior Member
   
Member since: January 2013
Posts: 2,035
Jan 15, 2013 13:05:28 GMT -5
Jan 15, 2013 13:05:28 GMT -5
|
Post by thug626 on Aug 24, 2013 1:24:36 GMT -5
Bill builds a ship?!?! Not armor? No tracks......or.....or .....or...wheels? Oh dear! The next thing you know there will be pandemonium in the streets......cats and dogs sleeping together......  Aw heck! Let the streets run riot! I am all in on this one. I can't wait to see this one. Dave |
|
|
|
Post by wbill76 on Aug 24, 2013 9:50:06 GMT -5
Thanks Dave! Should be able to start in on this one today. Biggest effort so far has been spent studying the instructions and figuring out the best way to approach the build/paint order. This is new territory in that department!  |
|
|
|
Post by deafpanzer on Aug 24, 2013 9:52:41 GMT -5
That's where your MBA comes in very handy!  |
|
|
|
Post by wbill76 on Aug 24, 2013 14:29:04 GMT -5
That's where your MBA comes in very handy!  MBA = Model Builders Anonymous!  |
|
|
|
Post by wbill76 on Aug 25, 2013 17:11:03 GMT -5
Due to the nature of this particular subject, it's impossible to do a 'traditional' build log going step by step through the instructions as I normally would. This is down to the fact that it's 1) a ship and 2) requires a totally different approach to building and painting. So with that little introduction, the project begins! First up was deciding whether to build this one as waterline or full hull since Dragon provides that option in terms of adding the lower hull half to an upper part or leaving the upper as-is. The kit includes a nice base to support the kit and I've always been partial to full hull, so the first task was joining the two parts of the hull together to go that route. The fit of the two hull portions was very good but some sanding was required to smooth away the join line to create a seamless hull result. As the hull is just over 14 inches long, that took a couple of hours of careful work to get the desired result. The Dragon instructions neglect to tell you to open up the holes in the bottom of the hull to take the stand supports, so be sure to do that before you join the hull halves. I didn't, so I had to drill the holes myself after assembling the stand and measuring to get them centered. The stand is only dry-fit and will be permanently fixed much later. 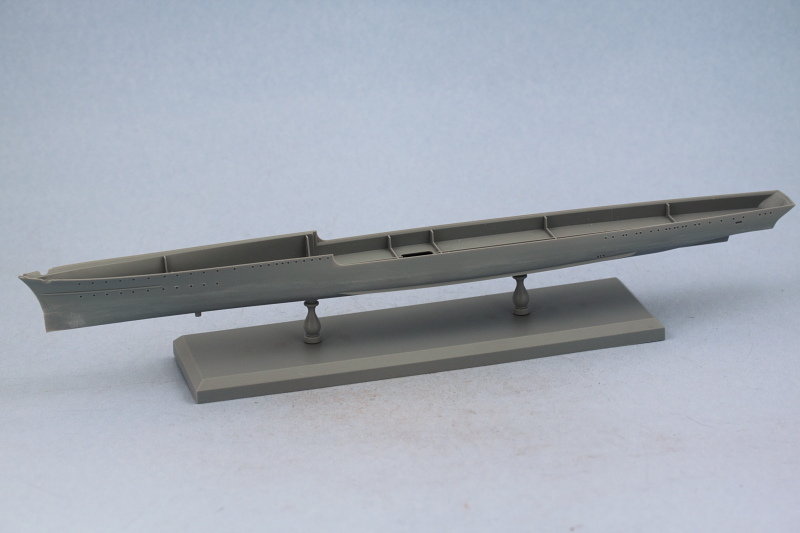 Next came attaching the one piece main deck insert. This also has a good fit but the deck curves upward slightly at the bow so it's necessary to use finger pressure and/or rubber bands to ensure it stays down until the glue sets up. 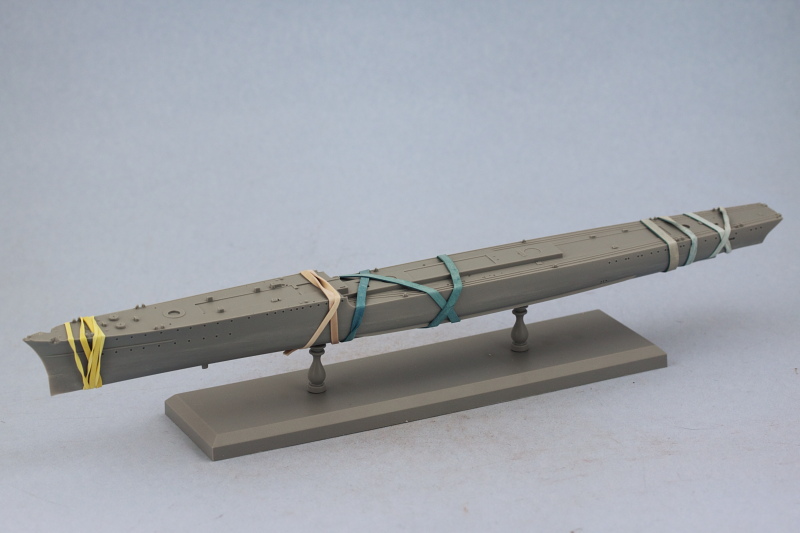 After the deck was done and the bands removed, the propeller shafts and rudders were installed along with the little fins that attach to the rear hull sides. Some putty was needed at the base of the shafts where they attach to the hull to fill gaps. 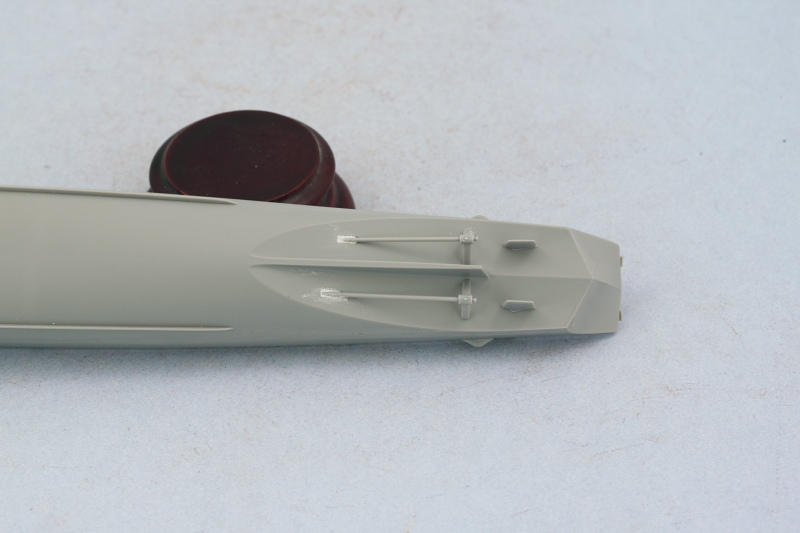 As part of the prep work for the first stage of painting, I identified all the upper works decking that needs to match the main deck in terms of the paint scheme. These consist of the gun platforms at the rear as well as around the second smoke stack. The lower bridge deck is a hybrid, the area around the bridge received some scribed planking using the tip of a triangular needle file and metal ruler while the deck holding the Flakvierling mount remained steel. Blue-tack poster putty was used to mask off the mount areas for the main guns and other items to avoid having to scrape paint later on. 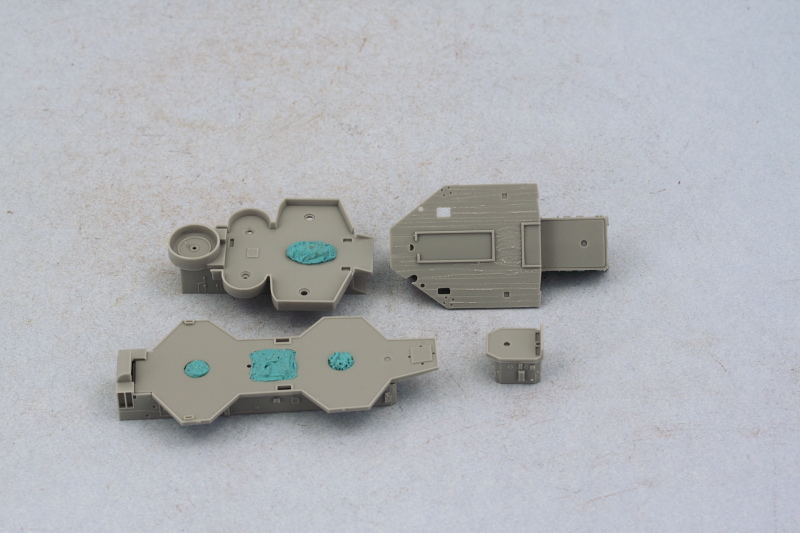 Rounding out the day's efforts, more Blue-tack was used on the main deck to mask off key areas for the superstructure elements. 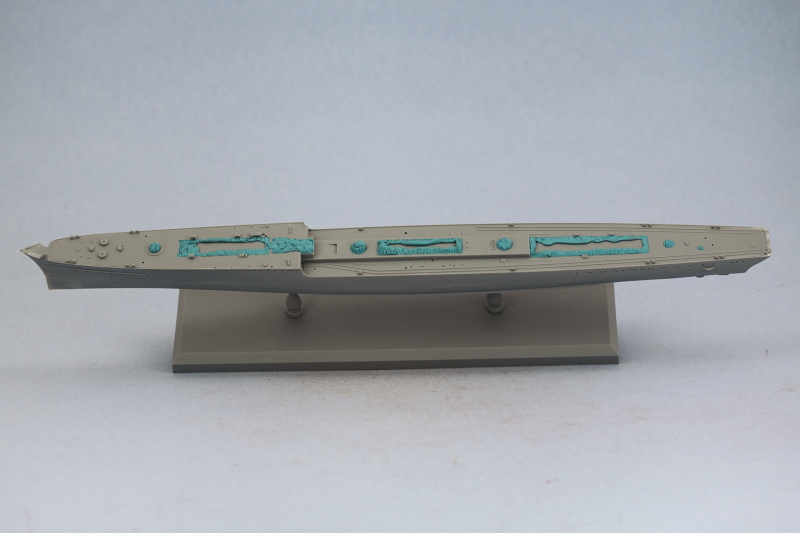 Next step will be painting the hull and decks. |
|
bigjohn
Reviews member    
Member since: December 2011
John Hale
Posts: 3,438
Dec 21, 2011 2:17:45 GMT -5
Dec 21, 2011 2:17:45 GMT -5
|
Post by bigjohn on Aug 25, 2013 17:28:15 GMT -5
|
|
Deleted
Member since: January 1970
Posts: 0
Nov 25, 2024 18:20:56 GMT -5
Nov 25, 2024 18:20:56 GMT -5
|
Post by Deleted on Aug 25, 2013 18:31:02 GMT -5
It'll take a long time before I do another floaty thing,so fair play to you Bill for having a bash at this ole gal!!!Nice start,BTW!  (Hate to say it,but I have the Airfix 1/350 Illustrious on top of the wardrobe...) |
|
|
|
Post by bbd468 on Aug 25, 2013 18:36:45 GMT -5
Well alright, We got plastic! Nice start brother Bill.  |
|
|
|
Post by wbill76 on Aug 25, 2013 19:39:38 GMT -5
BJ, it can be infectious! It's all Rob's fault...he started it!  CB CB, that's a big kit! I'll be honest and say the main reason I don't do ships is the same reason I don't do aircraft anymore...it's the display issue!  This one's fortunately not that big. 14" long and just under 1.5" wide at the beam.  Gary Gary, felt good to get this one underway but feels strange doing things in this order! It's already time for major painting! 
|
|
|
|
Post by bbd468 on Aug 25, 2013 19:42:54 GMT -5
Bill, do ya keep wonderin where tha wheels & tracks are?  |
|
|
|
Post by TRM on Aug 25, 2013 20:11:12 GMT -5
Off and Running...errr...floating...ahhh...building!  Looking like a man that has built many a ship there!! Keep up the steady progress!!! |
|
|
|
Post by wbill76 on Aug 25, 2013 20:12:13 GMT -5
Gary, not after spending about two hours yesterday doing nothing but sanding that hull join!  T T, thanks for the comments as always! Fingers crossed that my 'plan' for the painting and assembly delivers. 
|
|
|
|
Post by TRM on Aug 25, 2013 20:21:04 GMT -5
I'll cross em but pretty sure you won't need it!! Looking forward to the fun!!
|
|
|
|
Post by Leon on Aug 25, 2013 21:06:01 GMT -5
Off to a good start Bill.Hope your plan for painting goes well.Fingers,eyes and toes crossed.  |
|
|
|
Post by deafpanzer on Aug 25, 2013 23:43:34 GMT -5
Bill is really building a ship! World no longer stood still waiting for him to start... LOL This is going to be fun... great start!
|
|
|
|
Post by wbill76 on Aug 26, 2013 10:13:57 GMT -5
T, me too!  Leon Leon, don't do that too long or they'll be stuck that way permanently and then who will finish your M60?  Andy Andy, hard to believe but true! The devil will truly be in the details on this one...lots and lots of 'em!
|
|
vlpbruce
Full Member
  
Member since: March 2013
Posts: 1,463 
|
Post by vlpbruce on Aug 26, 2013 12:32:33 GMT -5
Looking good so far Bill.
|
|
AndyArgent.
Senior Member
    Aug 2013 MoM Winner
Member since: November 2011
Andy Bodge Argent - Aug 2013 MoM Winner
Posts: 1,746
Nov 17, 2011 17:09:43 GMT -5
Nov 17, 2011 17:09:43 GMT -5
|
Post by AndyArgent. on Aug 26, 2013 18:21:22 GMT -5
Nice super clean start bill
|
|
|
|
Post by wbill76 on Aug 26, 2013 19:28:08 GMT -5
Dicky, very true regarding Dragon instructions! Hopefully they aren't too true to form on this particular project.  Andy Andy, thanks for dropping by as well!
|
|
modelfreak72
Full Member
  
Member since: January 2012
Why worry, each of us is wearing an unlicensed nuclear accelerator on his back.
Posts: 1,479
Jan 28, 2012 23:21:46 GMT -5
Jan 28, 2012 23:21:46 GMT -5
|
Post by modelfreak72 on Aug 26, 2013 20:45:11 GMT -5
Great start! There's some nice woodgrain detail on the deck, dam! Paint soon me thinks?
|
|
|
|
Post by 406 Silverado on Aug 27, 2013 14:49:00 GMT -5
Off to a great start Bill. Sorry for getting here late but been busy with other things here..you know  |
|