|
|
Post by wing_nut on Jan 17, 2014 20:38:30 GMT -5
Bill hit it on the head. I got 109 fever. So I am straiting the Zvezda kit and will be posting progress here. Soon. 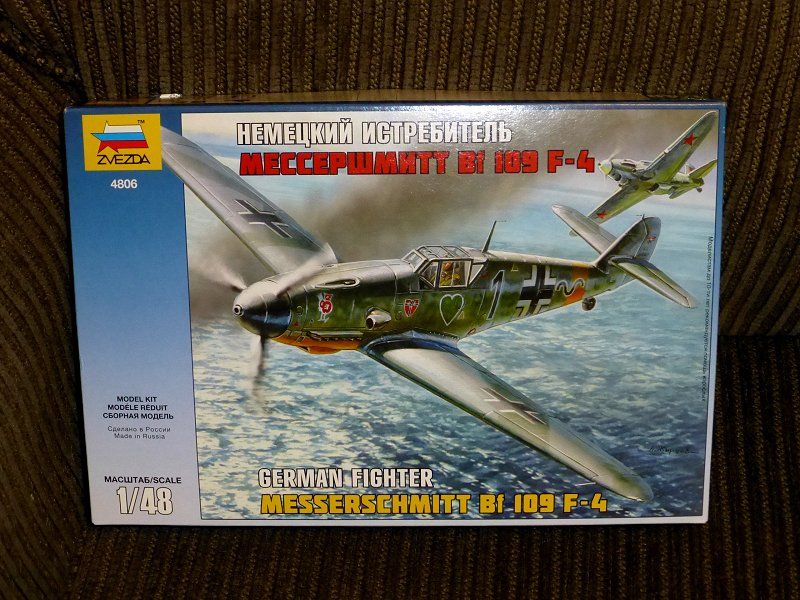 I already got some Quickboost resin exhausts and a ordered GWH rivet set. It's made for the Hasegawa kit but i am hoping it will adapt to this one. |
|
|
|
Post by Tojo72 on Jan 17, 2014 20:49:13 GMT -5
Uh-oh,now I'm getting worried.But it should be a good project for ure.
|
|
|
|
Post by wbill76 on Jan 17, 2014 21:05:59 GMT -5
Round 2! Fight!  |
|
|
|
Post by wing_nut on Jan 18, 2014 12:05:55 GMT -5
The cigar smoke that clouded my eyes and the bourbon that clouded my brain last night has dissipated. Got in a bit of bench time early this AM. Took some time to really go over the parts on the trees and they are every bit of what I've read about. Beautiful. No flash seen anywhere and the mold lines are as fine as frog's hair. The drawing in the instructions are nice an clear with Russian and English. This can built very clean or very dirty with everything open, tilted or drooped as the case may be. Since i love the lines of this so much the plan is engine cowl and canopy closed. Which there is no need to build the engine. The only thing needed it the firewall/gun mount. I am building and detailing the engine anyway just in case I change my mind. So far "just in case" means about 5 times. I can always build a 2nd  The engine seems monstrously huge for some reason  See the thin white ring near the base of the barrel toward the background? I built the entire 144th guy with micro parts, some almost thin enough to read through and didn't break a thing. After cutting of gun off the sprue it was in my hands for about 2 seconds and I snap the barrel  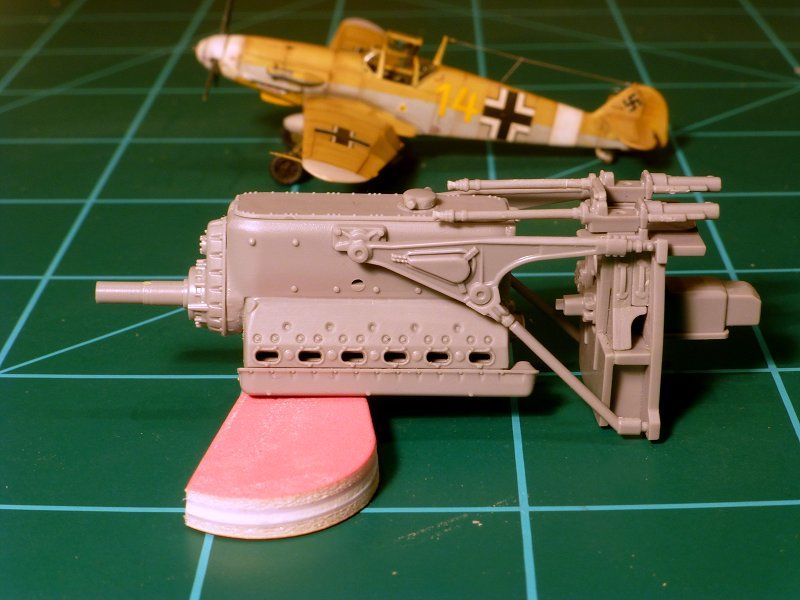 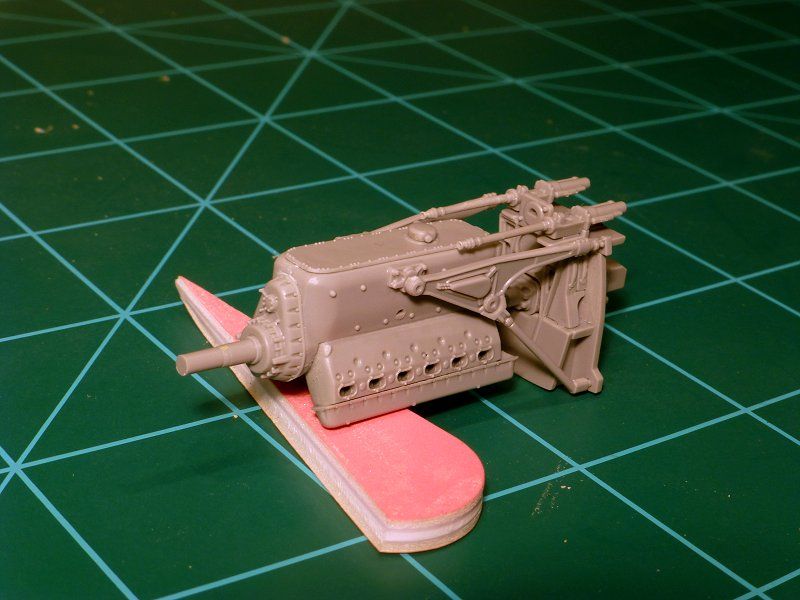 |
|
|
|
Post by deafpanzer on Jan 18, 2014 14:52:46 GMT -5
109 fever? That's OK... your avatar name says it all!!! You are nuts about wings, right?
Count me in... good luck!
|
|
|
|
Post by bullardino on Jan 18, 2014 15:24:37 GMT -5
Wow, another 109  I jump in. I'm thinking I'll have to get all my old books on the 109  |
|
|
|
Post by wbill76 on Jan 18, 2014 16:52:48 GMT -5
Off to a great start on this one Marc! I hear you about breaking parts...it usually happens a micro-second after that small voice says 'you should be careful when handling this one'!  |
|
|
|
Post by wing_nut on Jan 18, 2014 21:16:39 GMT -5
But Andy... my "nut" has tracks too  Come on Luigi jump right in the water's fine. The water temperature is "109F"  I am, trying to be careful Bill... really I am.  |
|
|
|
Post by bullardino on Jan 19, 2014 15:28:28 GMT -5
LOL, I'll stick to following, not going to build any  |
|
|
|
Post by wing_nut on Jan 19, 2014 17:07:58 GMT -5
Thanks Dicky. Yeah I laughed too. It went something like this...
$#%&$+?
Haha
&%-+*&
Mother %#$&*+er
Haha
?&(+&%$
Haha
Son of a%$#&*
|
|
|
|
Post by wing_nut on Jan 22, 2014 10:00:56 GMT -5
Been working on the cockpit so I can get the fuselage halves together. It does look like the pit would drop in nicely but figured have it ready just in case. I went though one of my drawers looking for a resin gun sight I was sure I had, and I did. But for a Fw190D-9. But I did find a set of set colored PE seat belts oft Luftwaffe planes and a PE set for a Hasegwawa kit that I will adapt what I can, like the storage compartment cover/latch, rudder pedals and a couple of levers on the throttle... so far. BTW... I see the seam on the control stick cover and that needs to be canvas too. Last update for a while. This time tomorrow I will be winging my way to Las Vegas for a week, happily leaving last night 12" of snow far behind, SO... who out there has a spare room I can live in after I lose the farm?   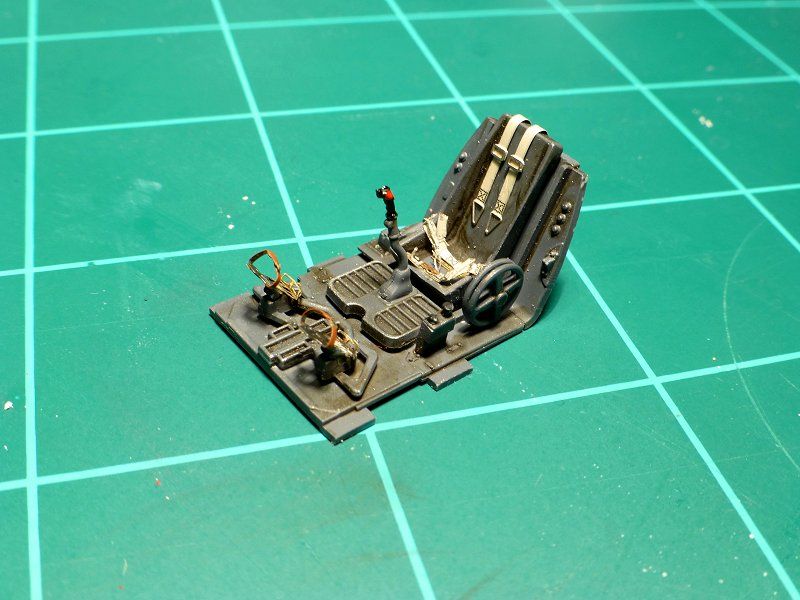 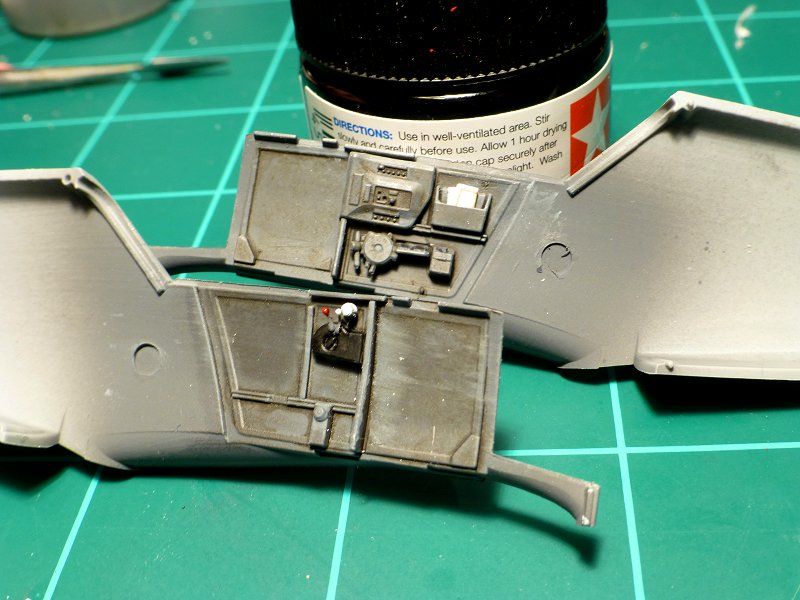 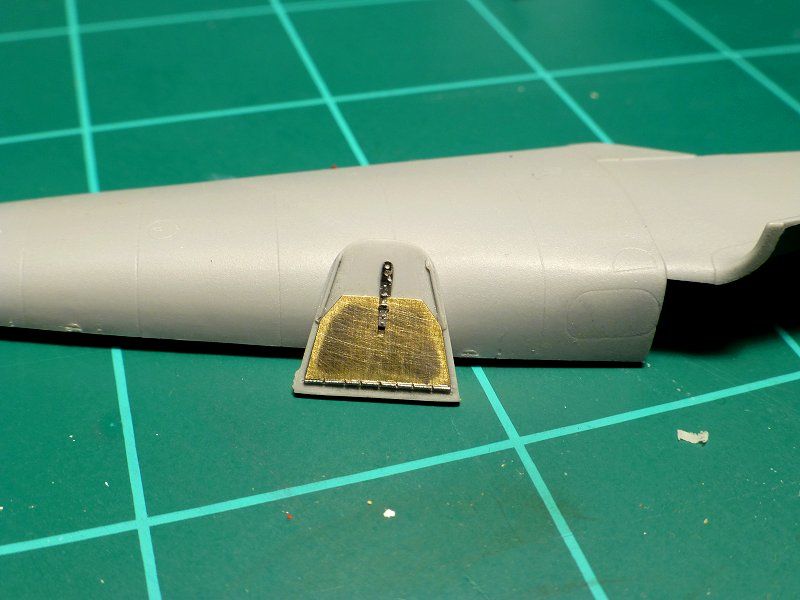 |
|
|
|
Post by bbd468 on Jan 22, 2014 10:54:17 GMT -5
Marc, the only cure for that fever.......OH, you've already got your prescription filled. My bad!  Lookin awesome bro.  |
|
|
|
Post by Leon on Jan 22, 2014 11:04:37 GMT -5
Great start on the 109 Marc.The pit is looking mighty fine.  |
|
|
|
Post by deafpanzer on Jan 22, 2014 15:14:45 GMT -5
Excellent work on the interior! Oh plenty of room here at my house but I get to keep half of your stash. Sounds fair enough?  |
|
|
|
Post by wing_nut on Jan 22, 2014 19:41:22 GMT -5
Andy...
DONE
|
|
|
|
Post by wbill76 on Jan 22, 2014 20:36:21 GMT -5
Careful what you agree to Marc!  Nice progress on the 109, have fun in Vegas. |
|
|
|
Post by fightnjoe on Jan 23, 2014 16:11:41 GMT -5
nice progress. looks very sharp.
joe
|
|
|
|
Post by bullardino on Jan 24, 2014 2:21:40 GMT -5
Great looking 'pit Marc  |
|
Rick
Full Member
  
Member since: March 2013
what to build, what to build . . . Ok THAT one!
Posts: 854 
|
Post by Rick on Jan 27, 2014 8:06:52 GMT -5
Marc, the office looks great. Love the details and textures. Will be following along as well. I've still got three 109's in the stash.
Rick
|
|
|
|
Post by wing_nut on Jan 29, 2014 10:13:32 GMT -5
To quote Randy Quaid... "Hello boys. I,m baaAAaack!" Sorry Andy but I'm going to have keep all of my stash  I didn't loose my house after all.  But your offer is noted  Need to get the shock of mid 60's to 10 degrees but it's good to be home. There is only so much dining at 4 star restaurants, gabling, booze and smoking hot cocktail waitresses a guy can take.  I ended up on the plus side buy a couple of hundred after an kick @$$ night Sunday at a $5 black jack table. Dunno if it was blind luck or the stars were just aligned in a special way. Beside just getting some good wins I got like 10 black jacks. After each "WOOHOO" from the table at my table others would come over to watch. It was cool as hell. I can see how people can have a gambling problem. A question for the experienced gamblers out there... Is winning $350 at a $5 table a lot? The pit boss was giving me funny looks. No update yet... but soon, I promise. Joe, Luigi, Rick thanks for or the comments. Sorry for the delay but I was a bit preoccupied  |
|
|
|
Post by bbd468 on Jan 29, 2014 10:25:25 GMT -5
To quote Randy Quaid... "Hello boys. I,m baaAAaack!" LOL!!!   Love that movie! So.....you got home with some fresh kit cash?  Great to see you back Marc.  |
|
|
|
Post by deafpanzer on Jan 29, 2014 14:49:19 GMT -5
A question for the experienced gamblers out there... Is winning $350 at a $5 table a lot? The pit boss was giving me funny looks. Way to go! With $350 you can easily get at least 14 kits... good move! |
|
Deleted
Member since: January 1970
Posts: 0
Nov 25, 2024 12:24:57 GMT -5
Nov 25, 2024 12:24:57 GMT -5
|
Post by Deleted on Jan 30, 2014 15:10:40 GMT -5
So you fly here and don't check in with the MiB?
For shame........
No, winning $350 isn't a big deal at a $5 table. What were you wearing though, a kiltutu? Don't worry, what happens here stays here, unless I start a file on you.
G
|
|
|
|
Post by Leon on Jan 30, 2014 16:45:49 GMT -5
So you fly here and don't check in with the MiB? For shame........ No, winning $350 isn't a big deal at a $5 table. What were you wearing though, a kiltutu? Don't worry, what happens here stays here, unless I start a file on you. G LOL  figures you would come up with that one G.   |
|
|
|
Post by wing_nut on Jan 31, 2014 13:37:28 GMT -5
Thanks guys. Sorry G... didn't realize you were out that way. Since the virus gods saw fit to wait til I got back to give me whatever it is that making each time I swallow feel like a hot rivet from a steel skyscraper going down my neck I was able to get some work done. I have to agree withe the reviews i read saying one of the few weak points in this kit is the IP. But I have decided to go with a buttoned up canopy, getting the instrument decal to settle over the IP is too bad looking and will be fine under the glass. I applied a piece of Bare Metal Foil on a very thin piece of acetate and punched a small circle to represent the lens in the gun sight, then used the same stuff to make the reflectors. 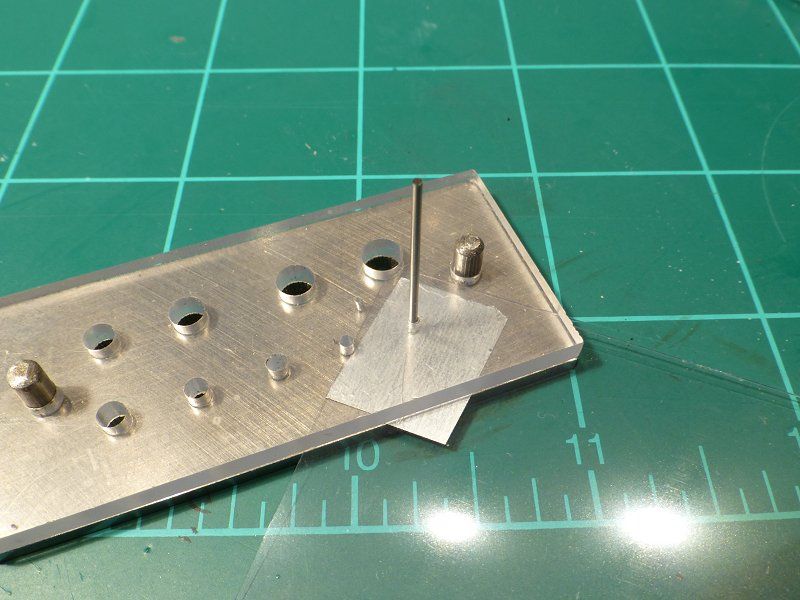 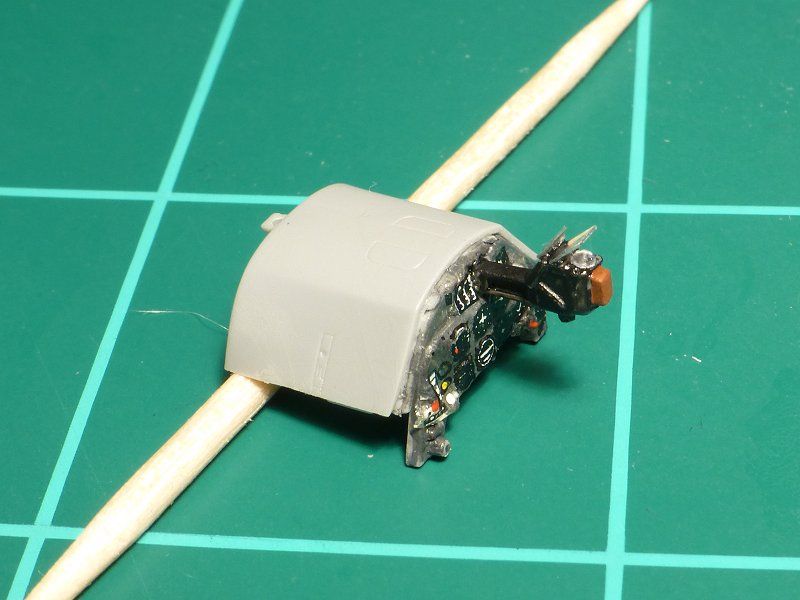 With the IP done and glued into its little section of the cowl, the fuselage halves were joined. I don't have a photo of the tail but Zvezda went with a 4 piece empennage with the 2 sides and the tail in 2 pieces. This is usual done for future kits to have different tails. Fine. I get it. But I have yet to have one of these go together without a lot of adjusting to get the best fit you can but then still having some sanding to do to remove a small step or something else. They also opted to make this fall on one of the very distinctive panel line features on a 109s. The vertical lines spaced down the length of the fuselage. Note the the manufactures that may be reading this... STOP THAT!  Make the seam in the middle of 2 sections. Way easier to fill, file and clean up that line and leave the pre-scribed panel line intact. That was we don't have to try to rescribe that line around the circumference of a tapering fuselage. And scribing over a glued line is always harder not matter how long it cures. PHEW! Sorry for the rant. But I do feel better now.  Cockpit pics... 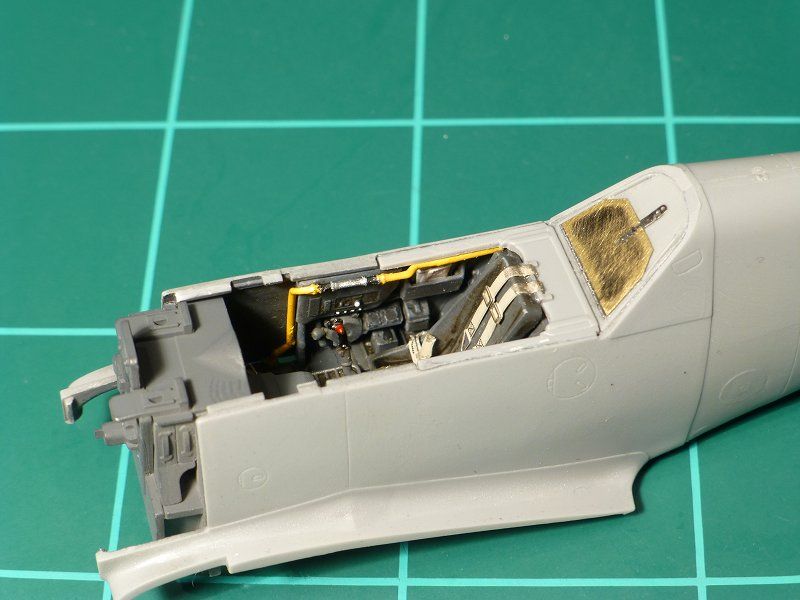 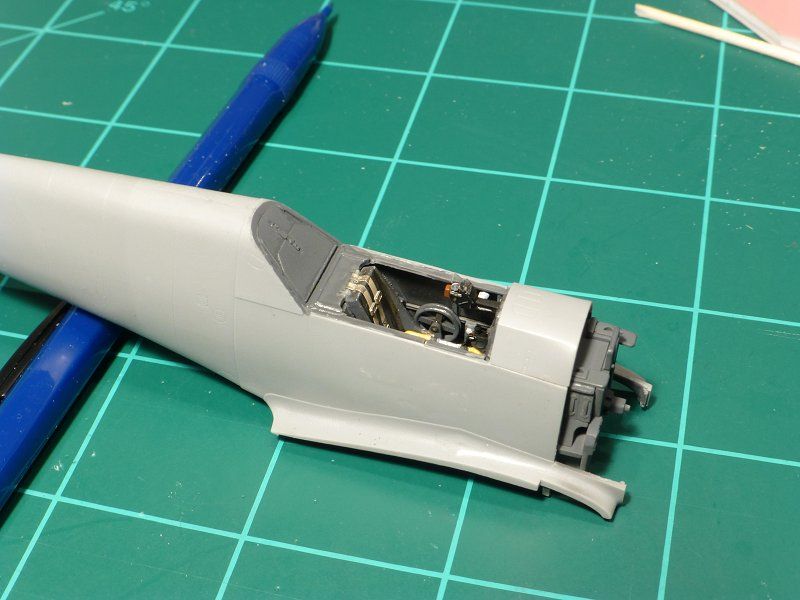 |
|
Deleted
Member since: January 1970
Posts: 0
Nov 25, 2024 12:24:57 GMT -5
Nov 25, 2024 12:24:57 GMT -5
|
Post by Deleted on Jan 31, 2014 14:22:54 GMT -5
Nice work on the CP and IP, it's really paying off  I know know what you mean about kit makers using panel lines to join parts. In some cases it helps but in most it's just a pain in the A$$  Before re now, I've filled the joint and moved the panel line by a few mm onto fresh plastic. It's ok on 1/48+ if you're careful  |
|
|
|
Post by wing_nut on Jan 31, 2014 17:45:19 GMT -5
Steve, Dicky... thanks lads. Steve that might on any other part of a 109 except the fuselage  Those panels lines e perfectly spaced. |
|
|
|
Post by wbill76 on Feb 2, 2014 12:03:42 GMT -5
Nice to see you back at it Marc! Looking good on the pit.
|
|
|
|
Post by wing_nut on Feb 2, 2014 21:34:47 GMT -5
With my cold today a more or less sat at the bench most of the day. First thing to do was fill in the wings where the slats go. Since I am going to have them down, the step at the back edge is way to high. The trailing edge of the slat itself is just the thickness of the wing skin so in 1/48 that step would be just about invisible. A little Tamiya putty filled and sanded smooth. The back edge of the slat sanded to a sharp edge. 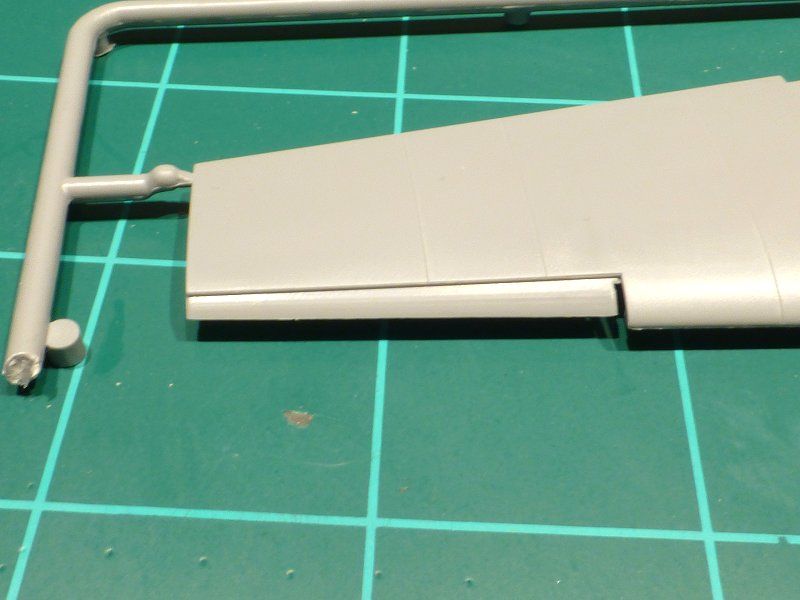 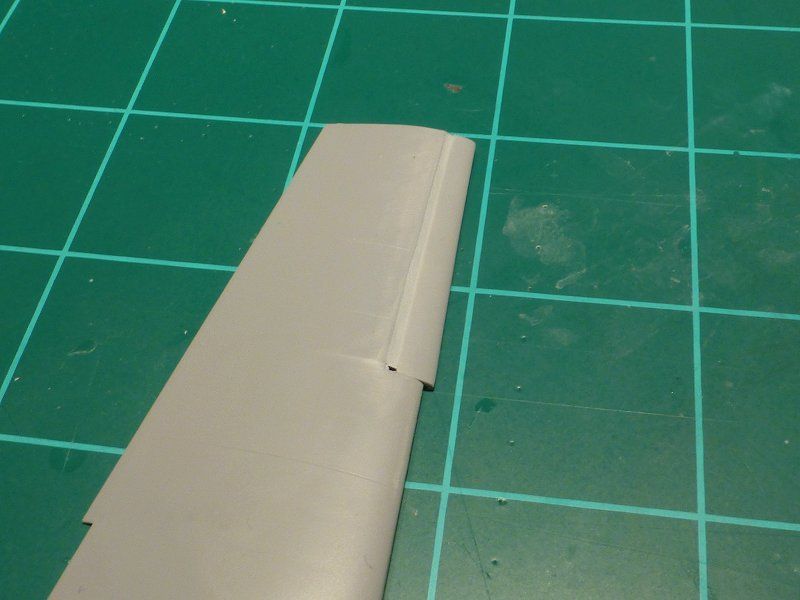 The basic airframe is pretty much done. i think I have all my re-scribing done but with double check. Getting all the engine cowls in place and straight was tedious to say the least. All just the flat edges of each piece with and sort of guide pins or any other "former" to align on. I glued a strip of styrene under the main hinge line of the upper cowls some added strength when there were glued together.&NBS; Before that set those where glued to the front of the aircraft since they set back into a notch on the wing root. Then the 2 halves of the oil cooler cowl... just behind the prop... which and been glued and and the seam taken care of, was glued to the front of the cowl because of a small tab that make a small section of cowl in front of the exhausts. Since this was the only way all these could possible go I was hoping that when I got to the last section, the underside cowl, it would just drop in place. And luckily It darn near did. Just some minor adjustments needed. Every controls surface is positionable except for the inner split flaps. They are separate but needed some slight modifications to droop. 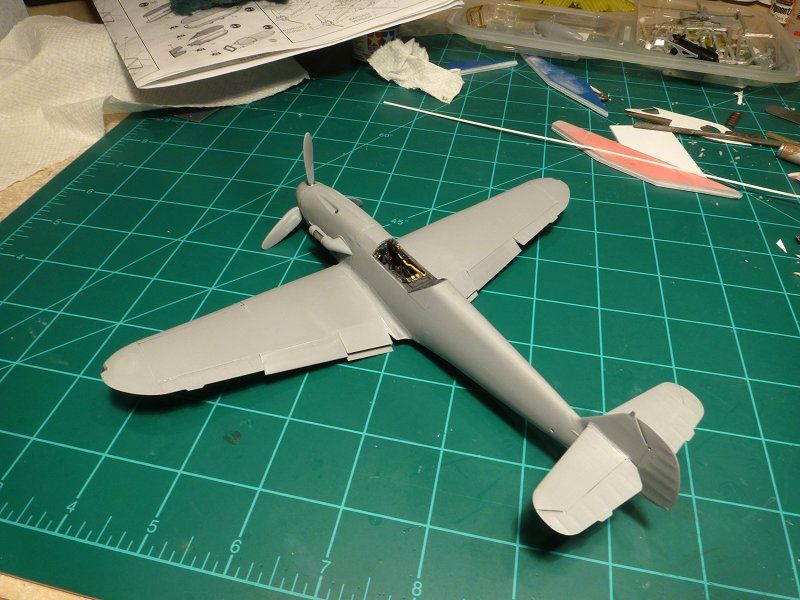 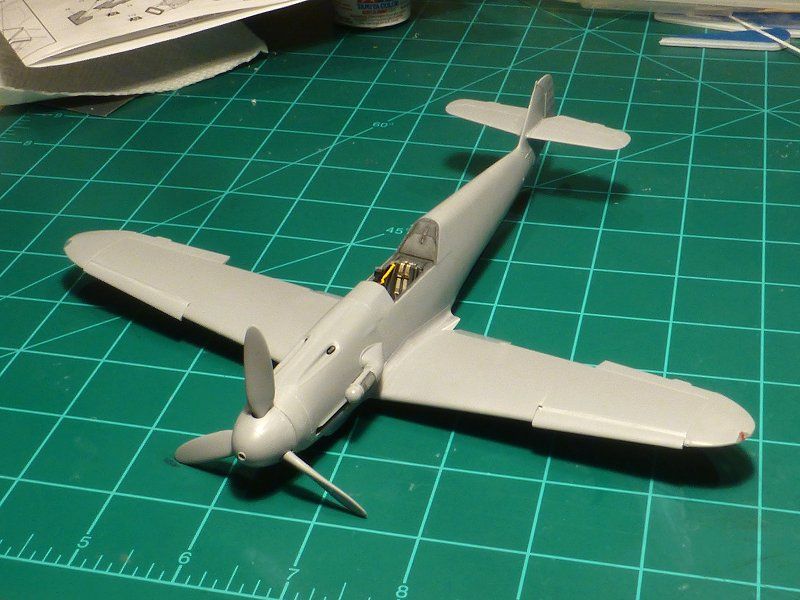 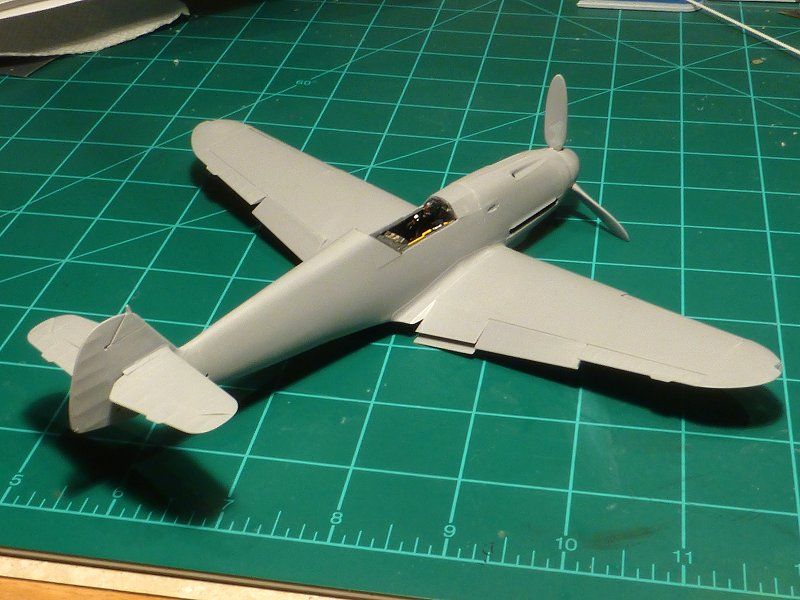 |
|
|
|
Post by Leon on Feb 2, 2014 21:46:15 GMT -5
Nice work on the flaps and cowling Marc.  |
|