|
|
Post by wbill76 on Mar 19, 2014 18:06:47 GMT -5
That is cool. So the pins must be friction fit or do they snap in place? Neither. The pins are separate and require glue to stay in place, they come on their own sprues with the connection point on the flat end of the 'bolt' head, so you apply a bit of glue, insert, let the glue catch a bit, then snip off the sprue with cutters and voila!  |
|
|
|
Post by wbill76 on Mar 19, 2014 18:07:18 GMT -5
Thanks Dicky! Glad to have you along for the ride as well.  |
|
|
|
Post by Leon on Mar 20, 2014 3:22:46 GMT -5
Nice start on the tracks Bill.Glad to see you back on tracks.  Soz couldn't resist the little pun.   |
|
afvfan
Senior Member
   
Member since: December 2012
Bob
Posts: 1,772
Dec 10, 2012 17:32:38 GMT -5
Dec 10, 2012 17:32:38 GMT -5
|
Post by afvfan on Mar 20, 2014 5:35:12 GMT -5
Sounds similar to the system Tristar uses on some of their kits.
|
|
|
|
Post by bullardino on Mar 20, 2014 11:08:36 GMT -5
Looks like Bronco defo stole MK technology  These are modelkasten tracks  |
|
|
|
Post by robbo on Mar 20, 2014 11:17:38 GMT -5
Oh yeah man, love these little panzers Bill, front row seat please before it gets too crowded
|
|
|
|
Post by wbill76 on Mar 20, 2014 11:52:28 GMT -5
Leon, just as long as I don't get stuck in a rut!  Bob Bob, Lui, it's almost an exact copy of the method MK uses on their workable tracks with the exception that the pins are larger/stronger and they aren't quite molded the same way in terms of how they come on the sprues...with MK's you can usually twist off the sprue 'handle' and with these the attachment point is a little stronger, so clipping is necessary. Ian, grab your seat fast, you know how these guys get in the front row! 
|
|
|
|
Post by Deano on Mar 20, 2014 11:57:54 GMT -5
O.K. enough of this small talk, where's the build?  Just for you Jeff!  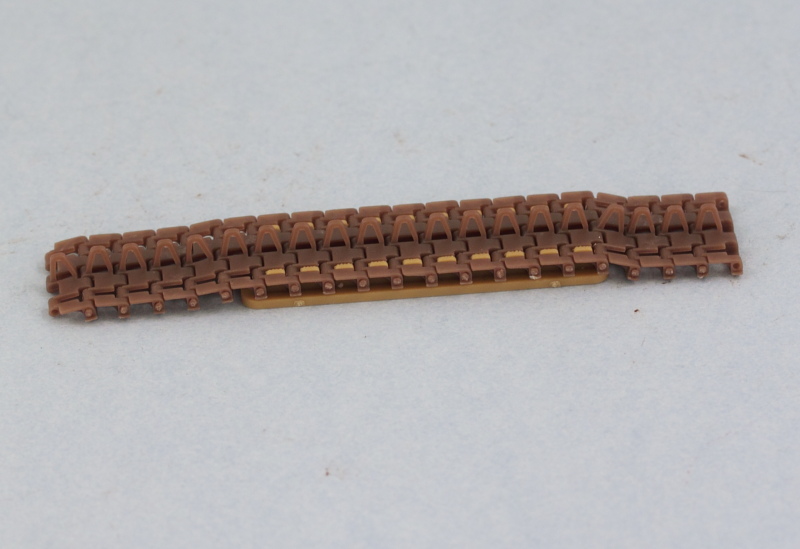 Not a lot but they look great!  |
|
|
|
Post by deafpanzer on Mar 20, 2014 12:06:32 GMT -5
O.K. enough of this small talk, where's the build?  Just for you Jeff!   I am very sorry but i have to ask you... knowing you very well I recall you like to do tracks while watching football games. But we are not in the season so what do you watch while you are doing those tracks? LOL Those tracks always look great!!! |
|
|
|
Post by wbill76 on Mar 20, 2014 12:21:05 GMT -5
Thanks Deano! Andy, these were done just a little bit here and there when I had some spare time and to serve as a 'test' run for assembling the sprockets/idlers/wheels later on to make sure everything plays nice together. Unlike Tony, NASCAR doesn't help me with track assembly in the 'off' season!  |
|
|
|
Post by wouter on Mar 21, 2014 10:17:20 GMT -5
always love these little panzers. Glad to see you starting a new panzerbuild again Bill
Cheers
|
|
|
|
Post by wbill76 on Mar 21, 2014 11:00:48 GMT -5
Thanks wouts! Going to have some fun with the interior on this one, so much packed into such a little vehicle!  |
|
Deleted
Member since: January 1970
Posts: 0
Nov 27, 2024 1:35:44 GMT -5
Nov 27, 2024 1:35:44 GMT -5
|
Post by Deleted on Mar 21, 2014 11:53:46 GMT -5
gawd! you teaser show us some plastic!!!
|
|
|
|
Post by wbill76 on Mar 21, 2014 13:57:03 GMT -5
gawd! you teaser show us some plastic!!! I did...that's as far as I've gotten with it honest!  More to come after this weekend.  |
|
Deleted
Member since: January 1970
Posts: 0
Nov 27, 2024 1:35:44 GMT -5
Nov 27, 2024 1:35:44 GMT -5
|
Post by Deleted on Mar 22, 2014 14:12:02 GMT -5
gawd! you teaser show us some plastic!!! I did...that's as far as I've gotten with it honest!  More to come after this weekend.  ha ha! so you did! silly me  |
|
|
|
Post by wbill76 on Mar 23, 2014 16:39:06 GMT -5
Got things off and rolling on this build by doing things a little differently. Bronco includes a lot of detail for the fighting compartment interior and also constructs the hull out of multiple panels vs. providing a single 'tub'. Ordinarily I wouldn't be that big of a fan of this approach but with all the interior detail and how tiny this vehicle is, this is actually a plus on this particular build as it lets you work with each panel separately. So, the first order of business was to prep all the major hull panels and the compartment floor and do a mock-up using masking tape to hold things together to ensure there weren't going to be any surprises along the way. 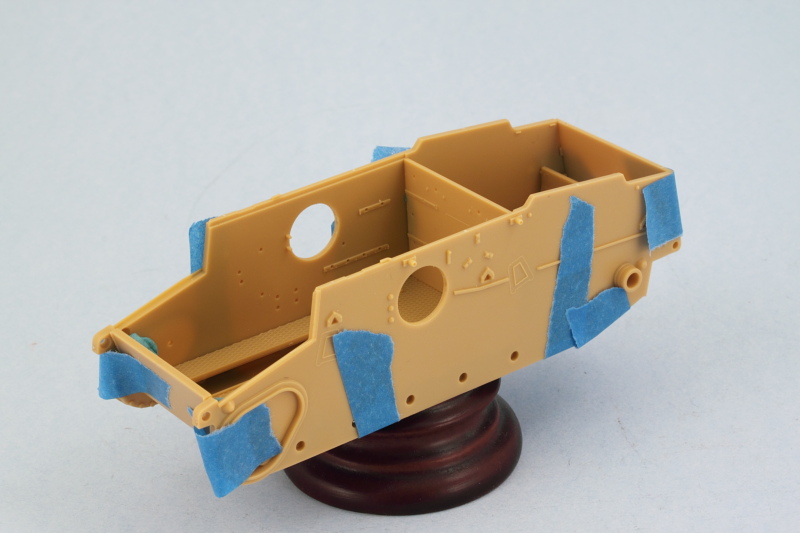 No major issues to report but it will be fun installing all the suspension torsion bars and getting all these elements together permanently once the detailing and paint work is finished, but we'll cross that bridge much later on! Because many of the interior components are made up of multiple parts, some tiny, some that require fit with other small parts, etc., I bounced around between various steps while glue set up to try to make the most of my available time. Taking advantage of the hull mock-up situation, I assembled the various transmission and drive-shaft components and also connected the firewall to the large transmission cover housing since those are initially separate pieces. The alignment here is key as it drives (no pun intended!) not only how the firewall sits but also where the commander's seat lines up and how everything interacts at the front of the hull. No real margin for error here either given how tightly packed everything is on the inside. 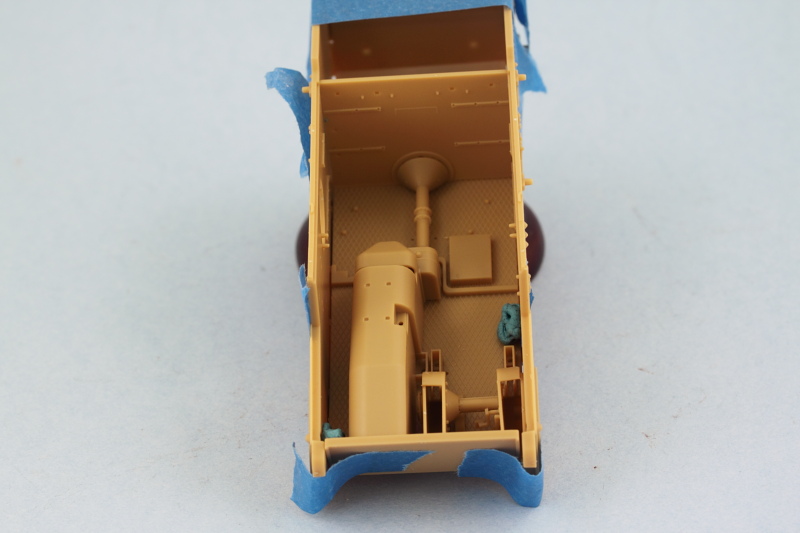 Once the glue had set on the transmission and firewall combo, I undid the mock-up and restored everything back to its panel parts for easier handling. The tiny driver's pedals were added and the driver's and commander's seats assembled. The commander's seat is a multi-part and very delicate 'free standing' assembly...so lots of care needed here to get it all together and aligned correctly. I left the headrest and main seat cushion separate for now to make it easier to paint them and will add them later. 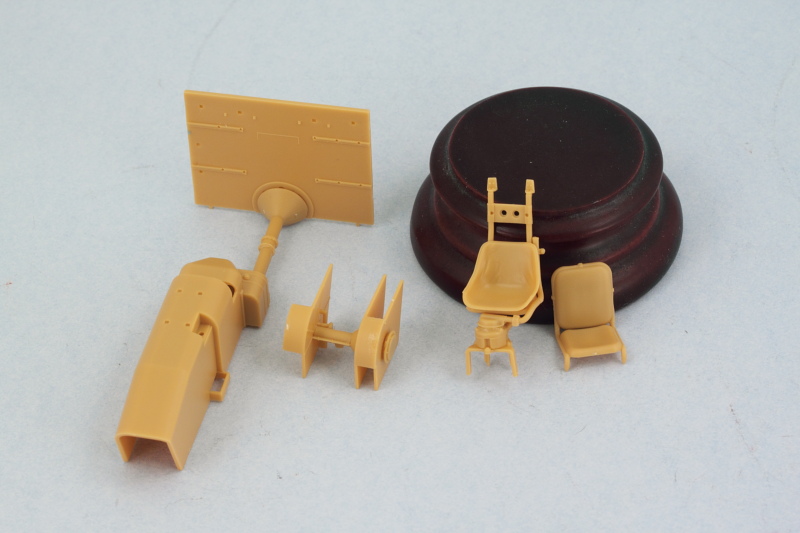 One of the really nice features of the kit IMHO is the inclusion of workable crew side escape hatches. Yes, that's right, fully workable...but you do have to be very careful with the assembly and where you put the glue, but in the end if you do it right, they will work just like on the actual vehicle. Only downside is that they tend to want to swing open all the time, so once the glue had set on the hinge arms, I'm using small blobs of blue-tack poster putty on the inside surfaces to keep them 'closed' while work continues. 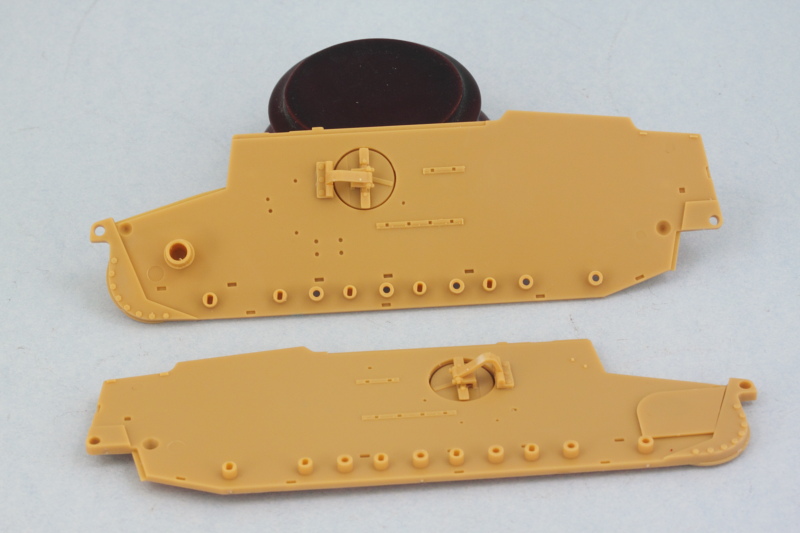 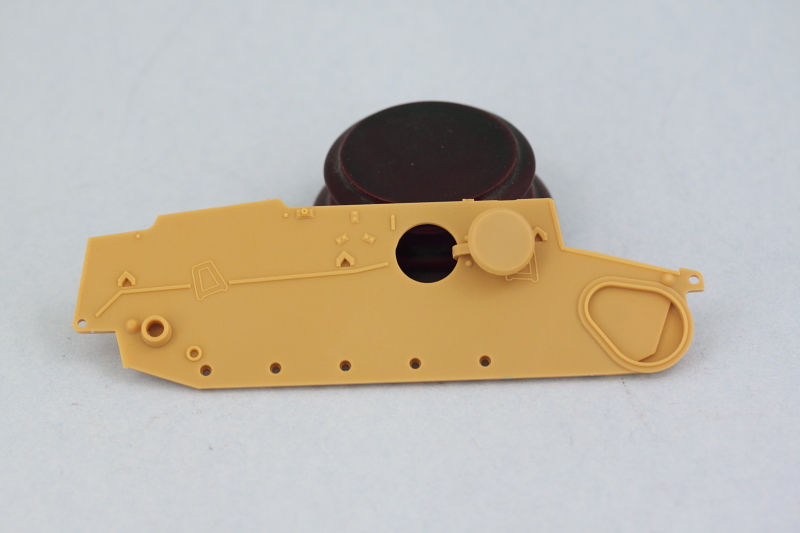 Next up will be devoting some attention to the rest of the gear details that go in this area like the radios, numerous ammo sacks for the turret MGs, crew equipment, etc. |
|
|
|
Post by bullardino on Mar 23, 2014 16:46:47 GMT -5
Very nice progress, Bill.
Will you show the hatches open in the end? It would be a pity to hide all those inner goodies.
|
|
|
|
Post by wbill76 on Mar 23, 2014 17:07:50 GMT -5
Very nice progress, Bill. Will you show the hatches open in the end? It would be a pity to hide all those inner goodies. I'm planning to show the turret hatch open as well as at least one of the side hatches. I had to try the workable hatch just because it was there!  |
|
|
|
Post by imatanker on Mar 23, 2014 17:12:38 GMT -5
Wild Bill rides again. This kit looks pretty nice. Great work so far Dude.
|
|
|
|
Post by wbill76 on Mar 23, 2014 17:41:06 GMT -5
Thanks Jeff! Felt good to be back on the ground again...and what's more, this one has only a handful of decals!  |
|
afvfan
Senior Member
   
Member since: December 2012
Bob
Posts: 1,772
Dec 10, 2012 17:32:38 GMT -5
Dec 10, 2012 17:32:38 GMT -5
|
Post by afvfan on Mar 23, 2014 17:59:53 GMT -5
It's great that they did the workable side hatches, especially since they were nice enough to go with a full interior.
|
|
|
|
Post by wbill76 on Mar 23, 2014 18:03:20 GMT -5
It's great that they did the workable side hatches, especially since they were nice enough to go with a full interior. I thought so too Bob. I was afraid I might have to get creative but this solves all three problems in one go (how to paint both sides, how to protect the interior, and how to avoid problems with fitting the fenders and tracks!).  |
|
bigjohn
Reviews member    
Member since: December 2011
John Hale
Posts: 3,438
Dec 21, 2011 2:17:45 GMT -5
Dec 21, 2011 2:17:45 GMT -5
|
Post by bigjohn on Mar 23, 2014 19:18:56 GMT -5
Nice start Bill, Seams like these new kits just keep getting better and better!
|
|
|
|
Post by wbill76 on Mar 23, 2014 19:46:11 GMT -5
Nice start Bill, Seams like these new kits just keep getting better and better! I'm very impressed with Bronco's latest offerings, they've really stepped it up in the quality and detail department IMHO. The only downside is their penchant for achieving detail through lots of TINY parts all stacked together...but that's the price you pay I guess!  |
|
thug626
Senior Member
   
Member since: January 2013
Posts: 2,035
Jan 15, 2013 13:05:28 GMT -5
Jan 15, 2013 13:05:28 GMT -5
|
Post by thug626 on Mar 23, 2014 20:00:11 GMT -5
Good evening Bill,
I would have to agree with you on Bronco's achievement of their level of detail….. Lots and lots of wee, tiny parts. Their kits have come a long way though.
Outstanding progress on the beastie.
Dave
|
|
|
|
Post by wbill76 on Mar 23, 2014 21:22:41 GMT -5
Thanks Dave! I still remember quite vividly doing a review of their very first 1/35 kit for another site. Plastic was so soft it wouldn't sand, just burred up!  |
|
|
|
Post by TRM on Mar 24, 2014 5:49:47 GMT -5
Very nice Bill!! Off and running now!! Must feel reall good to get back into 1/35 armor again?
|
|
|
|
Post by wbill76 on Mar 24, 2014 9:07:20 GMT -5
Very nice Bill!! Off and running now!! Must feel reall good to get back into 1/35 armor again? It does T! Although it's such a small vehicle, I don't know that it really changed much.  |
|
|
|
Post by wouter on Mar 24, 2014 11:32:49 GMT -5
seems like a great kit indeed, like that touch with those workeable hatches. Looking forward how you tackle the paintwork on the interior
Cheers
|
|
|
|
Post by wbill76 on Mar 24, 2014 11:55:11 GMT -5
seems like a great kit indeed, like that touch with those workeable hatches. Looking forward how you tackle the paintwork on the interior Cheers Thanks Wouts! Paint work on the interior is going to be done in modules, only real way to do it...then add all the details to the different panels/elements and keep my fingers crossed that they will all fit and play nice together in this VERY tight space.  |
|