|
|
Post by wbill76 on Aug 1, 2014 21:11:51 GMT -5
Just staking out the territory for the next build once the StuG III F/8 project winds up in the next couple of days. 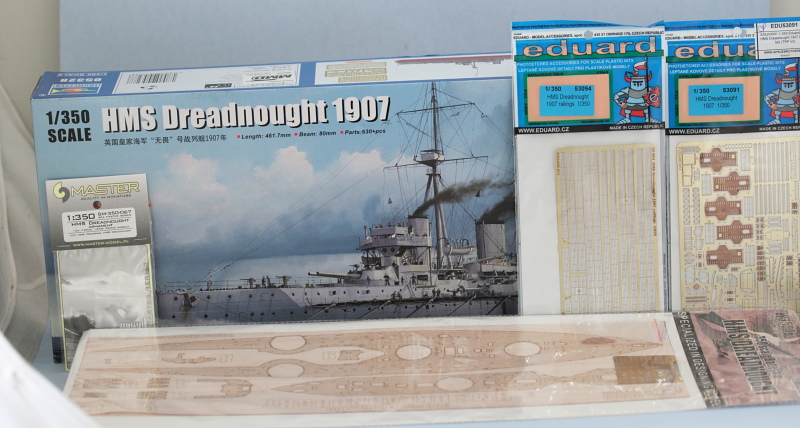 Managed to pull together a nice set of goodies for this one, the two Eduard sets cover the railings and other details (some of which the Trumpeter kit also provides, so have some options on which will be better), Wood Hunter decking, and some Master turned aluminum 12-inch and brass 12pdr gun barrels. The kit has over 600 parts all by itself, so this will be a somewhat involved project to say the least!  |
|
|
|
Post by Leon on Aug 1, 2014 21:25:12 GMT -5
Looking forward to you starting this one Bill.  |
|
|
|
Post by TRM on Aug 1, 2014 22:50:04 GMT -5
Fantastic!! I have been waiting since a little birdy mentioned something about another floaty waiting in the wings!! Count me in for whatever you can or want to break away and show us "brother"! She is a beautiful girl right there!!
|
|
Rick
Full Member
  
Member since: March 2013
what to build, what to build . . . Ok THAT one!
Posts: 854 
|
Post by Rick on Aug 1, 2014 23:21:12 GMT -5
Sweet! Looking forward to watching this one get ship shape.  Rick |
|
|
|
Post by wbill76 on Aug 2, 2014 14:00:30 GMT -5
Thanks guys for the interest, should be a fun one. Lots of firsts planned for this one...and it's only the 2nd ship I've attempted in my 'modern' building career...so we'll see how it all works out.  |
|
|
|
Post by 406 Silverado on Aug 2, 2014 16:25:51 GMT -5
I love those older ships, count me in Bill.
|
|
|
|
Post by wbill76 on Aug 2, 2014 16:59:59 GMT -5
Had a feeling you might pop in for this one Rob. Pull up a chair and make yourself comfy...just don't sneeze on any of those PE frets!  |
|
|
|
Post by wbill76 on Aug 4, 2014 20:20:22 GMT -5
Dreadnought project took its first steps today in terms of getting the hull together. The first step in the Trumpeter instructions assembles the two-part full hull along with 7 internal braces to stiffen the hull and also provide some support for the main deck. I had heard about other builders having issues with a gap in the hull join particularly in the middle, so I did a test fit first to see how things would play together. 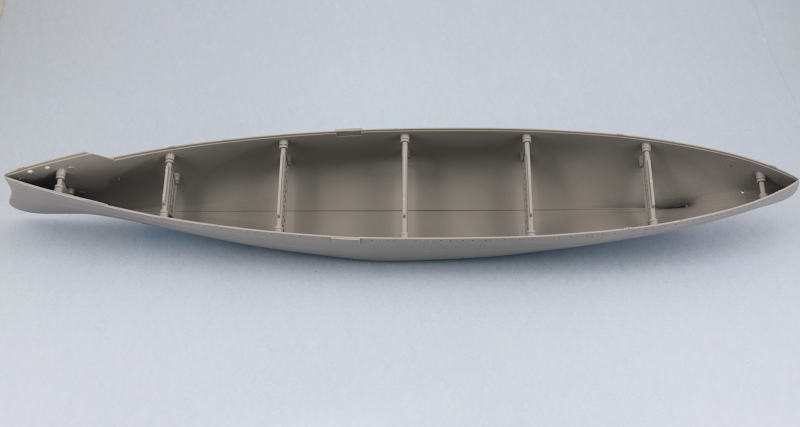 What I noticed was that the hull fit together very well at the bow and stern and only in the middle was there a slight gap. I also noticed that the braces had a very tight friction fit except for the smaller bow/stern braces into their mounting holes. I used some strips of masking tape along the bottom of the hull and then positioned each of the braces, squeezing in from the sides so that they would close up evenly. Once I did that, the slight gap in the bottom virtually disappeared and what remained could be closed up with some strategic pressure and rubber bands. I applied some liquid glue at the bow and stern first and used finger pressure to close those up until they set so I had a solid place to start from. Then to avoid any problems with the hull potentially warping at the top while I worked on the bottom, I used the main deck insert to help it hold its position and taped it down, then added two rubber bands to help wit the small gap on the bottom. 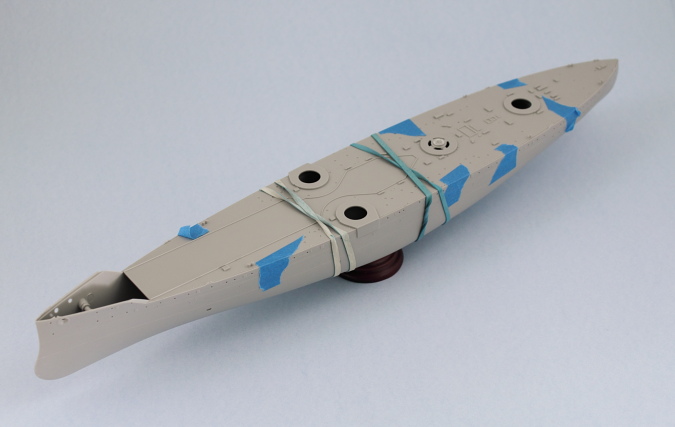 Starting at the bow and working my way back, I applied liquid glue in small sections and gently squeezed the hull together in combination with the rubber bands until the glue 'grabbed', then moved further down the seam repeating the process. 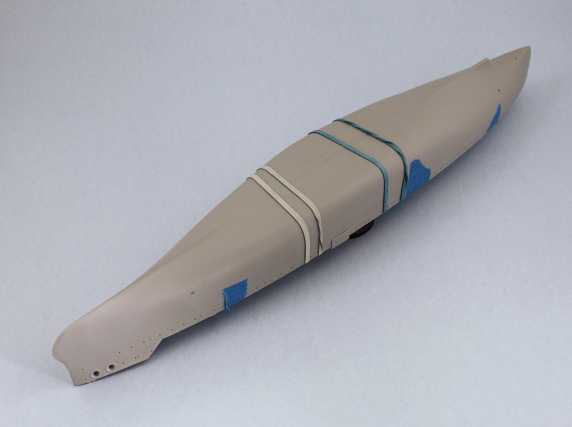 After the glue had set, the rubber bands came off and some light sanding of the seam using sanding sticks was all that was needed. I did need to apply just a small amount of putty around the propeller shaft area of the seam on the stern. This was due to a slight gap created when I removed the sprue connection point there though and not something inherent in the kit. 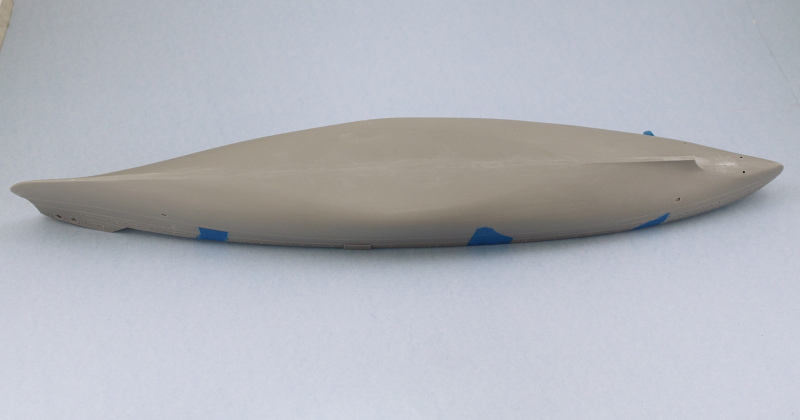 Last but not least, I knocked together the kit-supplied stand so I could have something to rest the hull on. I'm not too thrilled with it as a permanent base but it will serve for now. 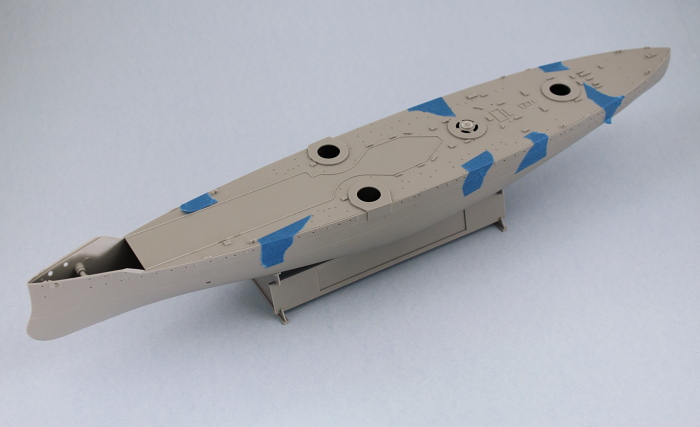 The main deck insert sits flush with the hull top edge so I can already tell that when I add the wood decking it will increase the deck height ever so slightly. I think that's actually going to be to my advantage though in terms of helping provide just a smidge of added contact surface for the railings but have to see about that when the time comes. |
|
|
|
Post by TRM on Aug 4, 2014 20:53:46 GMT -5
Looky there...off and running!! Nice bit of progress Bill! She will be a pretty one when you get done!! Love the lines on these old ones!!
|
|
|
|
Post by wbill76 on Aug 4, 2014 21:09:29 GMT -5
Have to agree with you there T...and the fact that it's got 5 turrets just adds to the mystique.  |
|
bbrowniii
Full Member
  
Member since: March 2012
If you are not part of the solution, you are part of the precipitate.
Posts: 1,238
Mar 25, 2012 22:08:04 GMT -5
Mar 25, 2012 22:08:04 GMT -5
|
Post by bbrowniii on Aug 4, 2014 21:41:03 GMT -5
Oh boy oh boy oh boy!!! This is gonna be fun!!!
Out of curiosity, Bill, of all the 1/350th ships, why this one?
|
|
|
|
Post by deafpanzer on Aug 4, 2014 23:18:57 GMT -5
You are not wasting your time on this one... great start! Now Boyd has made me very curious why you have chosen this kit!!!
|
|
|
|
Post by wbill76 on Aug 5, 2014 13:12:10 GMT -5
Oh boy oh boy oh boy!!! This is gonna be fun!!! Out of curiosity, Bill, of all the 1/350th ships, why this one? Glad to have you and Andy along Boyd! I chose this one for a couple of reasons. The earlier battleship designs always had a fascination for me due to their often oddball designs/layouts as navies tried to figure out what did or didn't work in the late 1800s and early 1900s. HMS Dreadnought 'revolutionized' ship design in terms of being the first 'all big-gun' ship (earlier designs had a mix of primary and secondary gun batteries, almost like hybrid battleship/cruisers in that regard) powered by steam turbines and historians have always referred to anything built before as 'pre-dreadnought' and anything after as simply 'dreadnought' type battleships. That significance, coupled with its unusual turret design, appealed to me greatly. That and the fact that it was recently released (2013) and ties in with WWI made it the perfect project. Not too big for display (18" long, 3" wide), not too expensive either (relatively speaking for a 1/350 ship, the kit and all the goodies came in under $200 including shipping), and readily available including various aftermarket stuff all played a factor too.  Now we will see if I've bitten off more than I can chew or not but so far, it's looking good!  |
|
|
|
Post by deafpanzer on Aug 5, 2014 15:05:08 GMT -5
Yeah, I am with you regarding early battleships... looking forward to see how much you can bite. If you can eat triple cheeseburger, then you can do this!
|
|
|
|
Post by Leon on Aug 5, 2014 18:16:14 GMT -5
The lower hull is looking good Bill.Nice clean work.   |
|
|
|
Post by wbill76 on Aug 5, 2014 19:08:38 GMT -5
Andy, we'll see about that triple!  Leon Leon, thanks as well, hull's the easy part...but good to get it out of the way up front!  Day 2 of the Dreadnought project saw the main deck get installed permanently in place. Overall the fit of the deck is quite good with just a little bit of pressure needed at the top sides in a couple of spots. I used liquid glue and some strategically placed rubber bands to hold it all together while the glue set.  While that was going on I turned my attention to the main guns and turrets. The kit-provided barrels have the blast bags molded on and depends on those as the contact points for the barrels to be installed. The blast bags weren't fitted in 1907 and my Master replacement barrels are the correct shape and length but have the standard pins on their bases...but there's nothing to actually attach them to. Fortunately the kit provides 6 turrets on the sprues so I decided on a little test first. I took some Aves epoxy-sculpt and mixed together a small amount to provide the means to mount the barrels. The trick here is that the replacement barrels need to have some of their bases inside the turret to be the right length but getting that right with both barrels can be tricky. Fortunately the Kagero book includes scale drawings with a top down plan view included, so I used that as my guide on how far the barrels should extend. The Aves is a two-part epoxy putty that will dry hard as a rock once it cures but has a good bit of work time, just the right amount of flexibility needed in this circumstance.  The base of the turret was added once I was sure I had the length and placement correct, but not glued in place. Adding the base caused the barrels to change their position and elevation just a bit due to the nature of the turret design and the general alignment.  Just to be sure I had things lined up correctly, I placed the turret in the A mount on the super deck and used a wooden toothpick balanced on one of the sky lights to ensure the gun barrels would hold the proper elevation while the Aves set up.  I'll leave that overnight to see if the experiment was a success...if it is, then I'll repeat it with the other 4 turrets needed and go from there. Fingers crossed!
|
|
|
|
Post by TRM on Aug 5, 2014 19:21:16 GMT -5
Well done Bill!! She is already looking sweet!! Nice work on the barrels! Loving this build right from the start!
|
|
|
|
Post by Leon on Aug 5, 2014 19:22:26 GMT -5
Replacement barrels really look good Bill.Hope your experiment is a success.   |
|
|
|
Post by wbill76 on Aug 5, 2014 19:59:27 GMT -5
Thanks T! Trumpeter did a good job with a lot of the details IMHO. Trying to decide if I want to use the Eduard plates for the turret tops or not...decisions, decisions!  Leon Leon, we'll see how things go in the morning!  I'm really impressed with the barrel set...the 12pdr gun barrels are teensy...those are going to be fun to replace for sure. |
|
|
|
Post by TRM on Aug 5, 2014 20:10:35 GMT -5
The plate would dress things up a lot. Getting them to sit tight can be a process. You have the power!!  |
|
Tojo72
Forum Moderator      Sept '24 Showcased Model Awarded
Member since: November 2012
Posts: 5,312
Member is Online
MSC Staff
|
Post by Tojo72 on Aug 6, 2014 8:17:18 GMT -5
Good start Bill, of course I will be looking in
Sent from my SM-N900V using proboards
|
|
|
|
Post by wbill76 on Aug 6, 2014 12:43:00 GMT -5
I think you're right T, especially since it's a 'pick your poison' approach since the little side extension platforms are provided as separate pieces by Trumpeter, so either way there's going to be something to deal with. I think I'd rather have the top surface be all one-piece from a visual/aesthetic perspective. I think I'm also going to rig up a little support/jig using that first turret as a guide to make it easier to gap and support the barrels on the next 4 turrets. Have to see about that.  Anthony Anthony, glad to have you along as well! |
|
|
|
Post by deafpanzer on Aug 6, 2014 13:01:59 GMT -5
AM barrels look much better in most cases and yours look great! Bet you will have that toothpick in your mouth when you are done with that task...  |
|
|
|
Post by wbill76 on Aug 6, 2014 19:55:04 GMT -5
You're not too far off there Andy!  Here's the latest... So after letting the first turret set up as a test bed (it set hard as a rock, so that part worked wonders), I realized that one of the limitations of this approach was ensuring the gun separation and alignment between the two barrels stayed the same. I thought about constructing a jig or support for the barrels outside the turret to help with that and then opted instead to use a piece of sprue inside the turret. So back to the Kagero scale drawings I went, used some small pieces of blue tack to hold the barrels in place over the drawings, and then marked a section of sprue at the correct width. Drilled out two holes and then test fit the barrels and the sprue piece inside the turret to make sure it would all fit and line up correctly with the barrels at the right length.  Process was repeated 3 times for the remaining four turrets to get their little supports and then CA gel used to permanently secure the barrels to the sprue chunk.  When I test fit the barrels with the turret bottoms and in the mounts on the hull, there was still too much play in the barrels, so I solved that issue by adapting my first test approach and using some more Aves epoxy sculpt to secure the bases.  This combo did the trick nicely while still allowing for some minor height adjustments with the different turrets. The turrets were placed and no toothpicks were needed this time around.   Still a lot more to do in terms of detailing the turrets but the guns themselves are now securely installed. One of those details is the 12pdr guns, so I started work on those. Clipped off the styrene barrel at the appropriate point and drilled a mount hole with a #78 micro drill and used CA gel to secure the Master brass barrel to the breech. There's 27 of these (not all are mounted, so I'll have a few spares just in case), so this will take a little time to get them all done.  |
|
|
|
Post by Leon on Aug 6, 2014 20:14:04 GMT -5
Fantastic results on the turret barrels Bill.  |
|
|
|
Post by deafpanzer on Aug 6, 2014 22:01:02 GMT -5
Excellent tip... I am definitely going to try that when I build my first ship. Just don't ask me when... LOL
Looking forward to another update!
|
|
|
|
Post by wbill76 on Aug 7, 2014 12:23:28 GMT -5
Thanks Leon! Andy, oh I have a feeling you might succumb sooner rather than later...  |
|
|
|
Post by deafpanzer on Aug 7, 2014 12:29:40 GMT -5
Yeah, even one of my boys asked me when I will build that USS Indianapolis that they gave me for Xmas. We watched a TV program... pre-Shark Week show... it was about USS Indianapolis. Man, one of sad chapters in US Navy history...
|
|
|
|
Post by wbill76 on Aug 7, 2014 12:41:50 GMT -5
The USS Indy is indeed one of the greater tragedies, even more so that it happened right at the end of the war. You've definitely got to get that one on the schedule sooner rather than later.  |
|
|
|
Post by wbill76 on Aug 7, 2014 19:30:59 GMT -5
Managed to get all 27 of the 12pdrs built and ready for use. The Trumpeter instructions incorrectly tell you to install 29 of them (and provide 32 in total on the sprues), but the two port-side bow guns that are called for in Step 12 weren't installed on the actual ship, so that's something for the unwary to watch out for. 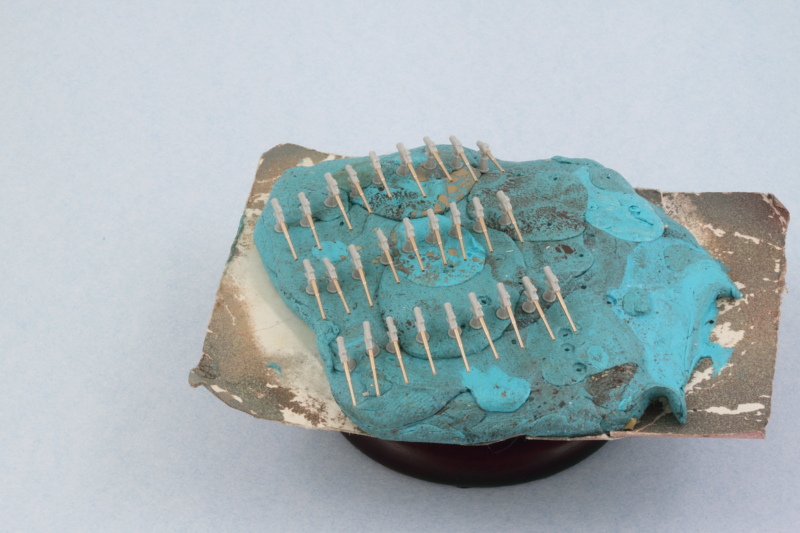 The rest of the day was spent prepping the main deck and super deck for the Wood Hunter set. I wanted to see how the set would fit and also get a handle on what could be installed prior to painting and what would have to wait until after the decks were added. The main deck is a snug fit in all respects and has the wood go right up to the outline for the super deck, so I'll have to trim that back slightly so the super deck can sit at the proper height and alignment. 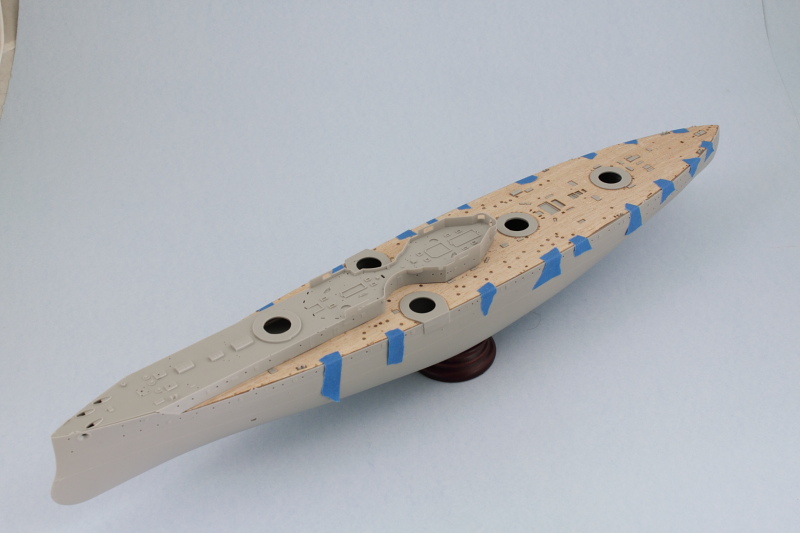 The rear deck area had a snug fit as well and the Eduard upgrade parts for some of the hatches and other elements are slightly wider than the kit's molded on versions, so that would've been a complication if I'd installed them first before the deck, so those will have to come after where appropriate. 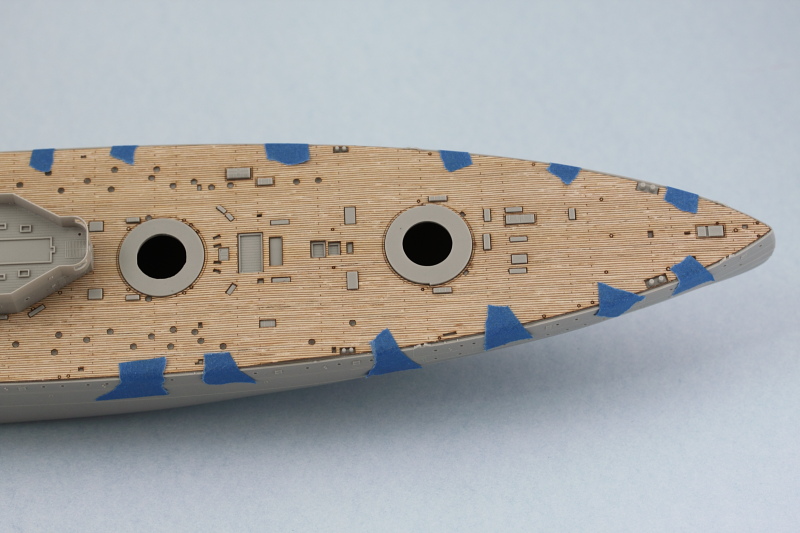 The super deck's insert is all one piece, so that means it's going to have to be installed first and then the enclosed faces of the superstructure portion added after. 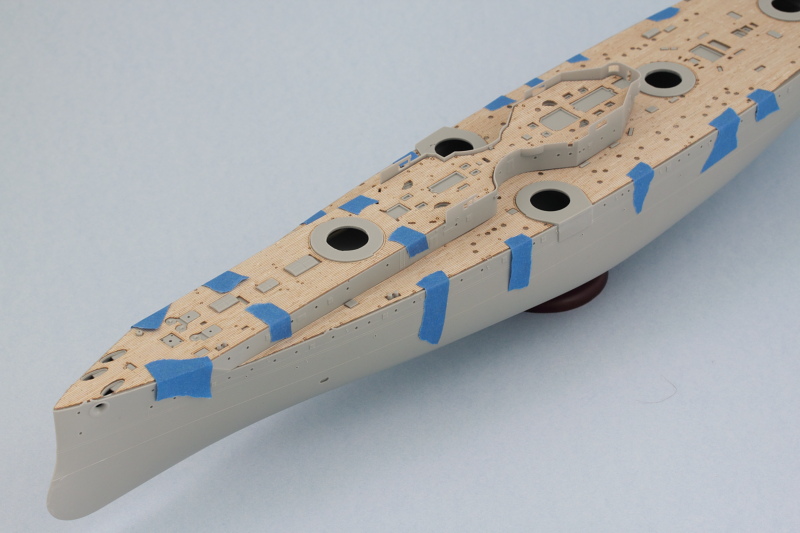 All in all I'm impressed with the deck so far, very little in the way of modifications appear to be needed to make it work, at least for the main parts. |
|