|
|
Post by wing_nut on Sept 26, 2014 7:42:18 GMT -5
Leon, Bill, Dave... thanks so much guys.
Bill, as I was stating my plans for something "armor" I was recalling that I want to finish my desert Fw190... and to that 1/72 Eindecker. Maybe I'll just write off 2014 with regards to armor and maybe get me head out of the clouds for 2015.
|
|
|
|
Post by wbill76 on Sept 26, 2014 16:56:43 GMT -5
Leon, Bill, Dave... thanks so much guys. Bill, as I was stating my plans for something "armor" I was recalling that I want to finish my desert Fw190... and to that 1/72 Eindecker. Maybe I'll just write off 2014 with regards to armor and maybe get me head out of the clouds for 2015. Time's working against you by the sound of it...go with whatever works and maximizes your enjoyment!  The ground is always there and gravity is relentless...  |
|
|
|
Post by wing_nut on Sept 29, 2014 10:27:28 GMT -5
No worries Bill. I am striving for maximal funnage. (uh oh... shades of Nemo)A bit more done. I don't see how glue would ever hold the control surfaces in place so I drilled and pinned them and they are nice and secure. The bottom wing has the cockpit floor panted as wood but it is barely visible. 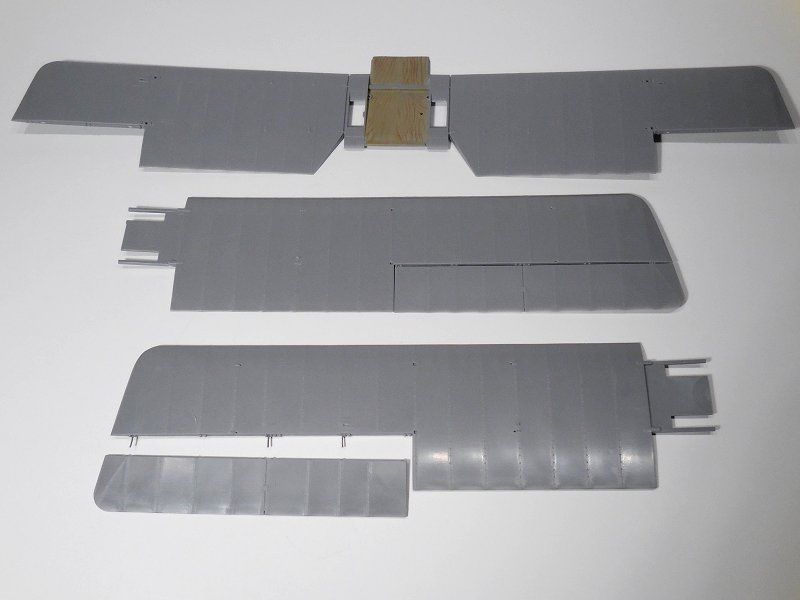 There are 2 options for the center section of the upper wings. Some “Harry's” had clear cellon over the center. And some of these where painted over, like the one I am doing. The kits come with types of center sections, 1 in gray plastic and the other in clear. I am wondering if here was a version of the model that was planned to use the clear parts since none of the schemes in the kit have it other than being painted over. And the internal stuff to assemble the wings is wrong to be seen through the clear. I roughed the surface with a Scotch Brite pad to give it some tooth for the paint. And then the upper wind ready to go. 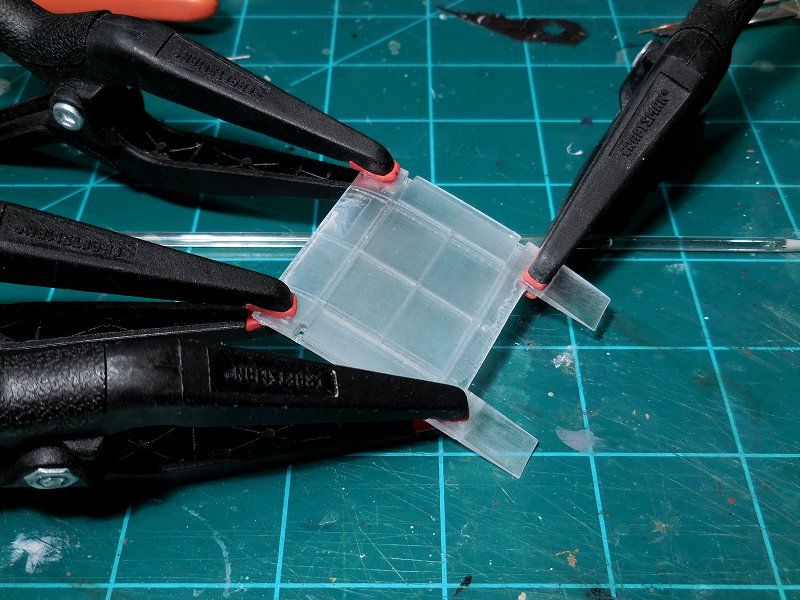 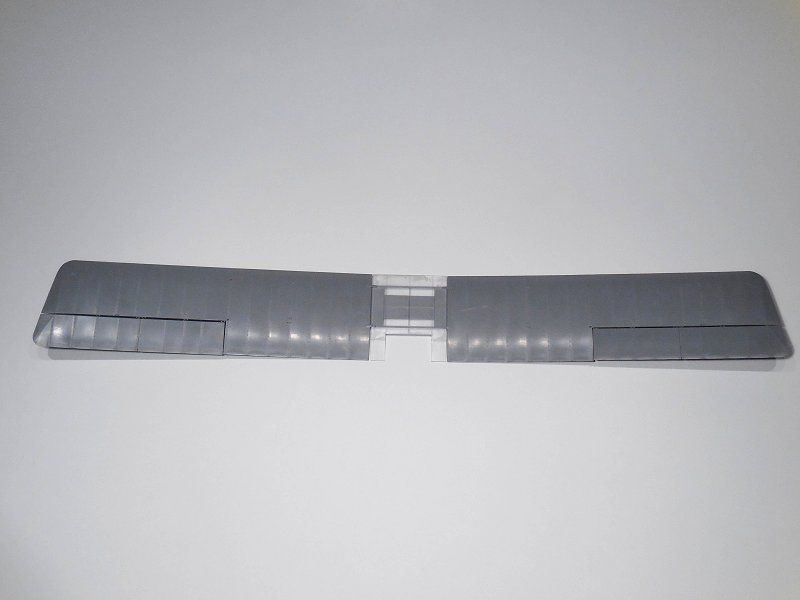 Fuselage closed up and the tail feathers starting to “grow”. 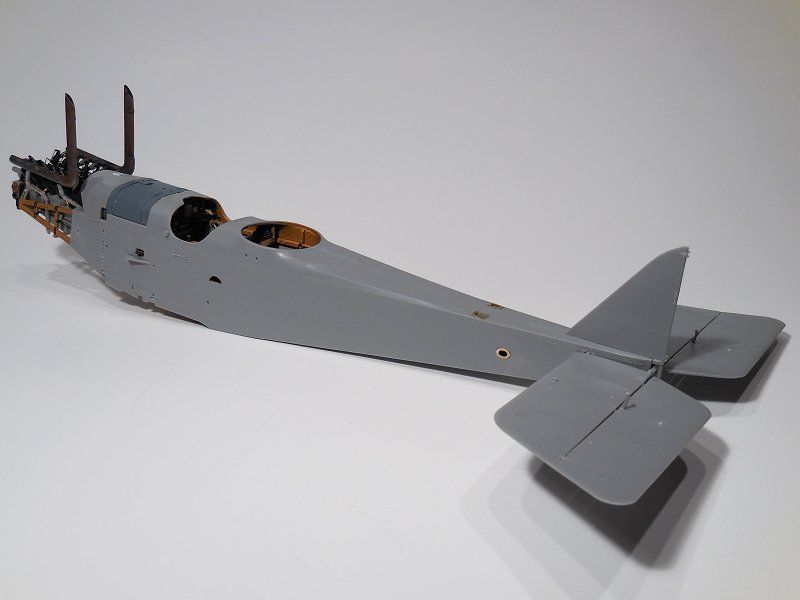 |
|
thug626
Senior Member
   
Member since: January 2013
Posts: 2,030
Jan 15, 2013 13:05:28 GMT -5
Jan 15, 2013 13:05:28 GMT -5
|
Post by thug626 on Sept 29, 2014 11:45:43 GMT -5
It's starting to look a lot like an airplane..As much at this type could.   Dave |
|
|
|
Post by wbill76 on Sept 29, 2014 17:11:57 GMT -5
Looking good Marc! This particular airframe would never win any points for aesthetics that's for sure! Function over form for sure when they designed this one.  |
|
|
|
Post by Leon on Sept 29, 2014 17:18:34 GMT -5
Looking really good Marc.I like how the exhaust point straight up.  |
|
|
|
Post by wing_nut on Sept 29, 2014 17:25:35 GMT -5
Dave, Bill... thanks guys. This is proof that wing enough wing area and power... anything will fly.
Thanks Leon. It's part and parcel to the overall odd design to my eye
|
|
|
|
Post by dupes on Sept 30, 2014 9:06:06 GMT -5
...I was recalling that I want to finish my desert Fw190... Your what? Have we seen that? All I seem to recall is these funky WWI airplanes. Innnnteresting! |
|
|
|
Post by deafpanzer on Sept 30, 2014 11:09:40 GMT -5
Looking sharp... looking forward to see it with wings on!
|
|
|
|
Post by wing_nut on Oct 2, 2014 13:03:16 GMT -5
Hey Marc... That was started at the other site before is shut down but had not gotten too far, had to start these 3 strings bags, so it was not transferred. Figured I would just start again. It's going to be a D-9 in WIF desert camo as if the Germans did better than they really did and Marseille didn't die bailing out of his 109G. Andy I got a wing on... a bit away from the other one  While the lower wing and engine cowl panels were curing I started in on the guns. Added the rear braces and made the cables out of twisted .003 wire. A small ring made from lead wire was added to the part where the cable wraps around since it is actually a pulley and the kit part was flat. 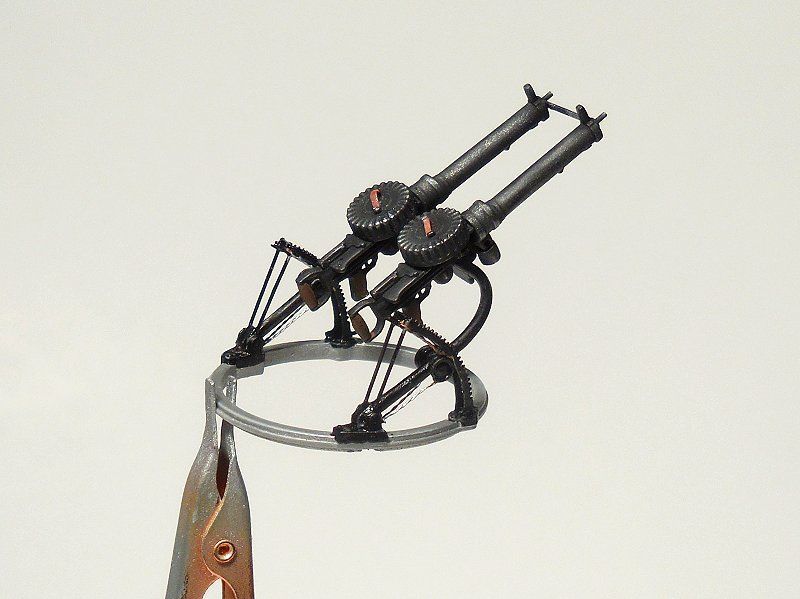 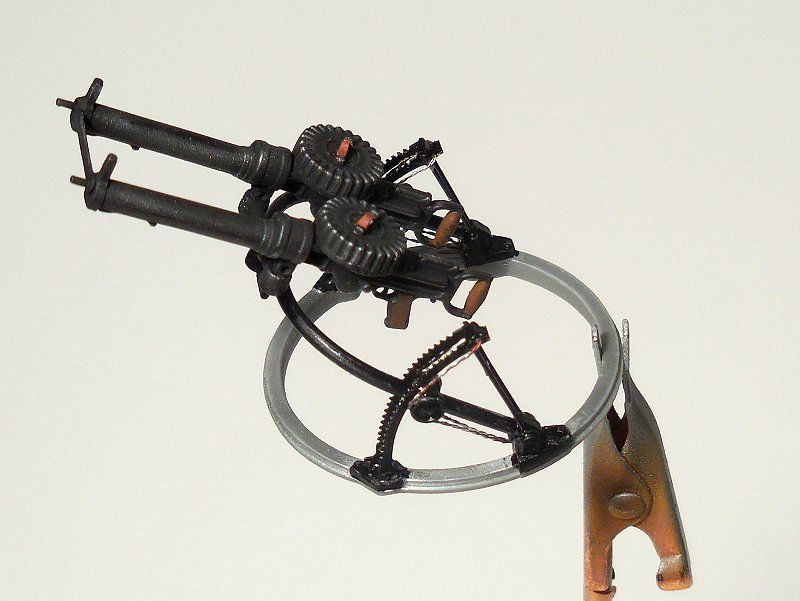 And what it will look like when mounted. 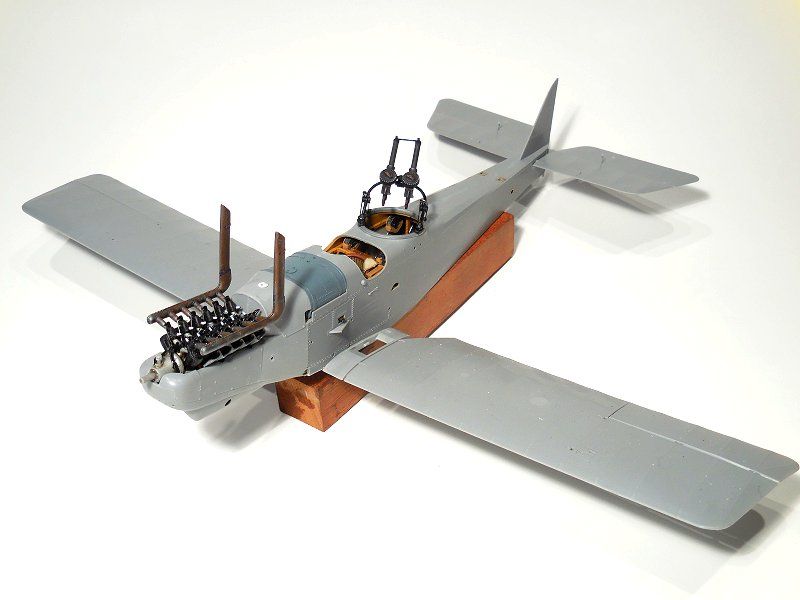 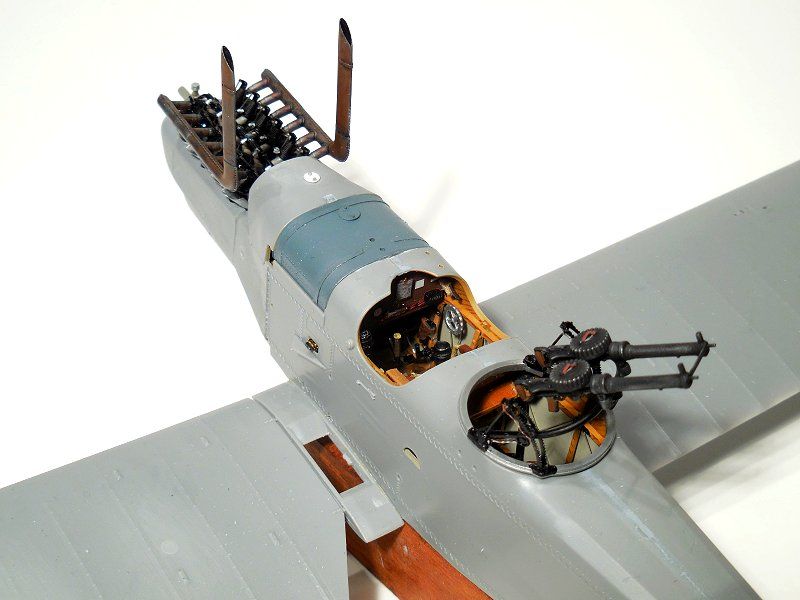 |
|
|
|
Post by deafpanzer on Oct 2, 2014 13:08:39 GMT -5
Those guns look lovely!!! Makes me want to shoot 'em...  |
|
|
|
Post by wing_nut on Oct 2, 2014 18:50:15 GMT -5
Thanks Andy. yeah it would be very cool to run a couple of ammo drums through those bad boys.
|
|
|
|
Post by TRM on Oct 2, 2014 18:58:17 GMT -5
Outstanding Marc!! Like Andy said, those guns look sweet!! Played catch up and I am still drooling over the interior work!!
|
|
|
|
Post by wing_nut on Oct 2, 2014 19:05:35 GMT -5
thanks T. Glad you're up to speed. It was tough gluing those panels in place and covering it up.
|
|
|
|
Post by wbill76 on Oct 2, 2014 19:46:34 GMT -5
Guns look spiffy there Marc, I bet you spent all afternoon making 'ratta-tat-tat' noises when no one was looking right?  |
|
|
|
Post by Leon on Oct 2, 2014 20:11:34 GMT -5
All of the above Marc.  |
|
|
|
Post by wing_nut on Oct 3, 2014 6:34:40 GMT -5
Bill, Leon... thanks guys. Ratta-tat-tat? Me? And I don't take the plane and flying it around the room and peel off for an attack making zooooooom noises either.  |
|
|
|
Post by wbill76 on Oct 3, 2014 12:10:46 GMT -5
Bill, Leon... thanks guys. Ratta-tat-tat? Me? And I don't take the plane and flying it around the room and peel off for an attack making zooooooom noises either.  Well it is a commission build so this is the only way you can have that kind of fun with it, right?  |
|
|
|
Post by wing_nut on Oct 6, 2014 7:05:37 GMT -5
|
|
|
|
Post by wbill76 on Oct 6, 2014 15:57:43 GMT -5
Wow, I can see how masking off the engine and exhaust stacks would've been a challenge. Nice work on that prop, hope the oils dry sooner rather than later!  |
|
|
|
Post by Leon on Oct 6, 2014 16:06:07 GMT -5
Ditto what Bill said Marc  !Nice work on the wrapping and prop,looking really good.  |
|
|
|
Post by deafpanzer on Oct 6, 2014 20:34:50 GMT -5
Love the wrapping!!! It delivers a great touch...
|
|
thug626
Senior Member
   
Member since: January 2013
Posts: 2,030
Jan 15, 2013 13:05:28 GMT -5
Jan 15, 2013 13:05:28 GMT -5
|
Post by thug626 on Oct 7, 2014 8:10:13 GMT -5
Good morning Marc, Who cares how much paint got laid down. It got painted!  I particularly like your additions to the landing gear. Dave |
|
|
|
Post by wing_nut on Oct 7, 2014 10:39:29 GMT -5
Andy, Dave... thanks guys. I looked at a bunch more photos of the 1:1 and it seems this was more or less normal. I think I should have butted the edges since the over lap looks a bit to proud.
|
|
|
|
Post by wing_nut on Oct 8, 2014 8:35:59 GMT -5
Engine and cowl has been re-masked  Base coat, tape, and the lighter overspray. 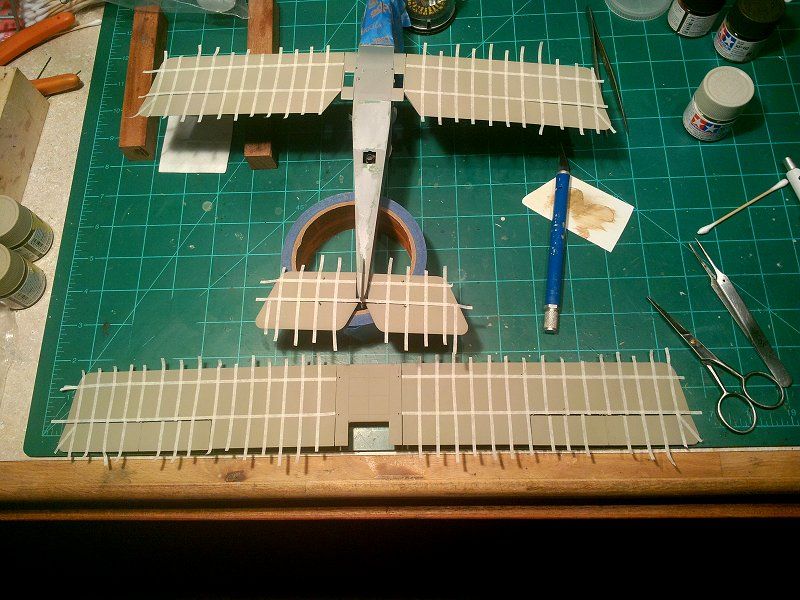 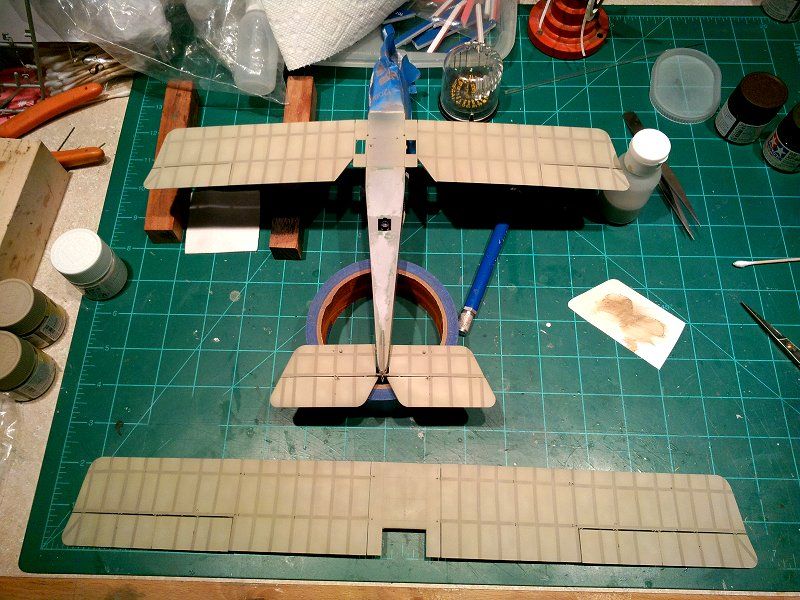 Now I get to do it all over again for the top of the wings. (Oh yeah... yippie) |
|
|
|
Post by wbill76 on Oct 8, 2014 12:04:44 GMT -5
Nice rib pattern there Marc, really adds to the realism of those fabric covered frames.
|
|
|
|
Post by deafpanzer on Oct 9, 2014 15:01:28 GMT -5
WOW! Excellent pattern... thank you for sharing another great tip. I admire anybody who shares many tips how to model better so you always have my respect. Cheers!
|
|
|
|
Post by Leon on Oct 9, 2014 16:31:32 GMT -5
WOW!!! Nice work on the rib pattern Marc
|
|
|
|
Post by wing_nut on Oct 10, 2014 6:37:33 GMT -5
Bill, Andy, Leon... thanks guys. It was tedious as hell but equally as much fun peeling them all off for that 1st look at the end result.
|
|
|
|
Post by wing_nut on Oct 11, 2014 6:37:15 GMT -5
In fact... nearly all the painting. I spilled some alcohol and had to touch up some big spot on the upper wing. A little touch up to do on the underside. The 9  steps involved: 1-Lightened base coat 2-Tape... lots of freakin' tape 3-Straight wing color, 2 Light coats 4-Lightened base- uneven fading between the ribs 5-Buff filter thinned about 90-95% 6-Darkened wing color- paper held at each rib for shadow on one side. Went around edges of fuselage and did some streaking then too. 7-Straight or lightened wing color touching up as needed to even things up 8-Filter again to tone it down and pull it together. 9-Pull all that tape and get that first gander  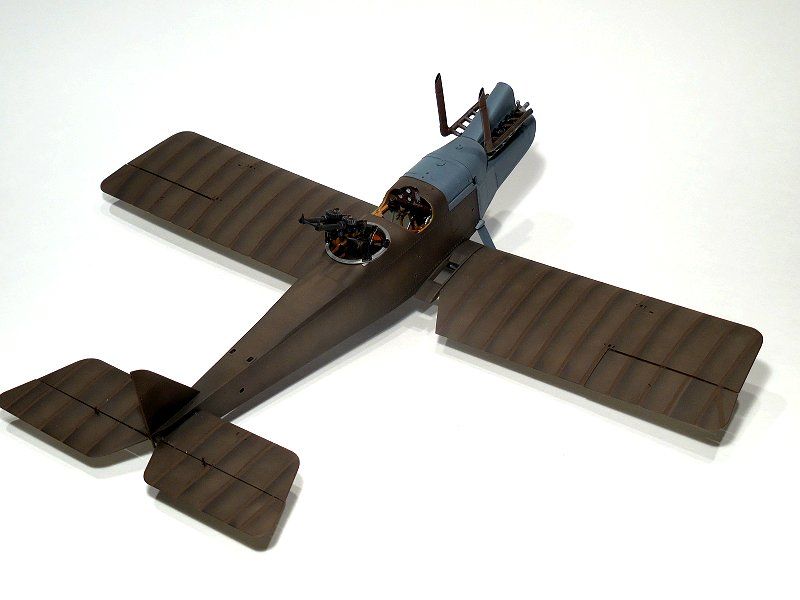 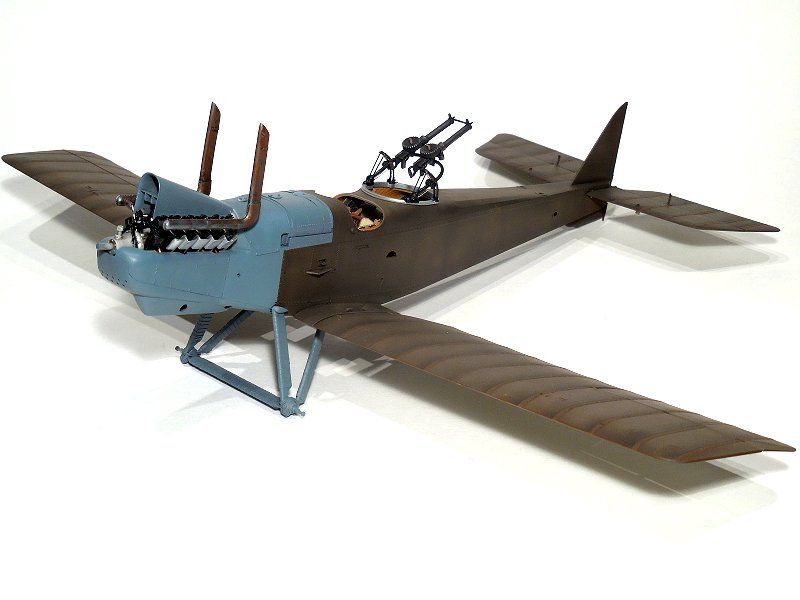  |
|