|
|
Post by wbill76 on Oct 18, 2014 12:14:49 GMT -5
Thanks Carl! Normally I would do camo free hand but since this guy is so tiny and needs a hard-edge pattern, masking was the only way to pull it off. Took about 10 hours in total between the masking and painting but definitely worth it.  Todd Todd, now the real fun will begin on this one for sure!  |
|
|
|
Post by wbill76 on Oct 18, 2014 14:42:58 GMT -5
Just a quick little update albeit an important one. Tracks received their base coat treatment by airbrushing some MM enamel Burnt Umber over the black plastic and will get some additional detailing/weathering attention later on. That doesn't mean they aren't still useful as it was time to go ahead and permanently fix the suspension elements in place to the hull. It was necessary to scrape some paint that had accumulated inside the drive sprocket and final drive mount holes as well as the mount pins themselves as the fit was too tight otherwise...something I had thought to prevent by masking those areas off with blue tack but forgot to do until it was too late. Liquid glue did the trick for those areas along with some CA for the metal struts at the front of the hull. The track runs were dry fit once more to ensure I had a level set top and bottom for the suspensions on both sides. 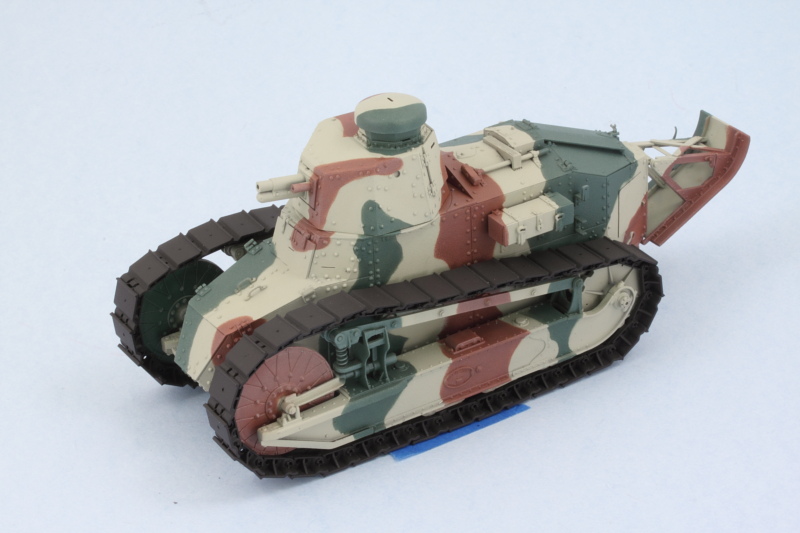 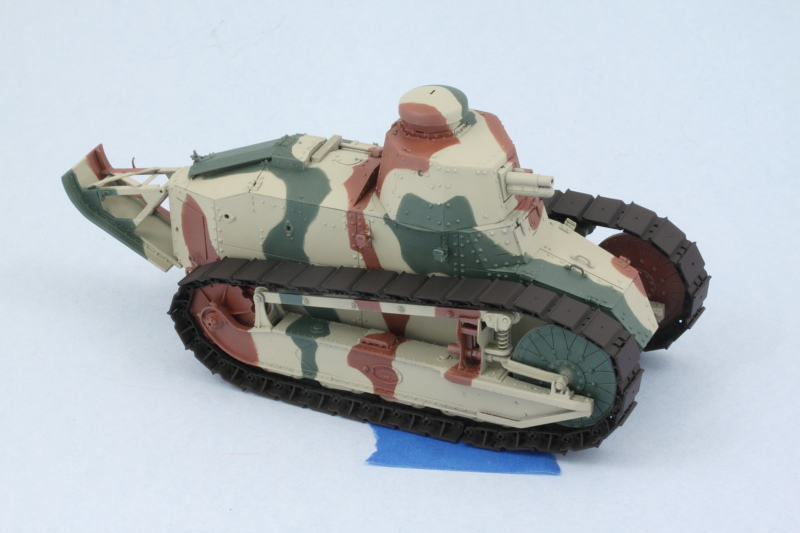 As you can see, having the tracks on totally changes the visual perception of the camo pattern as well, so that works out nicely. Just for fun, I also checked to see how it would look on the kit's dio base. 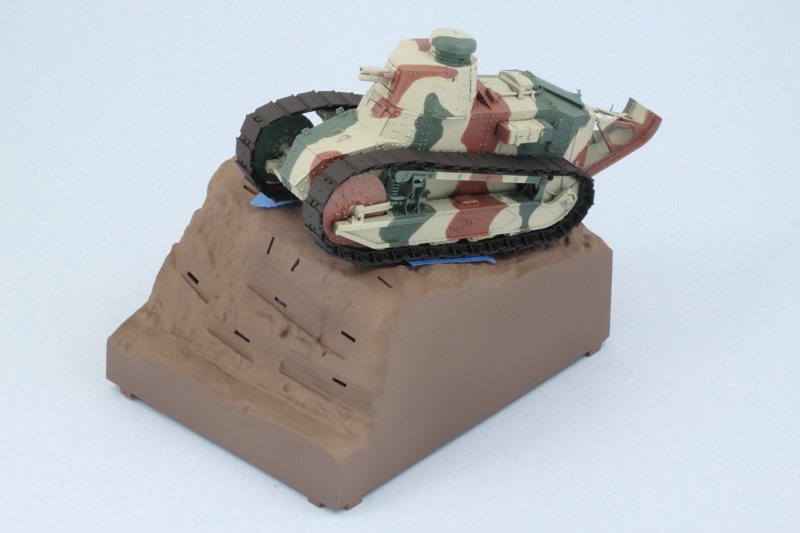 I'll let the suspension set up nice and solid before the next steps deal with the remaining details prior to getting the weathering process started. |
|
|
|
Post by deafpanzer on Oct 19, 2014 21:38:33 GMT -5
Catching up... was at amusement park for 13 hours plus 5 hours of driving. Today I am paying the price dearly! LOL
Camo looks lovely!!!!!!
|
|
|
|
Post by wbill76 on Oct 20, 2014 11:54:02 GMT -5
Thanks Andy! Sounds about right for a full day of fun...there's always a price to be paid!  |
|
|
|
Post by dierk on Oct 20, 2014 12:18:07 GMT -5
That is one excellent looking piece of kit Bill - if armour can ever be called 'cute', this would qualify. Lovely paint job too! I reckon I'll have to dip my toe into the world of masking on my ISU.
|
|
|
|
Post by wbill76 on Oct 20, 2014 12:34:46 GMT -5
Thanks Dierk! It does have a certain 'cute' aspect to it...poor little guy!  |
|
doogsatx/
Senior Member
    Feb and Sept 2014_ MoM Winner
Member since: November 2012
Posts: 1,642
Nov 14, 2012 21:29:10 GMT -5
Nov 14, 2012 21:29:10 GMT -5
|
Post by doogsatx/ on Oct 20, 2014 12:45:33 GMT -5
Coming along really, really well!
|
|
|
|
Post by wbill76 on Oct 20, 2014 18:46:15 GMT -5
Thanks Doogs! Have to say I'm very impressed with Meng's offering here for sure.
|
|
|
|
Post by TRM on Oct 20, 2014 19:40:19 GMT -5
She is looking pretty sexy with her legs on sitting on the mountain Bill!!
|
|
|
|
Post by wbill76 on Oct 21, 2014 12:10:24 GMT -5
Thanks T! I can just hear it screaming 'I'm king of the world!'  |
|
|
|
Post by wbill76 on Oct 27, 2014 16:55:28 GMT -5
After giving it some thought I decided to go ahead and continue work on the base area first before I start weathering the vehicle. This way I can treat them all as elements of the same end result more or less instead of working on them independently. To that end, I turned to Step 21 which deals with the trench details (sandbags, wooden frames/braces, etc.) The sandbags that go in along the top edge consist of 5 different pieces, 4 of which you can assemble together to create one large unit with the 5th piece, K4, needing to be dealt with separately. I had to enlarge a couple of the slot openings in this area to take the tabs on the underside of the sandbags but nothing major. I also cleaned up and test fit all of the L sprue parts that make up the frames/braces for the trench to see how they would all play together. 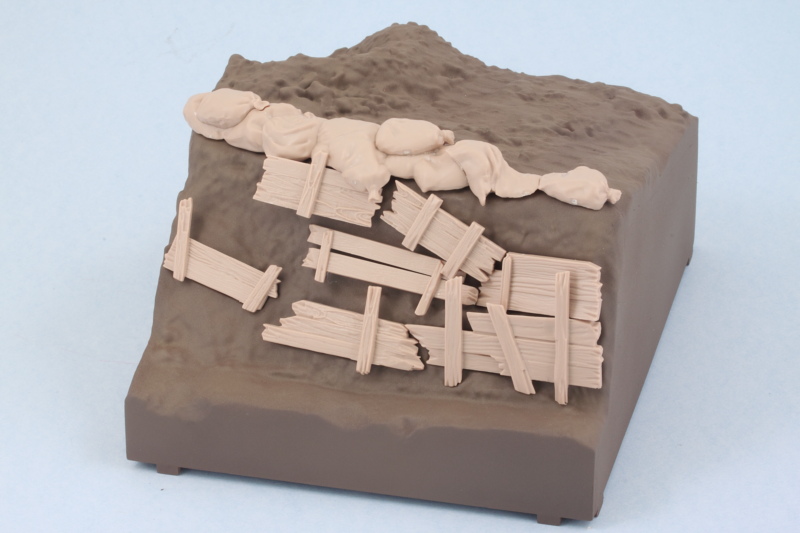 In Step 20, the instructions would have you add the angled frame plates of the base individually but I found it easier to attach them separately to create a single frame as some sanding/putty was needed at the joins to create a seamless result. I also had to sand down a couple of the tabs as they were slightly too wide to fit the slots in the base frames. 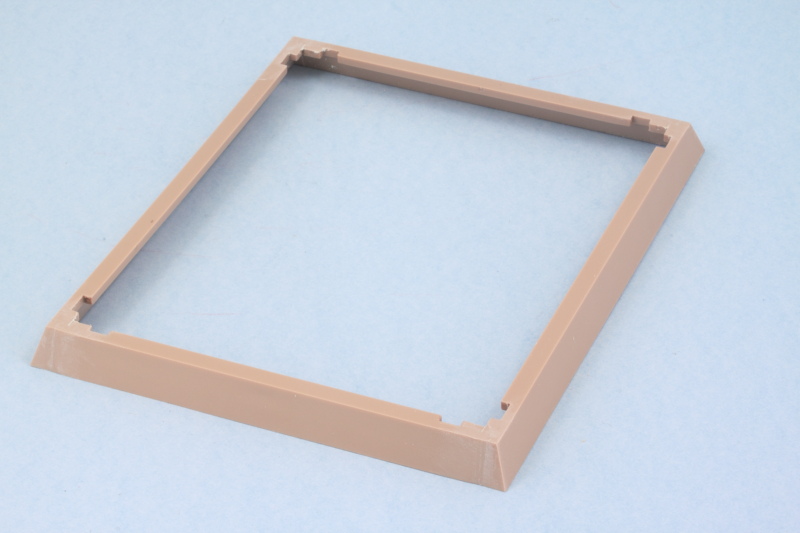 So with that done, it was time to give the airbrush a workout to 'block in' the colors I needed for the trench detail elements. I used Testors Model Master enamel Afrika Grunbraun for the canvas on the sand bags and used my 50/50 custom mix of Dunkelgelb/Light Gray for the wood frames/braces. That may seem like an odd choice but it's just a foundational color that's going to undergo some significant changes before its all said and done! While I was at it, I also applied some MM enamel Flat Black to the base frame. 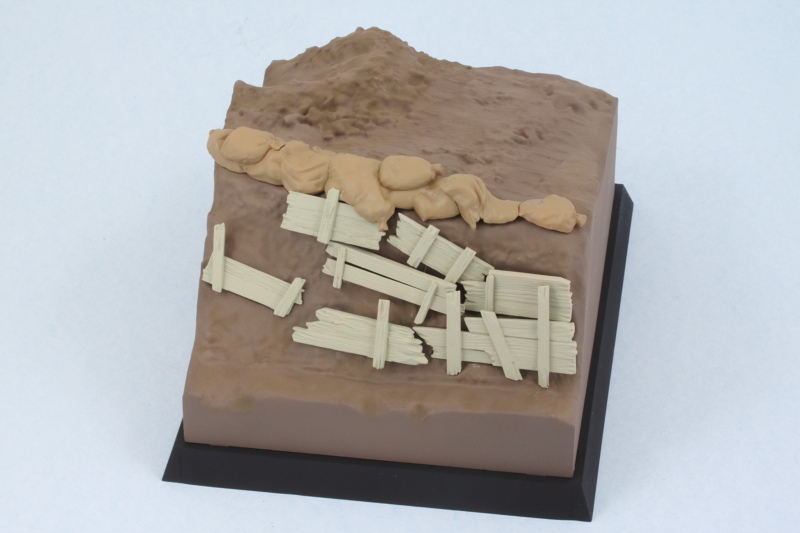 This will all get a chance to cure before moving on to the next steps but it is moving ahead! |
|
|
|
Post by deafpanzer on Oct 27, 2014 21:23:27 GMT -5
Nice work on the base... it looks better than I expected. Keep it coming my fav professor!
|
|
afvfan
Senior Member
   
Member since: December 2012
Bob
Posts: 1,772
Dec 10, 2012 17:32:38 GMT -5
Dec 10, 2012 17:32:38 GMT -5
|
Post by afvfan on Oct 27, 2014 22:55:40 GMT -5
Thanks Dierk! It does have a certain 'cute' aspect to it...poor little guy!  The "cute" factor really comes out when you stand next to a real one. You just want to pick it up and take it home. |
|
|
|
Post by Tojo72 on Oct 28, 2014 9:06:52 GMT -5
My wife would say "what a cute little tank" then I would glare at her.Looks good Bill, some weathering and that base will be a nice scene.
|
|
DeafStuG
Full Member
  
Member since: May 2013
..
Posts: 1,283 
|
Post by DeafStuG on Oct 28, 2014 9:20:09 GMT -5
OMG quickly build your FT-17 nearly finishes. you are lucky man, Great work.
|
|
|
|
Post by wbill76 on Oct 28, 2014 12:11:07 GMT -5
Andy, I'm always a little leery of plastic bases but this one has a solid construction and enough weight/stability to it based on the design that it will stay put. Just a little bit of sanding and gap work here and there as you might expect but it builds up nicely. Bob, no kidding! It reminds me of an armored coffin particularly with the way the nose and front compartment are designed.  Anthony Anthony, it's got a lot of nice detail molded in with the shell crater, dirt, wood grain, etc. that the weathering should bring out...just have to work at it carefully to avoid overwhelming everything in the process. Jeremy, since this one doesn't have a full interior, it does build up pretty quickly as a result. I've been having fun with it, fingers crossed as it comes down the home stretch! 
|
|
nicusi
Full Member
  
Member since: September 2013
Posts: 776 
|
Post by nicusi on Oct 28, 2014 15:05:36 GMT -5
Very interesting kit and the base looks so good. You've done a wonderfull job, Bill,can't wait to see the next steps!
Cheers!
Nicolae
|
|
|
|
Post by wbill76 on Oct 28, 2014 16:22:28 GMT -5
Thanks Nicolae! Been playing around with the trench planks/braces today, some of it successful, some less so...but all part of the process to try to get the right look I suppose.  |
|
|
|
Post by wbill76 on Oct 28, 2014 17:29:52 GMT -5
More progress on the base to report. I applied some weathering to the sand bags in the form of some black artist pastels and some dry brushing to create some shadows and highlights. For the wood braces/planks, things turned out a little more interestingly. I originally started out planning to finish them as relatively 'new' wood and applied a wash of MM enamel Leather over the previous paint base color. This worked out fine by themselves but when I placed them on the base I didn't like the tonal contrast, so I switched gears and decided to go aged wood instead. Rather than strip it and start over, I decided to keep what I'd already done and build on it instead. So I applied another wash, this time using MM enamel Gunmetal, and then dry brushed some MM enamel Light Gray to bring out the wood grain pattern. Some strategic use of black artist pastels also helped add some definition here and there. 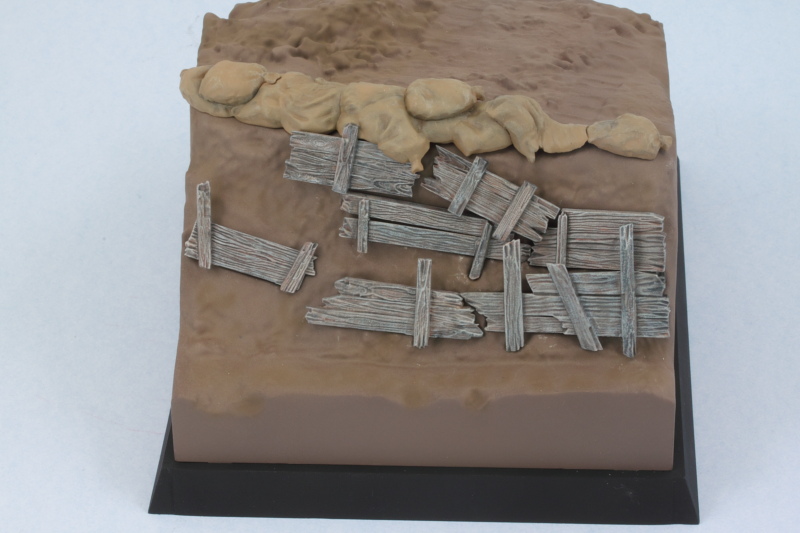 I'm fairly happy with the direction this one's heading in so far especially since it's sort of uncharted territory as I don't usually do bases for my builds. |
|
|
|
Post by Leon on Oct 28, 2014 17:37:16 GMT -5
Nice start on the trench details Bill.Looking good.  |
|
|
|
Post by wbill76 on Oct 28, 2014 18:56:19 GMT -5
Thanks Leon! Making progress one step at a time.  |
|
|
|
Post by deafpanzer on Oct 28, 2014 21:27:20 GMT -5
Those wood planks are fantastic... you nailed it!!!
|
|
|
|
Post by wbill76 on Oct 29, 2014 11:08:13 GMT -5
Thanks Andy!
|
|
nicusi
Full Member
  
Member since: September 2013
Posts: 776 
|
Post by nicusi on Oct 29, 2014 16:24:21 GMT -5
Excellent job, keep it on. I'm watching your topic!
Cheers,
Nicolae
|
|
|
|
Post by wing_nut on Oct 29, 2014 17:26:26 GMT -5
The one nice thing about coming into to this very late is not having to wait for updates. Really lovin' that.
|
|
|
|
Post by wbill76 on Oct 30, 2014 16:42:43 GMT -5
Thanks Nic! Glad to have you along for the ride! That's true Marc, hadn't quite considered it from that angle but suppose you're on to something there.  |
|
|
|
Post by tonylee-Rest In Peace on Oct 30, 2014 20:33:18 GMT -5
"You've got a brand new pair of roller skates and i've got a brand new key" Tony lee  |
|
|
|
Post by wbill76 on Oct 31, 2014 14:12:33 GMT -5
"You've got a brand new pair of roller skates and i've got a brand new key" Tony lee  Don't tell Andy Tony or he'll never go home!  Nice to see you popping in bud.  |
|
|
|
Post by wbill76 on Nov 1, 2014 16:14:12 GMT -5
Continuing on with the base work, I decided the trench area needed some help in the pigments department. I used a combination of Mig Dark Mud and Dry Mud applied as dry powders with stiff bristled brushes and worked it around until I was happy with the depth/shading it was giving me. 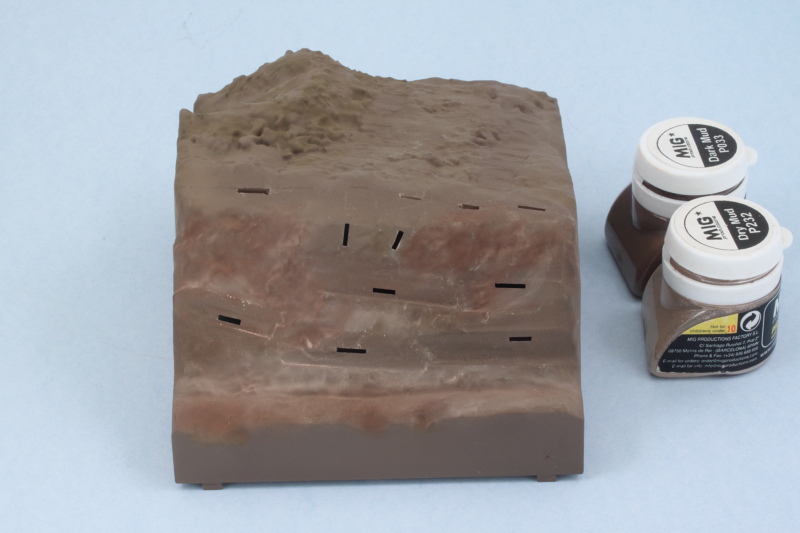 Then the wood braces were permanently installed along with the sand bags and the glue allowed to set. Once that was solid, I blended them in where appropriate using more of the pigments. 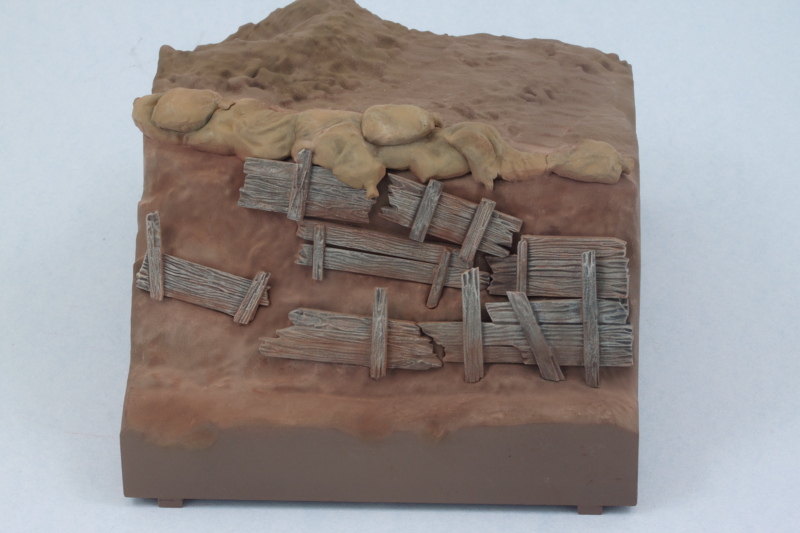 Shifting gears a bit, I went back to the vehicle and did some of the detail work there. The sledgehammer, shovel, and pick were hand detailed and installed where needed. Leather straps were painted and detailed and the muffler/exhaust worked on and installed as well. The folded tarp was added to the tail to round things out in that department. 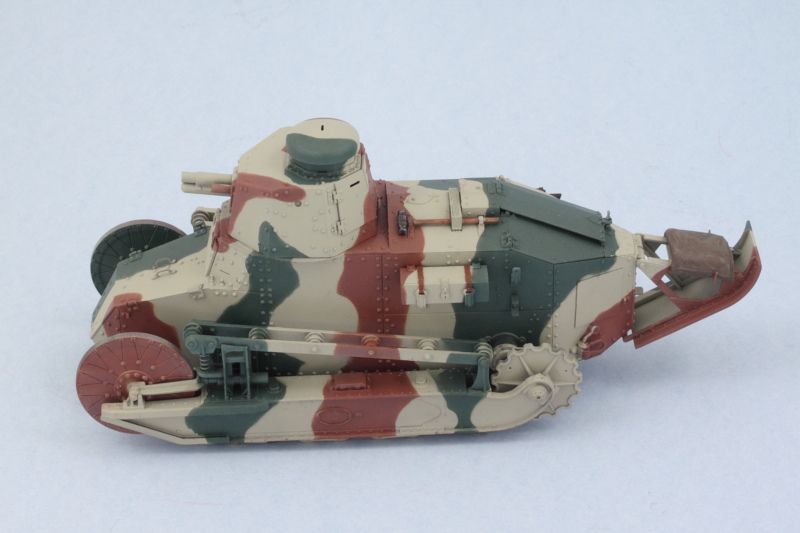 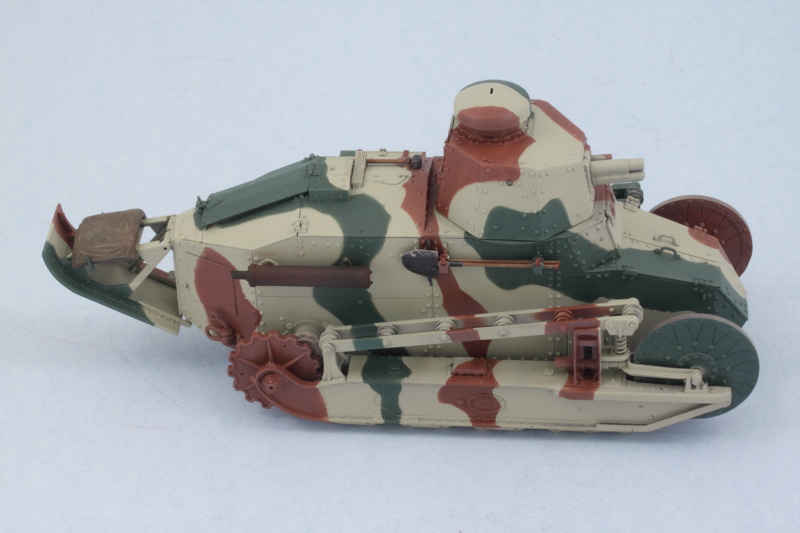 So here's where things stand at the moment as the little scene starts to come together. 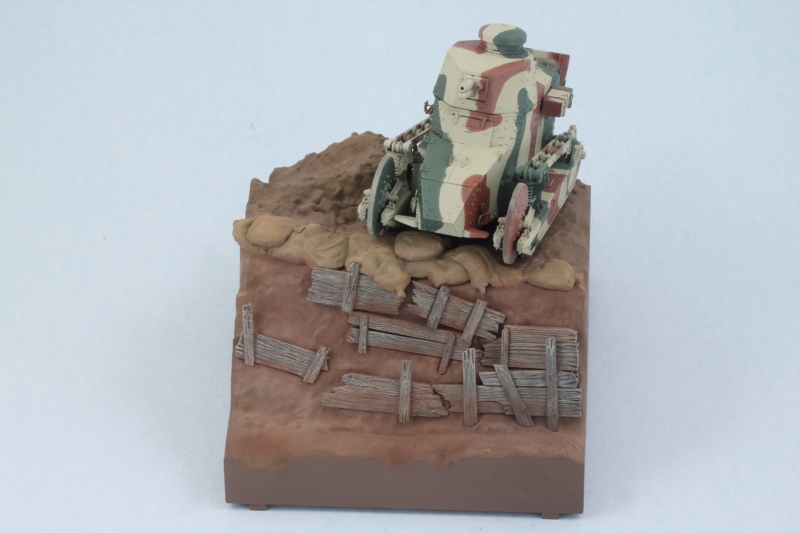 |
|
|
|
Post by Leon on Nov 1, 2014 17:13:29 GMT -5
This little dio is starting to come to life Bill  .Nice work with the pigments.  |
|