petros
Full Member
  
Member since: February 2014
Posts: 361 
|
Post by petros on Oct 2, 2014 2:43:14 GMT -5
Hi, I recently reviewed the Brigantine Phoenix kit from Milania ( trmreviewconnect.wordpress.com/2014/09/30/petros-modellbau-brigantine-phoenix-by-milania/ ) and now I started the construction works. First, I did some preparatory works - it is highly recommended to write the part numbers on all non-visible parts on the laser cut boards with a pencil. Then, I decided to start work with a boat - if i will trash it, I can easily get one more, and this way I could get used to wood working after a prolonged break, and also get familiar with the materials and tricks expected in the kit. To assemble the boat, you first build an auxiliary structure. First, you make the keel out of 4 parts, and then you take a thick plywood guide, and put all the frames in the slots. The frames are fragile! They are designed to be broken out of the ready boat, and thus they have laser cut break lines in them. Only the lower parts of the frames will stay in the boat. I managed to break nearly all of them by handling, but assembled them back with white glue - they are not a power structure. After that, the keel is glued in, and two thicker strakes on the side are laid in the pre-cut positions and fixed fore and aft. Next step would be to take lasercut pearwood strips and bend them around the current frames, fixing these only in the outside-the-boat-part which would be sawed away later. That is how the frame looks like now: 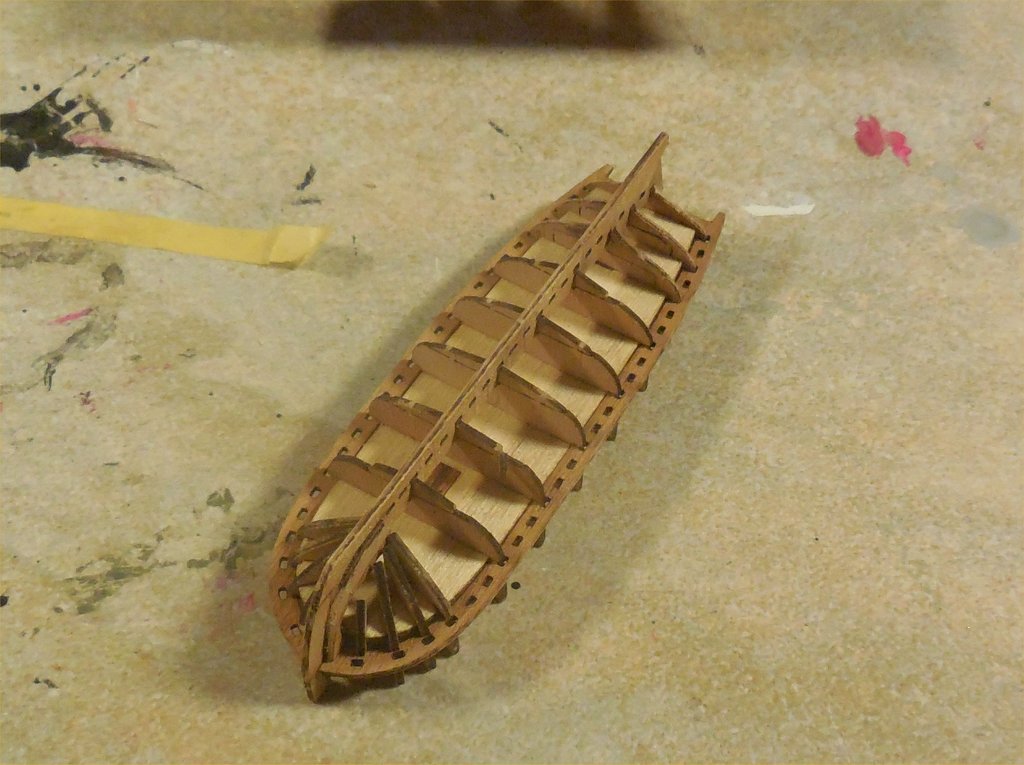 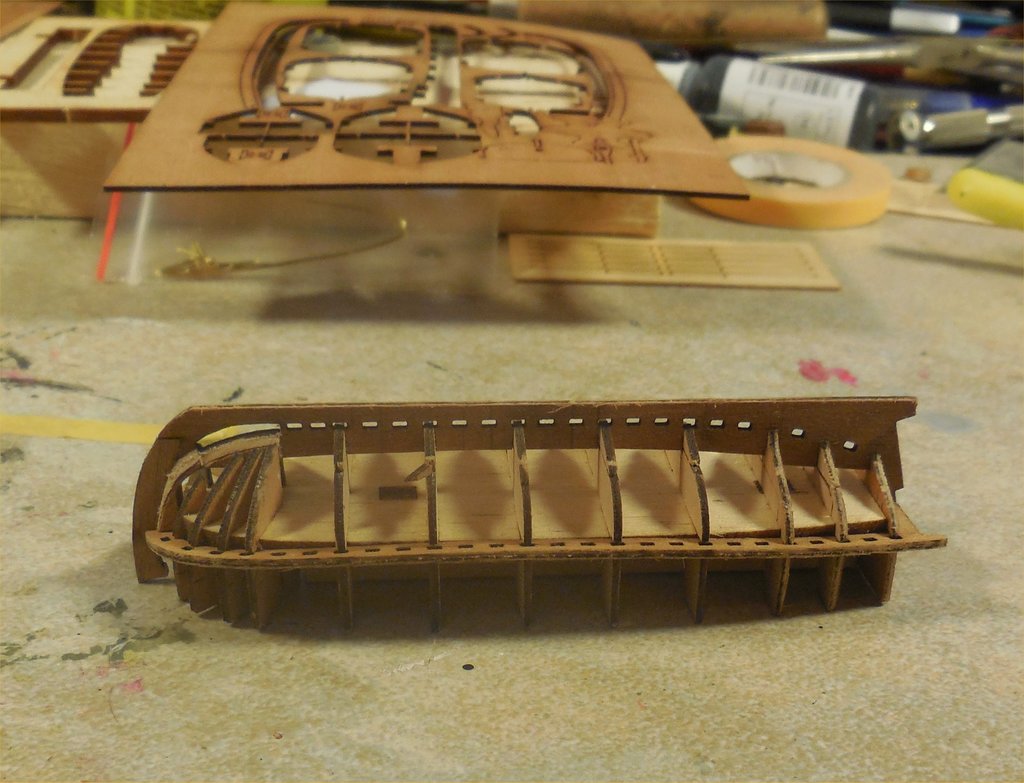 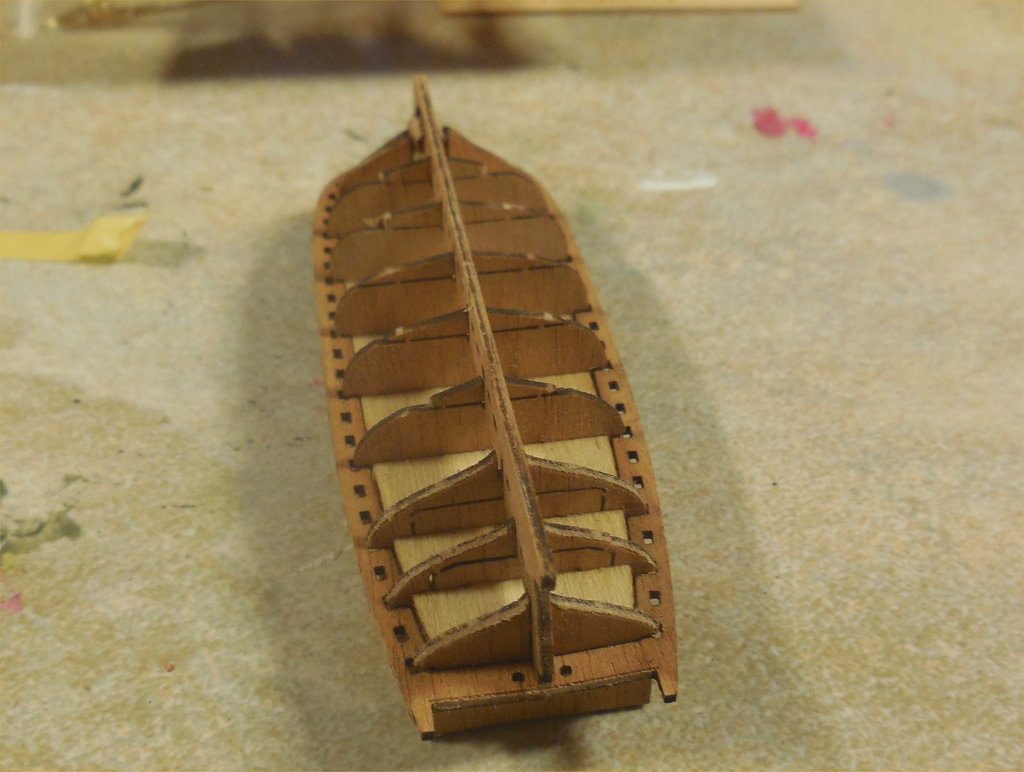 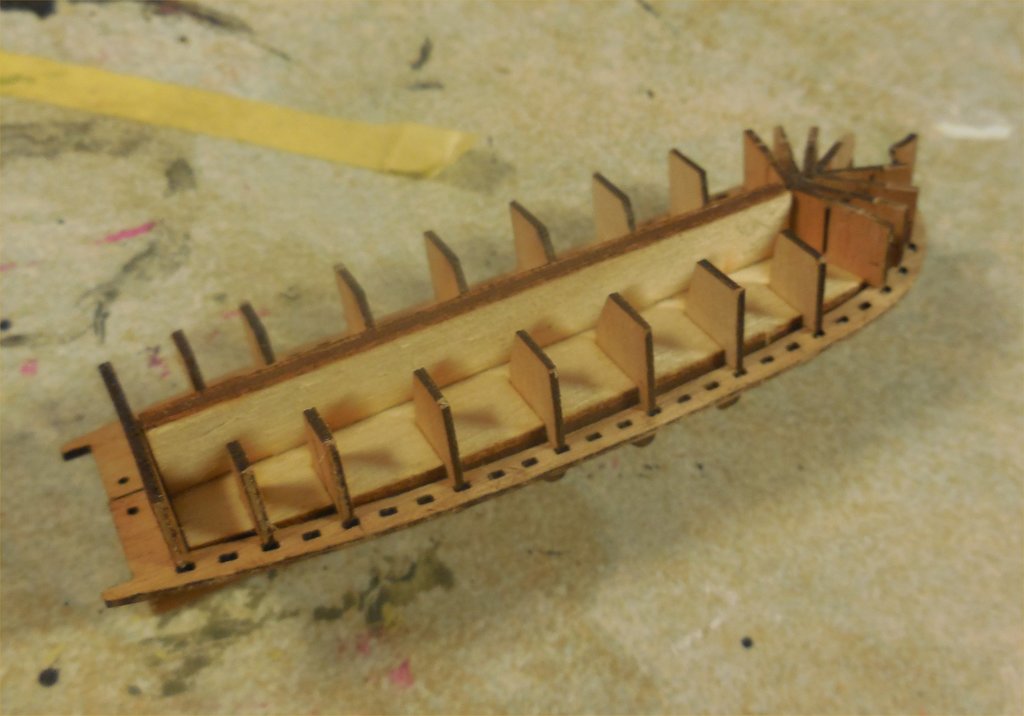 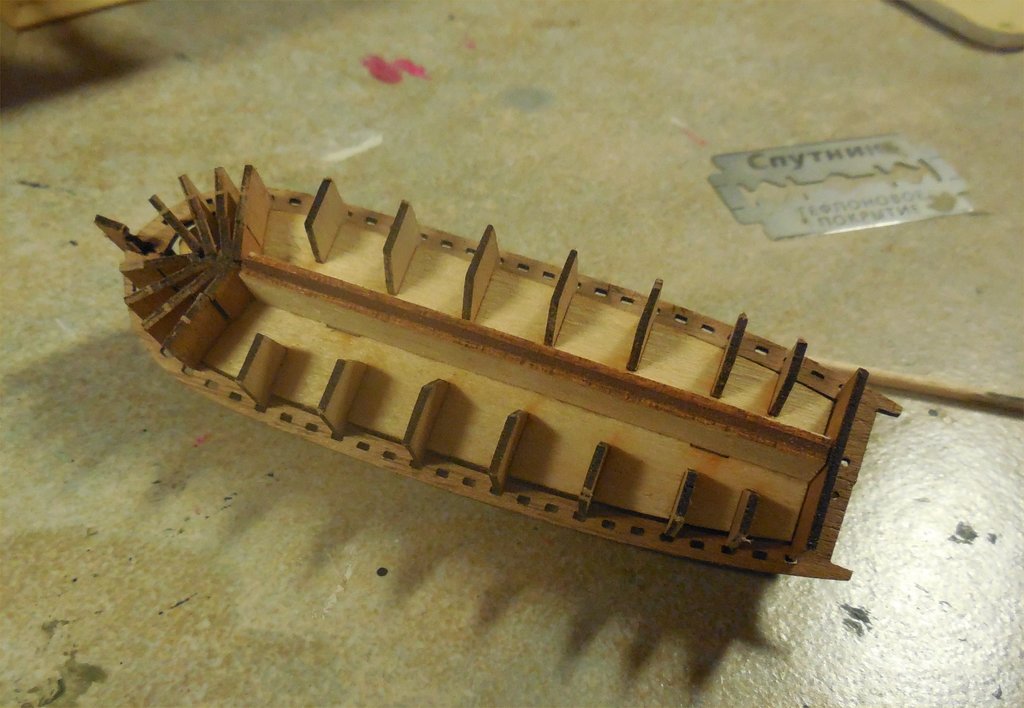 |
|
|
|
Post by Leon on Oct 2, 2014 3:54:08 GMT -5
Nice start on the frame work.
|
|
|
|
Post by TRM on Oct 2, 2014 6:56:22 GMT -5
Nice beginning Petr! Count me in!! I am really looking forward to seeing this one come together!!
|
|
|
|
Post by wbill76 on Oct 2, 2014 20:03:57 GMT -5
Nice! A wooden ship is a rarity around here, looking forward to more on this one.  |
|
WigWag Workshop
Reviews member    
Member since: May 2012
"Keep The Glue On The Styrene"
Posts: 720
May 22, 2012 7:25:45 GMT -5
May 22, 2012 7:25:45 GMT -5
|
Post by WigWag Workshop on Oct 3, 2014 16:22:22 GMT -5
Nice start, I will be watching the build progress. My other hobby is small scale woodworking/Scroll Sawing, and I have a pattern for some sort of wooden ship (sorry I am not remembering exactly which one) but it's a very complicated build, has you need to cut all the individual parts on the Scroll Saw, then assemble it.
-Steven
|
|
petros
Full Member
  
Member since: February 2014
Posts: 361 
|
Post by petros on Oct 15, 2014 3:13:12 GMT -5
Sorry for posting no updates recently - I am nearly done with the ships' boat, and make lots of photos, but I killed my digicam's cable recently (pushed it into HDMI exit instead of USB, bending the contacts...) and cant download the pictures to my PC...
|
|
|
|
Post by TRM on Oct 15, 2014 5:31:06 GMT -5
That is very unfortunate Petr! Hope you get things situated soon...looking forward to seeing your progress!!
|
|
petros
Full Member
  
Member since: February 2014
Posts: 361 
|
Post by petros on Oct 17, 2014 3:23:24 GMT -5
So, I finally got the photos out of the Camera - with Android app to tablet over Wlan, and then to PC... 1) Planking was easy work, the fit was very good even if a bit unconventional, going from the upper part to the keel. Only 2 last planks had to be adjusted a bit. The planks were perfect to bend after 5 minutes in the water. I used CA glue, and was a bit too hasty, leaving a few minor seams between the planks, and also not too fine result near the bow. I guess someone more careful can do much better job there. 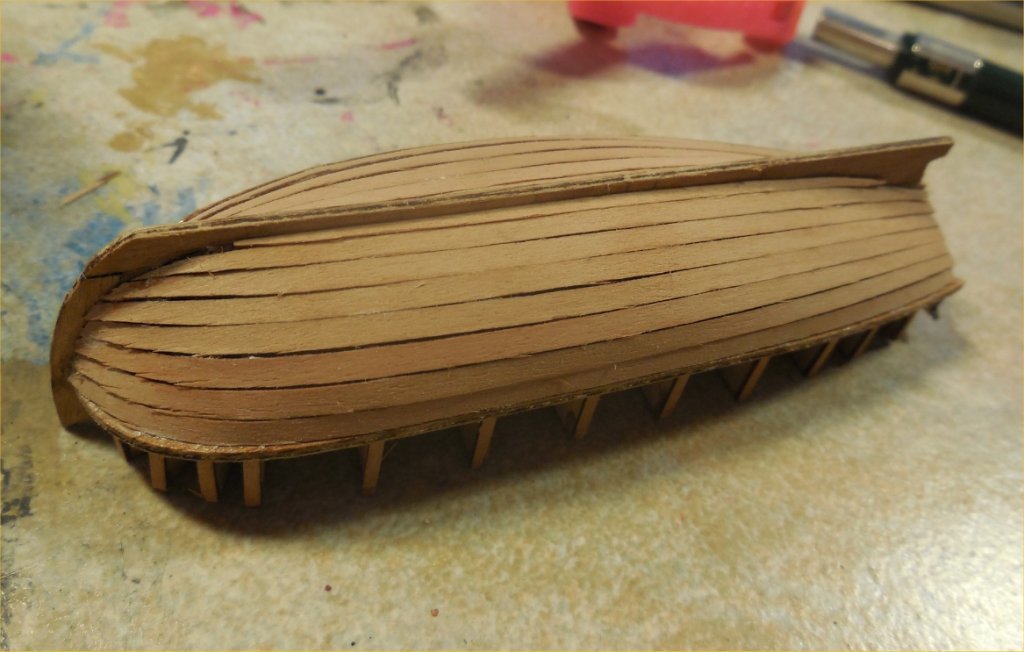 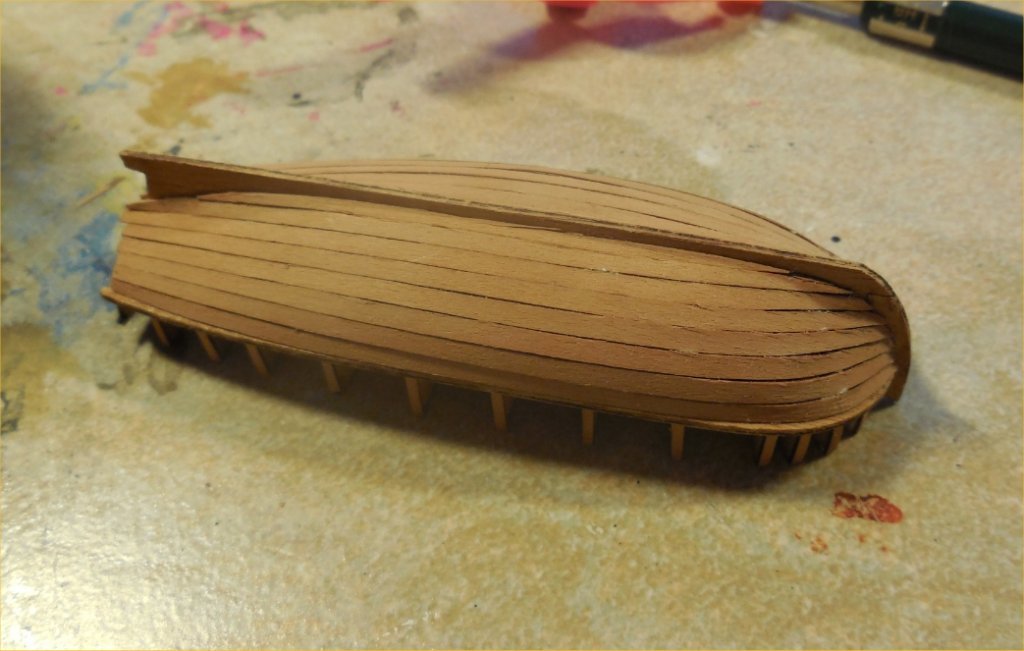 One more plank, now above the wearing. 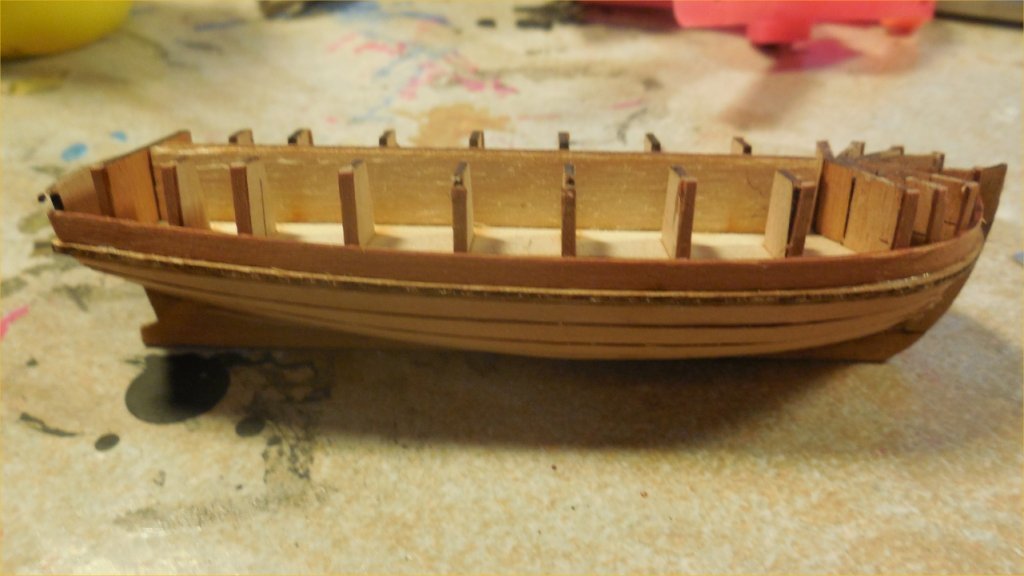 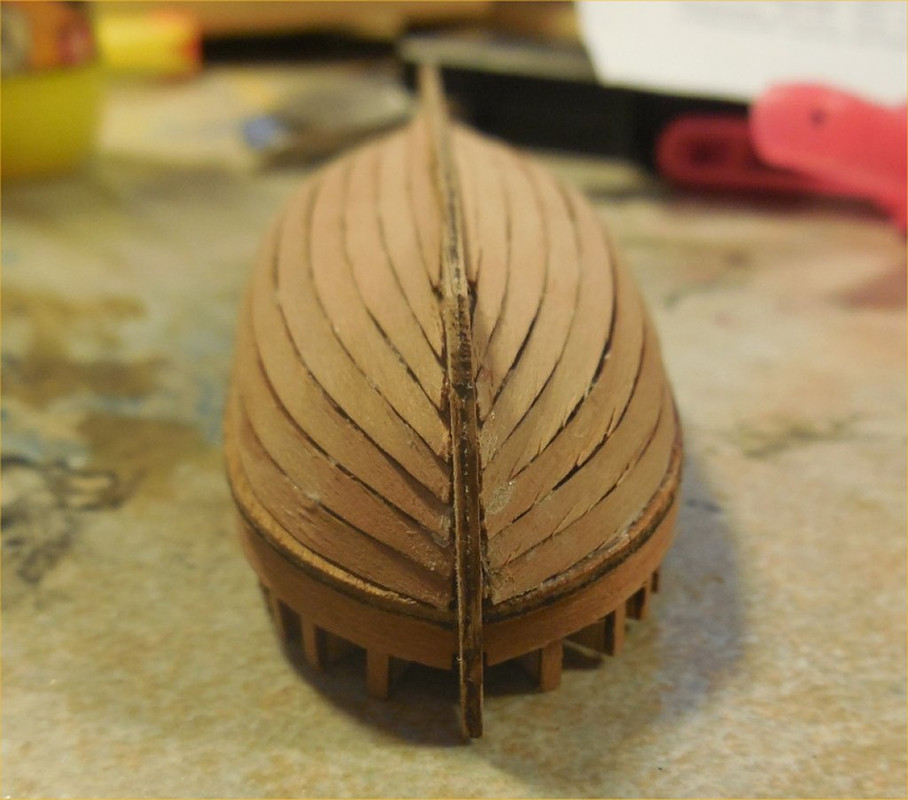 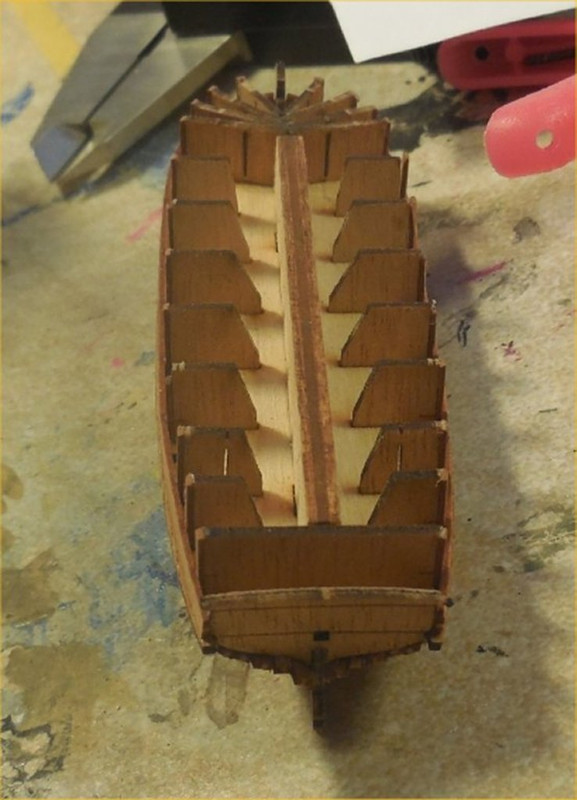 2) Sanding. I used flexible nail files from the local drug store - absolutely the same thing as specialized modeling flexifiles but for 10 times less cost. Available in half a dozen grades for just over 1 euro per file... I filled the seams between the planks with Clou Wooden filler, using walnut color for the seams, and the cherry/pear color for the planks where needed. Then sanded and polished once more. Careful here, only 0.6mm thickness is there! 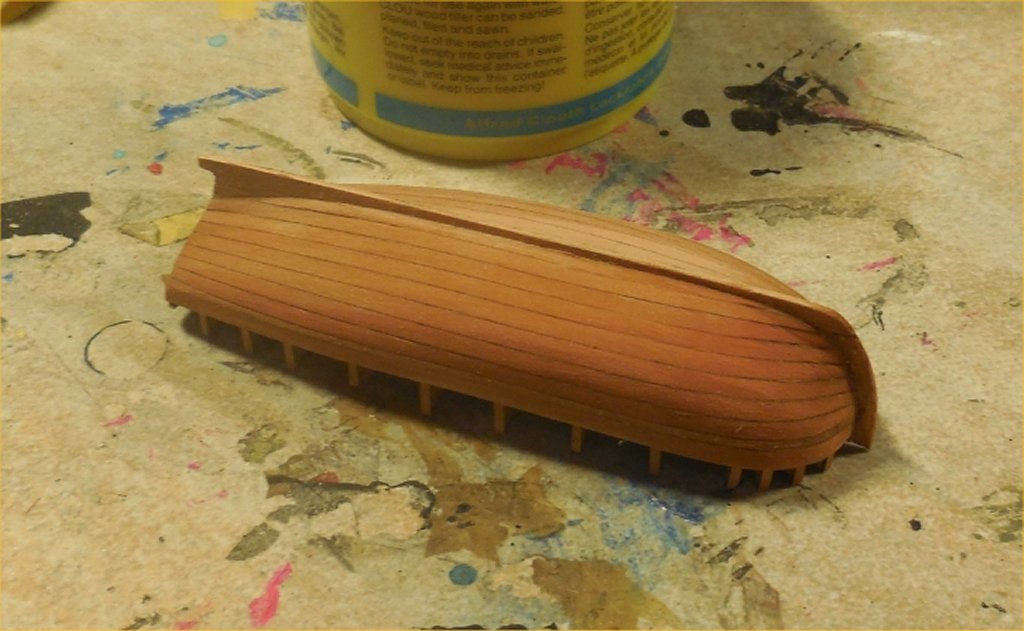 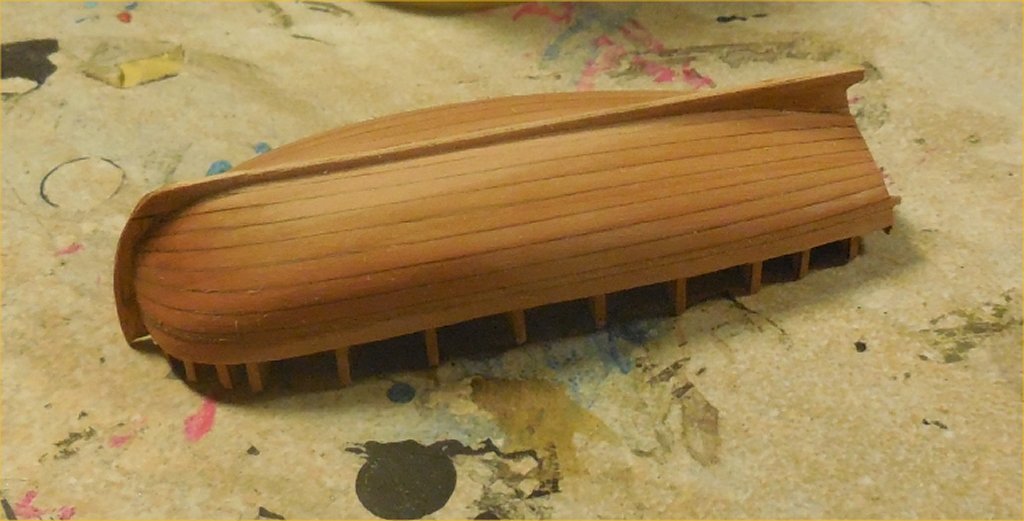 3) The most scary op came then - break out of the support matrix. Cut the frames with the micro saw just above the uppermost plank, then break out the temporary frames with pliers, and then pull out the matrix. In my case, I broke out the transverse bar in the matrix, so instead, I turned a pair of very large woodscrews (around 8-10mm in diameter) in the matrix (not too deep of course!) and pulled it out. Only breakage was with the supporting parts for the floor - they stayed on the pulled out frames instead of the planks in a few cases. Not a problem CA glue cant fix - these dont carry any load and are not visible later. 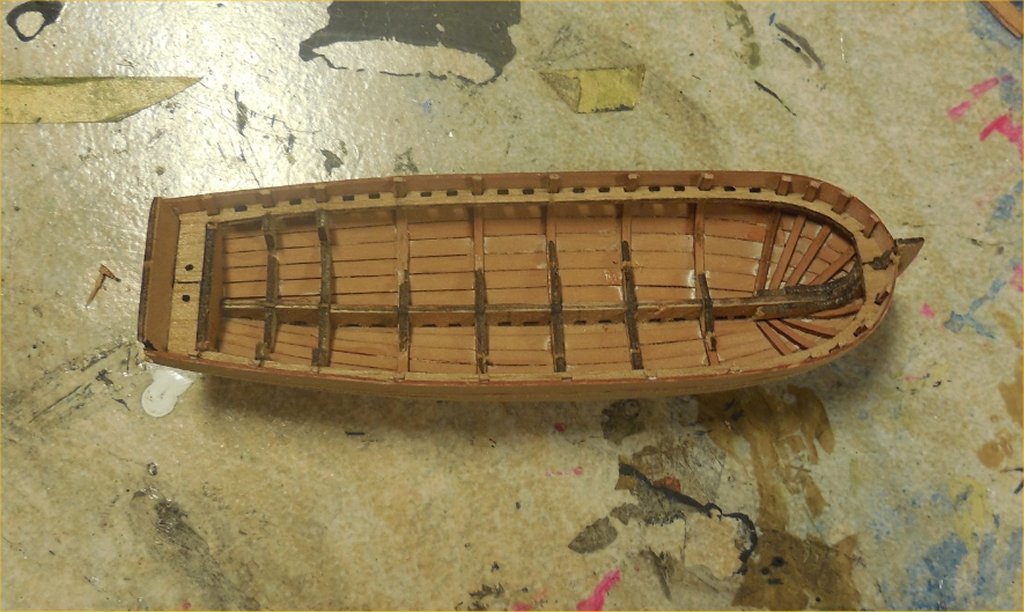 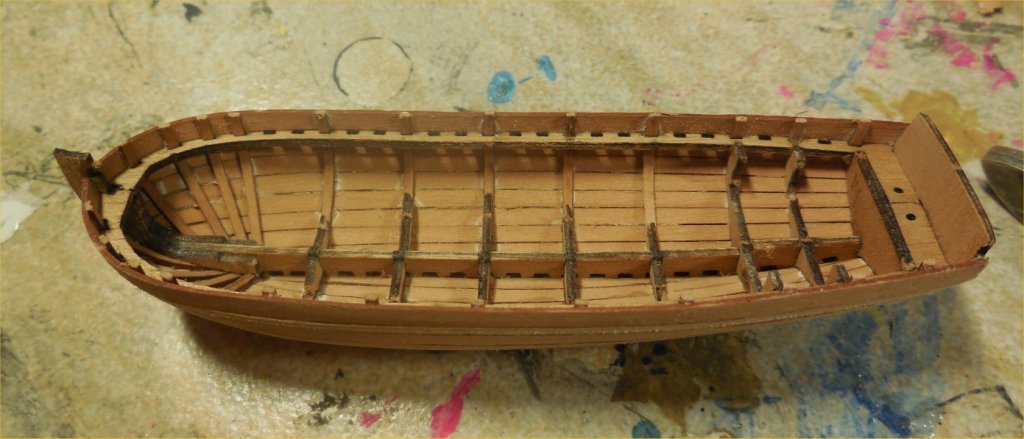 4) Added the frames in between - the kit has 2 times more material for that, I got exactly the half left over, as I was reusing the bits I cut off and only going to invisible area, not all the way down to the keel. Plank in the water, 2 mins, a drop of CA glue, insert the plank through the hole and fix it on the other end too - done. 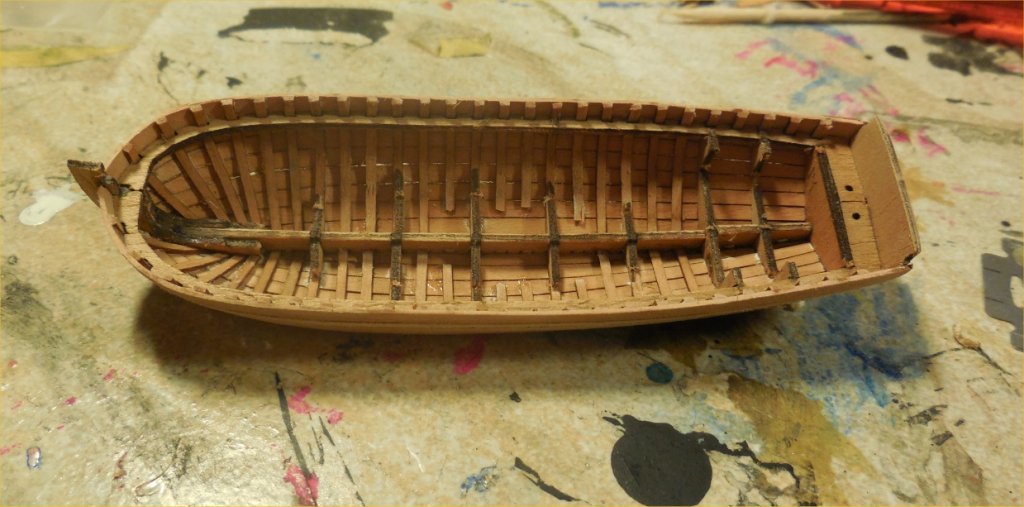 5) Then I added the inner bottom and storage boxes planking in the rear. 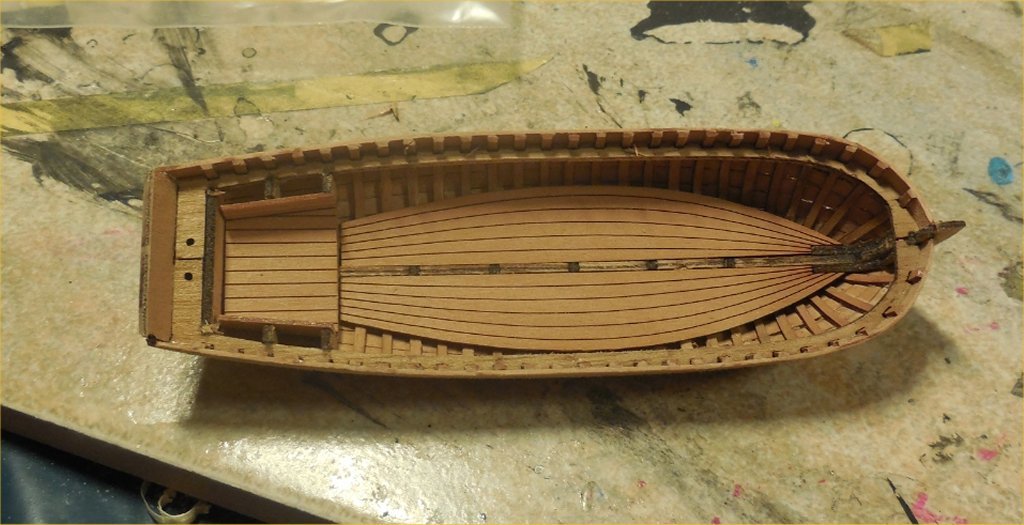 and a middle bottom part 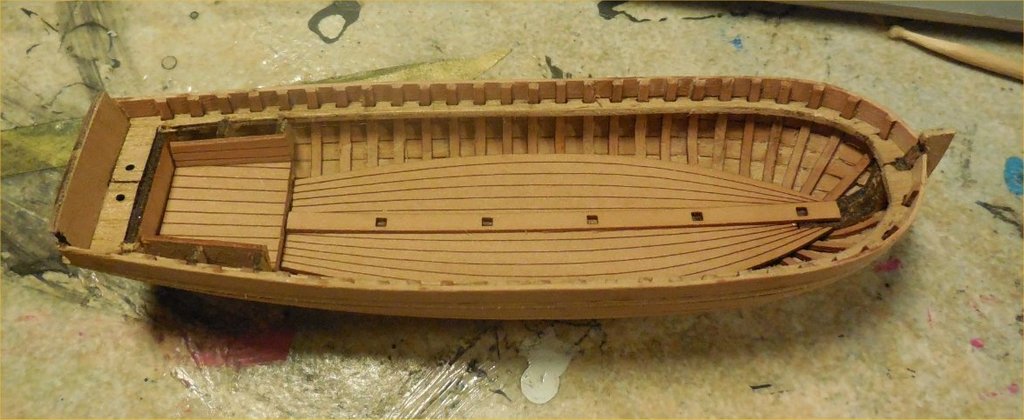 Later, there was a catastrophe - my 2 years old daughter got the boat in her hands, and broke out the transom plate and chewed the fore part of the keel.... I had to rebuild the transom with 2 layers of pearwood veneer, and also cover the entire keel with the same veneer all over. Photos of that follow in a day or two. |
|
|
|
Post by Leon on Oct 17, 2014 17:26:40 GMT -5
WOW!!!!!! Looking extremely nice Petr.Tough break on the transom and Keel,glad to hear you got it fixed.
|
|
|
|
Post by TRM on Oct 17, 2014 19:20:39 GMT -5
Nicely done Petr!! Strakes looks great and things sanded up pretty good!! Sorry to hear about the little one taking "a bite out of you modelling" time!! Glad to hear you have things in order again!!
|
|
|
|
Post by wbill76 on Oct 18, 2014 15:53:26 GMT -5
Nice progress Petr! I've heard of pets getting their teeth into a build but your 2 yr. old daughter must've been hungry!  |
|
petros
Full Member
  
Member since: February 2014
Posts: 361 
|
Post by petros on Oct 21, 2014 15:37:37 GMT -5
Ok, as I wrote above, my daughter chewed the kiel near the stem, and broke out the transom. I was so frustrated that I forgot to take the pictures of the damage... I used 0.6mm pearwood veneer to cut the and sand the new sidings for the keel, these were done two-part, with the original stem join on the correct place too. The sternpiece was also planked with the same veneer, as would be the rudder. An hour of careful sanding, and the fit was good, so glued the halves on, and added another line along the keel. Filled all gaps with Clou wooden paste, color Pear/Cherry, and sanded. The new transom was made out of two layers of the same veneer laminated over each other. It will take more details later. 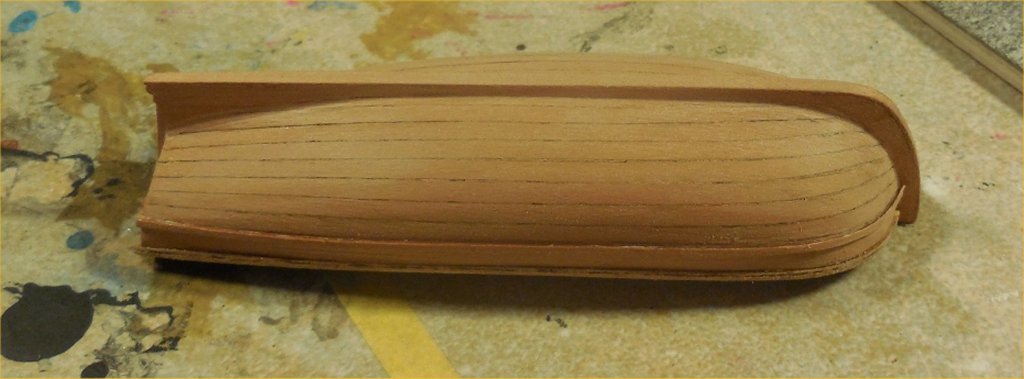 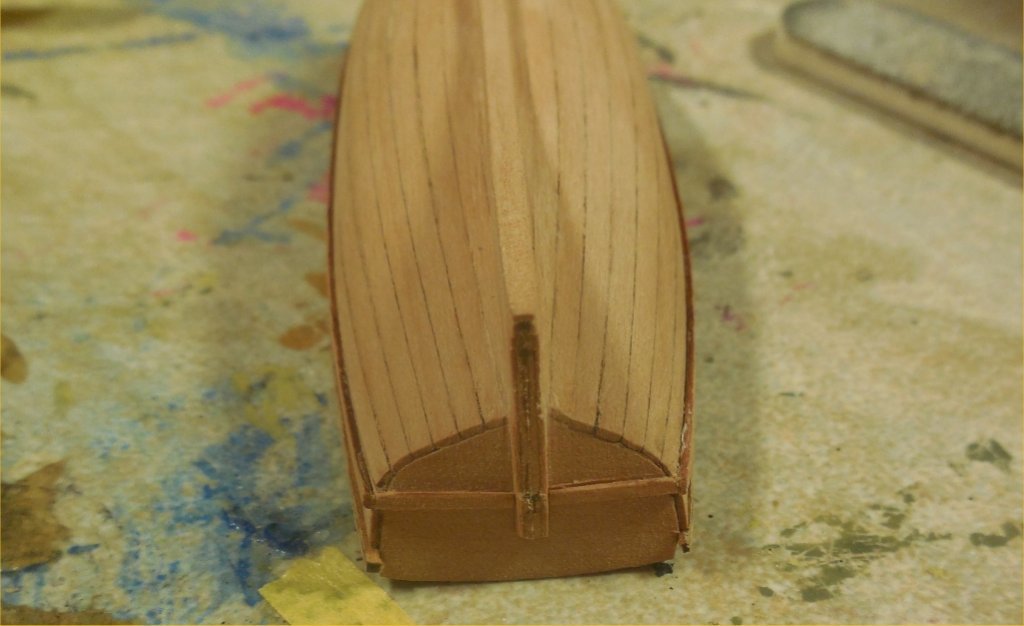 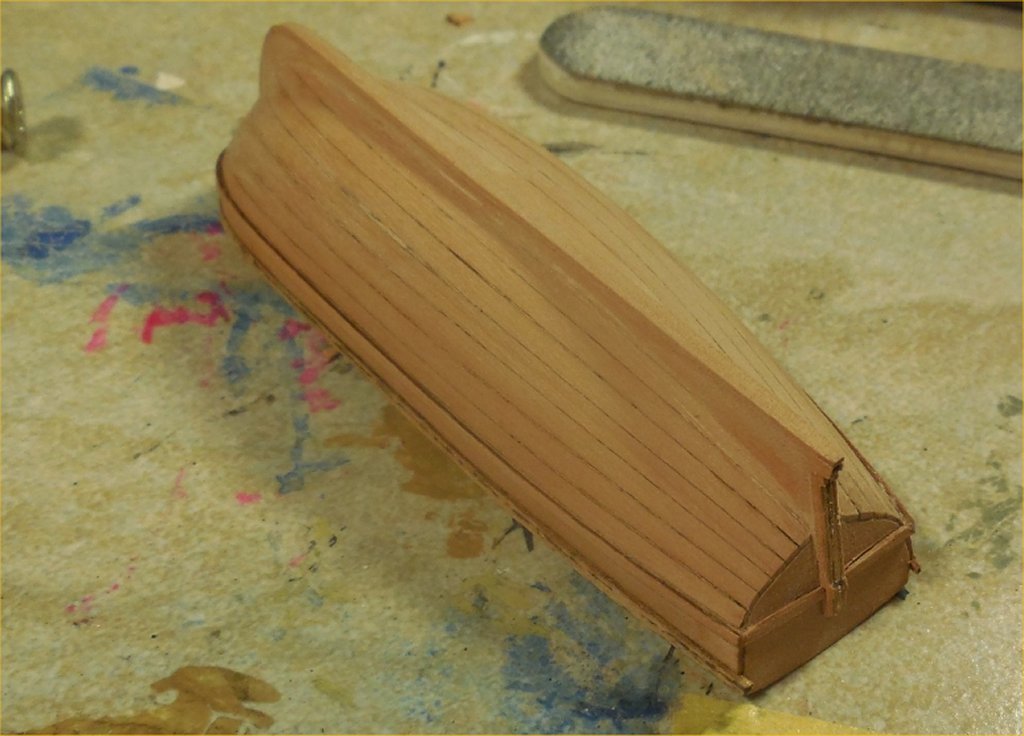 Then I added the benches, inner upper plank, and the gunwale. It looks good, but gunwale sides somehow dont let me sand the laser traces good enough. I would either paint it black, or redo it out of the massive pearwood board. As I need to go to a construction store to get the black stain, and a large stock of pearwood boards of different thicknesses is now in shipping from the ebay seller, I would put the boat aside as is, and wait until I could continue. I would lay down the ship tomorrow probably. 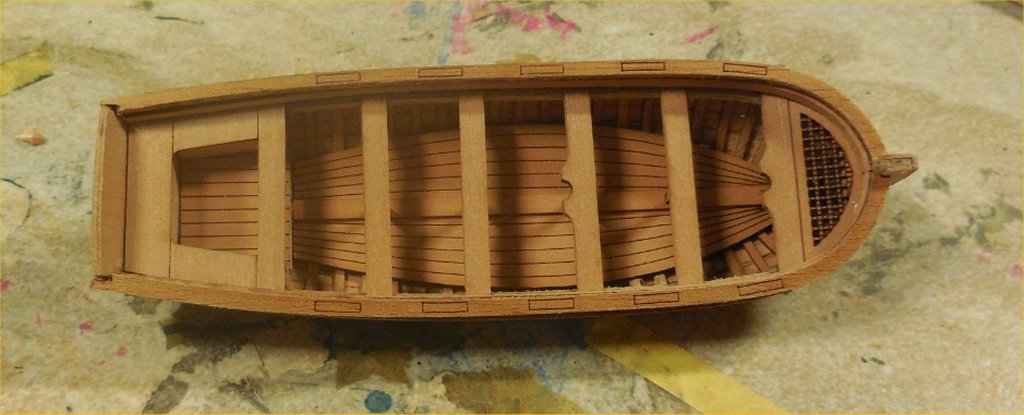 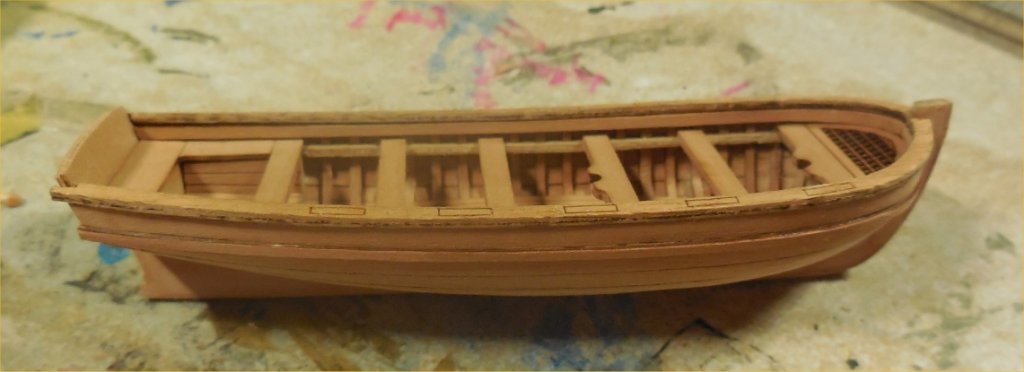 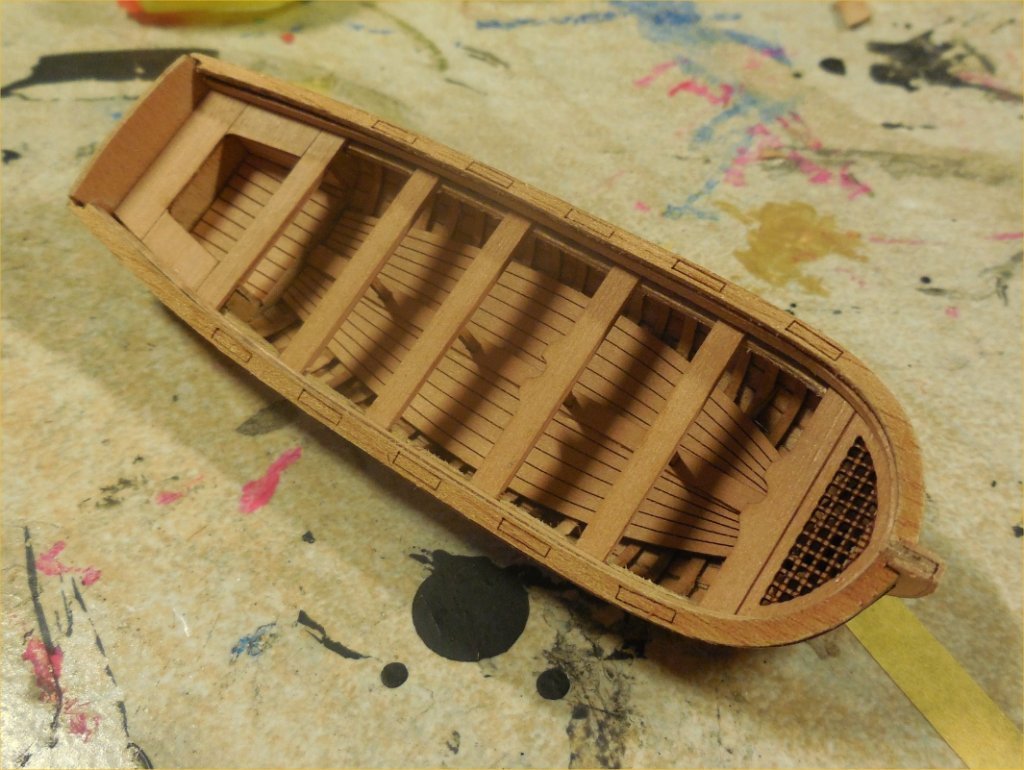 |
|
|
|
Post by wbill76 on Oct 21, 2014 15:45:28 GMT -5
That's some really nice detail for just the boat...what scale is the whole build?
|
|
petros
Full Member
  
Member since: February 2014
Posts: 361 
|
Post by petros on Oct 21, 2014 16:32:56 GMT -5
Thanks! The scale is 1:72
Its by far not all detail, rudder, oars, oar supports, bracket for mast, etc coming when done with gunwale
|
|
petros
Full Member
  
Member since: February 2014
Posts: 361 
|
Post by petros on Oct 30, 2014 3:19:47 GMT -5
So, after some days, I made a few more photos. With the gunwale, I decided to keep the original one, but tone it black, as I would most likely do the same with some elements on the ship itself. As I had neither black dye nor black ink, I took Humbrol water-based acrylics from the railroad line, diluted it, and applied, and it looks good - wooden texture is there, and the color is fine. I need to fix some scratches I did so far while adding the rudder, and would apply the same color to the tholes. I then turned my attention to the rudder. I had to widen it as I my repairs to the stern and kiel made them wider. Same veneer was applied. Then, I tried to build the gudgeons. I managed to loose the original brass strip, as I was doing the first one, so I had to cut brass strips from some old PE sets with the paper guillotine, which worked well. The gudgeons are composite/fake ones - the middle loop is separate, with the end of brass strip rolled around the roundnose pliers, and then glued into a pre-drilled hole with CA. Then the visible side strips were attached, all were blackened by brass black. I will add the rivets today. My plan is to use a punch to make small brass round rivet heads, and to glue them to the gudgeon strips. 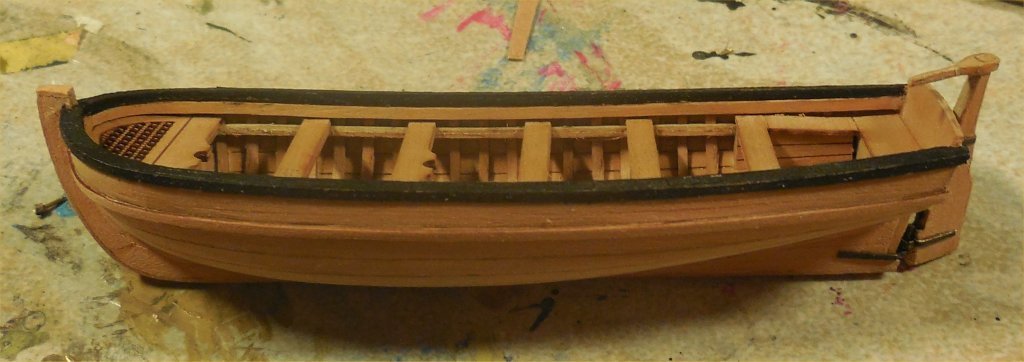 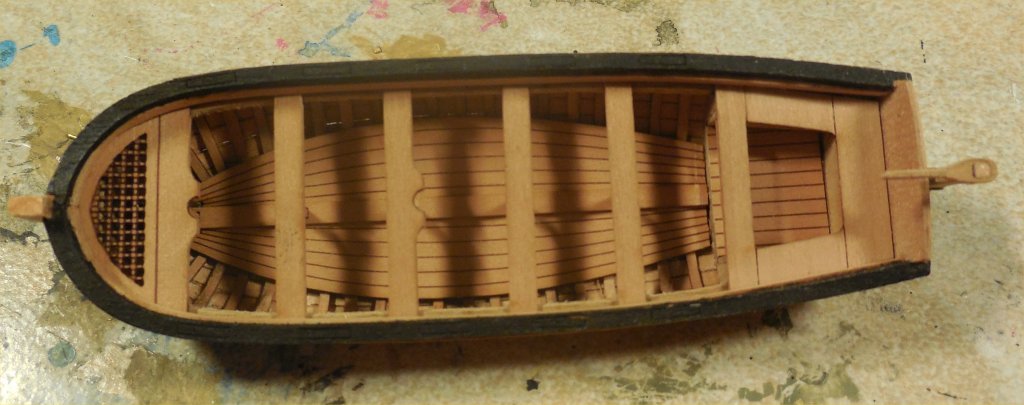 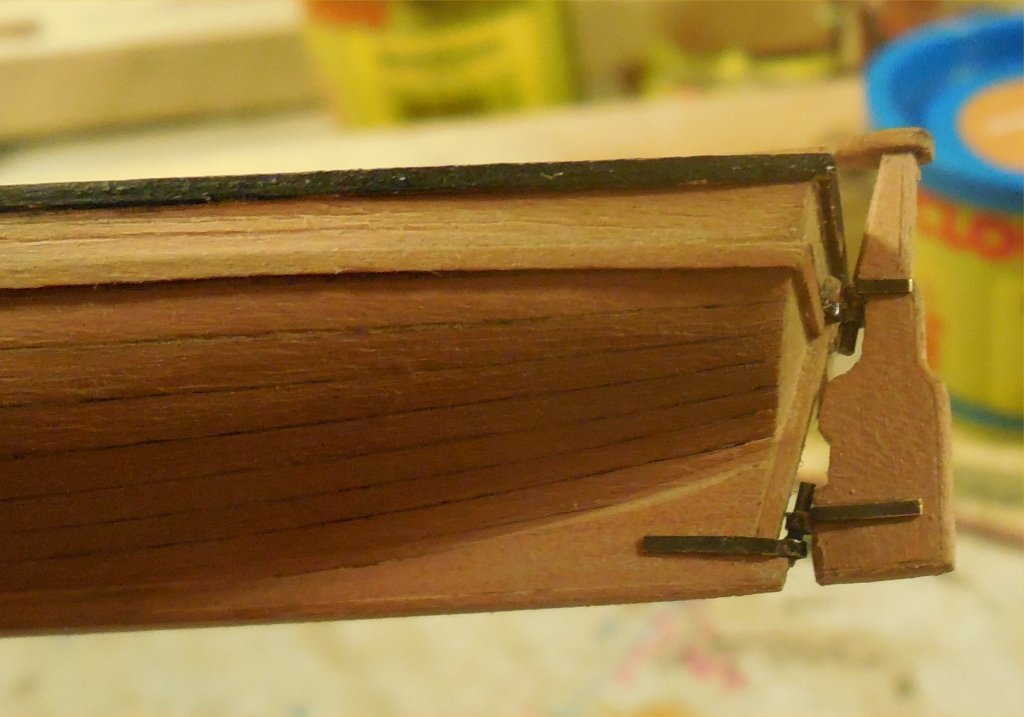 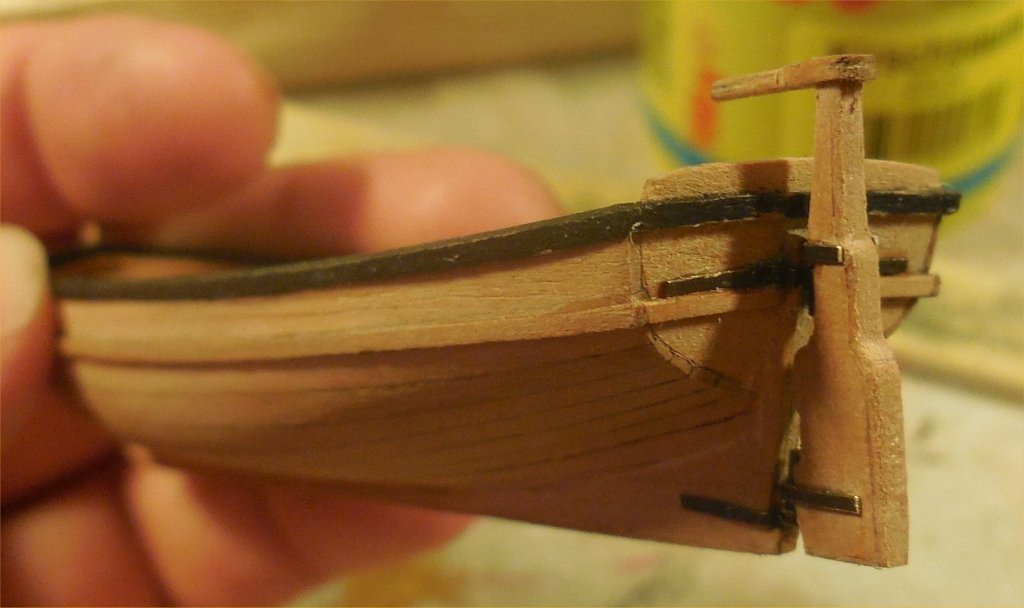 |
|
|
|
Post by TRM on Oct 30, 2014 5:51:24 GMT -5
Looking great Petr! Black rail looks really nice with the natural coloring! Are you planning on painting the hull as well or leaving clear?
|
|
|
|
Post by dierk on Oct 30, 2014 6:55:53 GMT -5
Impressive work on an interesting subject. Thumbs Up!
|
|
petros
Full Member
  
Member since: February 2014
Posts: 361 
|
Post by petros on Oct 30, 2014 8:03:54 GMT -5
Looking great Petr! Black rail looks really nice with the natural coloring! Are you planning on painting the hull as well or leaving clear? Hey I am going to keep the hull natural, but as you can see in the review, there are differently colored woods for different hull parts. The wales are black, etc. I however could imagine to use the black color to darken the railing around the poop deck. Else, I am going to keep the coloring as on the box art. |
|
|
|
Post by wbill76 on Oct 31, 2014 14:31:07 GMT -5
Looks like the boat's coming along nicely there Petr!
|
|
petros
Full Member
  
Member since: February 2014
Posts: 361 
|
Post by petros on Nov 4, 2014 4:36:24 GMT -5
Thanks!
I however decided to rebuild the rudder - the gap between lower hinge parts, and a seam along the rear edge, as well as rectangular form of the rudder when looking from the top or bottom were disturbing. I made a new one out of a pearwood strip, which I like much more. Would post photos later.
However I am stuck now - I cant find my punch and die to make rivets.. When moving to the new appartment last year, I stored it in some "safe place" and cant locate it now, searched all possible locations over last three days.. Really frustrating....
|
|
|
|
Post by dierk on Nov 4, 2014 5:46:11 GMT -5
Oh, yes: 'safe places' are almost as treacherous as the carpet monster  ! Good look hunting for it. Waidmann's Heil if you know what I mean |
|
petros
Full Member
  
Member since: February 2014
Posts: 361 
|
Post by petros on Nov 4, 2014 7:03:13 GMT -5
Yeah  I however thought, that in case I would not find it tonight, I would just start the ship itself, and would spend some time in adding some new products to my shop - got a new partner yesterday |
|
|
|
Post by dierk on Nov 4, 2014 7:21:29 GMT -5
Your new partner's not a supplier of punch and die sets, by any chance?  |
|
petros
Full Member
  
Member since: February 2014
Posts: 361 
|
Post by petros on Nov 4, 2014 8:21:46 GMT -5
Not really ;( I have to see if I can get some manufacturer of modeling tools to my shop soon however
|
|
|
|
Post by TRM on Nov 4, 2014 8:37:25 GMT -5
I would think Peter from RP Toolz would be interested to work with you providing punch and die sets along with other items they have to offer. Worth an email and see what he says!!  |
|
petros
Full Member
  
Member since: February 2014
Posts: 361 
|
Post by petros on Nov 4, 2014 8:38:50 GMT -5
You read my mind, I wrote them an email just 5 seconds ago  |
|
|
|
Post by TRM on Nov 4, 2014 8:41:27 GMT -5
Awesome! He is a great guy with a fantastic line of products. Wishing you luck!!
|
|
petros
Full Member
  
Member since: February 2014
Posts: 361 
|
Post by petros on Nov 4, 2014 17:02:12 GMT -5
Thanks, just added them  Would get a new Punch and Die soon. I however improvised today, and made the rivets out of CA-soaked paper, with an improvised punch and die set made of a brass tube and a wooden board. |
|
|
|
Post by Leon on Nov 4, 2014 17:46:23 GMT -5
Looking really good Petr.
|
|
petros
Full Member
  
Member since: February 2014
Posts: 361 
|
Post by petros on Nov 5, 2014 2:35:37 GMT -5
Hey I made the new rudder. Needs some minor polishing but I think its ok now. Macro shows up some minor defects invisible to normal Eyeball Mk.1 - the rudder blade is 6 mm wide in reality. 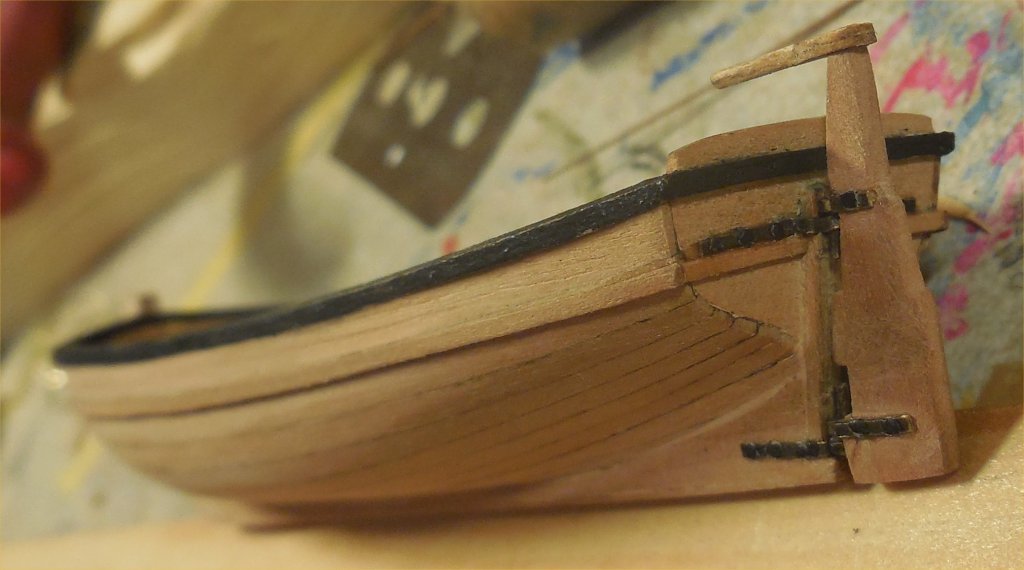 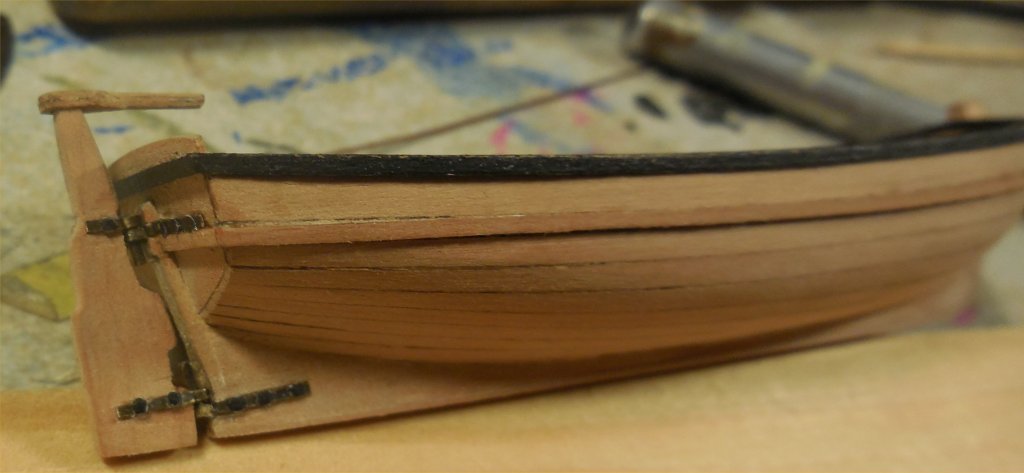 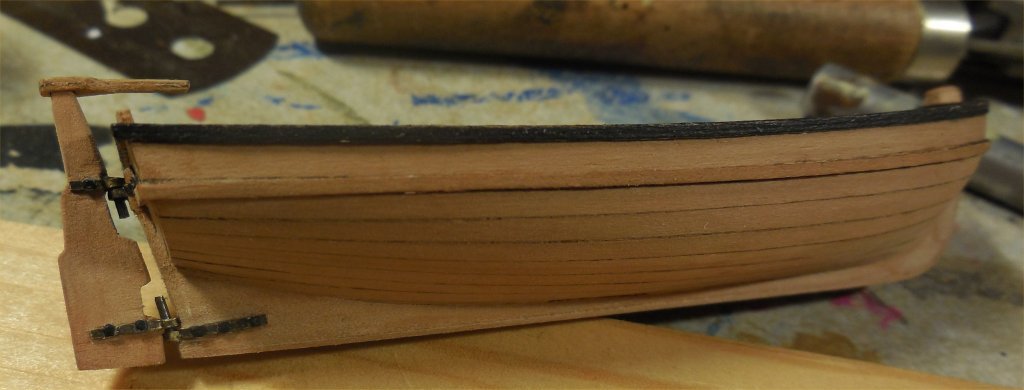 |
|