|
|
Post by wing_nut on Jan 1, 2015 22:51:17 GMT -5
Thanks guys, it was a fun little build. No idea it was going to take that turn when it got stated but I am happy with the outcome. And let me tell ya, tanks are way easier when you don't weather them  |
|
|
|
Post by deafpanzer on Jan 2, 2015 3:03:17 GMT -5
Marc, I really love it... never thought about this kind of concept. Way too cool!
|
|
afvfan
Senior Member
   
Member since: December 2012
Bob
Posts: 1,772
Dec 10, 2012 17:32:38 GMT -5
Dec 10, 2012 17:32:38 GMT -5
|
Post by afvfan on Jan 2, 2015 6:49:38 GMT -5
You should be happy with it, Marc. That turned out great!
|
|
|
|
Post by wing_nut on Jan 2, 2015 8:42:37 GMT -5
Thanks guys. Last night I noted the tracks got a bit wavy where they should be flat to the floor. Very srpingy so just pressing them down won;t fix it. Gotta put on the thinking cap for this one.
|
|
|
|
Post by 406 Silverado on Jan 2, 2015 10:31:22 GMT -5
Very nice Marc. I should do some sort of cut a way some day.
|
|
|
|
Post by wing_nut on Jan 2, 2015 13:55:55 GMT -5
Thanks Rob. You could combine that with your specialty and do it with rust holes.  BTW, If anyone wants/needs tracks for their 38(t), the links from the Tristar kit are very nice, and clean up looks pretty easy. I'll be happy to send them to ya. |
|
afvfan
Senior Member
   
Member since: December 2012
Bob
Posts: 1,772
Dec 10, 2012 17:32:38 GMT -5
Dec 10, 2012 17:32:38 GMT -5
|
Post by afvfan on Jan 2, 2015 18:39:37 GMT -5
Thanks guys. Last night I noted the tracks got a bit wavy where they should be flat to the floor. Very srpingy so just pressing them down won;t fix it. Gotta put on the thinking cap for this one. How about a drop of CA under each raised section, or would that cause the parts under the wheels to spring up? |
|
|
|
Post by wing_nut on Jan 2, 2015 19:41:40 GMT -5
No it doesn't push the other parts up. Since the "concrete" floor is a decal i am not sure of the how well the glue will hold. I am thinking of some sort of solvent to soften the paint and tape them down until they dry again. Not on the base of course  And FYI, the tracks have been claimed. |
|
bbrowniii
Full Member
  
Member since: March 2012
If you are not part of the solution, you are part of the precipitate.
Posts: 1,238
Mar 25, 2012 22:08:04 GMT -5
Mar 25, 2012 22:08:04 GMT -5
|
Post by bbrowniii on Jan 2, 2015 19:49:17 GMT -5
Beautiful piece Wing-nut. Love it!
|
|
|
|
Post by wbill76 on Jan 2, 2015 20:58:12 GMT -5
Love the way this one turned out Marc, very nice! I was going to suggest the solution you're going for...the other option would be to gently 'work' the links back and forth a bit (since you used MKs) to get them to lie flat.
|
|
|
|
Post by wing_nut on Jan 7, 2015 8:21:06 GMT -5
Where'd everyone go? Y'all give up?
|
|
|
|
Post by TRM on Jan 7, 2015 8:35:27 GMT -5
LOL...not giving up! At least form my side of things. I am waiting on some wheels to show up before I start the bulk of the weathering. I am close too!!  |
|
johnt
Full Member
   Feb 2012 MoM and 2012 Model of the Year Winner
Member since: November 2011
Posts: 1,174
Nov 15, 2011 5:38:32 GMT -5
Nov 15, 2011 5:38:32 GMT -5
|
Post by johnt on Jan 7, 2015 9:32:16 GMT -5
Hi Marc, nice 38 mate!
|
|
|
|
Post by dupes on Jan 7, 2015 10:40:33 GMT -5
Not whatsoever! Just needed a little break from the PE...and I'm having a bit of an issue weather-wise with spraying my primer. Tamiya rattlecan doesn't work so well when the high for the day is 8 degrees. BLAH
|
|
maschinenkrueger
Reviews member     Jan & Dec 2014 MoM Winner
Member since: June 2012
You want MaK with that?
Posts: 836
Jun 7, 2012 9:50:05 GMT -5
Jun 7, 2012 9:50:05 GMT -5
|
Post by maschinenkrueger on Jan 7, 2015 13:32:01 GMT -5
That's a great cut away museum model. Love the 38.
|
|
bbrowniii
Full Member
  
Member since: March 2012
If you are not part of the solution, you are part of the precipitate.
Posts: 1,238
Mar 25, 2012 22:08:04 GMT -5
Mar 25, 2012 22:08:04 GMT -5
|
Post by bbrowniii on Jan 7, 2015 15:20:13 GMT -5
I'm still in this too. Plugging away at all the PE bits that come with the DML kit. Want to assemble all those and get them ready for paint. I'm not the best or fastest solder-er, so it is taking a bit....
|
|
|
|
Post by wing_nut on Jan 7, 2015 16:00:29 GMT -5
Thanks for the compliments guys.
And glad to hear you other are still in the fray.
|
|
|
|
Post by TRM on Jan 12, 2015 18:02:24 GMT -5
LOL...it may look like I am sleeping at the wheel on this one, but nope, just waiting on some...wheels!  A nice little package was waiting in the mailbox when I got back home today! Celticwerks to the rescue! Mr. Reid did his magic with some masters I sent him... Here are the originals I sent him. I was most interested in the burnt ans dismantled wheels; the full copy was for a future build with a less than desirable wheel supplied...not any more though!   So with project in the final stages and needing some wheels, these were a welcomed sight for sure!!  Just what the doctor ordered!!!  Well now, I can cycle this one back into the mix I think! Hope to have something up and ready this week at some point!! Thanks for stopping in for a bit!!!  |
|
|
|
Post by Leon on Jan 12, 2015 18:10:04 GMT -5
On with the build bro!  The new wheels look great.  |
|
|
|
Post by TRM on Jan 12, 2015 18:15:32 GMT -5
Thanks Leon! What's great about this is the extras I will have for the Tristar kit I managed to grab at a club meet as well as a Grille I have in the stash I can build at some point!!  |
|
|
|
Post by wbill76 on Jan 12, 2015 18:22:26 GMT -5
Nice set of wheels there T, so no excuse now. Onward!  |
|
|
|
Post by TRM on Jan 12, 2015 18:30:59 GMT -5
LOL...I am sure I can find one or two Bill! But I might save those for later!!  |
|
|
|
Post by bbd468 on Jan 12, 2015 19:18:39 GMT -5
Marc, that is Bad A$$ my man....LOVE IT!!! hey Todd, wheres yours man?   |
|
|
|
Post by TRM on Jan 12, 2015 21:38:04 GMT -5
LOL...waiting to have those wheels installed Gary!! Should have this kissing the bench this week!!  |
|
|
|
Post by wing_nut on Jan 15, 2015 13:14:56 GMT -5
IT'S ALIVE! The thread that is. good to see you getting back to it T. Sorry for the late acknowledgement Gary my man but THANK YOU. There, if I say it louder it makes up for being late.  |
|
bbrowniii
Full Member
  
Member since: March 2012
If you are not part of the solution, you are part of the precipitate.
Posts: 1,238
Mar 25, 2012 22:08:04 GMT -5
Mar 25, 2012 22:08:04 GMT -5
|
Post by bbrowniii on Jan 15, 2015 23:19:47 GMT -5
Guys As I mentioned in an earlier post, I spent most of my bench time over the holidays 'puttering'. Mostly I tackled the PE bits in this kit, doing a bunch of soldering - something I certainly need practice with (a shout out to Thom Ivansco for the advice and assistance he gave me. It may not have made me great at soldering, but it certainly helped my make big strides. Thanks Thom!) I also painted and prepped a lot of the bits and pieces that go on the interior of the kit (for the record, I went back to my original plan - this will be strictly OOB, but I'm going to use EVERYTHING that is supposed to go in the kit. Well, with one or two exceptions...). So, I was kind of left with a bench that looked like this: 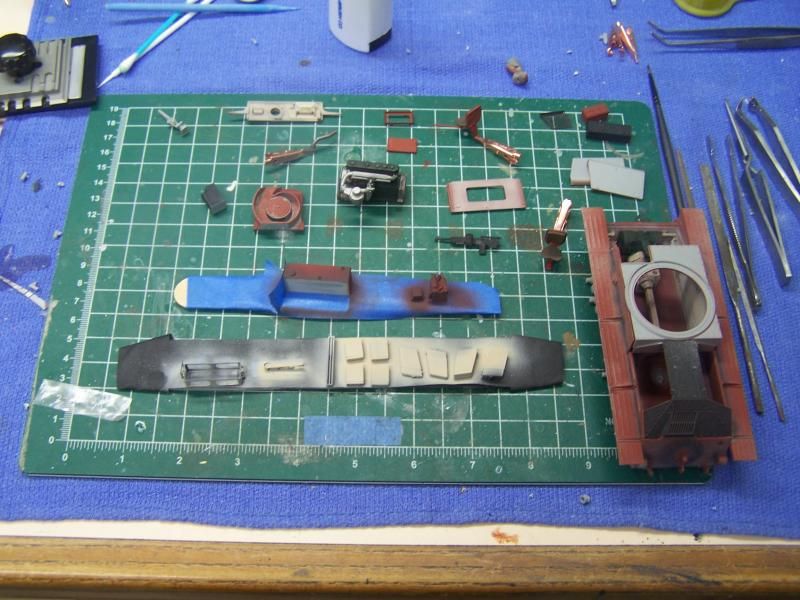 And that is really just the half of it. But, with that done, I could turn to some actual construction. First, I wanted to paint and install the engine: I started by picking out some of the pieces with various metal shades: 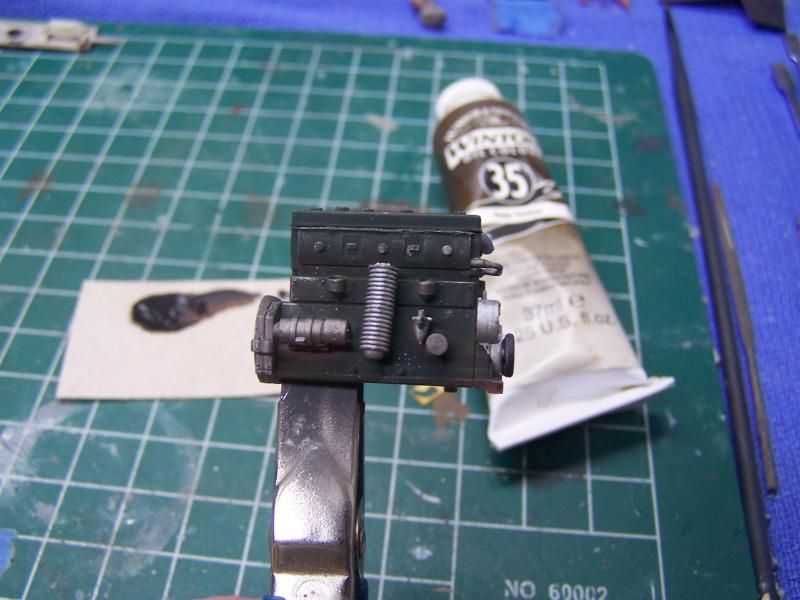 Then I decided to "grimey" it up a bit. Rather than just do a wash or six, I decided to try something I saw Wing_nut (I think) do a couple years ago with road wheels. I just globbed on a bunch of Van Dyke Brown oil, then slowly removed it to get the effect I wanted. The second pic does not do it justice, but it came out pretty well (at least, I'm happy with it and that is what matters, right?  ) 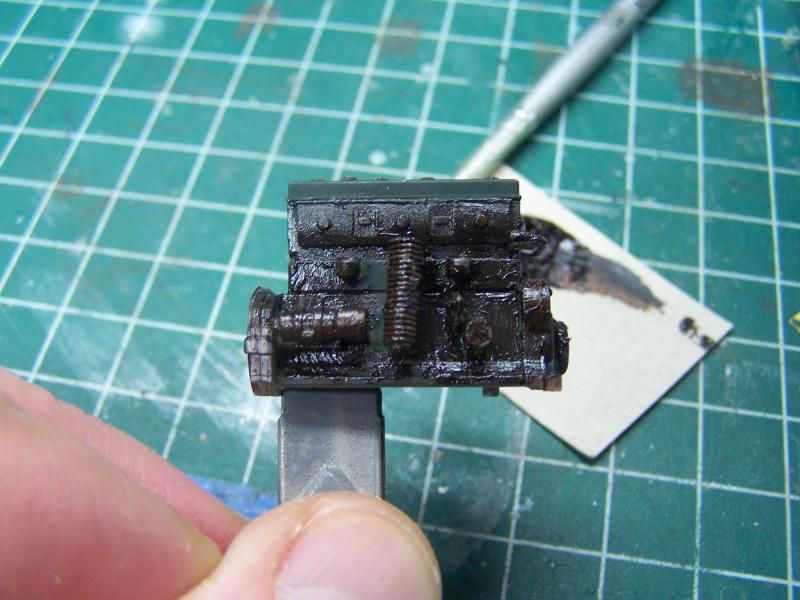 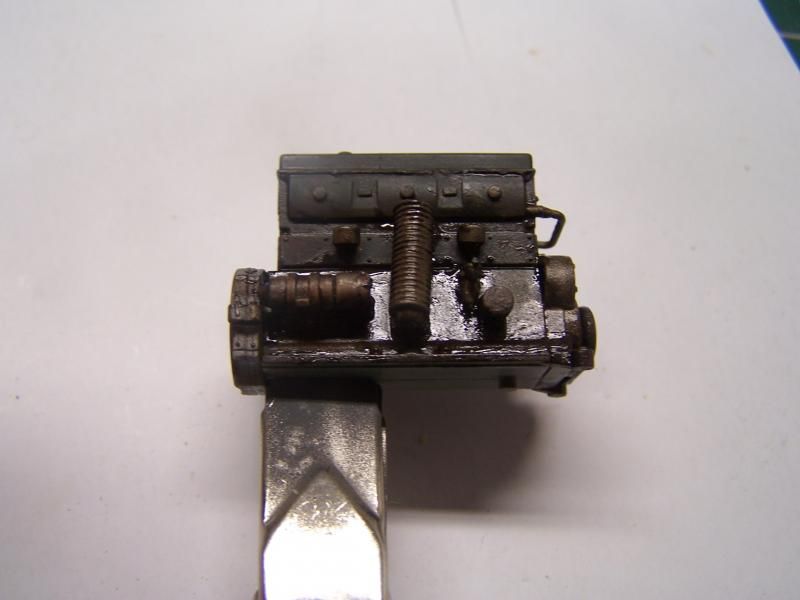 So, after the "Wing_nut-er-I-zation" of my engine, I was ready to install. But there was a problem. I don't know if you recall when I started in the engine compartment, but the two boxes that go along the hullsides were about 1/8 of an inch too tall. As it turns out, that seems to be a common problem with this kit. When I test fit my engine, I found: 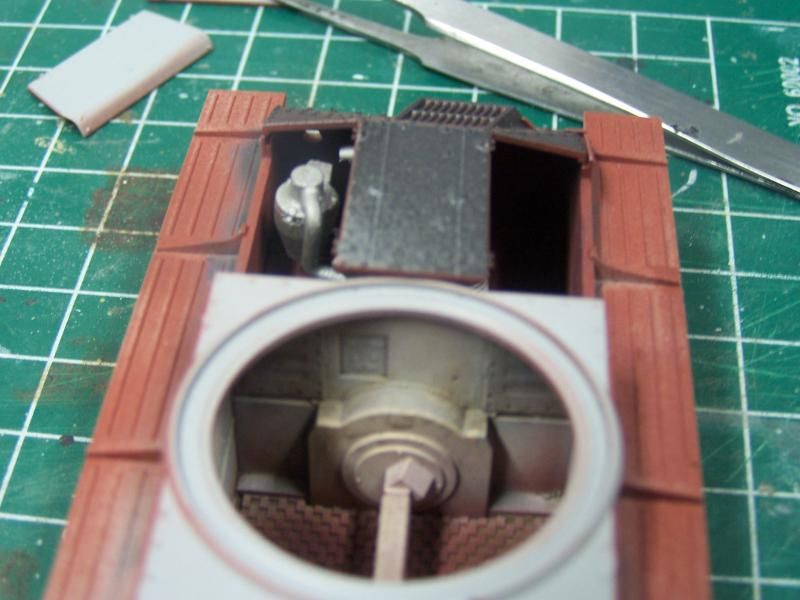 (Disclaimer: the savvy-eyed amongst you will notice that this dry fit was actually done prior to the special sauce treatment of the engine....  ) So, out come the cutters, away go the mounting lugs: 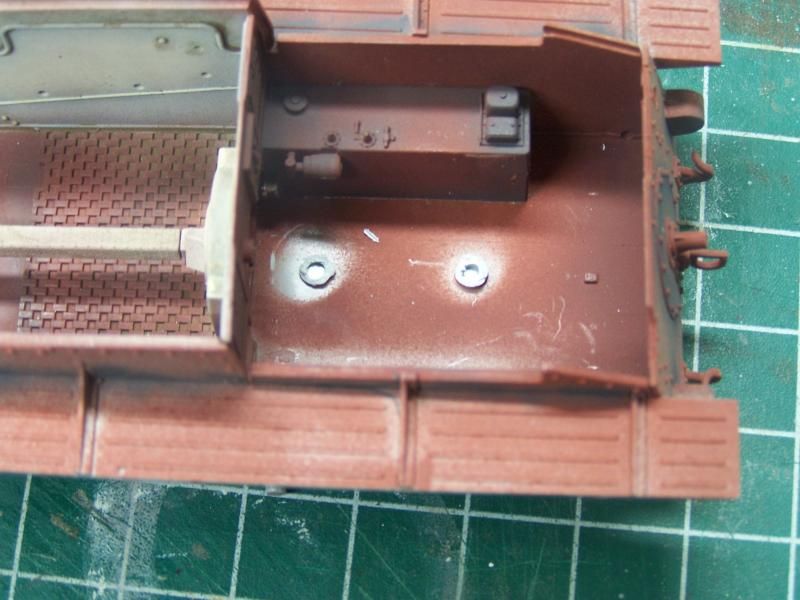 And now everything fits... I hope! Since I had to wait for the engine to dry, I turned my attention to the front compartment, added a few things, getting ready for the radio and the ammo bins, etc. So this is where we stand now: 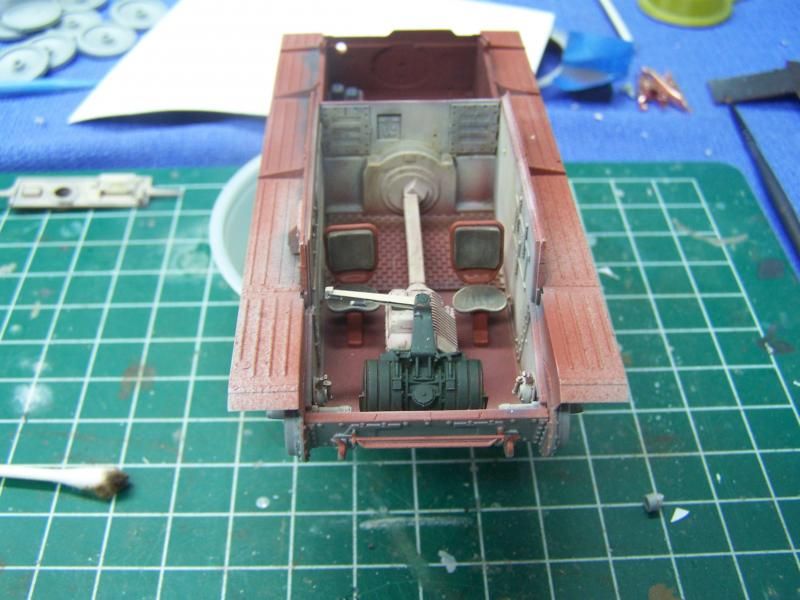 Enjoy. Feel free to comment. I'm always open for suggestions or critiques. |
|
|
|
Post by Leon on Jan 16, 2015 1:22:45 GMT -5
Boyd! Nice work on the engine and interior.Looking really good.  |
|
|
|
Post by TRM on Jan 16, 2015 10:48:43 GMT -5
Nice one Boyd! Glad to see you are getting over the PE/Soldering hump!! This are looking great under a little color!! Keep up the great work!!
|
|
|
|
Post by deafpanzer on Jan 16, 2015 11:48:46 GMT -5
Fantastic work on the interior Boyd!
|
|
|
|
Post by TRM on Jan 16, 2015 17:45:17 GMT -5
Since the wheels came, I have moved my 38 back to the center of the bench with a few other things. But, at least I can begin the weathering process I have been waiting to start!! With that, I started a couple things. One was the application of a filter to tone some things down a little.  While I plot my next move of washes and pigments, I hit one of the wheels to get the mental juices flowing a bit...  It is very early in the game right now but this gives me a good idea of where I will begin!! Thanks for peeking through the window!!  |
|