|
|
Post by Leon on Apr 17, 2016 10:58:38 GMT -5
Nice progress Bill! Getting close to paint.  |
|
|
|
Post by wouter on Apr 17, 2016 12:23:58 GMT -5
Oh suddenly this one is even going faster! Very cool to see the pieces come together. Will look impressive with the wings on!
Cheers
|
|
|
|
Post by wbill76 on Apr 17, 2016 12:31:24 GMT -5
Thanks Leon ! Wouts , it's moving along at a steady pace. I'm sitting here with the wings firmly clamped in my left hand due to the tricky join with the roots even as I type one-handed.  |
|
|
|
Post by wouter on Apr 17, 2016 12:33:02 GMT -5
Ah quite recognizable indeed. Happens to me sometimes as well...impressive LOL
Cheers
|
|
|
|
Post by wbill76 on Apr 17, 2016 19:44:59 GMT -5
Another productive day at the bench on Project Black Sheep. After thinking about it all, I decided to go ahead and attach the main wing portions to the roots. The fit is pretty tight but also a little tricky since the kit is designed to give you the option of folded wings and the contact surfaces, as a result, aren't that large. Careful use of liquid glue, finger pressure, and lots of waiting ensued but I got both wings attached. This was accomplished a lot easier with the wing root separate from the fuselage vs. the order the instructions would have you do it IMHO. 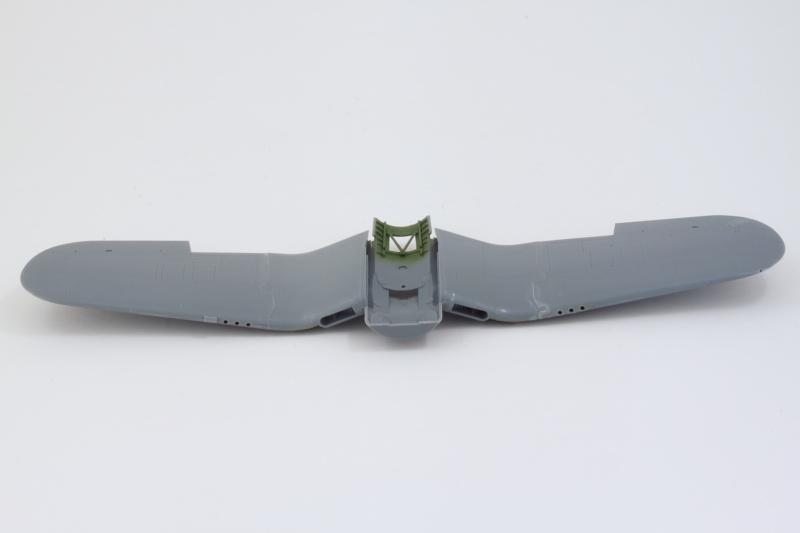 The exposed flap areas on the undersides got some Yellow Chromate via the airbrush. 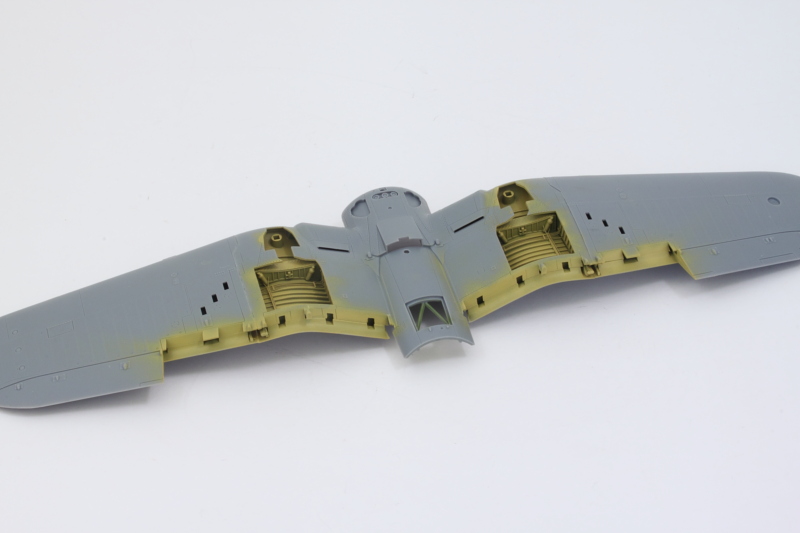 Moment of truth, the whole wing assembly was added to the fuselage. More finger pressure and liquid glue treatment but again, fit here is very good. The horizontal stabilizers were added as well and I cut down the radio mast so it would fit the exterior without the opening I neglected to create earlier. 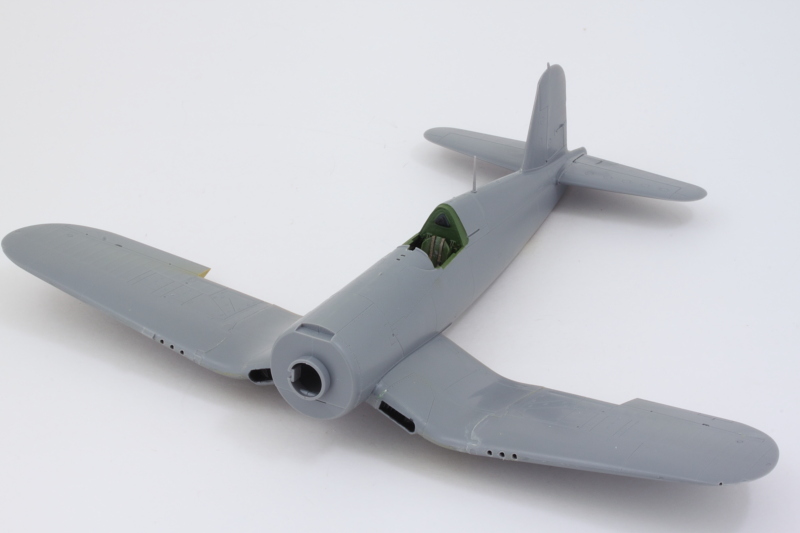 I went ahead and added the floor window clear piece since I'm getting close to painting the exterior. I debated whether or not to go with the bomb or the fuel tank and the fuel tank won out, so it was assembled as well. 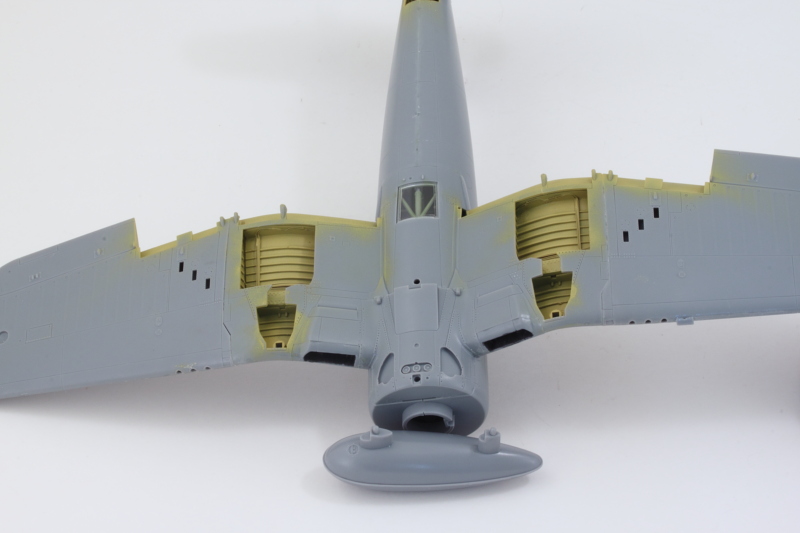 I broke out the Eduard masks and got the canopy parts ready for paint. The Eduard masks were showing their age a little bit...it was a bit of a challenge to get them to fit correctly and the side parts for the main canopy had large oval openings in their middle. The set recommends using liquid mask for those areas but I used the oval cutouts on the sheet that already covered 99% of the opening (I guess the complex curves and stretch that the mask needs to make precludes using the whole thing) and used small pieces of regular masking tape to cover over those seams so nothing would seep through. 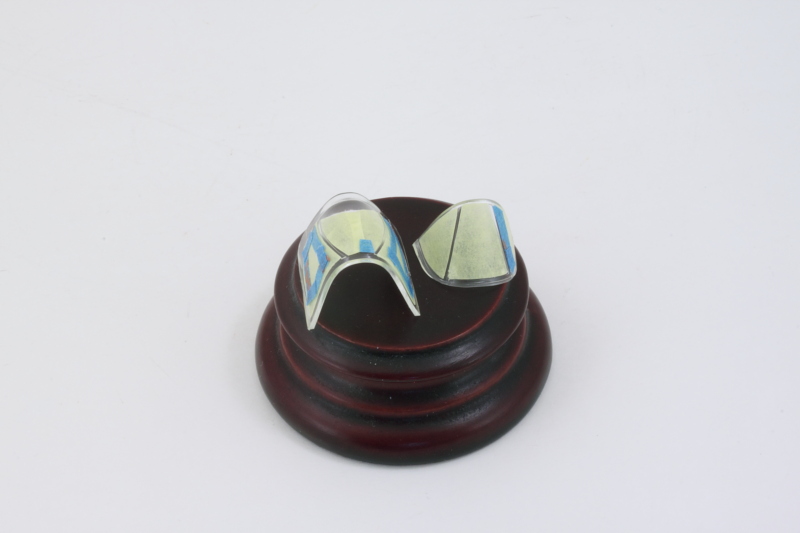 Airbrushed some MM enamel Interior Green first so that the inner frames would show a different color from the outsides. 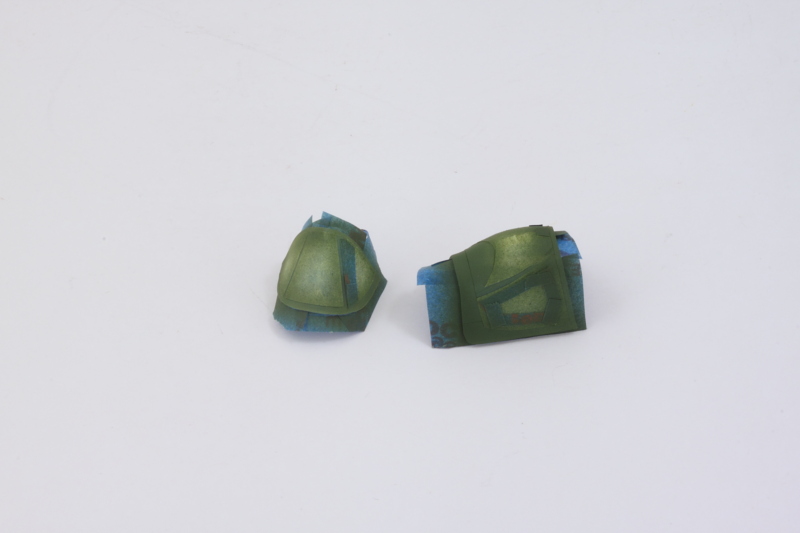 Another airbrush round of Testors enamel Dark Sea Blue provided the exterior color. Masks were removed and a couple of touch-ups here and there were all that were necessary. These will get set off to the side out of harm's way for now. They fit so well on the frame that I can wait and install them at the very end without worrying about filling or paint matching with the fuselage. 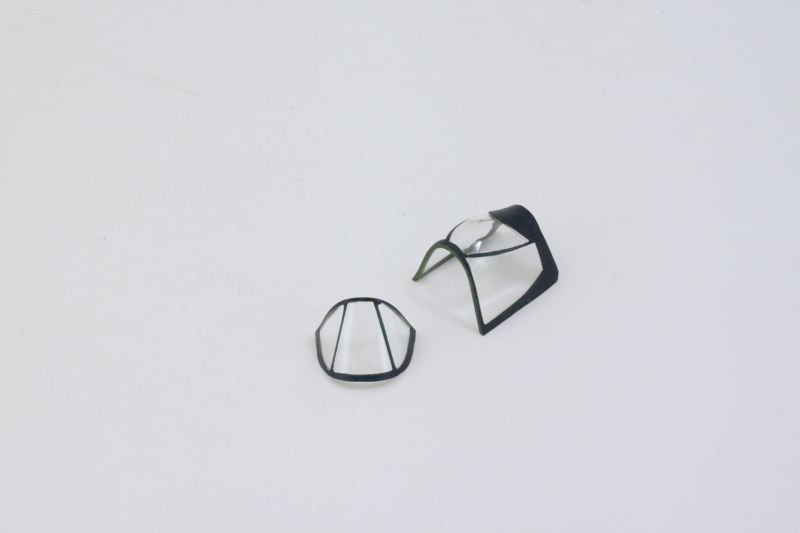 Next up will be a round of pre-shading to give the airbrush another workout. |
|
|
|
Post by Leon on Apr 18, 2016 4:41:27 GMT -5
Wings look great attached Bill,and the canopys look good!  |
|
|
|
Post by wbill76 on Apr 18, 2016 9:45:58 GMT -5
Wings look great attached Bill,and the canopys look good!  Thanks Leon! She's looking like a Corsair now for sure!  |
|
|
|
Post by wbill76 on Apr 18, 2016 22:13:25 GMT -5
Today was a marathon session in the spray booth. First up, a pre-shade treatment using MM enamel Flat Black for all the panel lines. 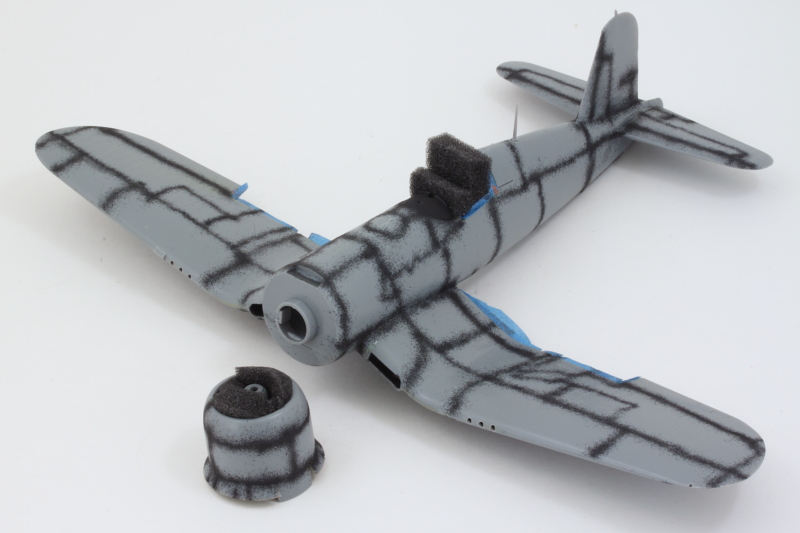 I started in on the three-tone scheme with Dark Sea Blue first. 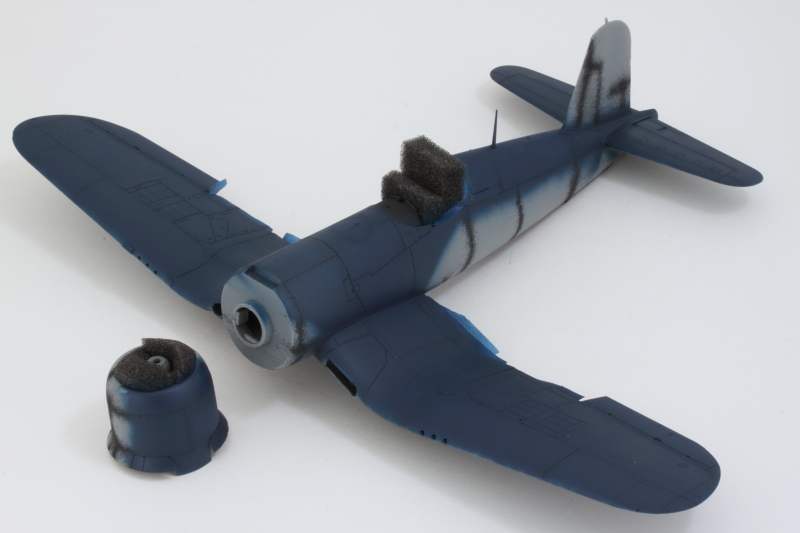 With that foundation in place, I added some MM enamel Light Gray and applied that for some variation. Then I added back in some of the original Dark Sea Blue and blended it back together with the original coat. 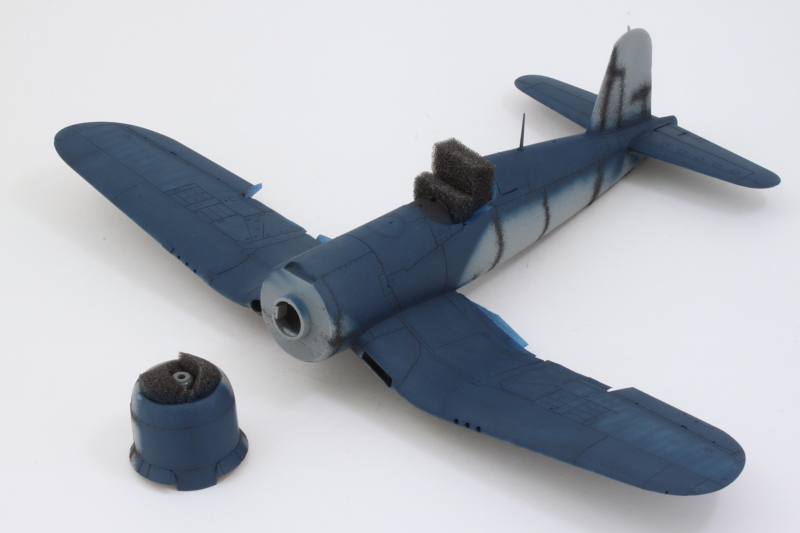 Lots of masking and prep work later, I airbrushed MM enamel Intermediate Blue for the 2nd level. Not pictured because I forgot to stop and take a shot is the use of some blue tack poster putty after the masking tape was pulled off to soften and round off the curves between the two colors around the wing roots. 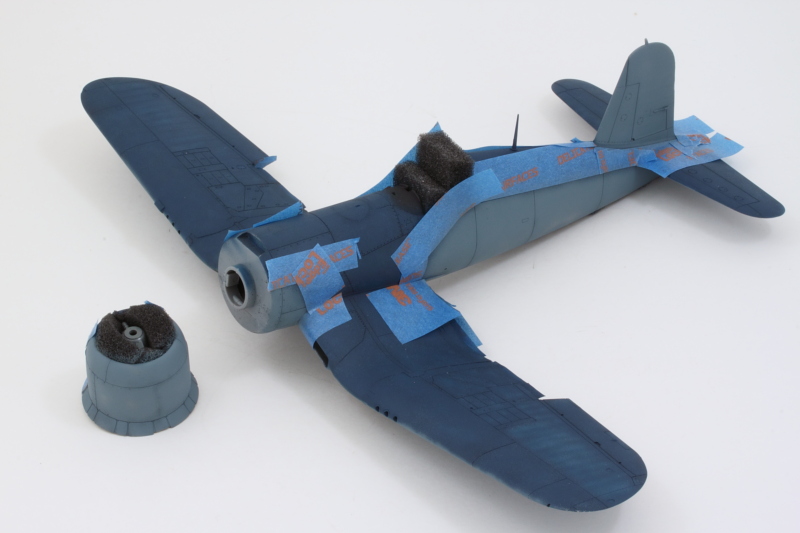 More masking and I airbrushed MM enamel Flat White to the underside for the third color in the pattern. 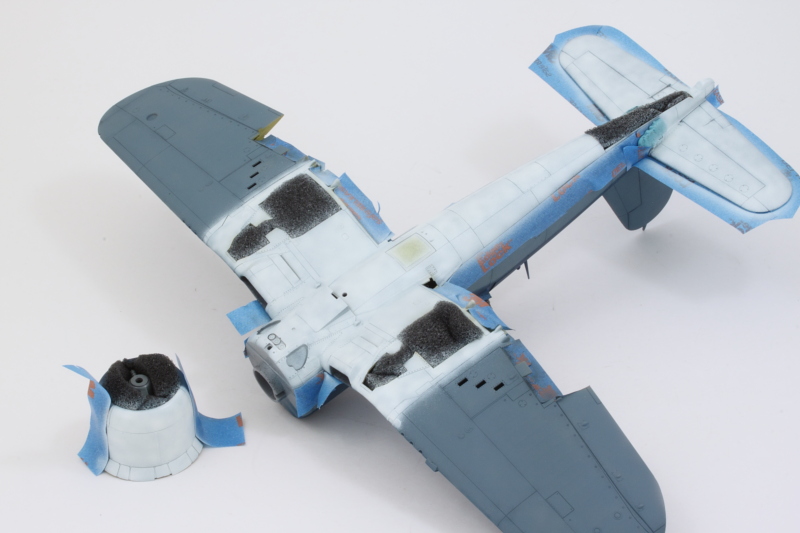 The Flat White is pretty stark all on its own, so I added some MM enamel Light Gray over the top of it to add some variation and tone it down just a touch. 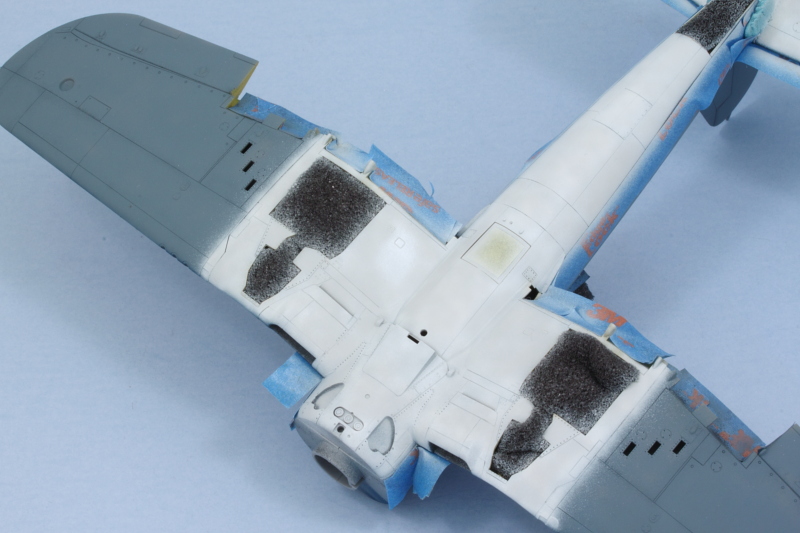 Removed all the masking and will let that sit up overnight. There's a couple of spots where I need to do some touchups along the wing edges and elsewhere, but all-in-all, I'm fairly pleased with where this is heading. 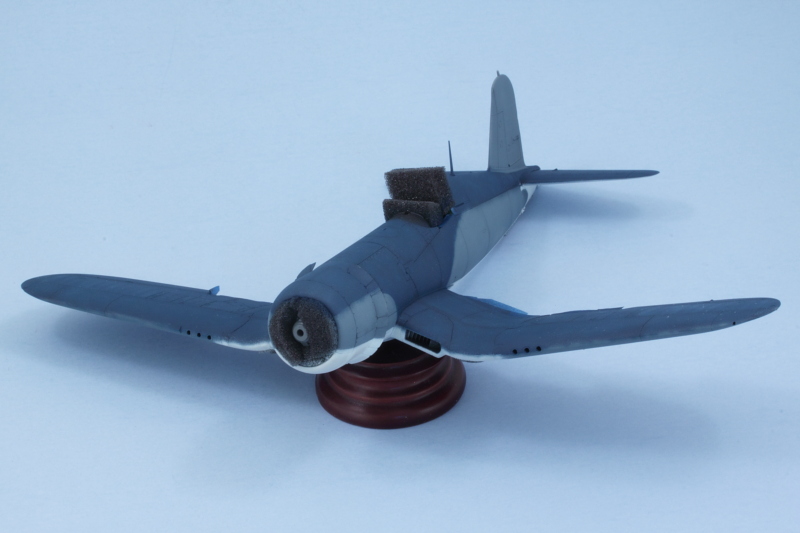 Also not pictured in all of this, I also airbrushed the various flaps and landing gear doors while I had the airbrush loaded up with the appropriate colors. After the touch-ups, I'll be working on the landing gear as the next big step. |
|
martslay
Full Member
  
Member since: February 2016
Posts: 1,113 
|
Post by martslay on Apr 19, 2016 2:30:35 GMT -5
Looks good Bill!. Interesting order of coloring: at first dark color, then light. I paint on the contrary: at first light colors, then dark.
|
|
|
|
Post by wbill76 on Apr 19, 2016 9:44:15 GMT -5
Looks good Bill!. Interesting order of coloring: at first dark color, then light. I paint on the contrary: at first light colors, then dark. Normally I would too, but in this case it was easier to work top to bottom given how the scheme was structured, so had to think a little different.  |
|
|
|
Post by dierk on Apr 19, 2016 10:23:56 GMT -5
Very nice Bill! OK, that's it - I'm off to do some paint-chucking of my own.
|
|
|
|
Post by Leon on Apr 19, 2016 10:41:58 GMT -5
Looking really good Bill!
|
|
|
|
Post by wbill76 on Apr 19, 2016 13:57:58 GMT -5
Thanks Leon! Dierk, it's always a good day for painting! About to get some more work in myself.  |
|
|
|
Post by wing_nut on Apr 19, 2016 14:32:39 GMT -5
WOOHOO PAINT!
Nice.
|
|
|
|
Post by wbill76 on Apr 19, 2016 14:49:50 GMT -5
Thanks Marc! Always fun to gun sling with the airbrush...even if it comes at a somewhat physical cost with the hand cramping.  |
|
|
|
Post by wing_nut on Apr 19, 2016 16:47:48 GMT -5
get a pistol grip AB. No more cramps for me.
|
|
|
|
Post by wbill76 on Apr 19, 2016 17:32:45 GMT -5
get a pistol grip AB. No more cramps for me. Normally that's not an issue...this time around it was more the total time involved in the day's session than anything else!  |
|
|
|
Post by wbill76 on Apr 19, 2016 17:33:01 GMT -5
After a round of touch-ups and small adjustments in different places (mostly around the tail), I removed all of the masking and foam protection from the various spots. Only a few places around the cockpit needed some touch-up work, so that's always a plus. I went ahead and installed the engine and cowl permanently in place now that the need to have it separate was gone. The gunsight was also detailed and placed for good measure. 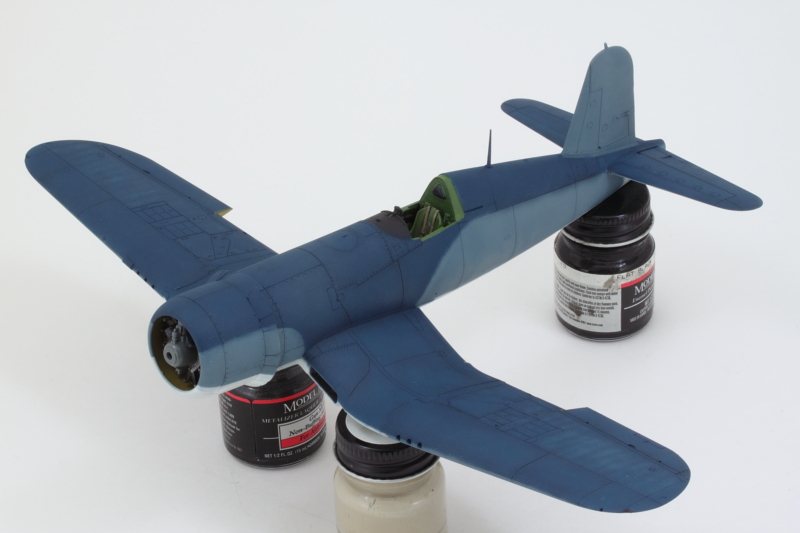 All the flaps were installed and the underside got some additional details like the exhaust pipes and some soot staining courtesy of black artist pastels. I picked out the wing lights with Tamiya Clear Red, Green, and Orange as called out in the instructions. 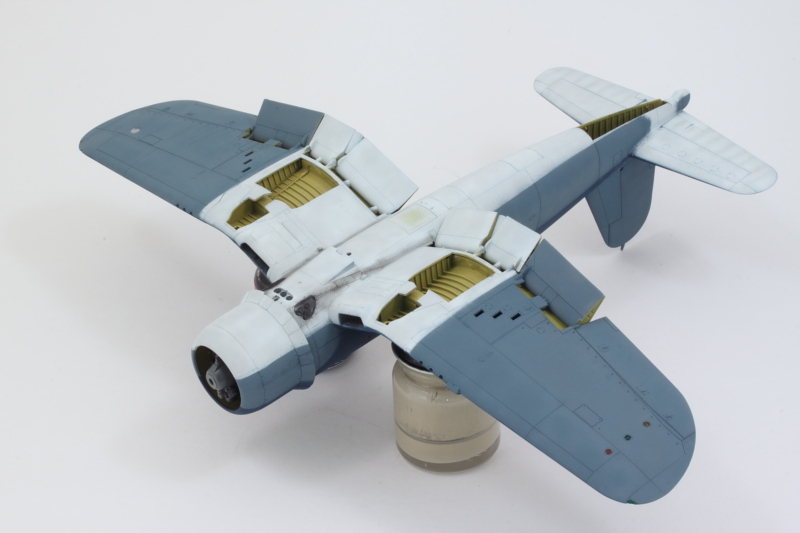 That clears the decks for me to work on the landing gear so I can get it up on its own legs. |
|
|
|
Post by Leon on Apr 19, 2016 17:54:26 GMT -5
Looking sharp as a tack Bill!  Looking forward to seeing her legs on.  |
|
|
|
Post by wbill76 on Apr 19, 2016 18:26:19 GMT -5
Looking sharp as a tack Bill!  Looking forward to seeing her legs on.  Me too Leon, it's tough keeping it off the ground in the meantime.  |
|
Rick
Full Member
  
Member since: March 2013
what to build, what to build . . . Ok THAT one!
Posts: 854 
|
Post by Rick on Apr 19, 2016 19:21:49 GMT -5
Nice work Bill! Wish I could build 'em as fast as your getting it done. Looking forward to your finishing touches
Rick
|
|
|
|
Post by wbill76 on Apr 19, 2016 19:24:56 GMT -5
Nice work Bill! Wish I could build 'em as fast as your getting it done. Looking forward to your finishing touches Rick I have a break in teaching my classes, otherwise this would be a little slower.  Finishing touches are a little way off just yet. Still a lot to go, especially the markings.  |
|
|
|
Post by wbill76 on Apr 22, 2016 20:54:26 GMT -5
I've been working steadily on the most intricate part of this whole build, the landing gear. The Eduard set provides a lot of nice little details for the main gear as well as the tail wheel but some of that also requires surgery to remove portions of the kit parts and replace them with the PE stuff. On the tail wheel, I added in the structural support details and drilled out the lightening holes that the PE depicted but which aren't there on the solid kit part. A lot of this disappears up inside the tail but it still upped the detail level overall a good bit. 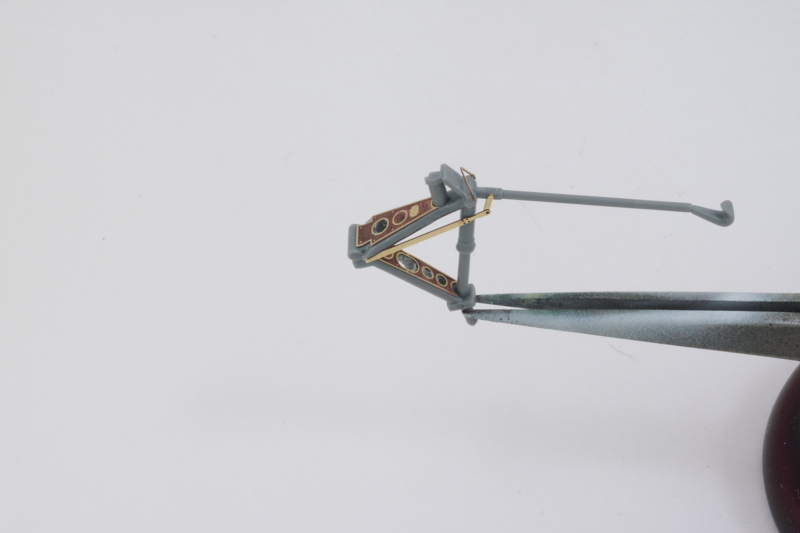 I hand painted the different components and details and airbrushed the tail wheel itself using the Eduard masks to assist. Then the rest of the wheel structure was assembled to create the whole unit that installs into the tail. 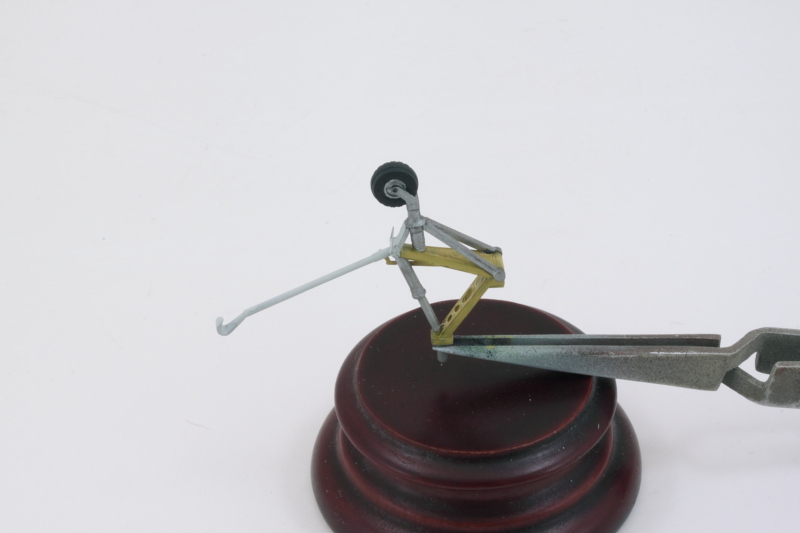 The main gear also got some attention. The Eduard set provided replacement scissor joints, brake lines, and door hinge's springs. More hand painting and detailing and airbrush work on the main wheels got those units together as well. 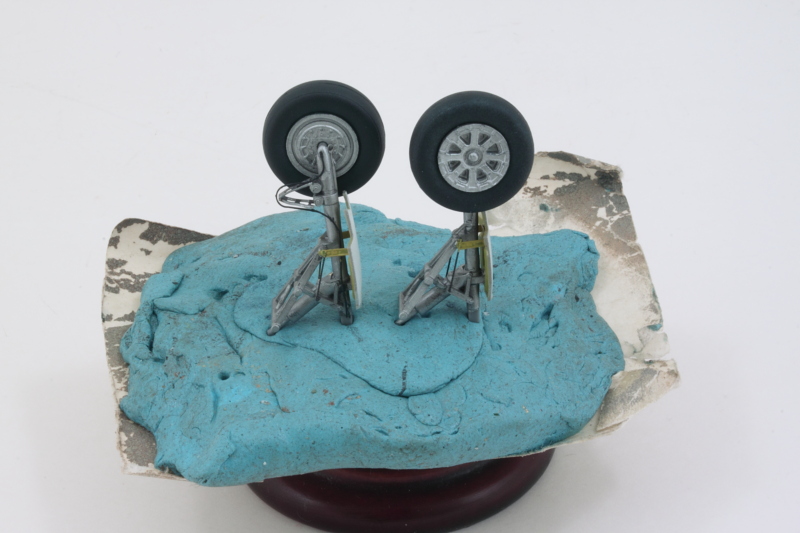 Moment of truth arrived and I added in the gear doors and installed all the gear into place along with the drop tank. Flipped it over and used some small bottles of paint to brace the gear while the glue set so that it would maintain a level stance. 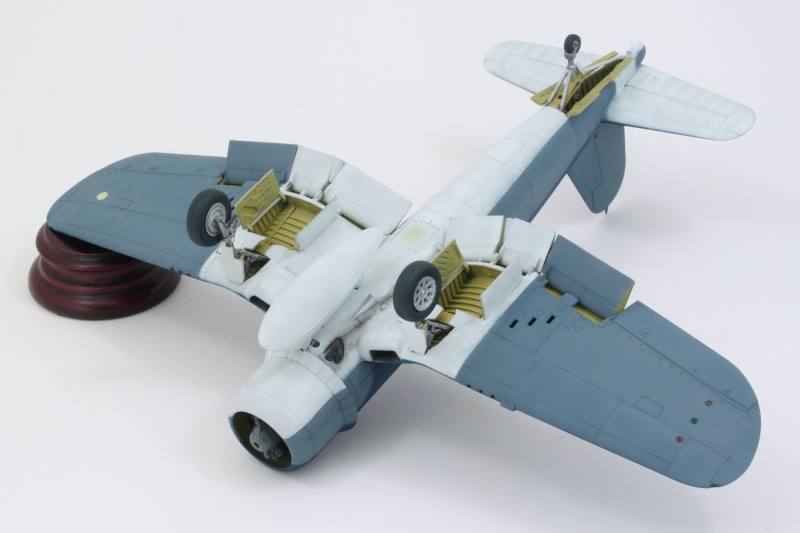 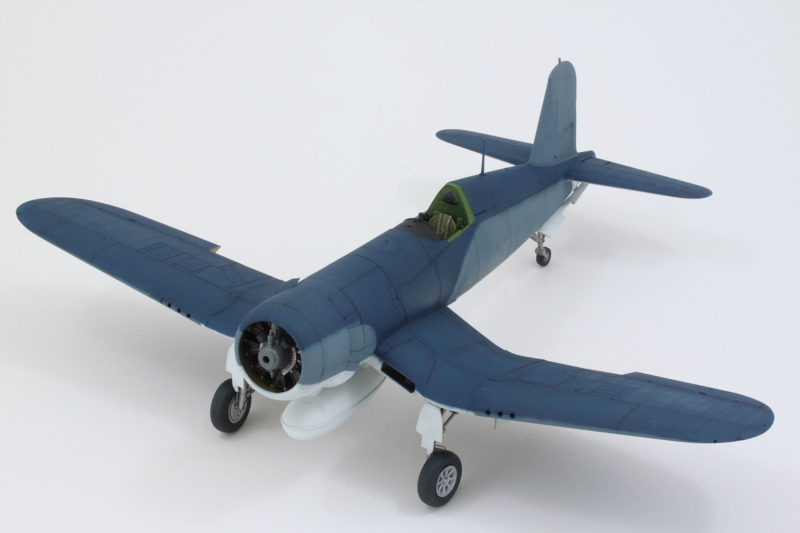 Will spend some time on the prop next and then it will be ready to start the decal process. |
|
afvfan
Senior Member
   
Member since: December 2012
Bob
Posts: 1,772
Dec 10, 2012 17:32:38 GMT -5
Dec 10, 2012 17:32:38 GMT -5
|
Post by afvfan on Apr 22, 2016 21:25:15 GMT -5
It's a bird. It's a plane. It's ..... oh, it's a plane.  Sorry, that looks so good, I got carried away.  |
|
|
|
Post by wbill76 on Apr 22, 2016 21:58:17 GMT -5
It's a bird. It's a plane. It's ..... oh, it's a plane.  Sorry, that looks so good, I got carried away.  Thanks Bob, wingy things can do that to you!  |
|
martslay
Full Member
  
Member since: February 2016
Posts: 1,113 
|
Post by martslay on Apr 23, 2016 1:21:07 GMT -5
Beautifully!  |
|
|
|
Post by wouter on Apr 23, 2016 2:22:41 GMT -5
You know what's so annoying concerning your builds, Bill? They make you wanna do something different. Now I want to do a plane again  Won't happen soon though LOL. Great paintwork I must say, really looks good. And those wheels and their struts, that's something worth extra detailing indeed! Lovely work  Cheers |
|
|
|
Post by dierk on Apr 23, 2016 3:14:07 GMT -5
Stunning paint Bill! Always happy to learn something new, I have heard of face-, finger- and brush-painting, but how does hand painting work?   |
|
|
|
Post by wing_nut on Apr 23, 2016 6:40:00 GMT -5
SCHWING!
|
|
|
|
Post by Leon on Apr 23, 2016 6:59:32 GMT -5
Nice work on the landing gear Bill!  The corsair looks good on it's feet.  |
|