|
|
Post by Leon on May 2, 2016 20:41:02 GMT -5
The palm tree is a great addition Bill!  The base really has that tropical look now.  |
|
|
|
Post by Tojo72 on May 2, 2016 20:47:33 GMT -5
Really great scene coming along,looking forward to the figure.
|
|
|
|
Post by wbill76 on May 2, 2016 22:46:28 GMT -5
Thanks Leon, just need some Hawaiian music in the background!  Anthony Anthony, pilot dude is patiently waiting for me to hurry up and finish his bird so he can stop hanging out in the plastic storage bin!  |
|
martslay
Full Member
  
Member since: February 2016
Posts: 1,113 
|
Post by martslay on May 3, 2016 0:22:42 GMT -5
Very, very, very nice! Bat, can be to add several shades on fuel barrels? They will look not monotonously.
|
|
|
|
Post by wbill76 on May 3, 2016 11:27:31 GMT -5
Very, very, very nice! Bat, can be to add several shades on fuel barrels? They will look not monotonously. Thanks Martin! Barrels are done and permanently attached to the base now, so no more work can be done with them. They've been hard to photograph to capture their in-person subtleties...but they do have different shades on them, several in fact. |
|
|
|
Post by wbill76 on May 3, 2016 19:04:30 GMT -5
Finally got a start on the weathering process for the Corsair today. I started on the Sea Blue portions first and applied a dot filter using Light Gray, Intermediate Blue, and the lightened Dark Sea Blue mix airbrushed previously. I worked in small sections at a time and used different sized square tip brushed in various spots to create variation in the finish. 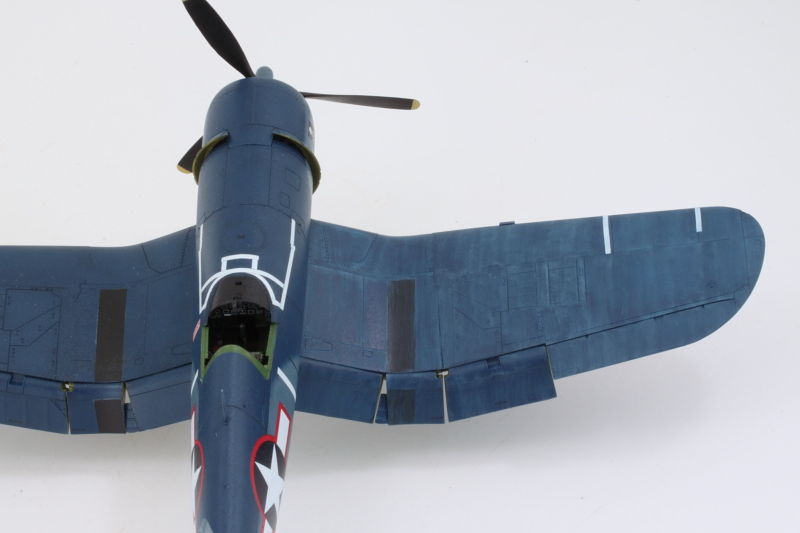 After a few hours, I got all the dark blue areas covered. Photos of Solomons Corsairs invariably show a lot of dust/fading, so that's what I was aiming to capture. I will be coming back over the panel lines to draw them back out a bit more as well. 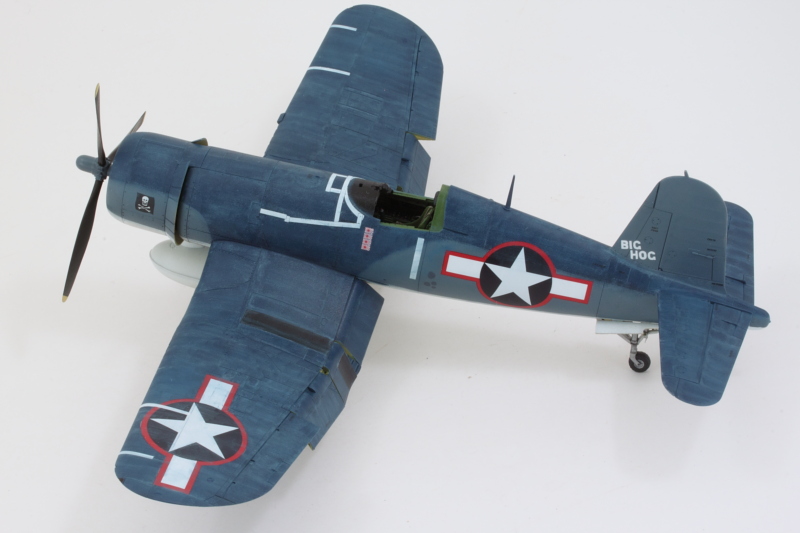 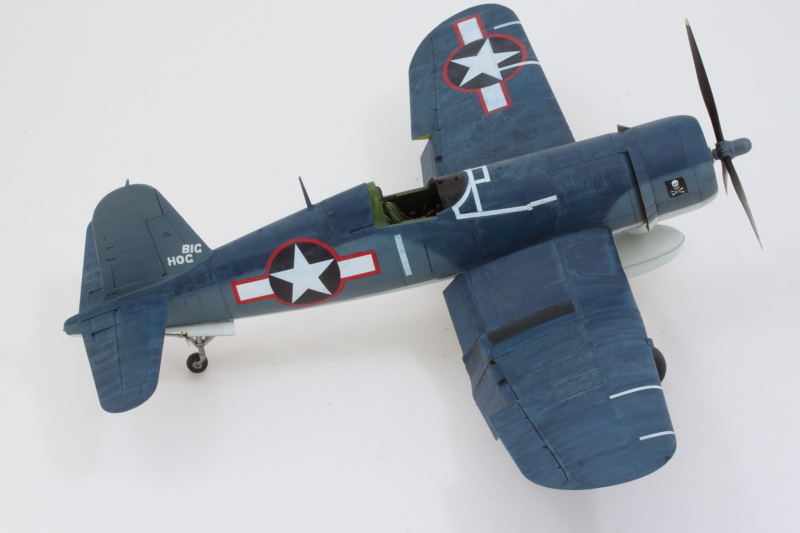 Still a ways to go but I've entered the final lap on this project.  |
|
|
|
Post by Leon on May 3, 2016 19:43:11 GMT -5
Great work on the dot filters Bill!  You really achieved that faded look.  |
|
|
|
Post by wbill76 on May 3, 2016 20:42:50 GMT -5
Thanks Leon! One of those rare moments where the mental image got reproduced on the first try.  |
|
martslay
Full Member
  
Member since: February 2016
Posts: 1,113 
|
Post by martslay on May 4, 2016 1:13:44 GMT -5
Aging has well turned out  I wait for continuation. |
|
|
|
Post by wing_nut on May 4, 2016 6:29:47 GMT -5
WOW that really turned out nice. Beautifully uneven dusty, salty look.
|
|
|
|
Post by wouter on May 4, 2016 6:40:54 GMT -5
Nice start on the weathering, that looks very cool indeed. And I like that palmtree as an addition. Quite like how you have done it.
Cheers
|
|
|
|
Post by wbill76 on May 4, 2016 9:37:38 GMT -5
Thanks Martin and Marc! Nice start on the weathering, that looks very cool indeed. And I like that palmtree as an addition. Quite like how you have done it. Cheers Thanks Wouts! The Internet is a great place for finding ways to try out. At first I was thinking a palm tree would be out of the question due to the complexity and cost of adding an AM one, but modelers are resourceful around the world, so I didn't have to reinvent the wheel.  |
|
|
|
Post by wbill76 on May 5, 2016 19:02:22 GMT -5
More progress on the weathering front. The undersides got their share of attention although once placed on the base, you would need a dental mirror to see much of it. I applied an overall Raw Umber wash to the underside and then adjusted that with a square-tipped brush and clean thinner. On the Intermediate Blue areas, I did some fading with Light Gray as a dot filter in addition to the Raw Umber. 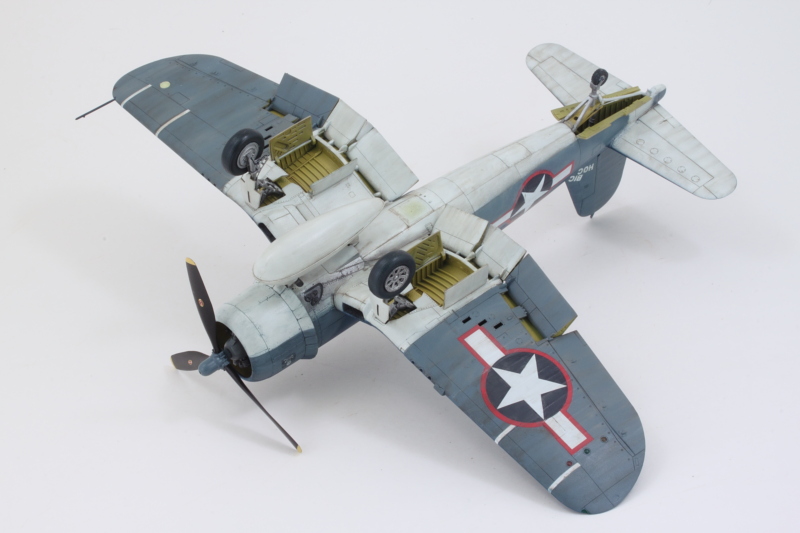 I applied a pin wash using a pointed 18/0 brush and thinned enamel Burnt Umber to get the panel lines and other details to pop. Same brush and clean thinner tightened it up where needed. 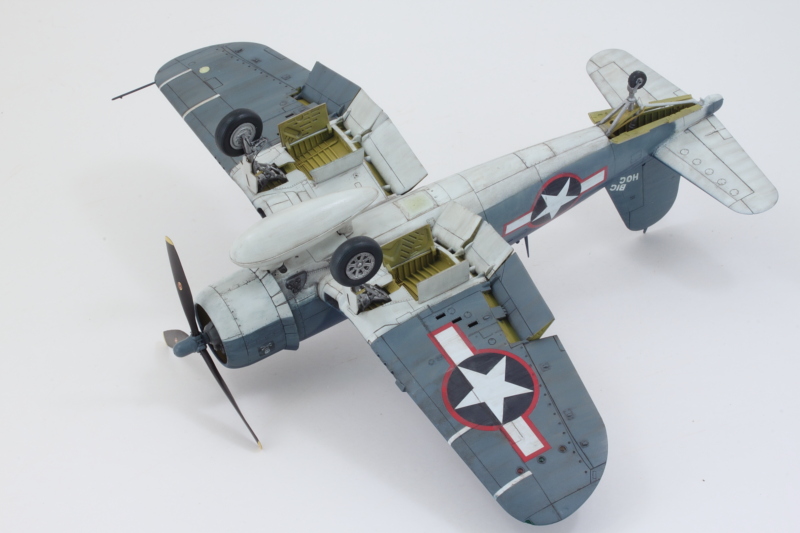 The same process was applied to the topside to complement the previous fading/weathering done to the sea blue areas in particular. 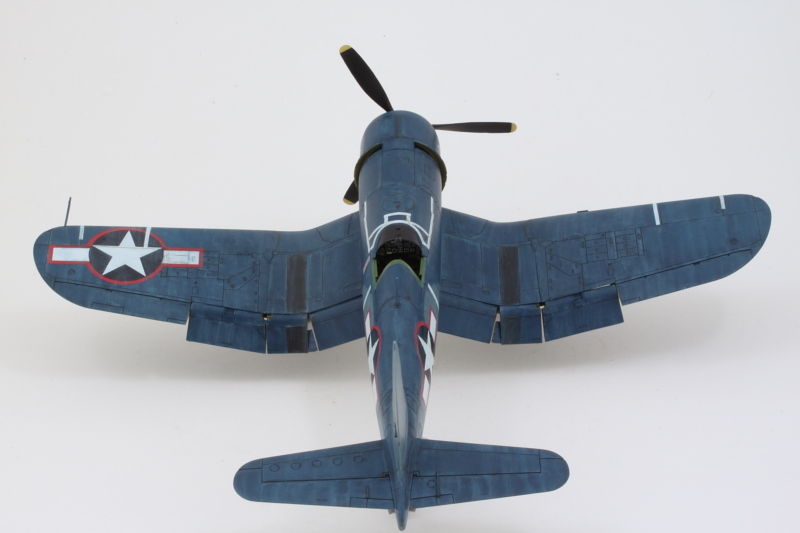 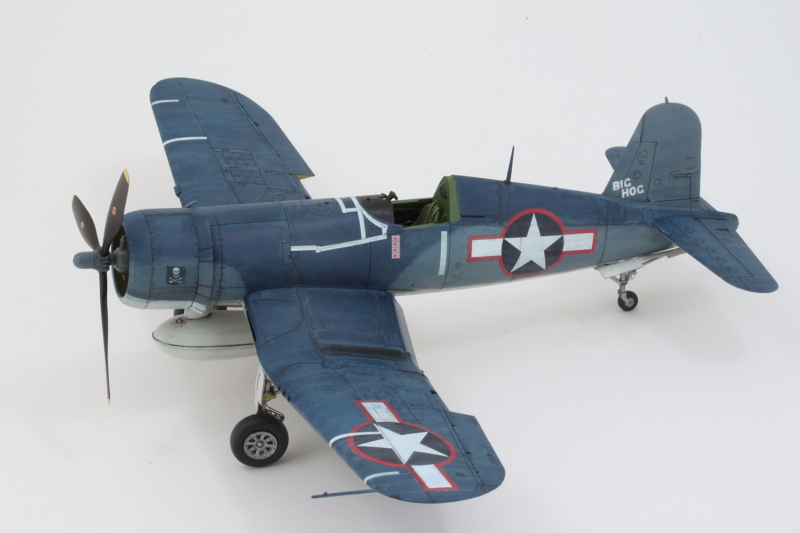 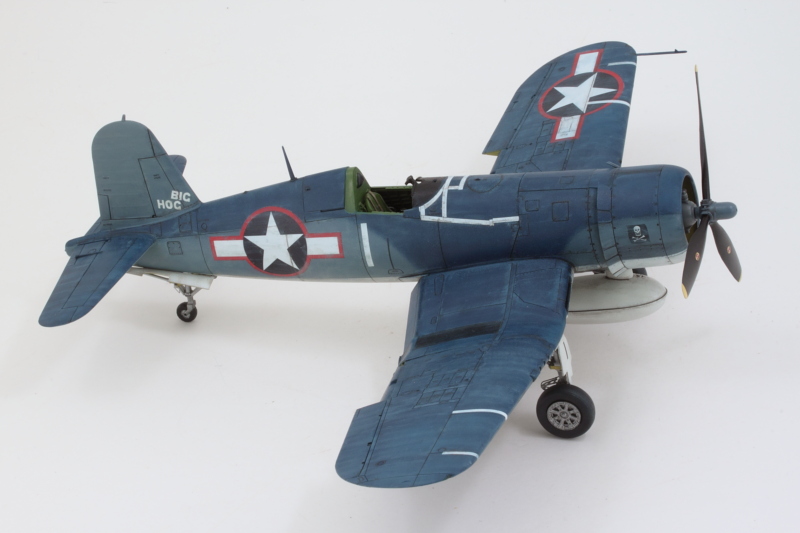 I'll let that sit overnight and see if I need to make any adjustments before sealing it all in. Heading down the home stretch now! |
|
|
|
Post by wing_nut on May 5, 2016 19:39:08 GMT -5
Oh my!  |
|
|
|
Post by wbill76 on May 5, 2016 19:46:43 GMT -5
Oh my!  I'll take that as a sign you're intending to beat Andy to the punch this time Marc?  |
|
martslay
Full Member
  
Member since: February 2016
Posts: 1,113 
|
Post by martslay on May 6, 2016 1:58:02 GMT -5
Bill, what to tell you... I have only one word: Perfectly!
|
|
|
|
Post by wing_nut on May 6, 2016 7:39:56 GMT -5
Oh my!  I'll take that as a sign you're intending to beat Andy to the punch this time Marc?  Yup, down on one knee...  |
|
|
|
Post by wbill76 on May 6, 2016 10:23:22 GMT -5
Thanks Martin! Almost done with it now.  |
|
|
|
Post by Leon on May 6, 2016 11:09:45 GMT -5
Great weathering as usual Bill!
|
|
|
|
Post by wbill76 on May 6, 2016 11:16:31 GMT -5
Thanks Leon! It's always fun when you can apply armor-related techniques to a wingy build!  |
|
|
|
Post by wbill76 on May 6, 2016 19:05:48 GMT -5
|
|
|
|
Post by Leon on May 6, 2016 19:20:59 GMT -5
Another outstanding finish Bill! Everything looks great.  |
|
|
|
Post by wbill76 on May 6, 2016 19:37:36 GMT -5
Thanks Leon! Had a blast with this one from start to finish...it kind of took on a life of its own!  |
|
|
|
Post by wing_nut on May 6, 2016 20:19:49 GMT -5
SCHA-WING
|
|
martslay
Full Member
  
Member since: February 2016
Posts: 1,113 
|
Post by martslay on May 7, 2016 1:50:21 GMT -5
I congratulate on the next fine work, Bill! Looks remarkable!  |
|
|
|
Post by armorguy on May 7, 2016 7:14:22 GMT -5
Bill you did it again !!!
|
|
|
|
Post by mustang1989 on May 7, 2016 10:07:39 GMT -5
I really like all the weathering efforts you put into this one Bill. And that's not to mention the display base/ diorama. I could sit and look at stuff like this for hours!
|
|
|
|
Post by wbill76 on May 7, 2016 11:46:01 GMT -5
Thanks Marc, Martin, and AG, appreciate the comments.  I really like all the weathering efforts you put into this one Bill. And that's not to mention the display base/ diorama. I could sit and look at stuff like this for hours! Thanks Joe! It kind of took on a life of its own, it originally was just going to be the plane itself as a quick little project. Then I found the photos and it changed everything.  Had a blast with it for sure, but at a square foot in total size, definitely a real estate hog!  |
|
|
|
Post by wing_nut on May 7, 2016 12:34:28 GMT -5
Sorry, just realized that was wrong. Should've been... SCHA-GULL-WING  |
|
|
|
Post by mustang1989 on May 7, 2016 14:59:13 GMT -5
Thanks Marc, Martin, and AG, appreciate the comments.  I really like all the weathering efforts you put into this one Bill. And that's not to mention the display base/ diorama. I could sit and look at stuff like this for hours! Thanks Joe! It kind of took on a life of its own, it originally was just going to be the plane itself as a quick little project. Then I found the photos and it changed everything.  Had a blast with it for sure, but at a square foot in total size, definitely a real estate hog!  I understand EXACTLY what your talking about. lol |
|