|
|
Post by panzerjager2 on Nov 30, 2016 2:13:59 GMT -5
WOW really nice work
|
|
|
|
Post by wbill76 on Nov 30, 2016 8:06:58 GMT -5
Thanks PJ! Bill's back! That interior looks niiiiiiiiiiice.  Kind of back...hopefully more to come over the Christmas break. The real trouble is getting a solid enough block of time to do anything during the regular week while also having the energy/focus to actually do anything!  |
|
|
|
Post by Tojo72 on Nov 30, 2016 10:10:43 GMT -5
Coming around nicely Bill
|
|
|
|
Post by wbill76 on Nov 30, 2016 19:58:45 GMT -5
Thanks Anthony, trying to keep it rolling in the right direction.  |
|
Rick
Full Member
  
Member since: March 2013
what to build, what to build . . . Ok THAT one!
Posts: 854 
|
Post by Rick on Dec 1, 2016 19:58:36 GMT -5
Exquidite detailing Bill. Looking forward to the halves coming together
|
|
|
|
Post by wbill76 on Dec 1, 2016 20:27:57 GMT -5
Exquidite detailing Bill. Looking forward to the halves coming together Thanks Rick! Hopefully they won't take too much coercion to join up properly.  |
|
|
|
Post by dierk on Dec 3, 2016 5:33:17 GMT -5
Clicked on the thread in to hope of finding an update...nah, just more blah   |
|
|
|
Post by wbill76 on Dec 3, 2016 11:40:05 GMT -5
Clicked on the thread in to hope of finding an update...nah, just more blah   Sorry for the click bait Dierk...but you know how that goes when it comes to people cycling through!  |
|
|
|
Post by dierk on Dec 3, 2016 13:10:30 GMT -5
Clicked on the thread in to hope of finding an update...nah, just more blah   Sorry for the click bait Dierk...but you know how that goes when it comes to people cycling through!  You git! You've done it again!   Twice in one day! |
|
joelsmith
Full Member
  
Member since: July 2012
There no winners in war, only survivors.
Posts: 1,404
Jul 5, 2012 22:33:58 GMT -5
Jul 5, 2012 22:33:58 GMT -5
|
Post by joelsmith on Dec 3, 2016 16:29:11 GMT -5
Bill, did you use "dull dark green" instead of "interior green"? The reason I ask is that the interior looks really dark. I remember a post from the distant past on Hyperscale stating that the primary primer color was "zinc chromate yellow" with the middle shade "interior green" prescribed for the cockpit. The ZCY can be obtained in the square 1/4 oz. Testors bottles, and the interior green is in the Model Master line. HTH, Joel.
|
|
|
|
Post by wbill76 on Dec 3, 2016 16:35:36 GMT -5
Bill, did you use "dull dark green" instead of "interior green"? The reason I ask is that the interior looks really dark. I remember a post from the distant past on Hyperscale stating that the primary primer color was "zinc chromate yellow" with the middle shade "interior green" prescribed for the cockpit. The ZCY can be obtained in the square 1/4 oz. Testors bottles, and the interior green is in the Model Master line. HTH, Joel. I used the MM enamel interior green but over a primer coat of Flat Black to provide some depth and shading, so that's likely why it's appearing darker vs. how it would look straight out of the bottle.  |
|
joelsmith
Full Member
  
Member since: July 2012
There no winners in war, only survivors.
Posts: 1,404
Jul 5, 2012 22:33:58 GMT -5
Jul 5, 2012 22:33:58 GMT -5
|
Post by joelsmith on Dec 3, 2016 21:28:10 GMT -5
OK, just wondering. Talk more soon, Joel.
|
|
|
|
Post by mustang1989 on Dec 4, 2016 9:11:55 GMT -5
I've been missin' out on this one. Detail looks good Bill.
|
|
|
|
Post by dierk on Dec 4, 2016 11:41:45 GMT -5
tappedy, tappedy, TAP !!!!
|
|
|
|
Post by wbill76 on Dec 4, 2016 13:03:59 GMT -5
I've been missin' out on this one. Detail looks good Bill. Thanks Joe! I'm impressed with the Eduard set, first time using that type of stuff. |
|
|
|
Post by wbill76 on Dec 23, 2016 20:35:09 GMT -5
Holiday break started this past week so that meant I could get some time in on the Black Widow project again. Since I need to airbrush Yellow Chromate for the landing gear bays, I decided to get the wings together and prep the twin booms for that. The wings go together fairly smoothly but since they trap the flaps and ailerons in a design to keep them movable, it makes getting it all together a little tricky. I used a combination of regular glue on the inside contact surfaces followed by liquid glue on the external edges and clamps to hold it all together while the glue set. 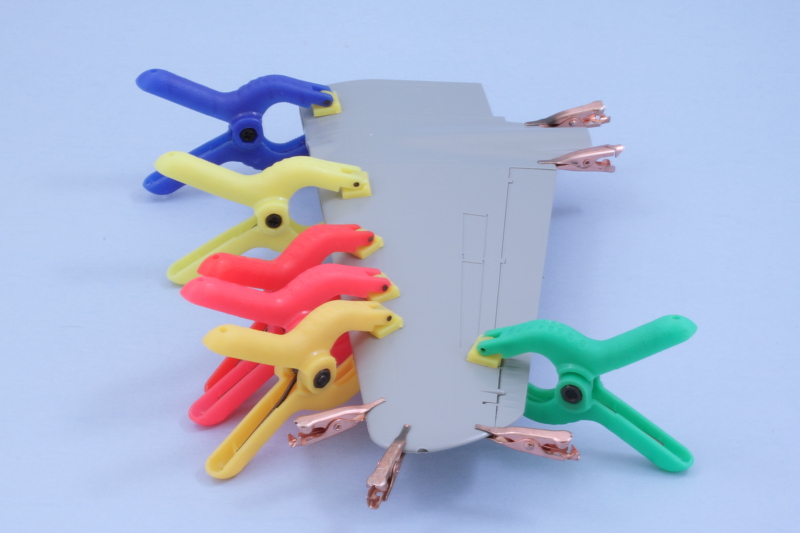 Some light sanding cleaned up the seam edges and I added the oil cooler inserts and the PE air brake flaps in the closed position since these would only be open while in the air. The PE parts have angled supports that have to be removed to install them in the closed position, easily done by using the etched bend line and bending them more than once until the ends come free. I also assembled the rear elevator section and the two small flap portions that install between the crew pod and the tail booms. 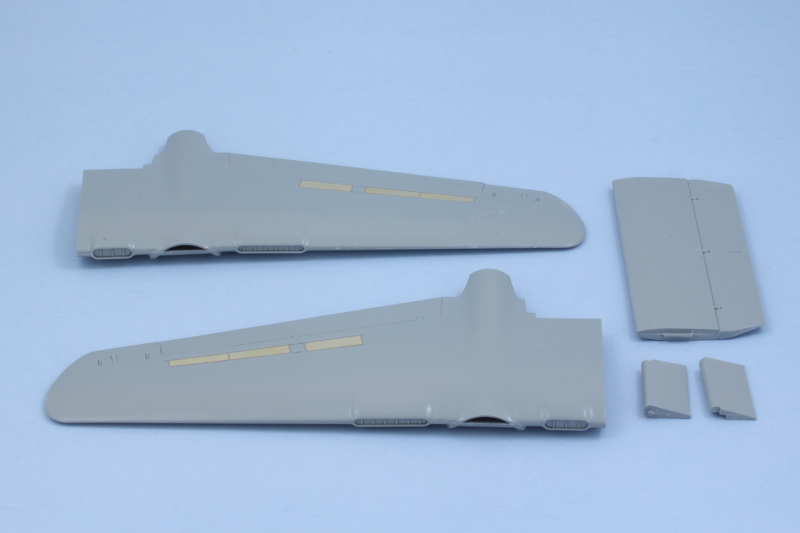 Speaking of the booms, I cleaned up the halves for each boom and assembled the main landing gear bays that go with them. After some test fits, I decided to install the bays in the boom half opposite the narrow section that the gear strut installs into so I could still access everything for painting and also be able to install the strut later on without interference. There were some tricky ejector marks that had to be removed with a round needle file to allow the bay bulkheads to install correctly and also remove some marks that will still be visible with the gear doors open. 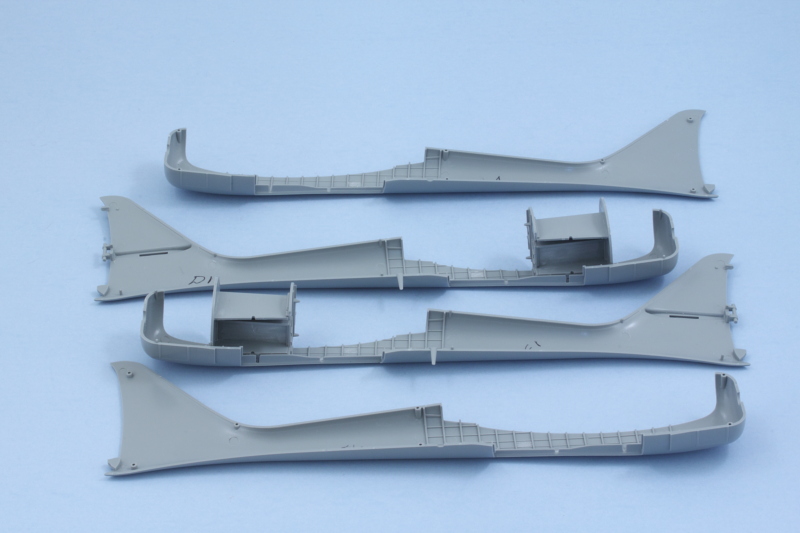 Last, but not least, I cleaned up all the gear bay doors for the main gear and nose gear so they could get their dose of Yellow Chromate as well. 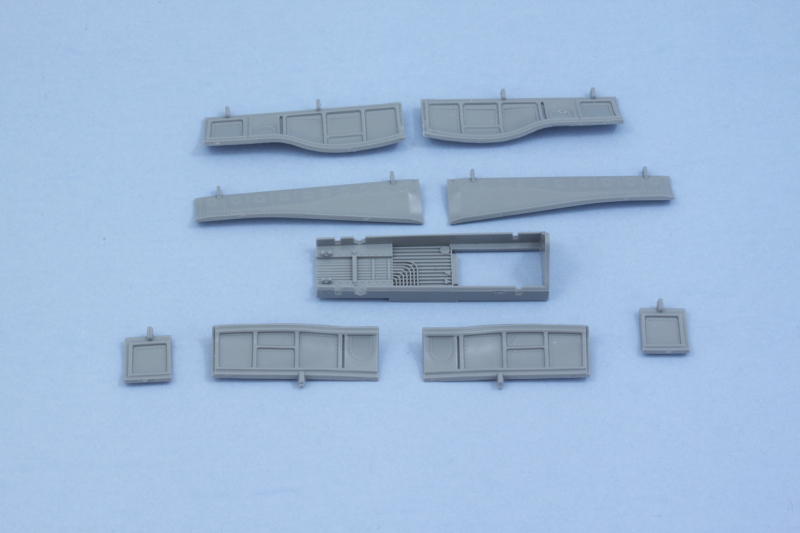 One thing's for sure, this Widow is going to be on the heavy side once it's all put together!  |
|
|
|
Post by TRM on Dec 23, 2016 21:32:28 GMT -5
Woo Hoo...Holiday break!! Using your time wisely I see, Bill! All clean and ready to go!!  Merry Christmas to you Sharron and Brenda my friend! |
|
|
|
Post by Leon on Dec 23, 2016 21:56:54 GMT -5
Nice to see you getting bench time on the widow Bill! Things are looking good.  Happy holidays to you and Sharon.  |
|
|
|
Post by dierk on Dec 24, 2016 6:14:25 GMT -5
HA!  |
|
|
|
Post by deafpanzer on Dec 24, 2016 10:56:19 GMT -5
Looking good! Figured you will be back on it during your winter break. Good having you back!
Merry Christmas buddy!
|
|
|
|
Post by wbill76 on Dec 24, 2016 12:45:45 GMT -5
Todd, have to do what I can in the window available...have through Jan 4th, may even be able to finish it depending!  Merry Christmas to you and the whole Michalak clan!  Leon Leon, happy holidays to you as well! Always good when you can sneak in some gluing in between the usual holiday stuff.  Dierk Dierk, hope those fingers are still in good shape after all that tapping!  Merry Christmas! Andy, Merry Christmas to you as well buddy! Off to go see Rogue One for the second time, this time in XD 3D with a theater virtually all to ourselves! 
|
|
|
|
Post by wbill76 on Dec 25, 2016 14:07:38 GMT -5
Merry Christmas everyone! I decided to hold off on the airbrush work just a bit since there are some other parts that can benefit from a session and I'm always a believer in maximizing the paint time for obvious reasons. To that end, I spent some effort on getting the engines together and cleaning up the cowls and flaps. I decided to go with the open cowl flap option since the kit gives you the choice of different separate flap parts for either open or closed. The engine crankcases were also assembled and cleaned up and the one-piece propeller/spinner combinations were also dealt with. Can't say I'm 100% thrilled with GWH's choice to go that route with the props, but it is what it is. There was a slight mold seam/shift between the prop blades where they meet the spinner due to the pitch on the blades that had to be carefully sanded down while preserving the curve on the spinner that was a little tricky. Sanding twigs to the rescue! 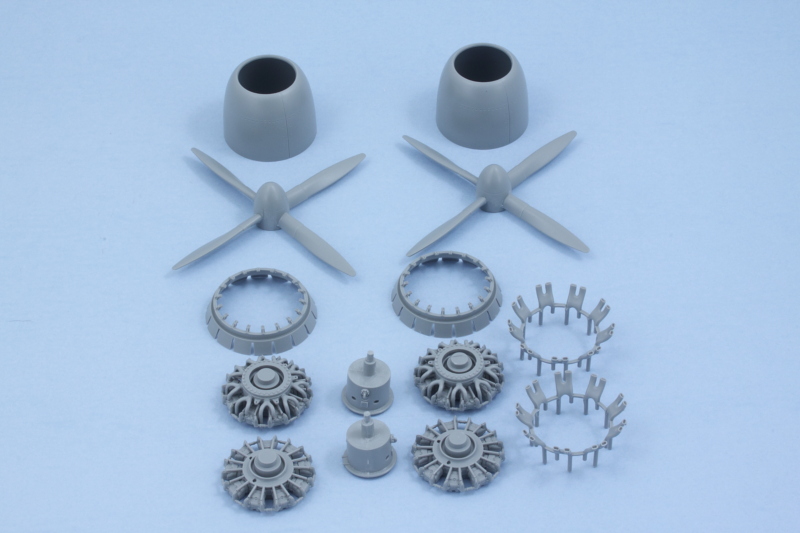 The engines possess a pretty nice level of detail in the molded parts but virtually all of it gets hidden away inside the cowls once it's all put together and in place on the mount booms. A test fit with the exhaust pipes also shows that their fit is pretty tight and I'll have to slightly sand down/trim the pipes to be able to slide in place properly. Either that or just cut down the longer pipes since they will be totally invisible once installed, have to decide which way I want to go. |
|
|
|
Post by Leon on Dec 25, 2016 14:50:50 GMT -5
Nice progress on getting the engines cleaned up Bill!  |
|
M1Carbine
Senior Member
    November '23 Showcased Model Awarded
Member since: November 2012
Posts: 1,730
Nov 16, 2012 2:49:11 GMT -5
Nov 16, 2012 2:49:11 GMT -5
|
Post by M1Carbine on Dec 25, 2016 23:05:29 GMT -5
Wow, wow and wow,
Bob
|
|
|
|
Post by wbill76 on Dec 26, 2016 10:57:53 GMT -5
Thanks Leon and Bob!
|
|
|
|
Post by wbill76 on Dec 26, 2016 22:01:01 GMT -5
Made the most of the airbrush session today, laying down a primer coat of MM enamel Flat Black to all the areas that needed Yellow Chromate plus the props and engine cowl flaps that will get a dose of Red later on. For the Yellow Chromate, I used the standard Testors enamel color in the little square bottle properly thinned and sprayed through the airbrush over the Flat Black in thin coats to allow the Flat Black to work as a pre-shade as well. 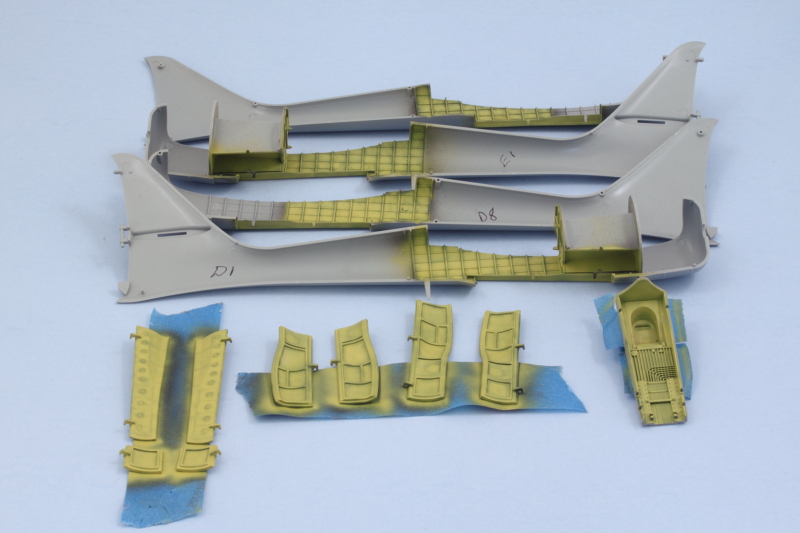 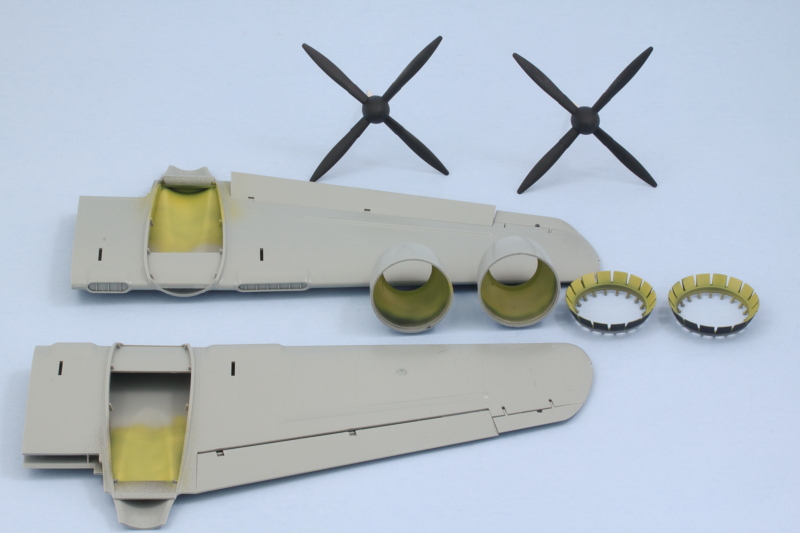 With that out of the way, I added the cockpit instrument panels that I'd left off previously and permanently installed all of the interior components into the fuselage pod on the right side. The fit of all the modules is pretty tight together as all three interact with each other to varying degrees in their placement. The only wobbly component is the turret cylinder, so I had to fit it carefully to make sure it lined up properly with the opening in the roof. I also added the clear windows to the radar operators pod at the rear since they have to go in now before the halves can be joined. 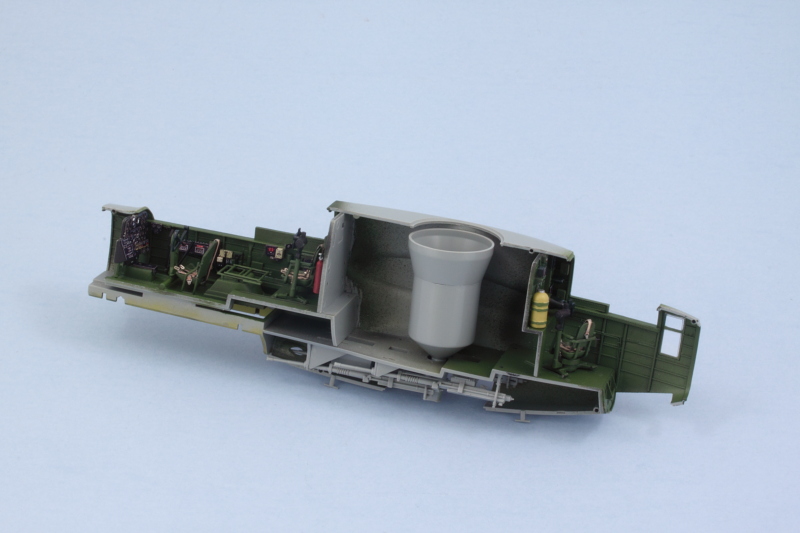 With all of the interior stuff in place, I painted up the nose gear strut since it has to sandwich in the bay between the fuselage halves and fitted it in place. Then the real fun of getting the fuselage halves together began. The mount pin holes weren't quite large enough for the pins to fit flush, so I used a micro drill bit to enlarge them enough to remove that obstacle. Starting at the nose, I added liquid glue to the seams and used a combination of rubber bands, clamps, and finger pressure to get it all together. 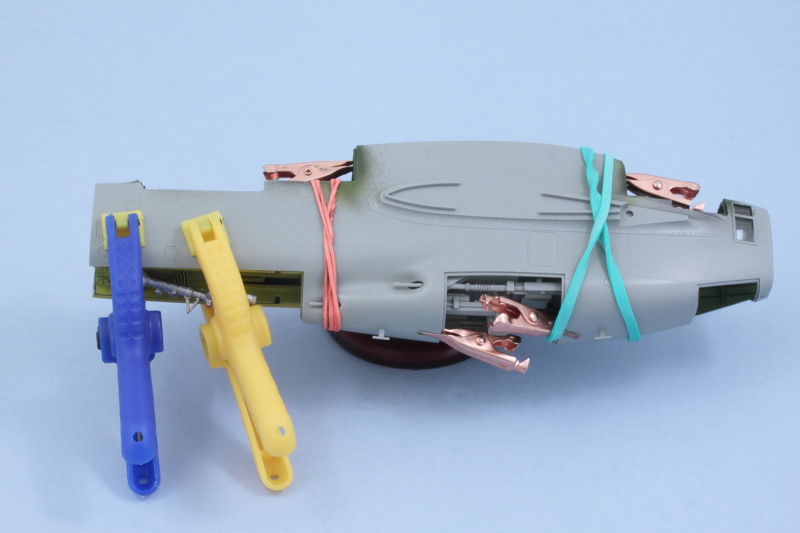 The two halves lined up pretty well with just a couple of small spots around the 20mm gun bays on the underside that will need some putty attention to completely fill. That will come tomorrow! |
|
|
|
Post by panzerjager2 on Dec 26, 2016 22:04:45 GMT -5
|
|
joelsmith
Full Member
  
Member since: July 2012
There no winners in war, only survivors.
Posts: 1,404
Jul 5, 2012 22:33:58 GMT -5
Jul 5, 2012 22:33:58 GMT -5
|
Post by joelsmith on Dec 26, 2016 22:31:11 GMT -5
Yellow Zinc Chromate looking real good there Bill! Can't wait to see the finished product, Joel.
|
|
|
|
Post by wbill76 on Dec 26, 2016 23:21:53 GMT -5
Thanks PJ and Joel, moving along at a good pace now.  |
|
|
|
Post by panzerjager2 on Dec 27, 2016 0:09:35 GMT -5
P-61 has always been one of my top 5 Aircrafts of all time, and your work is "OUTSTANDING"....
Keep up the great work Bill
|
|